
 06-10-2015, 01:14 PM
Last edit by: IB Advertising
See related guides and technical advice from our community experts:
Browse all: Engine Guides
- Mercedes-Benz C-Class AMG: How to Replace Air Filter
Step by step instructions for do-it-yourself repairs
Browse all: Engine Guides

DIY C180CGI K&N Air Filter Replacement
09-17-2011, 09:10 AM
#1
Member
Thread Starter
Join Date: Aug 2011
Location: Brunei Darussalam
Posts: 216
Likes: 0
Received 3 Likes
on
3 Posts
GLC250 Coupe
DIY C180CGI K&N Air Filter Replacement
Hi There,
Since the C180CGI engine layout is different from the C300, I've decided to post some easy to follow guides for those whom wanted to replace the standard Mann Paper Filter with a K&N High Flow.
Step 1 - Switch off engine and open bonnet... duh
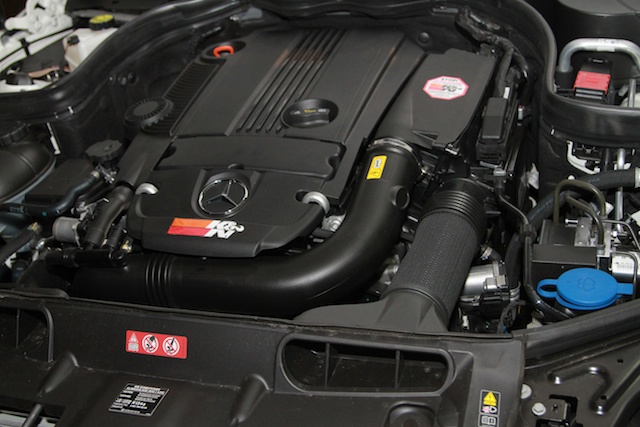
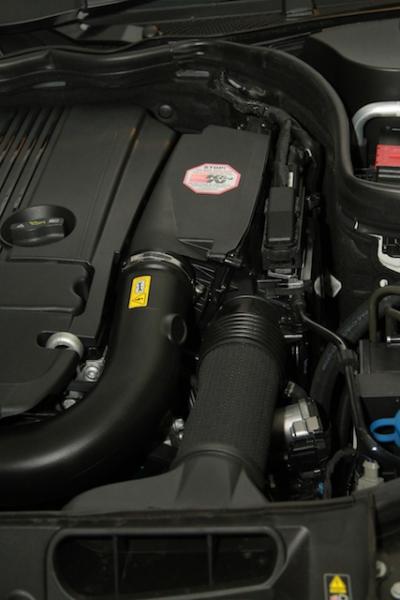
Step 2 - Look for the Air Intake and Filter Compartment (Withe the Hexagonal Sticker)
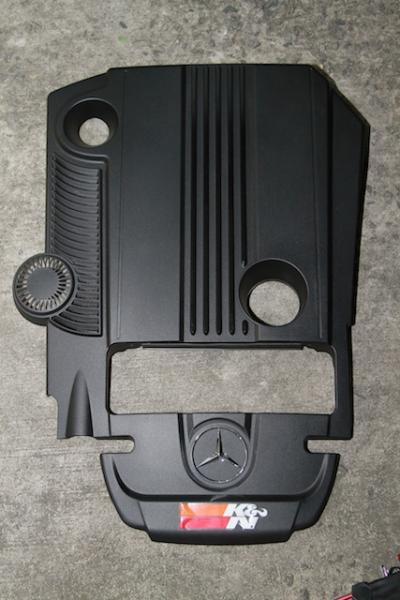
Step 3 - Remove the top engine cover. No special tools required.. just lift up with gentle force.
Extra - Since we only have one air flow intake, the other side is blanked out.
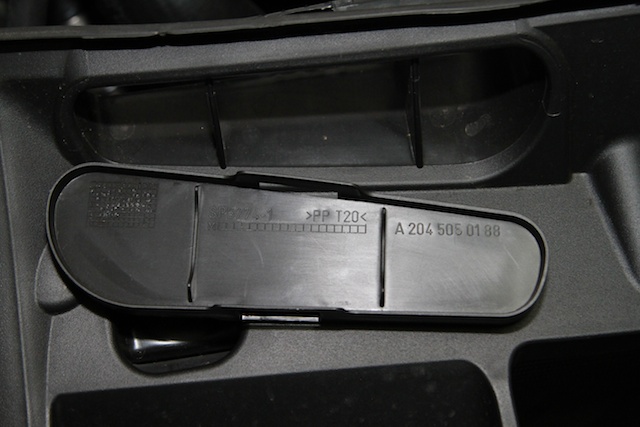
If you need the part number for the blank piece for whatever reason, let me know. (if the picture is not clear)
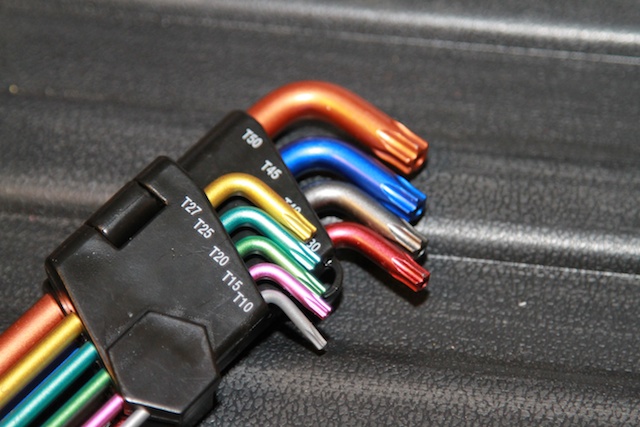
Step 4 - Get your tools out. Namely a T25 Torx Screwdriver
Step 5 - Get your K&N Filter Ready. (We only need one and the part number is 33-2965)

Since the C180CGI engine layout is different from the C300, I've decided to post some easy to follow guides for those whom wanted to replace the standard Mann Paper Filter with a K&N High Flow.
Step 1 - Switch off engine and open bonnet... duh
Step 2 - Look for the Air Intake and Filter Compartment (Withe the Hexagonal Sticker)
Step 3 - Remove the top engine cover. No special tools required.. just lift up with gentle force.
Extra - Since we only have one air flow intake, the other side is blanked out.
If you need the part number for the blank piece for whatever reason, let me know. (if the picture is not clear)
Step 4 - Get your tools out. Namely a T25 Torx Screwdriver
Step 5 - Get your K&N Filter Ready. (We only need one and the part number is 33-2965)
 09-17-2011, 09:20 AM
#2
Member
Thread Starter
Join Date: Aug 2011
Location: Brunei Darussalam
Posts: 216
Likes: 0
Received 3 Likes
on
3 Posts
GLC250 Coupe
Step 6 - Identify the 3 screws holding the filter bay and hose clip. The first one is beside the hose clip.
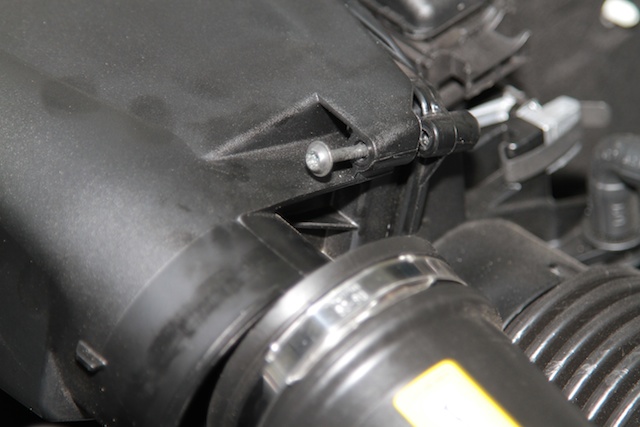
Step 7 - The other 2 are at the back, closer to the passenger side.
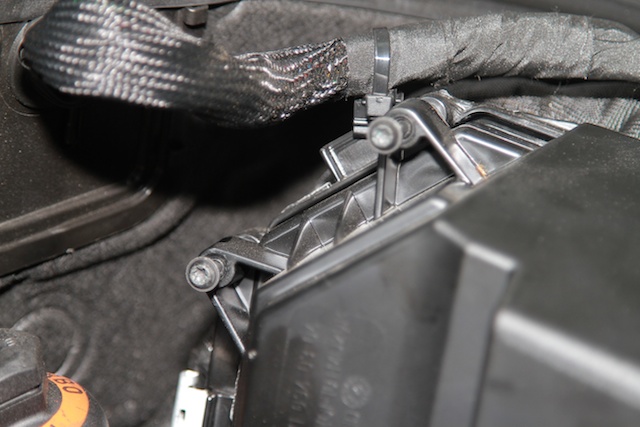
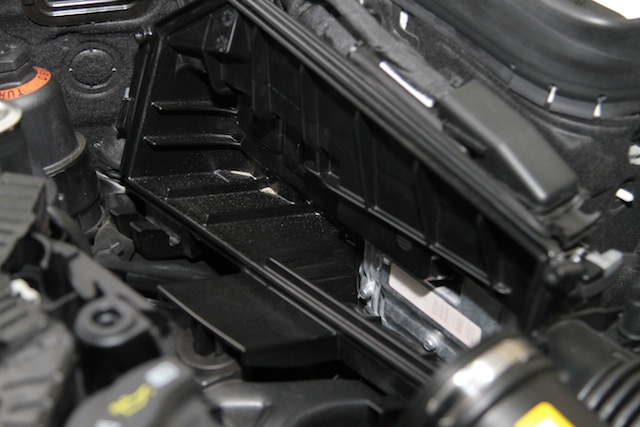
Step 8 - Swing filter open and lift up. Fit with the K&N Air Filter. As you can see the bottom part are just hinges that hold the filter bay closed.
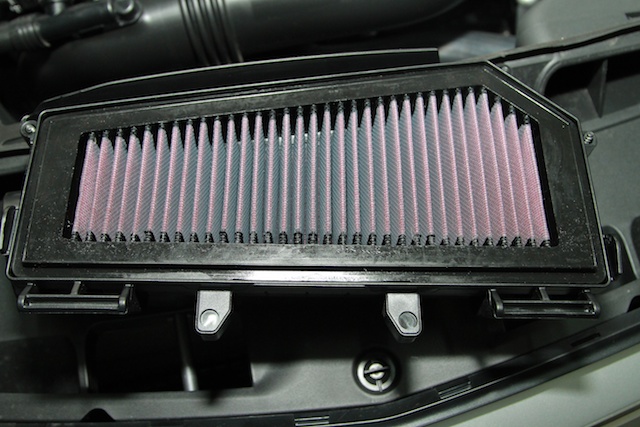
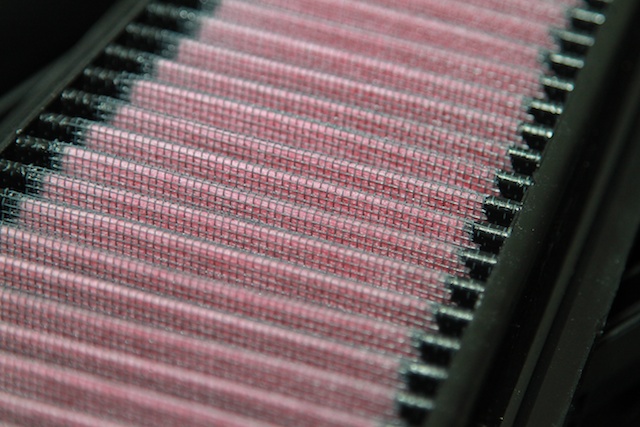
K&N Filter close up
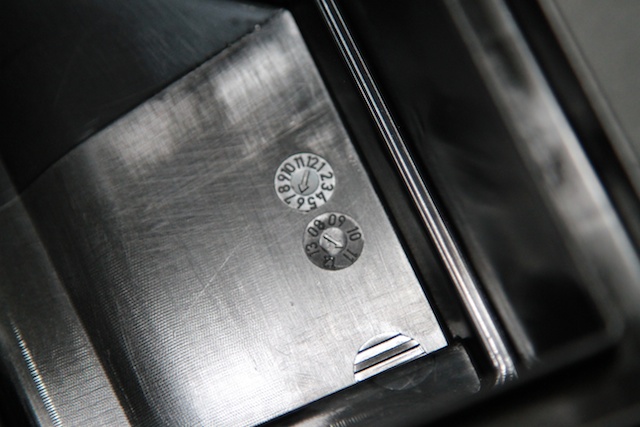
Manufacturing date stamped on the filter cover
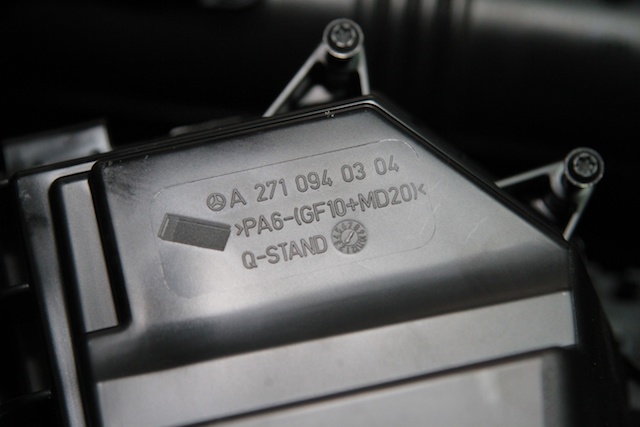
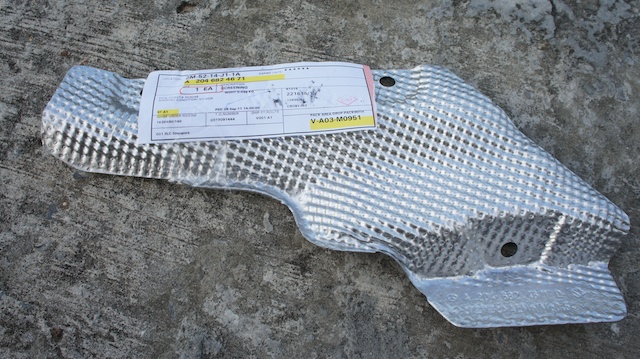
Filter Bay Part number incase you "lost" yours
Step 7 - The other 2 are at the back, closer to the passenger side.
Step 8 - Swing filter open and lift up. Fit with the K&N Air Filter. As you can see the bottom part are just hinges that hold the filter bay closed.
K&N Filter close up
Manufacturing date stamped on the filter cover
Filter Bay Part number incase you "lost" yours
09-17-2011, 09:34 AM
#3
Member
Thread Starter
Join Date: Aug 2011
Location: Brunei Darussalam
Posts: 216
Likes: 0
Received 3 Likes
on
3 Posts
GLC250 Coupe
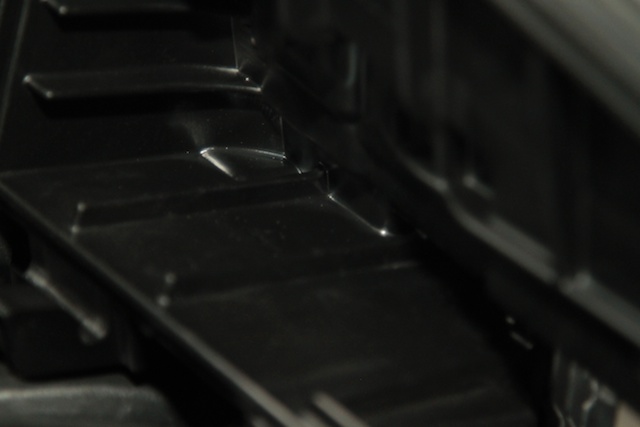
Step 9 - Showing some sand deposits in my filter bay
Close up of the sand deposit
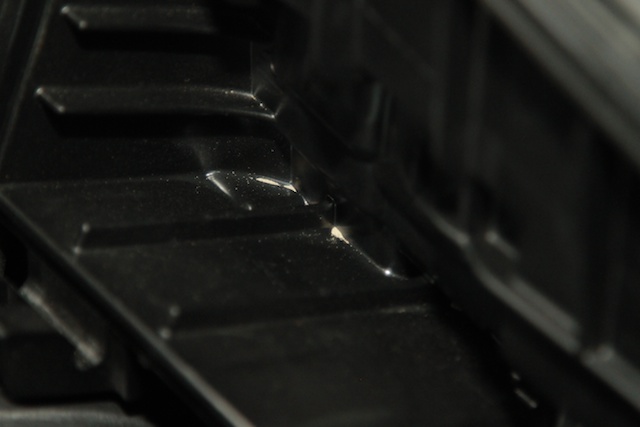
Use a vacuum cleaner to clean the sand away
Step 10 - Replace the air filter and work backwards to close everything up.
The engine cover is held by four rubber pods shown here.
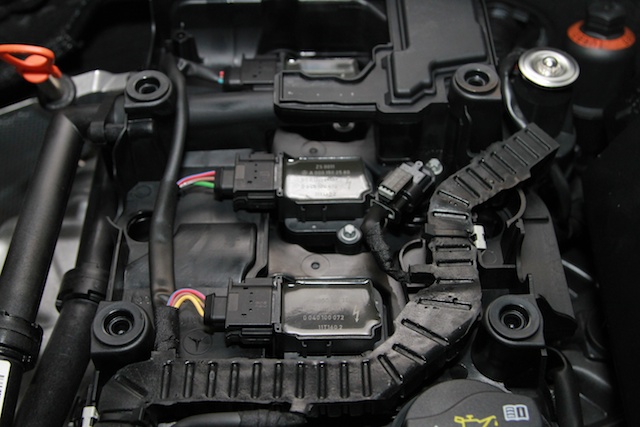
And that's all folks.
Close up of the sand deposit
Use a vacuum cleaner to clean the sand away
Step 10 - Replace the air filter and work backwards to close everything up.
The engine cover is held by four rubber pods shown here.
And that's all folks.

 09-28-2011, 08:56 AM
#6
Member
Thread Starter
Join Date: Aug 2011
Location: Brunei Darussalam
Posts: 216
Likes: 0
Received 3 Likes
on
3 Posts
GLC250 Coupe
I haven't ran it on the dyno yet, nor have I pushed the car too hard as it's still new with less than 1000km.
But I do feel the engine is lighter and more responsive.
But I do feel the engine is lighter and more responsive.

Trending Topics
10-29-2011, 09:49 AM
#8
Junior Member
Join Date: Apr 2011
Location: Melbourne, Australia
Posts: 24
Likes: 0
Received 0 Likes
on
0 Posts
2011 E250 CGI Coupe
thanks so much for sharing!! ive the e250cgi version of your engine and it looks exactly the same, i can finally change my stock to k&n 
ps. looking forward if you decide to get the racechip, im very tempted as well haha
ps. looking forward if you decide to get the racechip, im very tempted as well haha
10-29-2011, 11:26 AM
#9
MBWorld Fanatic!
Join Date: Mar 2006
Location: Hong Kong
Posts: 1,375
Likes: 0
Received 16 Likes
on
15 Posts
2010 C200 CGI
You don't really need to remove the engine cover to replace the filter, it may make things easier but it's possible to work the filter out without removing the cover, I did it at my last service interval. Great DIY btw.
10-29-2011, 12:30 PM
#10
Member
Thread Starter
Join Date: Aug 2011
Location: Brunei Darussalam
Posts: 216
Likes: 0
Received 3 Likes
on
3 Posts
GLC250 Coupe
stay tuned for my quad exhaust mod with the OEM C63 diffuser. Got the past yesterday and appointment schedule for Wednesday to get it done!
The RaceChip is on its way from Germany too. Once i get that sorted out, will post some comments here
10-29-2011, 01:27 PM
#11
MBWorld Fanatic!
Join Date: Mar 2006
Location: Hong Kong
Posts: 1,375
Likes: 0
Received 16 Likes
on
15 Posts
2010 C200 CGI
Also, what chip are you getting? I'm leaning towards the TMC Motorsports tuning box as it's a more financially viable option compared to the big names.
10-29-2011, 09:40 PM
#12
Member
Thread Starter
Join Date: Aug 2011
Location: Brunei Darussalam
Posts: 216
Likes: 0
Received 3 Likes
on
3 Posts
GLC250 Coupe
Pls document your install of the diffuser and quad exhaust, I looked under my gf's C200 and on the other side where normally where the other muffler would be on C300's+ there's actually some sort of cover/box. I tapped it and it seems solid as if it's actually a use for something so I'd be much interested to see what you find when you do yours.
Also, what chip are you getting? I'm leaning towards the TMC Motorsports tuning box as it's a more financially viable option compared to the big names.
Also, what chip are you getting? I'm leaning towards the TMC Motorsports tuning box as it's a more financially viable option compared to the big names.
Shoot... i've not yet uploaded those pics into my mac, but here are pictures of the heat panelling. All 3 of them cost less than USD150 total from the dealership.
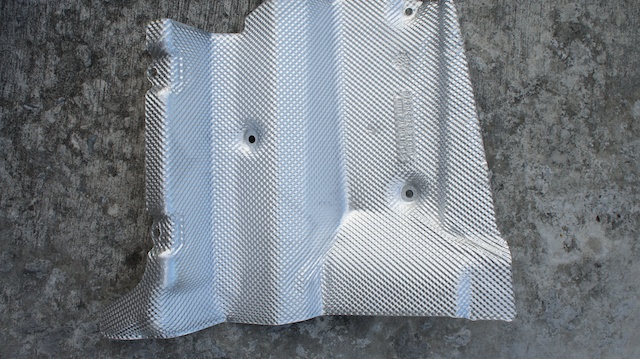
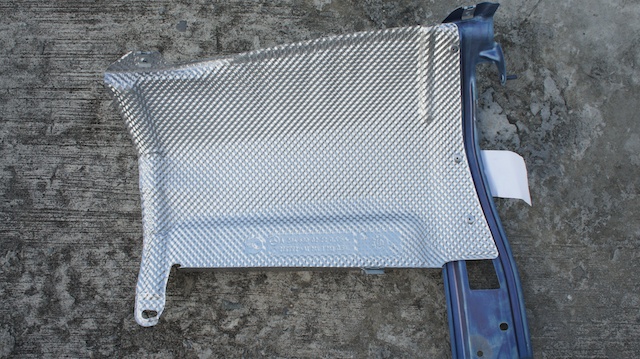
This is what it will look like with the Black panel removed
 10-30-2011, 06:12 AM
#13
MBWorld Fanatic!
Join Date: Mar 2006
Location: Hong Kong
Posts: 1,375
Likes: 0
Received 16 Likes
on
15 Posts
2010 C200 CGI
Interesting, I considered going this route but I think instead I'm going to opt for a modified muffler fit in the stock location. I just wish someone offered a better diffuser for ppl like me who prefer to stay single outlet instead of dual. Good luck and I look forward to your progress.
11-01-2011, 12:00 AM
#14
Member

Join Date: May 2008
Posts: 109
Likes: 0
Received 0 Likes
on
0 Posts
C 300
11-01-2011, 05:55 AM
#16
Member
Thread Starter
Join Date: Aug 2011
Location: Brunei Darussalam
Posts: 216
Likes: 0
Received 3 Likes
on
3 Posts
GLC250 Coupe
to the guys who are waiting for my quad exhaust mod and review on the Racehip, sorry to inform you that you might have to wait a few more weeks.
An SUV ramped into the back of my car and now the boot won't close, and the rear bumper is wrecked... Just when i have all the parts ready for installation, this happens.. oh well...
An SUV ramped into the back of my car and now the boot won't close, and the rear bumper is wrecked... Just when i have all the parts ready for installation, this happens.. oh well...
11-01-2011, 11:47 AM
#17
MBWorld Fanatic!
Join Date: Mar 2006
Location: Hong Kong
Posts: 1,375
Likes: 0
Received 16 Likes
on
15 Posts
2010 C200 CGI
to the guys who are waiting for my quad exhaust mod and review on the Racehip, sorry to inform you that you might have to wait a few more weeks.
An SUV ramped into the back of my car and now the boot won't close, and the rear bumper is wrecked... Just when i have all the parts ready for installation, this happens.. oh well...
An SUV ramped into the back of my car and now the boot won't close, and the rear bumper is wrecked... Just when i have all the parts ready for installation, this happens.. oh well...
11-01-2011, 02:31 PM
#18
MBWorld Fanatic!
to the guys who are waiting for my quad exhaust mod and review on the Racehip, sorry to inform you that you might have to wait a few more weeks.
An SUV ramped into the back of my car and now the boot won't close, and the rear bumper is wrecked... Just when i have all the parts ready for installation, this happens.. oh well...
An SUV ramped into the back of my car and now the boot won't close, and the rear bumper is wrecked... Just when i have all the parts ready for installation, this happens.. oh well...
11-01-2011, 03:42 PM
#19
Member
Join Date: May 2008
Posts: 109
Likes: 0
Received 0 Likes
on
0 Posts
C 300
Well "feeling" aside, to really do this right you'd have to do before and after dyno pulls (same day, same fuel maps, etc), to see if the rev range has shifted (not a function of air flow directly, in my experience). Hard to believe in this age of scrupulous computer assisted engineering that MB would somehow feel it was necessary to plug the system up on the intake end, yet design the rest of a system that somehow responds to opening that intake; the days of pre-EPA emissions focus/pre ECUs are long over.
11-01-2011, 10:10 PM
#20
Junior Member
Join Date: Apr 2011
Location: Melbourne, Australia
Posts: 24
Likes: 0
Received 0 Likes
on
0 Posts
2011 E250 CGI Coupe
to the guys who are waiting for my quad exhaust mod and review on the Racehip, sorry to inform you that you might have to wait a few more weeks.
An SUV ramped into the back of my car and now the boot won't close, and the rear bumper is wrecked... Just when i have all the parts ready for installation, this happens.. oh well...
An SUV ramped into the back of my car and now the boot won't close, and the rear bumper is wrecked... Just when i have all the parts ready for installation, this happens.. oh well...
11-01-2011, 10:42 PM
#21
MBWorld Fanatic!
to the guys who are waiting for my quad exhaust mod and review on the Racehip, sorry to inform you that you might have to wait a few more weeks.
An SUV ramped into the back of my car and now the boot won't close, and the rear bumper is wrecked... Just when i have all the parts ready for installation, this happens.. oh well...
An SUV ramped into the back of my car and now the boot won't close, and the rear bumper is wrecked... Just when i have all the parts ready for installation, this happens.. oh well...
11-18-2011, 03:15 AM
#22
Member
Thread Starter
Join Date: Aug 2011
Location: Brunei Darussalam
Posts: 216
Likes: 0
Received 3 Likes
on
3 Posts
GLC250 Coupe
hi guys! just got back from a long week in Bali.
My car's done up now and i can hardly tell where the bump was.
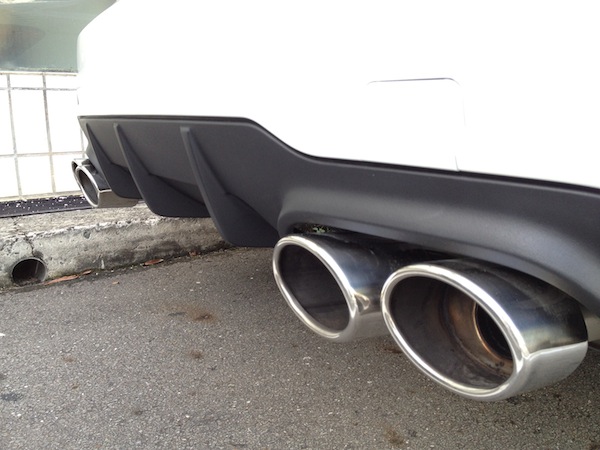
ooo and the exhaust and diffuser are up too.
I'll post more info when i had time to catch up with my work and recover.
meanwhile, here are 2 shots from the phone..
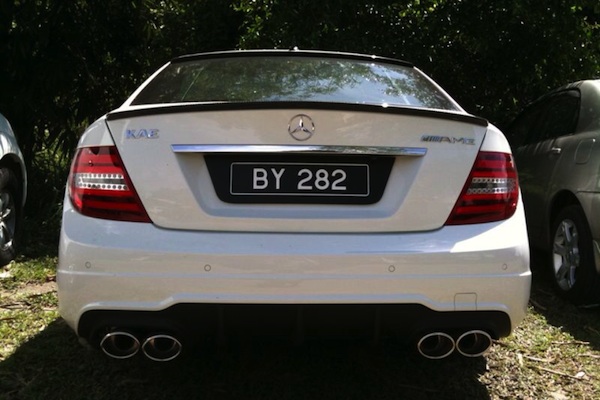
My car's done up now and i can hardly tell where the bump was.
ooo and the exhaust and diffuser are up too.
I'll post more info when i had time to catch up with my work and recover.
meanwhile, here are 2 shots from the phone..
11-18-2011, 05:18 PM
#25
Member
Exhaust looks fantastic! Was this a custom job or is there a company doing a quad exhaust setup for the 180cgi?


