
'14 C250 Lux - Comand screen replacement tips


Thread Starter
Member


Joined: Dec 2018
Posts: 225
Likes: 21
From: Mid-Atlantic USA
2014 C250 Luxury
'14 C250 Lux - Comand screen replacement tips?
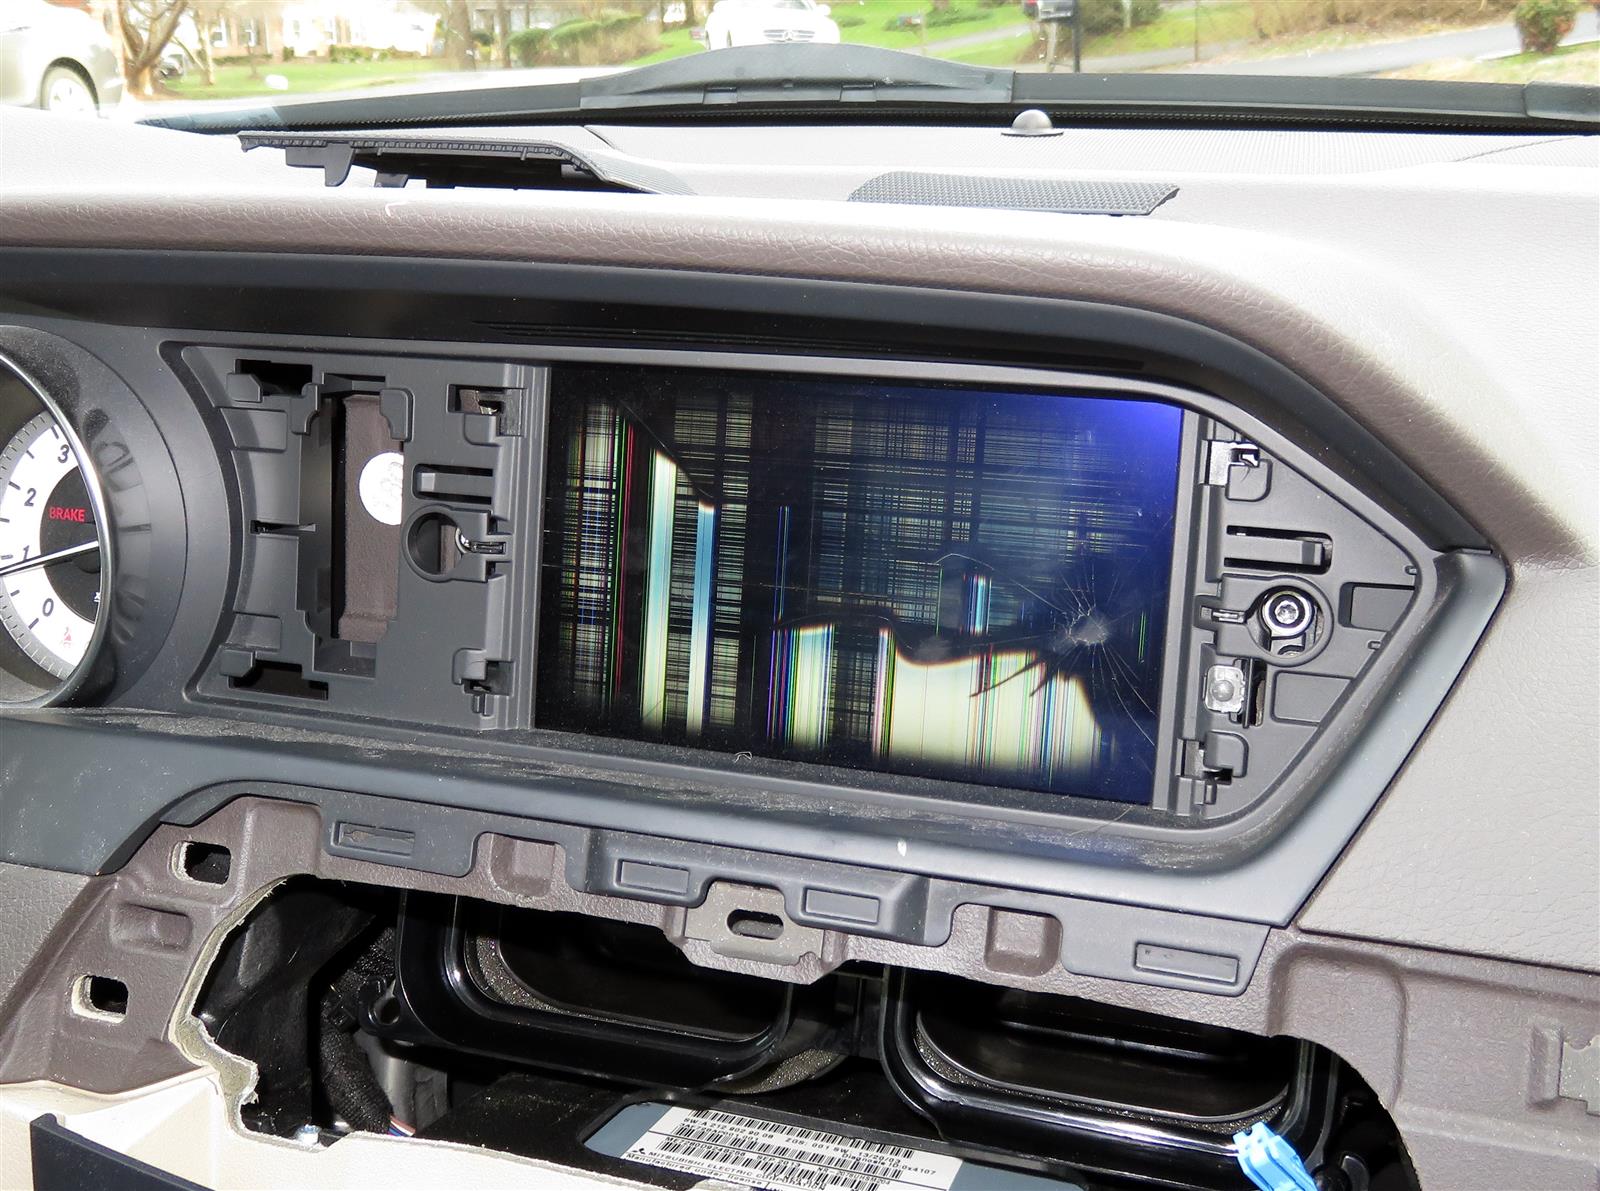
My girlfriend has a '14 C250 Luxury which has a shattered Comand screen as of a couple of days ago. Being new to the M-B world, I'm not familiar with all the terminology, but I believe her car's interior is the "post-facelift" version, right? Whatever you call it, it's got a 7" display screen that does not pop open/up, it's just there all the time. I'm thinking I can undertake the replacement myself, but wanted to check with those more knowledgeable about the platform to make sure there's not something I'm missing.
I talked to 2 local dealers and confirmed the screen is PN 1729003904; one of them even has it in stock, which is nice. I found this video on YT that shows how to get to the screen -
. (That's taken from another video by that same guy - you can watch it with narration rather than the subtitles here -
.) That looks pretty straightforward, just have to take my time to ensure I don't snap off any clips by trying too hard.
One thing I'm not sure of is if I would need to have the dealership do any sort of programming or "sync" the screen to the car? I'm not upgrading anything, I'm just installing a new screen, so I'm thinking there wouldn't be any special re-programming or whatever required, but I'd hate to go through all the work and then discover it doesn't work without a trip to the dealer. So, can someone set me straight on that; does it need to be reprogrammed by the dealer?
And is there anything else I should watch out for before I undertake this screen replacement myself?
Thanks!
I talked to 2 local dealers and confirmed the screen is PN 1729003904; one of them even has it in stock, which is nice. I found this video on YT that shows how to get to the screen -
One thing I'm not sure of is if I would need to have the dealership do any sort of programming or "sync" the screen to the car? I'm not upgrading anything, I'm just installing a new screen, so I'm thinking there wouldn't be any special re-programming or whatever required, but I'd hate to go through all the work and then discover it doesn't work without a trip to the dealer. So, can someone set me straight on that; does it need to be reprogrammed by the dealer?
And is there anything else I should watch out for before I undertake this screen replacement myself?
Thanks!
Last edited by AAIIIC; Mar 25, 2019 at 07:36 AM. Reason: clarifying questions
Thread Starter
Member
Joined: Dec 2018
Posts: 225
Likes: 21
From: Mid-Atlantic USA
2014 C250 Luxury

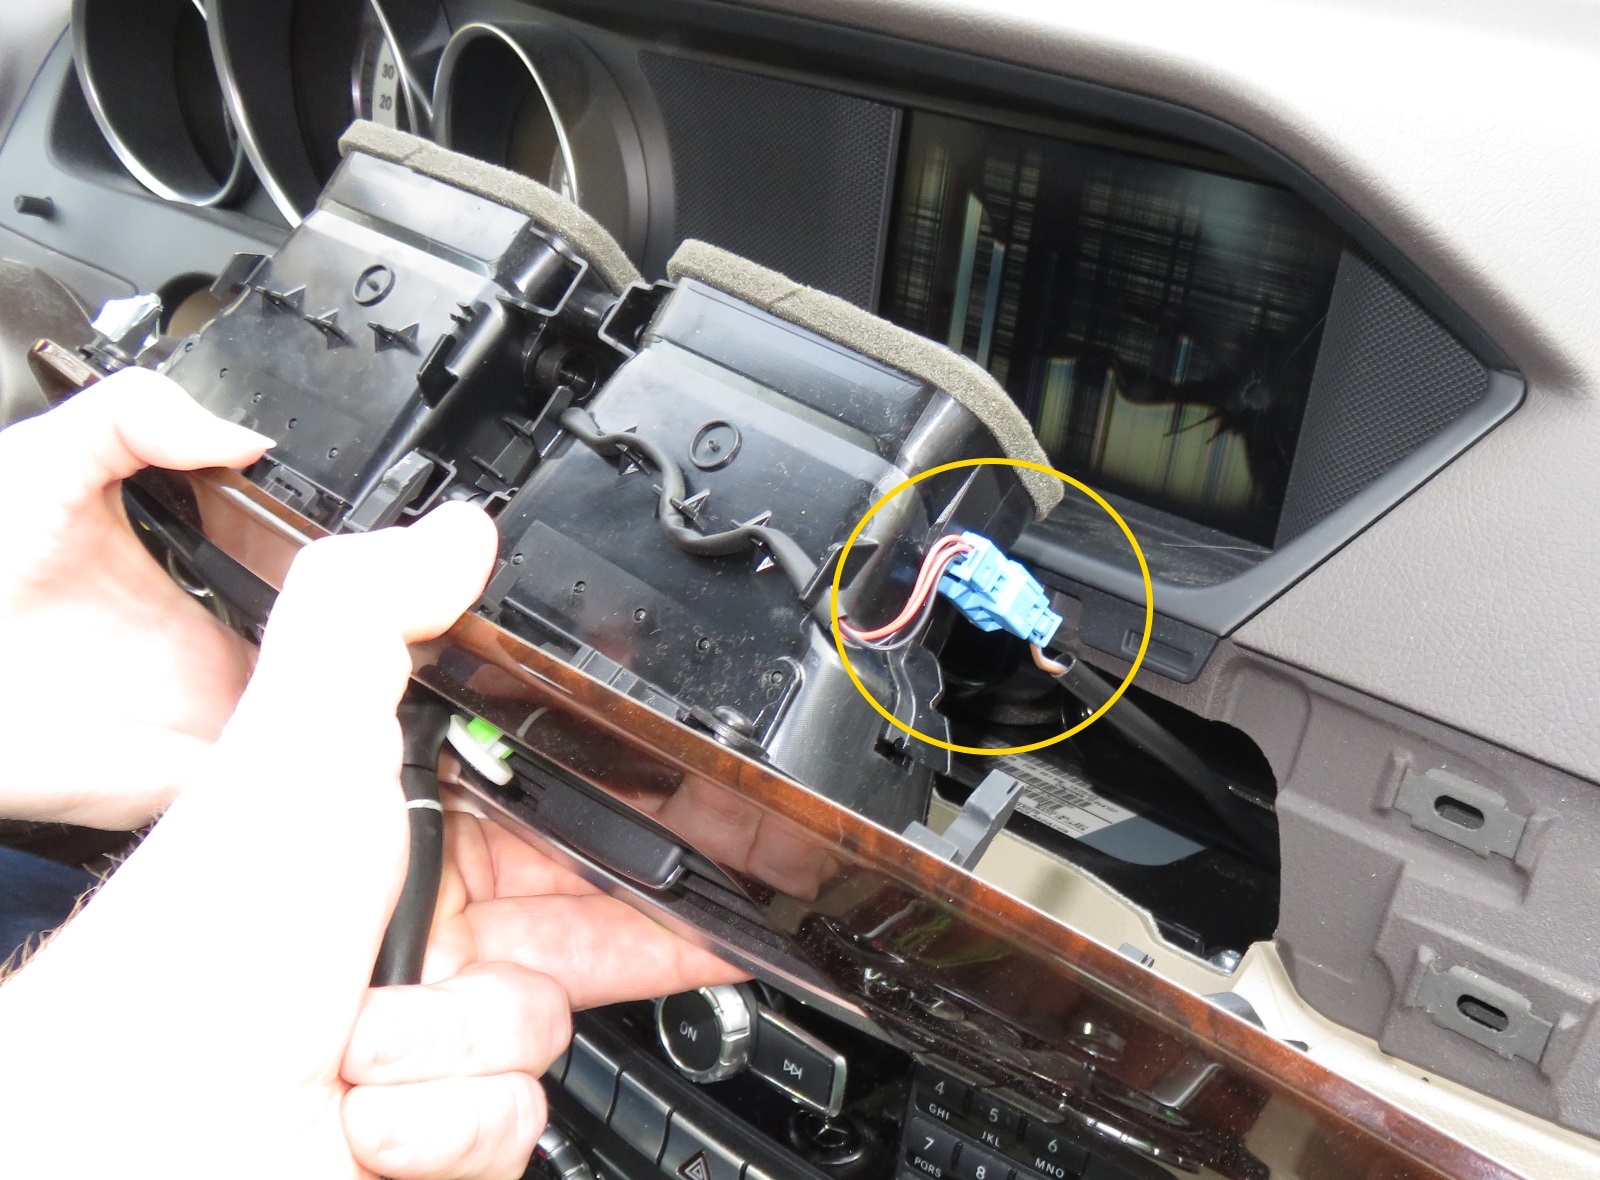
Obviously, at that point we had already pulled off the dash trim and the center vents, then removed the "grit covers" on either side of the screen. One thing that the video didn't show is that there's a harness connection on the vents - temp sensor, would be my guess.
The lower trim popped out pretty easily. With that said, I did crack one of the little tabs on the right end of the lower trim.
The upper trim also popped off easily. I even got the girlfriend involved

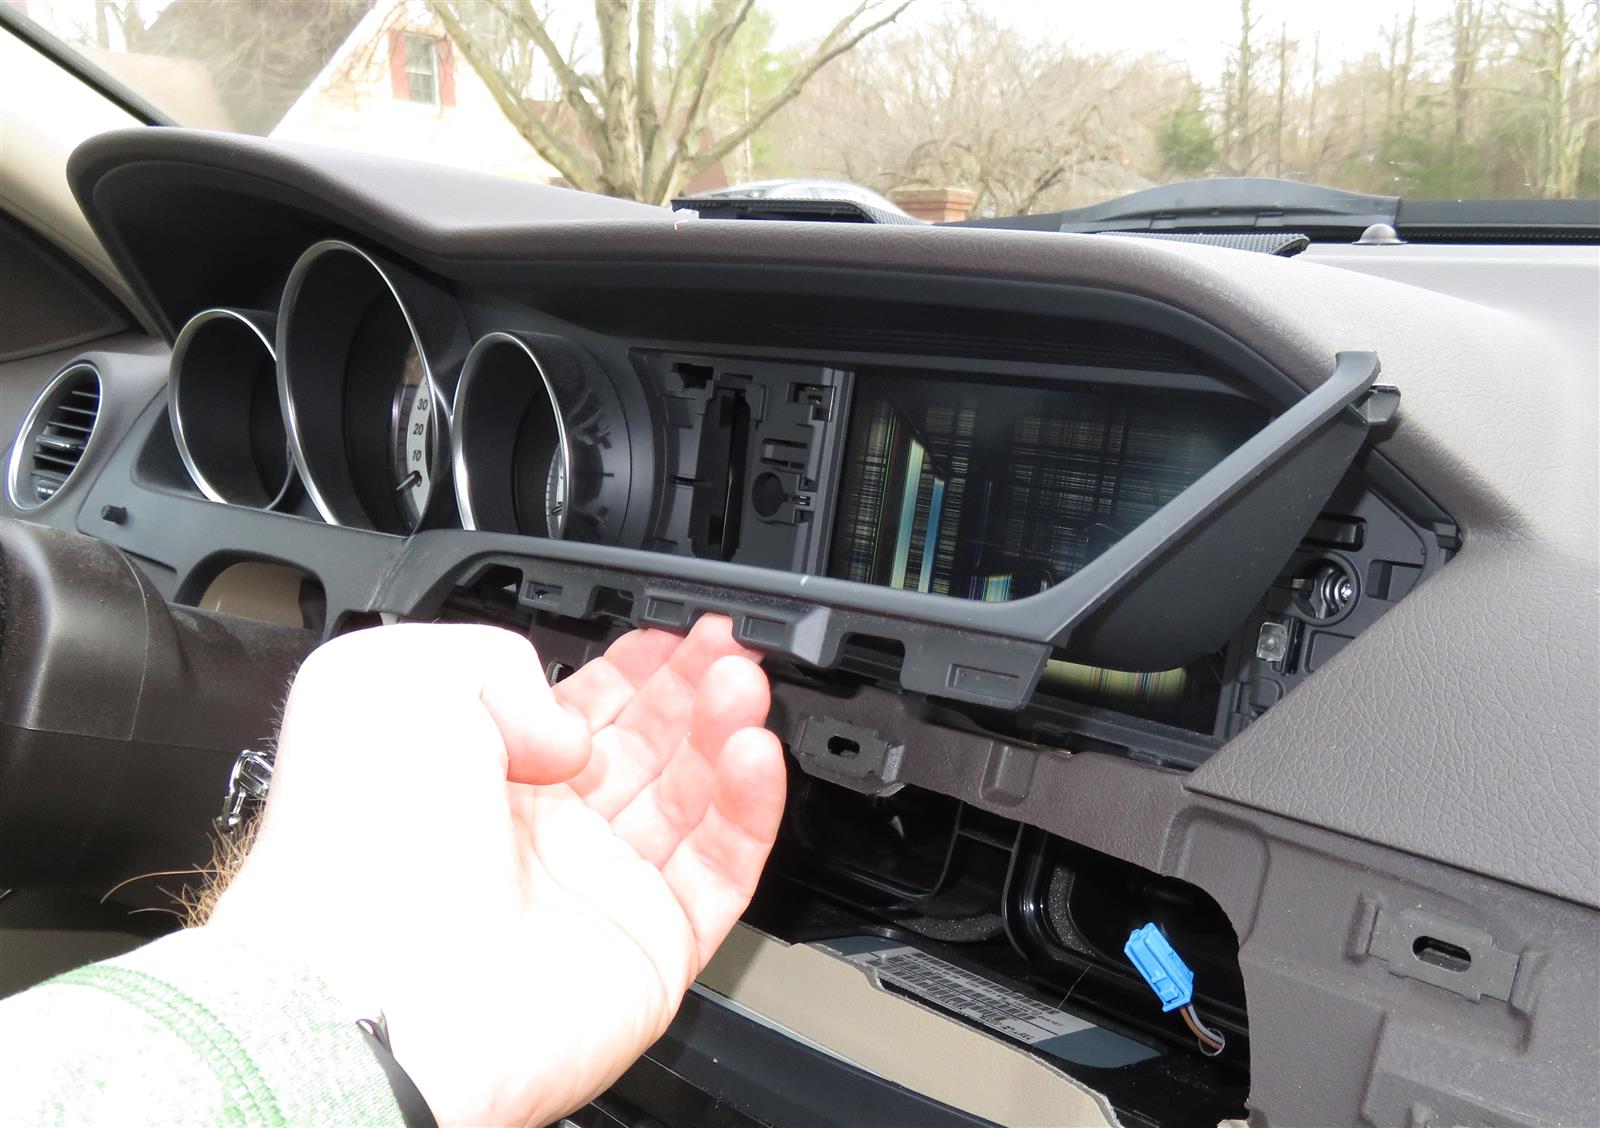
Again, I managed to break a couple of the little tabs - the double one by the top of the tach in the pic - but everything went back together nice and tight, so I don't think it mattered. Once the upper and lower trim were removed, it was on to the gauge trim, which extends over to surround the screen. I didn't need to use the pry tools to get the gauge trim off, it was basically just a matter of grabbing the gauge trim rings with my hands and pulling out, working from left to right. The gauge trim has some vertical tabs along the bottom that slot into some receptacles at the bottom of the gauge cluster - you have to flop the top of the gauge trim (and screen) forward, then it'll pull free. I didn't get a picture of how that all works, but it's pretty obvious once you're in there.

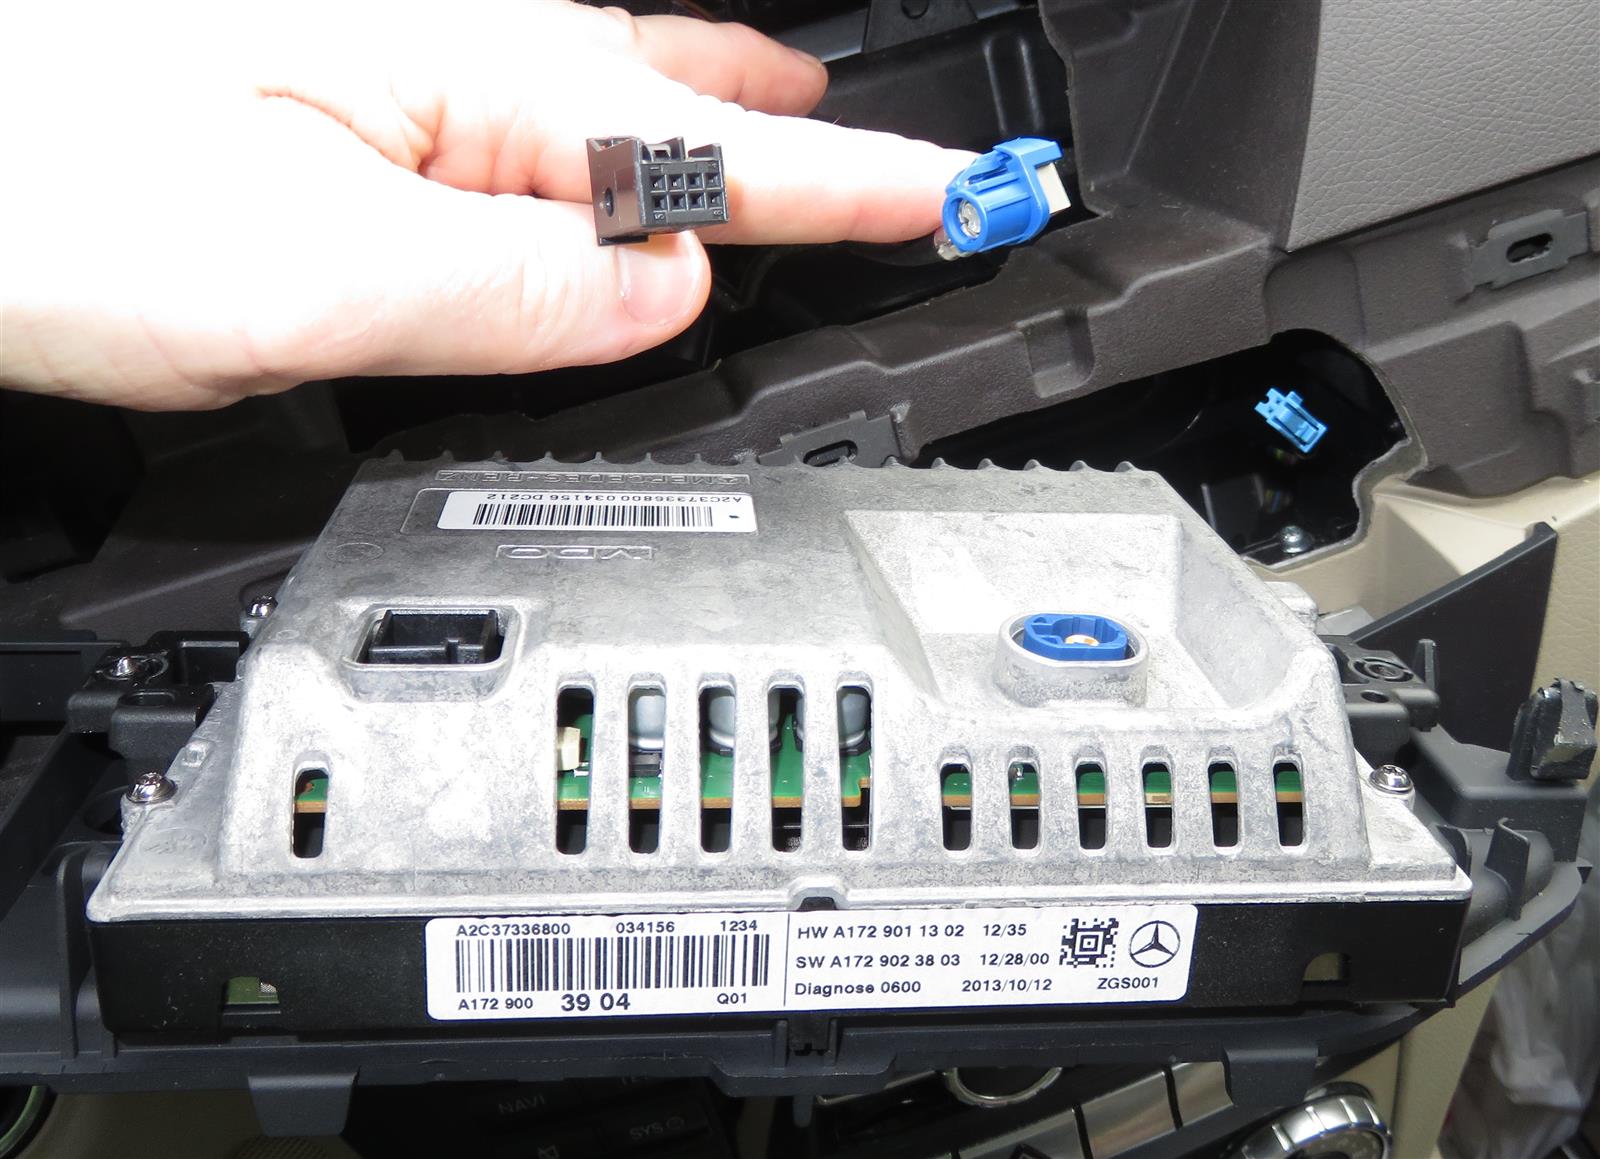
Disconnect the two harnesses and then you can pull everything out:
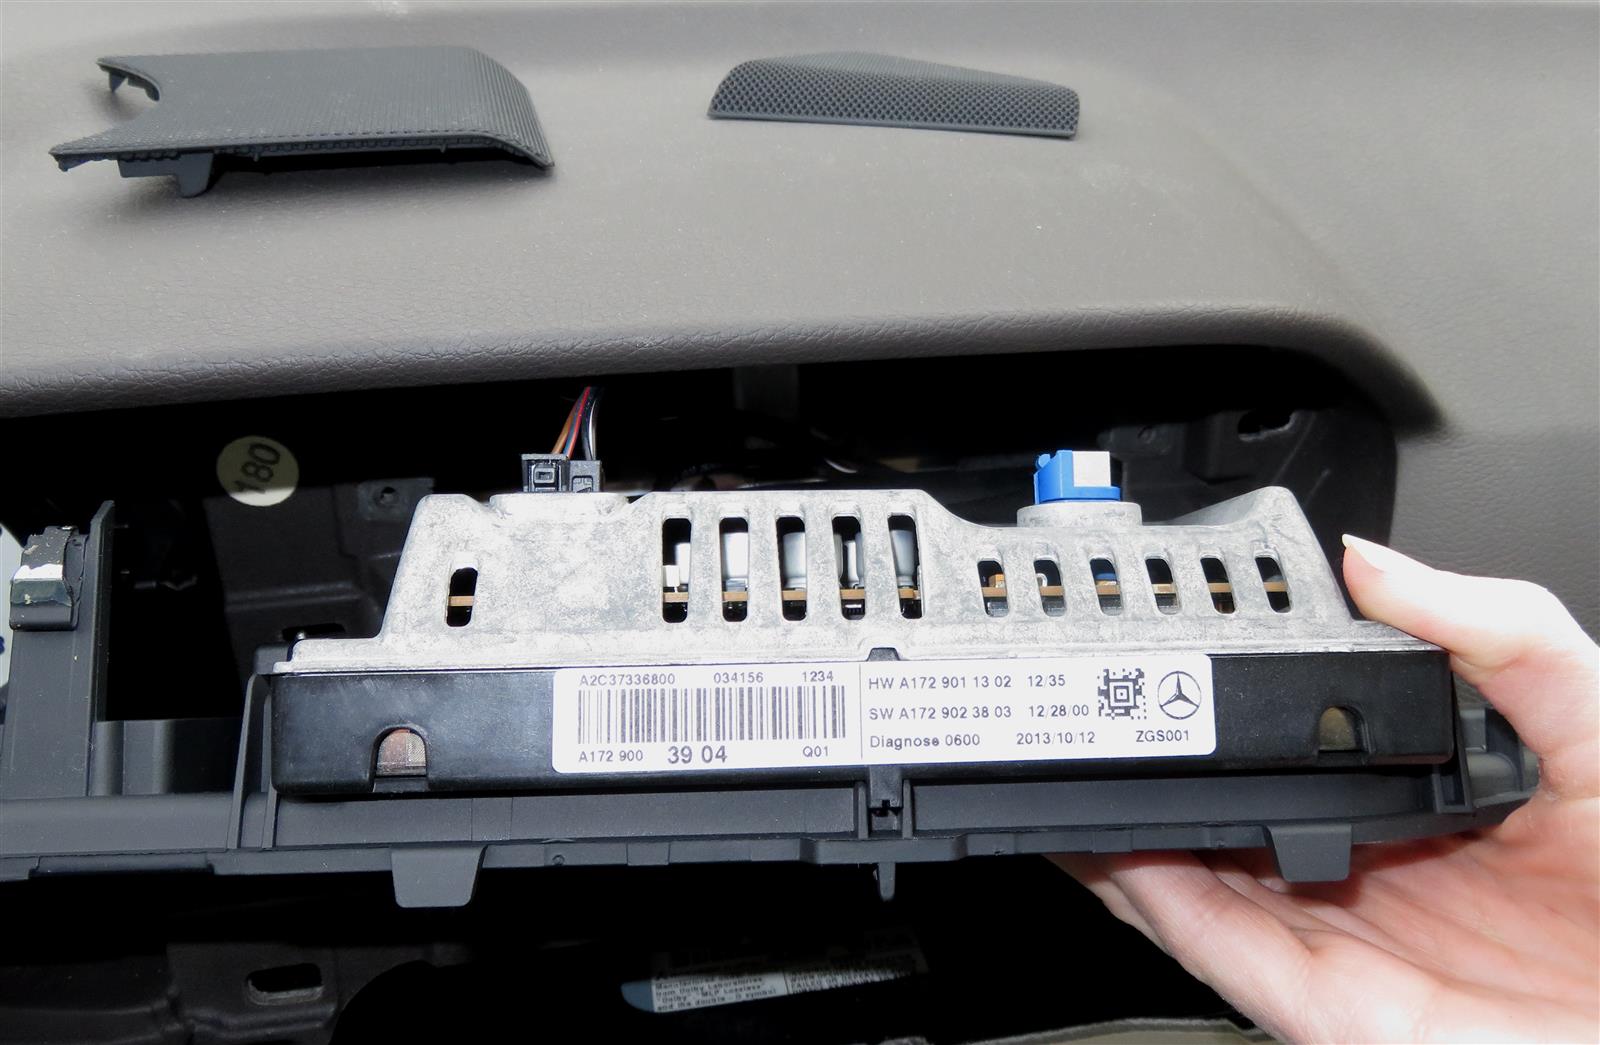
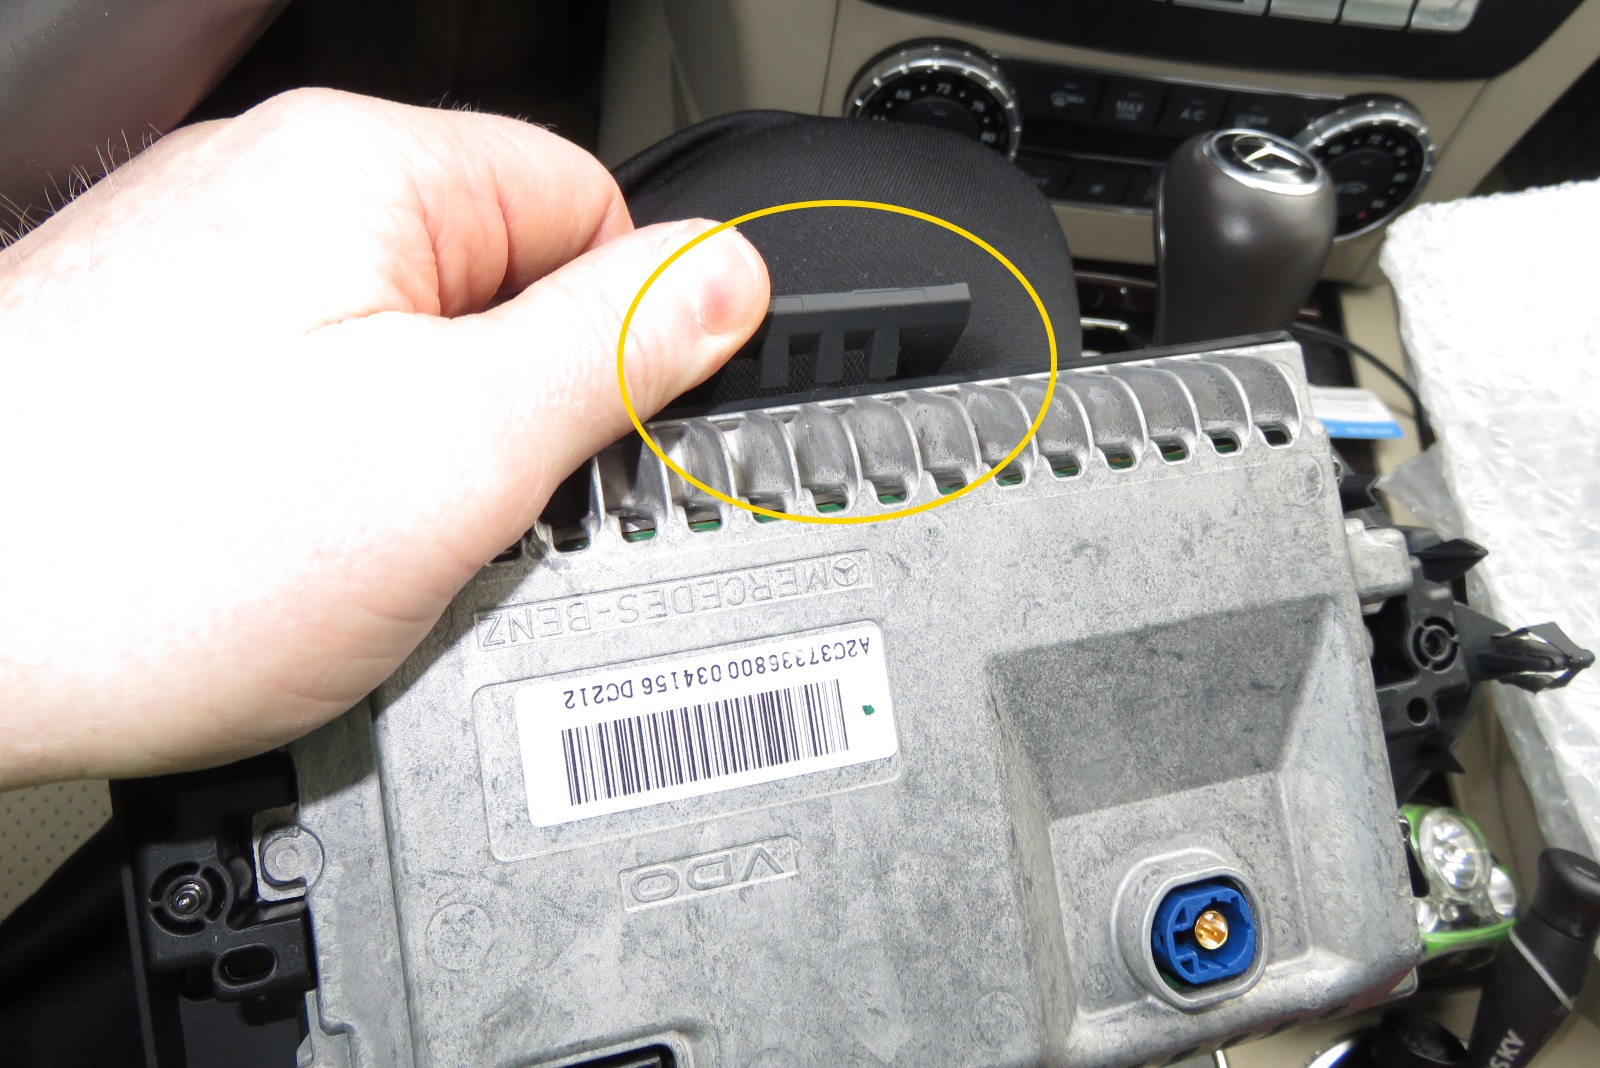
The screen is attached to the plastic trim with a big clip at the bottom of the screen (which is the top when you've flopped the thing forward to remove it):
Pull up that clip to release the bottom of the screen, then pivot the screen and disengage two tabs at the top corners of the screen from hooks on the trim panel:
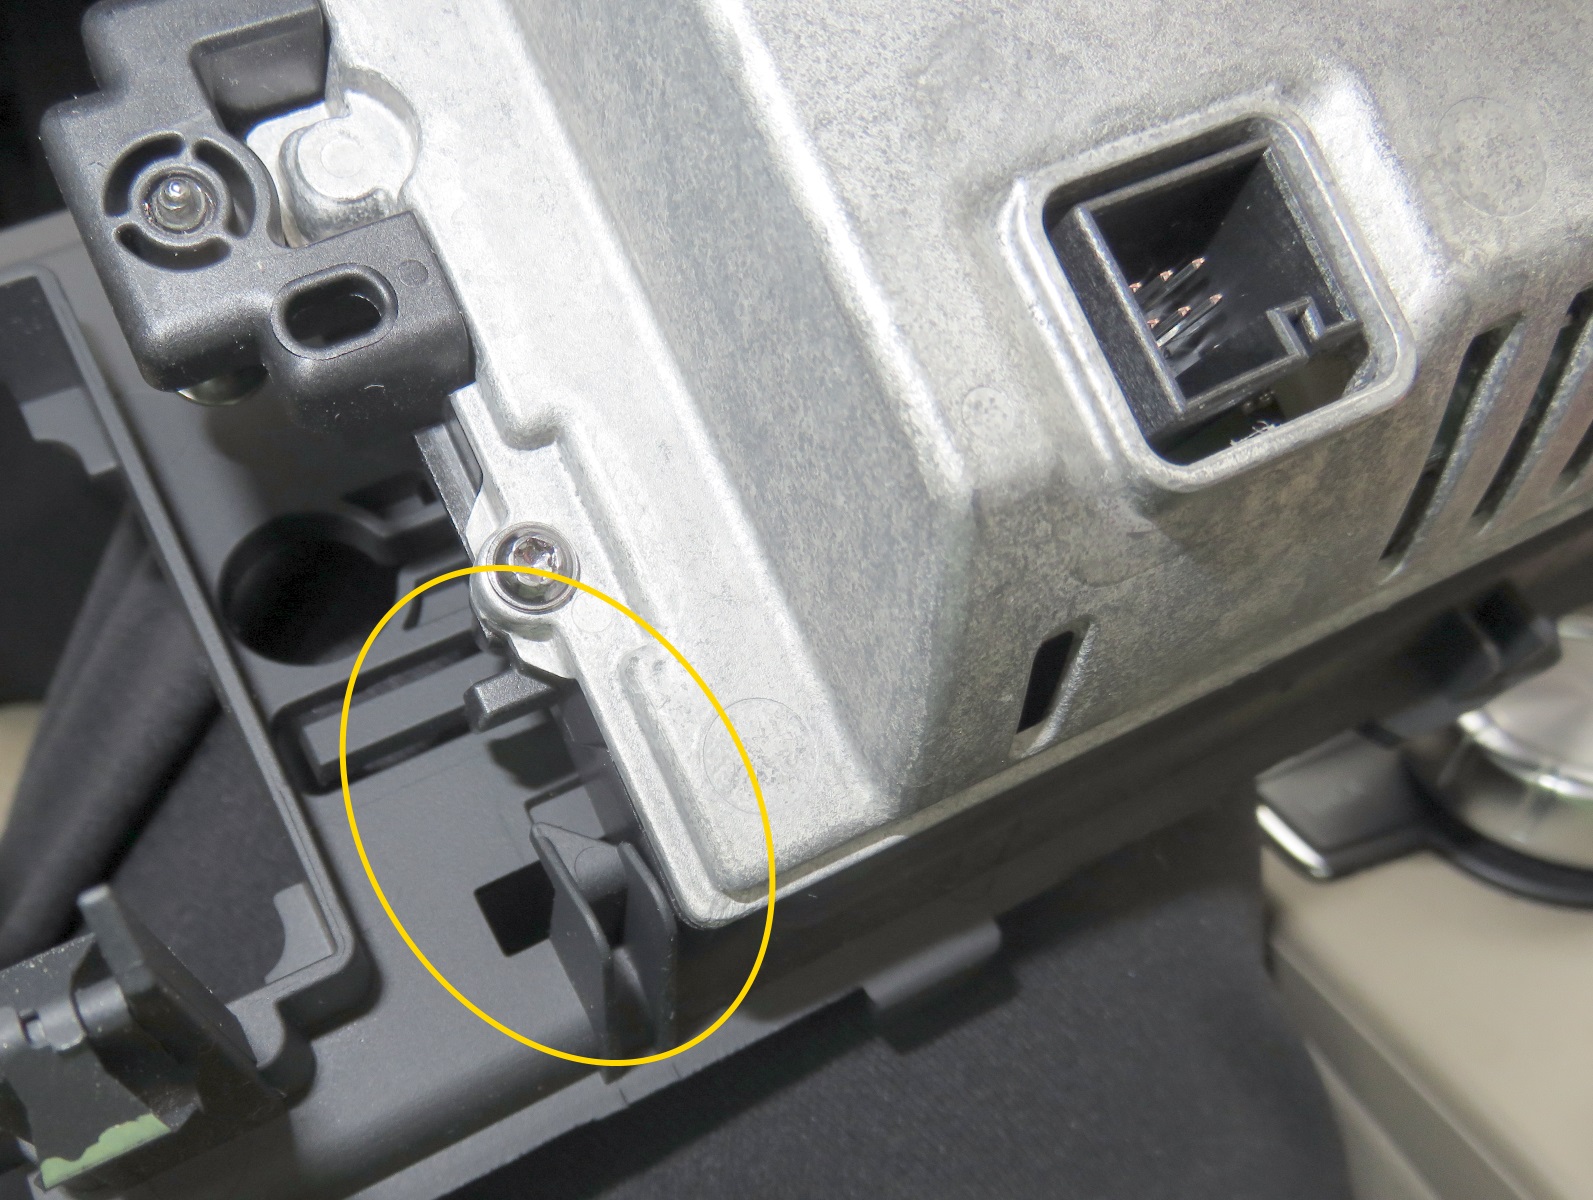
When you go to put it back together, in addition to those two tabs on the upper corners of the screen, there's also an alignment tab at the middle:
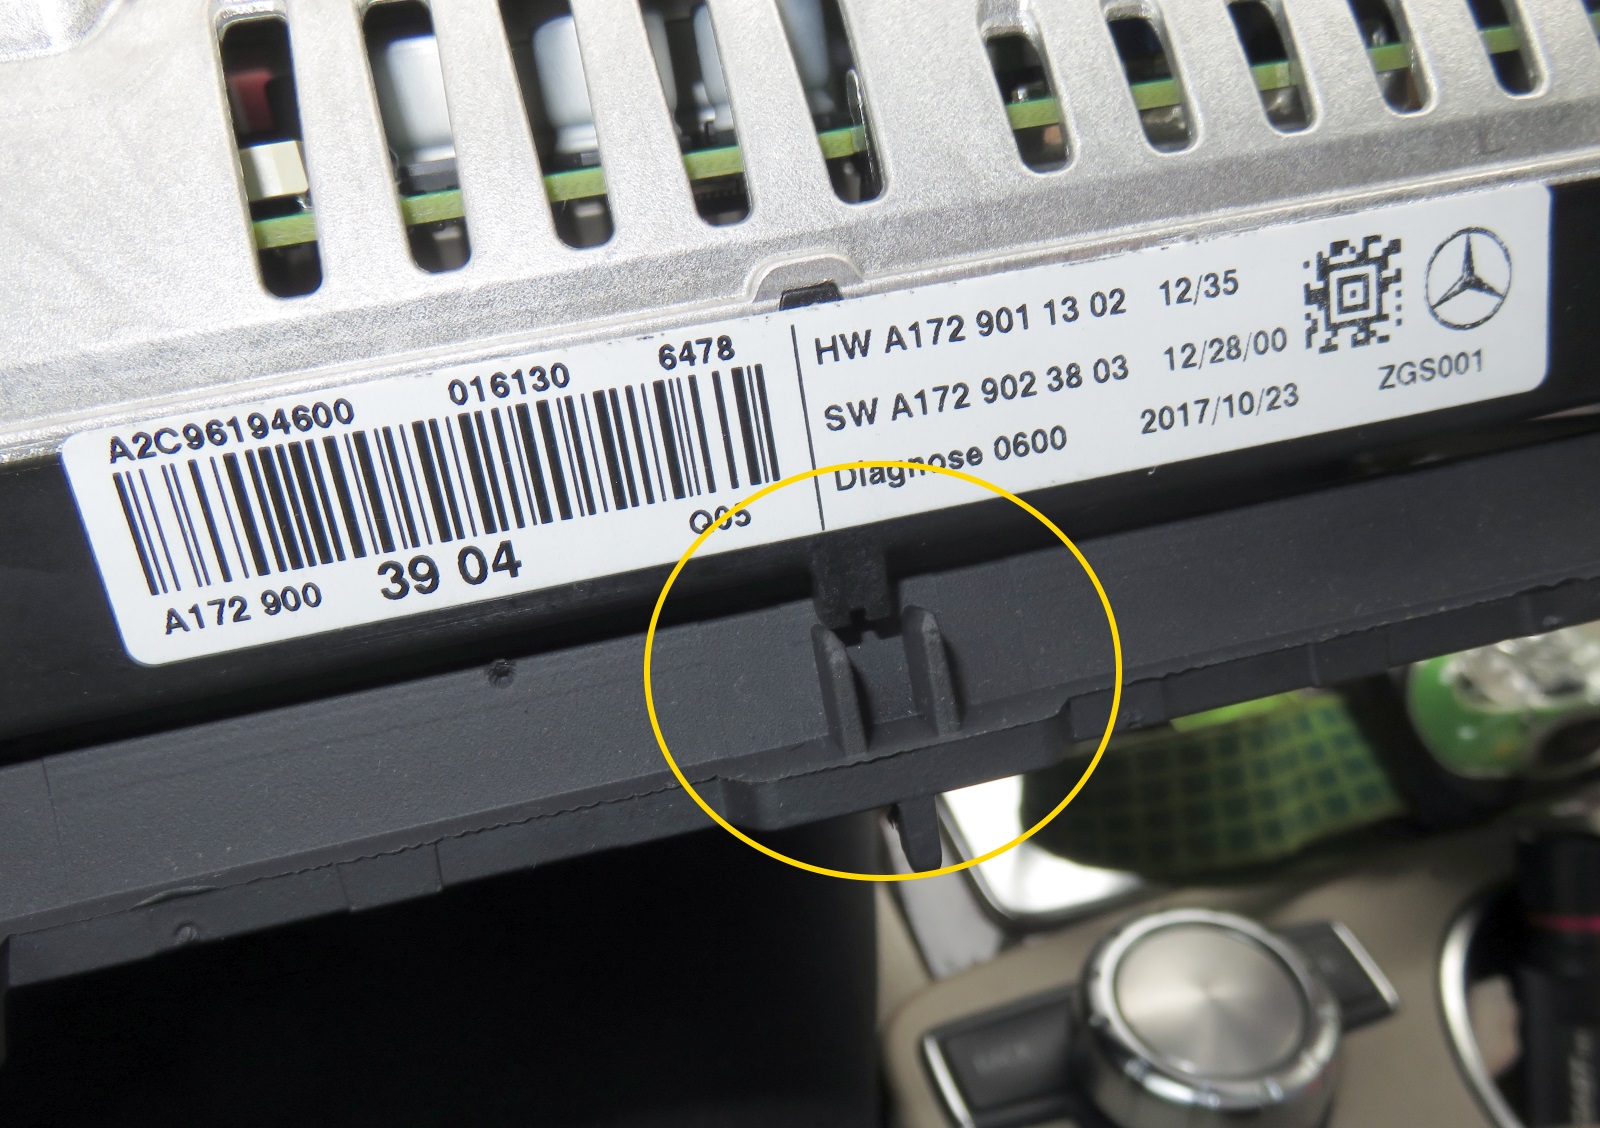
Slot those 3 tabs into position, then pivot the screen into the bracket so the big clip grabs the bottom of the screen. Good to go.
It all goes back together in reverse order. Make sure the vertical tabs on the gauge trim panel go into their receptacles as you pivot things into position - I missed one on the first attempt and had to partially disassemble things to get it right. And make sure the main clips are all in place when you put the trim panel / screen surround back in place. In our case, the right-most clip (the one to the right of the screen) was a little stubborn; it looked like the screen was in the correct position, but the upper trim piece wouldn't go back into place, so we realized the screen wasn't seated fully into position. It was hard to see that right-most clip, but we realized it wasn't seated; with a bit of wiggling we got it seated, tightened down the Torx screws (a very intense process, as seen below
 ), and then were able to install the upper and lower trim pieces.
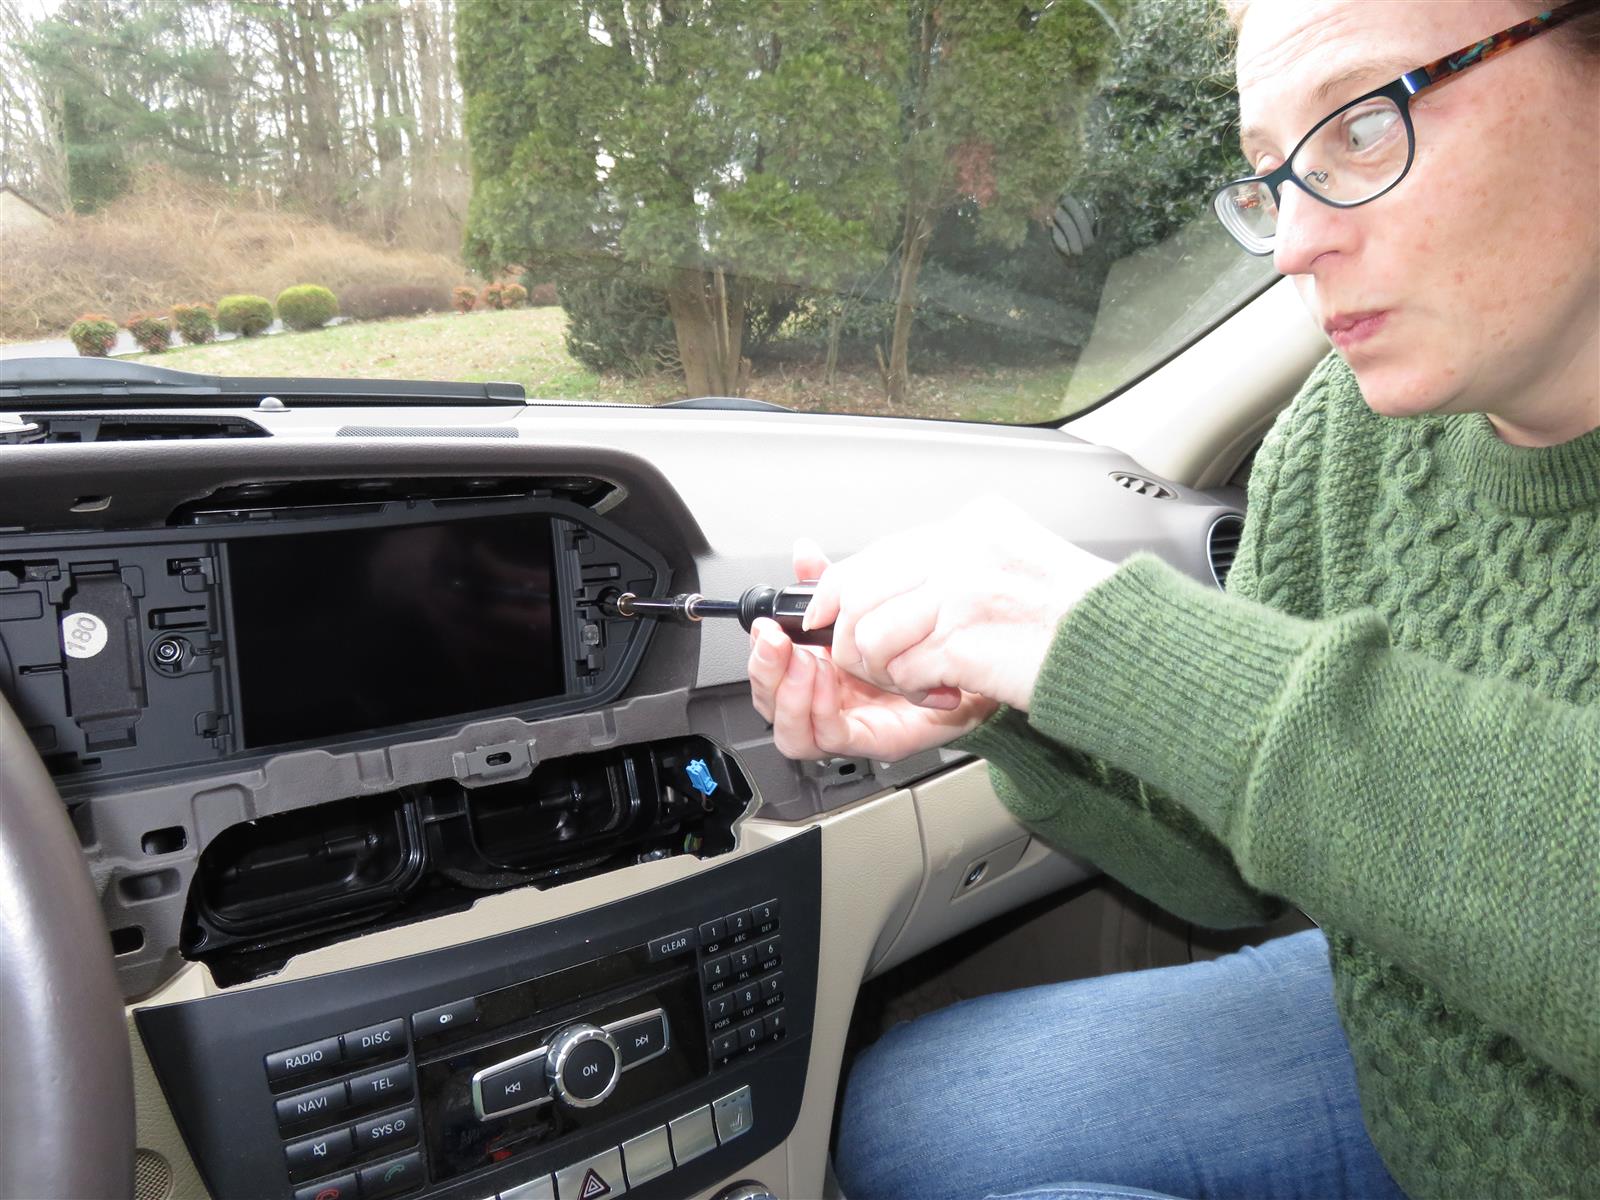
The only hitch in the whole process was getting the center vents back into place. I honestly don't know what the answer is on how to do it right, I just know that it took more force than it seemed like it should in order to get them to snap into position. We pulled the whole assembly out once or twice to take a closer look, to see if there was something we were missing. On the third or fourth attempt I somehow wiggled and pushed the thing in the correct manner and the vents were reinstalled.


