When you click on links to various merchants on this site and make a purchase, this can result in this site earning a commission. Affiliate programs and affiliations include, but are not limited to, the eBay Partner Network.
I finally got around to taking the time to upgrade my stock premium audio in my 2015 C400.
My car already had the Premium Audio Burmester system to start with, so I at least had enough speakers to play with and easy access to the stock amp in the trunk.
Here's a list of the components used in the project:
- JL Audio VX600/6i - 6 channel x 75W with integrated DSP - $900 Open Box Ebay
- JL Audio 500W Dual 8" Powered Sub Enclosure (ACP208LG-W3v3) - $650 Open Box Crutchfield
- JL Audio Fix-82 Signal Conditioner - $227 Open Box Ebay
- 6 ft. Amazon Basic Toslink digital optical cable (
)
- KnuKonceptz #8 OFC (used from d-block to main amp & sub box)
Burmester Wiring Diagram attached to reference for wire colors and polarity.
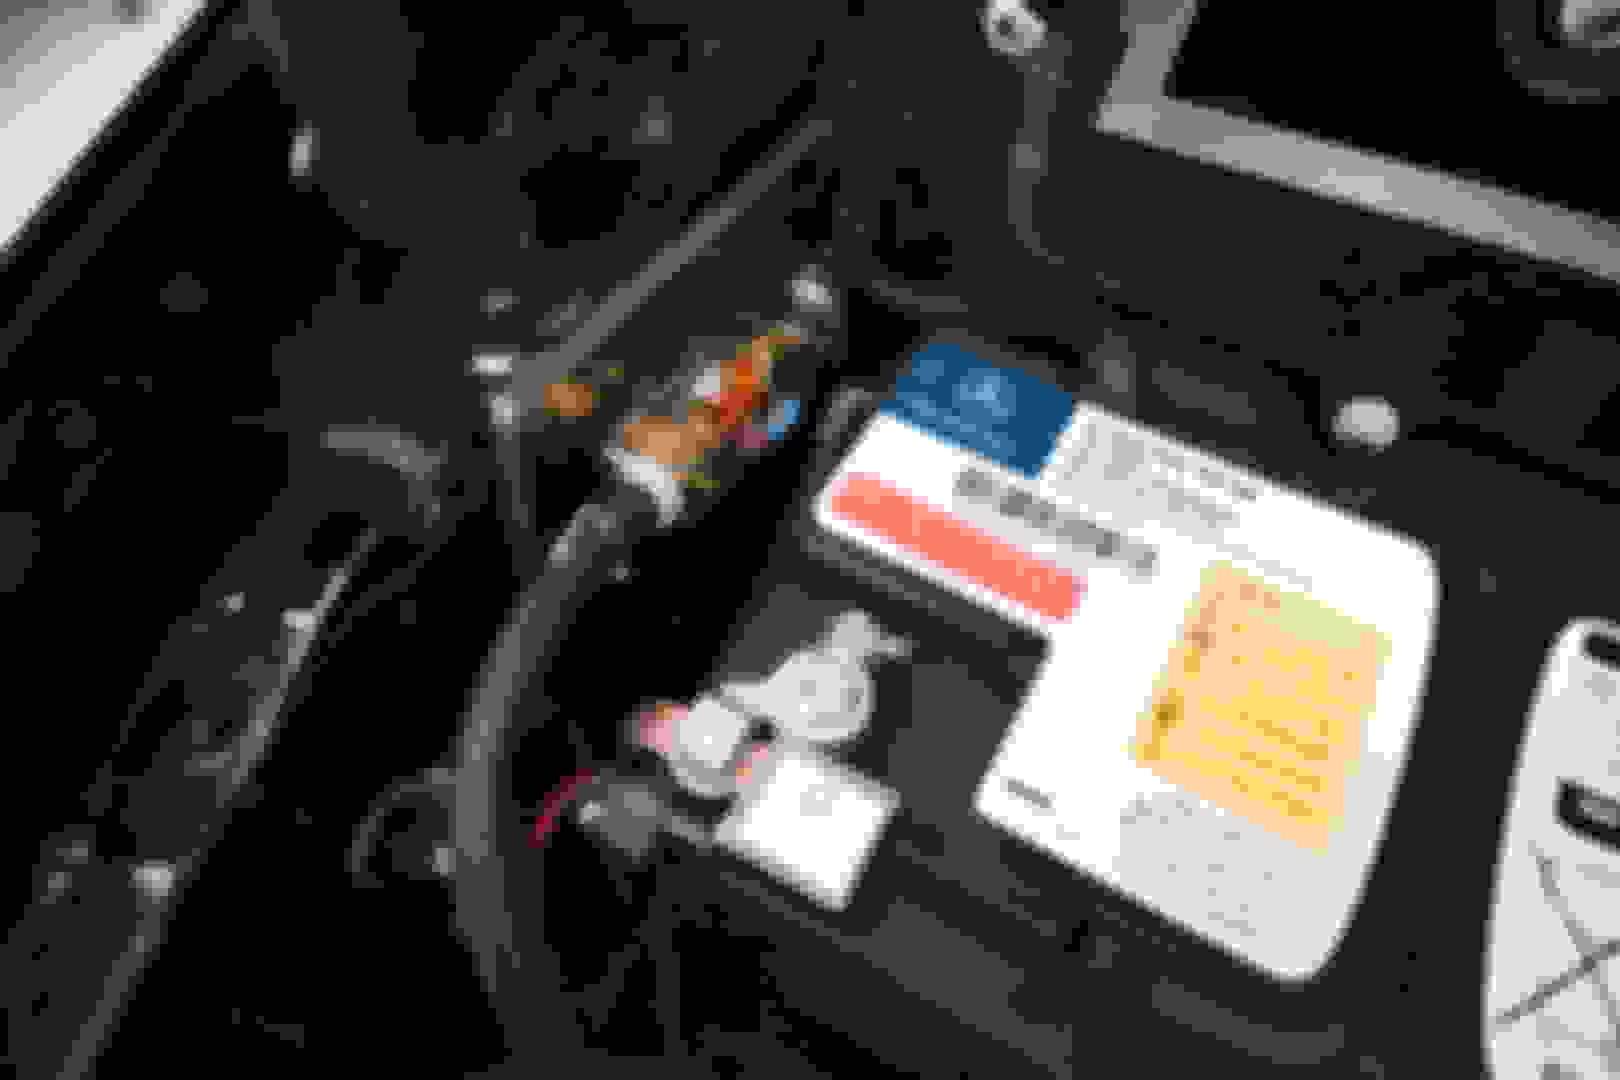
I started by finding a convenient location to mount my main battery fuse....there was a nice threaded bolt right near the battery to use..
I made a small mounting plate out of some Lexan I had laying around.
Next I got the door sill and other trim removed in order to fit the wire cleanly towards the trunk.
These were a major PITA at first. It took me quite a while to slowly figure out the correct order in which to pull all the pieces to avoid damaging the connectors or deforming the plastic too much.
There's also a nice firewall rubber grommet right behind the battery which makes it easy to snake the main wire through.
I used #4 OCF wire from the fuse back to the distribution block in the trunk. The power was taken off the secondary post of the battery positive terminal.
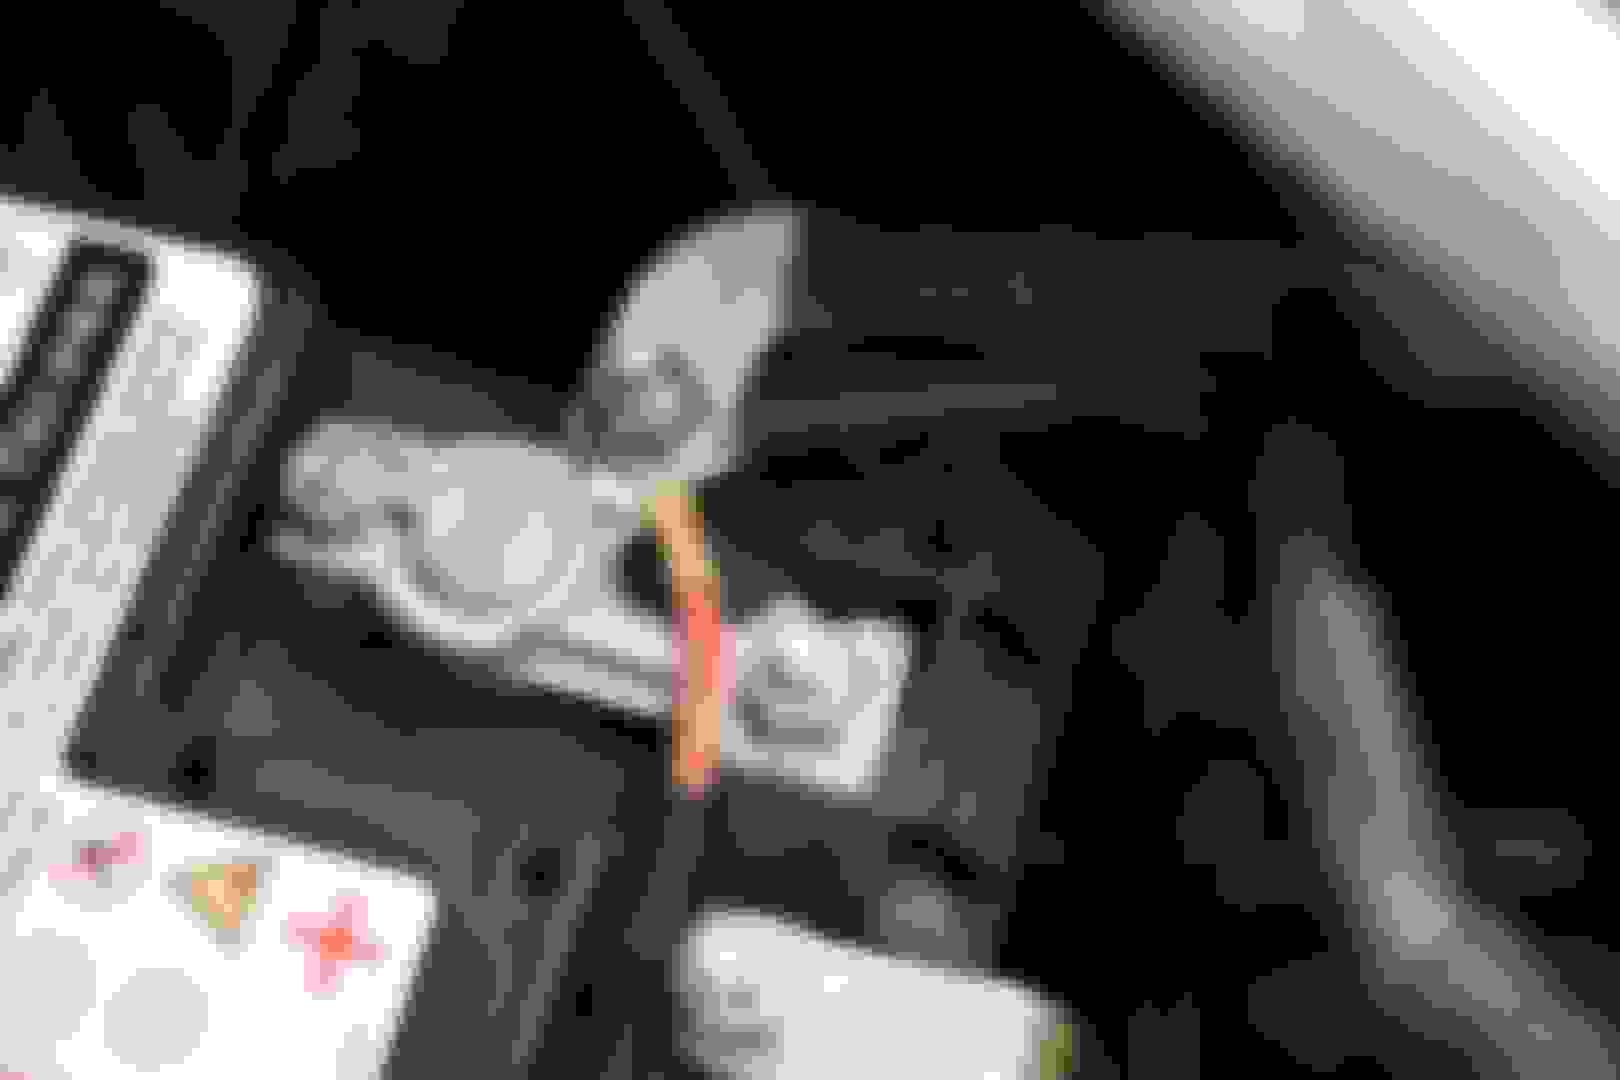
The #4 main power wire is the bright blue wire running along side the passenger rear seat. This leather cover is easily removed in order to properly pull the wire and zip tie it alongside the factory wiring.
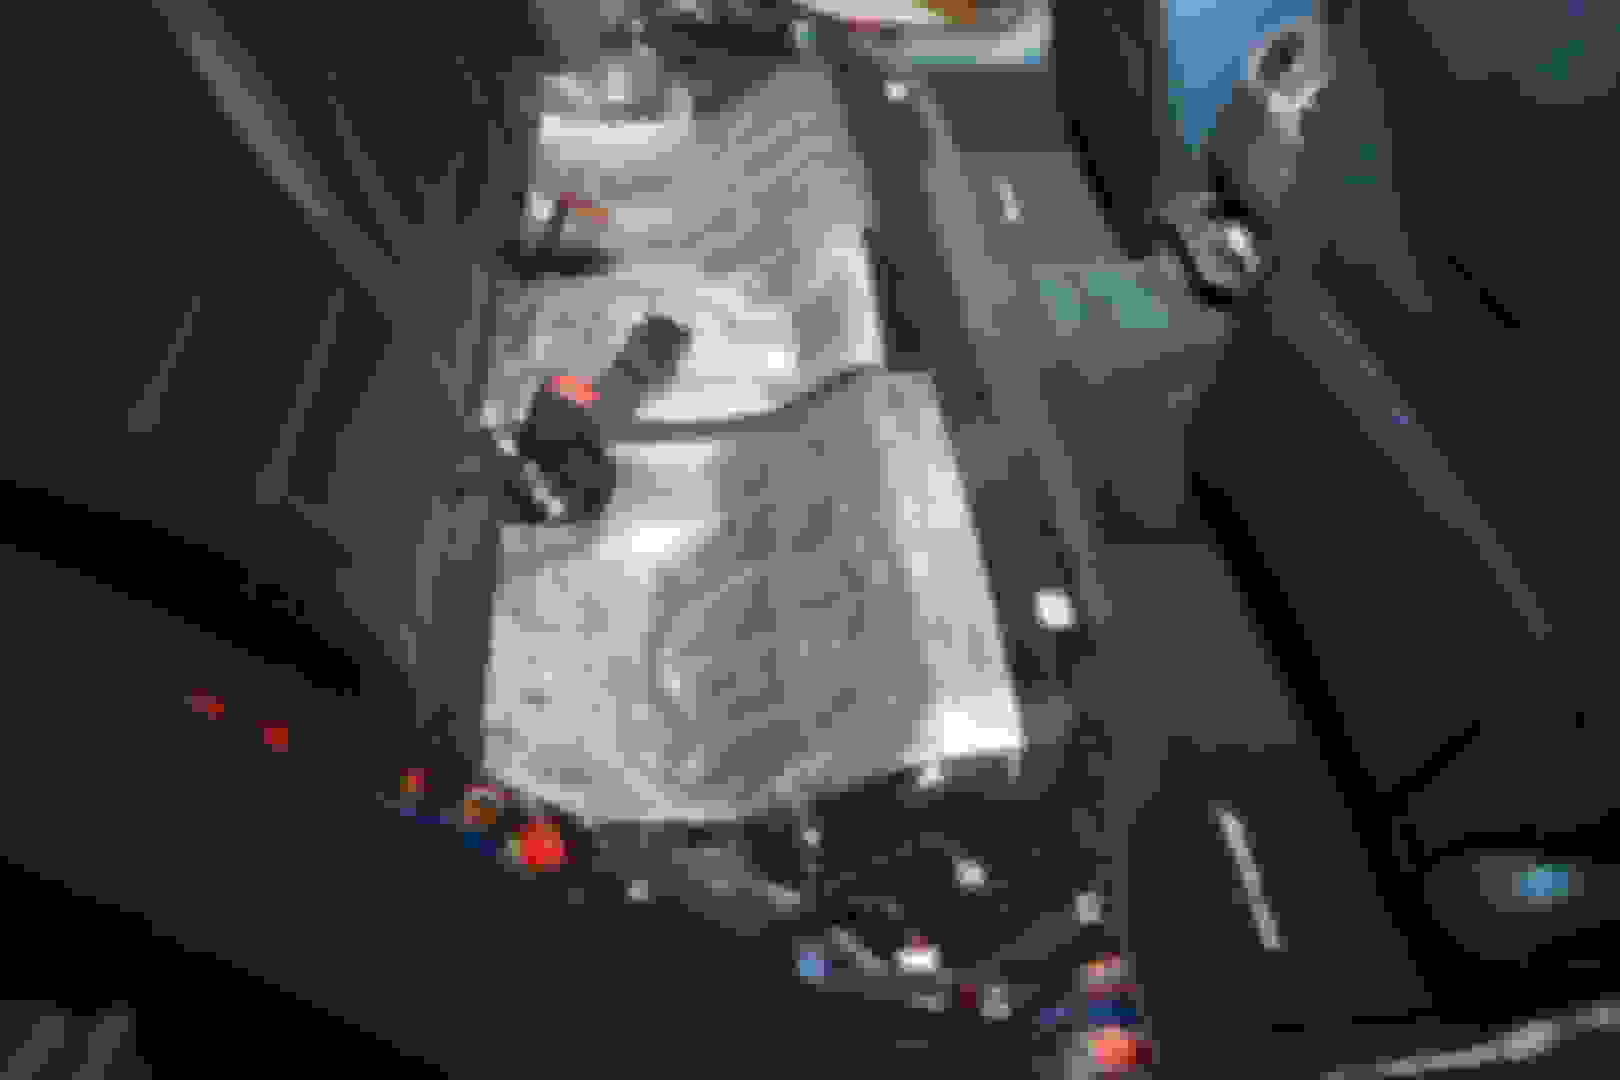
Since I had the rear seat removed, it was an opportune time to do a little sound reduction!
I got the amp mounted and distribution block installed. This particular amp was just a little to large to fit anywhere in the spare tire area. I tried for an hour straight to find a good mounting location that would be hidden under the existing plastic cradle in the spare tire area. This area has a lot of empty space, but not enough to clear this amp and provide enough comfortable room for wiring.
Here I'm also dry fitting the sub box. It really fits like a glove in this trunk. It slides in nearly perfectly and almost holds itself in place. It doesn't take up much trunk space at all and still allows the trunk floor to be pulled up as designed in order to access the spare tire area (although I don't have a spare tire under this hatch, I do keep a can of tire fix and a rechargeable battery jumper)
The power wires from the d-block were pulled up around the rear wheel well and directed through the rear seat cross member.
The Fix-82 was used to grab speaker level signal from the L/R and midbass channels and flattten and recalibrate timing off the factor HU/amp. This signal is flattened and time corrected back to a low level optical digital signal. This is then piped into the VXi amp via a Toslink cable in order to send out to the 6 channels and sub pre-out.
Pics of the mounting location for the Fix-82
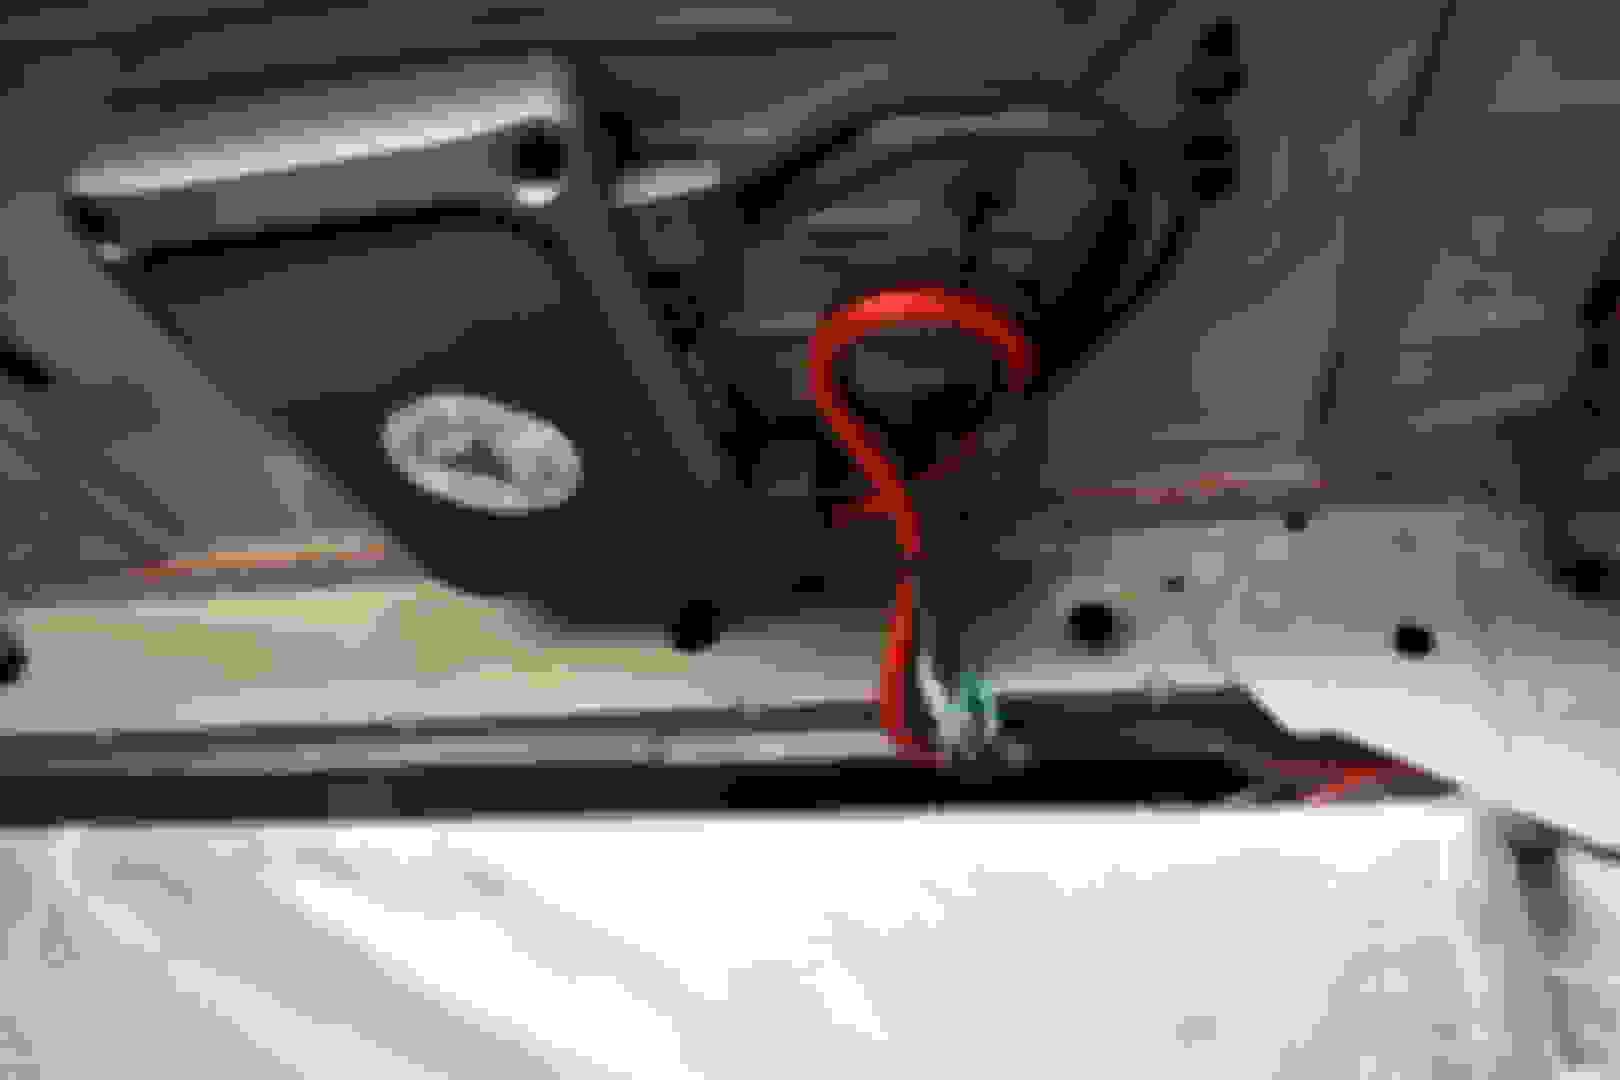
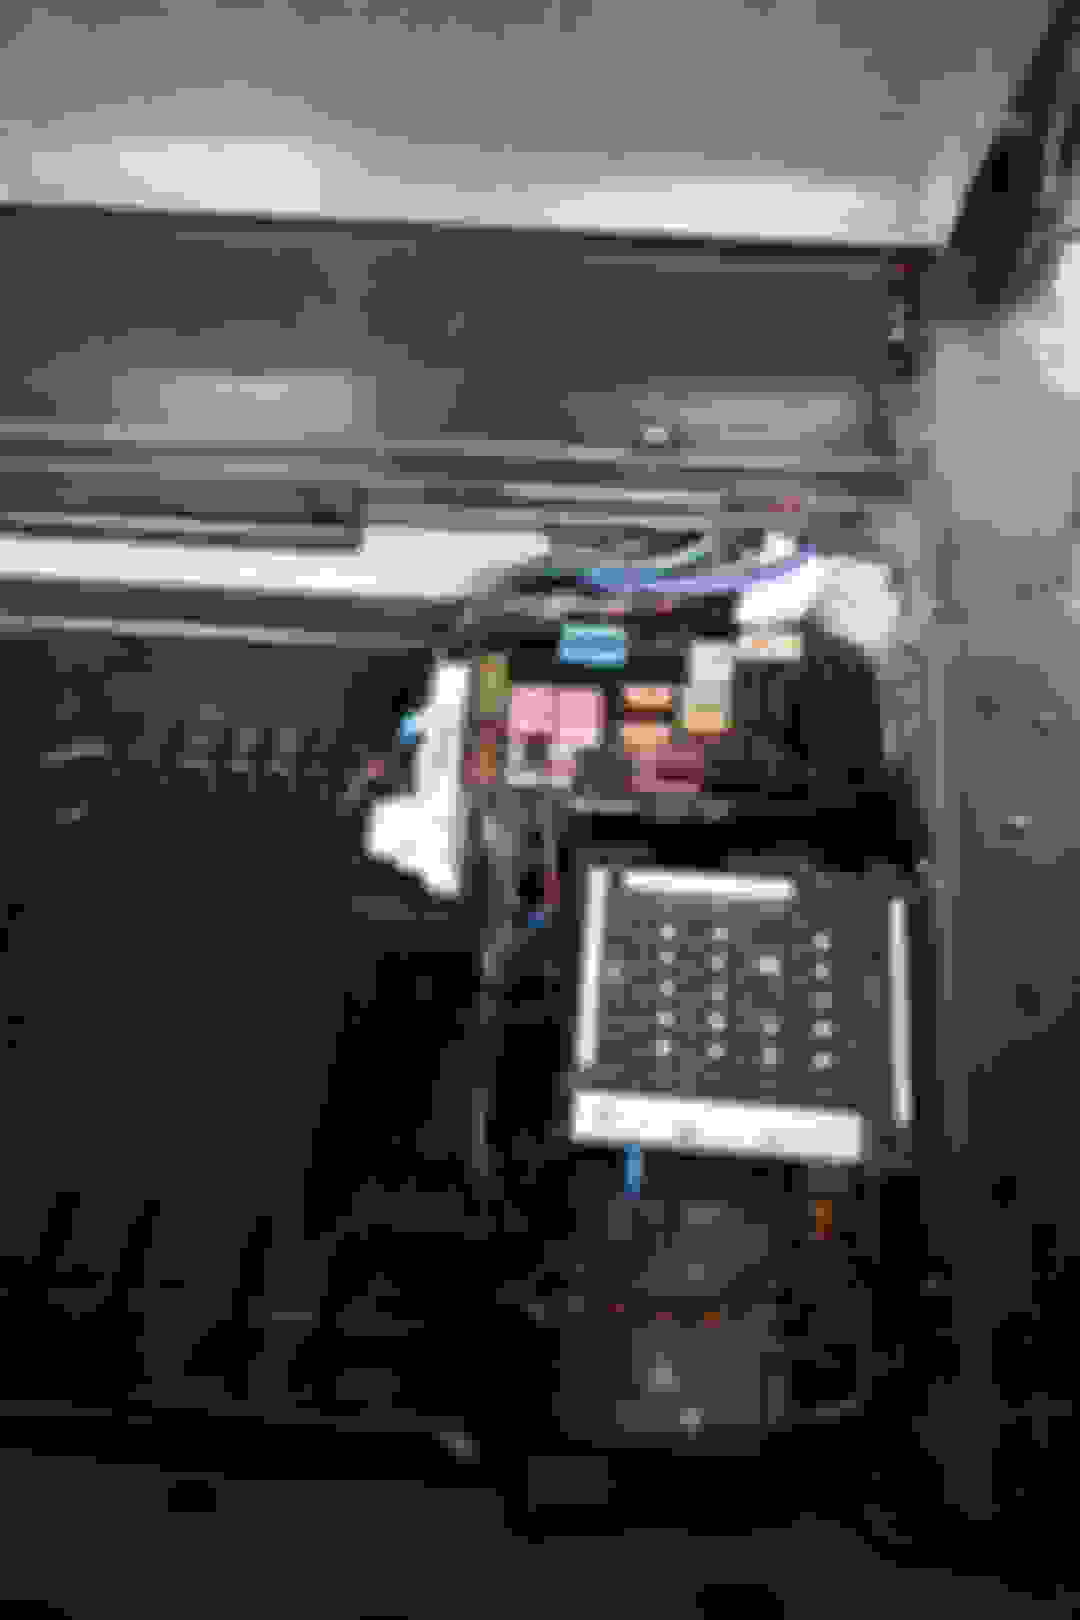
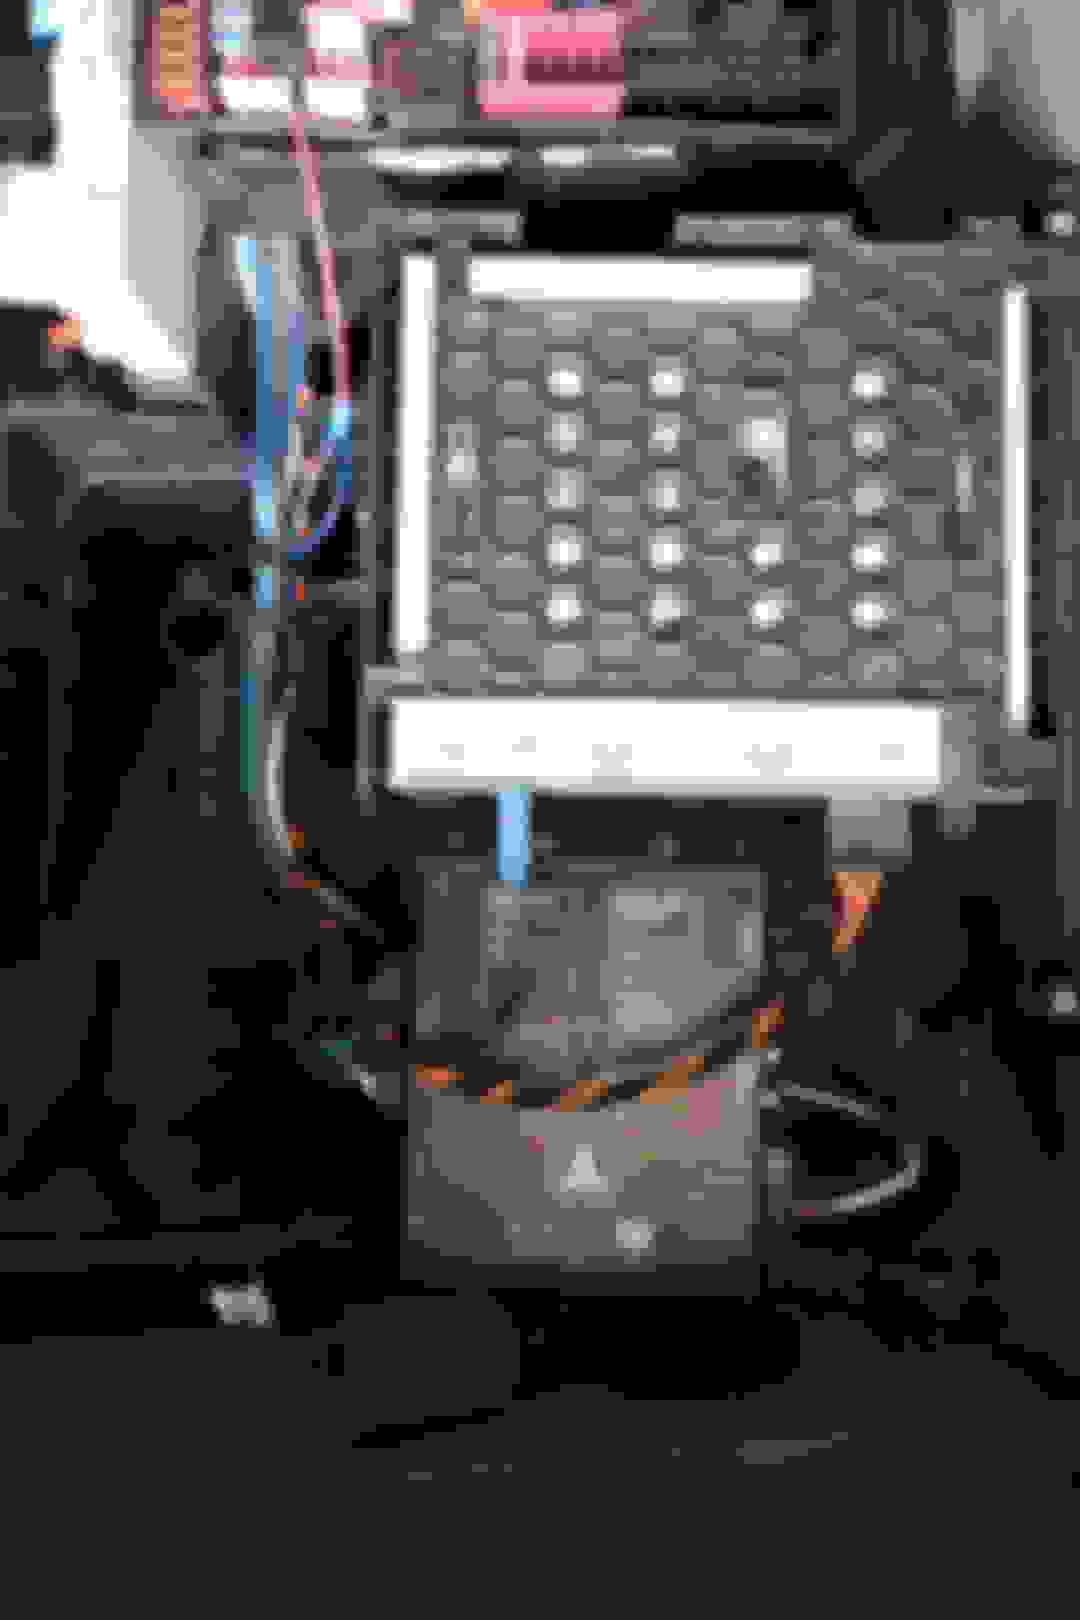
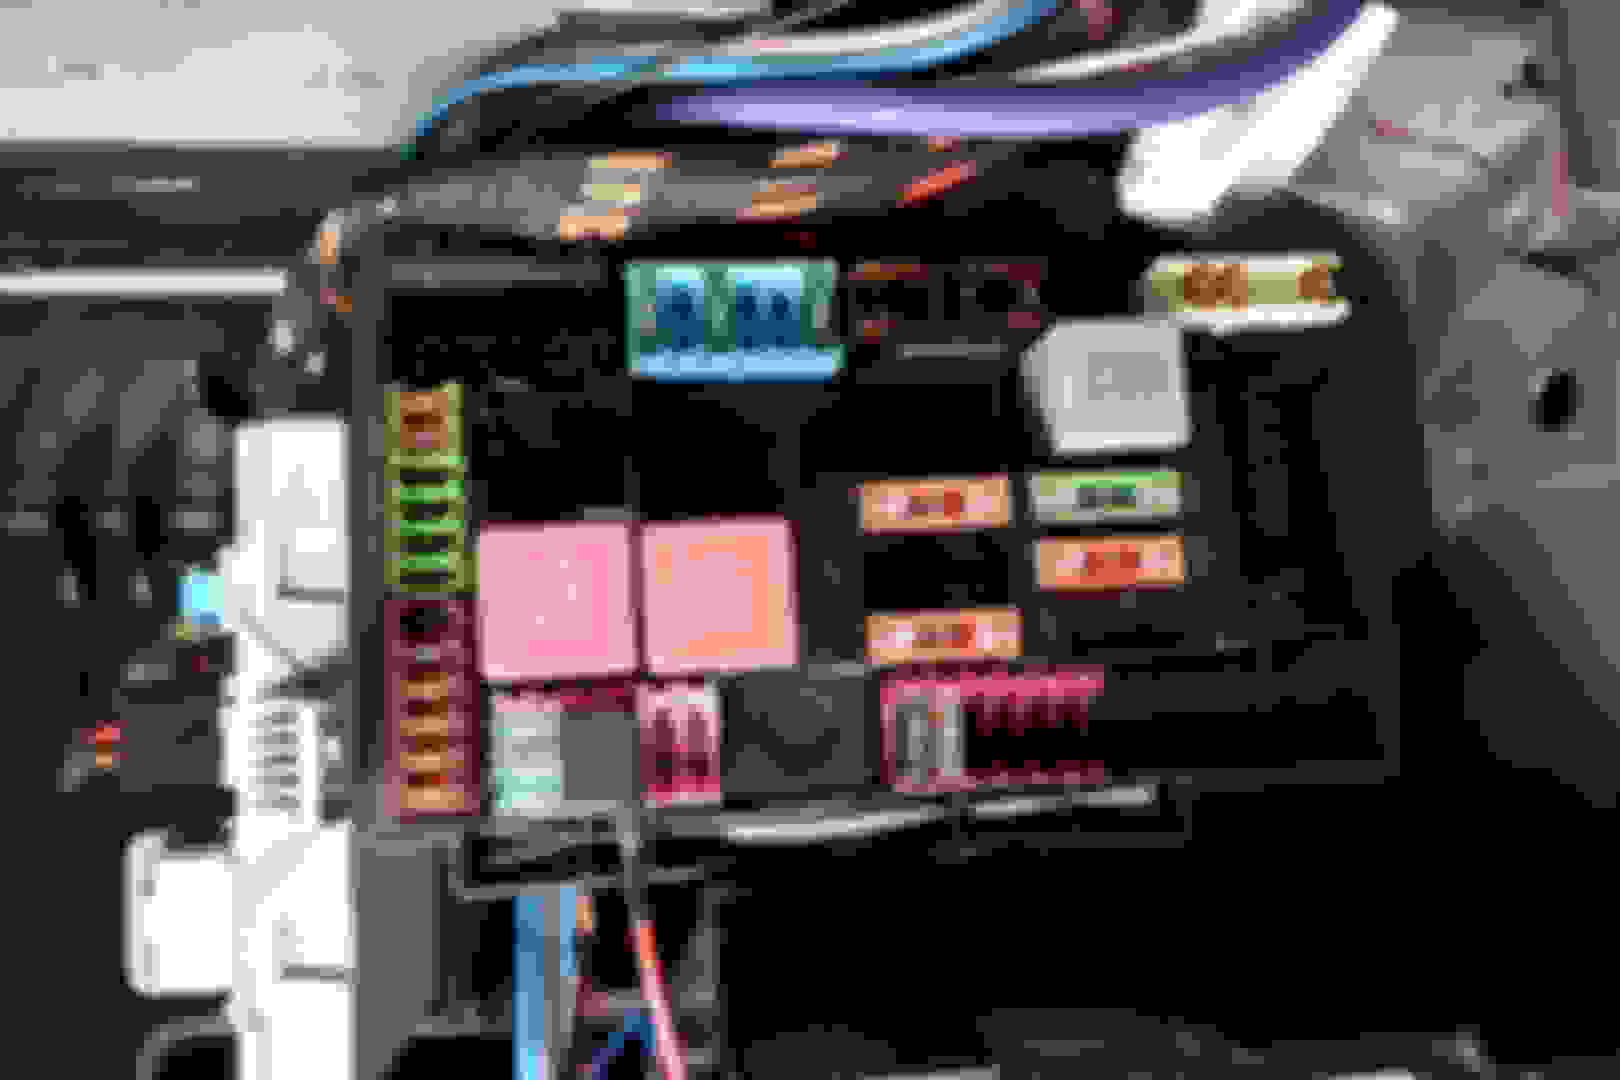
I used an add-a-circuit to tap off of one of the fuses in the trunk fuse box. I found the correct location in the fuse box that provides 12V whenever ignition is on. This signal was used to turn on the Fix, the VXi and the sub all from the same signal.
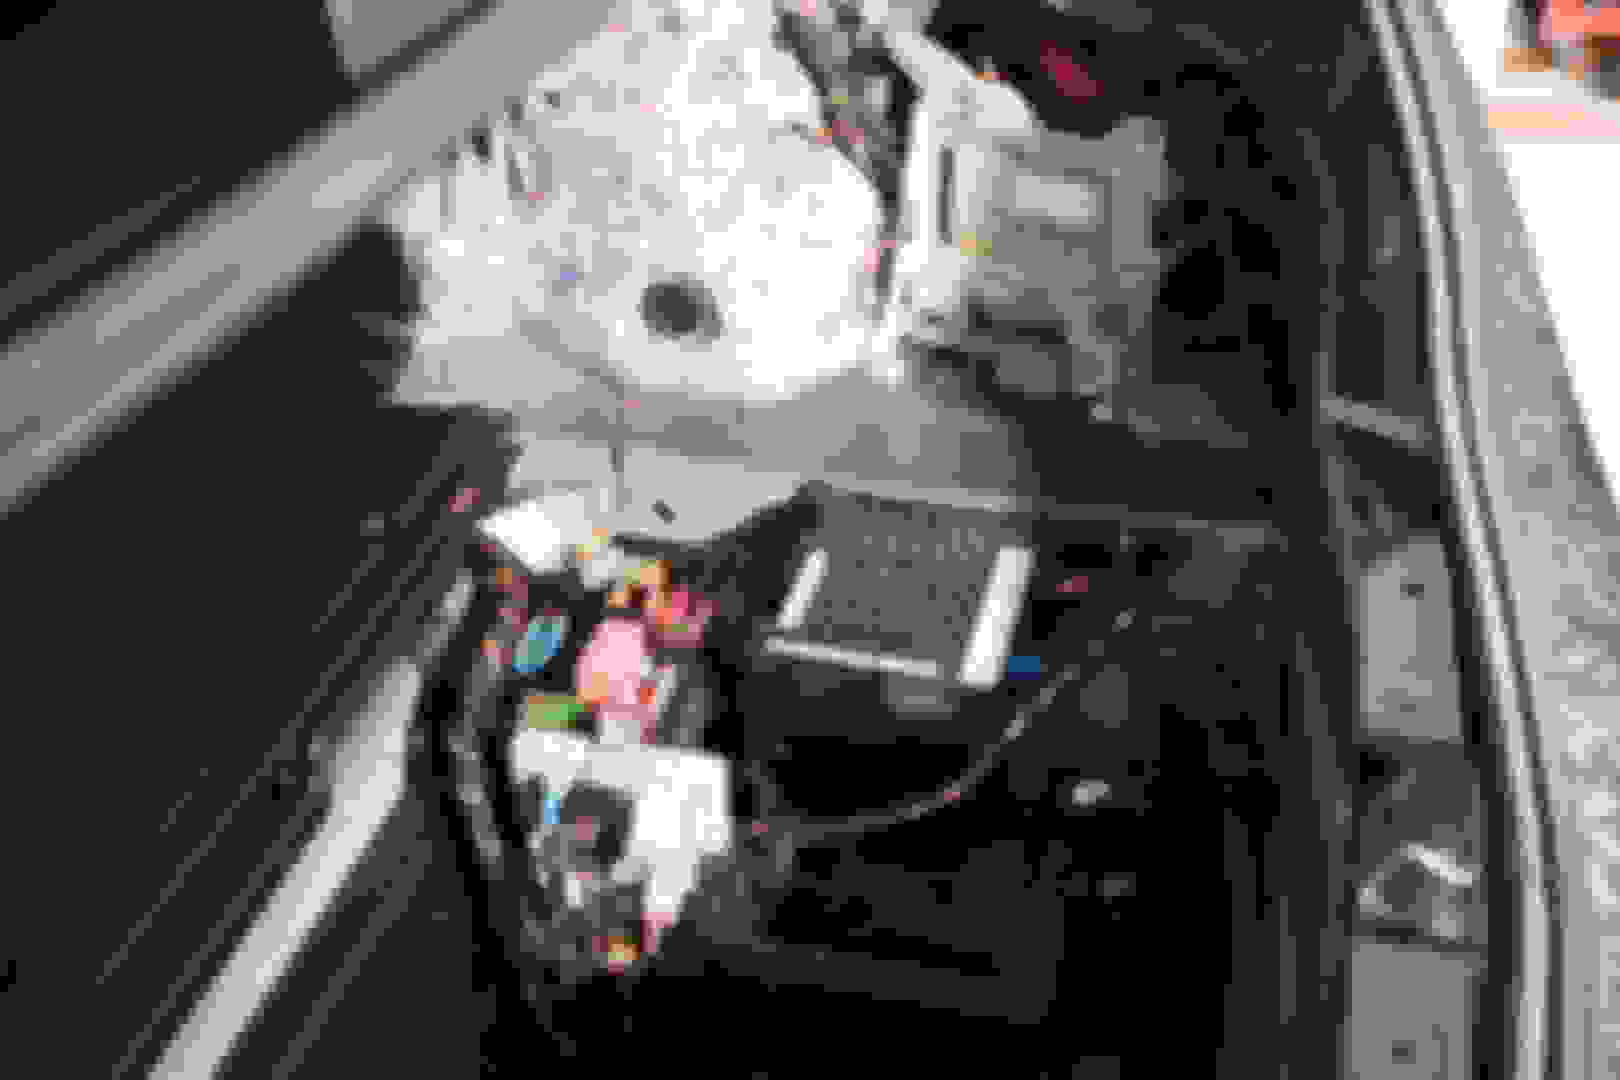
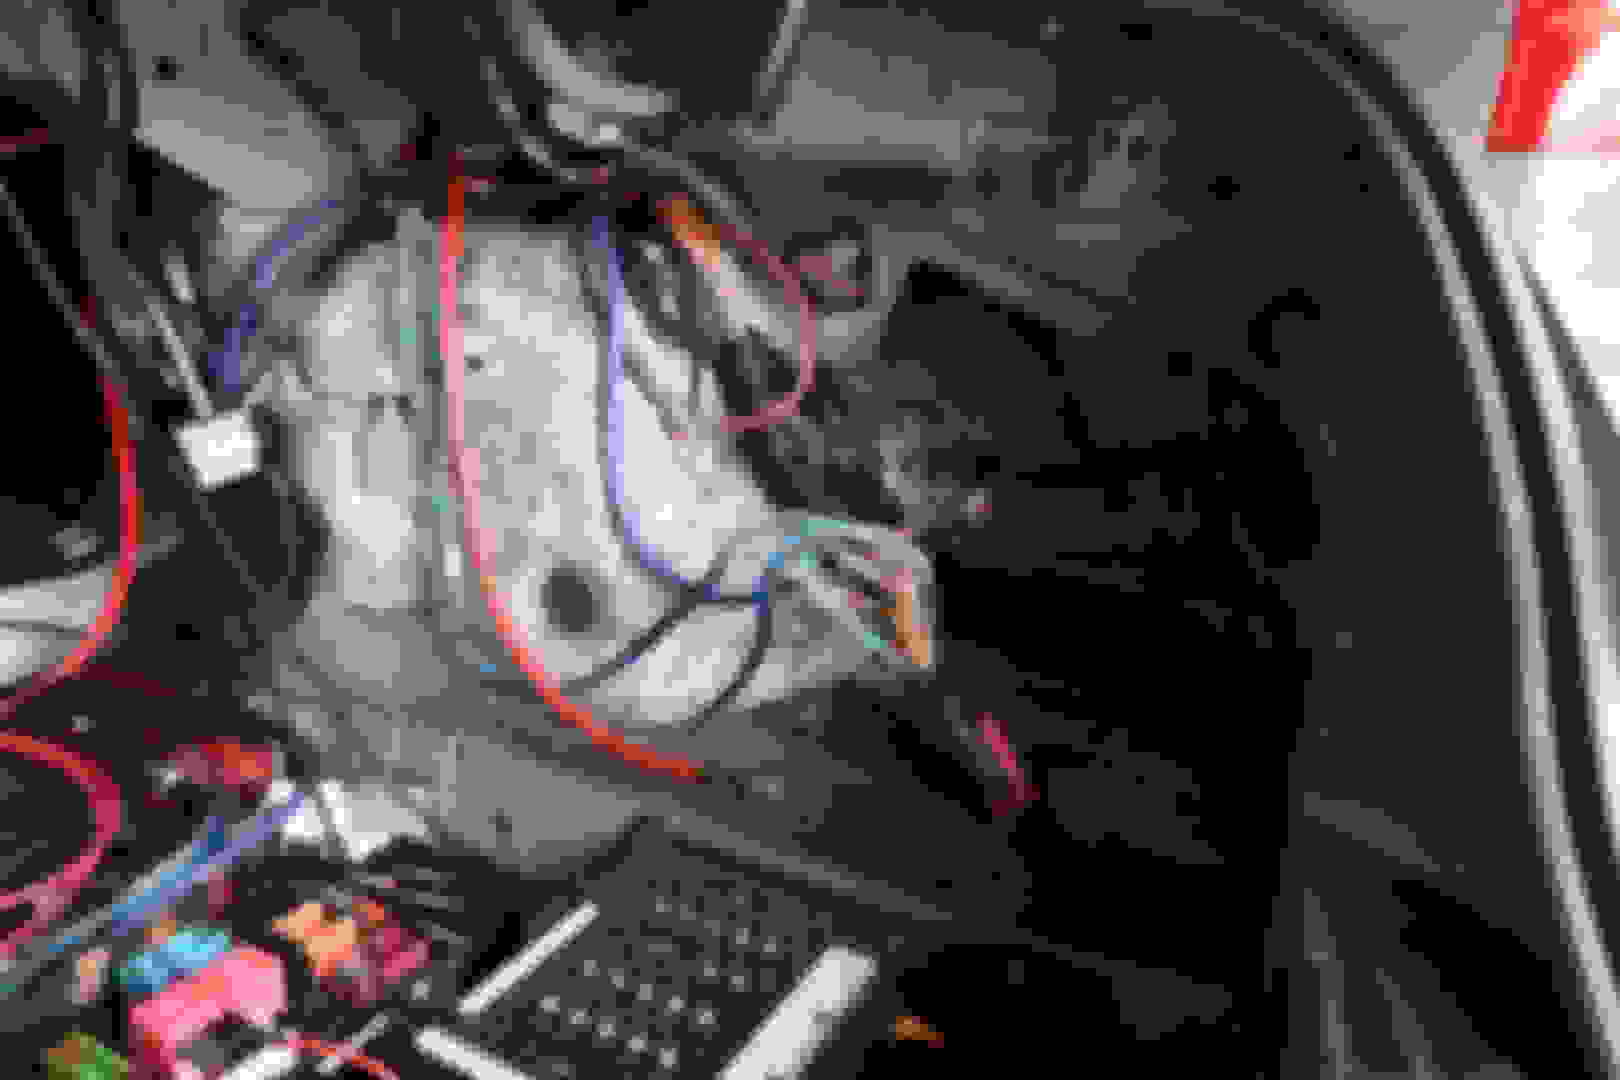
The factory amp and wiring before digging into anything....the Burmester amp is located in back corner of the truck, behind the wheel well, with the large pink handled connector
Factory Burmester amp is factor mounted behind the bracket....
Tapping into the factory wiring. In this factory system, the low level signal from the head unit is sent to the Burmester amp via a proprietary optical link, so there's no easy way to intercept this signal.
So, I had to interecept the speaker level high voltage signal coming out of the Burmester amp. I used the front left & right and footwell left and right to feed into the Fix 82. I cut the wires coming out of the Burmester and fed them into the Fix. Then the Fix feeds into the VXi via Toslink. Then the VXi feeds back into the same OEM wires heading outbound to all of the speakers.
Once all the cutting and splicing is complete, I tidied up all of the wiring.
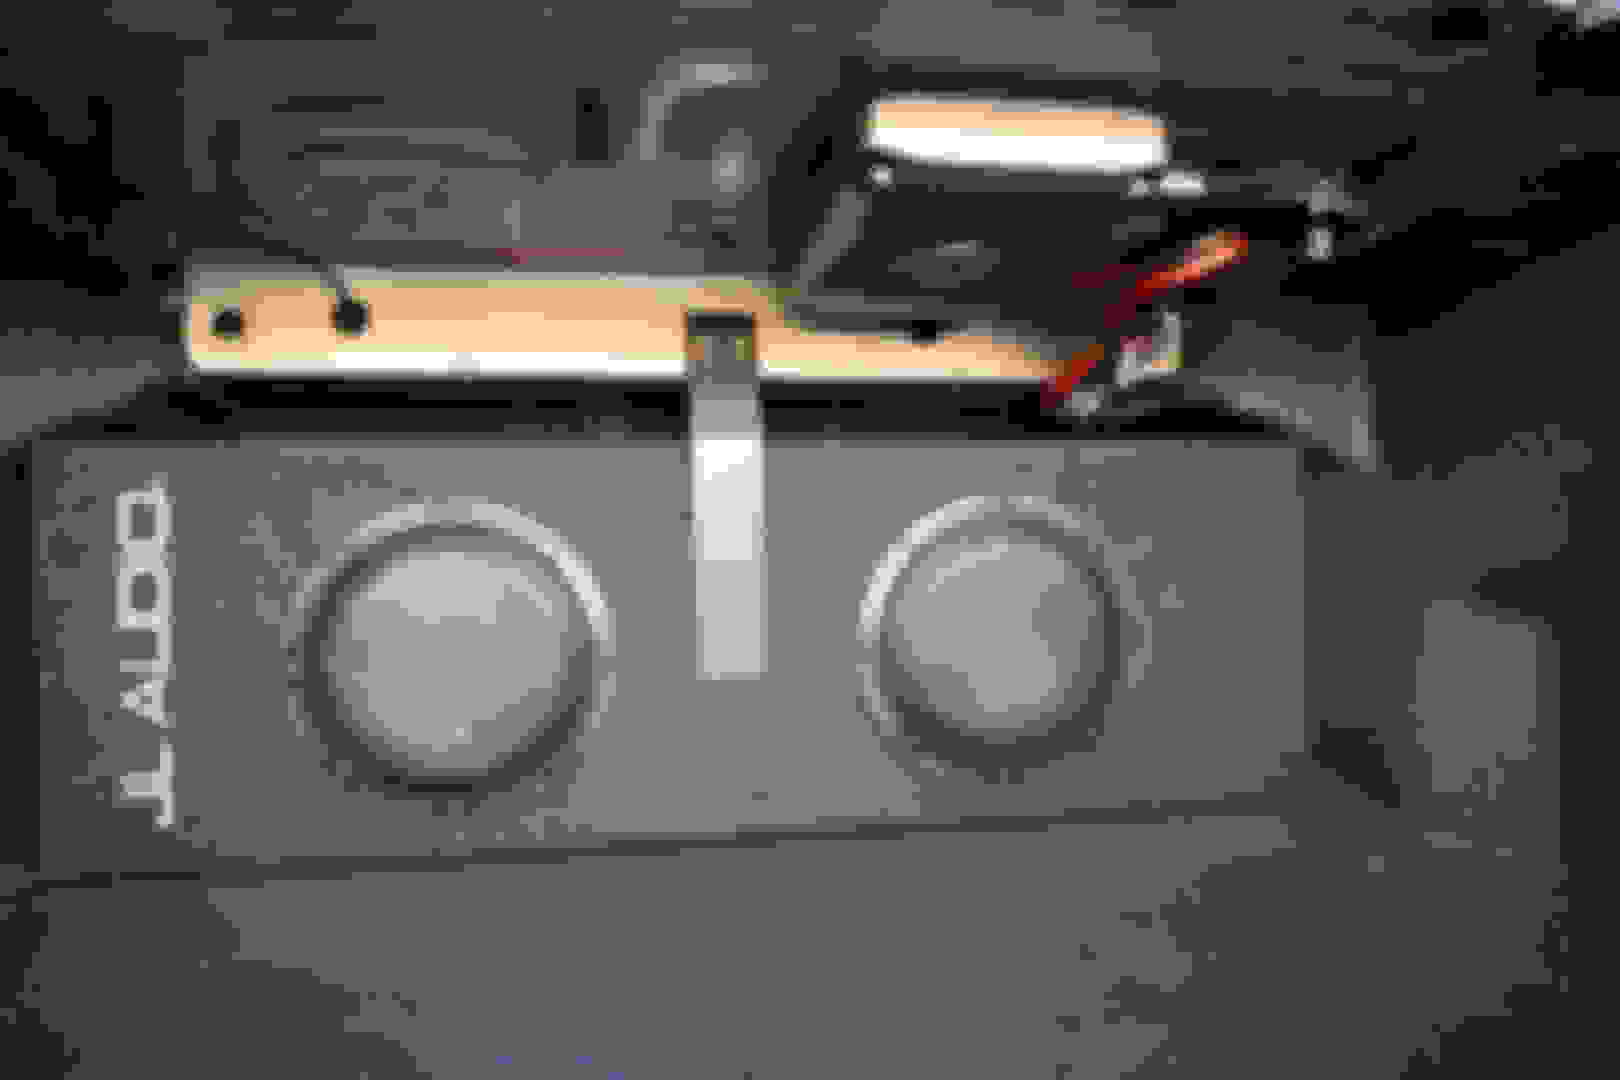
The final mounted sub and everything buttoned back up. I'm not crazy about having the amp mounted to the roof of the trunk, but it was the cleanest location I could find.
The sub box was a retuned unit that I bought from Crutchfield....it was basically brand new but does show a couple minor dents on one of the speaker grills.. No big deal to me, as the price was really good and it sounds like brand new! This JL sub is a quality piece of gear, it's really heavy and you can certainly tell it's build very well. I had some 1/4" steel flat stock laying around that I used to fab up a bracket to hold it in place. I hated to tap holes into the factory trunk, but I wanted a solid mount that I would never have to worry about coming loose.
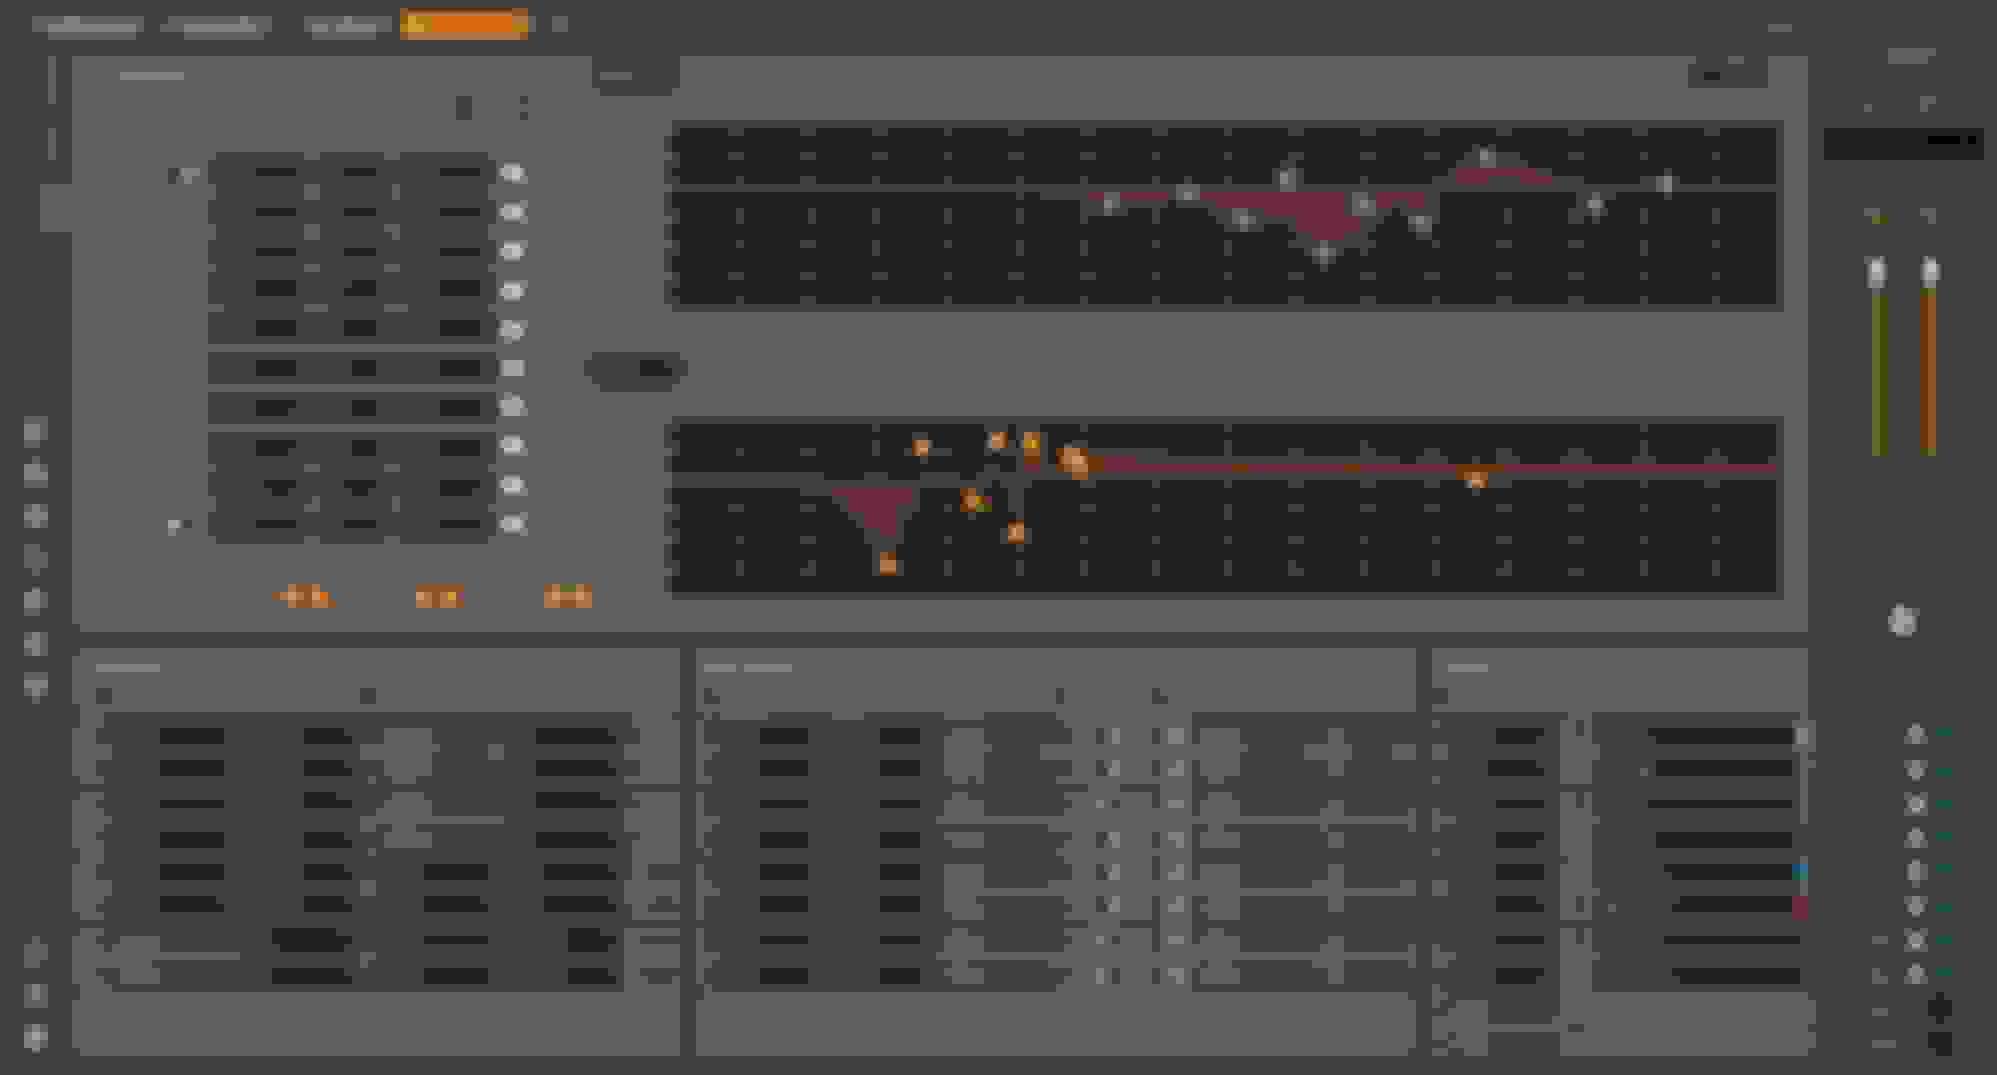
Calibration of the Fix82 took a few tries to get it right. I had a hard time updating the firmware with my laptop. Every time I'd attempt to update the firmware, the USB connection would drop out for some reason, it would give a bootloader error. After troubleshooting numerous time, I came to realize that the particular USB port on my laptop had a different driver assigned to open the bootloader on the Fix....it was a bootloader from a previous update I had done a month ago on my camera flash. Once I got the right bootloader driver installed, I was able to successfully update the Fix 82 firmware.
Next I had troubles with the Right channel giving a low signal error. The only way I could resolve it was to change the input polarity for the Front Right input. This allowed a proper calibration and the resulting output was matched left to right and the output was nice and flat.
After a few hours (actually a few days) of tuning using REW, I was able to get a great sounding system!
The system is now absolutely amazing. The overall sound stage is opened up so much more and centered properly. I ended up disconnecting the single front center and two rear surround speakers. They just muddied up the sound stage and weren't needed. I absolutely enjoy listening to music now and the system cranks if needed! Even with the crappy factory speakers, the clean 75W coming from the VXi amp really drives the speakers nicely. The footwell drivers are used to fill in the midbass region and the JL dual sub in the trunk really sounds amazing.
Last edited by flyboyusa; May 9, 2020 at 04:54 PM.
Right about $2,000 total...I was afraid to add it up lol.
I've updated the post with the pricing I paid for the individual components. I kept monitoring Ebay and Crutchfield until I found decent open box options from reputable sellers that I could trust and am happy I did, as I save a few hundred dollars at least.
If you would like to remove the JL Fix 82 and Burmester amplifier in your chain, you can use the NAV-TV ZEN MOST-150 interface. ($750)
The NAV-TV ZEN-M processor seamlessly converts late model Mercedes factory MOST-150 audio bus to 12-channel analog RCA and TOSLink output. Adding aftermarket amplifiers to the OE NTG 5, 5.1, 5.2 or 5.5 system has never been so simple. This module integrates with the OEM M.O.S.T.� bus to retain volume control, full fade and balance (analog only), treble, mid-range, bass control & Bluetooth voice calls with no external speaker (true OEM integration).
Just make sure to update the firmware before using. (Firmware v1.2.7 has an issue where the Bluetooth telephone volume goes to max when making or receiving calls.)
An alternate spot to install the amplifier could be under the spare tire panel. Just remove the gray collapsible shopping crate and add a wood tray. 13 x 18 inches.
OP, where are you located? Before I go to a local speaker shop, I wanted to ask. I gotta have my JL W6 and 1000/1 remove from my current CLA and switched to my new GLC next month.
I finally got around to taking the time to upgrade my stock premium audio in my 2015 C400.
My car already had the Premium Audio Burmester system to start with, so I at least had enough speakers to play with and easy access to the stock amp in the trunk.
Here's a list of the components used in the project:
- JL Audio VX600/6i - 6 channel x 75W with integrated DSP - $900 Open Box Ebay
- JL Audio 500W Dual 8" Powered Sub Enclosure (ACP208LG-W3v3) - $650 Open Box Crutchfield
- JL Audio Fix-82 Signal Conditioner - $227 Open Box Ebay
- 6 ft. Amazon Basic Toslink digital optical cable (Amazon)
- Rockville #4 Gauge OFC Amp Install kit (Amazon) - $52
- Rockford Fosgate Distribution Block (Amazon)
- KnuKonceptz #8 OFC (used from d-block to main amp & sub box)
Burmester Wiring Diagram attached to reference for wire colors and polarity.
I started by finding a convenient location to mount my main battery fuse....there was a nice threaded bolt right near the battery to use..
I made a small mounting plate out of some Lexan I had laying around.
Next I got the door sill and other trim removed in order to fit the wire cleanly towards the trunk.
These were a major PITA at first. It took me quite a while to slowly figure out the correct order in which to pull all the pieces to avoid damaging the connectors or deforming the plastic too much.
There's also a nice firewall rubber grommet right behind the battery which makes it easy to snake the main wire through.
I used #4 OCF wire from the fuse back to the distribution block in the trunk. The power was taken off the secondary post of the battery positive terminal.
The #4 main power wire is the bright blue wire running along side the passenger rear seat. This leather cover is easily removed in order to properly pull the wire and zip tie it alongside the factory wiring.
Since I had the rear seat removed, it was an opportune time to do a little sound reduction!
I got the amp mounted and distribution block installed. This particular amp was just a little to large to fit anywhere in the spare tire area. I tried for an hour straight to find a good mounting location that would be hidden under the existing plastic cradle in the spare tire area. This area has a lot of empty space, but not enough to clear this amp and provide enough comfortable room for wiring.
Here I'm also dry fitting the sub box. It really fits like a glove in this trunk. It slides in nearly perfectly and almost holds itself in place. It doesn't take up much trunk space at all and still allows the trunk floor to be pulled up as designed in order to access the spare tire area (although I don't have a spare tire under this hatch, I do keep a can of tire fix and a rechargeable battery jumper)
The power wires from the d-block were pulled up around the rear wheel well and directed through the rear seat cross member.
The Fix-82 was used to grab speaker level signal from the L/R and midbass channels and flattten and recalibrate timing off the factor HU/amp. This signal is flattened and time corrected back to a low level optical digital signal. This is then piped into the VXi amp via a Toslink cable in order to send out to the 6 channels and sub pre-out.
Pics of the mounting location for the Fix-82
I used an add-a-circuit to tap off of one of the fuses in the trunk fuse box. I found the correct location in the fuse box that provides 12V whenever ignition is on. This signal was used to turn on the Fix, the VXi and the sub all from the same signal.
The factory amp and wiring before digging into anything....the Burmester amp is located in back corner of the truck, behind the wheel well, with the large pink handled connector
Factory Burmester amp is factor mounted behind the bracket....
Tapping into the factory wiring. In this factory system, the low level signal from the head unit is sent to the Burmester amp via a proprietary optical link, so there's no easy way to intercept this signal.
So, I had to interecept the speaker level high voltage signal coming out of the Burmester amp. I used the front left & right and footwell left and right to feed into the Fix 82. I cut the wires coming out of the Burmester and fed them into the Fix. Then the Fix feeds into the VXi via Toslink. Then the VXi feeds back into the same OEM wires heading outbound to all of the speakers.
Once all the cutting and splicing is complete, I tidied up all of the wiring.
The final mounted sub and everything buttoned back up. I'm not crazy about having the amp mounted to the roof of the trunk, but it was the cleanest location I could find.
The sub box was a retuned unit that I bought from Crutchfield....it was basically brand new but does show a couple minor dents on one of the speaker grills.. No big deal to me, as the price was really good and it sounds like brand new! This JL sub is a quality piece of gear, it's really heavy and you can certainly tell it's build very well. I had some 1/4" steel flat stock laying around that I used to fab up a bracket to hold it in place. I hated to tap holes into the factory trunk, but I wanted a solid mount that I would never have to worry about coming loose.
Calibration of the Fix82 took a few tries to get it right. I had a hard time updating the firmware with my laptop. Every time I'd attempt to update the firmware, the USB connection would drop out for some reason, it would give a bootloader error. After troubleshooting numerous time, I came to realize that the particular USB port on my laptop had a different driver assigned to open the bootloader on the Fix....it was a bootloader from a previous update I had done a month ago on my camera flash. Once I got the right bootloader driver installed, I was able to successfully update the Fix 82 firmware.
Next I had troubles with the Right channel giving a low signal error. The only way I could resolve it was to change the input polarity for the Front Right input. This allowed a proper calibration and the resulting output was matched left to right and the output was nice and flat.
After a few hours (actually a few days) of tuning using REW, I was able to get a great sounding system!
The system is now absolutely amazing. The overall sound stage is opened up so much more and centered properly. I ended up disconnecting the single front center and two rear surround speakers. They just muddied up the sound stage and weren't needed. I absolutely enjoy listening to music now and the system cranks if needed! Even with the crappy factory speakers, the clean 75W coming from the VXi amp really drives the speakers nicely. The footwell drivers are used to fill in the midbass region and the JL dual sub in the trunk really sounds amazing.
hey I've got open circuit on my 2016 c class coupe and diagnosis came back as open circuit on all speakers and also said my sound amplifier fan 2 malfunction..so no sound but I see the music playing and also rear camera doesn't come up on screen or open in rear since this occurred.
any help would be appreciated.
Also would my amp be located in trunk side like yours.
I finally got around to taking the time to upgrade my stock premium audio in my 2015 C400.
My car already had the Premium Audio Burmester system to start with, so I at least had enough speakers to play with and easy access to the stock amp in the trunk.
Here's a list of the components used in the project:
- JL Audio VX600/6i - 6 channel x 75W with integrated DSP - $900 Open Box Ebay
- JL Audio 500W Dual 8" Powered Sub Enclosure (ACP208LG-W3v3) - $650 Open Box Crutchfield
- JL Audio Fix-82 Signal Conditioner - $227 Open Box Ebay
- 6 ft. Amazon Basic Toslink digital optical cable (Amazon)
- Rockville #4 Gauge OFC Amp Install kit (Amazon) - $52
- Rockford Fosgate Distribution Block (Amazon)
- KnuKonceptz #8 OFC (used from d-block to main amp & sub box)
Burmester Wiring Diagram attached to reference for wire colors and polarity.
I started by finding a convenient location to mount my main battery fuse....there was a nice threaded bolt right near the battery to use..
I made a small mounting plate out of some Lexan I had laying around.
Next I got the door sill and other trim removed in order to fit the wire cleanly towards the trunk.
These were a major PITA at first. It took me quite a while to slowly figure out the correct order in which to pull all the pieces to avoid damaging the connectors or deforming the plastic too much.
There's also a nice firewall rubber grommet right behind the battery which makes it easy to snake the main wire through.
I used #4 OCF wire from the fuse back to the distribution block in the trunk. The power was taken off the secondary post of the battery positive terminal.
The #4 main power wire is the bright blue wire running along side the passenger rear seat. This leather cover is easily removed in order to properly pull the wire and zip tie it alongside the factory wiring.
Since I had the rear seat removed, it was an opportune time to do a little sound reduction!
I got the amp mounted and distribution block installed. This particular amp was just a little to large to fit anywhere in the spare tire area. I tried for an hour straight to find a good mounting location that would be hidden under the existing plastic cradle in the spare tire area. This area has a lot of empty space, but not enough to clear this amp and provide enough comfortable room for wiring.
Here I'm also dry fitting the sub box. It really fits like a glove in this trunk. It slides in nearly perfectly and almost holds itself in place. It doesn't take up much trunk space at all and still allows the trunk floor to be pulled up as designed in order to access the spare tire area (although I don't have a spare tire under this hatch, I do keep a can of tire fix and a rechargeable battery jumper)
The power wires from the d-block were pulled up around the rear wheel well and directed through the rear seat cross member.
The Fix-82 was used to grab speaker level signal from the L/R and midbass channels and flattten and recalibrate timing off the factor HU/amp. This signal is flattened and time corrected back to a low level optical digital signal. This is then piped into the VXi amp via a Toslink cable in order to send out to the 6 channels and sub pre-out.
Pics of the mounting location for the Fix-82
I used an add-a-circuit to tap off of one of the fuses in the trunk fuse box. I found the correct location in the fuse box that provides 12V whenever ignition is on. This signal was used to turn on the Fix, the VXi and the sub all from the same signal.
The factory amp and wiring before digging into anything....the Burmester amp is located in back corner of the truck, behind the wheel well, with the large pink handled connector
Factory Burmester amp is factor mounted behind the bracket....
Tapping into the factory wiring. In this factory system, the low level signal from the head unit is sent to the Burmester amp via a proprietary optical link, so there's no easy way to intercept this signal.
So, I had to interecept the speaker level high voltage signal coming out of the Burmester amp. I used the front left & right and footwell left and right to feed into the Fix 82. I cut the wires coming out of the Burmester and fed them into the Fix. Then the Fix feeds into the VXi via Toslink. Then the VXi feeds back into the same OEM wires heading outbound to all of the speakers.
Once all the cutting and splicing is complete, I tidied up all of the wiring.
The final mounted sub and everything buttoned back up. I'm not crazy about having the amp mounted to the roof of the trunk, but it was the cleanest location I could find.
The sub box was a retuned unit that I bought from Crutchfield....it was basically brand new but does show a couple minor dents on one of the speaker grills.. No big deal to me, as the price was really good and it sounds like brand new! This JL sub is a quality piece of gear, it's really heavy and you can certainly tell it's build very well. I had some 1/4" steel flat stock laying around that I used to fab up a bracket to hold it in place. I hated to tap holes into the factory trunk, but I wanted a solid mount that I would never have to worry about coming loose.
Calibration of the Fix82 took a few tries to get it right. I had a hard time updating the firmware with my laptop. Every time I'd attempt to update the firmware, the USB connection would drop out for some reason, it would give a bootloader error. After troubleshooting numerous time, I came to realize that the particular USB port on my laptop had a different driver assigned to open the bootloader on the Fix....it was a bootloader from a previous update I had done a month ago on my camera flash. Once I got the right bootloader driver installed, I was able to successfully update the Fix 82 firmware.
Next I had troubles with the Right channel giving a low signal error. The only way I could resolve it was to change the input polarity for the Front Right input. This allowed a proper calibration and the resulting output was matched left to right and the output was nice and flat.
After a few hours (actually a few days) of tuning using REW, I was able to get a great sounding system!
The system is now absolutely amazing. The overall sound stage is opened up so much more and centered properly. I ended up disconnecting the single front center and two rear surround speakers. They just muddied up the sound stage and weren't needed. I absolutely enjoy listening to music now and the system cranks if needed! Even with the crappy factory speakers, the clean 75W coming from the VXi amp really drives the speakers nicely. The footwell drivers are used to fill in the midbass region and the JL dual sub in the trunk really sounds amazing.
Originally Posted by Muu
Would suggest to check the optical circuit first
I've tested speakers with a diagnostic machine and there was sound coming out..I've been told that the amp may be the issue and once I replace the amp it should be fine...however locating this is the issue..thanks
I second the Nav-TV Zen M as a solid option. I'm using one with the Toslink output to connect to a Match UP 10DSP amp, and there is no noise that I can hear at all. I have a blank music track just for checking for noise and I can turn the volume all the way up and I hear nothing.
My understanding is that there is a metal wall between the trunk area of the W222 S class and the cabin area with no air opening access between the two. So how does a subwoofer box placed in the trunk able to affect the sound in the cabin. If the sound is able to pass through the metal wall this must mean that it is able to pass just as much to the outside of the car.
My understanding is that there is a metal wall between the trunk area of the W222 S class and the cabin area with no air opening access between the two. So how does a subwoofer box placed in the trunk able to affect the sound in the cabin. If the sound is able to pass through the metal wall this must mean that it is able to pass just as much to the outside of the car.
Am I missing something?
I didn�t read the whole thread but this is c class discussion not s class
I�m not trying to be rude just want u to get the answer ur looking for. Are u asking about C or S?
I talked to an installer who put a JL powered sub in an s class. And said it still pushed good bass into the front of the car. The plate is not the same as the exterior panels.
but depending on how much sound ur looking for will dictate what speakers u need
I talked to an installer who put a JL powered sub in an s class. And said it still pushed good bass into the front of the car. The plate is not the same as the exterior panels.
but depending on how much sound ur looking for will dictate what speakers u need
Thank you very much for you response.
I have a ported box subwoofer from a different car I just sold so I will give it a try in the trunk.
If you would like to remove the JL Fix 82 and Burmester amplifier in your chain, you can use the NAV-TV ZEN MOST-150 interface. ($750)
The NAV-TV ZEN-M processor seamlessly converts late model Mercedes factory MOST-150 audio bus to 12-channel analog RCA and TOSLink output. Adding aftermarket amplifiers to the OE NTG 5, 5.1, 5.2 or 5.5 system has never been so simple. This module integrates with the OEM M.O.S.T.� bus to retain volume control, full fade and balance (analog only), treble, mid-range, bass control & Bluetooth voice calls with no external speaker (true OEM integration).
Just make sure to update the firmware before using. (Firmware v1.2.7 has an issue where the Bluetooth telephone volume goes to max when making or receiving calls.)
CAn you give me some more info on this product? From my understanding i can plug this in, run amps off the rca's, tune the stock stereo. I will still need power for any additional amps fromthe battery correct? If i an bypassing the stock amp and get a 5 channel or whatever is needed to power the burmester system, with the tuning will a new amp make the burmester sound better or is it already at its limit?
CAn you give me some more info on this product? From my understanding i can plug this in, run amps off the rca's, tune the stock stereo. I will still need power for any additional amps fromthe battery correct? If i an bypassing the stock amp and get a 5 channel or whatever is needed to power the burmester system, with the tuning will a new amp make the burmester sound better or is it already at its limit?
All of this has already been discussed on the site (ad nauseam). The search works great and you can refer to the manufacturers website for additional technical details.
I finally got around to taking the time to upgrade my stock premium audio in my 2015 C400.
My car already had the Premium Audio Burmester system to start with, so I at least had enough speakers to play with and easy access to the stock amp in the trunk.
Here's a list of the components used in the project:
- JL Audio VX600/6i - 6 channel x 75W with integrated DSP - $900 Open Box Ebay
- JL Audio 500W Dual 8" Powered Sub Enclosure (ACP208LG-W3v3) - $650 Open Box Crutchfield
- JL Audio Fix-82 Signal Conditioner - $227 Open Box Ebay
- 6 ft. Amazon Basic Toslink digital optical cable (Amazon)
- Rockville #4 Gauge OFC Amp Install kit (Amazon) - $52
- Rockford Fosgate Distribution Block (Amazon)
- KnuKonceptz #8 OFC (used from d-block to main amp & sub box)
Burmester Wiring Diagram attached to reference for wire colors and polarity.
I started by finding a convenient location to mount my main battery fuse....there was a nice threaded bolt right near the battery to use..
I made a small mounting plate out of some Lexan I had laying around.
Next I got the door sill and other trim removed in order to fit the wire cleanly towards the trunk.
These were a major PITA at first. It took me quite a while to slowly figure out the correct order in which to pull all the pieces to avoid damaging the connectors or deforming the plastic too much.
There's also a nice firewall rubber grommet right behind the battery which makes it easy to snake the main wire through.
I used #4 OCF wire from the fuse back to the distribution block in the trunk. The power was taken off the secondary post of the battery positive terminal.
The #4 main power wire is the bright blue wire running along side the passenger rear seat. This leather cover is easily removed in order to properly pull the wire and zip tie it alongside the factory wiring.
Since I had the rear seat removed, it was an opportune time to do a little sound reduction!
I got the amp mounted and distribution block installed. This particular amp was just a little to large to fit anywhere in the spare tire area. I tried for an hour straight to find a good mounting location that would be hidden under the existing plastic cradle in the spare tire area. This area has a lot of empty space, but not enough to clear this amp and provide enough comfortable room for wiring.
Here I'm also dry fitting the sub box. It really fits like a glove in this trunk. It slides in nearly perfectly and almost holds itself in place. It doesn't take up much trunk space at all and still allows the trunk floor to be pulled up as designed in order to access the spare tire area (although I don't have a spare tire under this hatch, I do keep a can of tire fix and a rechargeable battery jumper)
The power wires from the d-block were pulled up around the rear wheel well and directed through the rear seat cross member.
The Fix-82 was used to grab speaker level signal from the L/R and midbass channels and flattten and recalibrate timing off the factor HU/amp. This signal is flattened and time corrected back to a low level optical digital signal. This is then piped into the VXi amp via a Toslink cable in order to send out to the 6 channels and sub pre-out.
Pics of the mounting location for the Fix-82
I used an add-a-circuit to tap off of one of the fuses in the trunk fuse box. I found the correct location in the fuse box that provides 12V whenever ignition is on. This signal was used to turn on the Fix, the VXi and the sub all from the same signal.
The factory amp and wiring before digging into anything....the Burmester amp is located in back corner of the truck, behind the wheel well, with the large pink handled connector
Factory Burmester amp is factor mounted behind the bracket....
Tapping into the factory wiring. In this factory system, the low level signal from the head unit is sent to the Burmester amp via a proprietary optical link, so there's no easy way to intercept this signal.
So, I had to interecept the speaker level high voltage signal coming out of the Burmester amp. I used the front left & right and footwell left and right to feed into the Fix 82. I cut the wires coming out of the Burmester and fed them into the Fix. Then the Fix feeds into the VXi via Toslink. Then the VXi feeds back into the same OEM wires heading outbound to all of the speakers.
Once all the cutting and splicing is complete, I tidied up all of the wiring.
The final mounted sub and everything buttoned back up. I'm not crazy about having the amp mounted to the roof of the trunk, but it was the cleanest location I could find.
The sub box was a retuned unit that I bought from Crutchfield....it was basically brand new but does show a couple minor dents on one of the speaker grills.. No big deal to me, as the price was really good and it sounds like brand new! This JL sub is a quality piece of gear, it's really heavy and you can certainly tell it's build very well. I had some 1/4" steel flat stock laying around that I used to fab up a bracket to hold it in place. I hated to tap holes into the factory trunk, but I wanted a solid mount that I would never have to worry about coming loose.
Calibration of the Fix82 took a few tries to get it right. I had a hard time updating the firmware with my laptop. Every time I'd attempt to update the firmware, the USB connection would drop out for some reason, it would give a bootloader error. After troubleshooting numerous time, I came to realize that the particular USB port on my laptop had a different driver assigned to open the bootloader on the Fix....it was a bootloader from a previous update I had done a month ago on my camera flash. Once I got the right bootloader driver installed, I was able to successfully update the Fix 82 firmware.
Next I had troubles with the Right channel giving a low signal error. The only way I could resolve it was to change the input polarity for the Front Right input. This allowed a proper calibration and the resulting output was matched left to right and the output was nice and flat.
After a few hours (actually a few days) of tuning using REW, I was able to get a great sounding system!
The system is now absolutely amazing. The overall sound stage is opened up so much more and centered properly. I ended up disconnecting the single front center and two rear surround speakers. They just muddied up the sound stage and weren't needed. I absolutely enjoy listening to music now and the system cranks if needed! Even with the crappy factory speakers, the clean 75W coming from the VXi amp really drives the speakers nicely. The footwell drivers are used to fill in the midbass region and the JL dual sub in the trunk really sounds amazing.
I need help routing the power wire from the battery. Any more pictures of that area?
Really good write up indeed and thank you for all this information I intend to install an aftermarket system on my new GLE 450 2020 my system as basic or standard system so I have a few question. Where can the amplifier be found and does this system use the optical output as also have a fix. Also does anyone have the wiring diagram for my standard system .?
Mercedes SLR McLaren 722 S Is Extremely Rare Example Modified by McLaren
Slideshow: A one-of-one U.S.-spec Mercedes-Benz SLR McLaren Roadster became even rarer after a factory-backed transformation at McLaren's headquarters.