When you click on links to various merchants on this site and make a purchase, this can result in this site earning a commission. Affiliate programs and affiliations include, but are not limited to, the eBay Partner Network.
Is there a how-to for the carpet removal for installation subwoofers?
Hi there,
I've ordered an Audio System Mfit system for my W205 which replaces the speakers in the door and add some tweeters to it, but it also adds an extra subwoofer and replaces the standard subwoofer.
Now I'm wondering how I remove the carpet to get by the subwoofers. They're both located around the footrest. Some say you have to remove the seats to do this, but I can't find anywhere how exactly to do this.
Hopefully someone can help me out.
This is one of the best videos I have found. The subwoofer removal starts at 17:52
Ah thanks! I've partly watched this video before, but missed the subwoofer part, superb!
no I have to get the inverse torx :-)
If you are in the US, Harbor Freight is a good source for inexpensive inverse Torx sockets. You will need some other sizes to remove the components in front of the subwoofers.
If you are in the US, Harbor Freight is a good source for inexpensive inverse Torx sockets. You will need some other sizes to remove the components in front of the subwoofers.
Are those also inverse torx or normal torx?
My brother had the E14 inverse torx so I've tackled that problem. Do you need what sizes I need more?
I needed a very small inverse torx a month ago for changing the crankshaft sensor, think it was size 8. Happily when I was at the point of removing, my brother had it
My brother had the E14 inverse torx so I've tackled that problem. Do you need what sizes I need more?
I needed a very small inverse torx a month ago for changing the crankshaft sensor, think it was size 8. Happily when I was at the point of removing, my brother had it
These two sets should cover you for most of the inverse Torx fasteners you will encounter:
Hopefully I'm going to change it this week. I've watched the entire movie and what seems to be the most difficult part is to remove the OBD connector and especially the hinge for the hood.
The doors seems to be pretty easy and straight forward 🤞
I plan to do the same this weekend as well. I have speakers for the front and rear doors, which I will change out first, then the two subwoofers (my car currently has only one subwoofer). Maybe we can swap success (or horror) stories next week lol!
I plan to do the same this weekend as well. I have speakers for the front and rear doors, which I will change out first, then the two subwoofers (my car currently has only one subwoofer). Maybe we can swap success (or horror) stories next week lol!
Let's do that ☺️
I'm going to do it with a friend of mine that bought the same set🤞
Yesterday I've managed to install the door tweeters and the tweeters. This was pretty straight on, especially with the video! 👍👍
Only thing that's important is that you need a relatively long torx 30. I've used a ratchet with a long extension.
I've also used some plastic interior remover for both the door panels and the mid-range woofer on the door. The woofer was really tight and the interior remover helped a lot!
I've used bitumen tape for both the tweeters and the woofers, but haven't used other insulation. To mount the filter on the door I've used carpet take and extra tape on the outside. For the remaining wires I've used an inner tube from my bicycle to prevent rattling :-)
The sound is already way better even without the subs installed. Think a Composet makes the biggest difference.
Strange thing with the plug and play Compo set is that the jumper on the filter is on the wrong place according the manual. It's stated in the manual that the jumper should be @2.7 and P or so for mounting in the mirror cover and stock it's set for a tweeter in the door panel. Door panel removed Changed filter by manual All mounted Interior remover kit
Excellent! Well done! I'm glad the sound is much better, even without the subwoofers. It also looks like you didn't break anything, which is a major achievement. Unfortunately, the weather did not cooperate this weekend, and I was unable to swap out my speakers. Hopefully, next weekend.
Excellent! Well done! I'm glad the sound is much better, even with the subwoofers. It also looks like you didn't break anything, which is a major achievement. Unfortunately, the weather did not cooperate this weekend, and I was unable to swap out my speakers. Hopefully, next weekend.
Nope haven't break anything. Was really afraid to break the stock woofers cause you really need force to get them out. If you exactly follow the video, it can't go wrong.
I was a little bit in a hurry because it was pretty cold here, so at first I forgot to remove one clip from the door onto the door card (is that the right word on English?). I couldn't get the door card back on the door, but after putting the clip in first it was a lot easier :-)
Hope to get ahead next Thursday but it'll be freezing then and maybe also during day. This was also the case when I installed the woofers and tweeters, but for that you only have to be in the car for around 10-15 minutes to take both door boards/cards off and then assembly everything inside the house. Reinstalling is a bit longer then 10-15 minutes. I think it took me around 20-30 minutes or so, but my hand were pretty cold 🥶
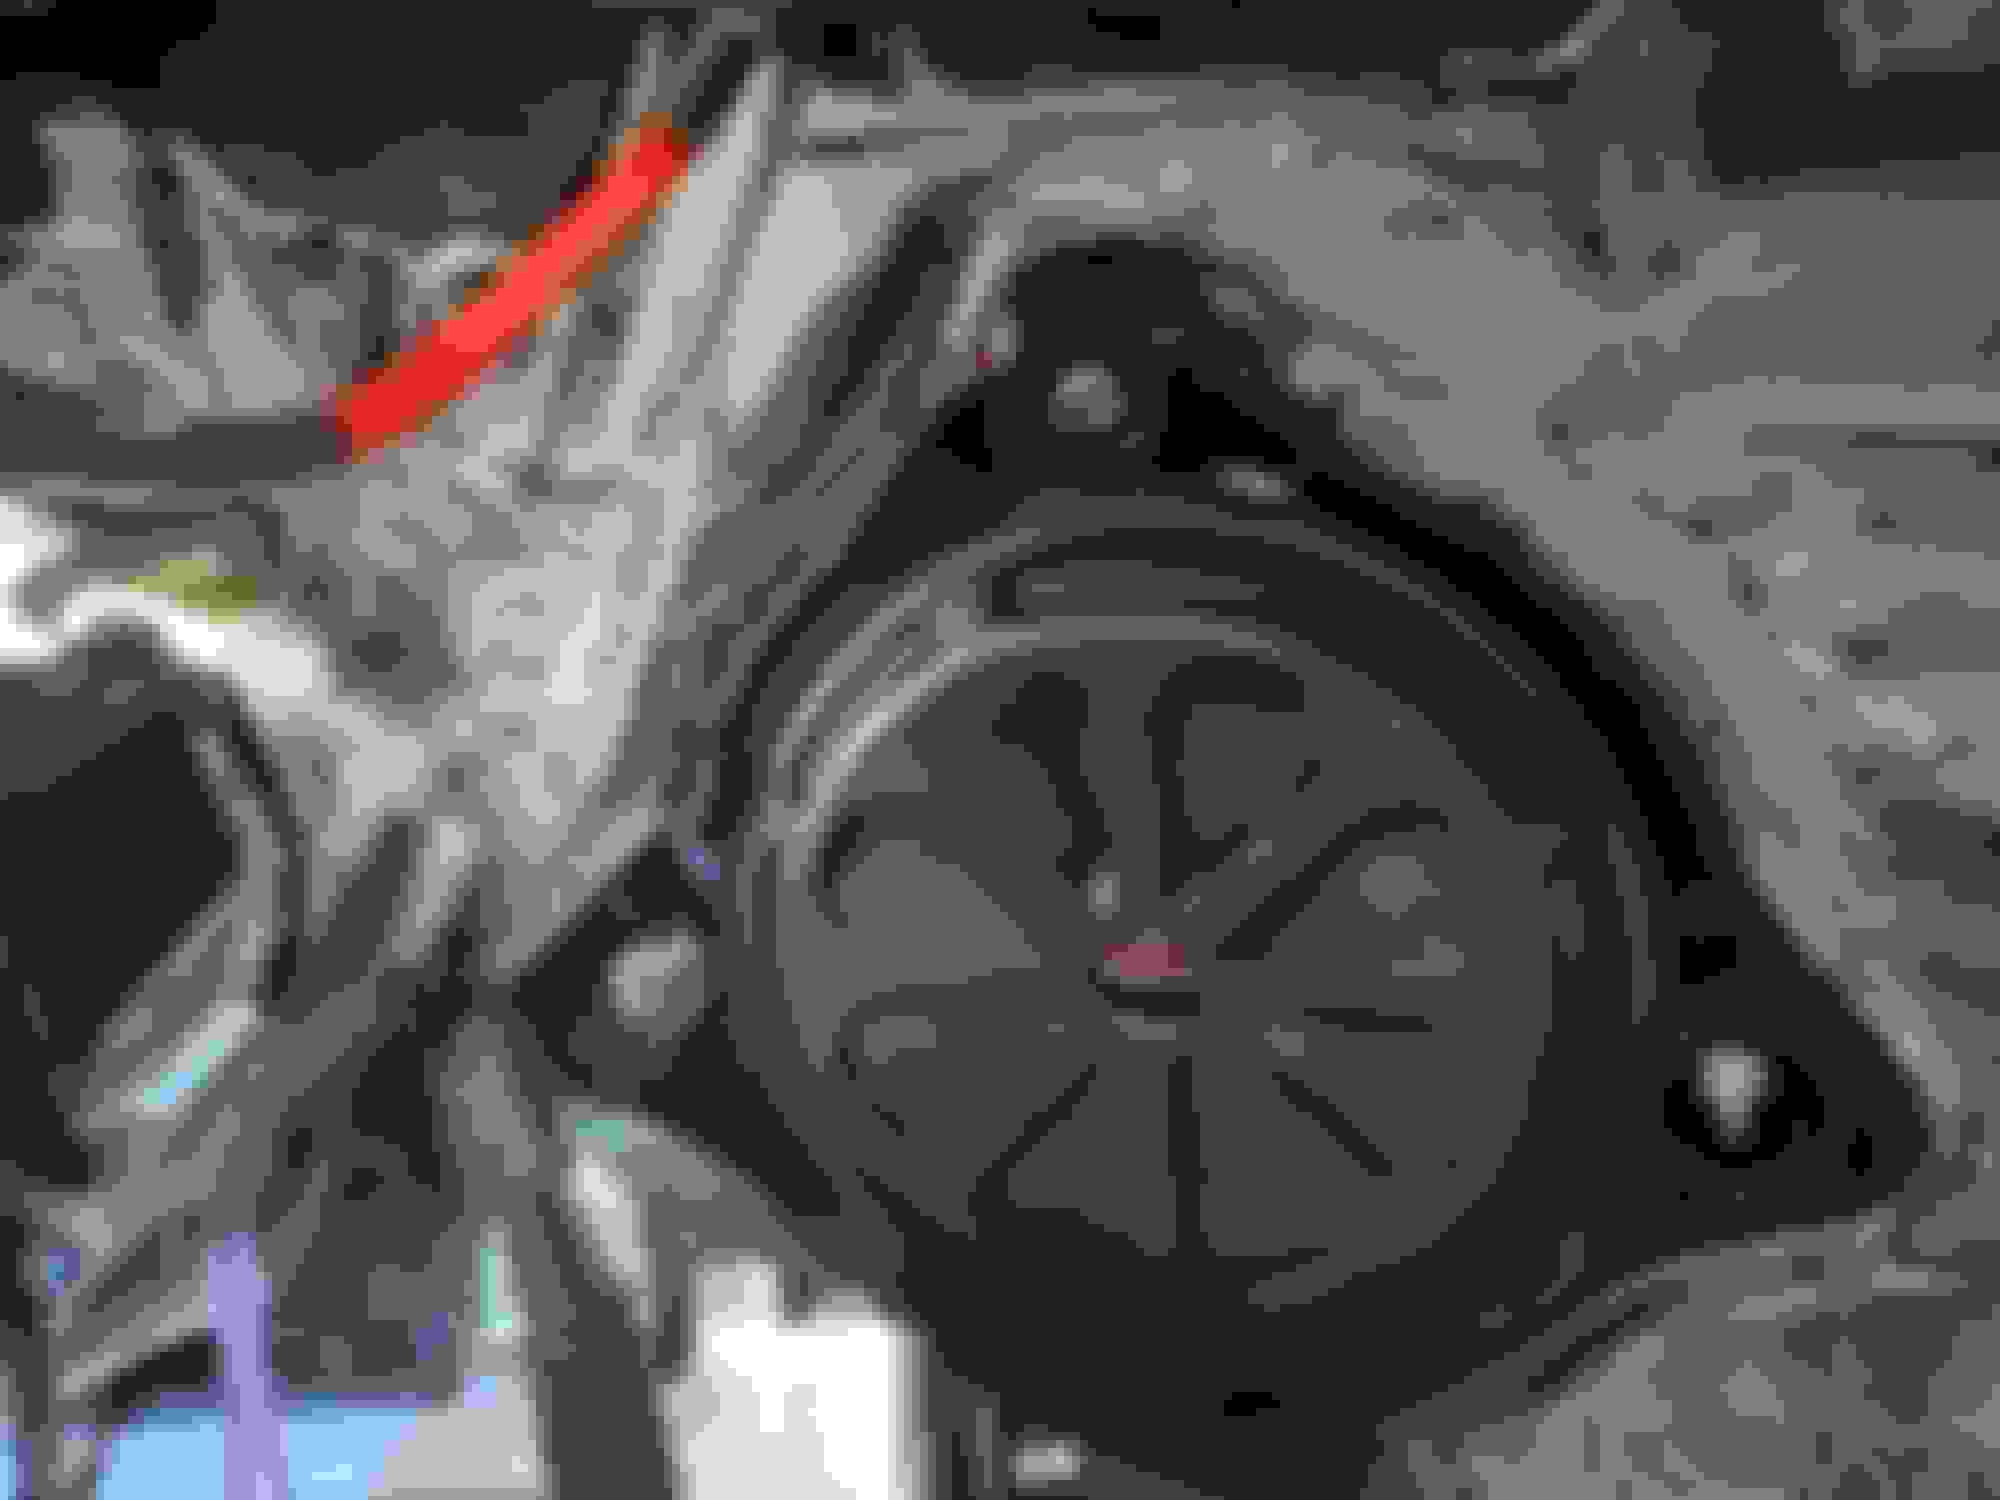
Yesterday I was able to install the woofers. With this video it was pretty straight forward I must say. Only thing I couldn't find out is how to remove the handle for the hood from the cover, but I managed to leave it there and put it aside.
Only thing that weren't good were the comnectors that went into the subs. They were really really tight and one woofer the adapter broke loose. Fortunately the wires were intact and it still works.
Later I tried to remove both the connectors to see if I'm doing something wrong but then the pin snatched on both of them. Pretty crappy material in my opinion. All cables and all OEM connectors came out easy despite the cold weather. Happily they're in so tight that they'll stay into place. I put a little table on it to hopefully prevent it to go loose.
The sound is already a pretty bit better. However for the full potential you have to put it around 60% or more. When the volume is low in missing grunt and when it's high you can feel the original HU is out of breath. Even though it's a big upgrade from stock, but I'm thinking to put a small Eton M120.2 amplifier in it to boost the subs. Not sure about that, first try if I'll think it's just enough this way :-)
Some pictures: Cover just hanging loose All carpet and covers away 1 New sub installed All carpet and covers away 2 Old sub size Old vs new sub New sub size
Broken pin on the connector
Congratulations on the subwoofer installation, and thank you for the photographs and the comment about the additional amplifier. I had thought about a DSP, but I decided to wait until after I swapped out the speakers and then make a decision. Besides, I need to replenish the piggy bank! I would be interested if you still feel the same way about an additional amplifier after you have had the chance to experience the new speakers for a few weeks.
Congratulations on the subwoofer installation, and thank you for the photographs and the comment about the additional amplifier. I had thought about a DSP, but I decided to wait until after I swapped out the speakers and then make a decision. Besides, I need to replenish the piggy bank! I would be interested if you still feel the same way about an additional amplifier after you have had the chance to experience the new speakers for a few weeks.
I'll let you know and you're very welcome!
Today we've installed the same set in the C350e of a friend of mine and he was really satisfied! Was a bit more hassle to install it in his car while he had a auxiliary battery in the way... Once disconnected there was a short on metal plate behind the 12V block somehow. We then wanted to disconnect the head battery but hey don't know who invented it, but it's almost impossible to get both the power and negative pole of the battery. We decided to take off only the negative pole and happily no more shorts on the 12V circuit.
For the aux battery there was one tricky bolt which was difficult to access, especially when putting everything back together. We solved it to put some tape on the rattle extension and then put the bolt on it. Worked great!
 01-02-2024, 03:06 PM