

W204 C63 Wrap/Paint Door Handle Writeup (DIY)


Thread Starter
Member
Joined: Mar 2013
Posts: 108
Likes: 1
From: Los Angeles, CA
2012 C63
I was looking online and I couldn't really figure out how to take apart my door handle; so I just messed around with my car, and I figured it out. Here's my DIY on how to take apart the door handle, whether you want to black it out, keep it chrome or whatever it may be. Done by E=mC63.
What you need:
T-20 Torx Screw Driver (Make sure it's long!!!)
T-7 Torx Screw Driver
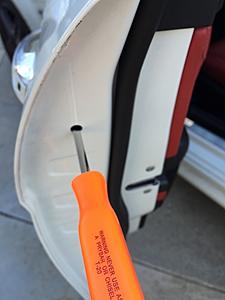
Step 1.
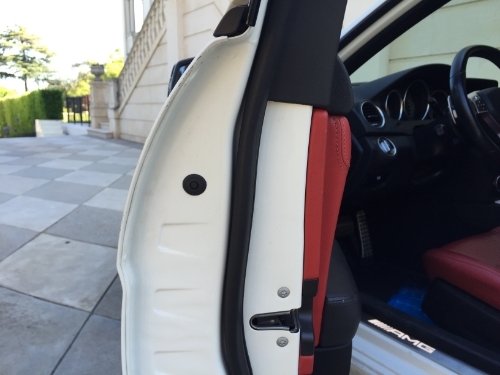
Open the door to the door handle you're going to take off, and locate the rubber squeegee. Once it has been located, pull it out of its socket.

Step 2.
Get your T-20 Torx Screw Driver and locate the screw. Once it has been located, unscrew the screw to a point where it is loose; but make sure to not unscrew it out of it's socket.
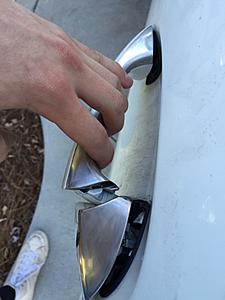
Step 3.
Pull on the door handle, and at the same time wiggle the smaller back part of the door handle until it budges out. (You may need to go back to step 2 and unscrew the screw a little more.)
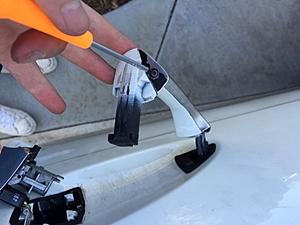
Step 5.
There are two screws on the actual door handle that need to be unscrewed to take off the insert. Grab your T-7 Torx Screw Driver unscrew both of them.
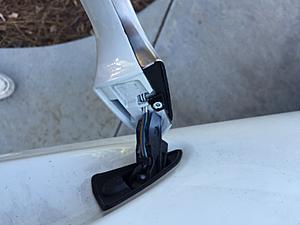
Step 6.
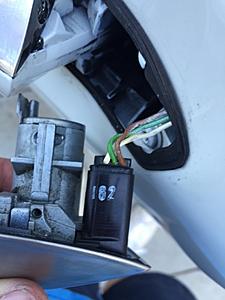
On the smaller back portion of the door handle, carefully unplug the electrical wire.
Step 7.
Wrap your parts, or paint them, and put it all back together. A tip to put the door handle back on the car: Put the door handle on first, pull it up, and then attatch the smaller back portion on the vehicle.
Please perform at your own risk, as this is a written up do it yourself of how I personally took apart my door handle. I do encourage you to take my advice, however whatever happens to your vehicle I am not liable over. Have fun and enjoy!
What you need:
T-20 Torx Screw Driver (Make sure it's long!!!)
T-7 Torx Screw Driver
Step 1.
Open the door to the door handle you're going to take off, and locate the rubber squeegee. Once it has been located, pull it out of its socket.
Step 2.
Get your T-20 Torx Screw Driver and locate the screw. Once it has been located, unscrew the screw to a point where it is loose; but make sure to not unscrew it out of it's socket.

Step 3.
Pull on the door handle, and at the same time wiggle the smaller back part of the door handle until it budges out. (You may need to go back to step 2 and unscrew the screw a little more.)

Step 5.
There are two screws on the actual door handle that need to be unscrewed to take off the insert. Grab your T-7 Torx Screw Driver unscrew both of them.


Step 6.
On the smaller back portion of the door handle, carefully unplug the electrical wire.

Step 7.
Wrap your parts, or paint them, and put it all back together. A tip to put the door handle back on the car: Put the door handle on first, pull it up, and then attatch the smaller back portion on the vehicle.
Please perform at your own risk, as this is a written up do it yourself of how I personally took apart my door handle. I do encourage you to take my advice, however whatever happens to your vehicle I am not liable over. Have fun and enjoy!


