When you click on links to various merchants on this site and make a purchase, this can result in this site earning a commission. Affiliate programs and affiliations include, but are not limited to, the eBay Partner Network.
Onelightmind said: links for sale require no unbolting or bolting, but this does mean you ruin your stock links, as you pry them off the ball hinge making it darn near impossible to put back on. I chose to make my own
But then you ruined the stock front links anyway by drilling out the rivet on the top bracket :-) A terrific overall solution, but -
My question: what is the size of the ball in the stock links? If I'm going to mess up the stock front links anyway - why not just make a simple ball-socket link? Two ball-sockets of the correct size connected by threaded rod, just like the stock ones - and the $300 ones for sale BTW. Would be $8 each to make using 10/32 rod and a 7mm or 10mm ball-socket. I'll post pictures and web-site links if successful.
Thank you - any info appreciated.
Last edited by smartadze; May 2, 2017 at 12:24 PM.
Onelightmind said: links for sale require no unbolting or bolting, but this does mean you ruin your stock links, as you pry them off the ball hinge making it darn near impossible to put back on. I chose to make my own
But then you ruined the stock front links anyway by drilling out the rivet on the top bracket :-) A terrific overall solution, but -
My question: what is the size of the ball in the stock links? If I'm going to mess up the stock front links anyway - why not just make a simple ball-socket link? Two ball-sockets of the correct size connected by threaded rod, just like the stock ones - and the $300 ones for sale BTW. Would be $8 each to make using 10/32 rod and a 7mm or 10mm ball-socket. I'll post pictures and web-site links if successful.
Thank you - any info appreciated.
The $300 ones are a nonsense. There is absolutely no need for the over engineering involved with those.
Two observations...the stock ones are not ruined by removal, and links can now be bought for less than $100.
This is an amazing thread and a very worthwhile modification to any CL :-) However, there is a far easier method of constructing the links, and the finished product is easily the equal of any of the "lowering kits" that sell from $99 to over $300. In addition, this method leaves the stock hardware untouched and available for putting things back to stock configuration. The total cost for both front and rear is less than $25.
Simply, one pries off the existing links, measures them, and constructs new ones from parts that are cheap, high quality, and readily available on the interwebs.
See earlier photos of where the links are located and how to access them - no need to remove the wheels, just jack her up (wheels off the ground) using either of the jacking pucks on the sills. Pop off the existing links using a pair of pliers opened and used as a lever across the socket ends.
The existing ***** are 10mm size. I used and recommend these parts, available from McMaster.com. You will also need a few 6mm x 1 hex nuts - get them at any hardware store or at McMaster (100 for $3).
Measure your existing links: my front ones were right at 4 inches.
Assemble new links by cutting the rod and using hex nuts to lock the ends in place. Make the links LONGER in the front, and SHORTER in the back to effect lowering. See existing text for how much length changes height. The cost per link is less than $6.
Snap them onto the existing *****. Drive around and use the Raise/Lower feature to settle things (might take a couple trips). If you want to adjust, simply lengthen or shorten the links.
Flawless! Fun and easy to do, amazing results.
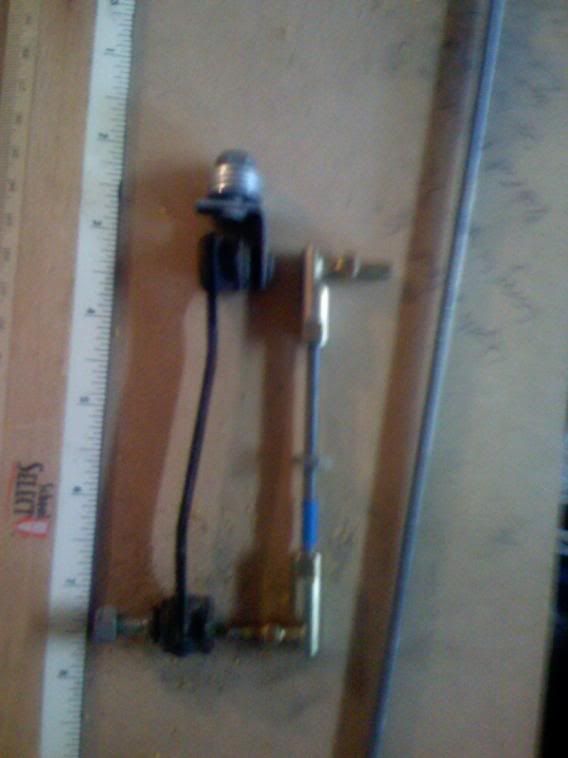
Stock front link at 4 inches
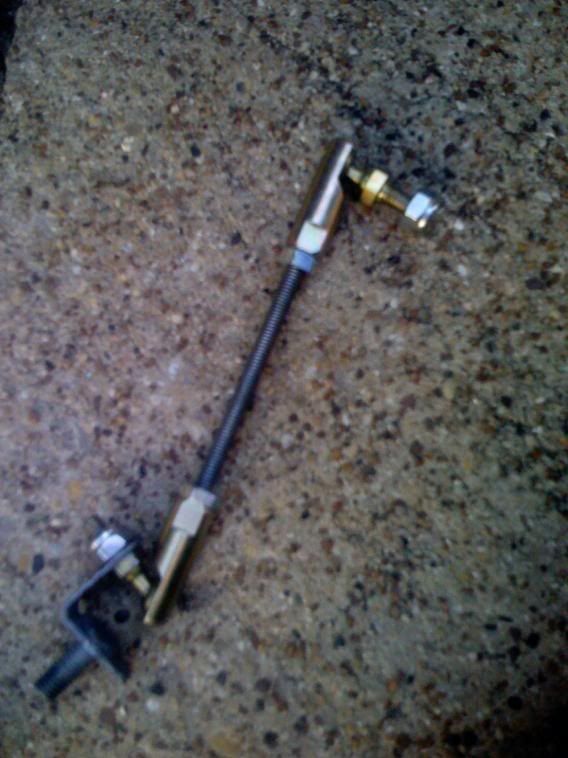
Finished link (***** do not need to be removed from car)
Last edited by smartadze; May 15, 2017 at 11:08 AM.
What is the washer trick for the front ? I can�t picture how it works in my head
Originally Posted by onelightmind
I have learned a little about lowering here goes....
You have to have one of two things;
1. Money
2. Time and Determination
I like to keep #1 so I chose #2 for my project
There are four ways to lower a mercedes with ABC or air shocks.
1. Have a tech reprogram the computer with a program called star diagnose (rarely happens)
2.Expensive module that tricks computer by altering potentiometer signal on all wheels (expensive and cut wires usually are a no no for us... hard to remove also) $1200 plus
3. Lowering links to readjust potentiometers tricking computer (easy as a lazy sunday with a monday holiday)
4. Add washers to the FRONT only to extend or space the rod making it longer.
So I chose lowering links (after only having washers in front) since my tech did not have the expensive equip to read the angles on the suspension to trick the computer.
The cheapest I have seen links for sale is at adjustableairride.com and their links require no unbolting or bolting, but this does mean you ruin your stock links, as you pry them off the ball hinge making it darn near impossible to put back on. I chose to make my own, all for less than $70.00 which we will add up later off my receipt.
So what do we need hardware wise?
1 set of metric wrenches
1 set of standard wrenches
1 socket set
1 hacksaw
vise or vise grips
(possibly drill and tap set to thread aluminum)
8 adjustable rod ends
1 3' threaded rod to match
8 locking nuts (plastic inside on end) to match rod
8 regular nuts to match rod
(possibly aluminum angle - a few inches)
(Possibly 8- 1/4" washers if so cut the other materials in half as you will only need 2 links)
Where do we begin?
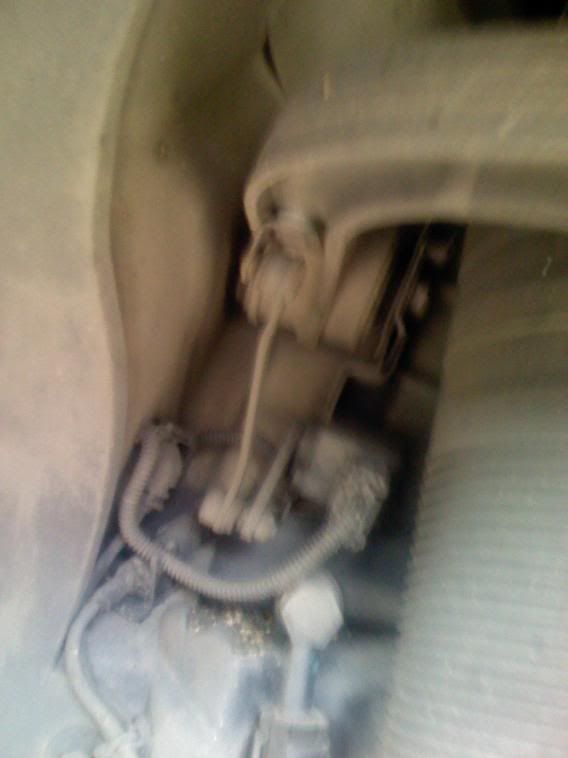
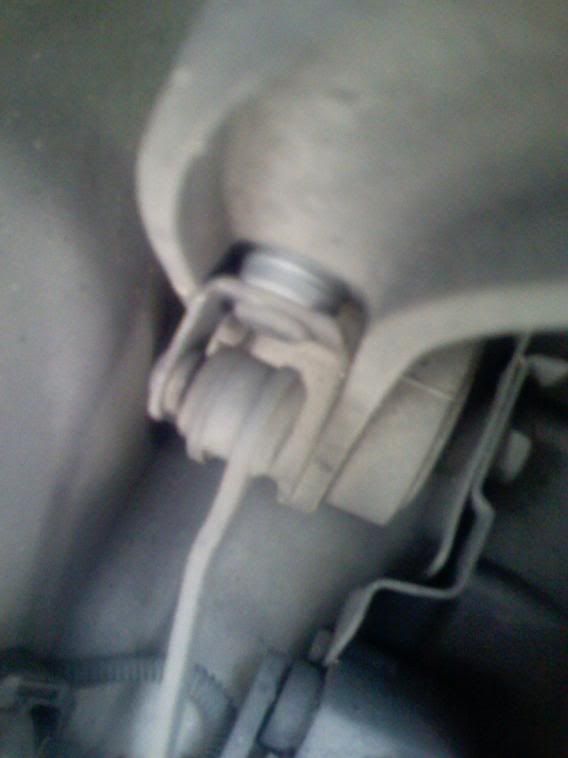
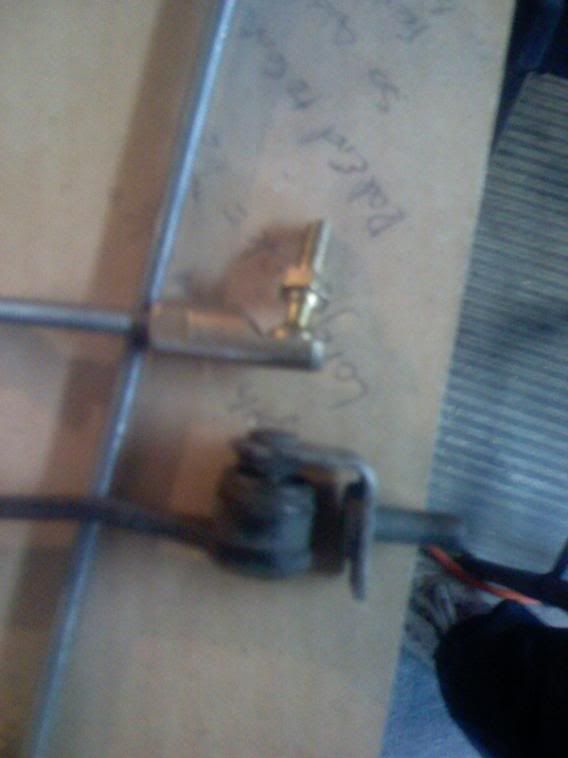
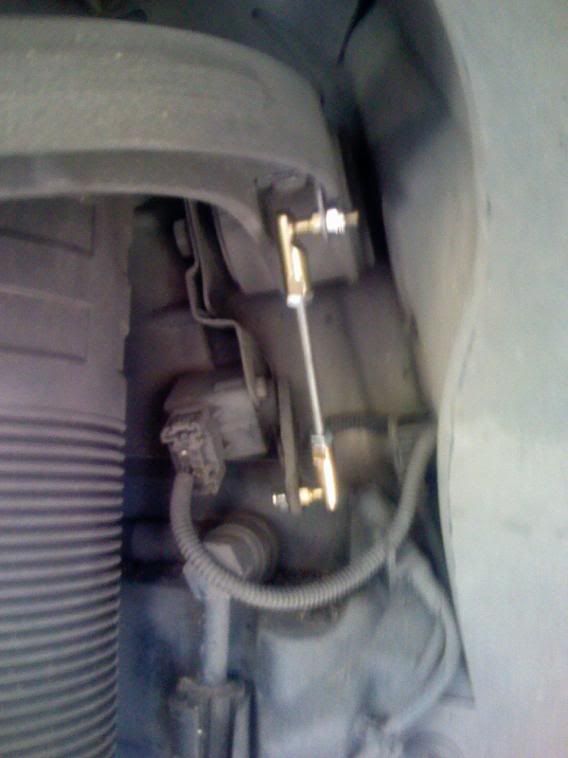
Remove the front rim and look for this... it is your front link you will replace with an adjustable one...or
Notice the silver at the top of the rod
This is where you will put the washers after you remove the nut on top of the arm with a 10mm socket. the drop is a 4:1 ratio 4 washers are about 1/4" and give you a perfect 1" drop... super simple and accurate since the washers are the same thickness.
To lower the car:
In the front the arm needs to be LONGER so extending the length or adding washers does the trick, while the back we must SHORTEN the rod.
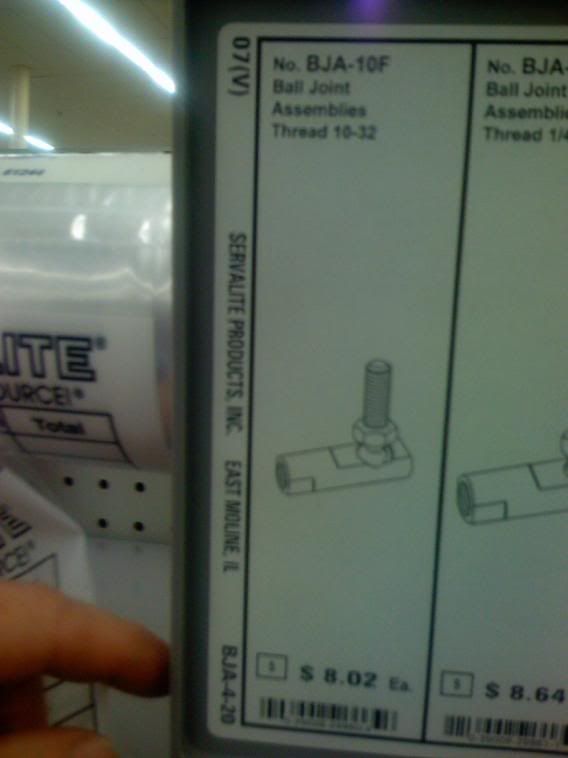
Here is a photo of the rod ends I purchased. 10/32 threaded rod end so all hardware must match this. It is a bit smaller than the original, but this ensured it fit without making the hole bigger or an additional trip (1hr) to the hardware store.
The rods have no load on them so they don't need to be super strong...yes we can bend the threaded rod, but will it get bent while installed... not likely
Remove the front link and measure the link from the bolt to the bolt to determine stock rod length.... I have the measurements and will edit/add later ... this is the front min length you want since we LENGTHEN for the front.
Determine the depth the rod end will screw onto your thread rod and cut the length accordingly... mine went on 1/2" each so I measured and made my rod with the ends screwed on abit longer than stock and with almost 1" of adjustment possible I could slam my car where the tires bent the plastic wells... we have plenty of room to slam the car if we wish.
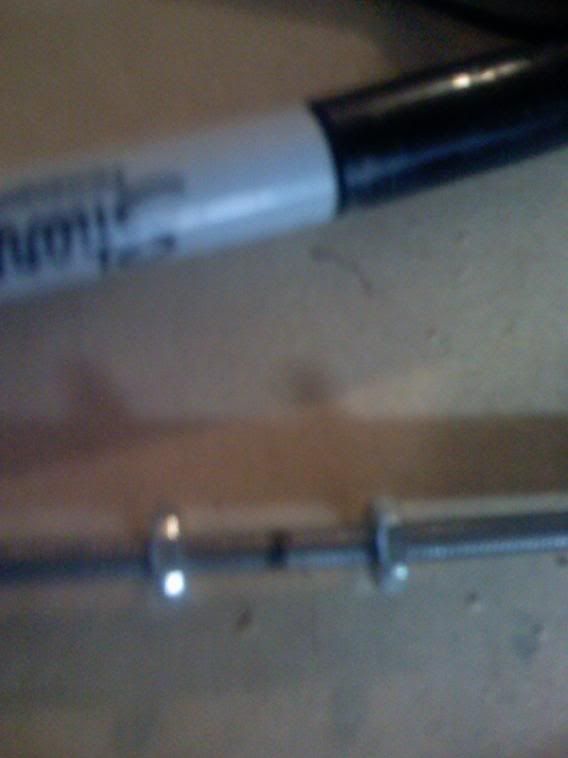
So before you cut mark the line you will cut with a sharpie and place two nuts on either side of cut so after you cut them you can unscrew the nuts correcting the bent threads.... excellent trick
So make the link...
Make sure you put the nuts in the mddle of the rod to screw tight onto the rod ends to prevent ends from moving after length is set...
Now notice the difference, we need to make the angle attachment... you have one of two options here...
1. cut angle aluminum similar drilling a top hole and a side hole and threading one hole on top. Place the rod end through the bottom/side hole and attach. use a bolt to travel through the top of suspension arm and screw into newly threaded aluminum angle to attach
2. cut stock link and to remove rivit and bolt onto new link... super easy but this ruins your stock link... I didn't care however...
How do you lower with washers in the front ?
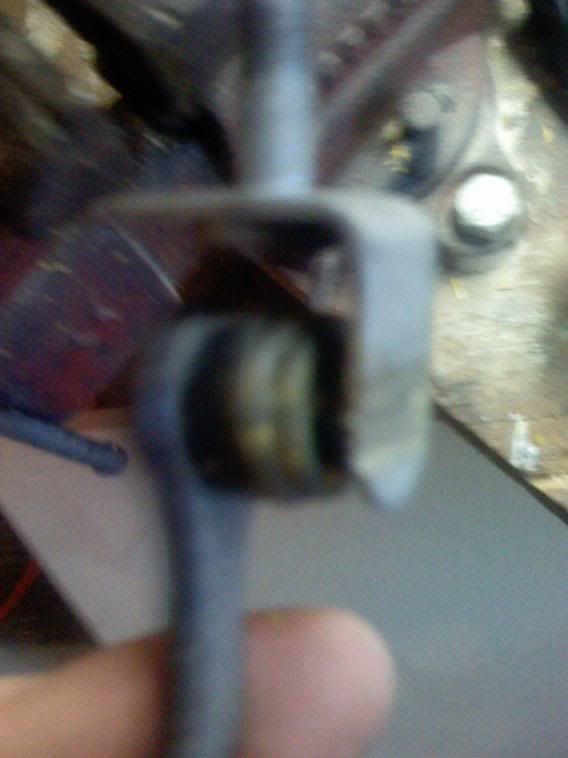
Punch out rivit and attach... your front link souuld now look like this
Make both front links at one time and adjust to the same length. Use the 4:1 drop ratio to calculate approximate drop. I dropped 1" so my rod length (measurement from center of stock bolt) comapred to new rod length (center to center again) was 1/4" longer Lock the rods into place once made to match. Put one on and replace tire. Start car and press the raise button then lower to fully lowered your car will reflect new rod. If you like it great, if not adjust, BUT when you do adjust the other rod AT THE SAME TIME... this will save a headache later, so you can just slap the other side on and get it correct with little worries.
BAM... this is what it looks like on
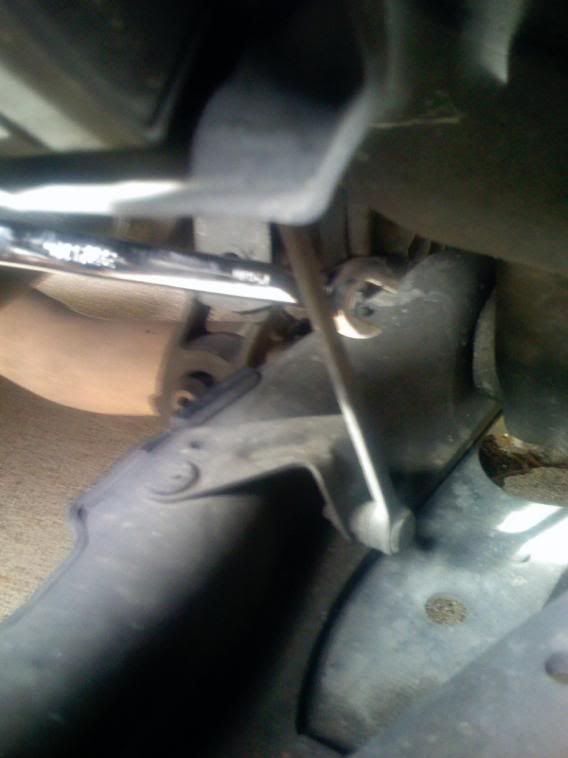
NOW The Back...
Pain to remove... little half turns with two wrenches... A true test of patience...
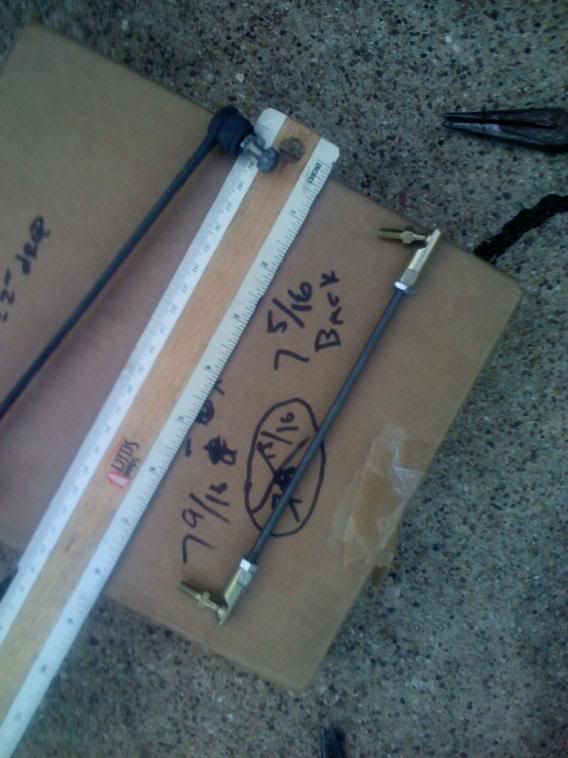
Make the rod as before... but REMEMBER these have to SHORTEN so measure and barely screw them on to recreate the stock length, so they can be shortened to achieve drop... mine wer 7 9/16" stock so with a 1" drop I made the rods (center of bolt to center of bolt) 7 5/16" 1/4" difference= 1" drop
Easy wasn't it...
Bolt em up as before...
PRESTO!!! U GOT DROP
What would I do if I were you??? I would do the washer drop for the front using 4 washers 1/4" total for a 1" drop and make links for the back and match the drop. You will have all the stock links to replace if necessary. 1" is a good drop all the way around for me. Well I think mine is 1 1/4" but anyway. Spread the word and I feel this post is a good sticky. THIS WORKS FOR ALL ABC AND AIRRIDE. Just make sure the model you have adjusts the same way... longer in front to drop and shorter in back to drop... use common sence this is not hard stuff!!!
8 ends @ $8.02 ea
8 nuts @ .10 ea
8 plastic lock nuts
@ .17 ea
3' threaded rod
@ 1.67
68.47 + tax
So I lied... a little over $70 with tax, but who really cares. Let it be the "$70 DROP," You actually could do it for about half with the washers for the front drop.
Thanks for bumping this thread, I'm going to be fabricating some of those adjustment rods to get my ride height sorted out too. Always nice to see what other designs look like before one starts.
As for the washer method, you simply put them under the bracket to the linkage.
I made a quick picture to help out.
(This would raise the rear)
Last edited by Viper GTS; Jun 22, 2020 at 03:29 PM.