When you click on links to various merchants on this site and make a purchase, this can result in this site earning a commission. Affiliate programs and affiliations include, but are not limited to, the eBay Partner Network.
Installation of W-218 aftermartket NGK colder sparks after Weistec tune
I wanted to play around with this car since I got a few weeks ago. Sent Weistec my map late Friday and by Monday at 10:30 CST they sent me my new map. I asked them questions before I put my tune in...like, "should I put the NGK colder spark plugs and such" They said with my car and my base tune I was o.k. to rip a bit this problem is only on the C-63's.... They said it would be best with if I changed my plugs in a few thousand since they are of unknown millage.
Car ripps!! it spins all 4 tires for a bit in sport mode. If you put it back in 'E' it calms the e**f down. Great feedback. No problems with software. zero problems with customer service.
I'll be continuing this thread with a sparkplug change and regular maintenance.
Last edited by Firewood; 02-19-2020 at 05:08 PM.
Reason: Updating information
I wanted to play around with this car since I got a few weeks ago. Sent Weistec my map late Friday and by Monday at 10:30 CST they sent me my new map. I asked them questions before I put my tune in...like, "should I put the NGK colder spark plugs and such" They said with my car and my base tune I was o.k. to rip a bit this problem is only on the C-63's.... They said it would be best with if I changed my plugs in a few thousand since they are of unknown millage.
Car ripps!! it spins all 4 tires for a bit in sport mode. If you put it back in 'E' it calms the e**f down. Great feedback. No problems with software. zero problems with customer service.
I'll be continuing this thread with a sparkplug change and regular maintenance.
Her she is. I've named her Betty...she looks like a Betty. I'm getting all the stuff to do a Spark plug DIY with options for Botch and NGK. This forum sucks for DIY and I'll try and add something to the picture.
If this forum 'sucks' then maybe you and Betty need to find another home. Clearly, you have lost your backing here!
Sorry I don't have 'Your' backing, but I'm going to be here awhile and move on to DIY to try and help others out. Love the car so far..you can hate me but not my love of the car.
Sorry I don't have 'Your' backing, but I'm going to be here awhile and move on to DIY to try and help others out. Love the car so far..you can hate me but not my love of the car.
Obviously you don't need my backing, I'm just pointing out how you've "screwed the pooch" here and maybe should move on. Bi-Polar?
9 posts in and he he hates us already .... record ?
ok Mr Firewood not sure why you think this place sucks, but I can assure you with that attitude why would we help you know ?
and back to work i go
oh I love the color...
Nothing better than getting shoved in a corner because I was unsatisfied by some vendor's service.
And I said "This place sucks for DIY" specially for this car. I know it's because this car is new and most are still under warranty but some like mine are 8 years old and you either have to DYI...pay or get rid of it.
Sorry I don't have 'Your' backing, but I'm going to be here awhile and move on to DIY to try and help others out. Love the car so far..you can hate me but not my love of the car.
Originally Posted by Firewood
Bipolar? No..Bicurious or BiSerious?
Your attitude and childish behavior have put you in a corner, nothing else. Good luck.
I've got all the tools to attempt a spark-change. Ordered most form Amazon. Here's a pic of the tools, 12 point 14mm spark pluck socket, locking 3/8" drive universal joint, locking 3/8" drive extensions, feeler gauge for gaping the plugs, e-torx set for the coil packs and a regular 1/4" drive torx bit set.
I've also purchased two different spark-plugs. The first was before I got my tune, which is the Bosch OEM ZR6SII3320 plug, Then I purchased the Tuner's recommended NGK plug SIZKBR8A from Wal-Mart and gaped them @ 24 thousands from the gap that they came at, which was 31 thousands.
Here is the comparison between tuner recommended plugs v.s. OEM
I warmed up the garage and changed my plugs Saturday. On a scale of difficulty I would rate this as a 6.5 out of 10.
FYI my background: I've done a few engine swaps, Head bolt and head gasket replacements, multiple clutch and transmission changes, tons of regular repairs like AC compressors, alternators, PS pumps, fuel pumps and tons of suspension work...never mind changing the brakes and what not. I'm a master Industrial automation electrician by trade.
My car has almost 100k and I believe it had the original OEM plugs with very little dielectric grease from the factory. I'll show you tips and tricks to getting this job done with minimal breakage. I didn't break anything during the installation but found some minor broken stuff from others.
First I decided to go with the NGK SIZKBR8A8HS plug. These are available at Wal-Mart with free shipping. I had zero problems with these.
I also have a set of new 8 OEM Bosch plugs ZR6SII3320 that I'll probably never use, P.M. me and I'll send them to you for $50.00 shipped. cost me around $60.
Here are the links of all the tools I purchased for this project.
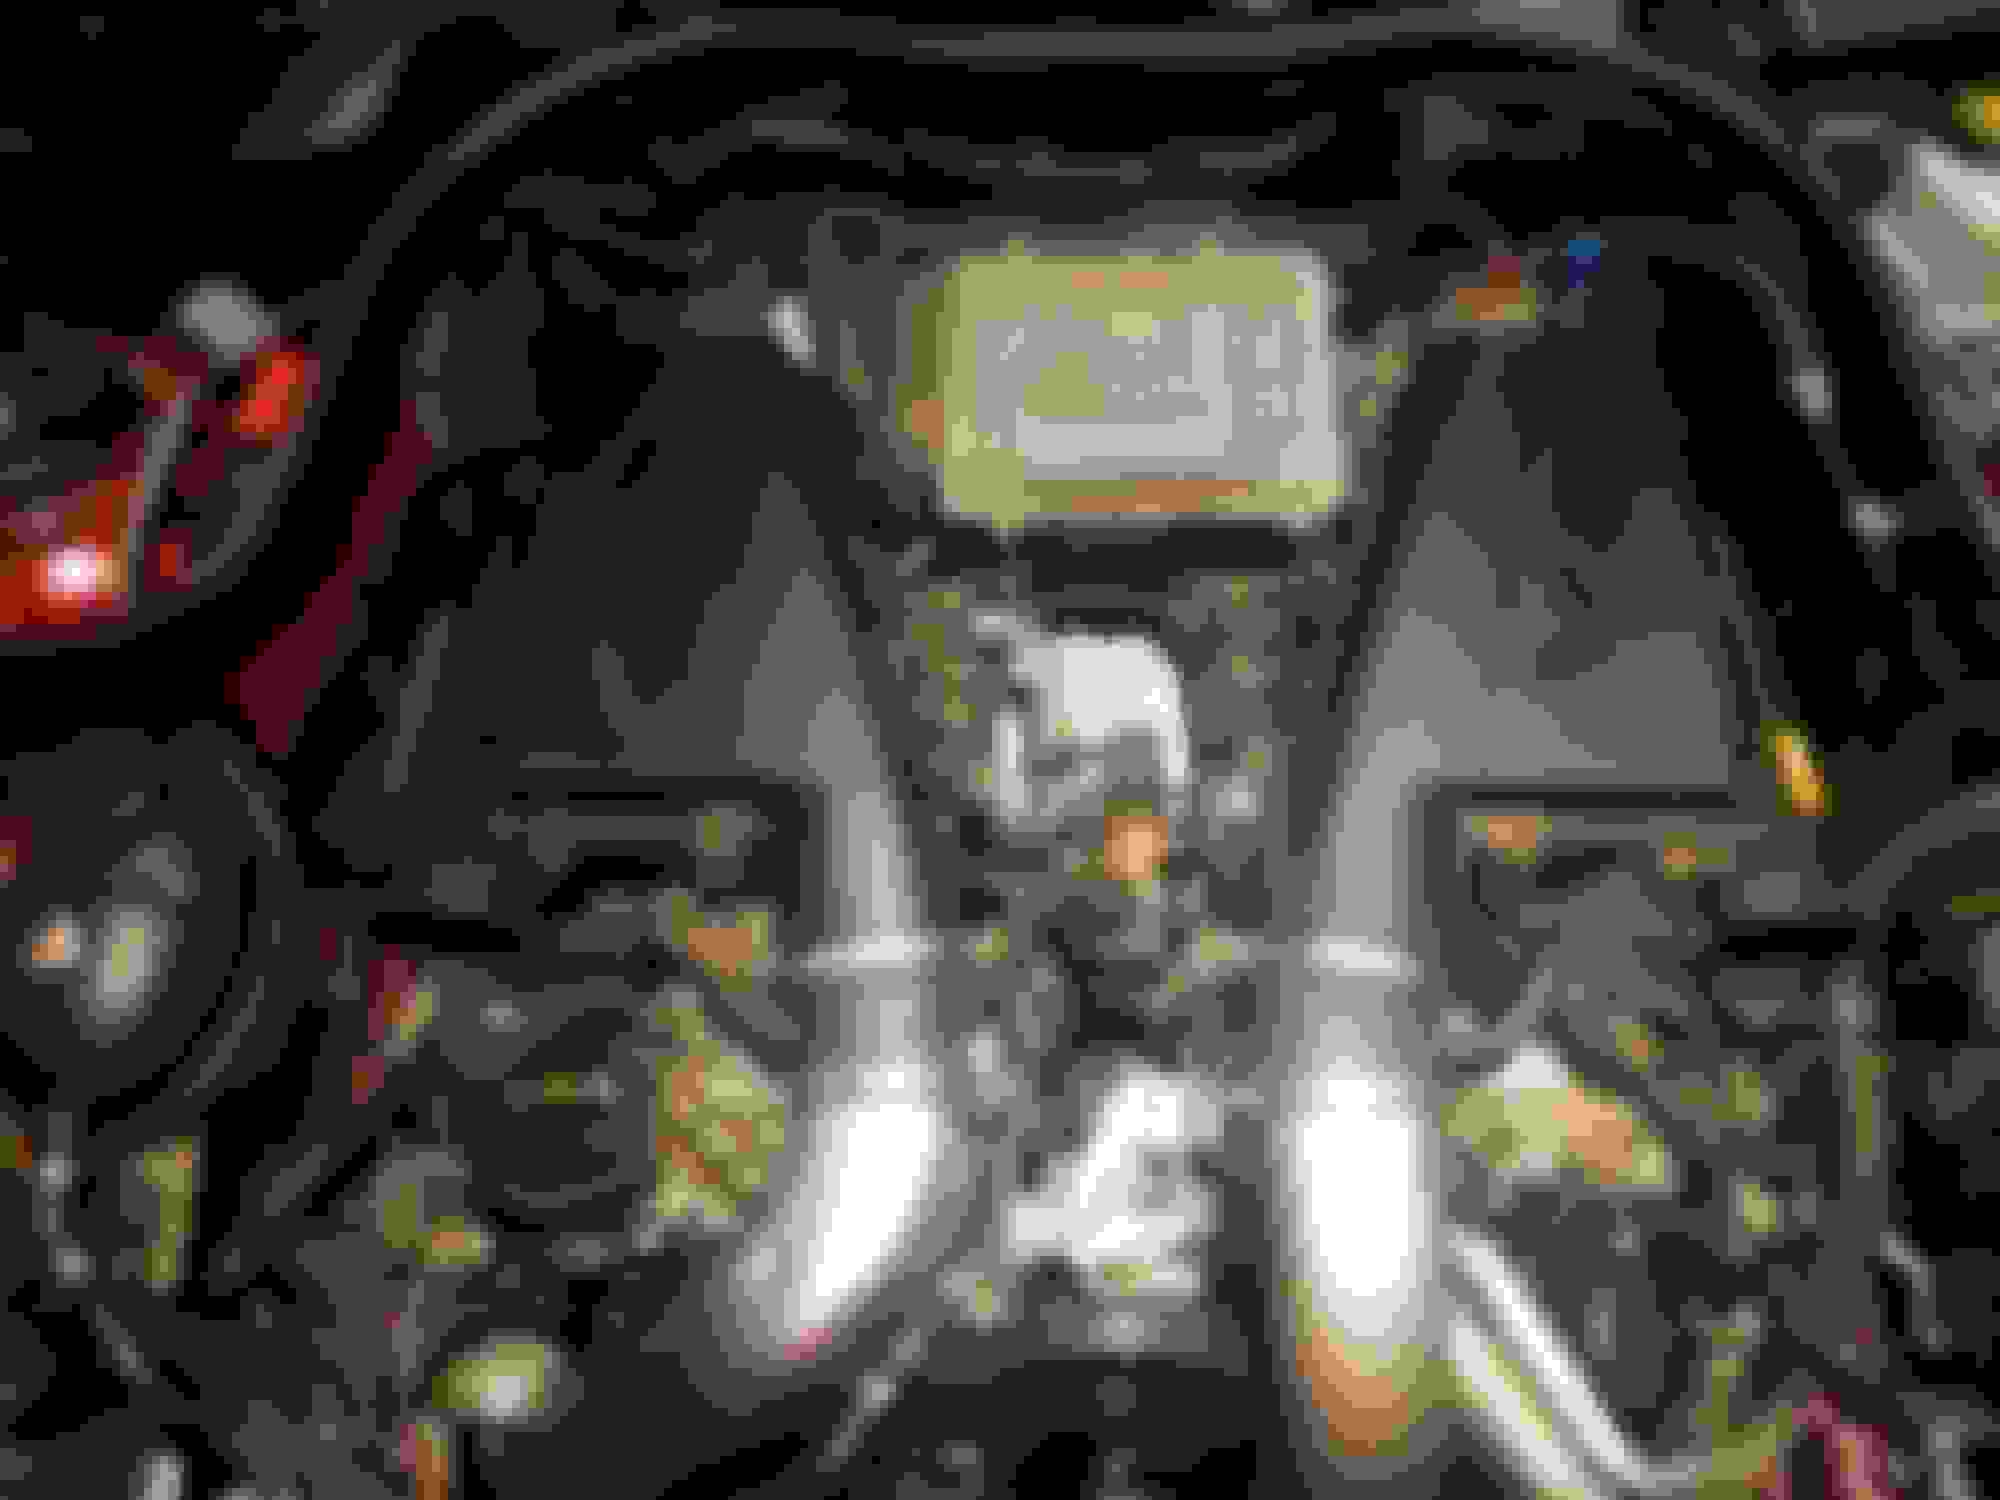
First get really good light and open the engine bay. I'm really impressed with MB 90 degree hood for maintenance.
Next take off all of the plastic covers. these just pop straight off with little effort
Now you are down to your intake filter housings. There are two electrical clips on the fire-wall of both of these. You need to pull back the (grey) locking clip of each one. Then I would recommend using a pliers of your choice and lightly squeezing and pulling them off. This frees up the filter housing and you can now just lift them up after loosening the 7 mm bolts holding the flexible rubber from the turbo aluminum piping to the filter housings. My filter housing had 3 out the 4 plastic clips broke off from previous work.
With the intake filter housing removed you are now free to get at the coil packs. This was my set up to remove the size 8 E-torx bolts that hold the coil packs down. It's a 1/4" shallow socket, universal joint, 2" extension, 3" extension followed by another universal joint and a 6" extension to get at cylinders 4 and 8 (these are the back two by the firewall and will take the most time) My 1/4" drive electric ratchet was awesome removing these little buggers.
This is the setup to get at the back coil pack hold down bolts (cyl 4 & 8)
Next is lifting the coil packs out...without breaking them!!! This was by far the most difficult part of the job. The front coil packs are fairly easy and I just pulled them out with my hands with easy tension whiole using the coil pack base and the pushdown on the rubber lead equally. One more thing!! I didn't disconnect any of the signal/control wires to the coil packs. You can do the whole job without disconnecting any of them. The only thing Ii did was disconnect the #4 cylinder injector connector to get more room for the coil pack on #4.
I tried a couple of methods once space got tight on the back cylinders.
I tried the zip tie method somebody mentioned and it worked great!! You get yourself some 10" long 3/16" zipties and thread them under the base of the plastic pushdown and pull straight out.
My coil packs were very dry with just a dap of yellow dried Mercedes OEM lube.
I added a dap of high voltages silicone grease to each coil pack before installation. I smeared around a bit.
Any major performance differences between the "tuner" recommended NKG's vs. the Bosch double iridiums? I always just replace with OEM.
I've put close to 200 miles on the car since the plug change. Mind you my plugs probably had 40k on them when I changed them. I've noticed definitely more pep and zero misfire at WOT. No check engine lights and better gas millage.
BTW: the NGK plugs that I purchased work just fine.....and no, they didn't put a hole through my cylinders........best just go pay $1K at the dealership and get a free cup of coffee...... and a
have the state of mind that you didn't really do anything except get 2% on your credit card points.
After all of the coil packs were pulled I went after removing the plugs. This is the #1 best set up to get after those little buggers.
This is a 12point 14mm 3/8" drive socket, a locking 3/8" universal joint, and a 2" locking extension. You can get at ALL plugs with this setup and not have to remove anything to get the tools, and plug out in one piece.
BTW: I posted a link for these tools up in thread.
After all the plugs were removed I set about gaping them. My goal was .024" based on my tuner's recommendation.
These NGK's come stock at a .031" gap. I use these plies gently to squeeze the gap down. You use controlled pressure!!
Next I grab my feeler gauges to pull back to just the right gap. I use my pliers in reverse to pull back the gap a pit at a time........and no.....this won't screw up the threads on the plug if you use them gently.
Here is me checking the gap.
Next you should grease the ceramic portion of your new plugs with silicon grease. I put a dab on.
Then I spread it evenly around the plug.
I torqued them to 20 nM as to the Weistech spec using a beam torque wrench. this was my setup.
The installation the rest is reverse as normal.
Fell free to pm'em me on any questions or missing instructions,

 02-03-2020 | 06:31 PM