My system installation progress- PICS
 12-26-2006, 06:42 AM
#26
MBWorld Fanatic!
Join Date: Jun 2005
Location: San Diego Californ-i-a
Posts: 1,467
Likes: 0
Received 0 Likes
on
0 Posts
89 300TE, and 68 280sel
It might not be a big concern. Were not talking about terribly high air flows here, and I am not an HVAC engineer, so if you have no issues, it must not be that big a deal, Phew! That sealing will be nice. It amazes me how well benzes are audibly insulated, thus helping to keep sound in as well. I love having a good stereo(not the best) in my car. Alpine deck, infinity speakers(mids) 10inch infinity sub 15 inch sub.
Keep the pics coming!
Keep the pics coming!
 01-01-2007, 11:57 PM
#27
MBWorld Fanatic!
Thread Starter

Alright, here are some more updates.
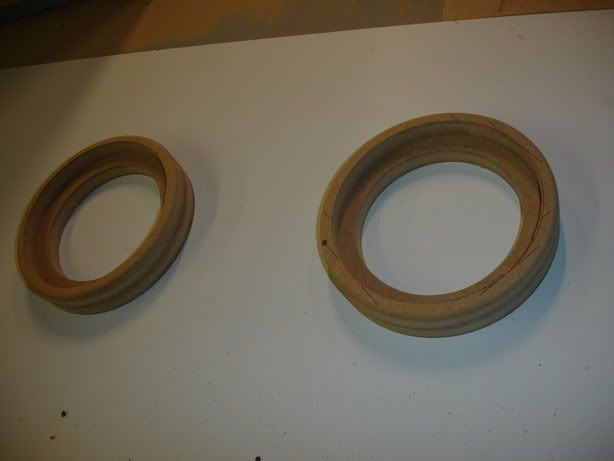
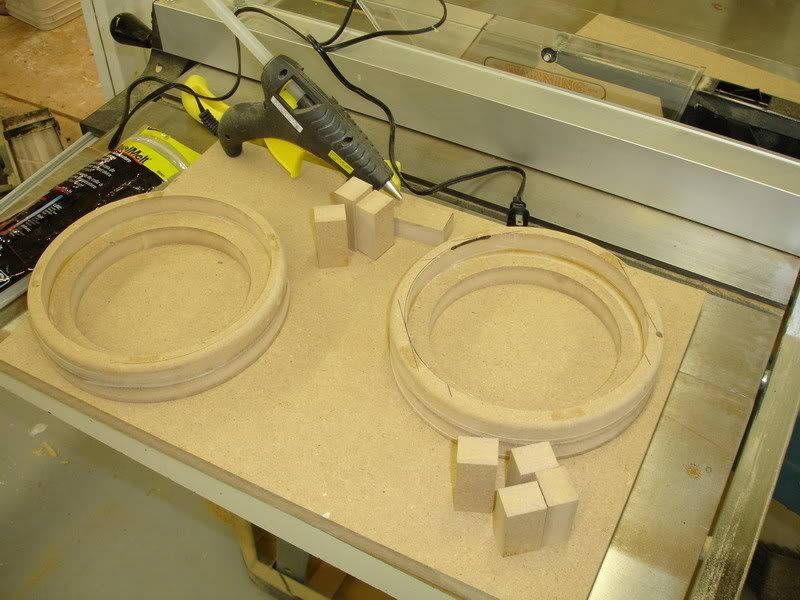
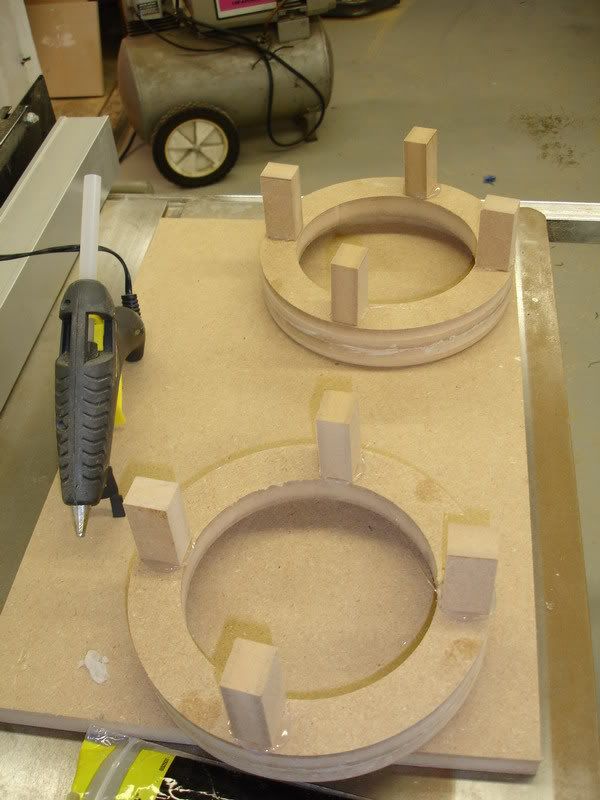
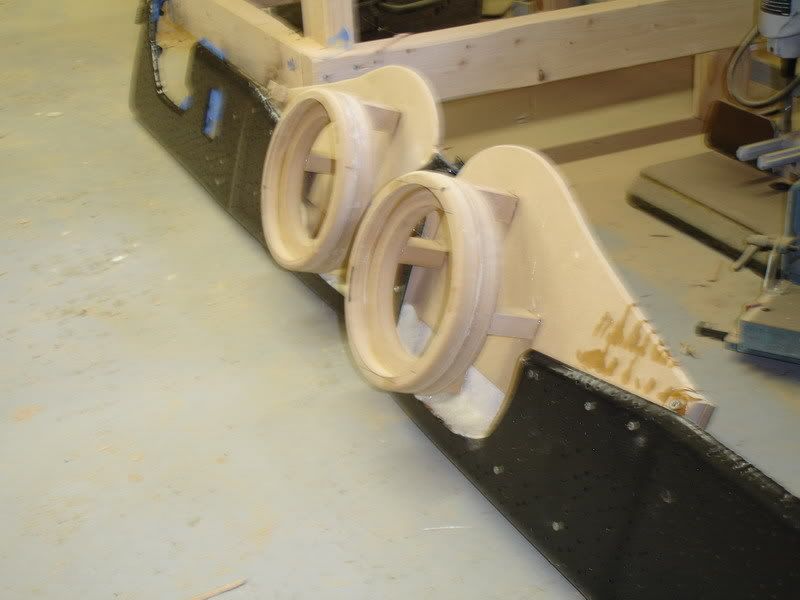
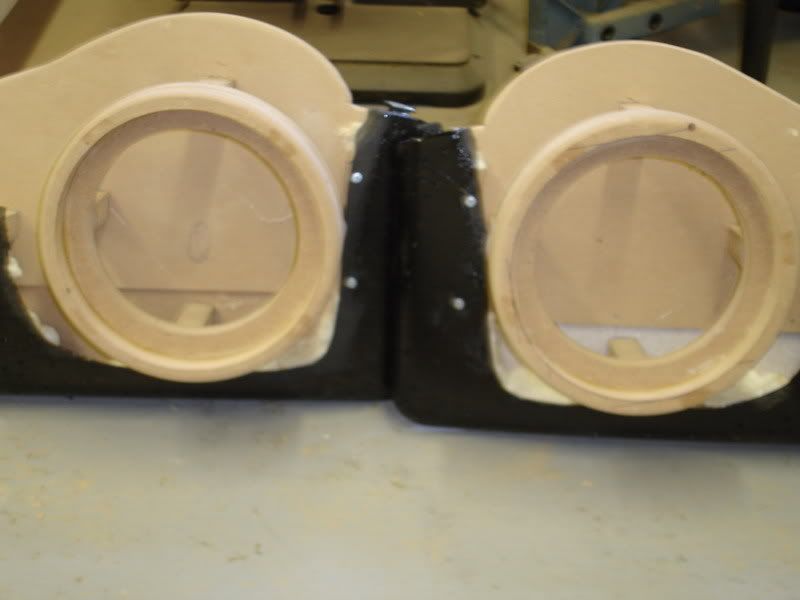
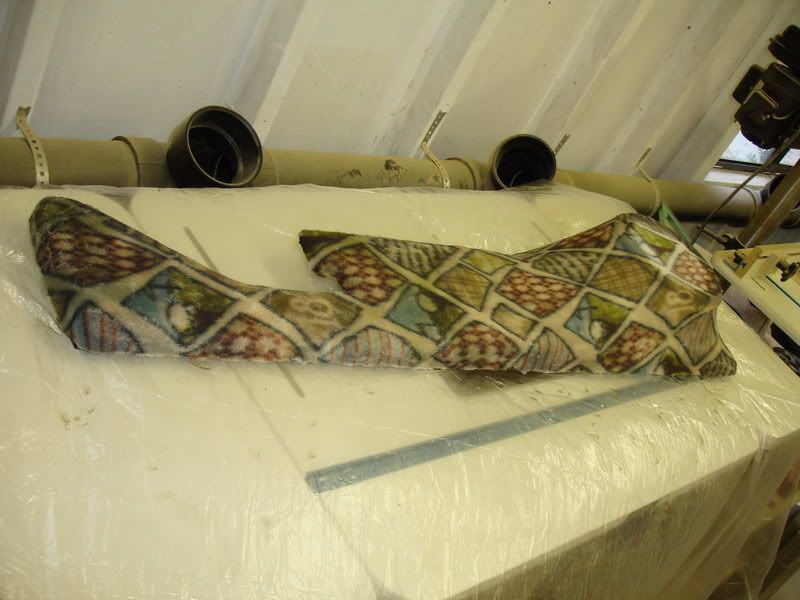
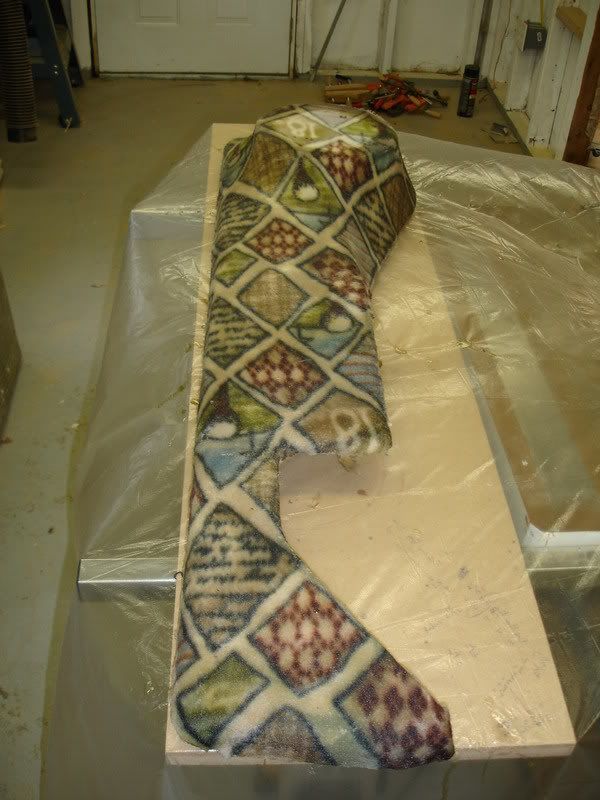
I started made the speaker rings for my door enclosures, and started the fiberglass work for my tweeter pods. Check it out.
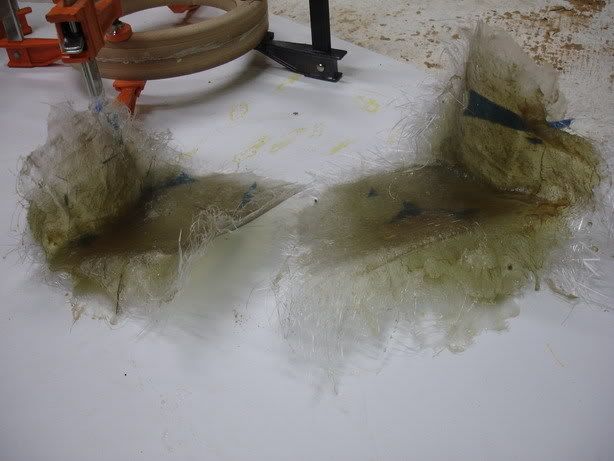
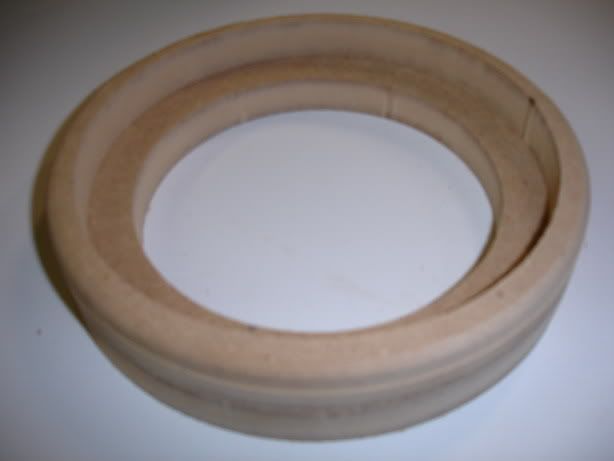
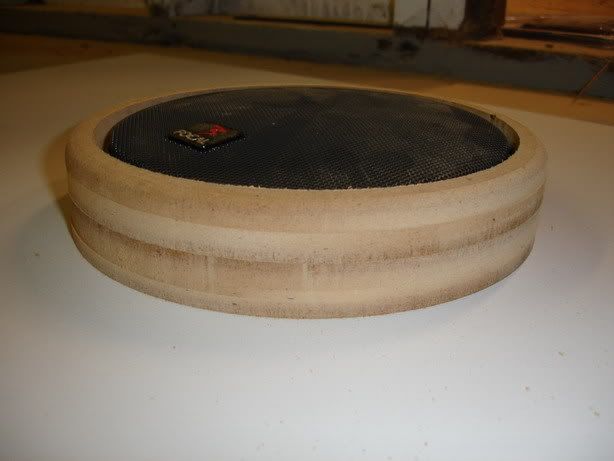
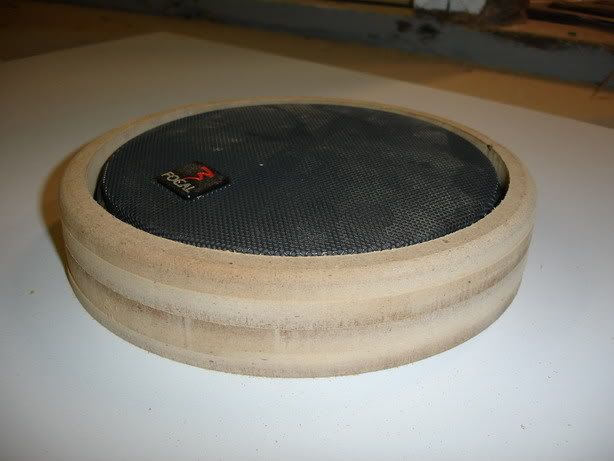
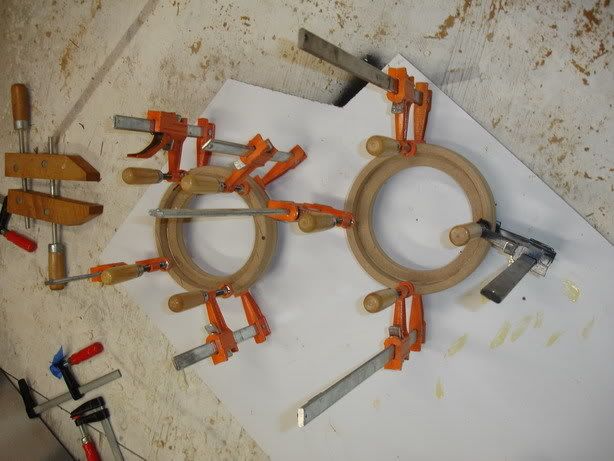
The speaker rings... Since these door speakers will be in a high-traffic area, I want to make sure they're protected. So I made 2 rings for each side and glued them together.
We're gettin' there. Lots more to do... stay tuned.
I started made the speaker rings for my door enclosures, and started the fiberglass work for my tweeter pods. Check it out.
The speaker rings... Since these door speakers will be in a high-traffic area, I want to make sure they're protected. So I made 2 rings for each side and glued them together.
We're gettin' there. Lots more to do... stay tuned.
01-02-2007, 03:16 AM
#28
MBWorld Fanatic!
Pete, you get a well deserved *****-you-crazy. Amazing work man. Ever thought of offering your skills up to some shops? Im sure you could make some good side cash like that! Not that you need to, but ****... Amazing work
01-02-2007, 08:34 AM
#29
Almost a Member!

Join Date: Nov 2006
Posts: 74
Likes: 0
Received 0 Likes
on
0 Posts
Just Kidding Pete, work looks good!!
I will be installign teh MB Quart 3-way component sets in teh front and my full memphis system in teh car this weekend. I will document mine similarly.
***Pete, how bout some pics of your trunk?????***
Last edited by big83bronco; 01-02-2007 at 08:36 AM.
01-02-2007, 10:33 AM
#30
MBWorld Fanatic!
Thread Starter
Thanks guys. Honestly, I'm hardly all that skilled at this stuff. I'm just fortunate enough to have a lot of woodworking tools so it makes this much easier. I used to be pretty timid about doing work like this myself, but you'd be surprised how simple it is if you do some research on the net. Trust me. Fiberglass is actually very easy, it just requires patience. Well, I guess all of this requires patience. Probably the best lesson I've learned is to redo something if I feel like I didn't do a great job. It's demoralizing at first and it feels like a setback, but it magnifies the gratification when it turns out just right.
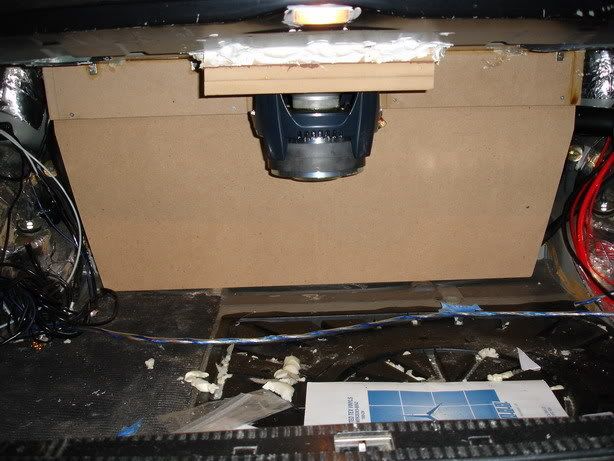
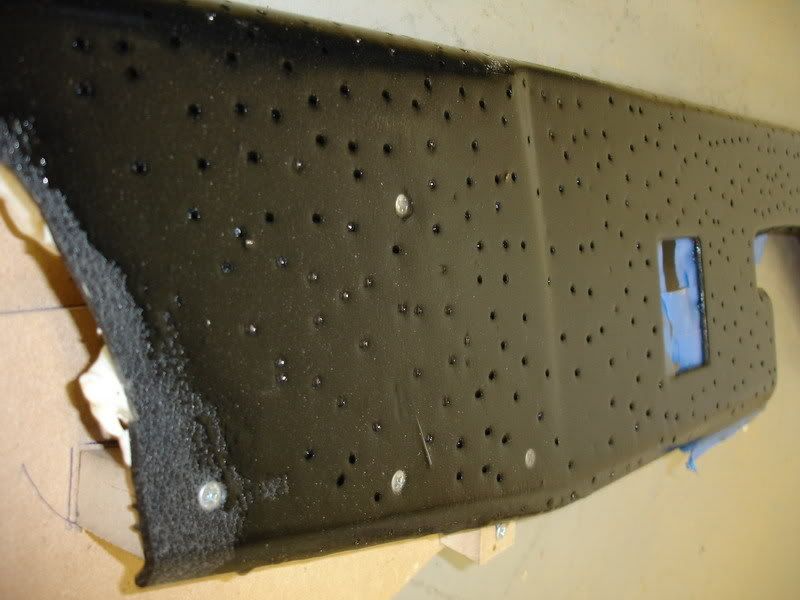
bronco, here are some pics of the trunk that I have. It's not much to look at yet at all. And in the end, it's going to be very basic. I'm not one of those guys who likes all the flash (plexiglass, colored lights, etc). Currently, the amp rack (that big board) has all of the holes/ slots/ T-nuts installed. Everything wood-colored is now painted flat black.
Sorry, for some reason I haven't taken pics of the trunk in a long time. This is all I have for now. Again, thanks for the kind words, guys. This project is really trying my patience, which is a good thing I guess.
01-02-2007, 08:56 PM
#33
MBWorld Fanatic!
Thread Starter
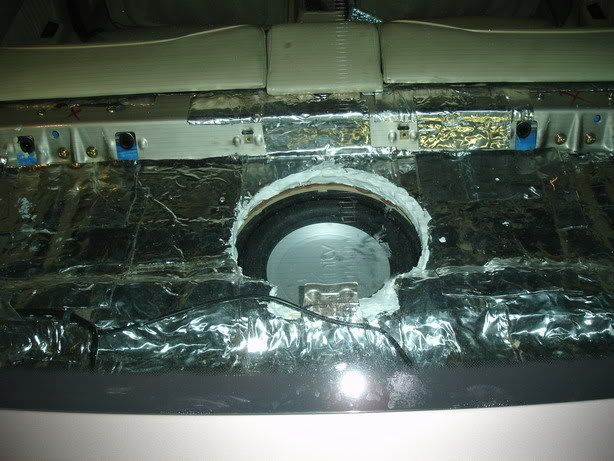
Bronco, I cut the hole with a dremel, using reinforced metal cut-off wheels. They're little disks. It works pretty well. I drew a template out of posterboard, taped it to the deck, drew the circle with a sharpie, took the template off, and went at it. Note (and you'll see this if you look in your car) the metal deck is not flat. So in order to seal my sub to the rear deck, I used sheet metal screws to attach a baffle made of 3/4" MDF to the underside of the deck, and used expansion foam (the brand I used was "Great Stuff", available at any hardware store), and sprayed it into the gaps. Turned out great. The foam is paintable, too. So like I said, I used a rattle can and sprayed everything black. I wouldn't recommend doing an infinite baffle installation like this unless you're ready to really go for it and make permenant modifications. Otherwise, put a sub in a sealed box and remove your rear speakers completely to let the bass into the cabin.
LknPrk, the amps and EQ will be mounted to that big board that goes along the gas tank. I'm assuming you know that its that gas tank, so don't drill there!! My recommendation is to get some liquid nails adhesive, lay a strip of wood on the floor of the trunk, and glue it down. Then do the same for the underside of the deck. Use angle brackets to screw into a board and the wood strips, and there you have it.
LknPrk, the amps and EQ will be mounted to that big board that goes along the gas tank. I'm assuming you know that its that gas tank, so don't drill there!! My recommendation is to get some liquid nails adhesive, lay a strip of wood on the floor of the trunk, and glue it down. Then do the same for the underside of the deck. Use angle brackets to screw into a board and the wood strips, and there you have it.
01-04-2007, 03:13 AM
#34
MBWorld Fanatic!
What are these MB quart speakers that you speak of? I donno what my stock ones are in the 300ce but they are decent. I have a set of Rockford-fosgate t142c (front deck) and t152c (rear deck) speakers that are waiting for me to get enough money for a decent amp and a new becker headunit. They will be waiting a long time it seems :C How do all these speakers stack up? The stock MB vs the Quart vs the Fokal vs the Rockford-fosgate?
01-04-2007, 10:36 AM
#35
MBWorld Fanatic!
Thread Starter
Well, it really depends. I know nothing about Rockford Fosgate. No offense intended, but I typically avoid them. I'm sure they have some decent stuff.
Focal and MB Quart are pretty even with eachother in terms of prices, so it just comes down to listener preference. Both manufacturers have many product lines, so their lowest levels probably start in the mid price range, and work up to some incredibly expensive ones. My speakers are right about in the middle.
I have had MB Quarts and I've had Focals now, and frankly I prefer MB Quarts. I was convinced to try Focal when I blew a set of my MB Quarts, and I basically just stuck with them because I didn't want to replace my entire system. They're great speakers, but in comparison to MB Quart, I think they sound slighly muffled. I don't know how else to describe it.
I'm sure your rockford fosgates will sound much better than stock.
 I hope so too, the are the second level from the highest level speakers Rockford makes...
02-11-2007, 03:41 PM
I hope so too, the are the second level from the highest level speakers Rockford makes...
02-11-2007, 03:41 PM
#37
MBWorld Fanatic!
Thread Starter
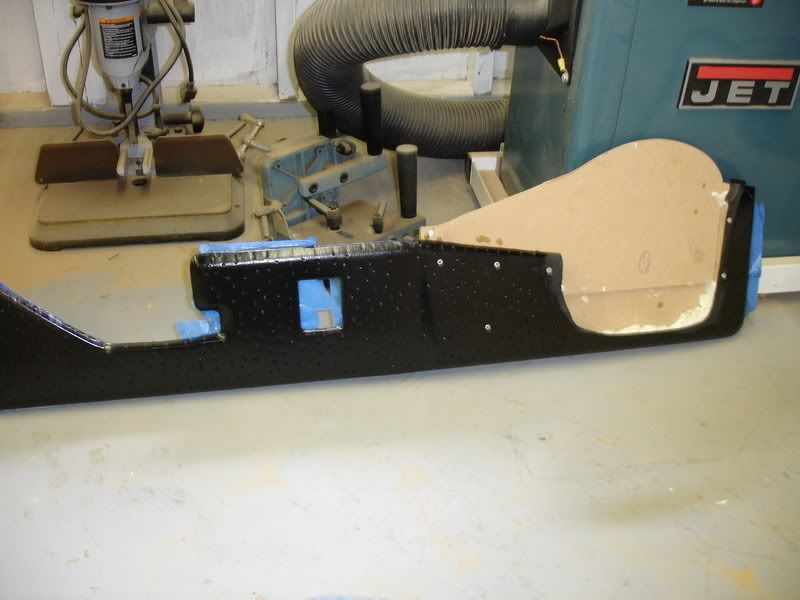
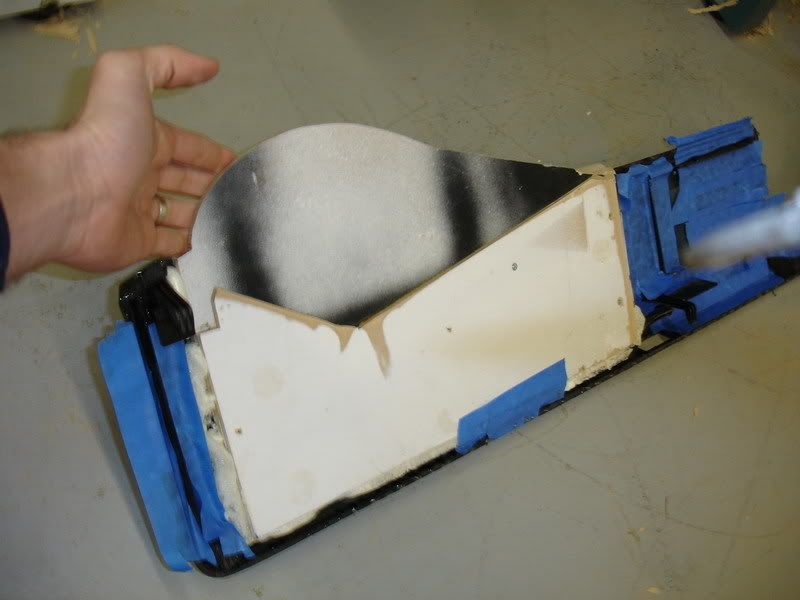
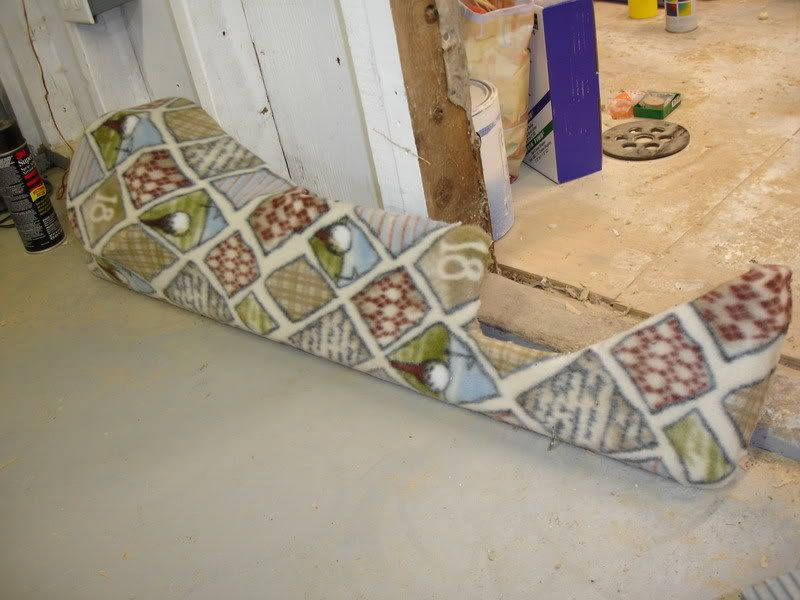
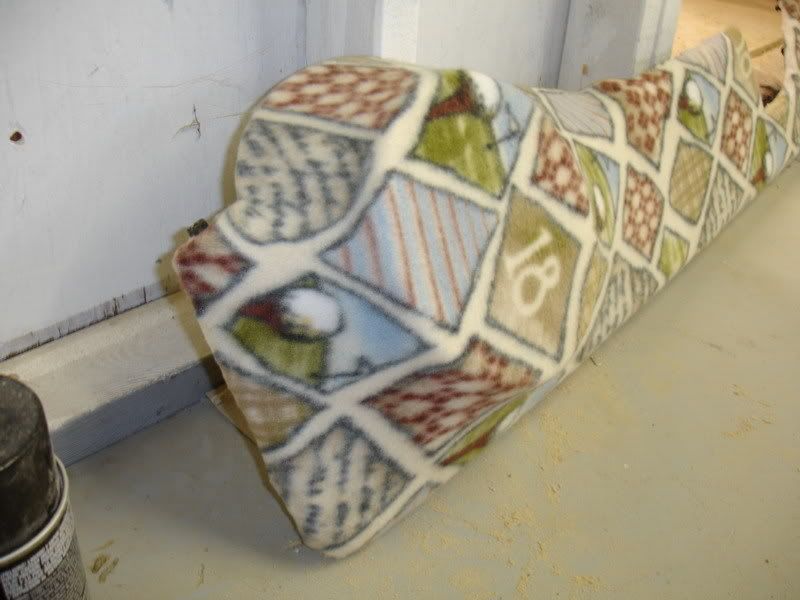
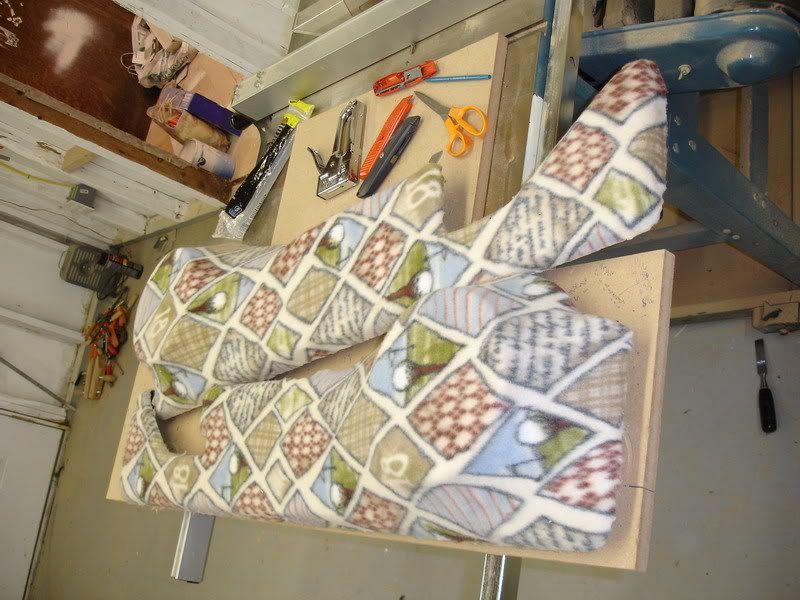
Here are some updates. I'm gonna let the pics speak for themselves because I'm too lazy to describe everything I've done. These are the map pockets and I'm working on the door pods.
I didn't get to start on the fiberglassing yesterday, but that will be for next time. Thanks for looking.
I didn't get to start on the fiberglassing yesterday, but that will be for next time. Thanks for looking.
02-11-2007, 06:55 PM
#38
Member
Join Date: Jan 2007
Location: UK
Posts: 76
Likes: 0
Received 0 Likes
on
0 Posts
W124 280E and a Mini R50
Wow, I'm really impressed!!!
I was thinking of sorting out my sound system but don't think I'll go that far - all I want to do is replace the speakers and maybe the wires... but when one day I'll finally get some time (& more money to spend on the sound system), I'll try to copy some of your work!
I was thinking of sorting out my sound system but don't think I'll go that far - all I want to do is replace the speakers and maybe the wires... but when one day I'll finally get some time (& more money to spend on the sound system), I'll try to copy some of your work!
02-11-2007, 07:43 PM
#39
MBWorld Fanatic!
Thread Starter
Thanks, man. If I could do it all over again, I wouldn't have gone this crazy. You live, you learn. It just better sound good after all this work!!
02-11-2007, 08:09 PM
#40
Member
Join Date: Jan 2007
Location: UK
Posts: 76
Likes: 0
Received 0 Likes
on
0 Posts
W124 280E and a Mini R50
For the time being I've replaced the old stereo with an alpine mp3 headunit. I've got a pair of jbl gto525e speakers (standard coaxial 5.25" speakers) that I never got round to fitting to a previous car so I'll try to fit them in the back (I have no clue what speakers I've got in the back). I've checked the front ones and turns out they are coaxial clarion - decent speakers actually. As far as I remember seeing the receipts, the previous (first) owner had the dealership upgrade the sound system to a pioneer tape deck and cd changer. I've removed the tape deck and cd changer - I prefer to have an in-dash single cd with mp3 instead (and yes, I know I lose quality if I listen to mp3 tracks). ;-)
Do you think it's worth replacing the wires or will that make no difference at all? I didn't intend to use any amps - I was hoping to run the speakers from the headunit.
Do you think it's worth replacing the wires or will that make no difference at all? I didn't intend to use any amps - I was hoping to run the speakers from the headunit.
02-11-2007, 09:38 PM
#42
MBWorld Fanatic!
Join Date: Dec 2006
Location: St. Croix, US Virgin Islands
Posts: 1,033
Likes: 0
Received 0 Likes
on
0 Posts
1995 E320 SE, 162,000 Miles (Sold)
I'm sure it's a stupid question, but how did you remove the cover to access the speakers in the front corners of the dash, next to the windshield? One of mine is blown and I need to fix. I don't see any screws on mine. Do you just pry it up carefully or what?
Last edited by shdoug; 02-11-2007 at 09:42 PM.
02-11-2007, 09:55 PM
#43
http://www.mercedesshop.com/Wikka/W124Stereo
02-11-2007, 10:45 PM
#44
MBWorld Fanatic!
Thread Starter
yeah. that link will answer your question, but in short, just take a flat-head screwdriver, pry up the strip that looks like a separate peice of the grille. Just do it carefully. That will expose 2 screws, and there you have it. Just be careful cuz I scratched my passenger side grille and being the perfectionist that I am, it drives me insane to look at. It's fairly subtle but maybe I'll pick a new one up at a junk yard sometime.
Thanks for the comments guys.
Thanks for the comments guys.
02-20-2007, 12:22 AM
#46
MBWorld Fanatic!
Thread Starter
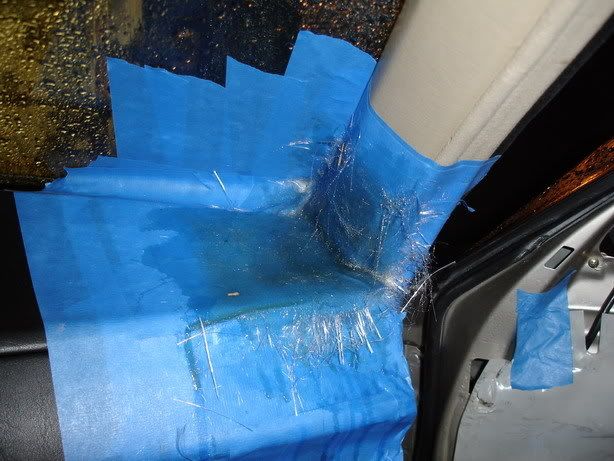
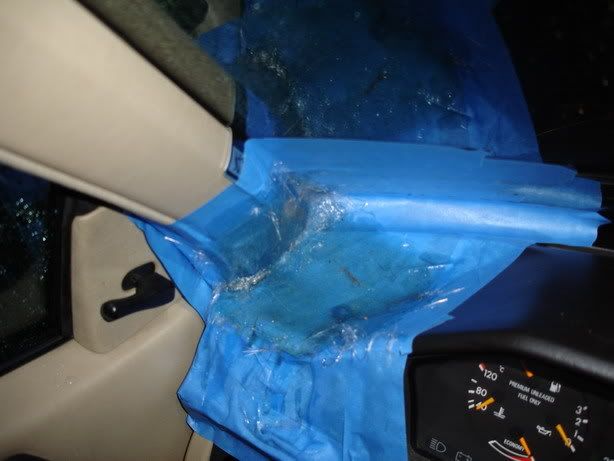
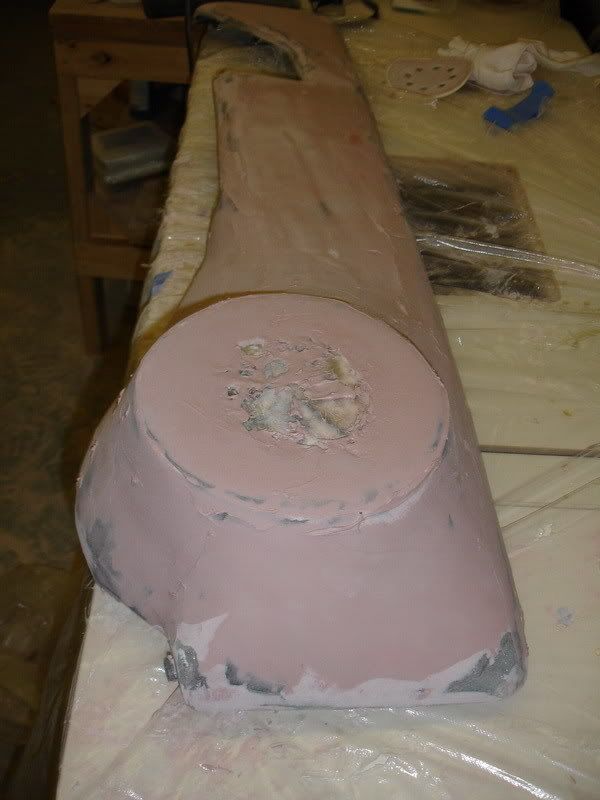
More progress... Put a coat of resin on the fleece:
Laid up all of the fiberglass layers, trimmed the edges, and went to town on them with a belt sander. Obviously I will do bondo and tons of sanding later, but there were some high spots that would be better to knock down before bondo. Bondo will be next weekend. I'll use a flashlight at a sharp angle to make sure I fill and smooth them to perfection.
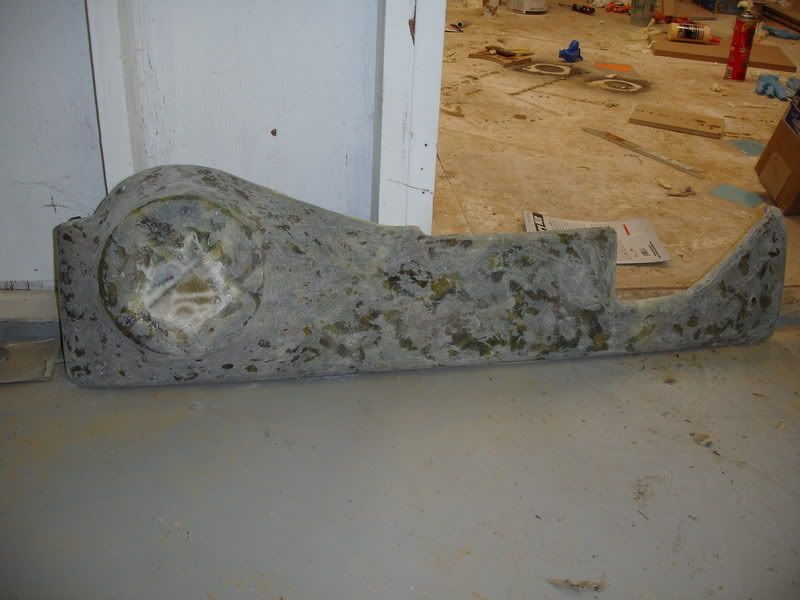
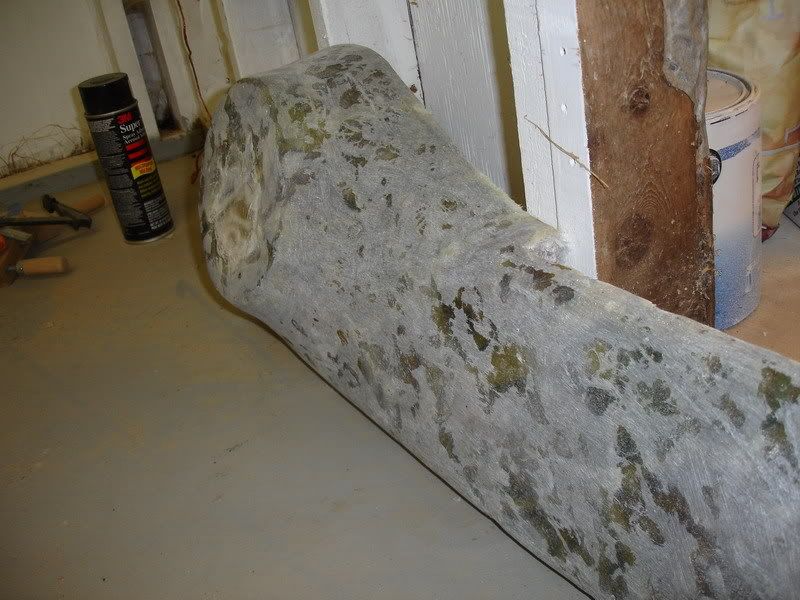

This last pic shows you how bumpy one of them turned out. This one will require extra sanding... to be expected since I'm a fiberglass noob.
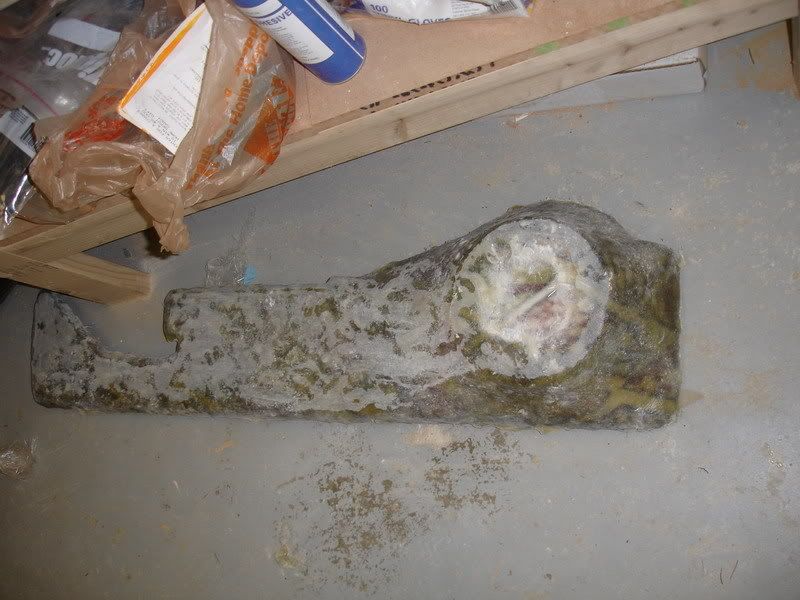
Laid up all of the fiberglass layers, trimmed the edges, and went to town on them with a belt sander. Obviously I will do bondo and tons of sanding later, but there were some high spots that would be better to knock down before bondo. Bondo will be next weekend. I'll use a flashlight at a sharp angle to make sure I fill and smooth them to perfection.
This last pic shows you how bumpy one of them turned out. This one will require extra sanding... to be expected since I'm a fiberglass noob.
02-26-2007, 12:50 AM
#49
MBWorld Fanatic!
Thread Starter
Did all of the bondo and sanding. Next weekend, I'll trim the hole out with a flush-trim router bit (hence why I wanted to smooth the area out with bondo first so that the router will guide smoothly), set up the plugs for the speaker cables, and apply the vinyl if I have time.
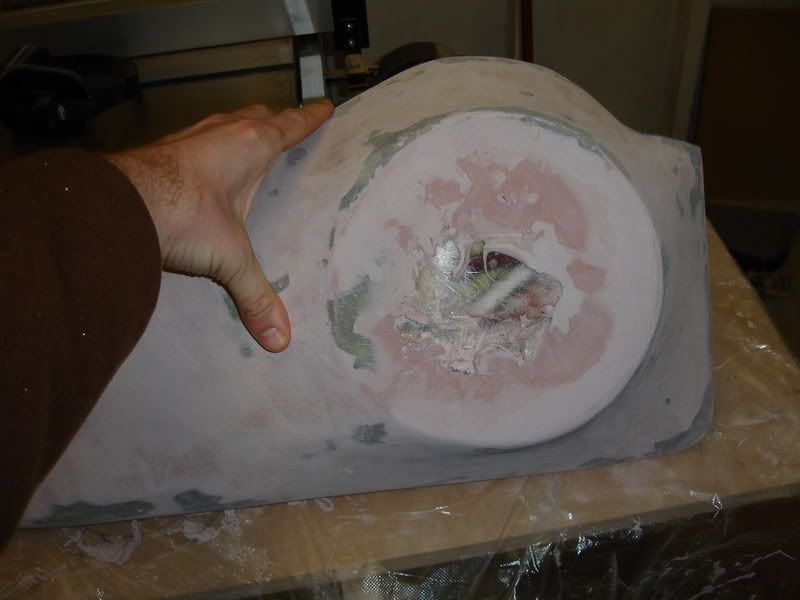
A few pics of the second coat of bondo before sanding:
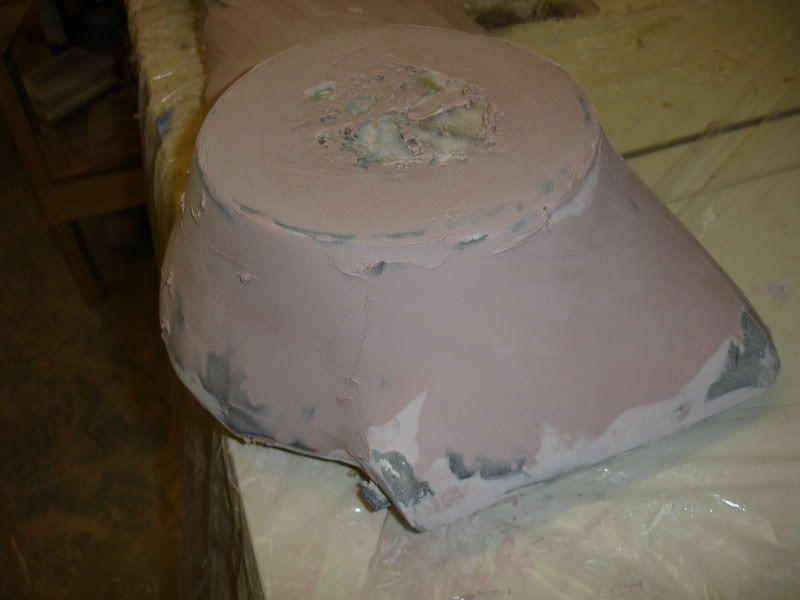
Pics after sanding was complete. Sanding was a snap with my random orbital sander and 80 grit sand paper. Very minimal hand-sanding.
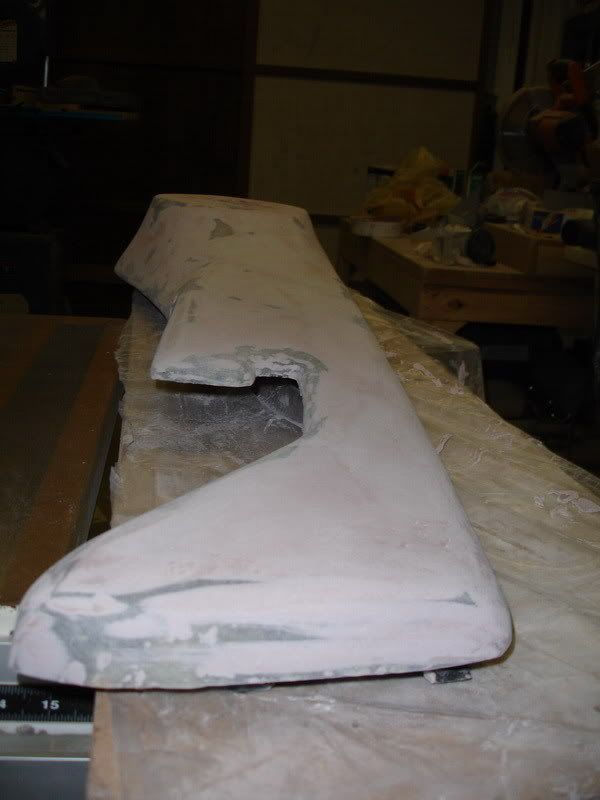
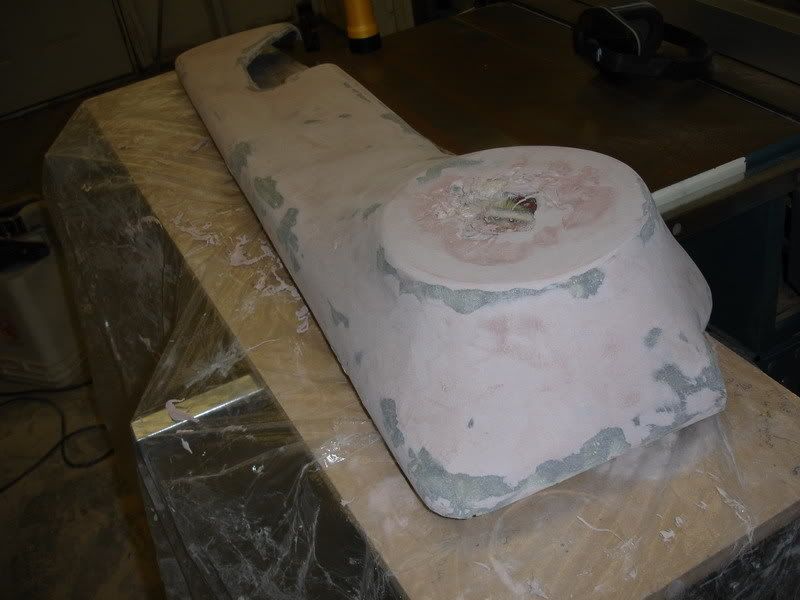
Test-fitted
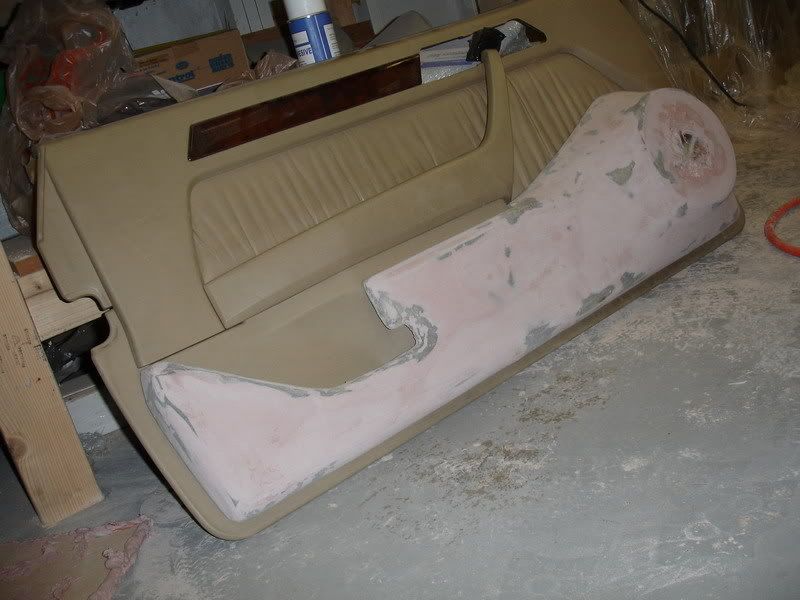
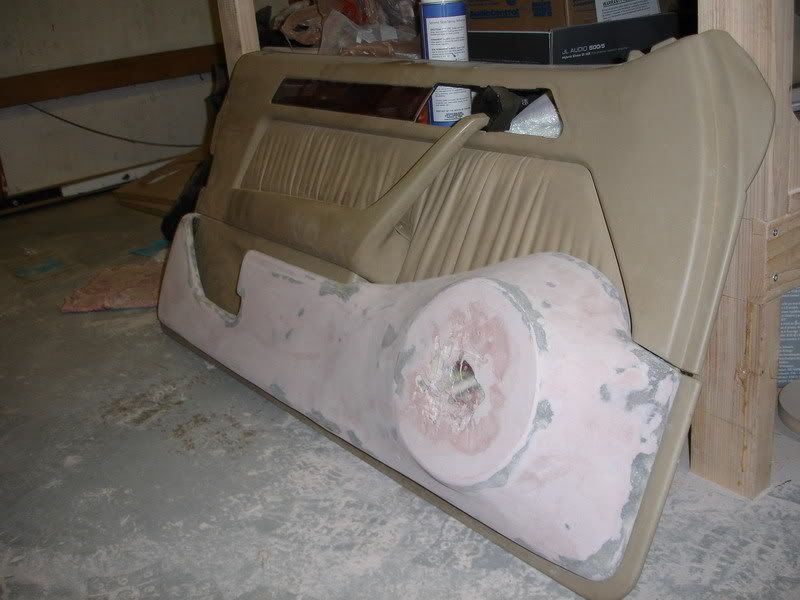
We're gettin there bishes.
A few pics of the second coat of bondo before sanding:
Pics after sanding was complete. Sanding was a snap with my random orbital sander and 80 grit sand paper. Very minimal hand-sanding.
Test-fitted
We're gettin there bishes.
03-03-2007, 05:31 AM
#50
Super Member
Join Date: Jun 2004
Location: So CAli/L.A
Posts: 514
Likes: 0
Received 0 Likes
on
0 Posts
88 260 E
Big Pete !!! You've made progress my friend  Excellent work, and good advise to the noobies, you don't know what you're really capable of achieving until you dive right in. Those bumps are mainly from the epoxy drying to fast and you might have applied it on a lil lumpy. Just means extra sanding and bondo, looks great though.
~Cali
Excellent work, and good advise to the noobies, you don't know what you're really capable of achieving until you dive right in. Those bumps are mainly from the epoxy drying to fast and you might have applied it on a lil lumpy. Just means extra sanding and bondo, looks great though.~Cali


