Projects on my new, to me, 1973 280SEL 4.5
 02-06-2017, 09:48 PM
#26
Member
Thread Starter

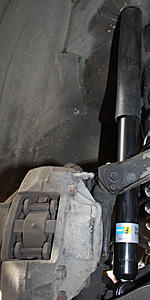
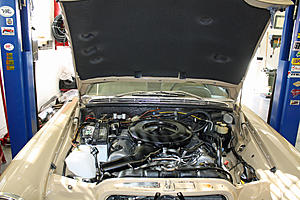
The front shocks went on today. The rear shocks haven't been on the car for very long but the front ones have and I noticed that the front end could use some help.
The right side required removing the battery to access the top nut. Installing the first shock was somewhat challenging as, once I was able to compress the shock and remove it from the top hole, I then to had to figure out the best way to extract it from the control arm and to re-insert the new one.
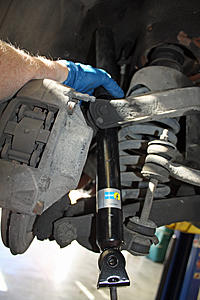
Installing the new shock was a bit tricky as well as the lower two studs on the shock have to be at just the right angle to go through the holes on the lower A arm. Took a few tries on that first shock but, as is usually the case on a job like this, the second shock went on in about a fourth of the time.

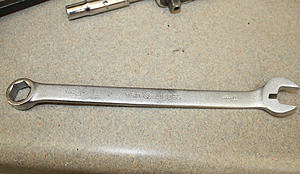
Tightening the top nut was made easier by the special tool I bought. There is a notch in a 17mm wrench with an angled head to hold the shaft while tightening the nut. It worked very well.
BTW, these shocks are the only two clean things on the bottom of this car!!
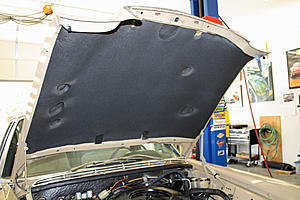
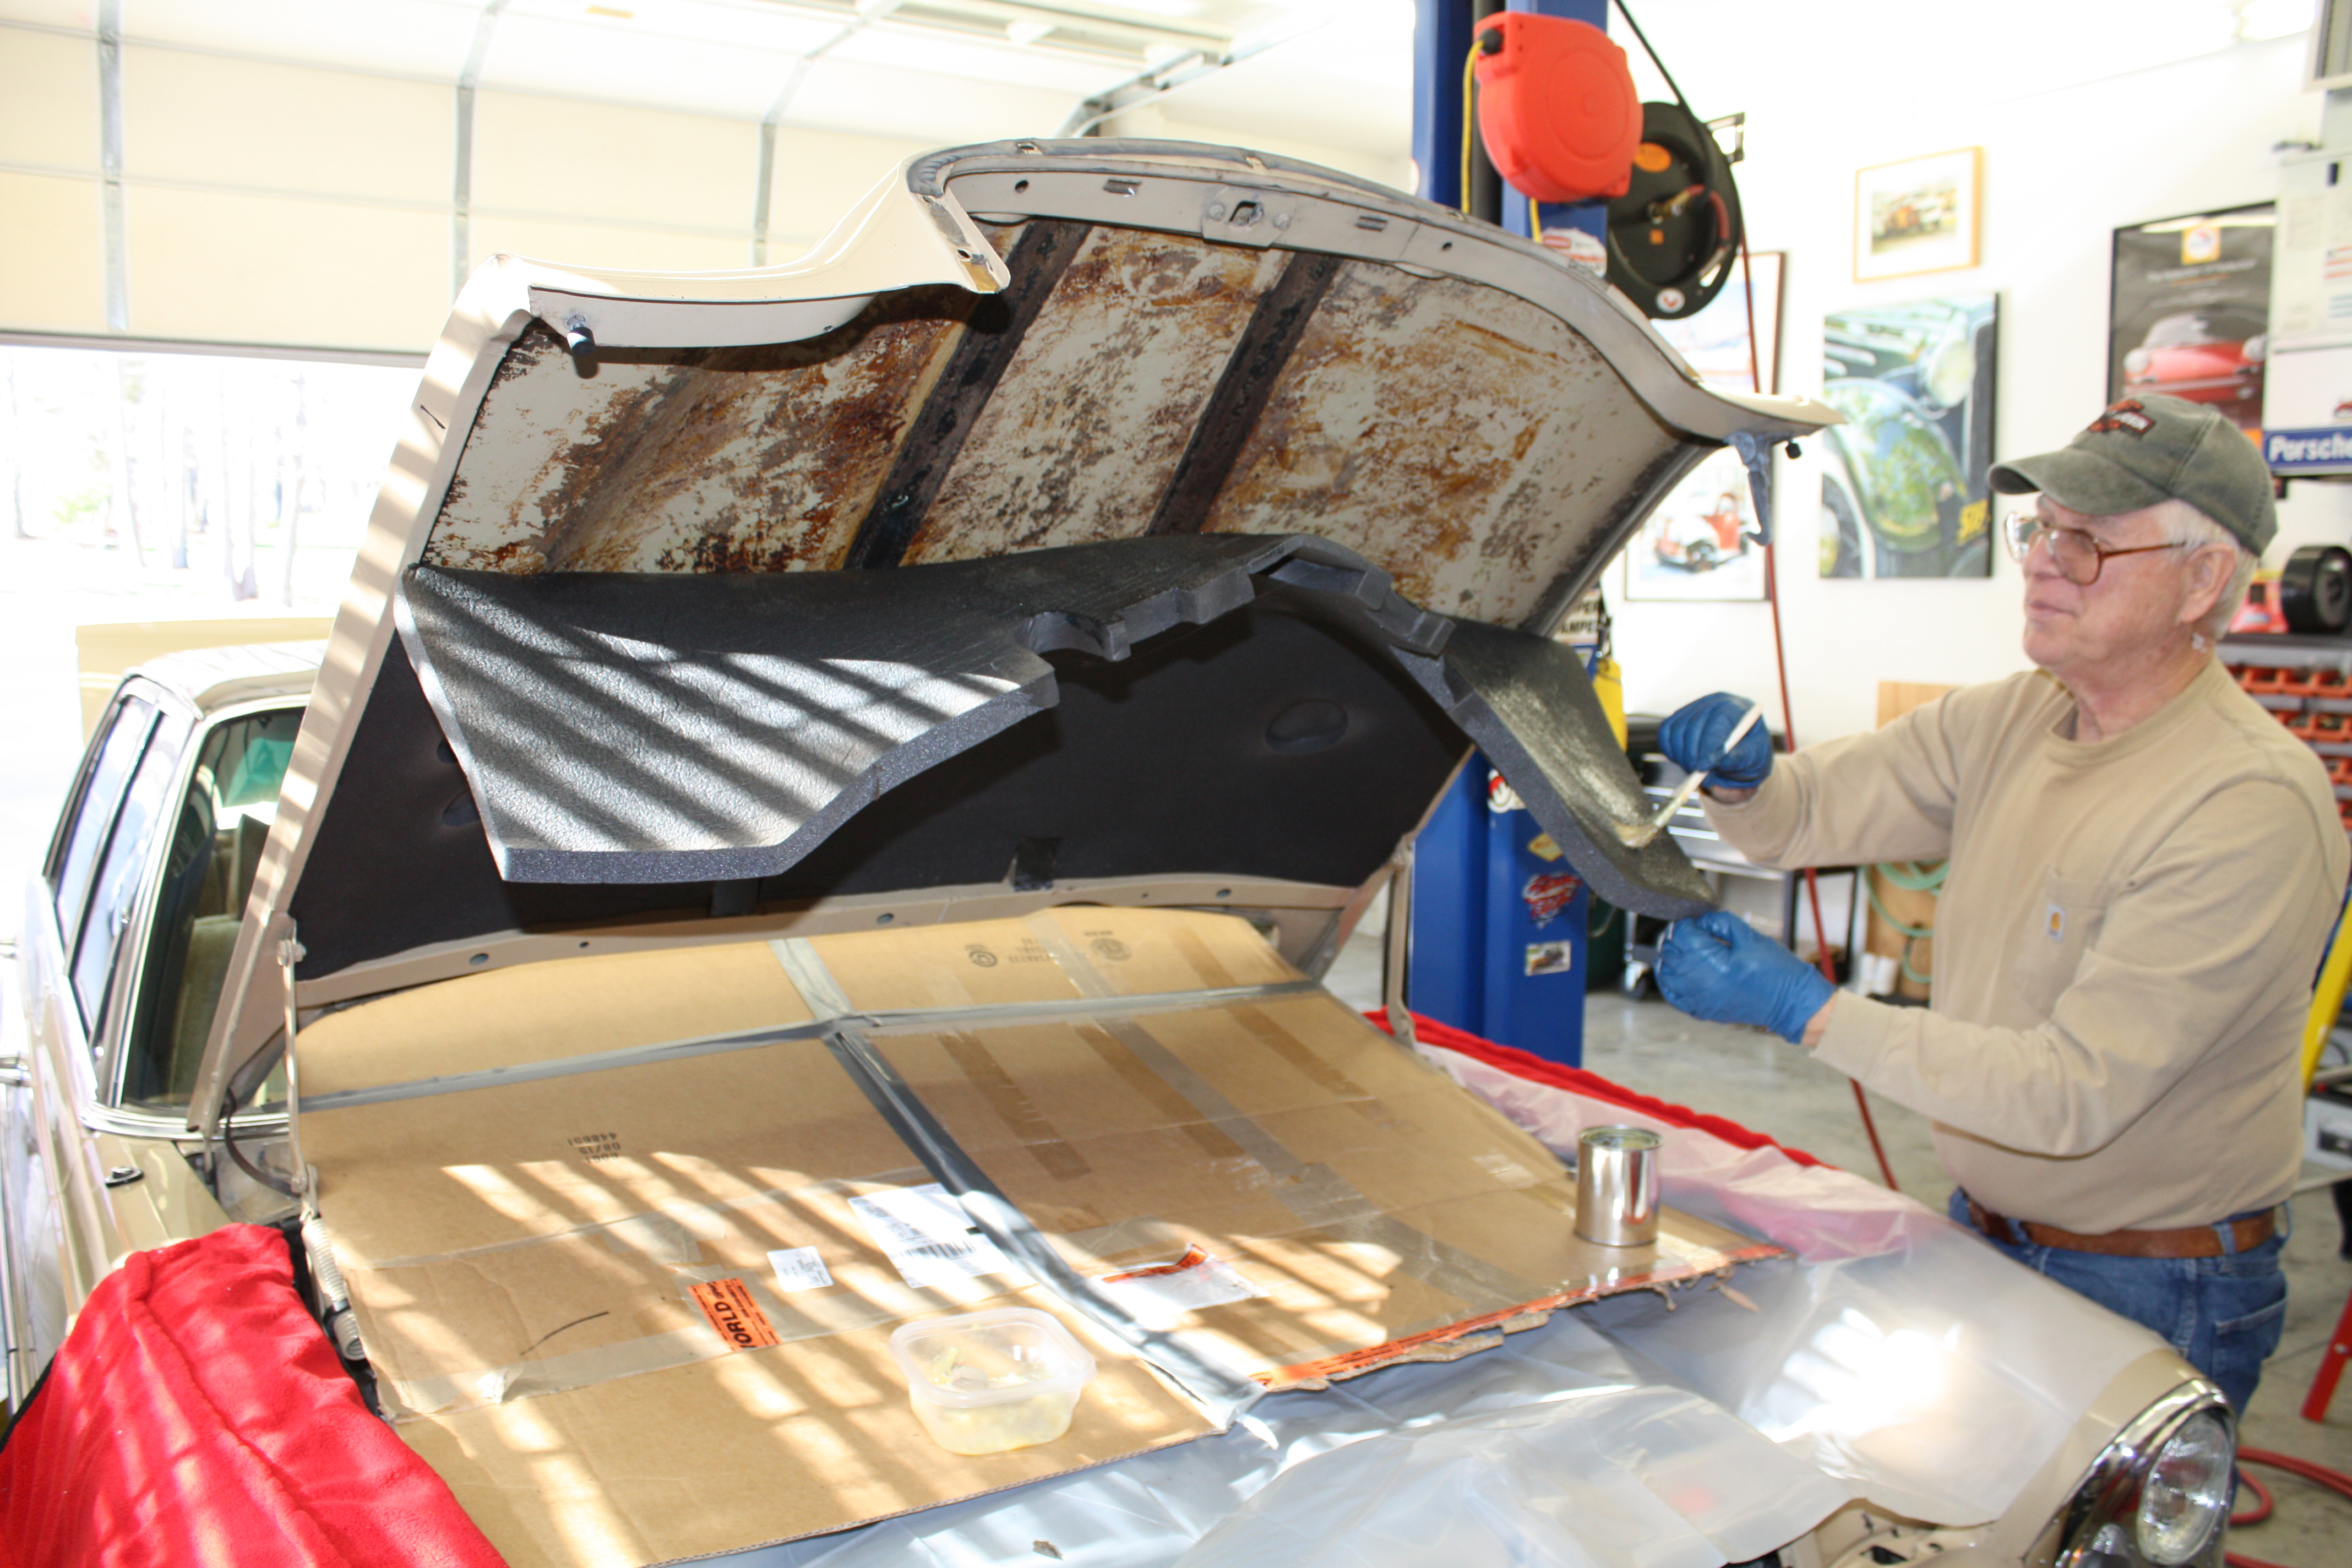
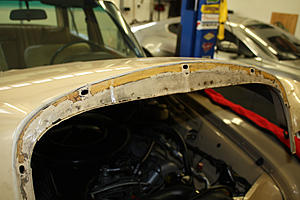
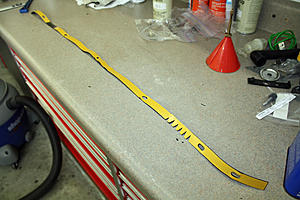
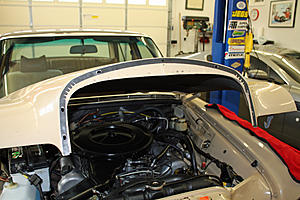
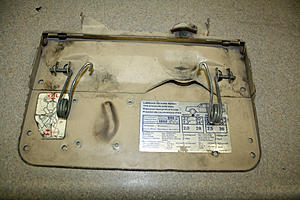
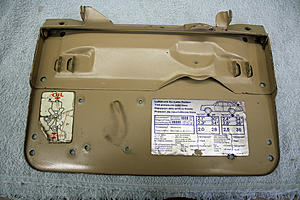
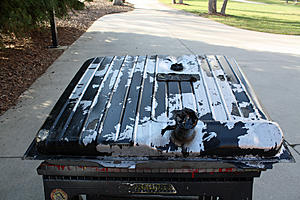
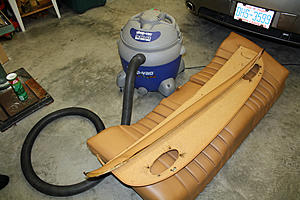
My buddy Reese came over this afternoon to help me install the hood pad. He is a car guy as well and lives a few houses down from me. We help each other out on projects whenever an extra set of hands is needed.
I watched a video on how to install a hood pad. The guy recommends putting a light coat on the pad, then a heavy coat on the hood followed by another light coat on the pad as it will soak up some of the glue. He then recommends laying a piece of visqueen on the glue side of the pad starting about 8" from the top. Once the glue is tacky, he says to start at the top, get it lined up stick the pad on the hood. Once you have that part sticking to the hood, then pull off another foot or so of the visqueen and stick that part to the hood. Do this again until you have the pad in place. The visqueen keeps the pad from accidentally touching the hood causing it stick somewhere where you don't want it to stick.
I had the plastic cut to size and was ready to go but we decided on an alternate plan. To make sure the new pad fit and to make sure we knew how it went on, we stuck the pad in place without any glue. Once we did that, we realized that by tucking the pad in at the top and sides, the pad would stay in place. After discussing it a bit, Reese said he thought we could pick up the bottom half, apply the glue and then stick that part to the hood. Once we had the lower half attached, we peeled back the top, applied the glue and fastened it to the hood while tucking the pad into place. That plan worked like a charm. It always helps to have another set of eyes look at a project.

The right side required removing the battery to access the top nut. Installing the first shock was somewhat challenging as, once I was able to compress the shock and remove it from the top hole, I then to had to figure out the best way to extract it from the control arm and to re-insert the new one.

Installing the new shock was a bit tricky as well as the lower two studs on the shock have to be at just the right angle to go through the holes on the lower A arm. Took a few tries on that first shock but, as is usually the case on a job like this, the second shock went on in about a fourth of the time.

Tightening the top nut was made easier by the special tool I bought. There is a notch in a 17mm wrench with an angled head to hold the shaft while tightening the nut. It worked very well.

BTW, these shocks are the only two clean things on the bottom of this car!!

My buddy Reese came over this afternoon to help me install the hood pad. He is a car guy as well and lives a few houses down from me. We help each other out on projects whenever an extra set of hands is needed.
I watched a video on how to install a hood pad. The guy recommends putting a light coat on the pad, then a heavy coat on the hood followed by another light coat on the pad as it will soak up some of the glue. He then recommends laying a piece of visqueen on the glue side of the pad starting about 8" from the top. Once the glue is tacky, he says to start at the top, get it lined up stick the pad on the hood. Once you have that part sticking to the hood, then pull off another foot or so of the visqueen and stick that part to the hood. Do this again until you have the pad in place. The visqueen keeps the pad from accidentally touching the hood causing it stick somewhere where you don't want it to stick.
I had the plastic cut to size and was ready to go but we decided on an alternate plan. To make sure the new pad fit and to make sure we knew how it went on, we stuck the pad in place without any glue. Once we did that, we realized that by tucking the pad in at the top and sides, the pad would stay in place. After discussing it a bit, Reese said he thought we could pick up the bottom half, apply the glue and then stick that part to the hood. Once we had the lower half attached, we peeled back the top, applied the glue and fastened it to the hood while tucking the pad into place. That plan worked like a charm. It always helps to have another set of eyes look at a project.


 02-07-2017, 10:21 PM
#27
Member
Thread Starter
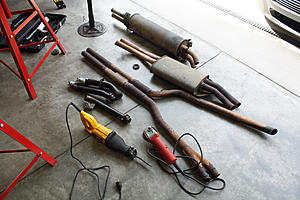
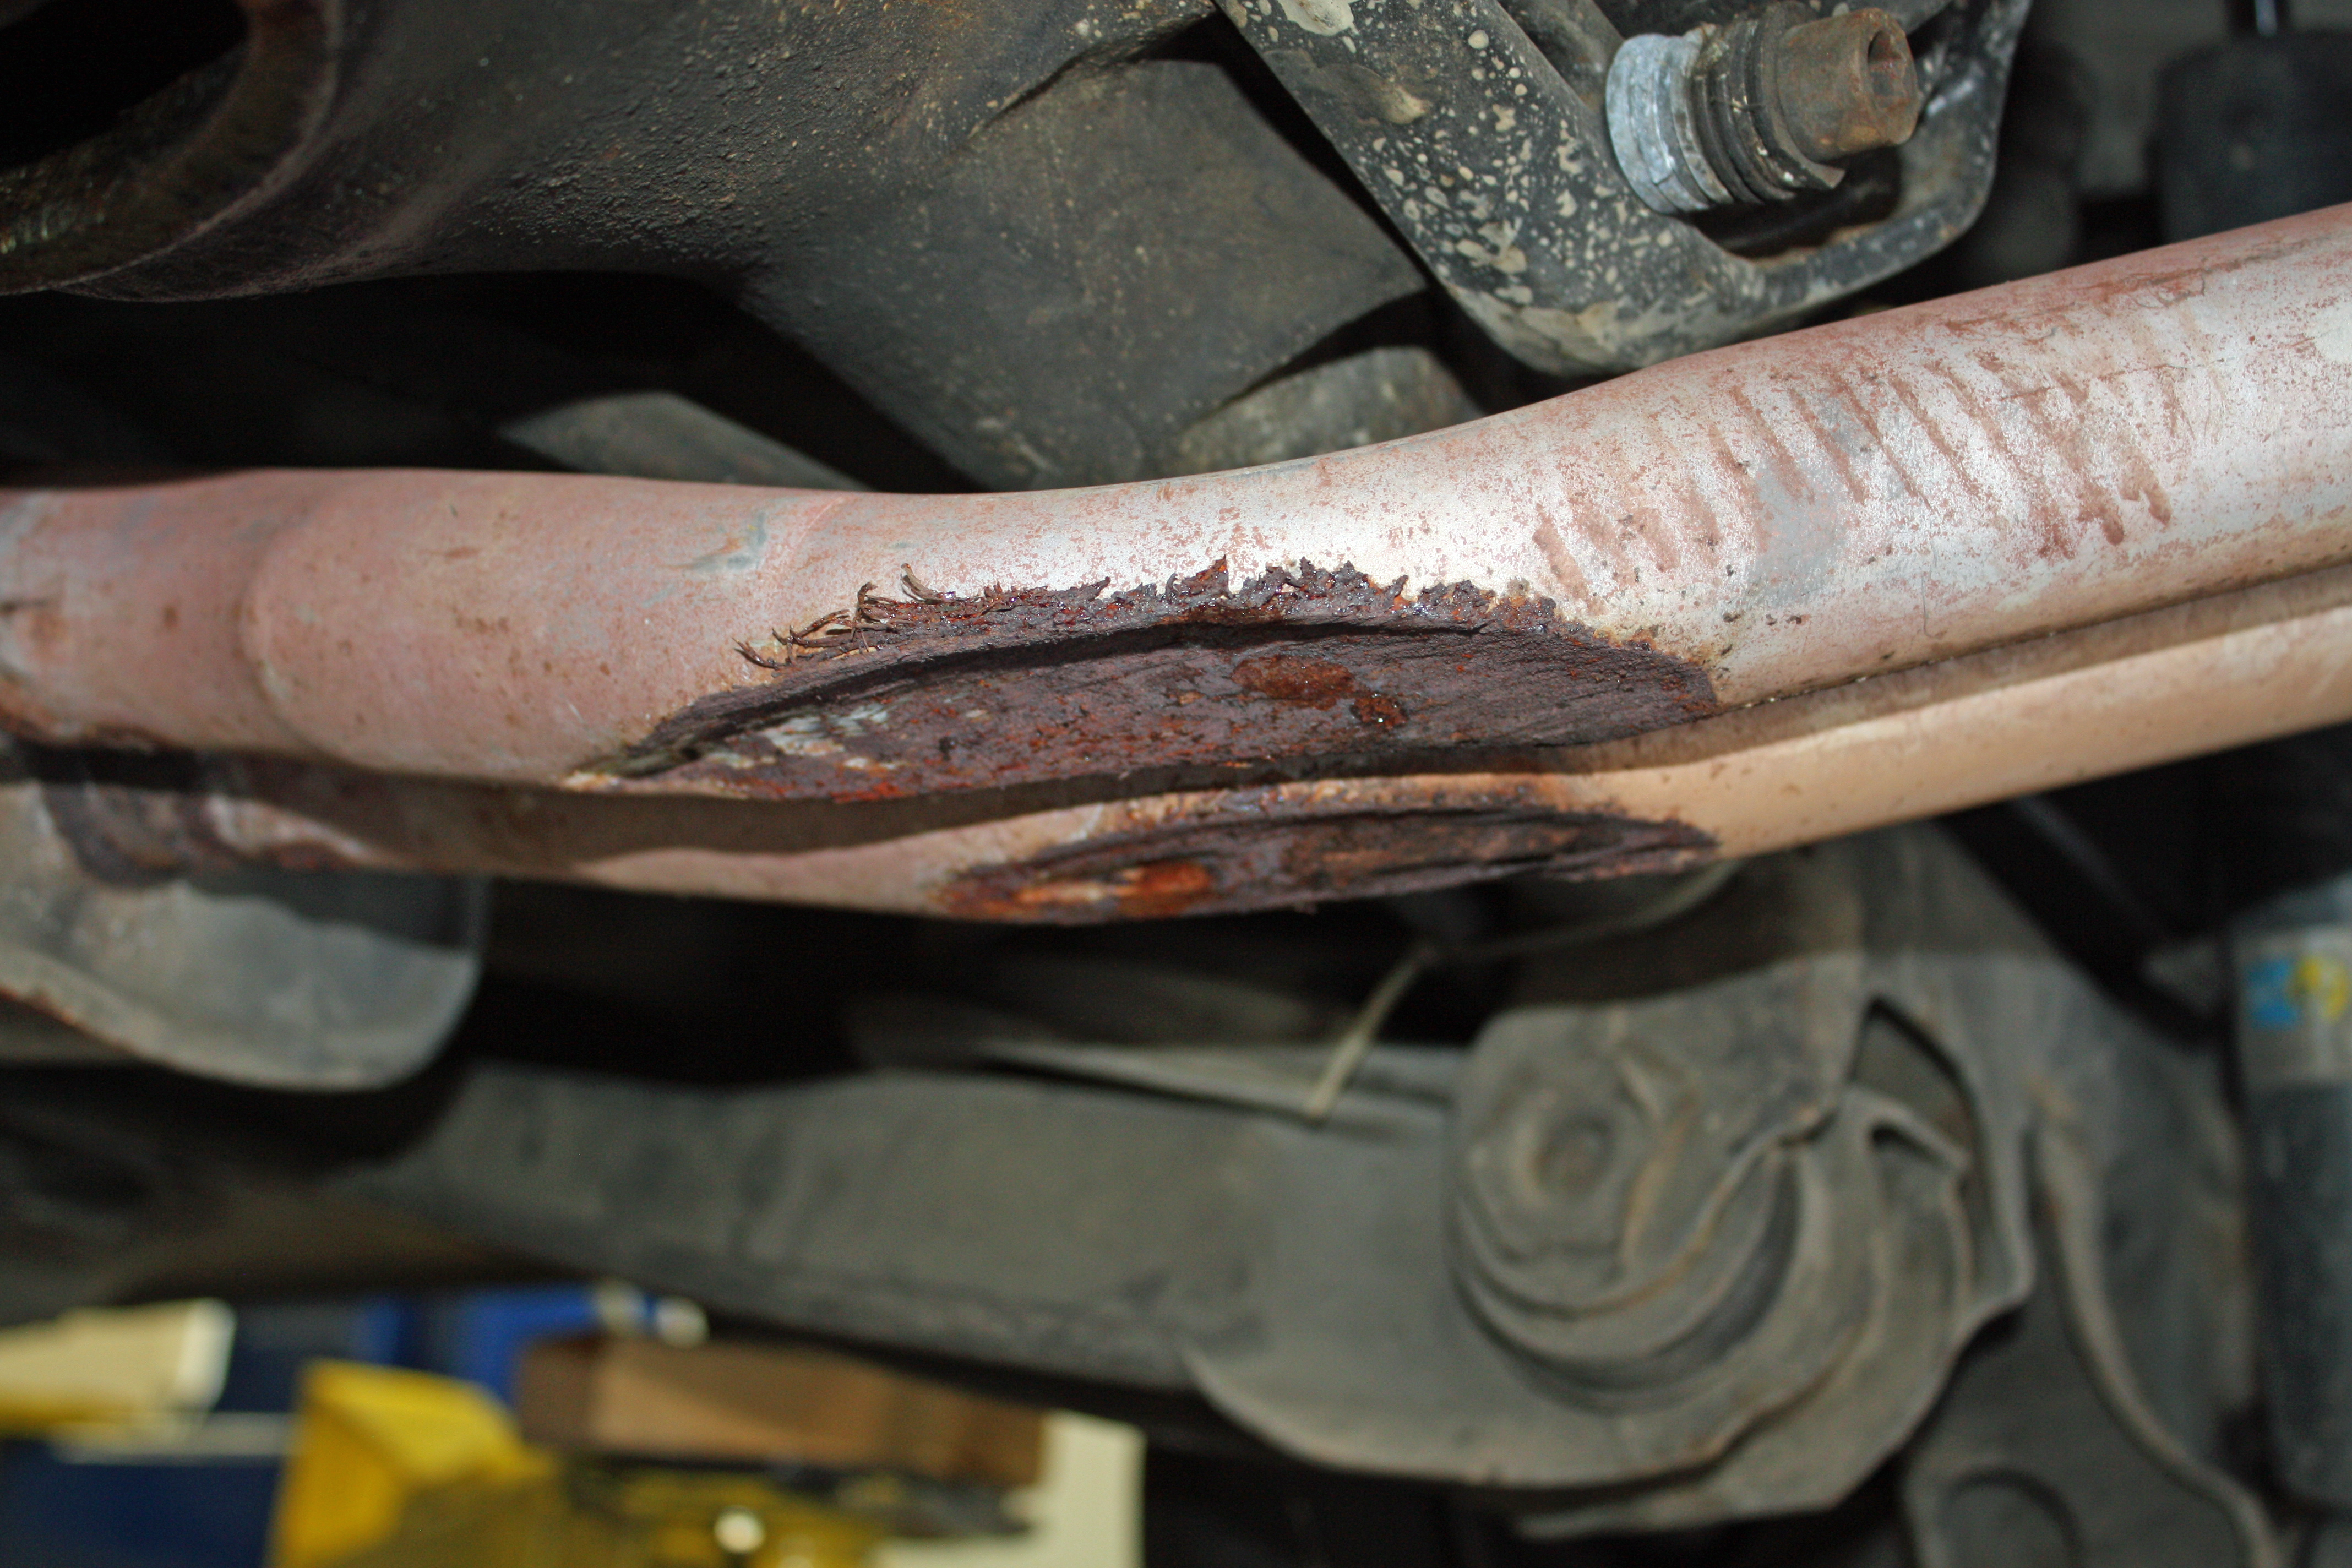
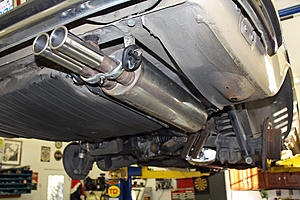
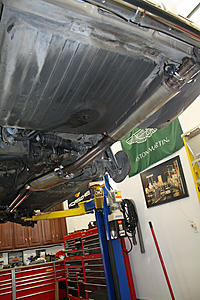
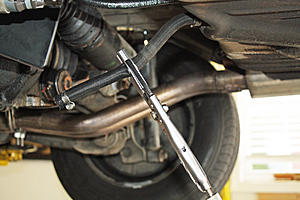
The existing exhaust is in pretty poor shape, especially at the rear. It appears to have been scraped on the bottom of the pipes between the two mufflers and on the bottom of the rear muffler. Judging by the rust on the scraped area, it happened some time ago as there was a hole in the crushed area. I am sure the exhaust was restricted through those pipes that had been partially crushed.

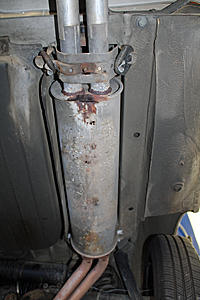
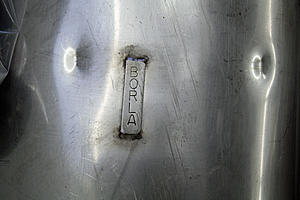
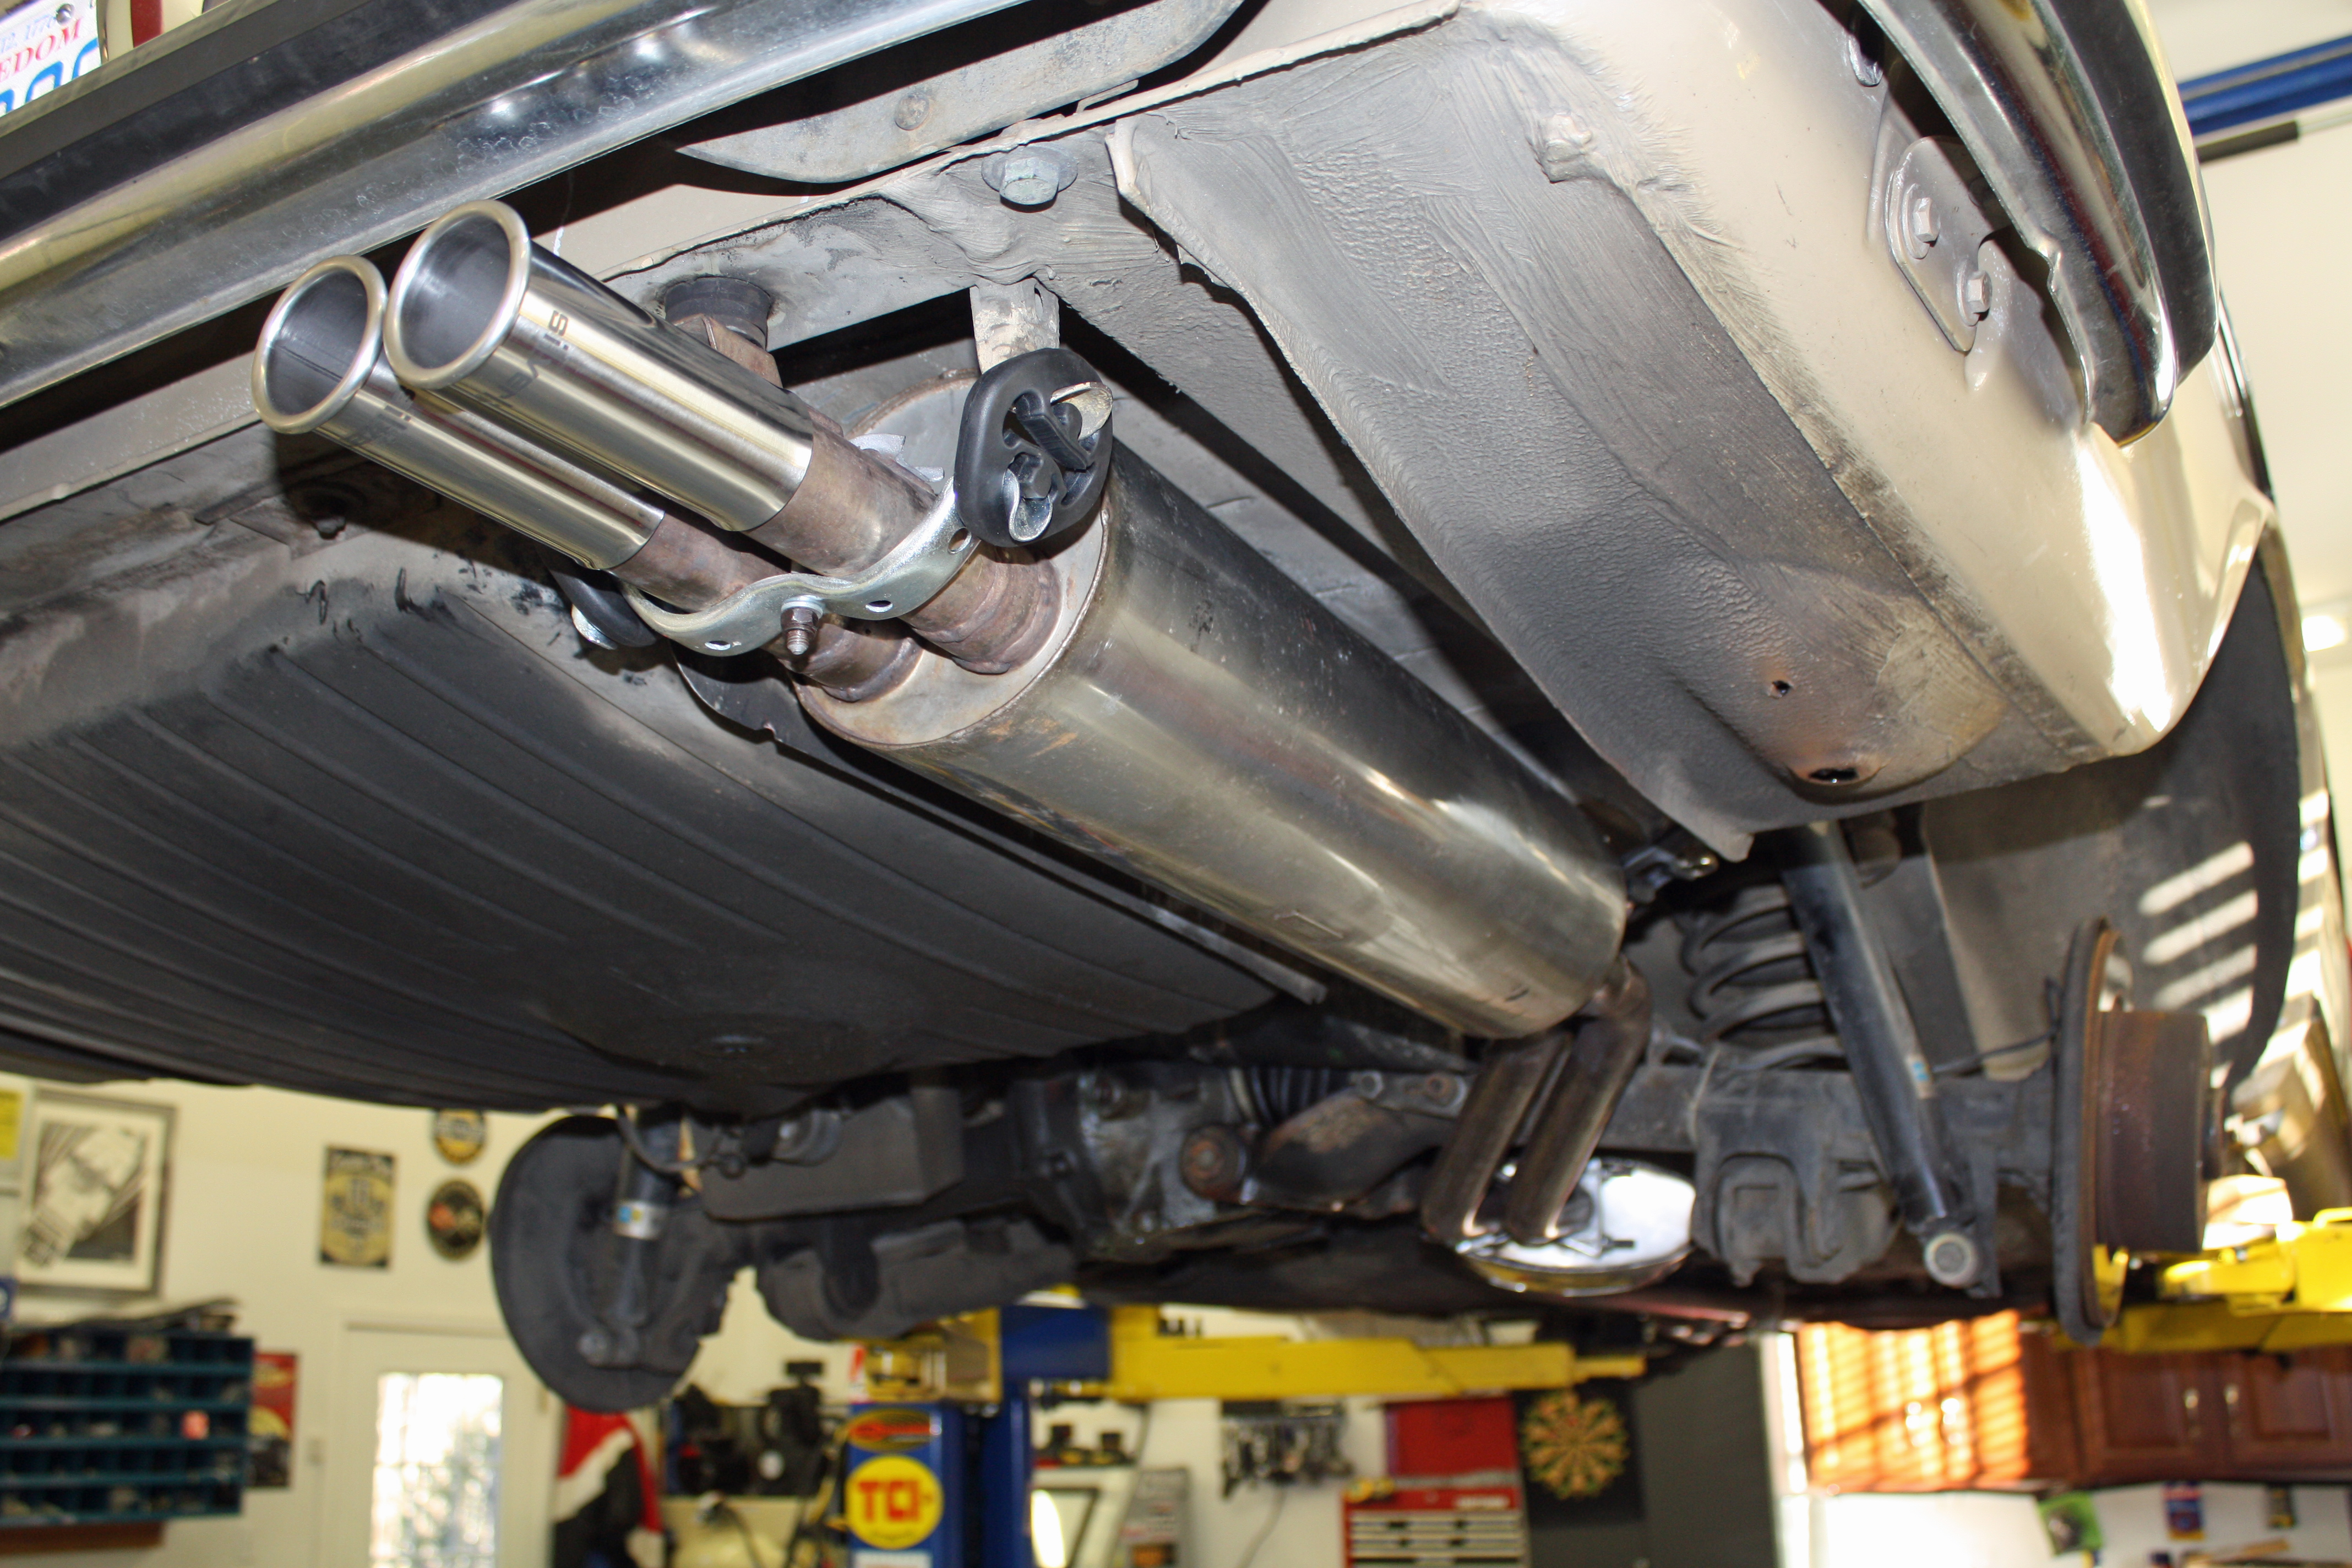
I was fortunate to find a used Borla stainless steel exhaust on eBay. It is in very good shape and, being stainless, may well be the last exhaust system installed on this car.

Since the exhaust was in poor shape and to make taking it off easier, I cut the system into four parts.

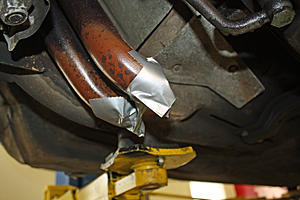
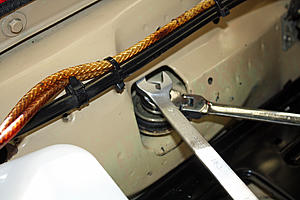
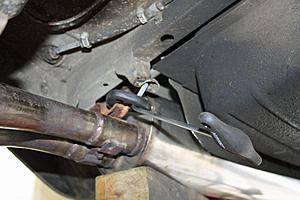
I had soaked the exhaust bolts at the manifold with a penetrant for a number of days. Removing the left side exhaust pipe at the manifold was fairly easy as I could get a wrench on the top side. The right side, with its two outlets, was much more difficult. I was able to get one of the four bolts out from the bottom, but I could not get a wrench on the top side of the other three bolts. So I lowered the car, removed the battery, and was able to get a 1/8" ratchet on the other three bolts from the top. I had to remove one spark plug wire.
At this point I considered calling my buddy Reese to have him hold the socket on from the top while I went underneath to loosen the other end. However, I hate to call him unless there is no other option. Kind of a pride thing here. Once I had the socket on the upper bolt, I used black duct tape to tape the ratchet wrench to either the valve cover or the battery tray. This kept the socket in place while I was engaging the other end. Worked like a charm.
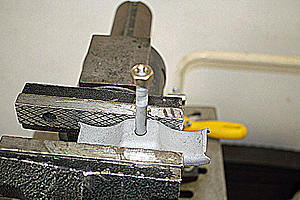
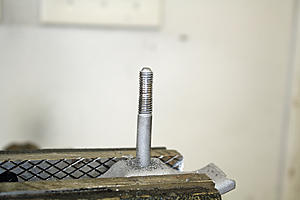
When I tried to remove the rusted hanger from the Borla exhaust, the bolt broke. This same piece on the original exhaust was in good shape but was welded to the exhaust. I cut it off with my angle grinder. After bead blasting it, I used a thread chaser to clean up the threads.
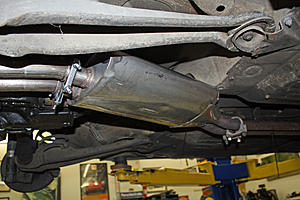
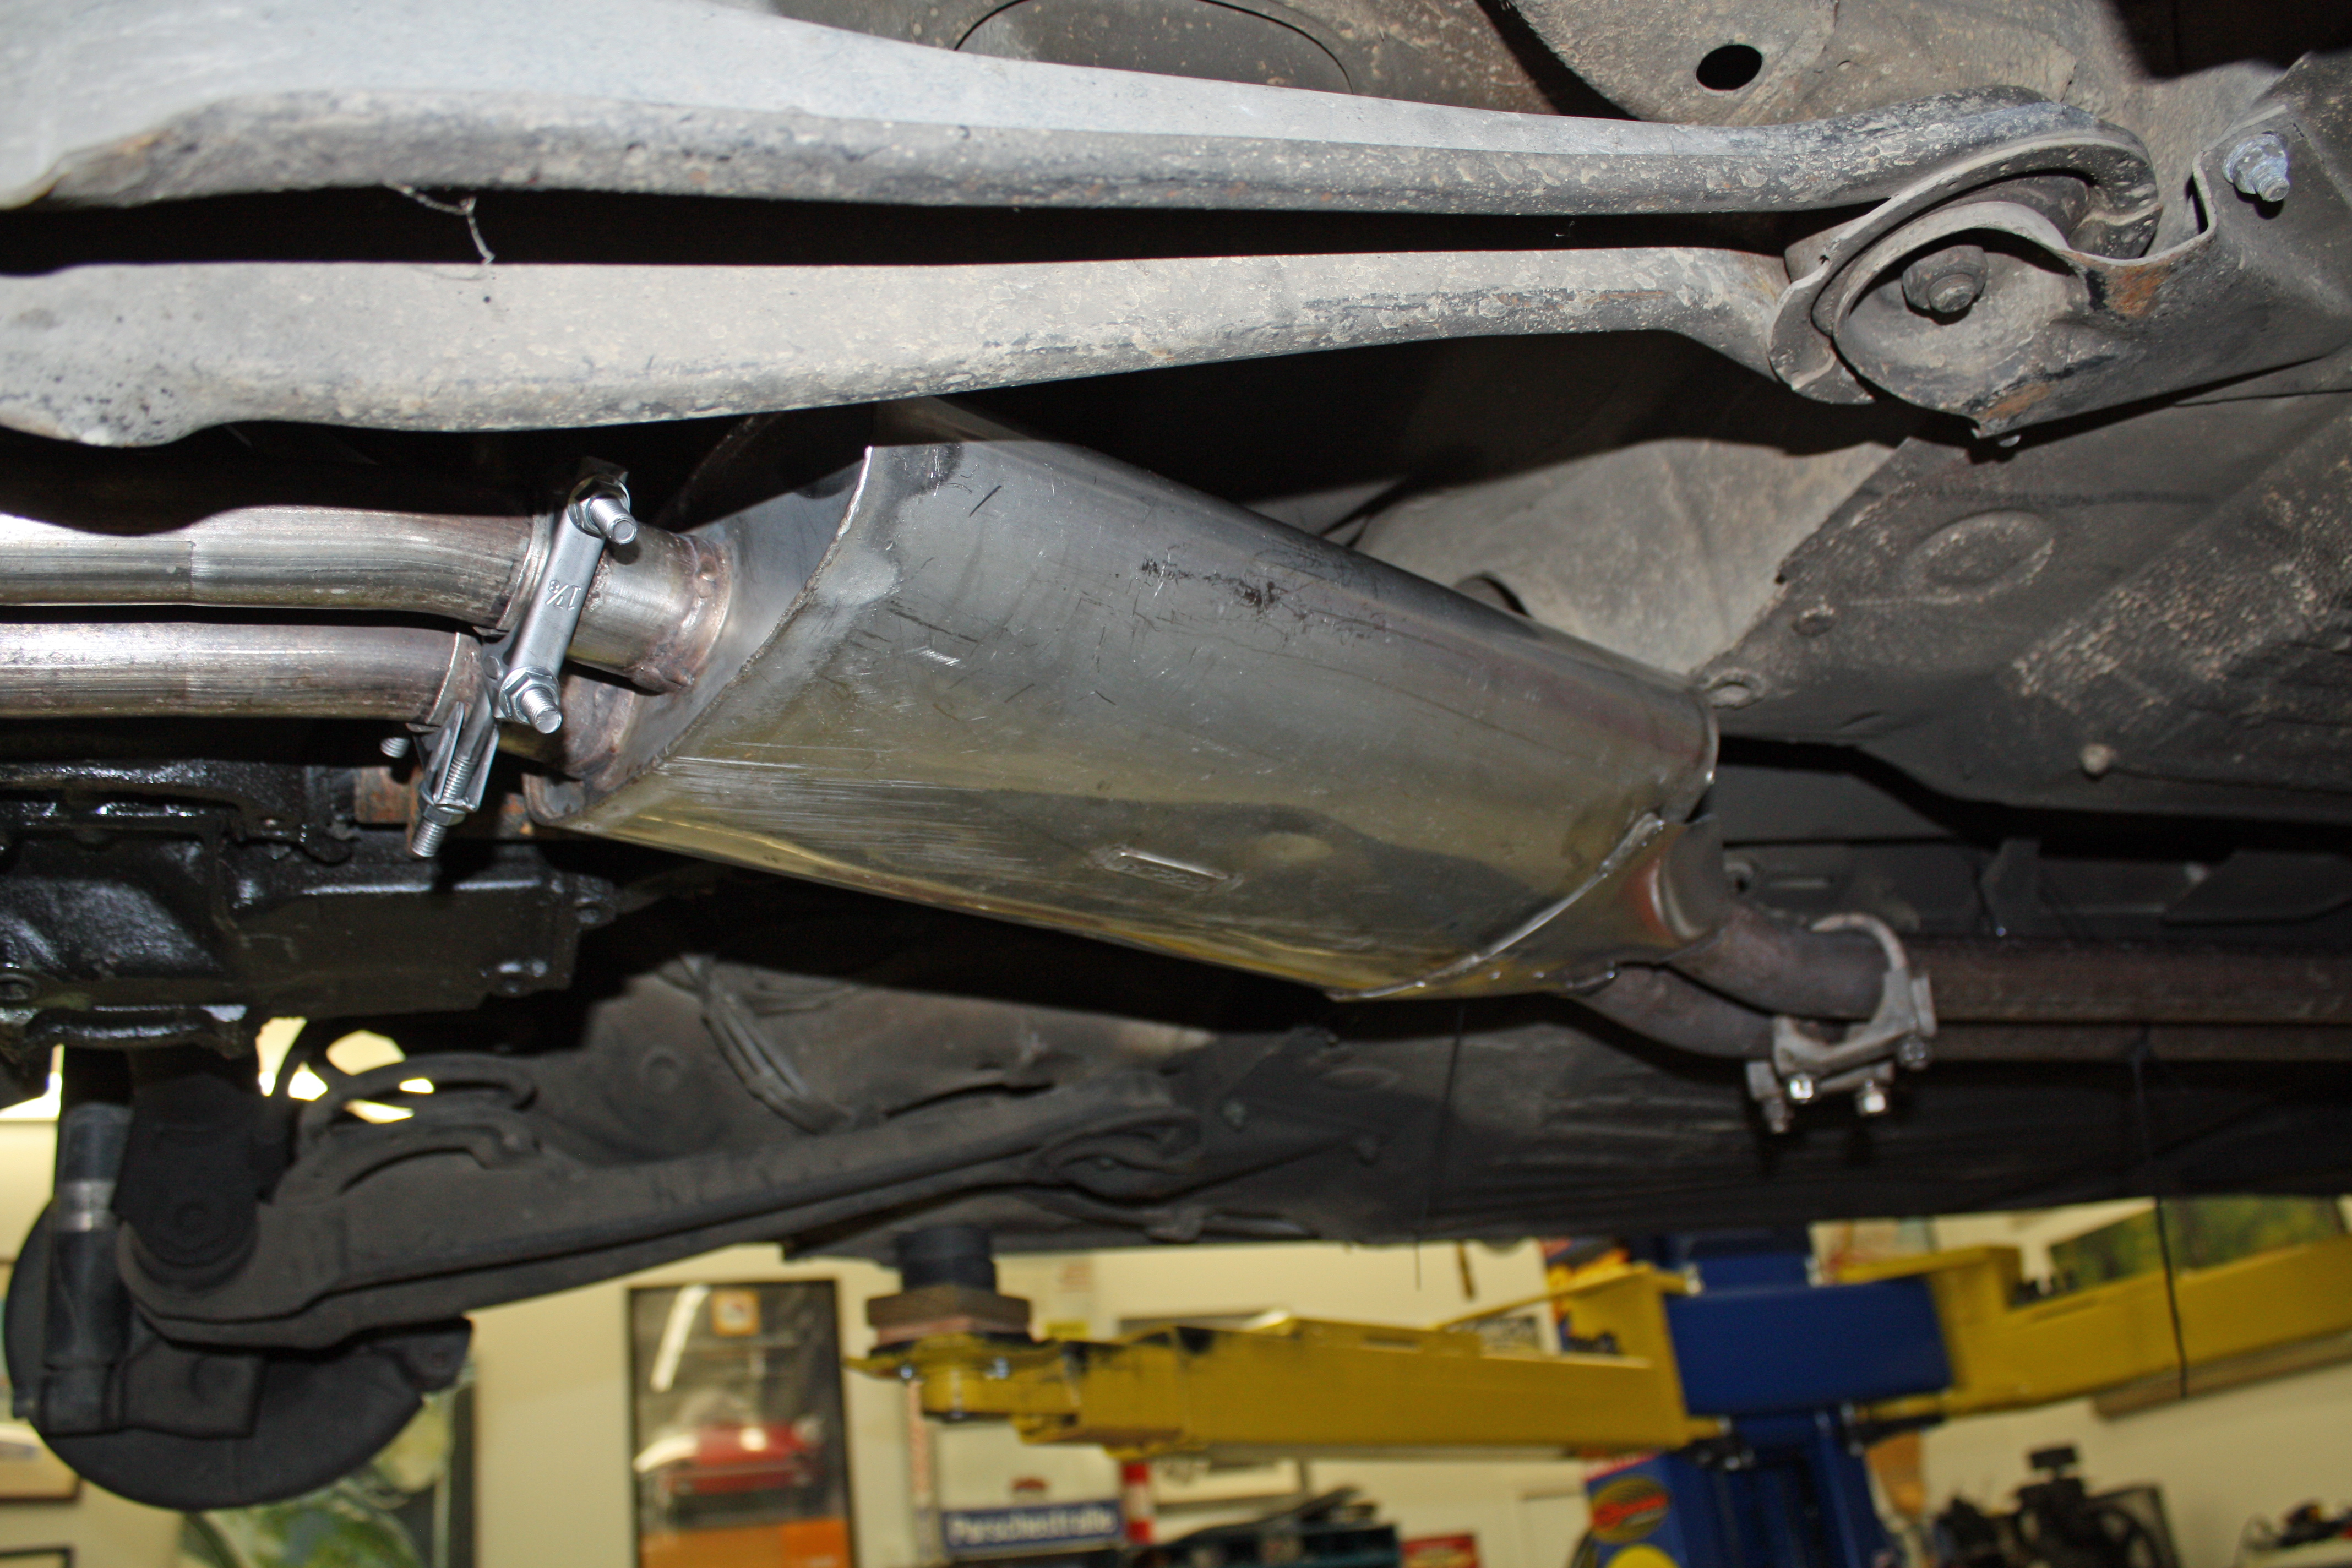
Now I was able to mount the rear muffler. To engage the rubber hangers, I used a tool designed for that job. It was a big help but getting those rubber hangers on was a challenge.

With a little shaping of the exhaust pipe openings, I was able to mount the forward muffler.
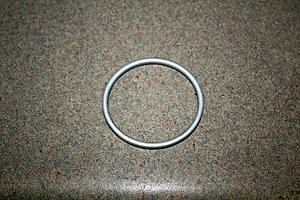
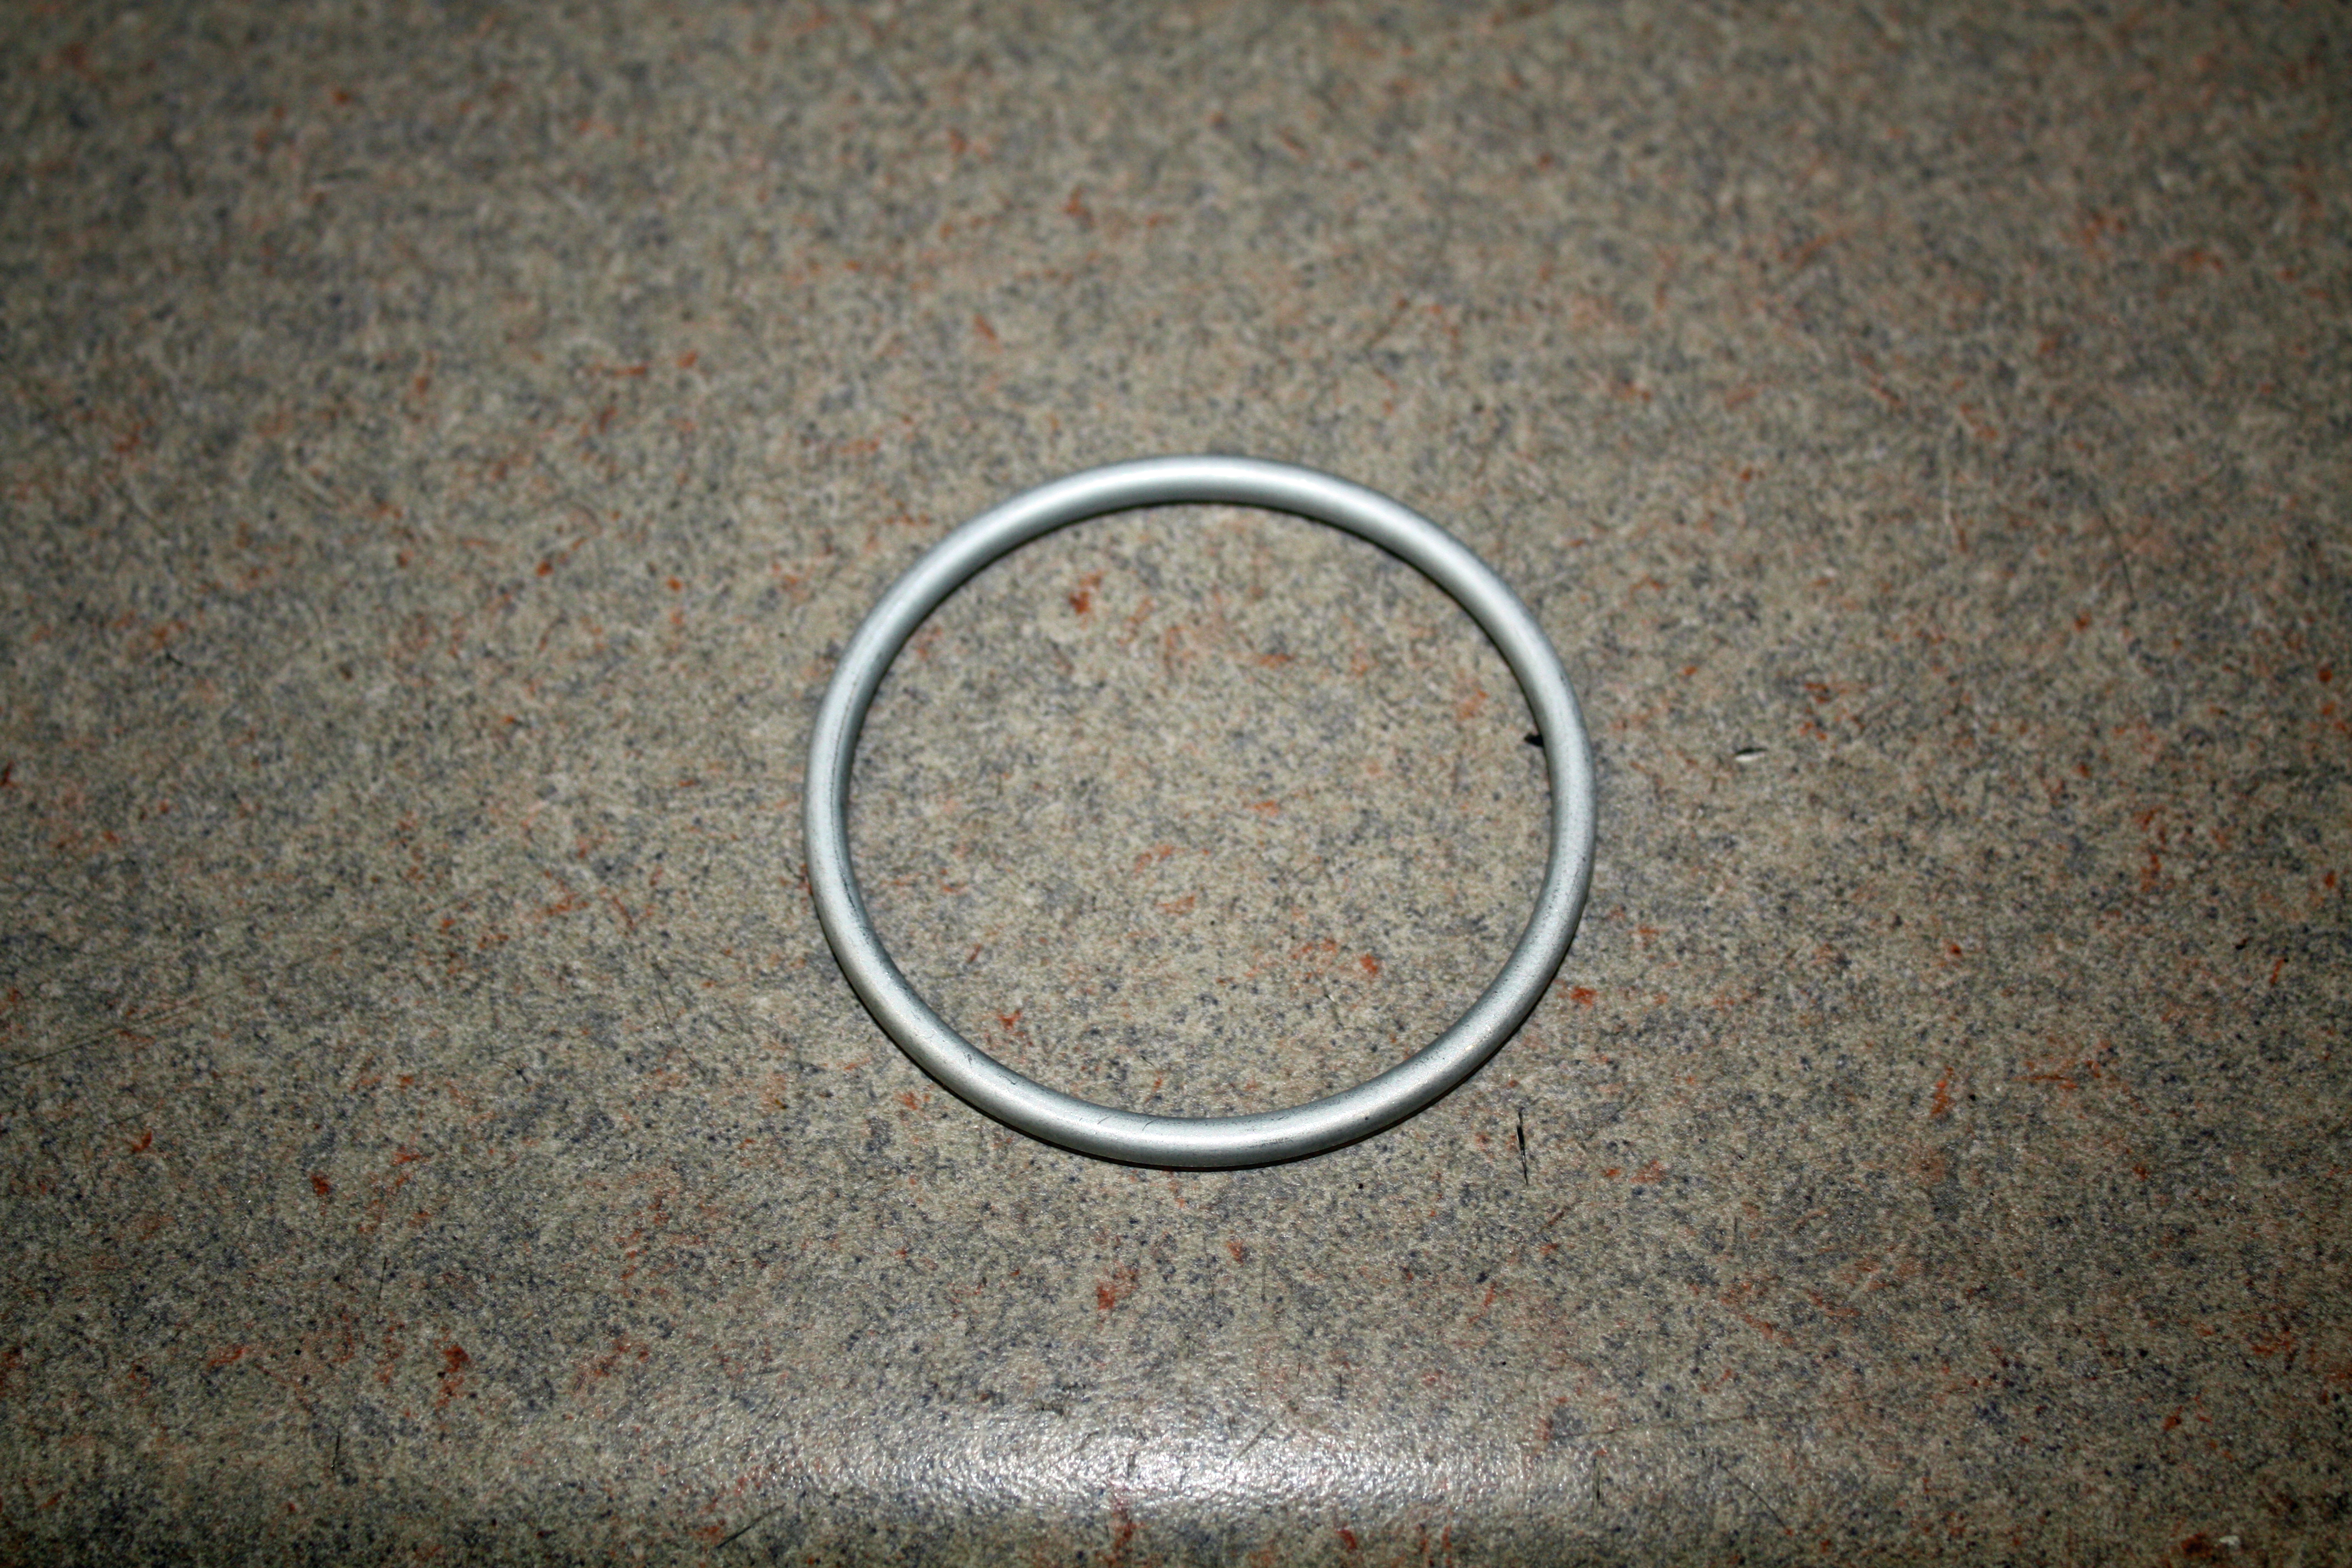
At this point I ran into a problem that stopped the work for the day. I had purchased three exhaust rings that slip over the end of the exhaust where it meets the exhaust manifold. Unbeknownst to me, there are two sizes of rings and I only had the one larger one used on the left side. I have the smaller rings on order.

I was fortunate to find a used Borla stainless steel exhaust on eBay. It is in very good shape and, being stainless, may well be the last exhaust system installed on this car.
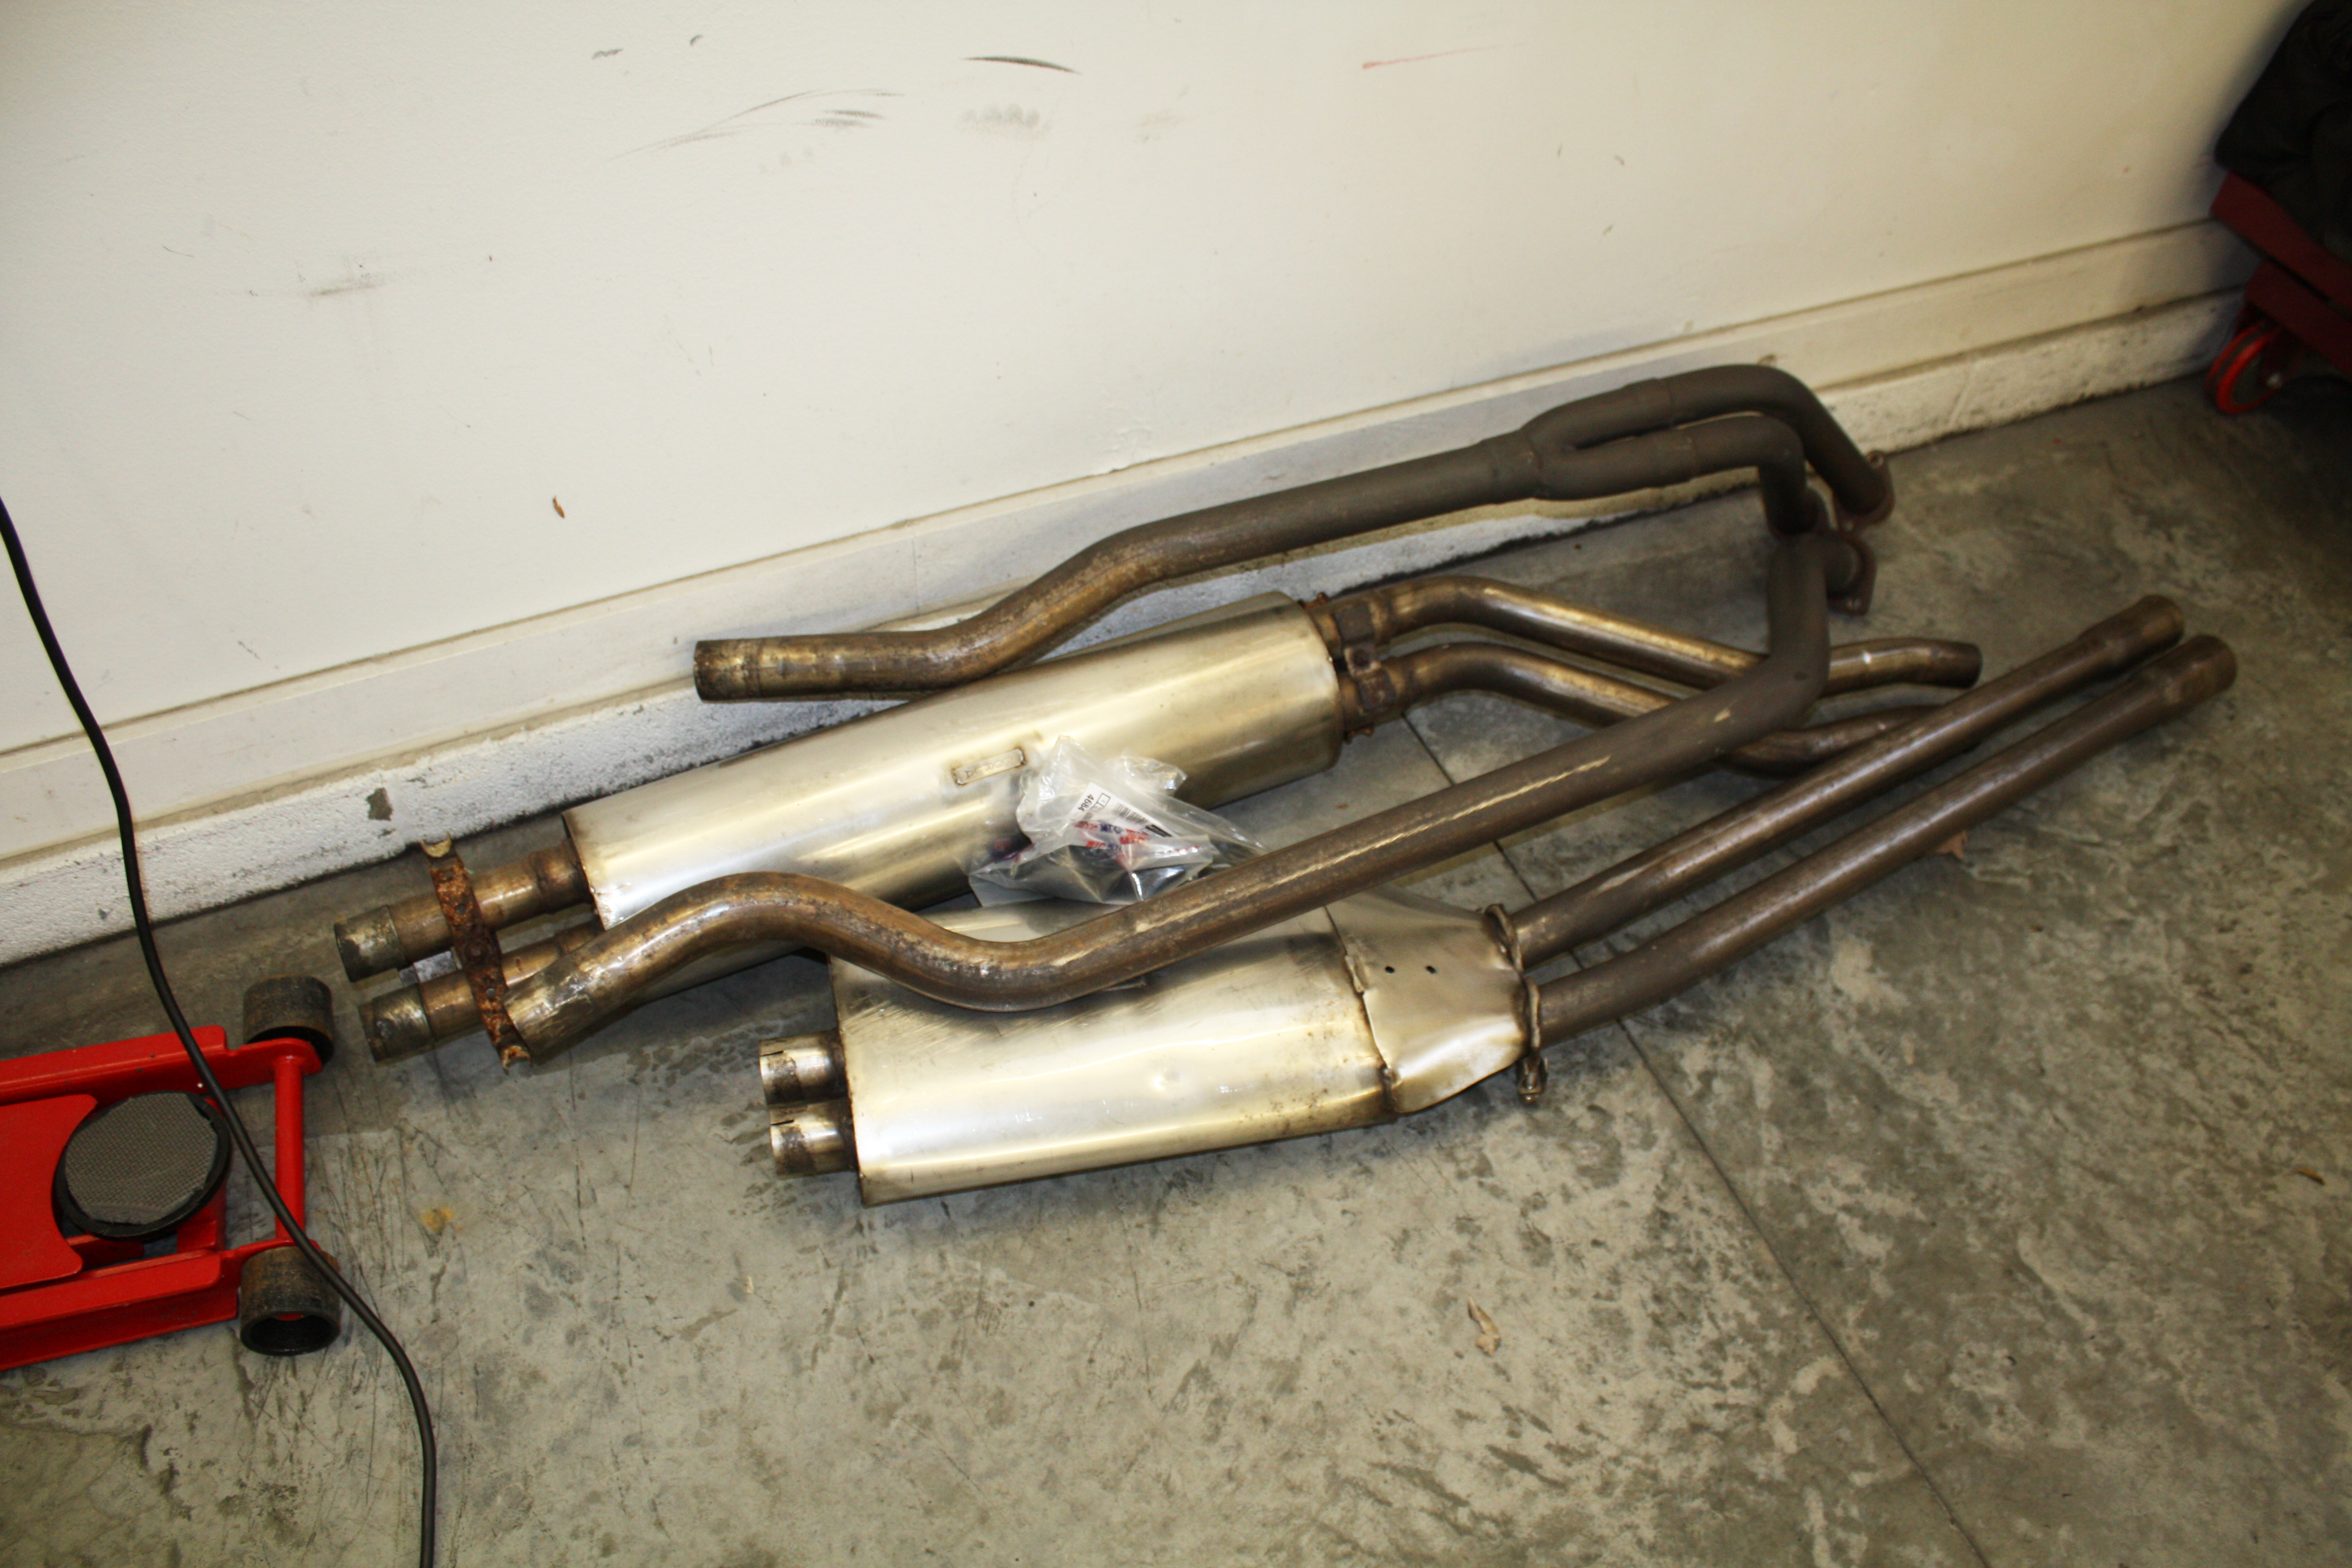

Since the exhaust was in poor shape and to make taking it off easier, I cut the system into four parts.


I had soaked the exhaust bolts at the manifold with a penetrant for a number of days. Removing the left side exhaust pipe at the manifold was fairly easy as I could get a wrench on the top side. The right side, with its two outlets, was much more difficult. I was able to get one of the four bolts out from the bottom, but I could not get a wrench on the top side of the other three bolts. So I lowered the car, removed the battery, and was able to get a 1/8" ratchet on the other three bolts from the top. I had to remove one spark plug wire.
At this point I considered calling my buddy Reese to have him hold the socket on from the top while I went underneath to loosen the other end. However, I hate to call him unless there is no other option. Kind of a pride thing here. Once I had the socket on the upper bolt, I used black duct tape to tape the ratchet wrench to either the valve cover or the battery tray. This kept the socket in place while I was engaging the other end. Worked like a charm.

When I tried to remove the rusted hanger from the Borla exhaust, the bolt broke. This same piece on the original exhaust was in good shape but was welded to the exhaust. I cut it off with my angle grinder. After bead blasting it, I used a thread chaser to clean up the threads.


Now I was able to mount the rear muffler. To engage the rubber hangers, I used a tool designed for that job. It was a big help but getting those rubber hangers on was a challenge.


With a little shaping of the exhaust pipe openings, I was able to mount the forward muffler.
At this point I ran into a problem that stopped the work for the day. I had purchased three exhaust rings that slip over the end of the exhaust where it meets the exhaust manifold. Unbeknownst to me, there are two sizes of rings and I only had the one larger one used on the left side. I have the smaller rings on order.
 02-15-2017, 11:20 AM
#28
Member
Thread Starter
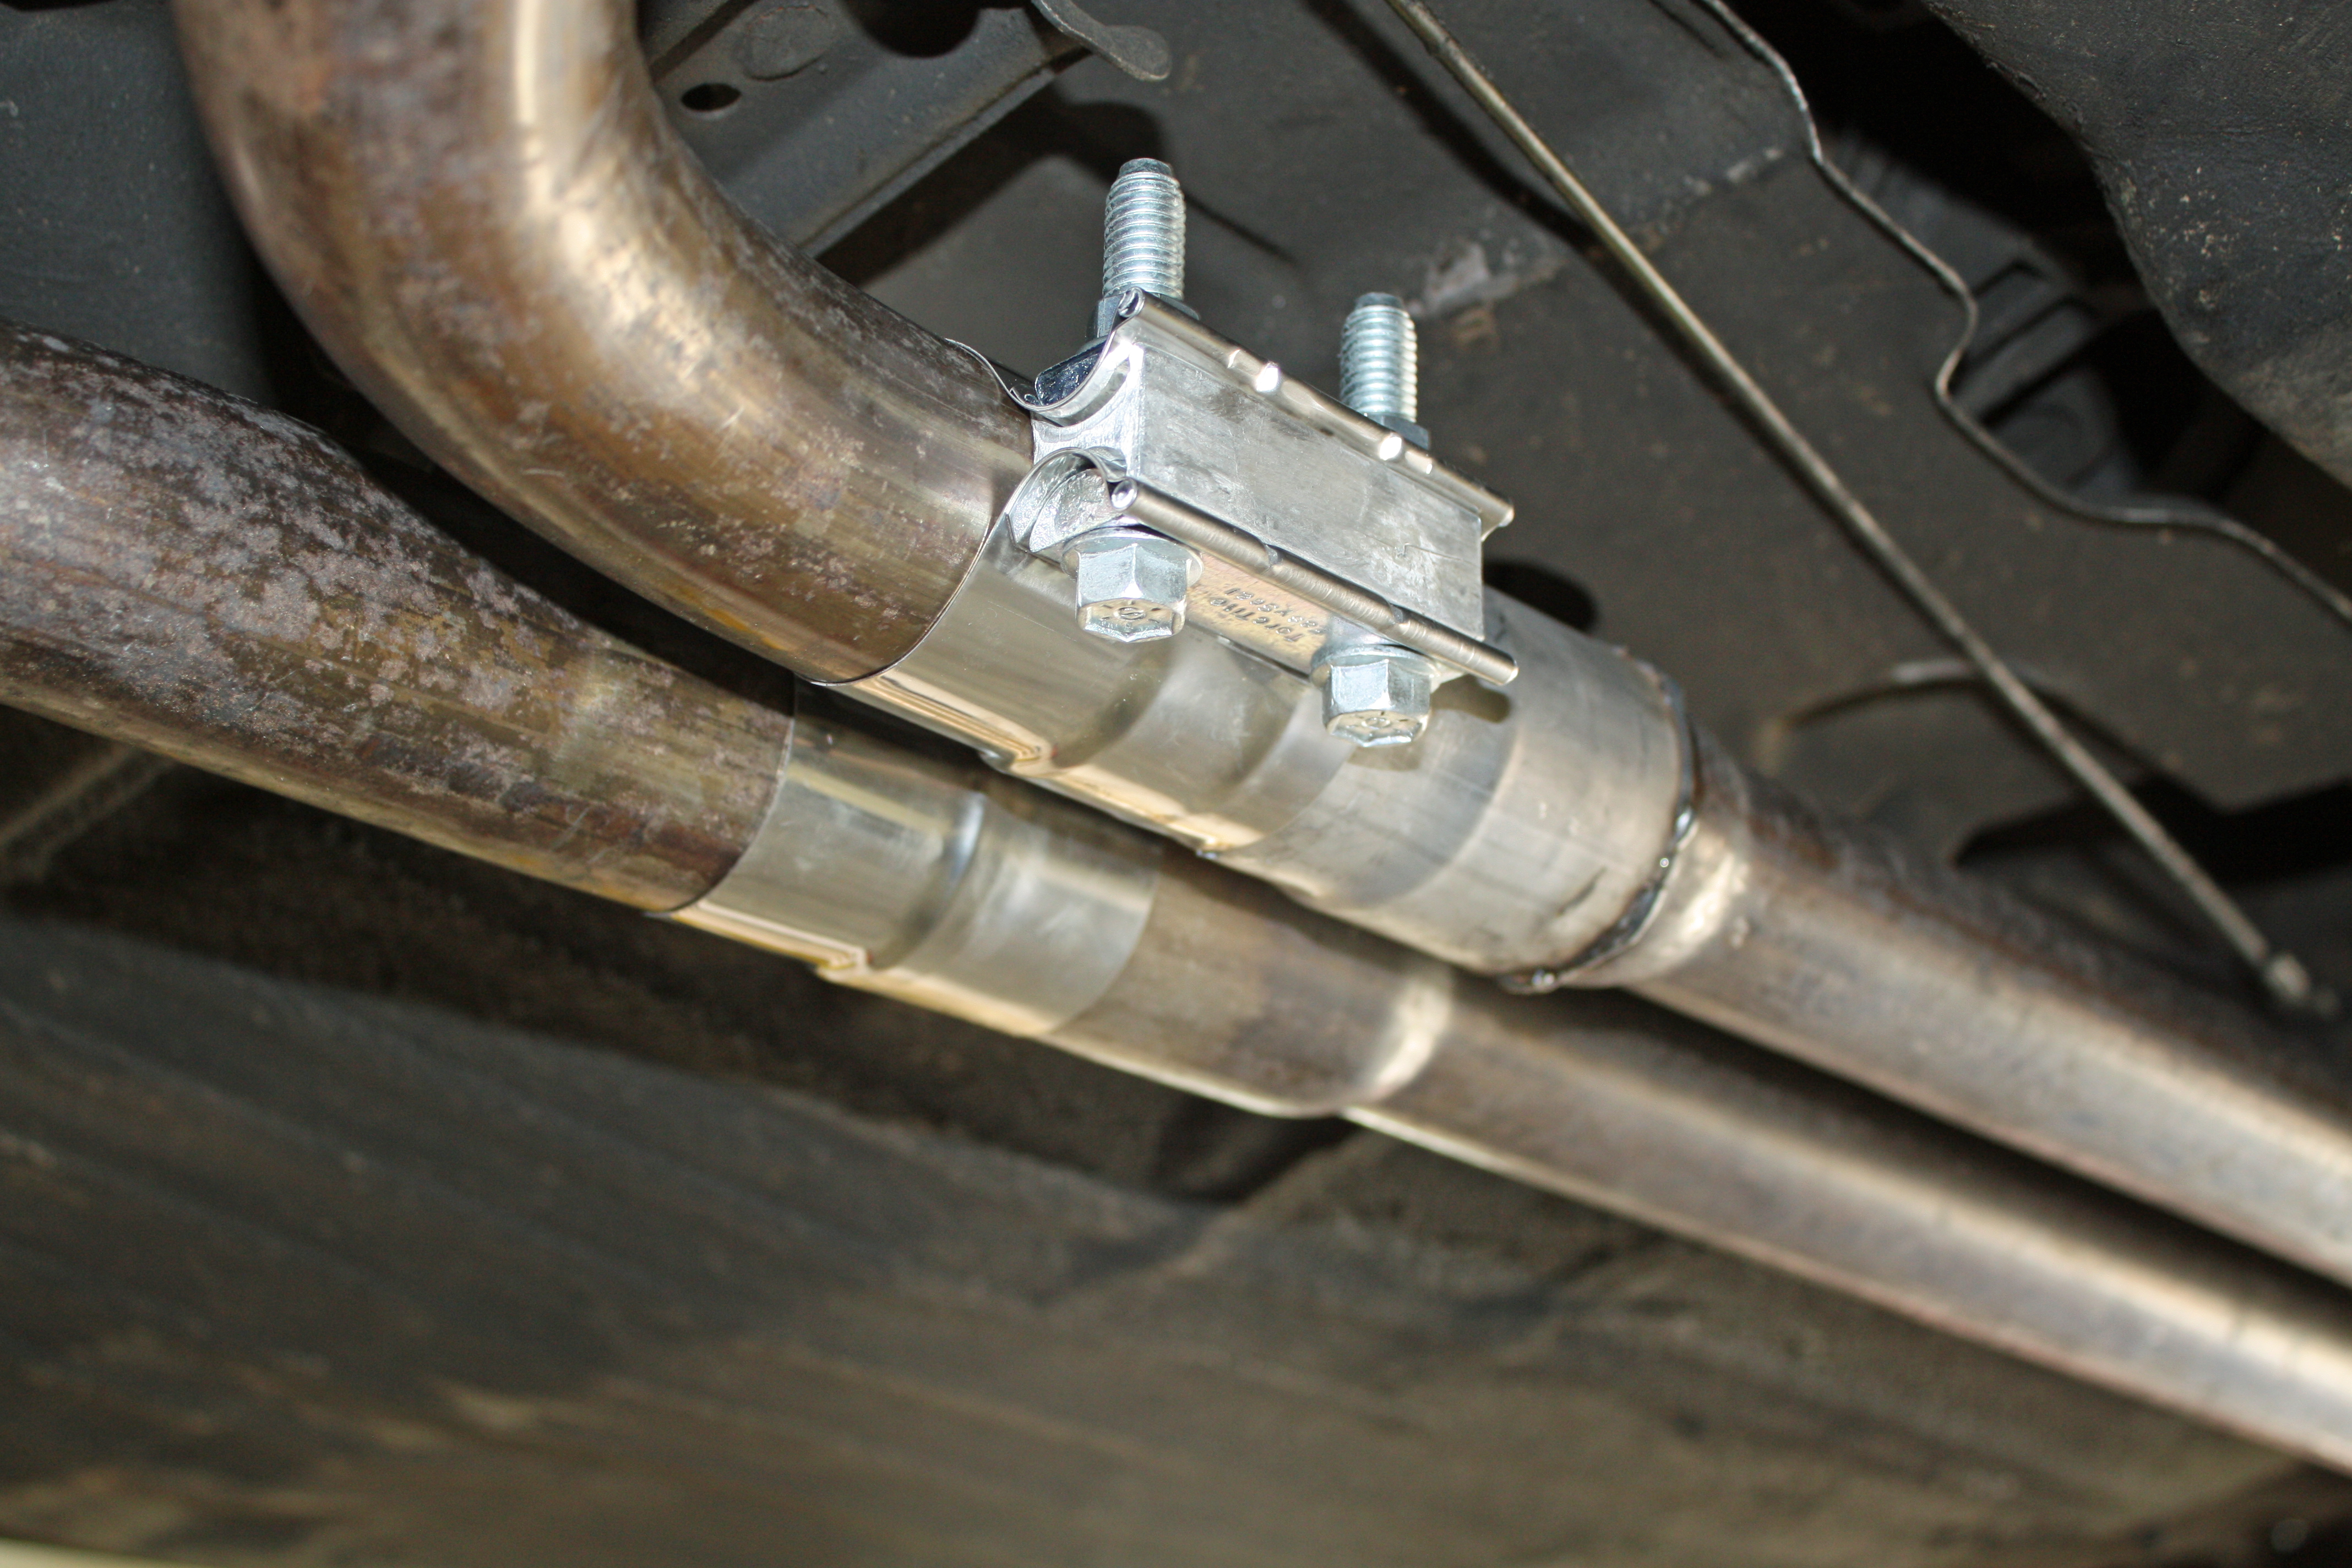
The exhaust sealing ring arrived and I was able to complete the exhaust installation. I had an exhaust leak at the connection of the front pipes to the forward muffler. To solve that issue I ordered a a pair of band clamps from Summit.

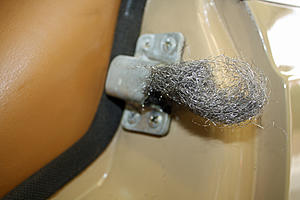
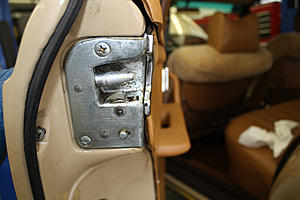
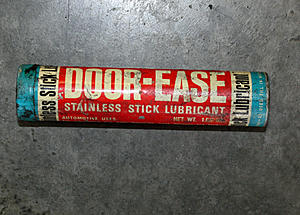
When I bought the car the left rear door would not open. After doing some searches, I discovered the cause is that the either the pin, its receptacle or both are corroded. I was fortunate in that by putting my shoulder against the interior of the door while holding the door handle open, I was able to pop open the door. I soaked some steel wool in penetrant and used that to clean up the receptacle and the pin. I also sprayed penetrant into the latch. I then lubricated the latch and the hinges. I performed the same procedure on the other three doors.
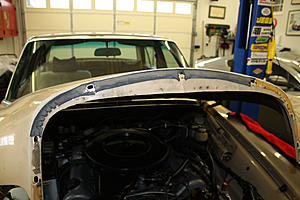
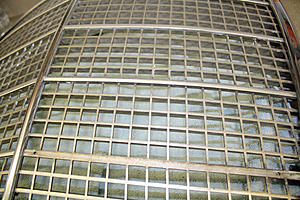
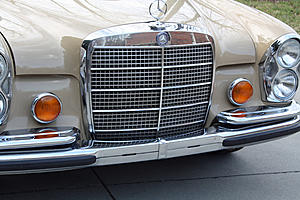
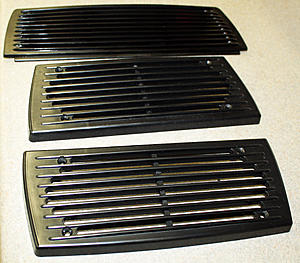
Now that I had the hood pad installed, I could re-attach the grill. I removed the old seal and glue. The new seal had an adhesive back so it was simple to install.
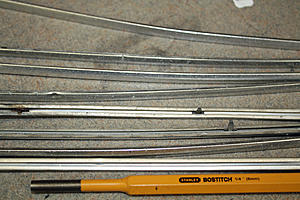
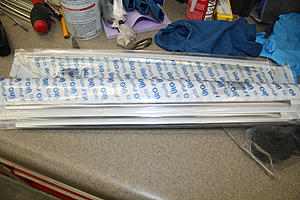
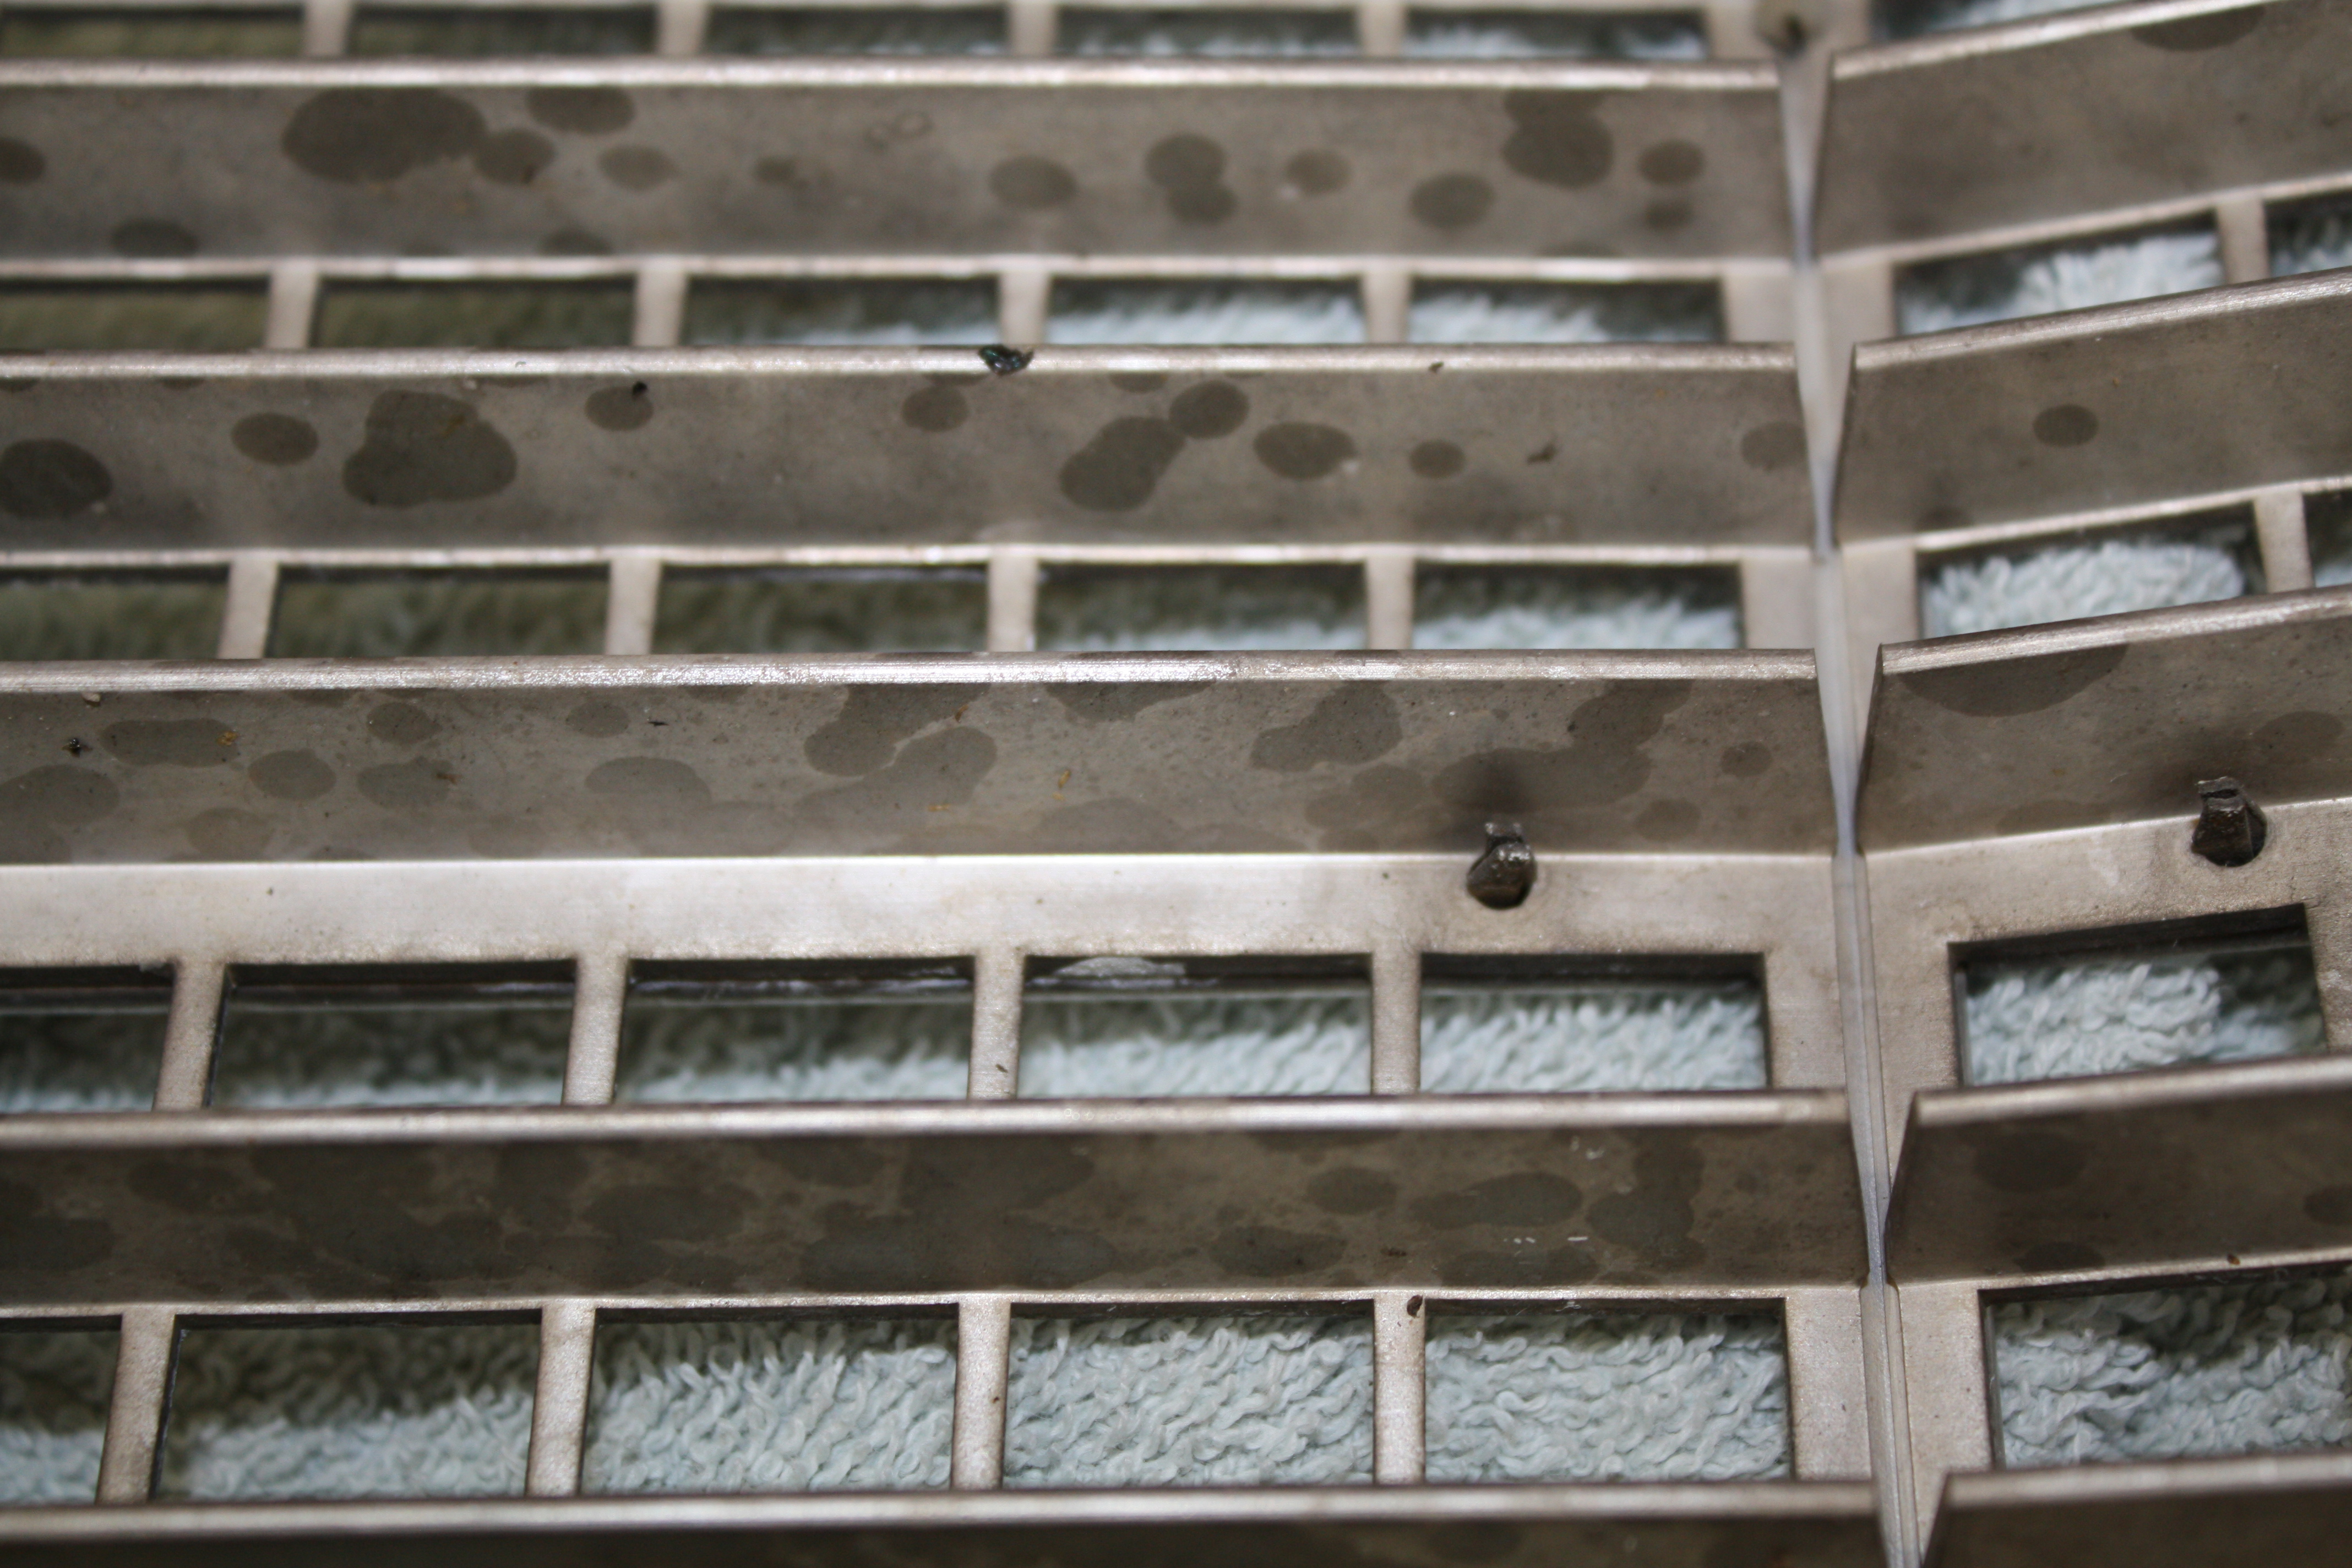
The horizontal slats on the grill had a sandblasted look so I replaced them. There are retaining pins accessible from the back. I used a punch on the pins to remove the old slats. The new ones were generic and not cut to length. Since they were thin aluminum, I could easily cut them with a nipper. I then used a pliers to compress the outer edge so it would slip under the grill. After inserting the new retainers, pushing down on the outer edge of the grill provided enough room to insert the flattened end of the slat.

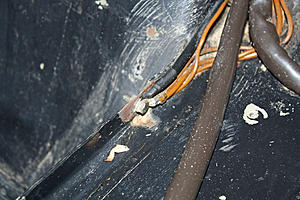
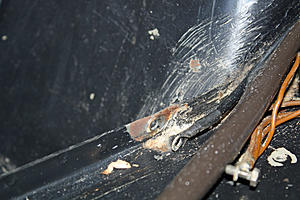
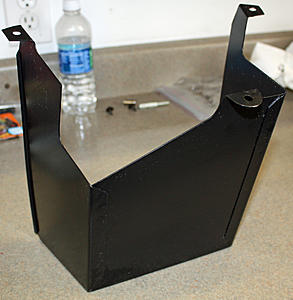
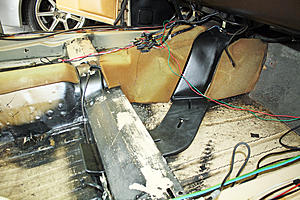
While cleaning up the trunk I had removed the wire and hose covers on each side. The one of the left was plastic while the right one was metal. It has some slight surface rust so I bead blasted and painted it. Under the left side was a common ground location. I removed the fastener, sanded down the metal and the wire ends and then re-installed everything.

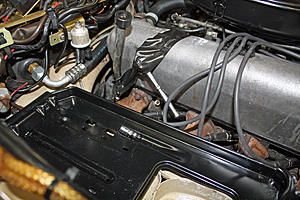
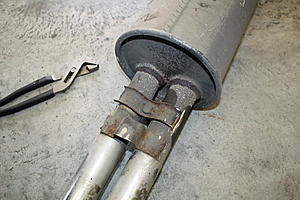
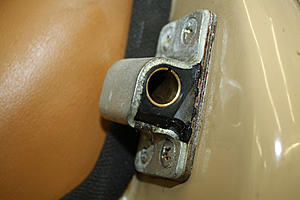
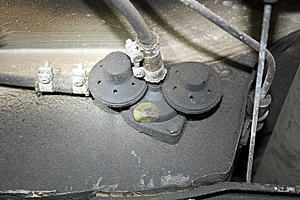
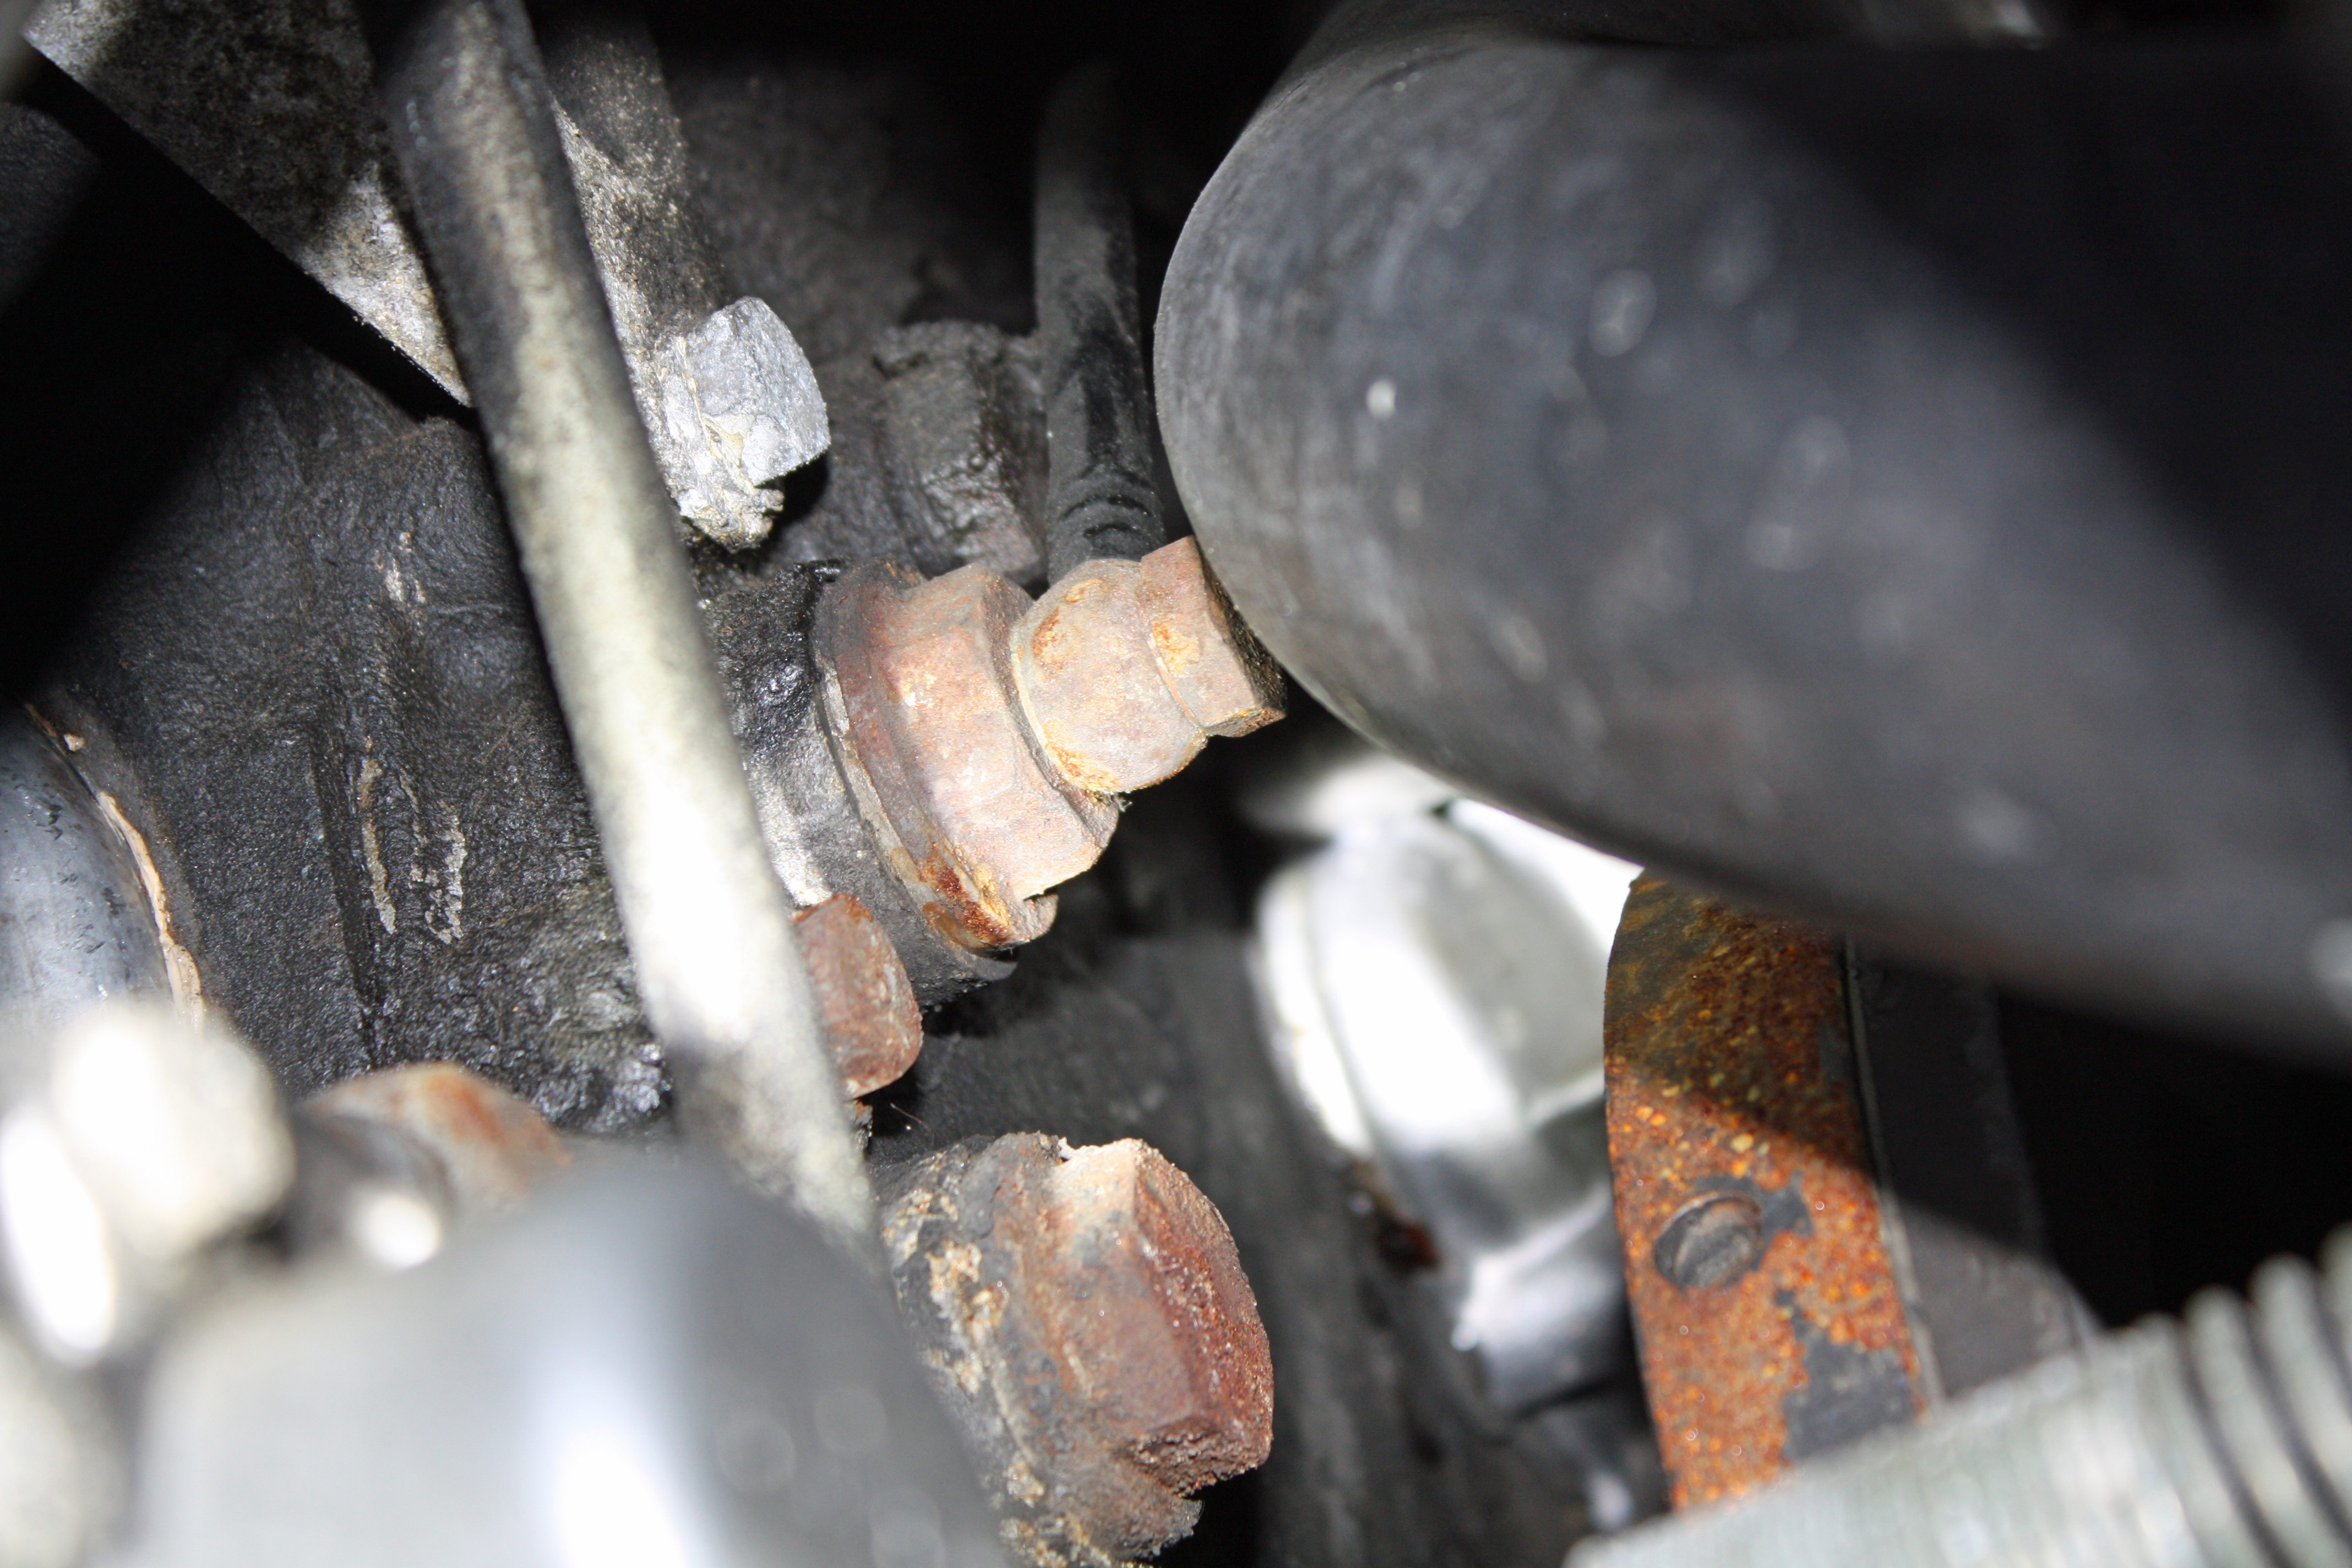
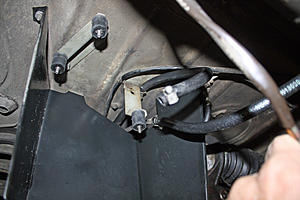
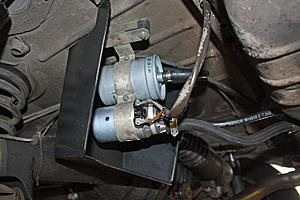
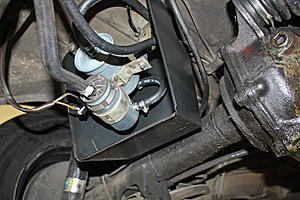
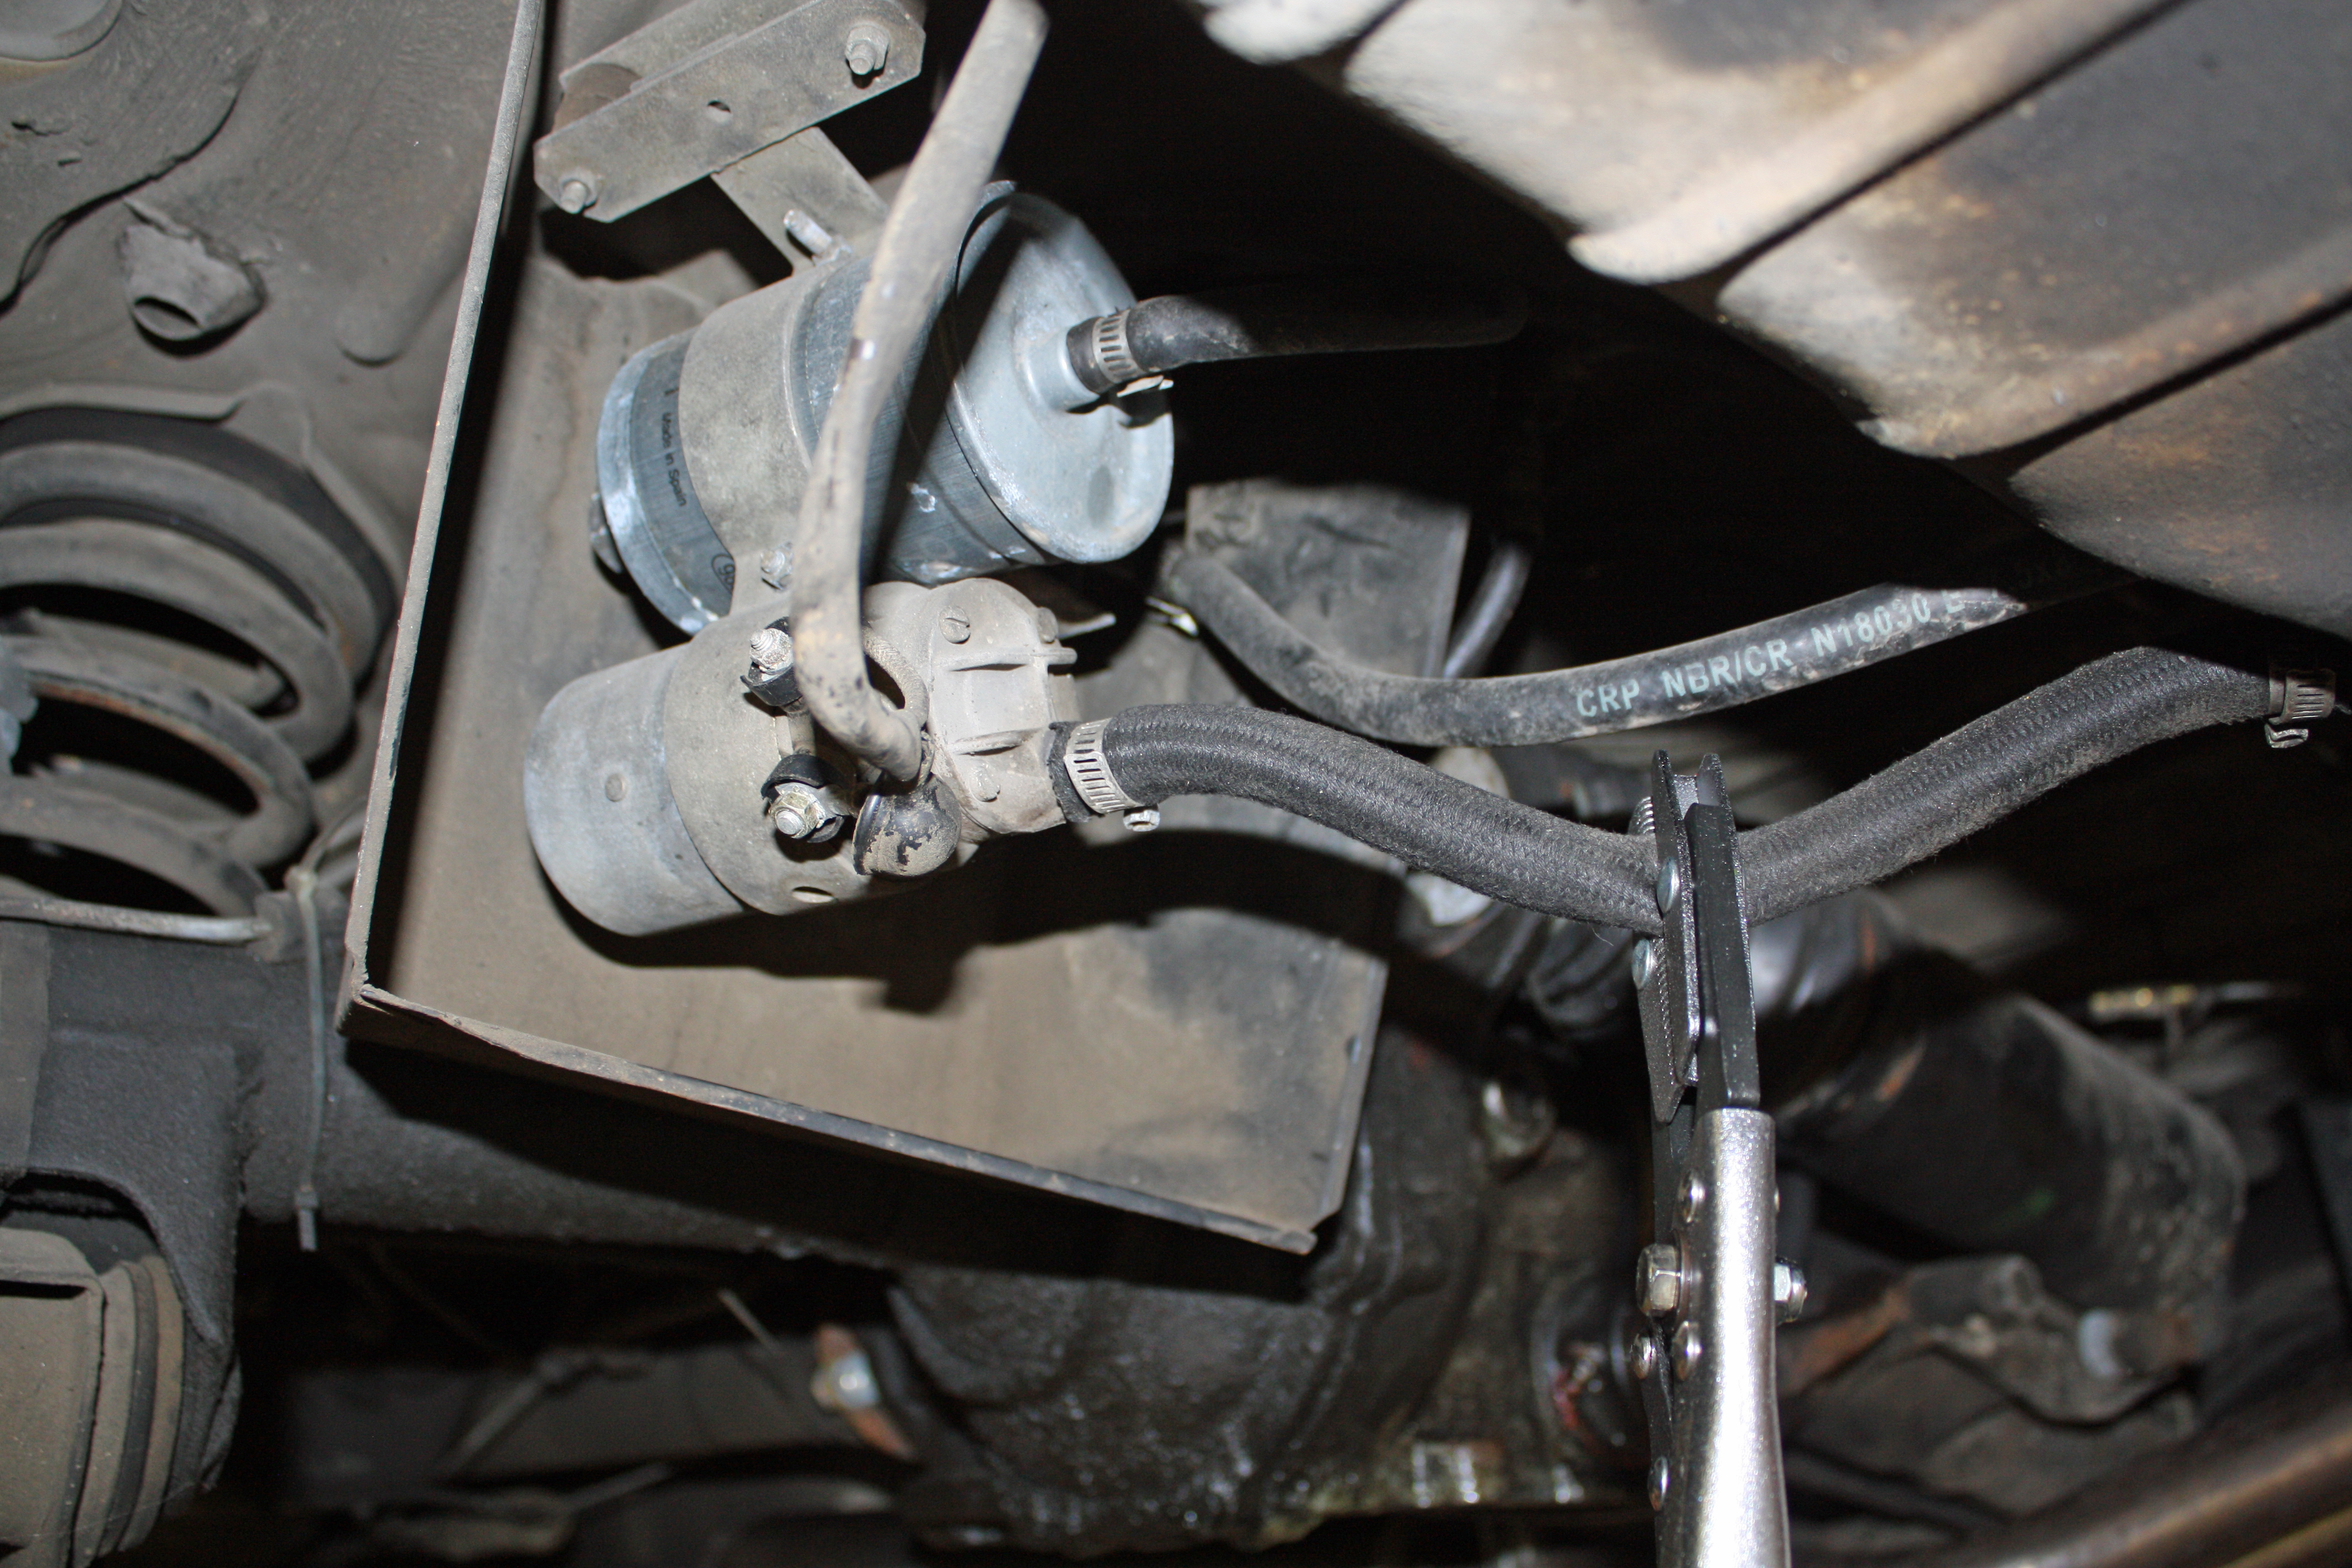
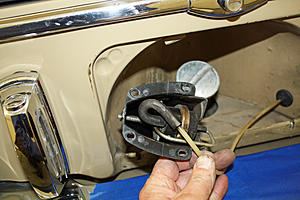
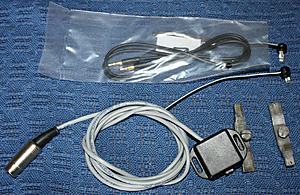
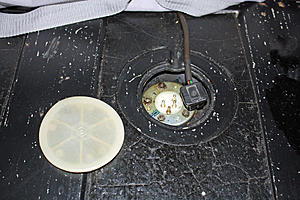
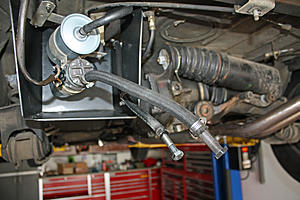
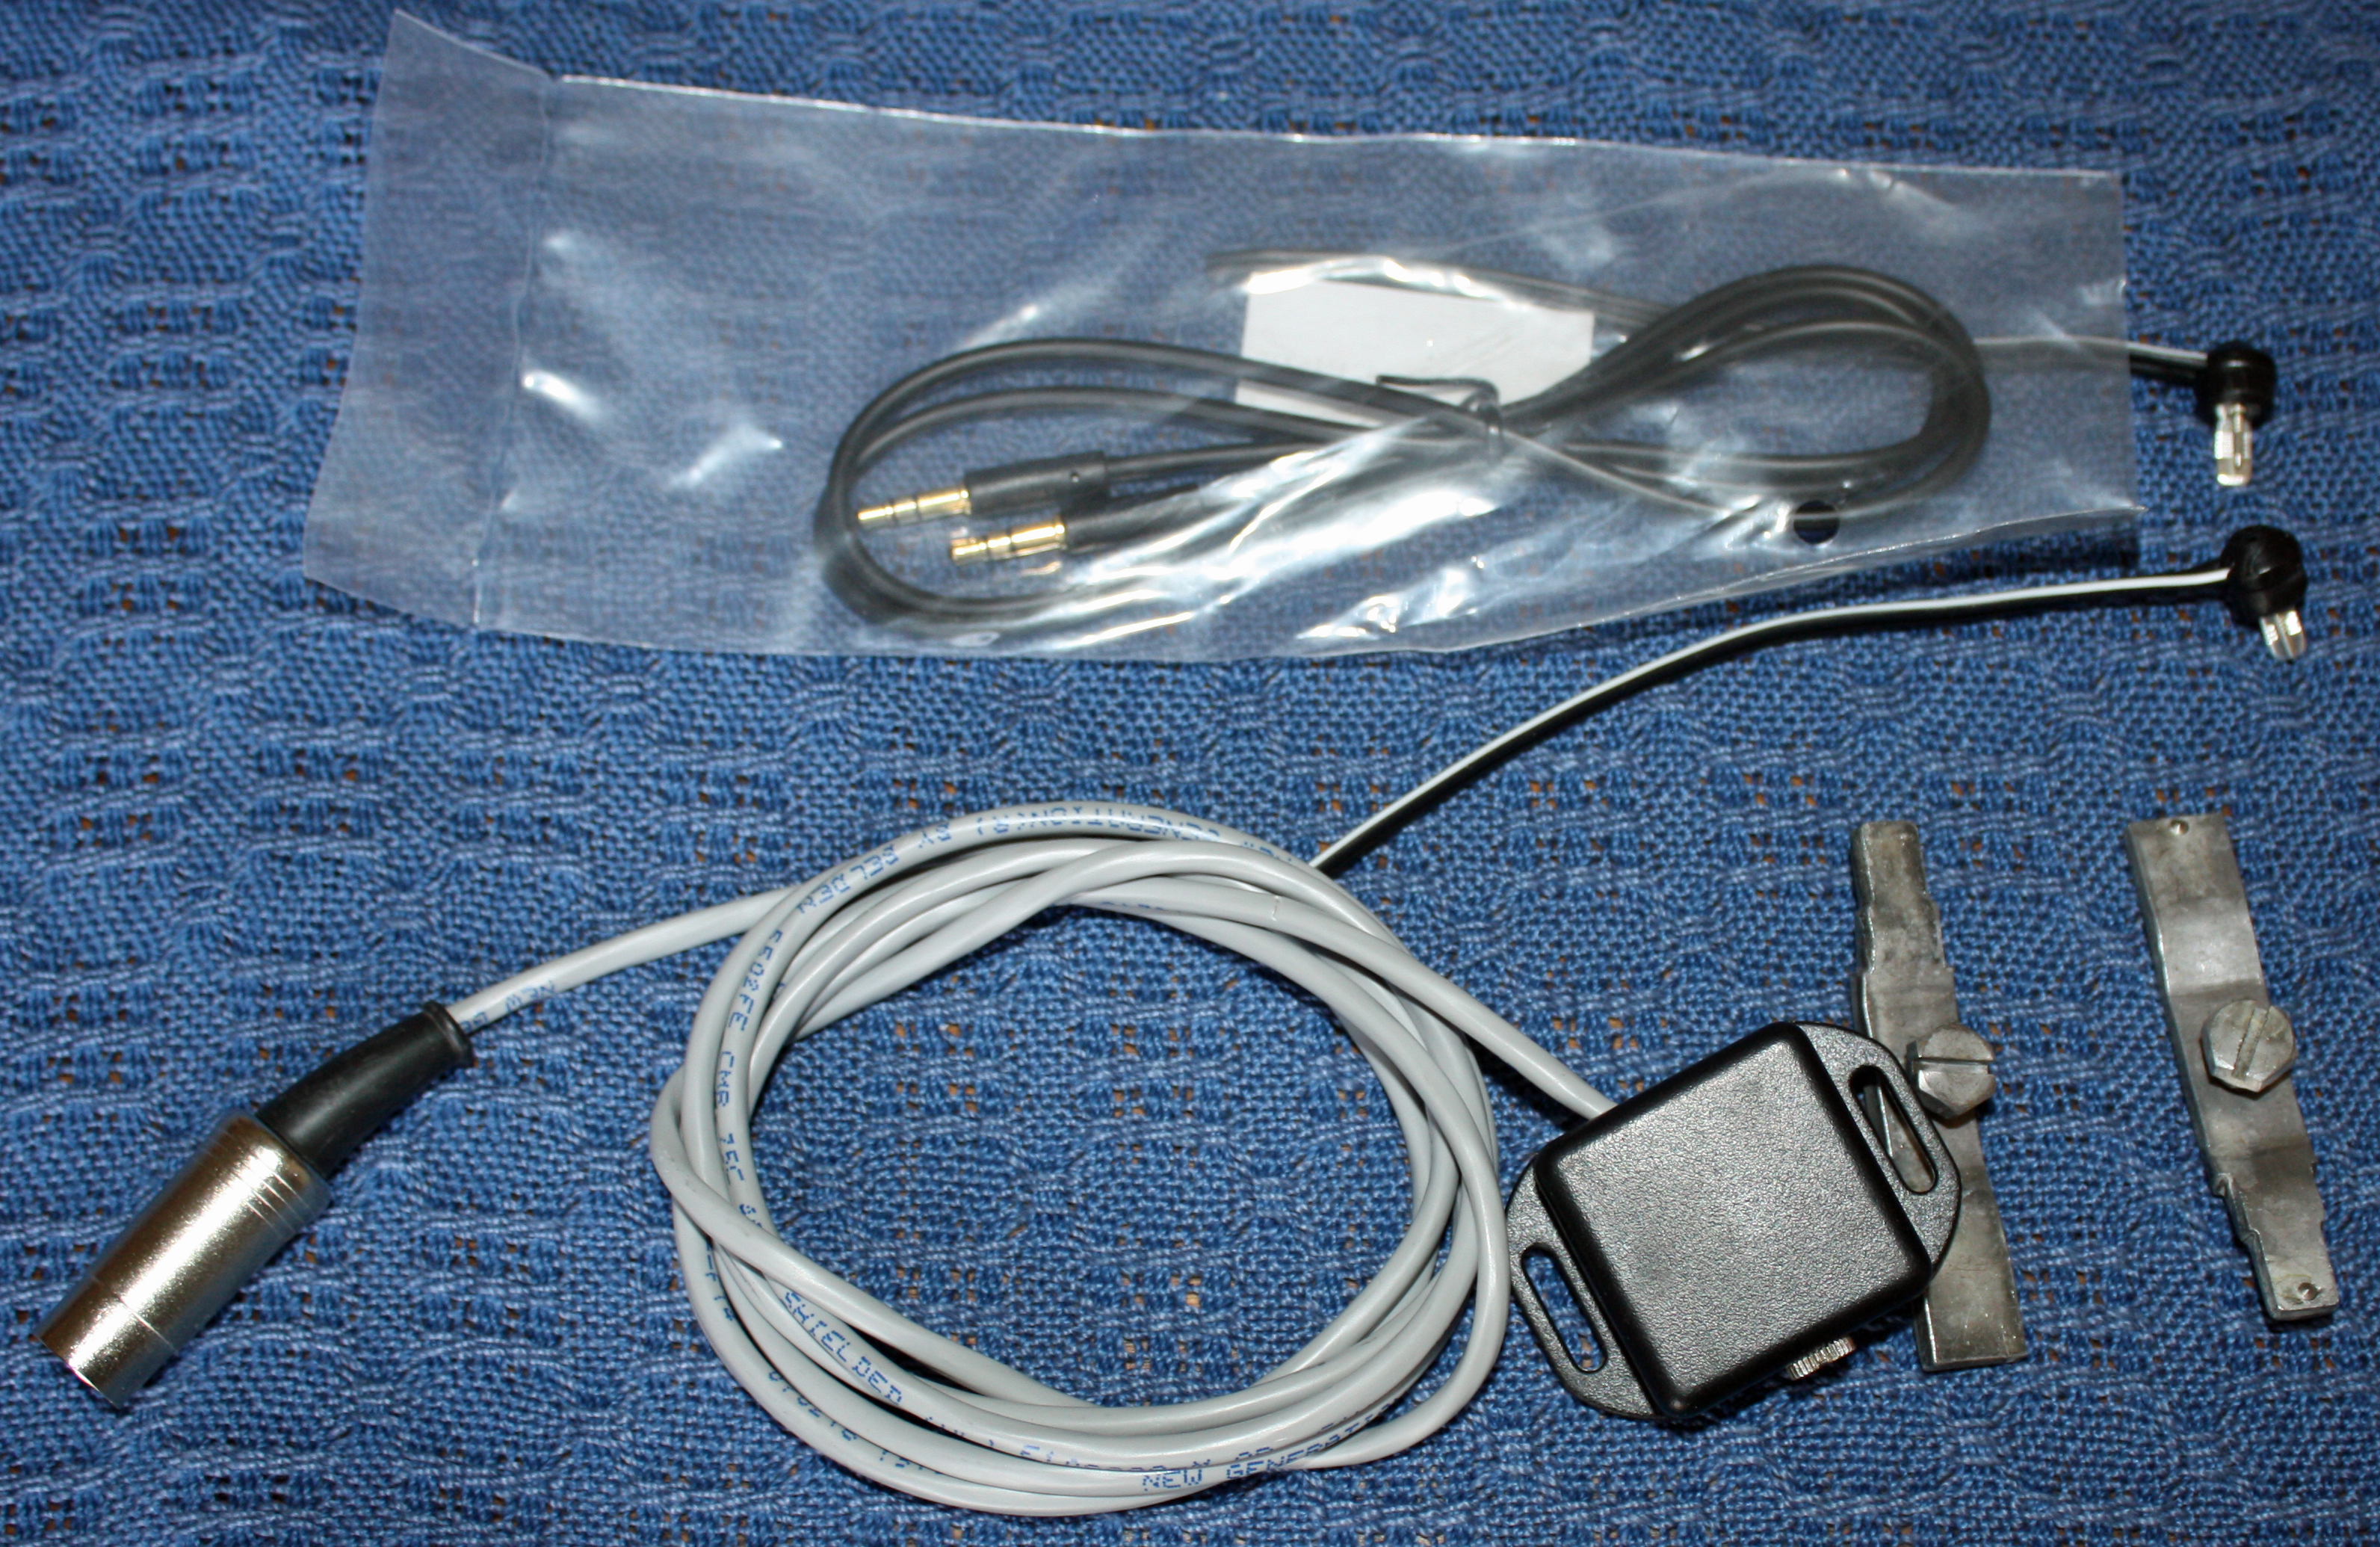
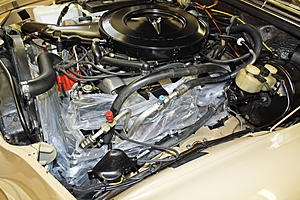
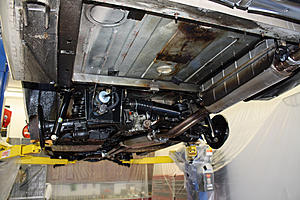
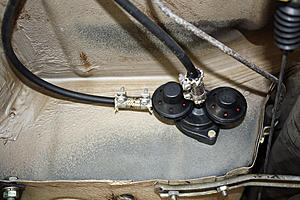
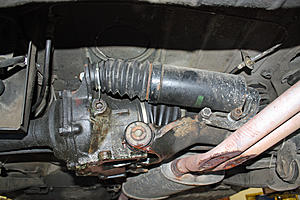
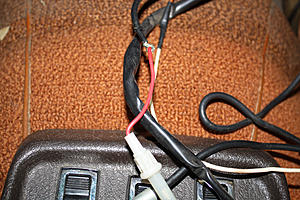
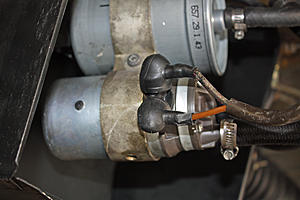
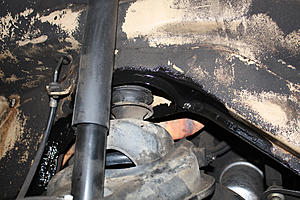
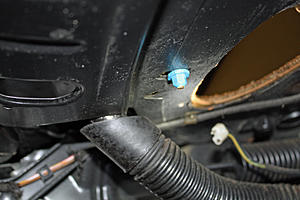
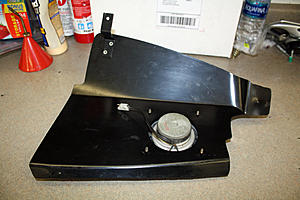
I would like to know what these two items are and their function. The first one is at the rear of the car and has fuel lines connected. The second photo is of a part mounted on the right front of the motor. There is a line that connects these two parts.

Yesterday I polished the car with my orbital buffer and 3M Ultra Fine Polish. Some paint residue came off on my buffing pad. I discovered that the hood and front fenders still have single stage paint while the rest of the car has a base/clear finish. After polishing, I waxed the car.

When I bought the car the left rear door would not open. After doing some searches, I discovered the cause is that the either the pin, its receptacle or both are corroded. I was fortunate in that by putting my shoulder against the interior of the door while holding the door handle open, I was able to pop open the door. I soaked some steel wool in penetrant and used that to clean up the receptacle and the pin. I also sprayed penetrant into the latch. I then lubricated the latch and the hinges. I performed the same procedure on the other three doors.


Now that I had the hood pad installed, I could re-attach the grill. I removed the old seal and glue. The new seal had an adhesive back so it was simple to install.


The horizontal slats on the grill had a sandblasted look so I replaced them. There are retaining pins accessible from the back. I used a punch on the pins to remove the old slats. The new ones were generic and not cut to length. Since they were thin aluminum, I could easily cut them with a nipper. I then used a pliers to compress the outer edge so it would slip under the grill. After inserting the new retainers, pushing down on the outer edge of the grill provided enough room to insert the flattened end of the slat.


While cleaning up the trunk I had removed the wire and hose covers on each side. The one of the left was plastic while the right one was metal. It has some slight surface rust so I bead blasted and painted it. Under the left side was a common ground location. I removed the fastener, sanded down the metal and the wire ends and then re-installed everything.


I would like to know what these two items are and their function. The first one is at the rear of the car and has fuel lines connected. The second photo is of a part mounted on the right front of the motor. There is a line that connects these two parts.

Yesterday I polished the car with my orbital buffer and 3M Ultra Fine Polish. Some paint residue came off on my buffing pad. I discovered that the hood and front fenders still have single stage paint while the rest of the car has a base/clear finish. After polishing, I waxed the car.
 02-15-2017, 06:42 PM
#29
Member
Thread Starter
This past Sunday my wife and I drove about 35 miles to visit our son's family in the Mercedes. The car was very low on fuel when we left so we filled up prior to leaving town. The car ran like a top on the way over. After showing off the car and visiting for about a half hour, we all piled into the 4.5 to go to lunch. This is only the second time I have tried to start it when it was warm and both times it was a hard start. I had read in the manual that it should not be given gas on a cold start but could be given gas on a warm start. We finally got it started but, with my son driving, the engine was not running like it should on the way to lunch.
After lunch, we again had a hard time starting it but it eventually caught. This time it ran more like normal on the way back to my son's house. Because of the difficulty starting it, I did not shut it off while we said our goodbye's. As we pulled out of the driveway, it was sputtering and not running on all cylinders. It progressively got worse until, about two miles away from our son's house, it would start but then die as soon as you gave it gas. With help from a local homeowner, we managed to push it into a driveway. My son came over to see if we could get it going but to no avail. We both conjectured that it was a clogged fuel filter. Having run the tank very low may have contributed to that issue.
We called Triple A who arrived about an hour and a half later. Upon his arrival, the car started easily and I was able to line it up for the transporter. The hauler unloaded the car in my driveway going the wrong direction. Again the car started easily and I was able to drive it onto the road, turn it around and drive it into the garage.
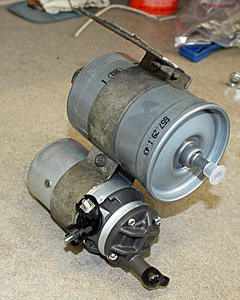
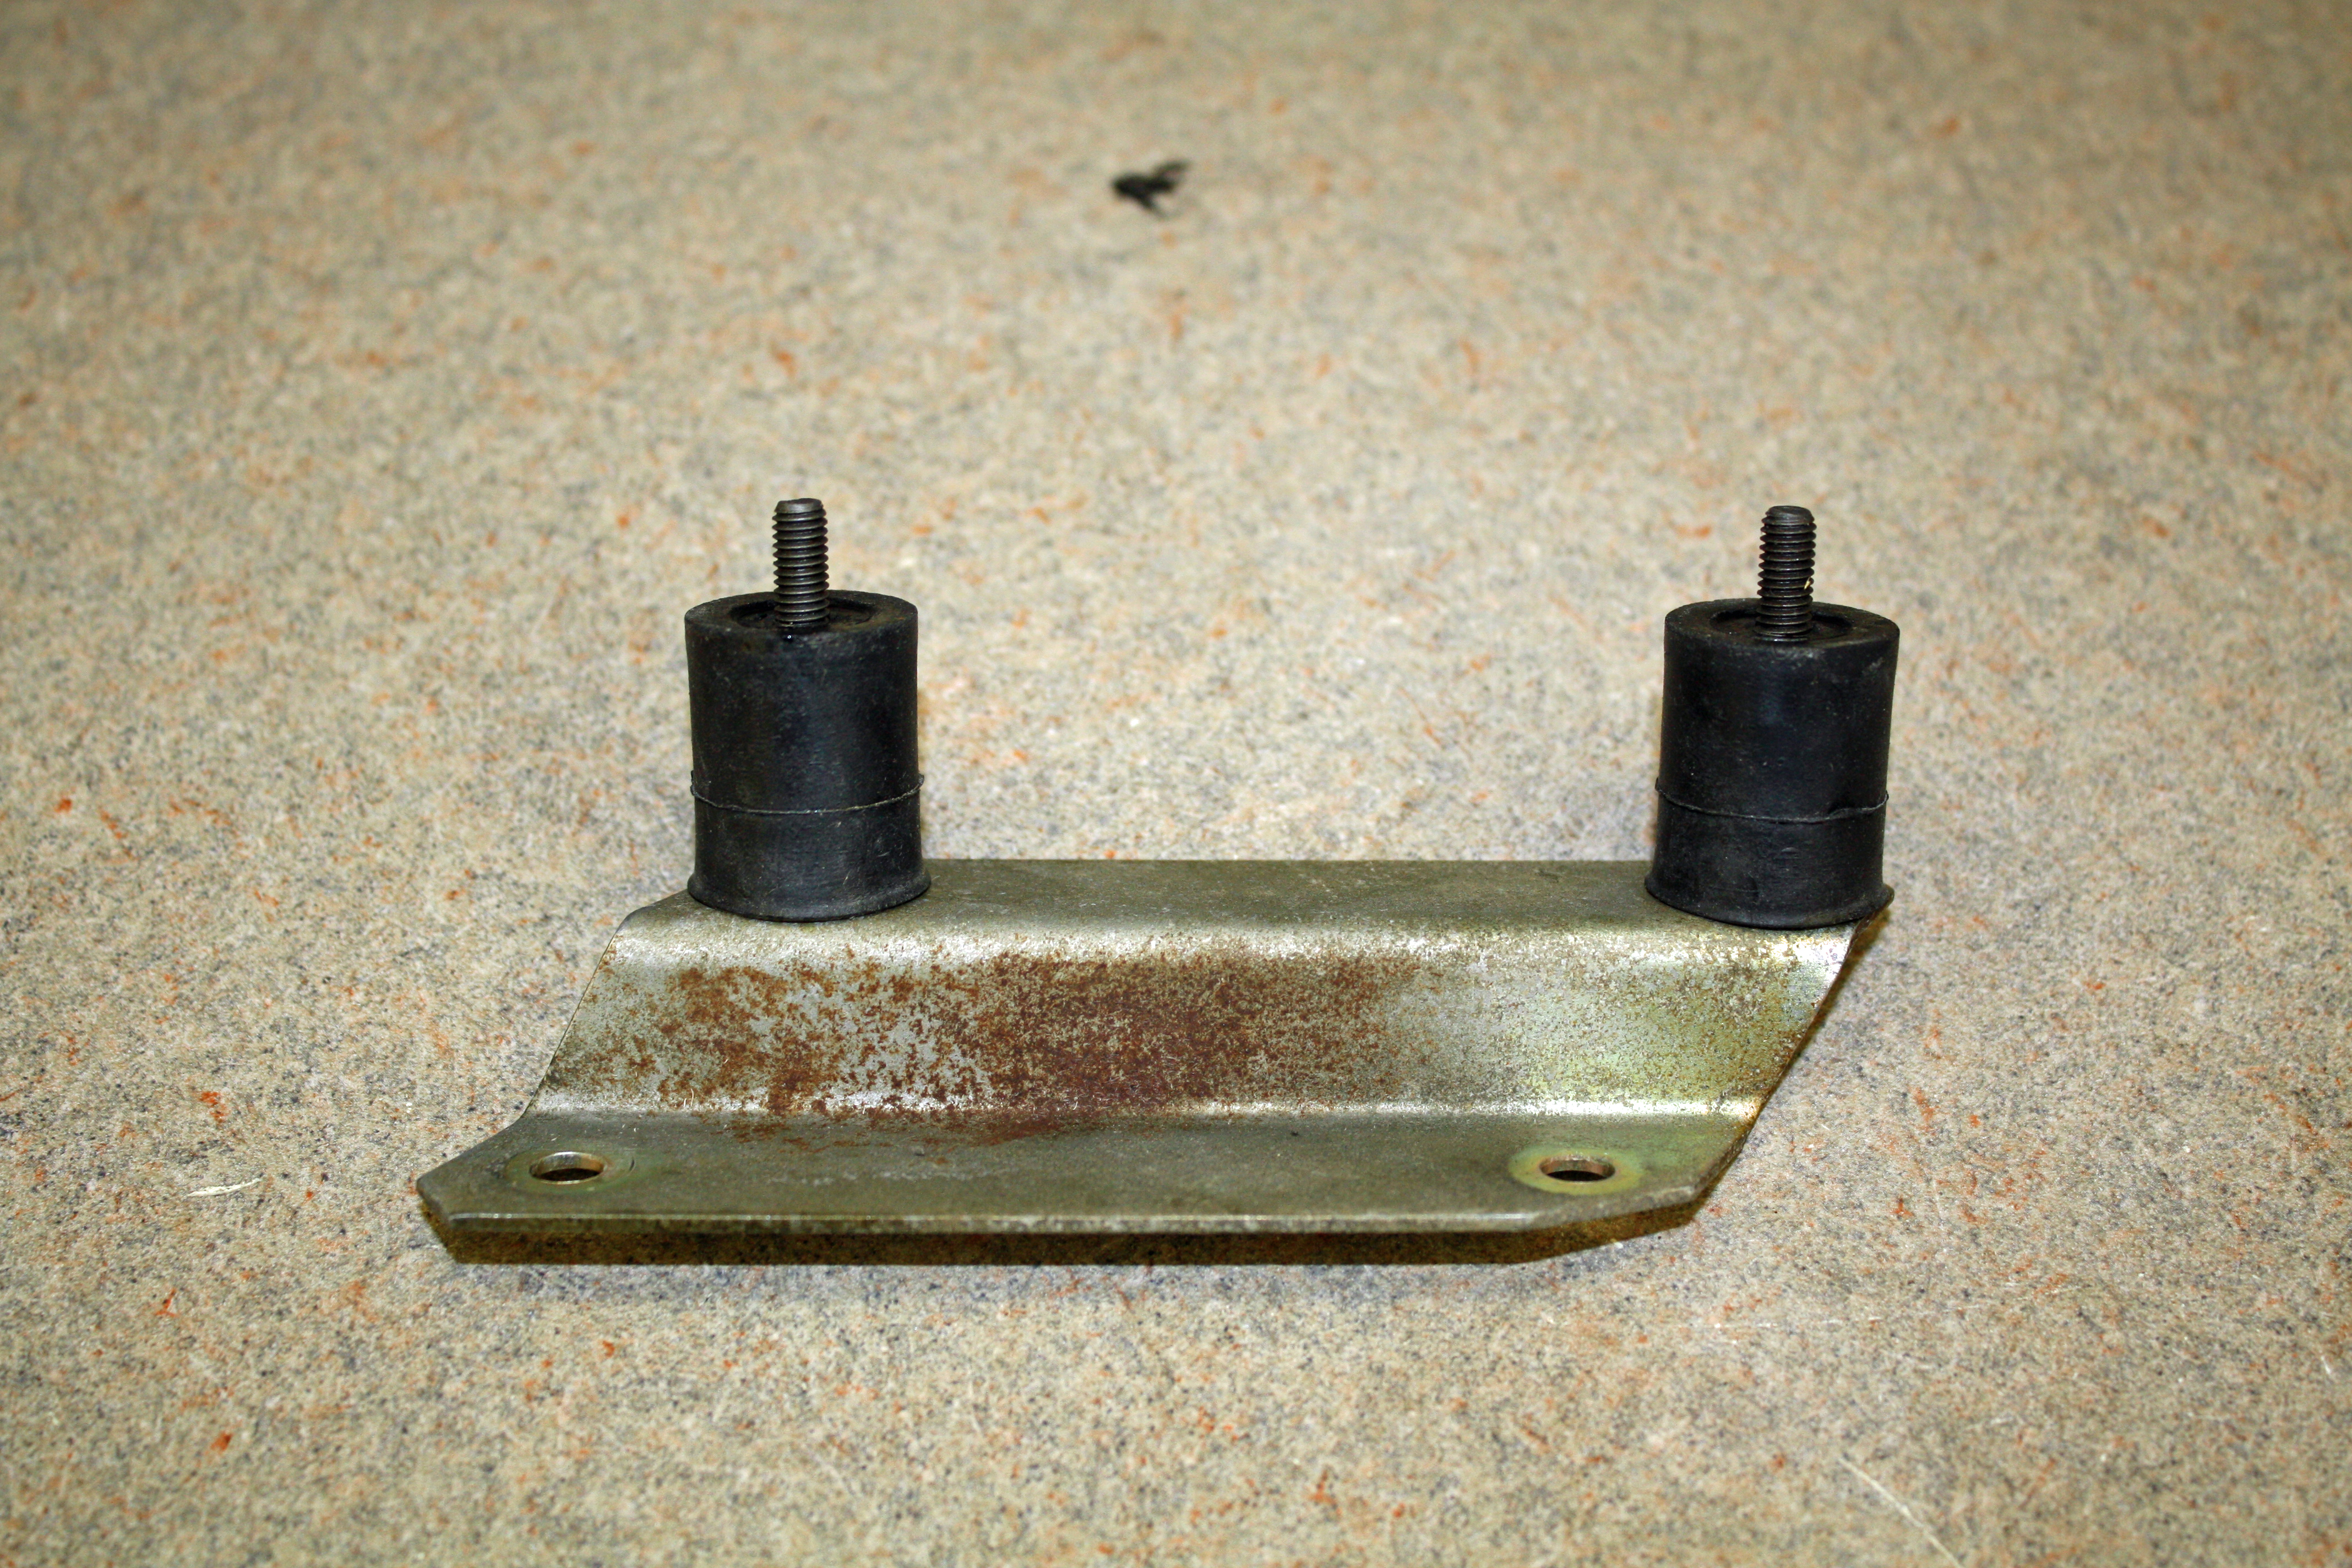
I went online to order a new fuel filter. When my son looked at the issue, he commented that he would also replace the fuel pump as it appeared to have been on the car for a long time. In the records I could not find that it had been replaced. During my search for a fuel pump, I came across a thread that gave a part number of a Nissan fuel pump for a 280Z that was exactly like the factory pump. I entered that part number on eBay and, sure enough, it looked exactly like the pump on my car...but at a much cheaper price. I also noticed that there were three rubber bumpers used on the fuel pump/filter mount so I ordered new ones.
All of those parts came today in the mail. I spent this afternoon disassembling everything, cleaning the parts and then re-assembling everything. After cleaning, the box around the fuel pump/filter looked like new with not one spec of rust. All of the hoses looked good except for the one from the fuel pump to the filter.

After allowing a little time for the fuel to make it to the engine, the car started easily and ran fine. I took a fifteen minute drive and it ran great. I parked the car in my driveway and my wife and I and the dog went for our daily two mile walk. When we returned, the car started easily. I did some research on warm hard starting and one of the many culprits was a weak fuel pump. I won't know for sure if I have solved the problem until I get a few more miles on it. Hopefully it is now good to go.
After lunch, we again had a hard time starting it but it eventually caught. This time it ran more like normal on the way back to my son's house. Because of the difficulty starting it, I did not shut it off while we said our goodbye's. As we pulled out of the driveway, it was sputtering and not running on all cylinders. It progressively got worse until, about two miles away from our son's house, it would start but then die as soon as you gave it gas. With help from a local homeowner, we managed to push it into a driveway. My son came over to see if we could get it going but to no avail. We both conjectured that it was a clogged fuel filter. Having run the tank very low may have contributed to that issue.
We called Triple A who arrived about an hour and a half later. Upon his arrival, the car started easily and I was able to line it up for the transporter. The hauler unloaded the car in my driveway going the wrong direction. Again the car started easily and I was able to drive it onto the road, turn it around and drive it into the garage.
I went online to order a new fuel filter. When my son looked at the issue, he commented that he would also replace the fuel pump as it appeared to have been on the car for a long time. In the records I could not find that it had been replaced. During my search for a fuel pump, I came across a thread that gave a part number of a Nissan fuel pump for a 280Z that was exactly like the factory pump. I entered that part number on eBay and, sure enough, it looked exactly like the pump on my car...but at a much cheaper price. I also noticed that there were three rubber bumpers used on the fuel pump/filter mount so I ordered new ones.
All of those parts came today in the mail. I spent this afternoon disassembling everything, cleaning the parts and then re-assembling everything. After cleaning, the box around the fuel pump/filter looked like new with not one spec of rust. All of the hoses looked good except for the one from the fuel pump to the filter.


After allowing a little time for the fuel to make it to the engine, the car started easily and ran fine. I took a fifteen minute drive and it ran great. I parked the car in my driveway and my wife and I and the dog went for our daily two mile walk. When we returned, the car started easily. I did some research on warm hard starting and one of the many culprits was a weak fuel pump. I won't know for sure if I have solved the problem until I get a few more miles on it. Hopefully it is now good to go.
02-16-2017, 09:00 PM
#30
Member
Thread Starter
I did drive the car quite a bit today with a number of start and stops and it ran perfectly. It started easily every time. I was pleased but I won't brag yet. Bragging is a guarantee that something will go wrong.
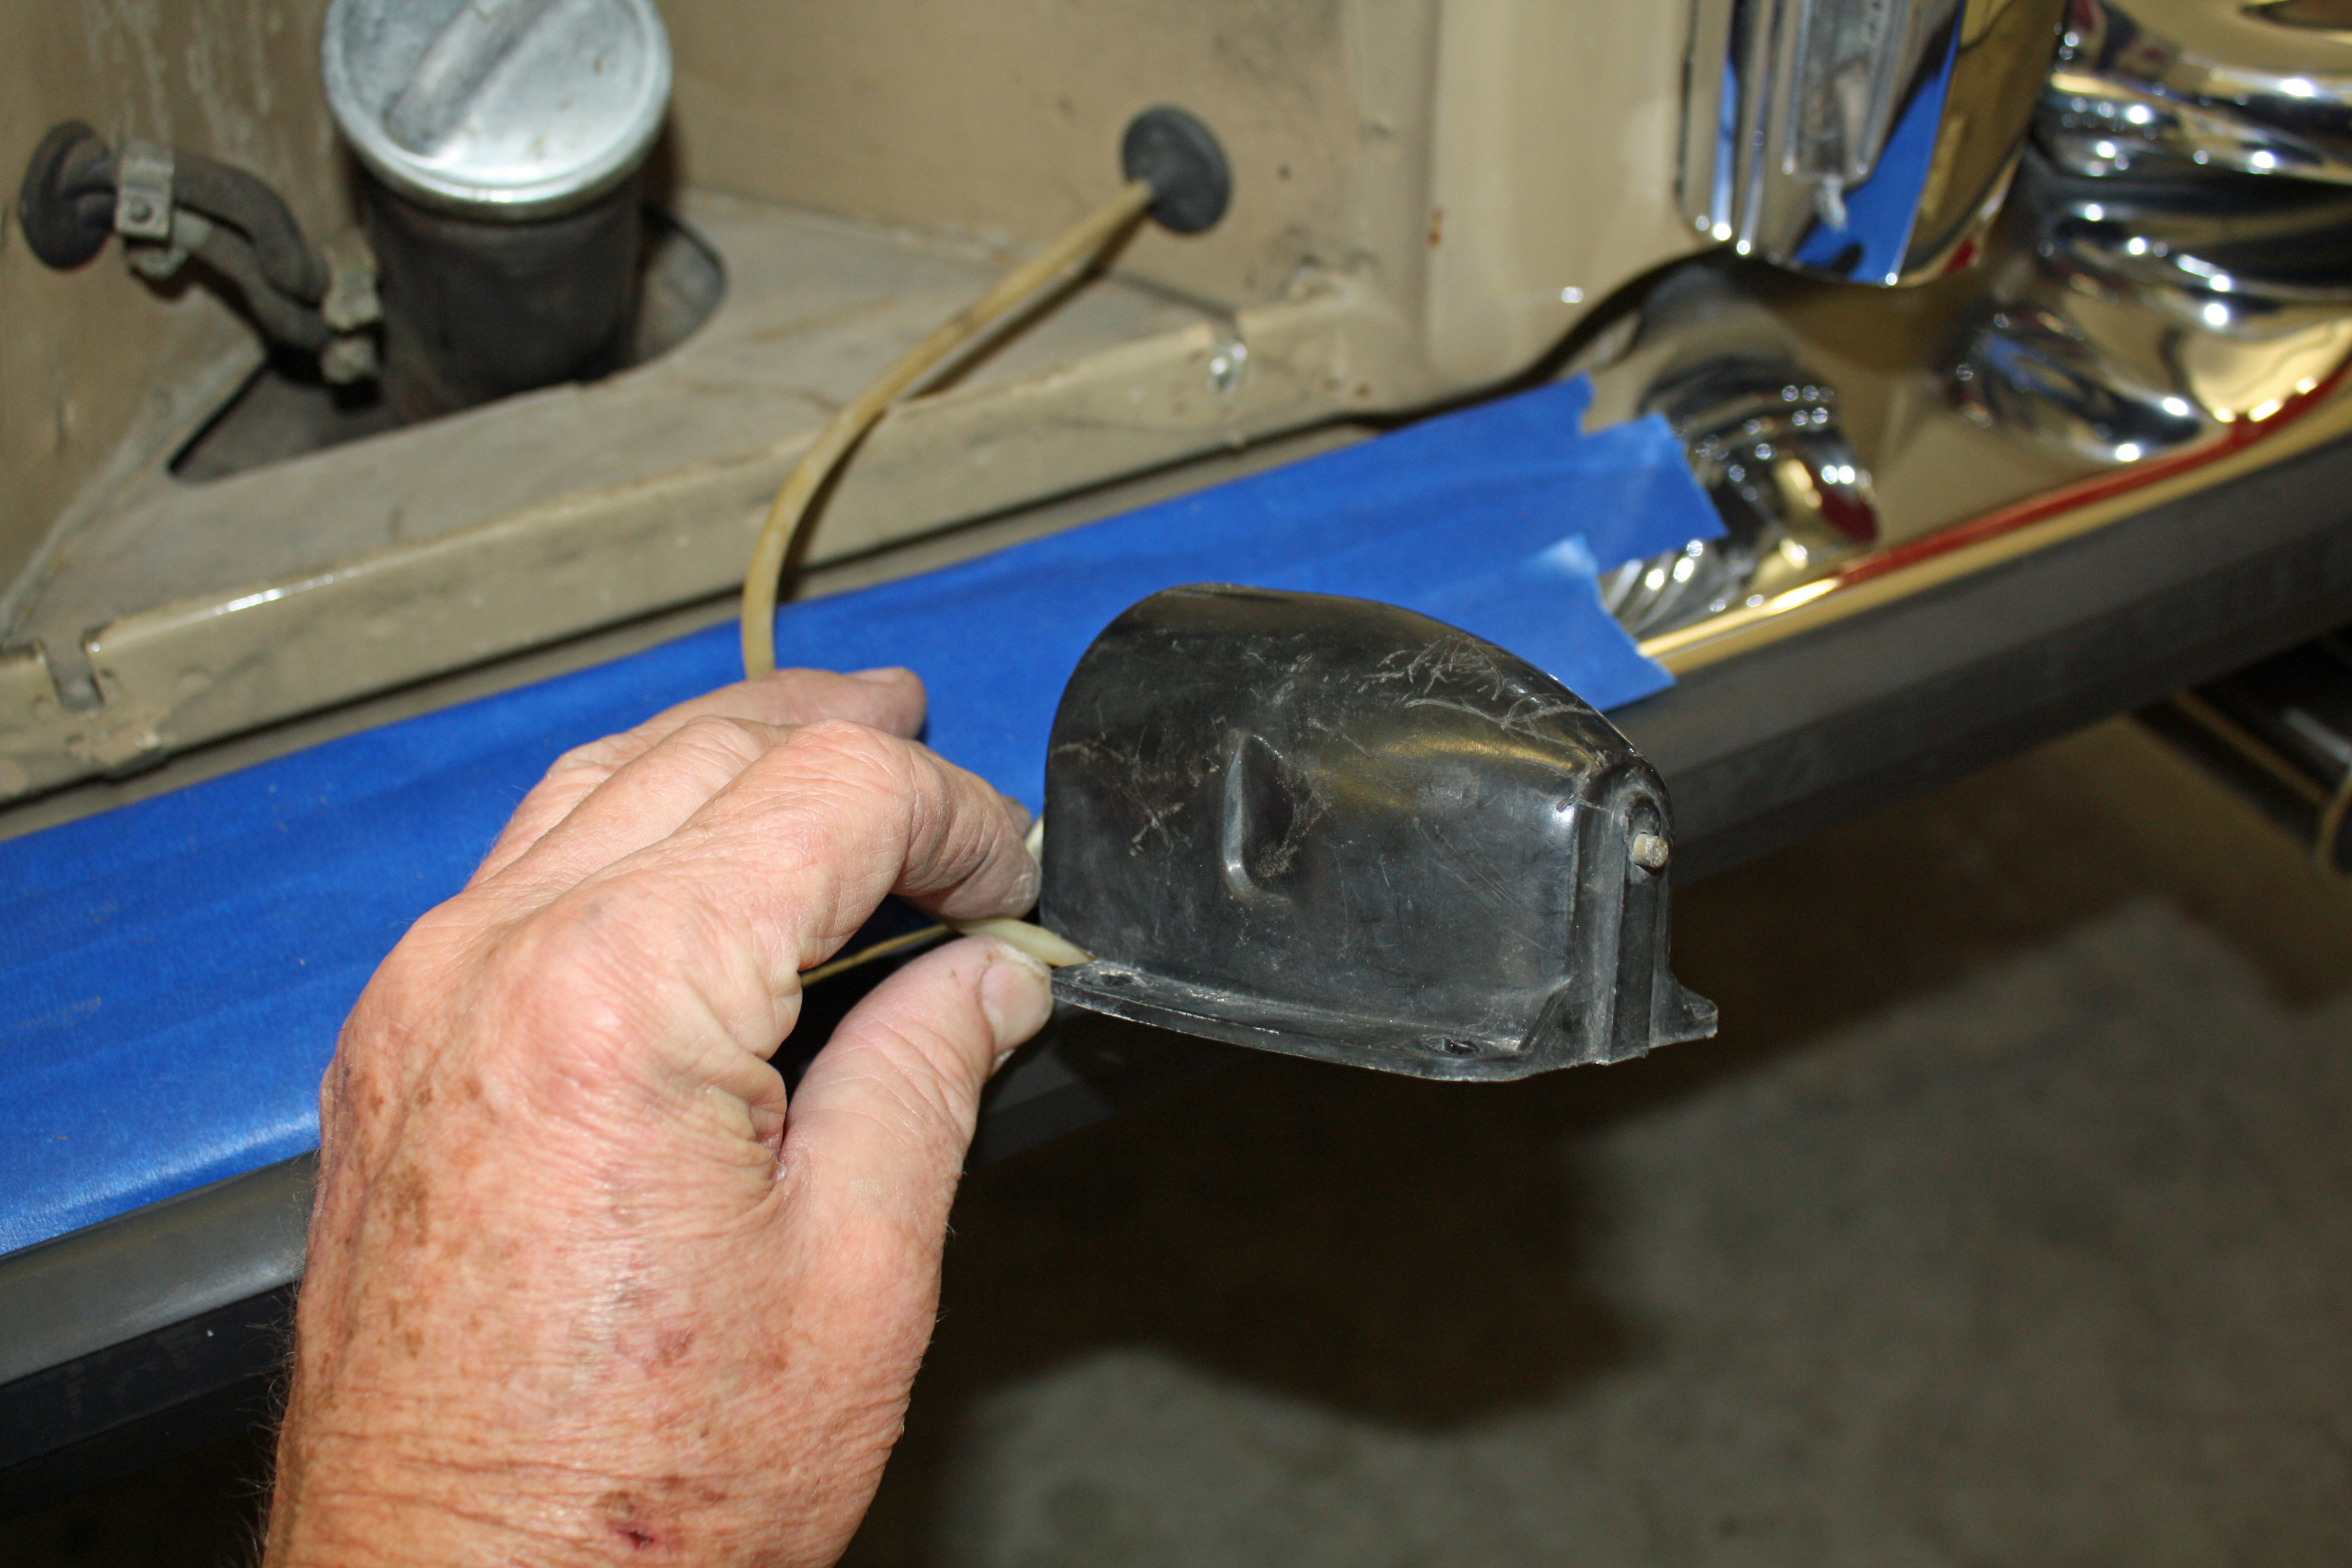
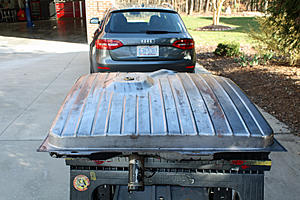
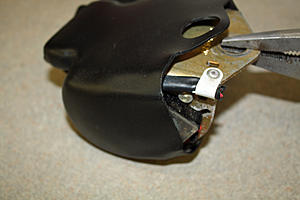
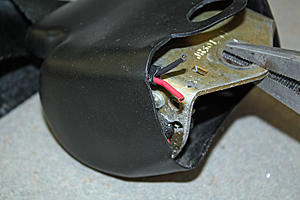
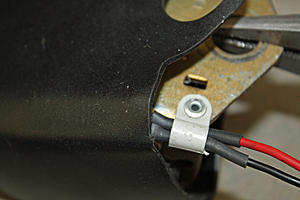
North Carolina allows one to use a vintage license plate of the year of your car as long as you have the current plate in the car. I found a '73 plate on eBay. I have a frame I wanted to use around the plate but when I tried to use it earlier, I found that I could not open the fuel access cover to put gas in the car. The reason that it did not work was that there were only holes for the top screws on the plate which allowed the bottom to bow out when opening up for putting in fuel.
So I removed the license plate holder, drilled a couple of extra holes, used some 1/4" stainless steel nuts as spacers to give clearance for the frame, and remounted everything. But....not without cleaning everything, including polishing the gas cap.
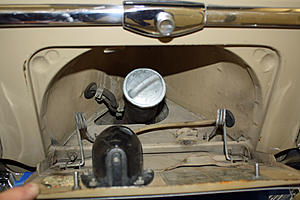
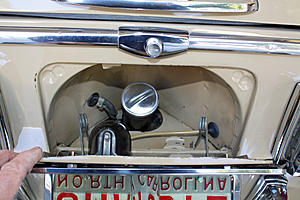
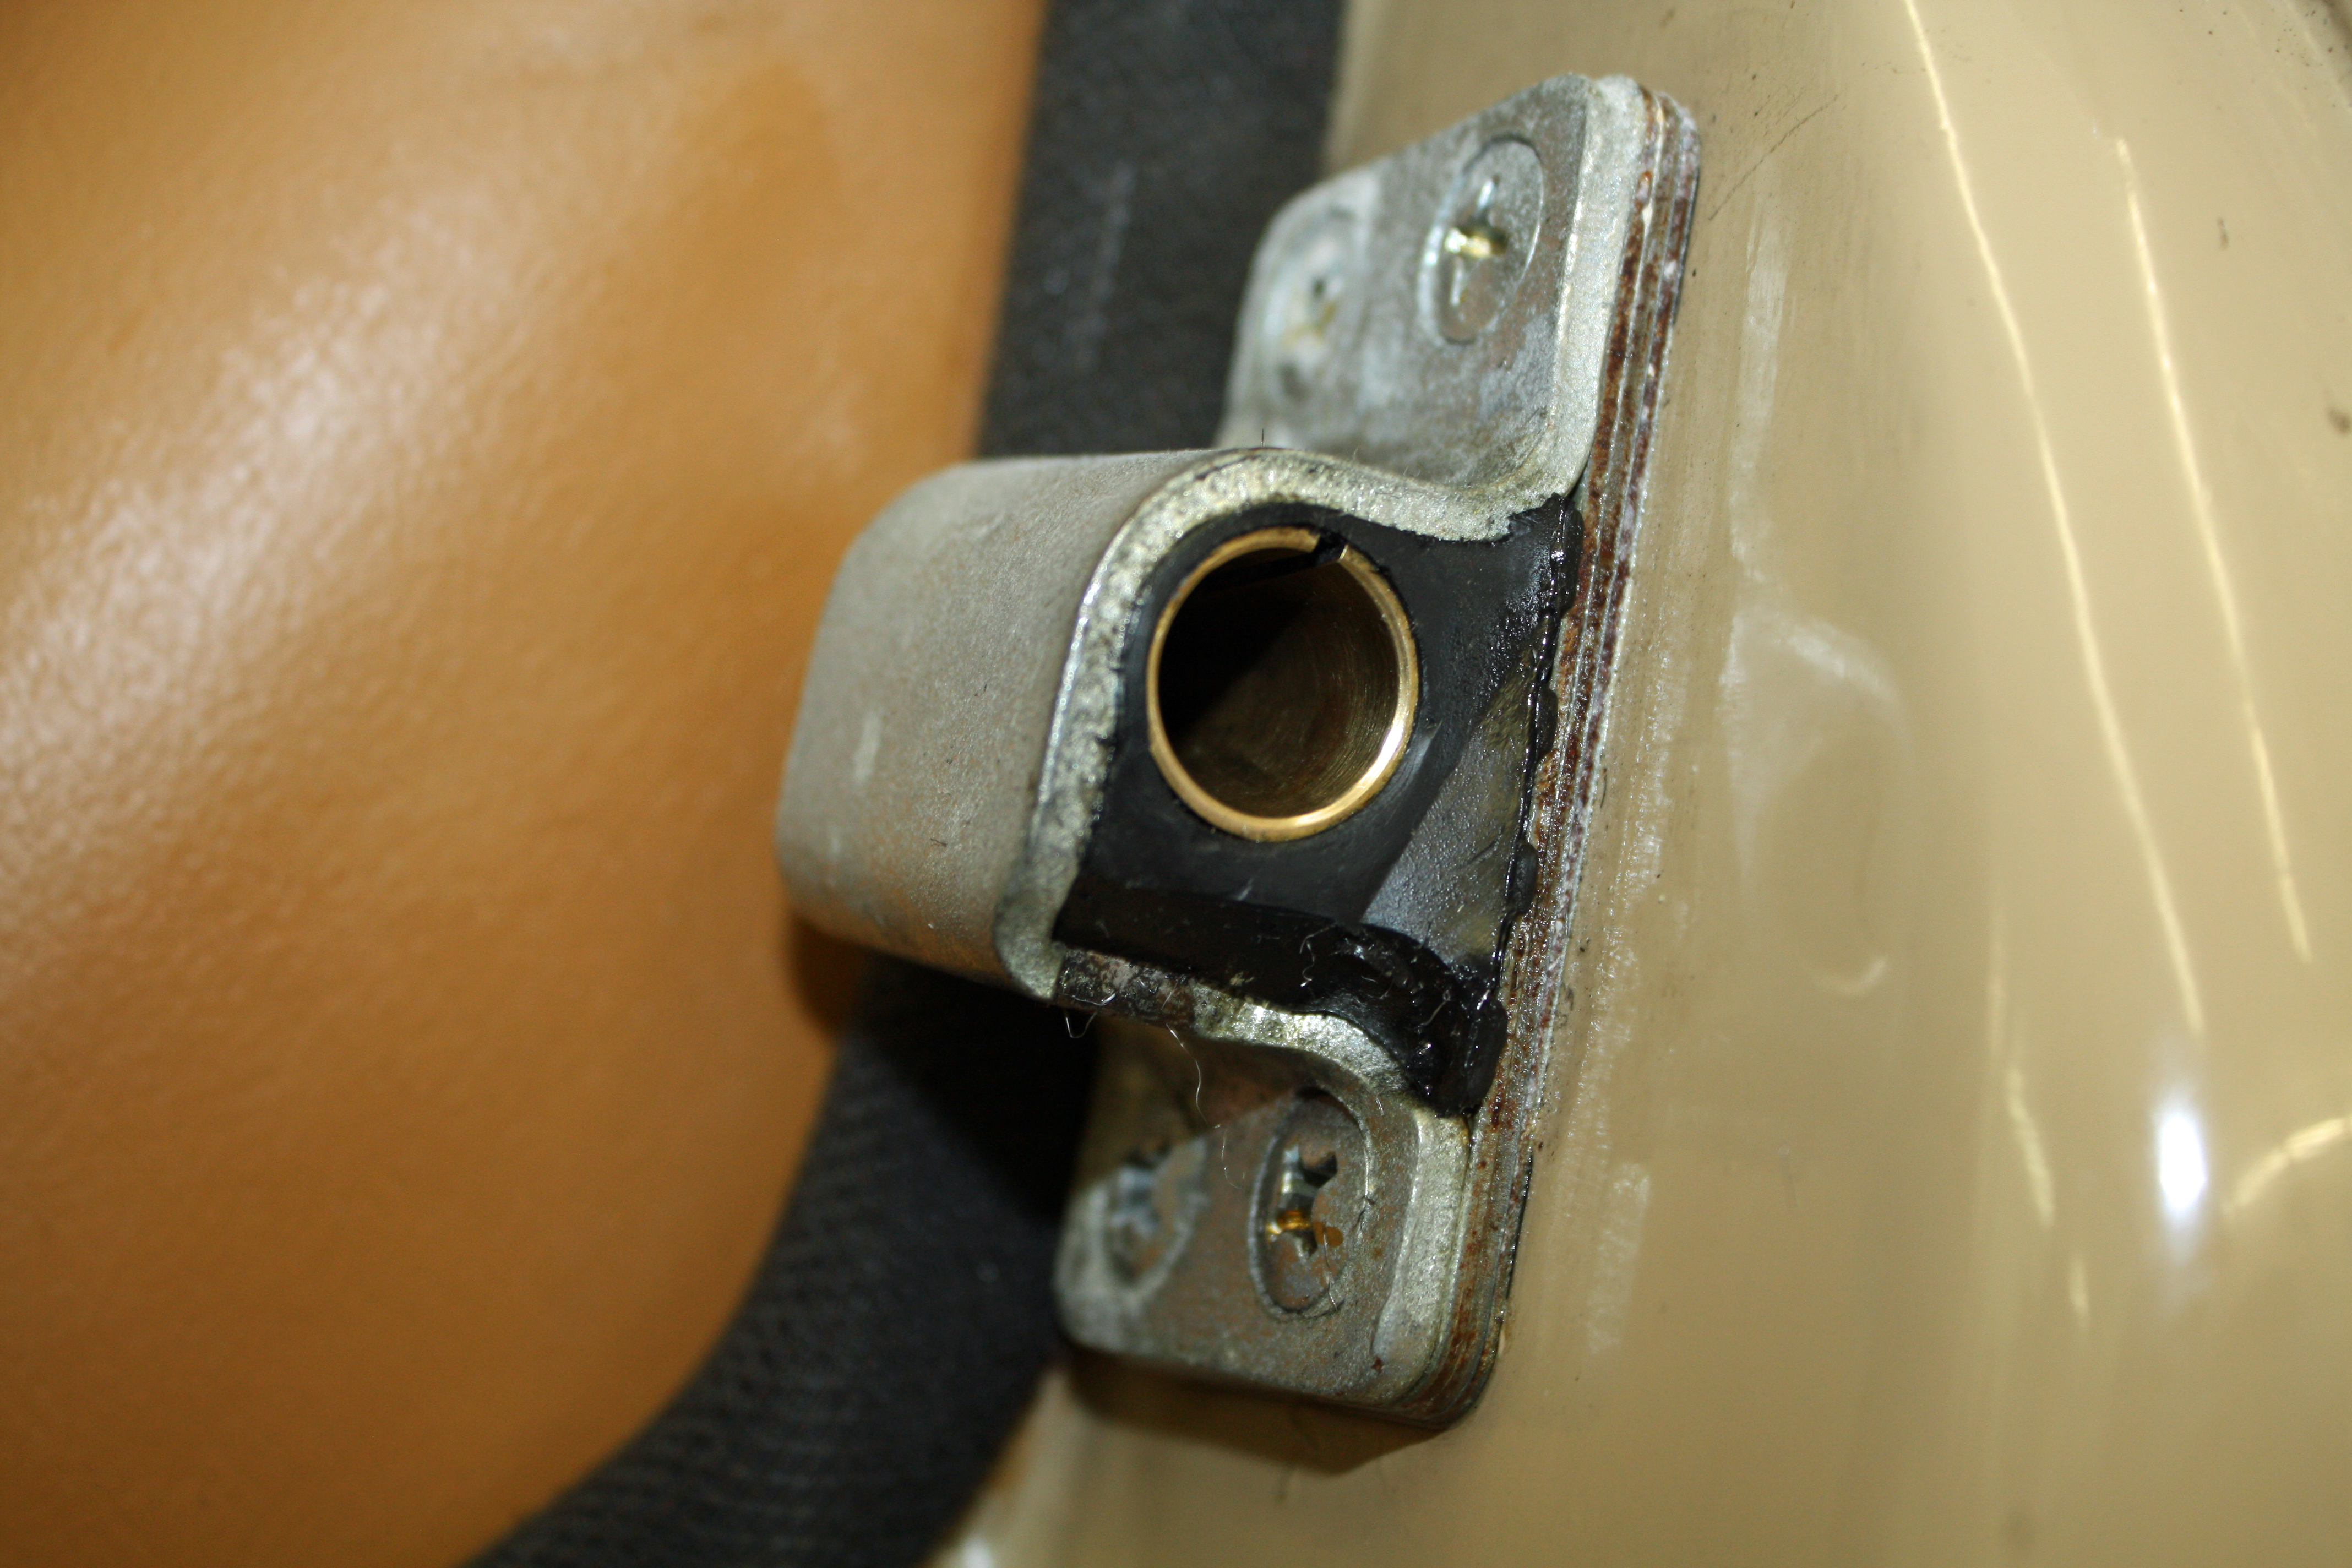
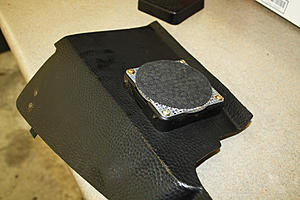
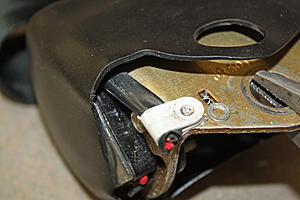
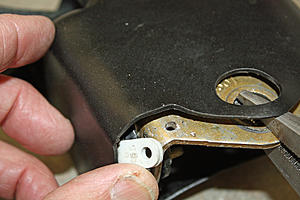
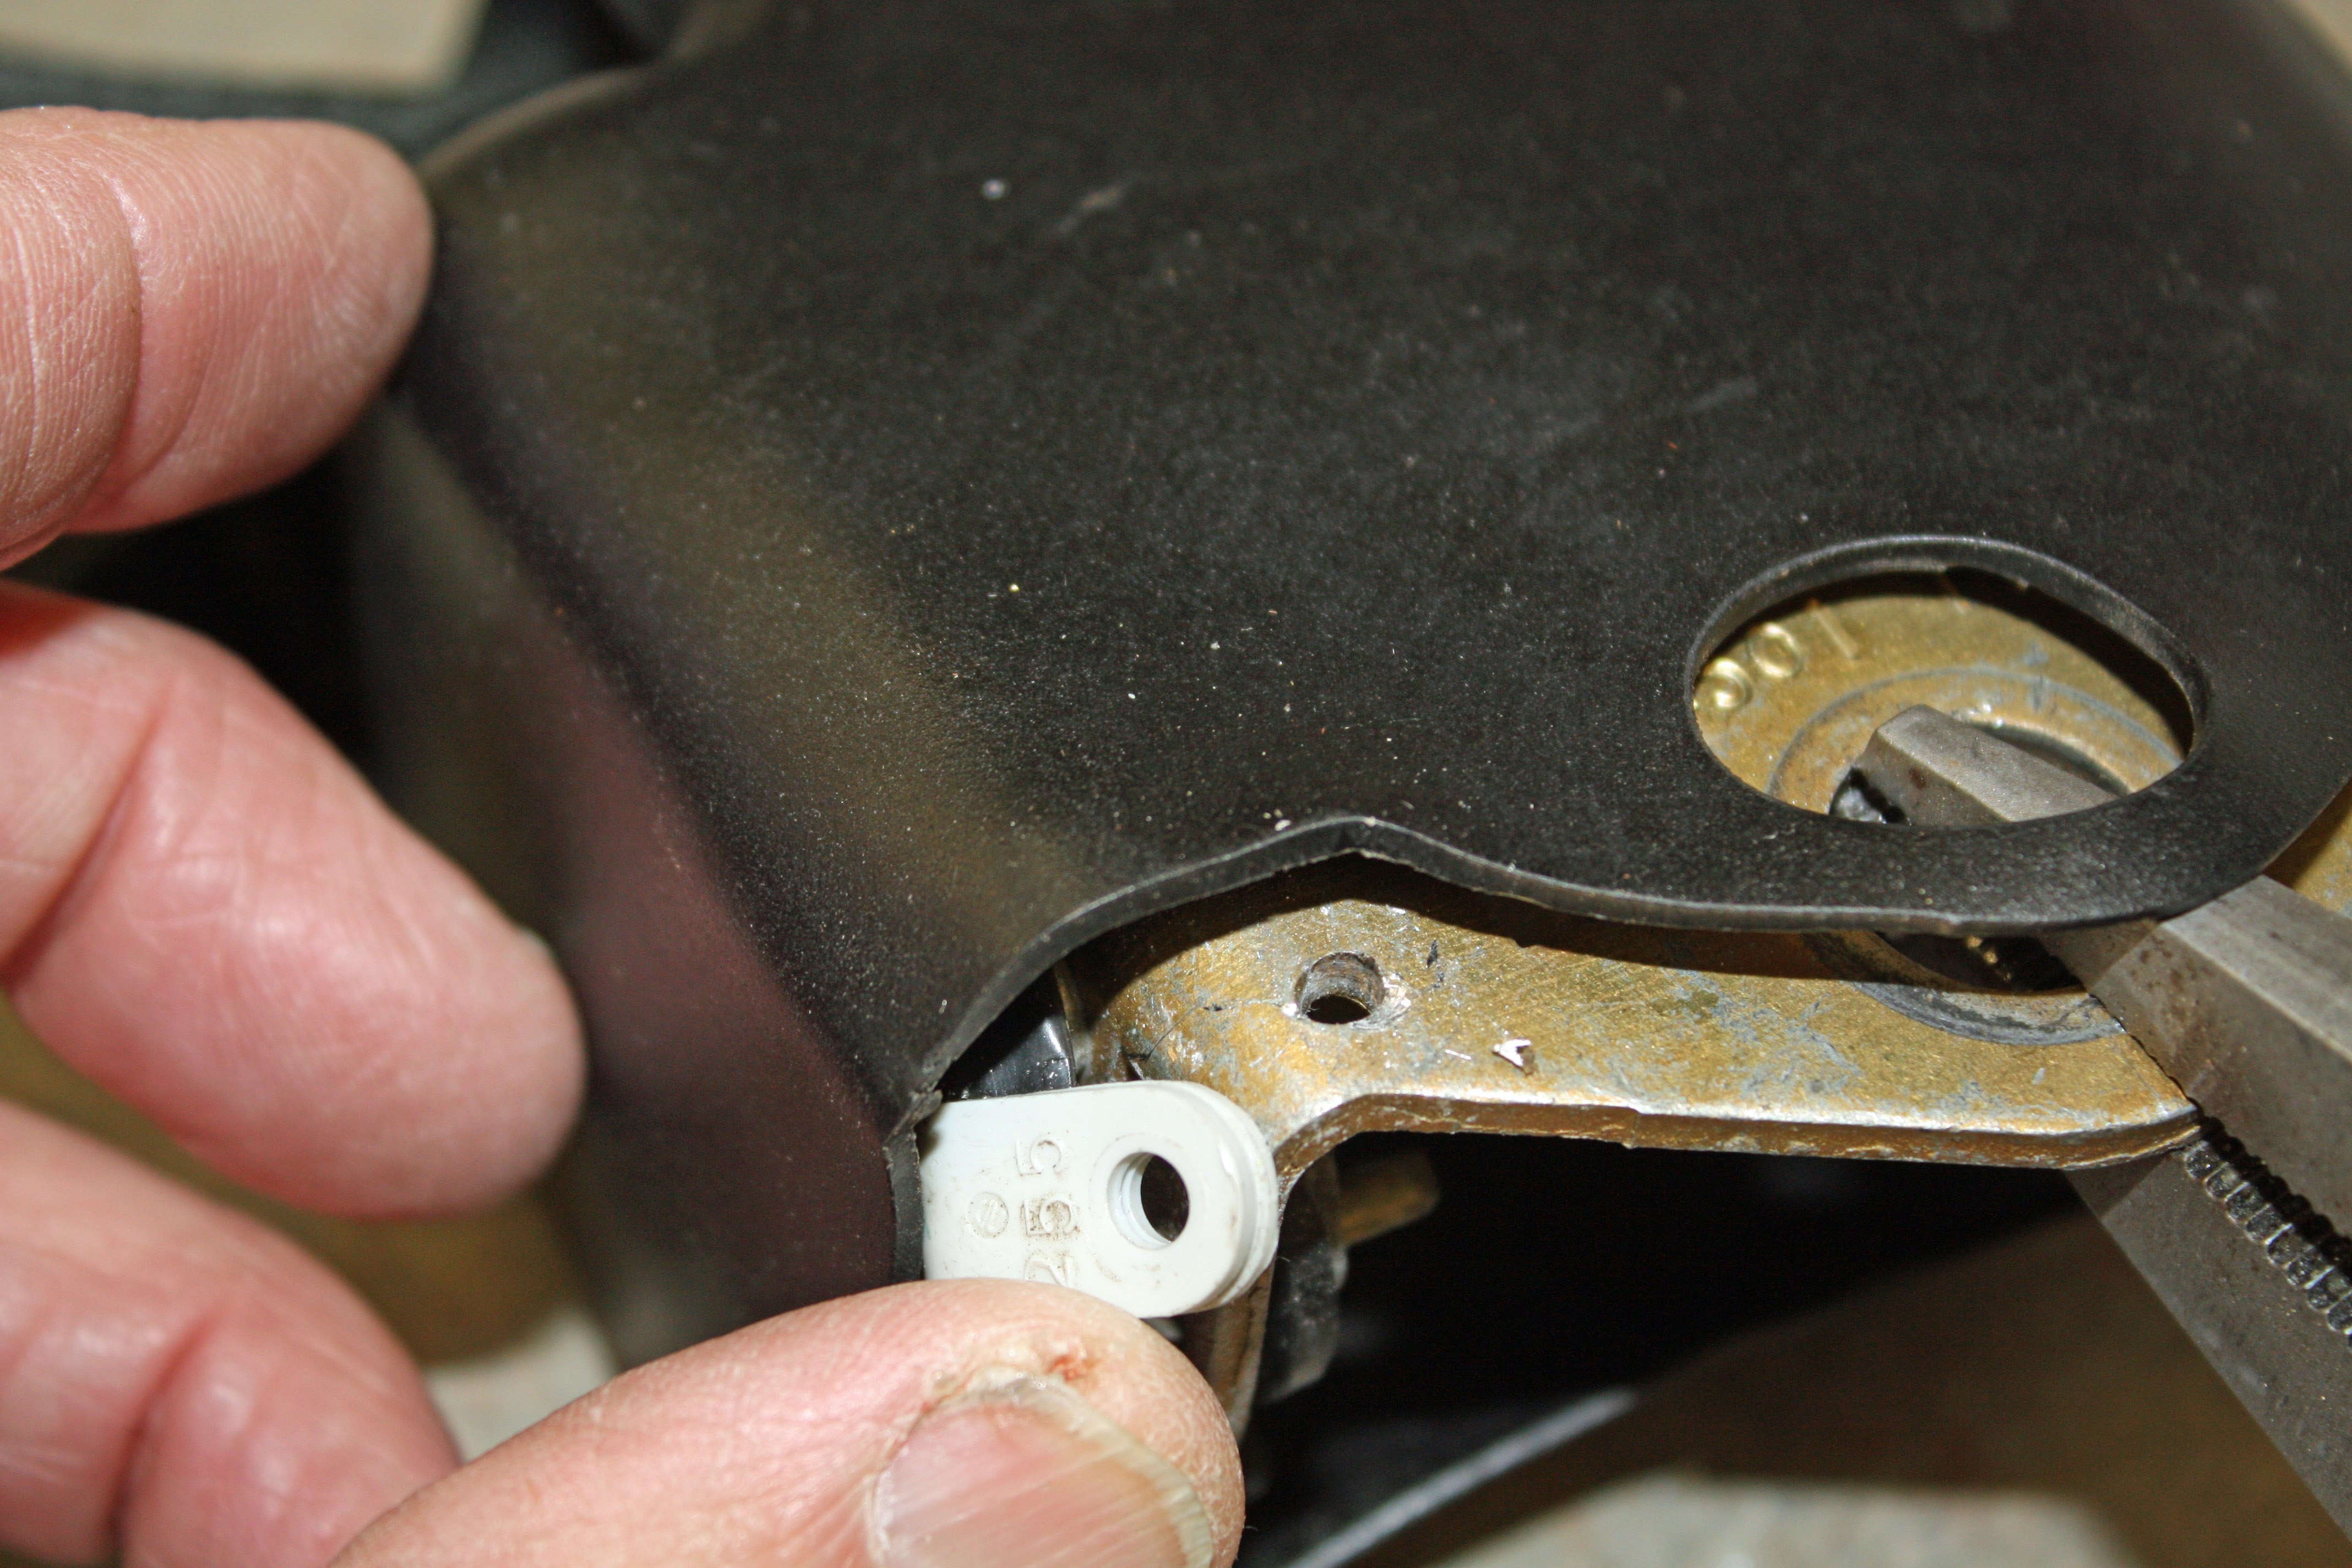
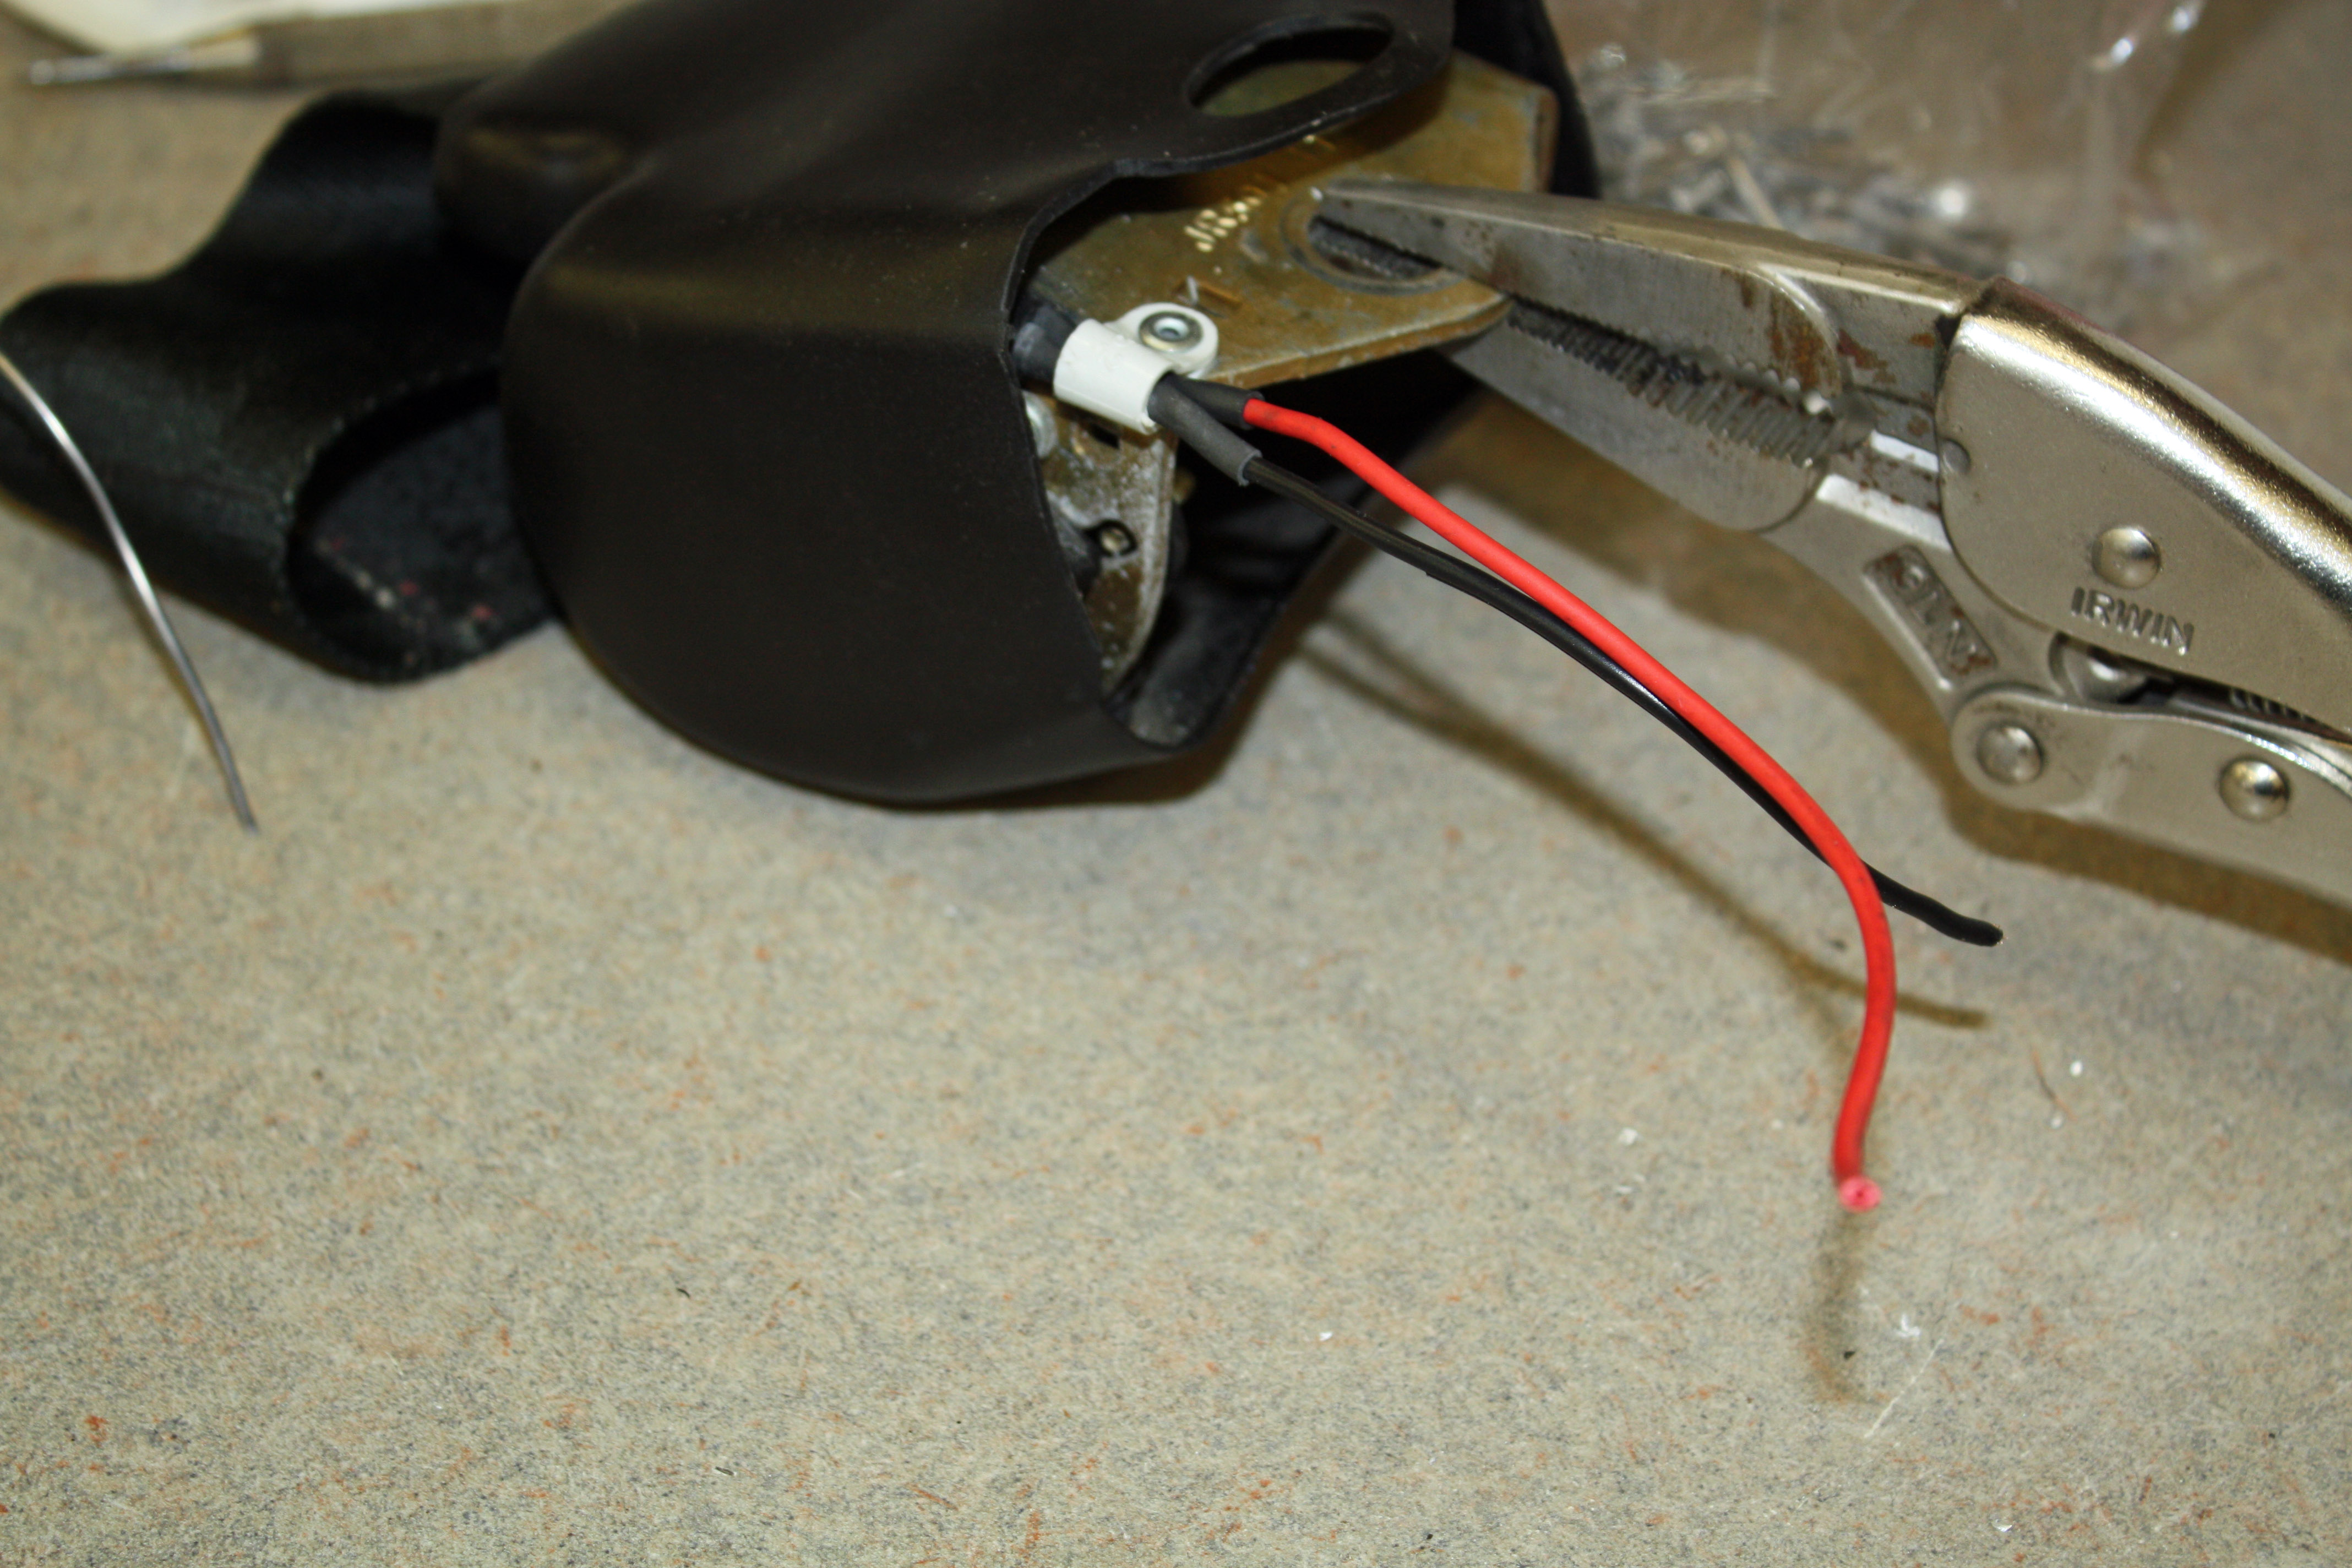
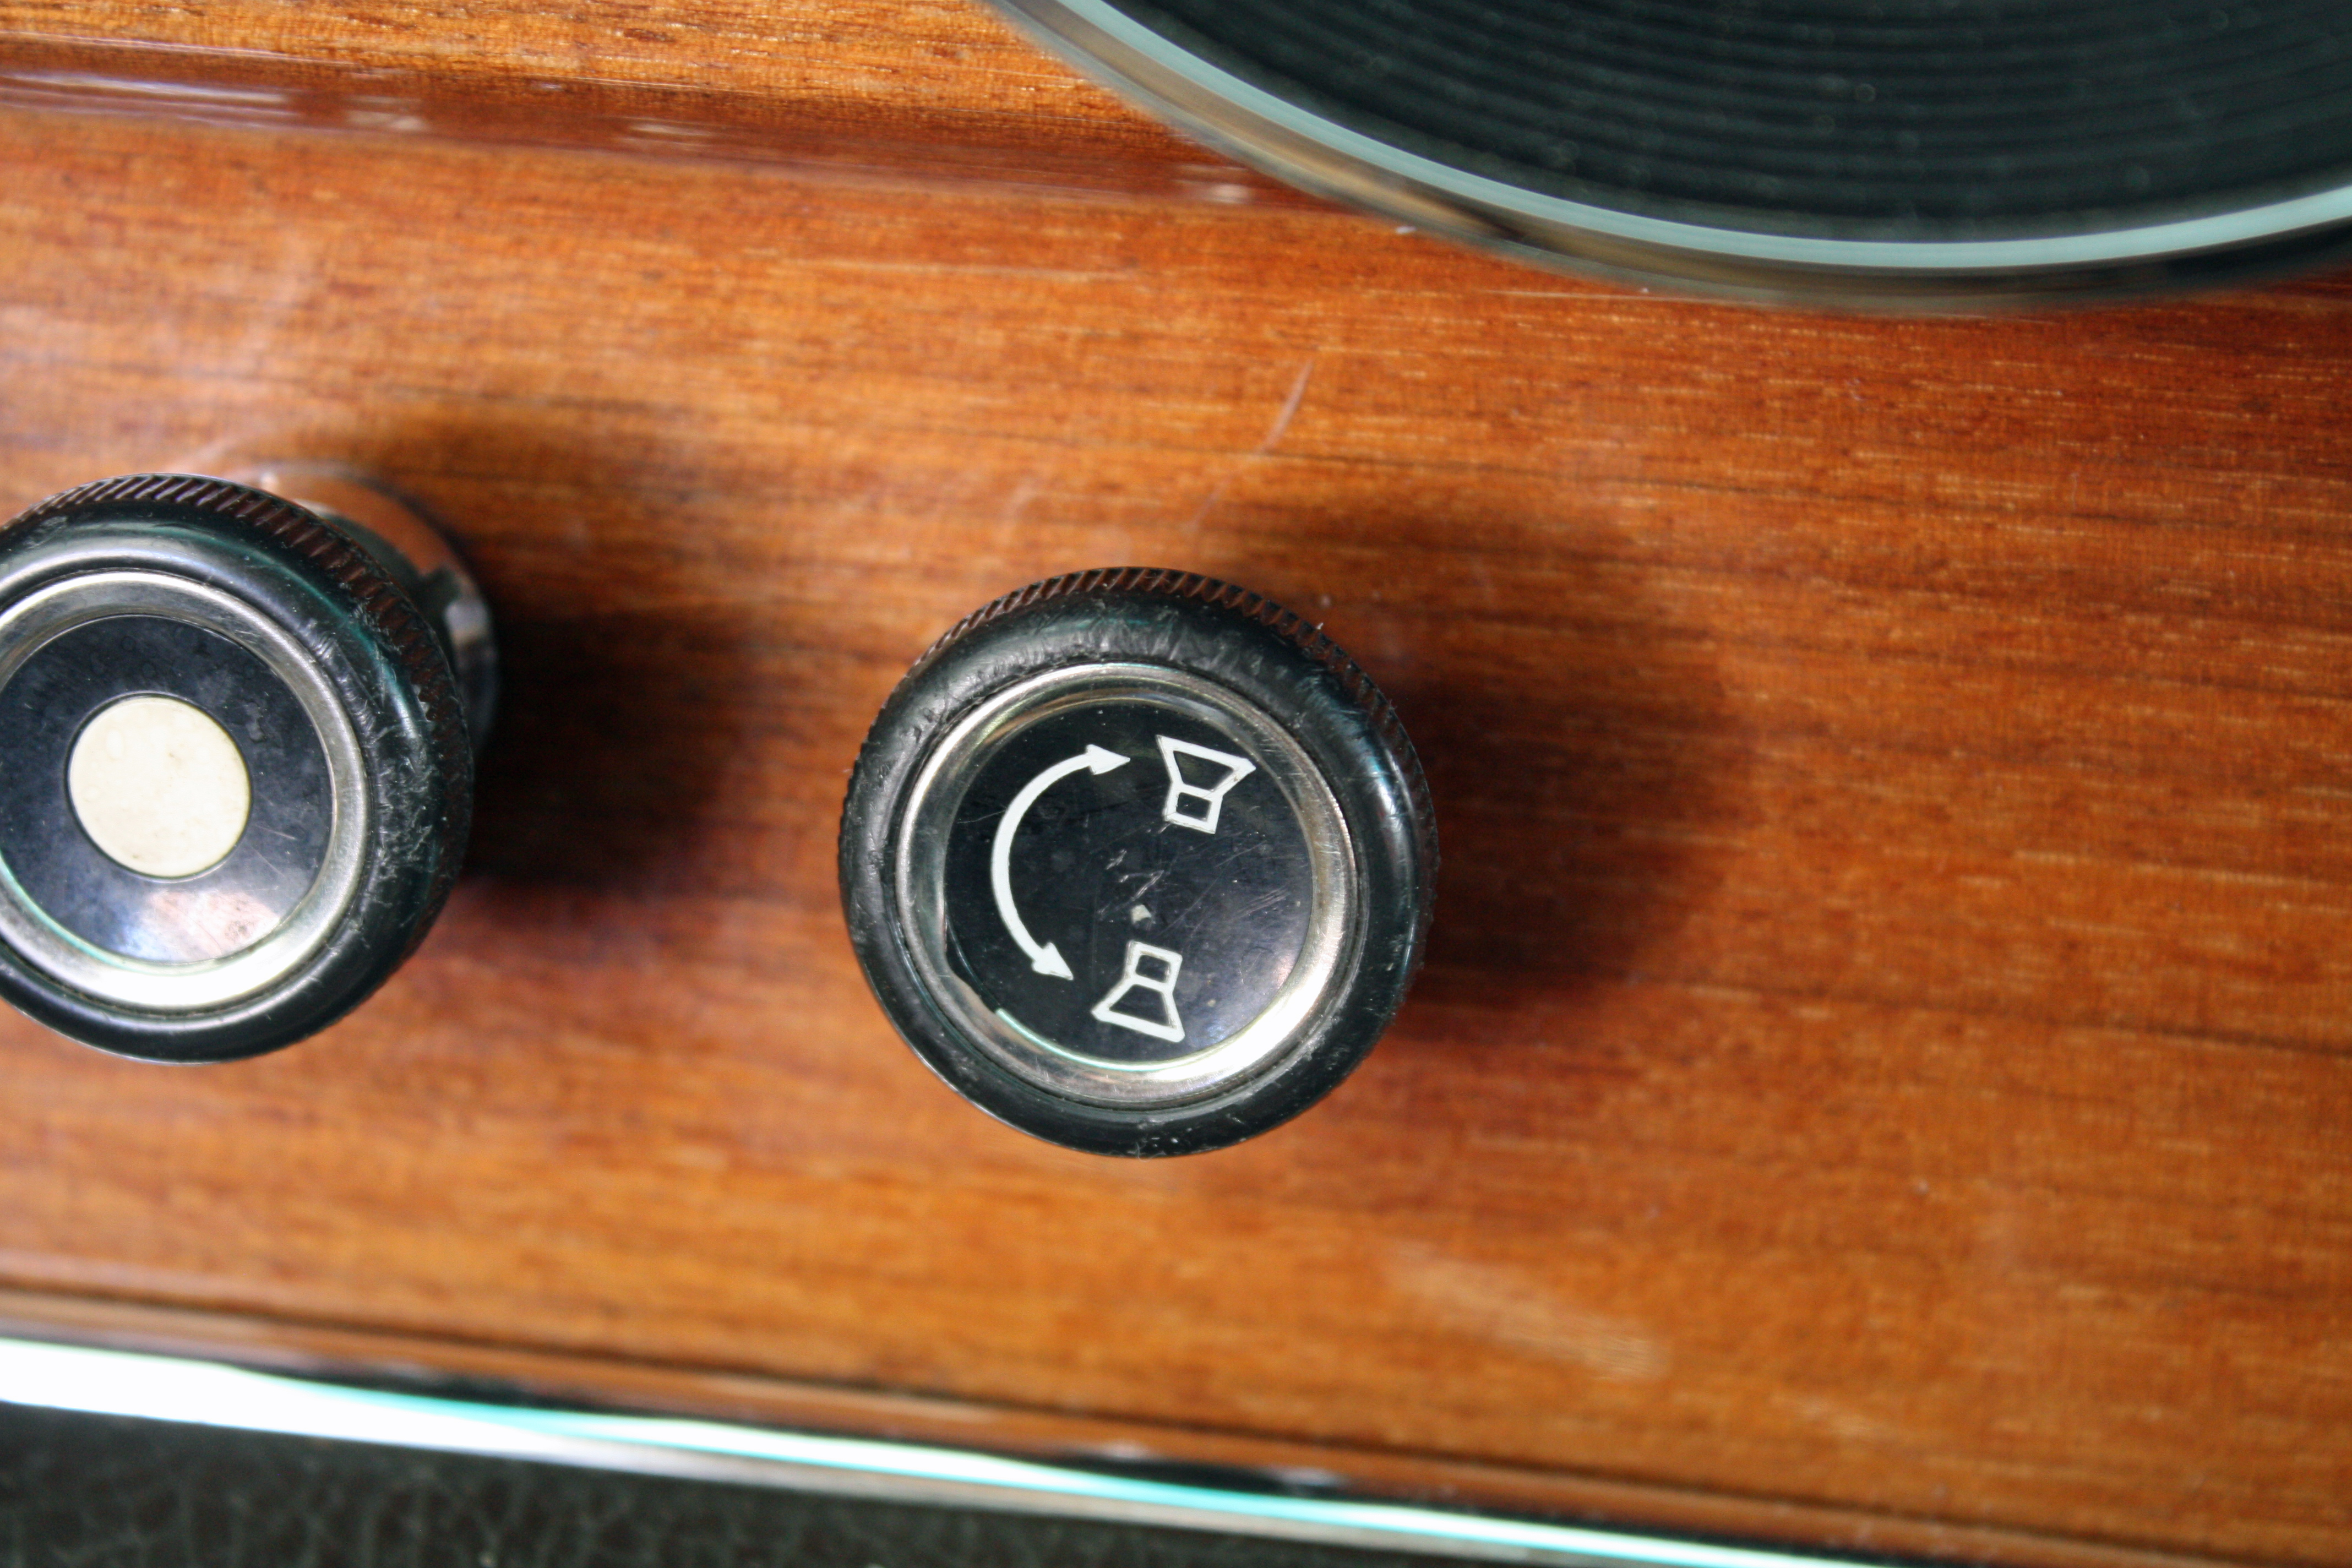
I have another question about the device mounted on the inside of the license plate holder. What does it do?

North Carolina allows one to use a vintage license plate of the year of your car as long as you have the current plate in the car. I found a '73 plate on eBay. I have a frame I wanted to use around the plate but when I tried to use it earlier, I found that I could not open the fuel access cover to put gas in the car. The reason that it did not work was that there were only holes for the top screws on the plate which allowed the bottom to bow out when opening up for putting in fuel.
So I removed the license plate holder, drilled a couple of extra holes, used some 1/4" stainless steel nuts as spacers to give clearance for the frame, and remounted everything. But....not without cleaning everything, including polishing the gas cap.


I have another question about the device mounted on the inside of the license plate holder. What does it do?
 02-17-2017, 09:40 AM
#31
MBWorld Fanatic!
Maybe a lock actuator to secure fuel like today's models?
02-17-2017, 08:08 PM
#32
Member
Thread Starter
Great guess! This is what someone posted on another forum.
"It is indeed the lock. When the driver's door button is pushed down, all the doors lock - including the fuel door. Ideally, the system can hold that locked for a week or two before it bleeds down. If all your doors don't lock when you push the driver's lock down, the system has leaks. If it doesn't even do it when the engine is running, either you have major leaks, or the actuator in the driver's door may be bad."
"It is indeed the lock. When the driver's door button is pushed down, all the doors lock - including the fuel door. Ideally, the system can hold that locked for a week or two before it bleeds down. If all your doors don't lock when you push the driver's lock down, the system has leaks. If it doesn't even do it when the engine is running, either you have major leaks, or the actuator in the driver's door may be bad."
02-19-2017, 02:52 PM
#33
Member
Thread Starter
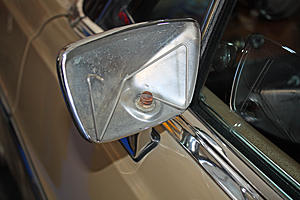
When I was polishing and waxing the car the other day, I discovered the glass in my exterior mirror was about to fall out. The perimeter plastic retainer had failed. Since the mirror was faded, I ordered a new mirror and seal. To install the mirror, the spring is placed in the mirror housing. Then you insert the mirror and push it back against the spring. While it is pushed back, you install the white retainer around the perimeter, which is what holds the mirror in the housing.

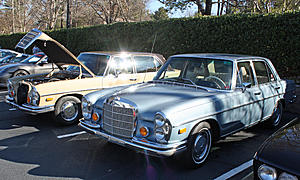
It was a beautiful Charlotte morning so I drove the fifty miles to Cars and Cappuccino. Because of the weather, they had the largest turnout I have ever seen. This gathering is for European cars only although there were a few transgressors. Amazingly, a '72 280SE 4.5 parked next to me. He arrived with his young children and the car is his daily driver. However, he said the water pump just began leaking so he had some work to do.
It was a little over 100 miles round trip. The car ran perfectly...for 96 miles. The last four miles it was spitting and sputtering but I made it home. The gas tank will be coming out. Also, where exactly is that filter on the tank?
Besides having big numbers, there was quite a variety of cars. A good time was had by all!!!


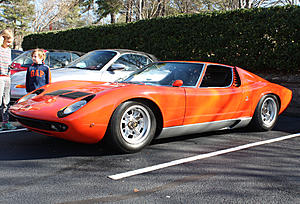

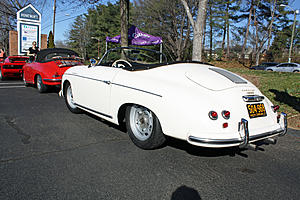
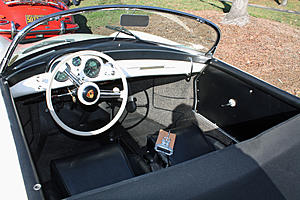


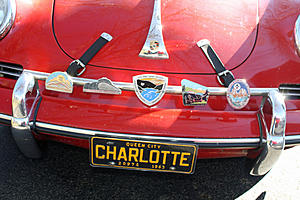


It was a beautiful Charlotte morning so I drove the fifty miles to Cars and Cappuccino. Because of the weather, they had the largest turnout I have ever seen. This gathering is for European cars only although there were a few transgressors. Amazingly, a '72 280SE 4.5 parked next to me. He arrived with his young children and the car is his daily driver. However, he said the water pump just began leaking so he had some work to do.

It was a little over 100 miles round trip. The car ran perfectly...for 96 miles. The last four miles it was spitting and sputtering but I made it home. The gas tank will be coming out. Also, where exactly is that filter on the tank?
Besides having big numbers, there was quite a variety of cars. A good time was had by all!!!


 02-19-2017, 02:54 PM
#34
Member
Thread Starter
02-21-2017, 06:44 PM
#35
Member
Thread Starter
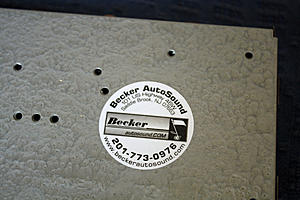
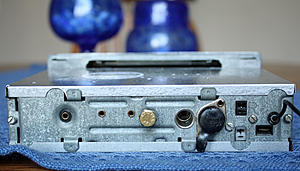
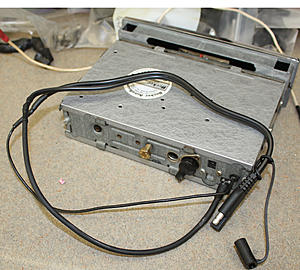
Yesterday my Becker Europe II Stereo radio arrived. I had decided to go back to the stock radio and looked at the eBay offerings. However, I never felt comfortable with those auctions. So I called Becker to see if they offered a remanufactured Europe II. They did. It comes with an auxiliary input and a one year warranty.

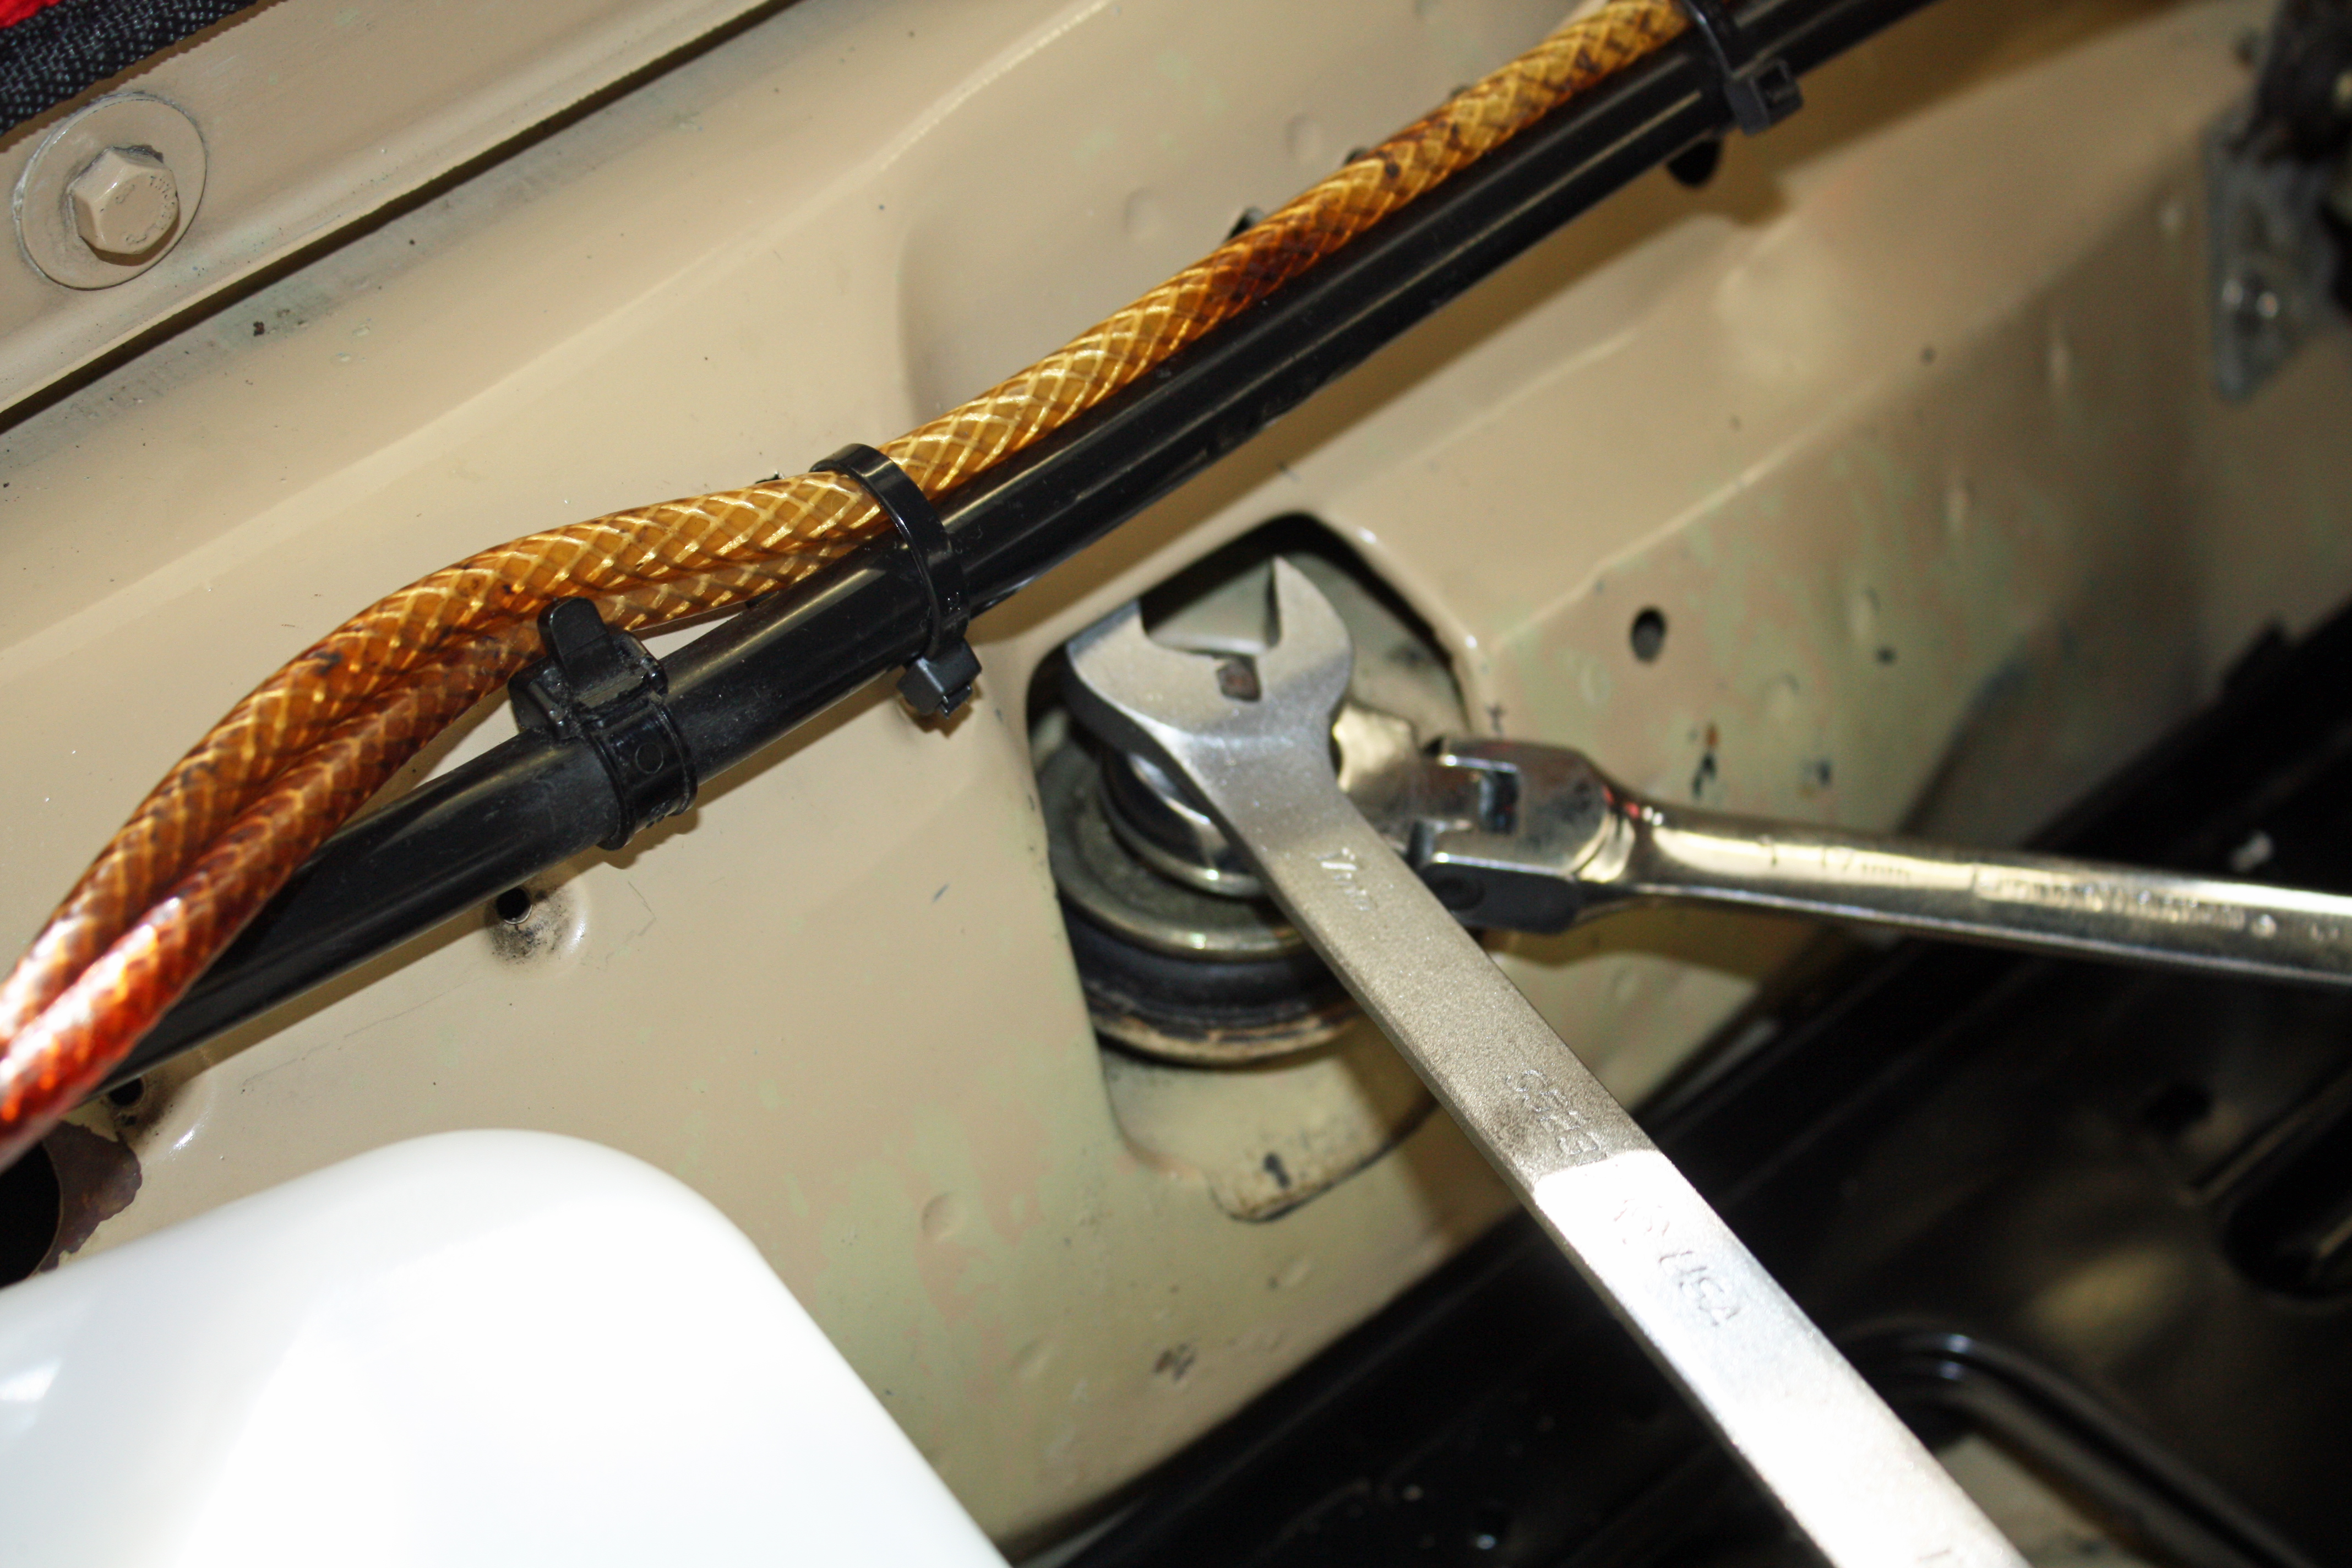
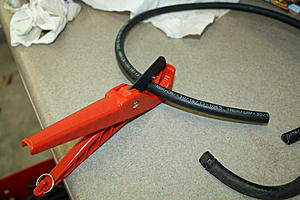
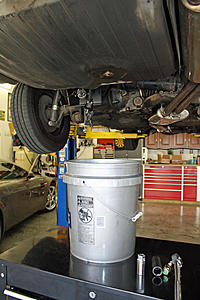
Because of what happened on Sunday, I had made up my mind to remove the gas tank and have it professionally cleaned. To begin that process, I clamped the fuel line to the fuel pump so I could remove it from the pump. Once I had it removed, I drained the fuel into a five gallon paint can that I had cleaned. It filled this container three times. The fuel was pretty clean in the container. I have a funnel with a strainer so I poured the fuel into three five gallon gas cans.
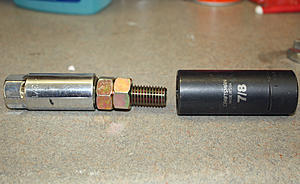
Using a spark plug socket, I bought a 9/16" bolt that would fit into the other end of he socket. I tightened two nuts against the bolt, inserted the bolt into the strainer opening and removed the old strainer. It did not come out easily.
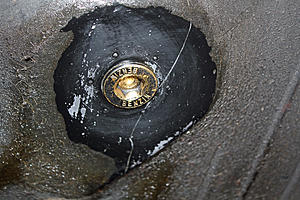
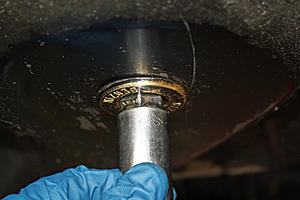
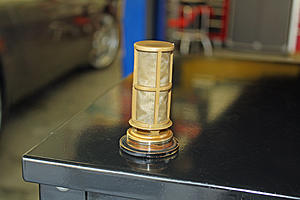
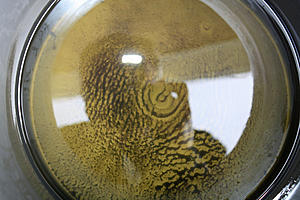
Up to now the draining fuel had been pretty clean. That was not the case with the fuel released by removing the strainer.
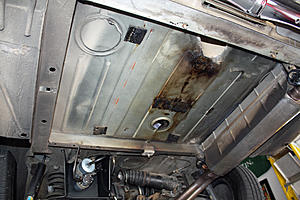
After eating lunch while the remaining fuel drained, I prepared the tank for removal. There are two fuel hose lines attached to the neck that have to be disconnected. In the trunk there is a white plastic cover over the access hole for the fuel sender. The plug to that sender must be disconnected.

The return line to the tank must also be disconnected. I placed a bolt in the end of each of these lines to keep them from being contaminated.
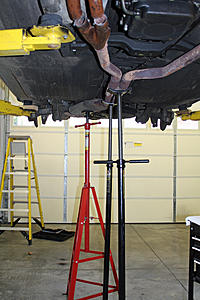
I placed a couple of tall stands under the tank to stabilize it while I removed the fasteners. There are two at the rear, one on the left side and one at the rear.

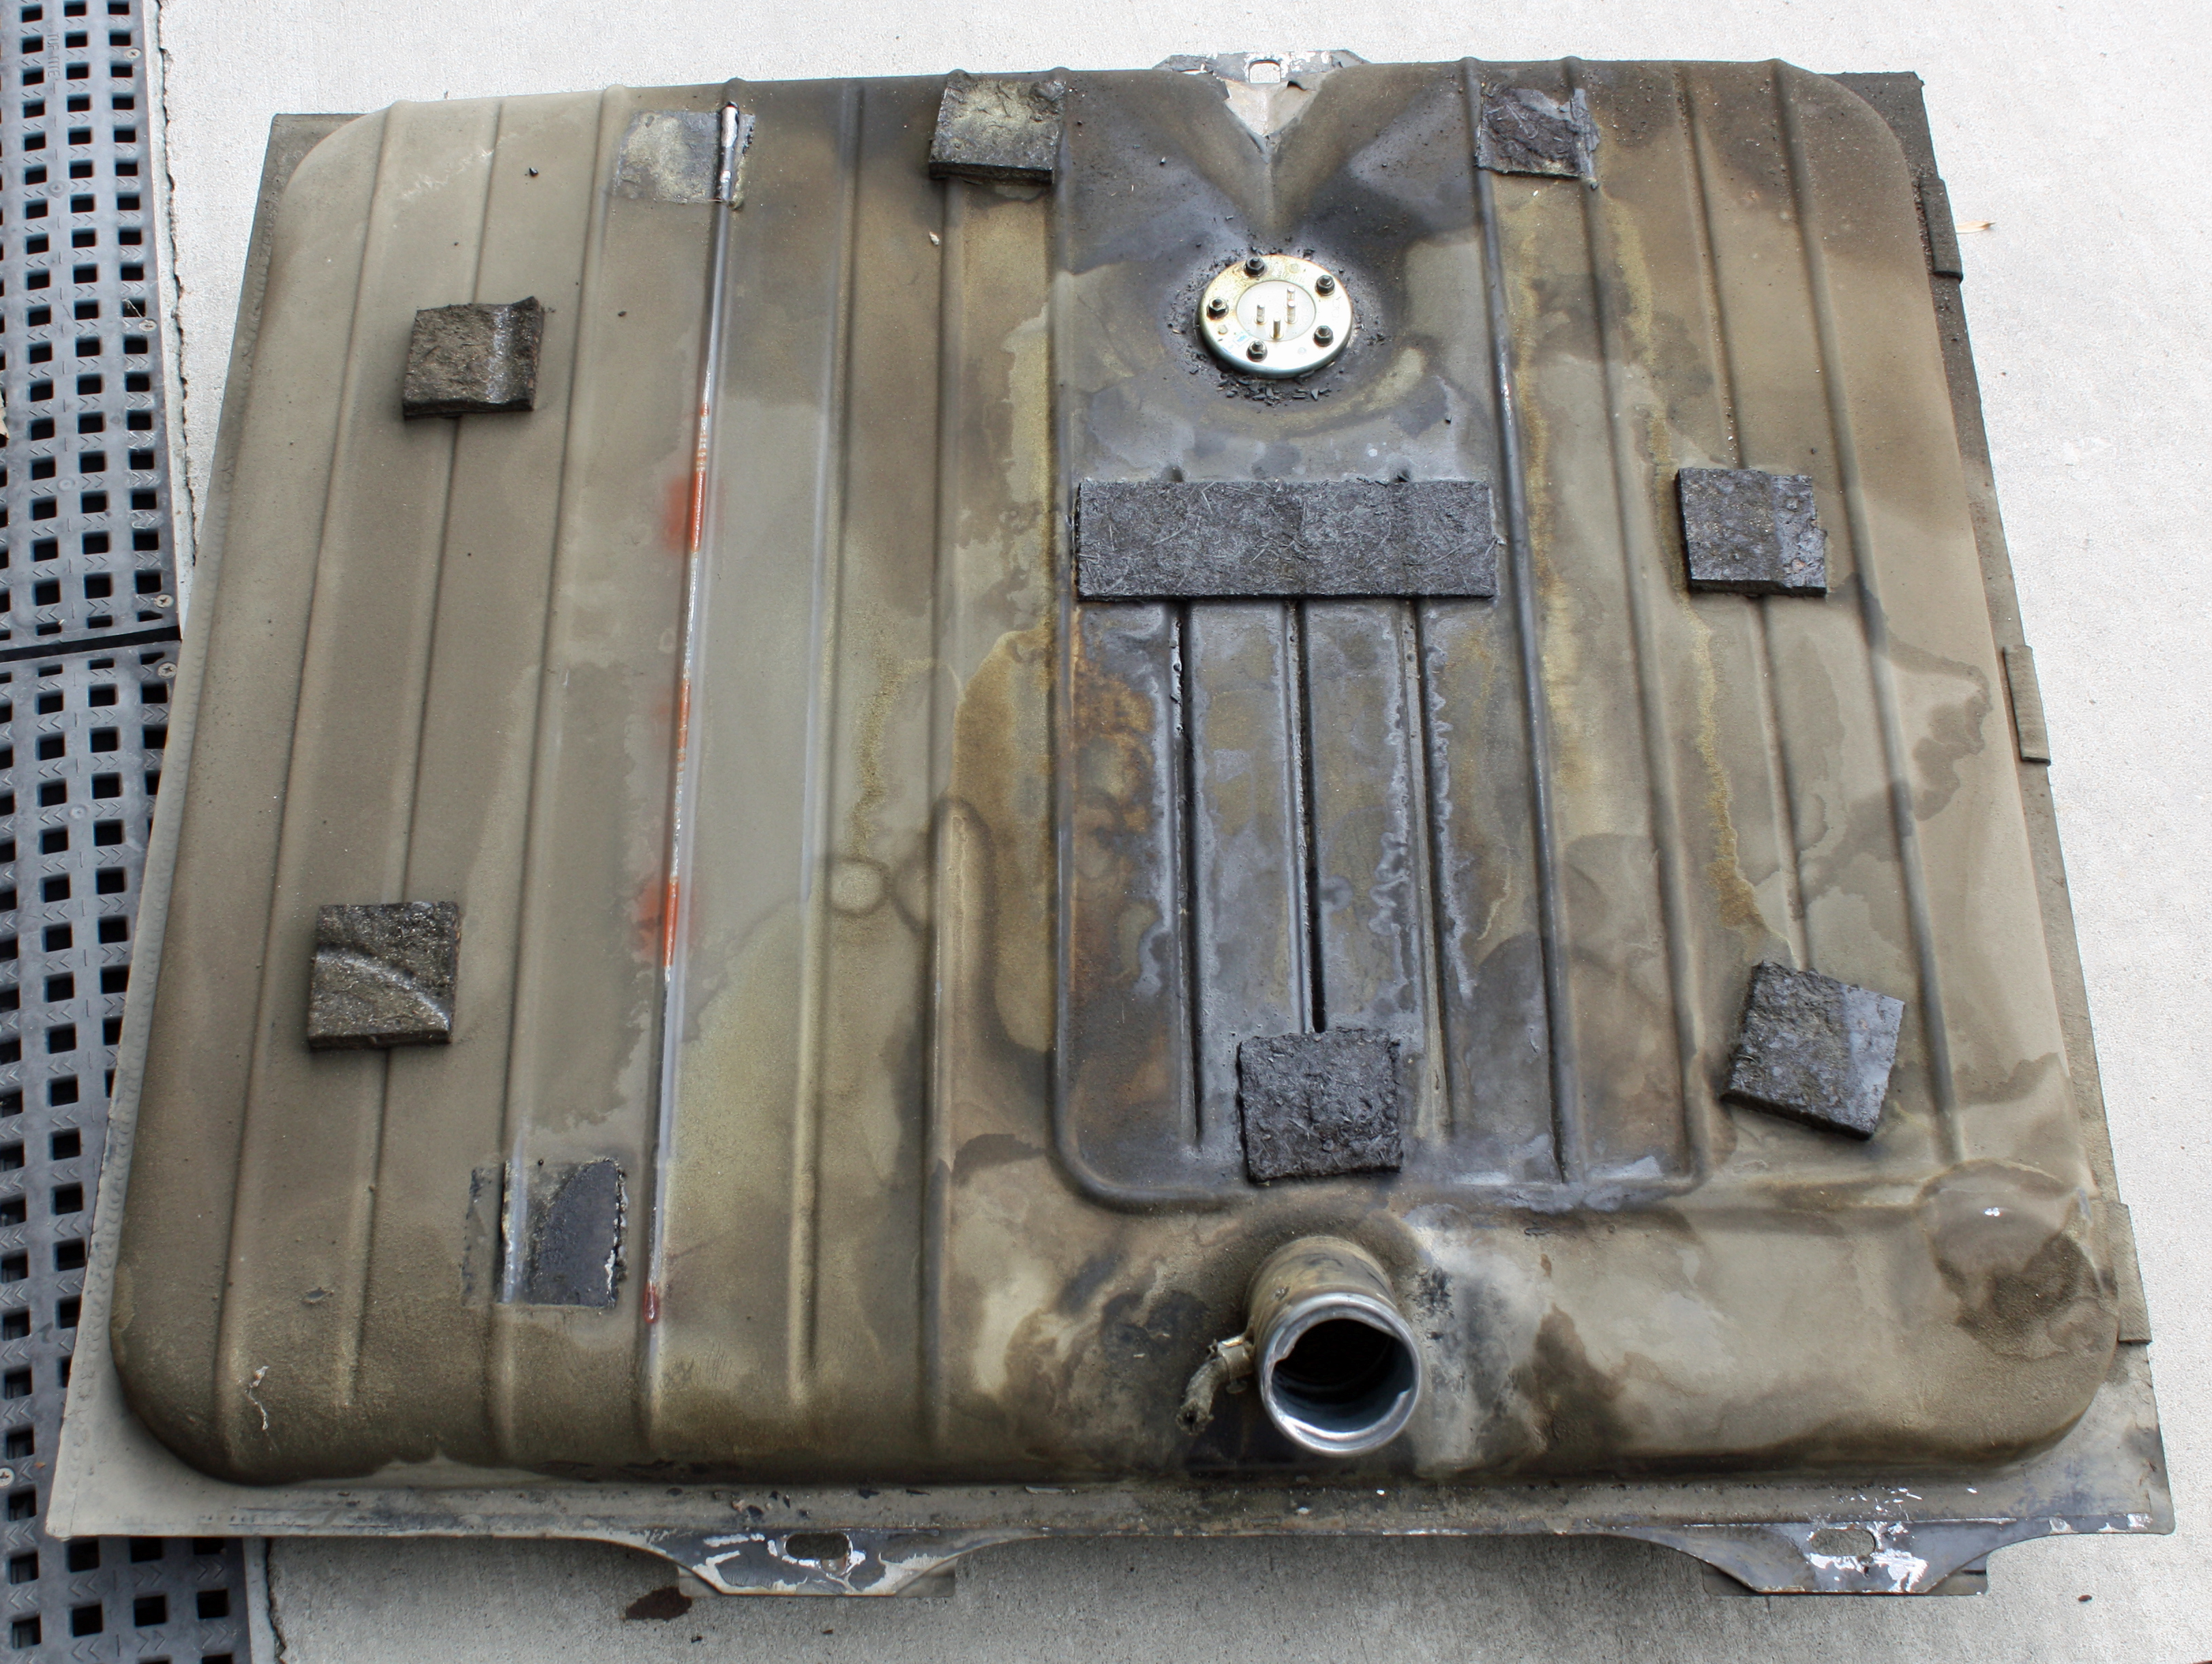
Since I have never taken a gas tank to have it cleaned, I wasn't sure about whether or not the exterior would be cleaned. Since I did not want to clean it after the interior of the tank had been cleaned, I cleaned it before taking it to the repair shop.


Because of what happened on Sunday, I had made up my mind to remove the gas tank and have it professionally cleaned. To begin that process, I clamped the fuel line to the fuel pump so I could remove it from the pump. Once I had it removed, I drained the fuel into a five gallon paint can that I had cleaned. It filled this container three times. The fuel was pretty clean in the container. I have a funnel with a strainer so I poured the fuel into three five gallon gas cans.


Using a spark plug socket, I bought a 9/16" bolt that would fit into the other end of he socket. I tightened two nuts against the bolt, inserted the bolt into the strainer opening and removed the old strainer. It did not come out easily.


Up to now the draining fuel had been pretty clean. That was not the case with the fuel released by removing the strainer.
After eating lunch while the remaining fuel drained, I prepared the tank for removal. There are two fuel hose lines attached to the neck that have to be disconnected. In the trunk there is a white plastic cover over the access hole for the fuel sender. The plug to that sender must be disconnected.


The return line to the tank must also be disconnected. I placed a bolt in the end of each of these lines to keep them from being contaminated.

I placed a couple of tall stands under the tank to stabilize it while I removed the fasteners. There are two at the rear, one on the left side and one at the rear.


Since I have never taken a gas tank to have it cleaned, I wasn't sure about whether or not the exterior would be cleaned. Since I did not want to clean it after the interior of the tank had been cleaned, I cleaned it before taking it to the repair shop.

 02-23-2017, 05:57 PM
#36
Member
Thread Starter
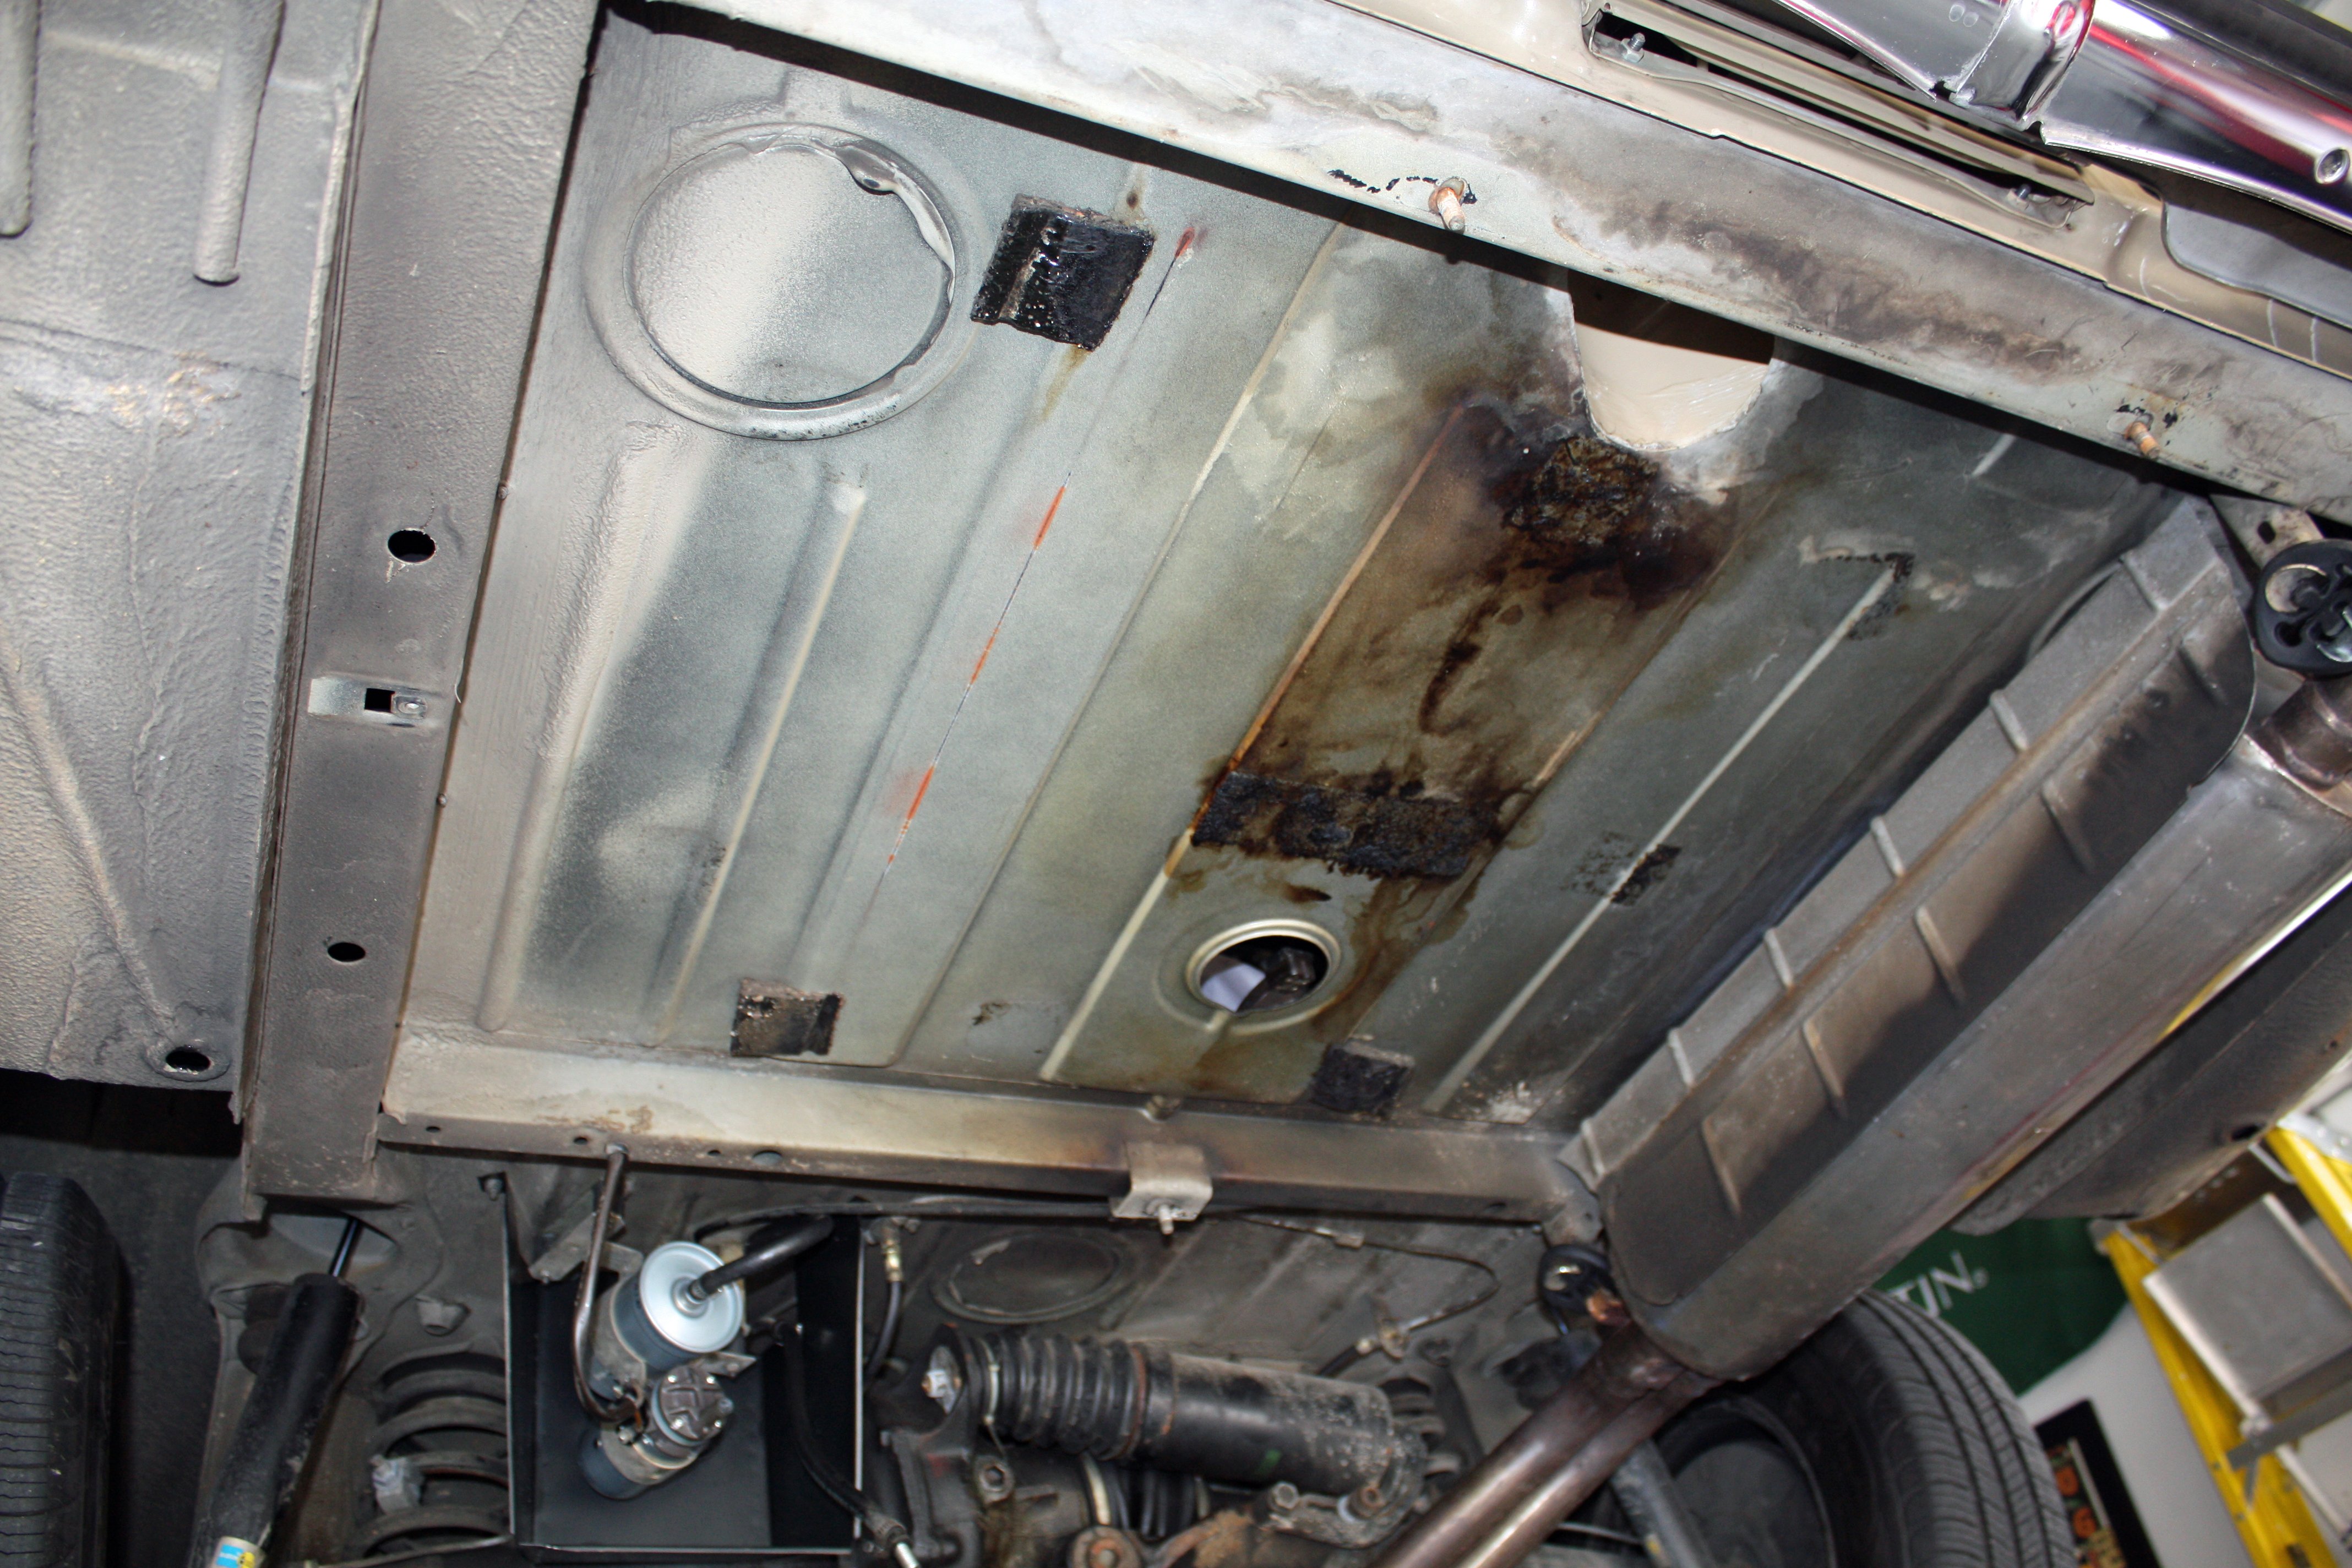
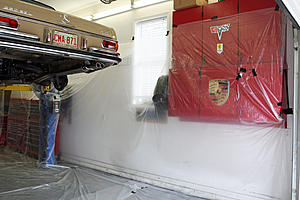
There was no way I was going to re-install the gas tank without cleaning the area above it. The more I thought about that, the more I became convinced it was time to pressure wash the bottom of the car. I spent a couple hours yesterday preparing my garage for this very dirty event. I usually buy my visqueen at either Lowe's or the local hardware store with the size being 9'x12'. I happened to be in Wal-Mart the other day and discovered that theirs is 10'x20". This worked out great as I only needed two rolls to do the walls. I used three more rolls to cover the floor.
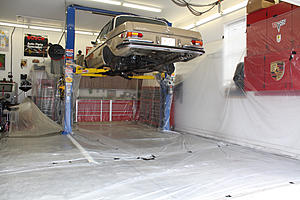
In the engine bay I used tape to cover any holes and stuffed some plastic down alongside the motor. I still had some residue enter this area but it will only require some light cleaning. I also taped holes in the trunk.
The next step was spraying the entire bottom of the car with nine cans of engine degreaser.

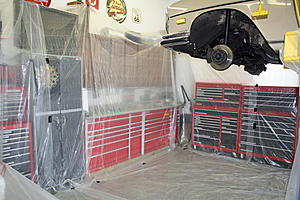
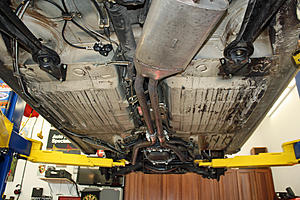
I donned a Tyvek painter's suit and cut a hole in the bottom of a garbage bag and draped it over my head. And I still was entirely soaked by the end of the cleaning. It took me about two hours to pressure wash the bottom and another two hours to clean up my garage!!! In the middle of this the mail lady needed a signature for a package. She was somewhat hesitant to approach me and commented that I was really dirty. I then commented that a cleaning project like this is actually just transferring the dirt from the car to me and the garage. However, it does look much better and it will be easier to work on the bottom now. Most of the darker areas in the photos below is the cosmoline that was applied prior to shipping the car. For some reason there is more on the right side of the car than on the left side.
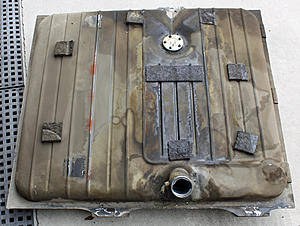
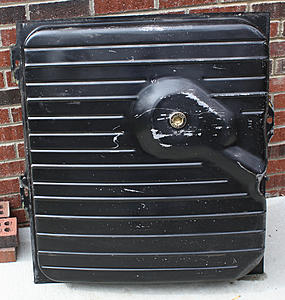
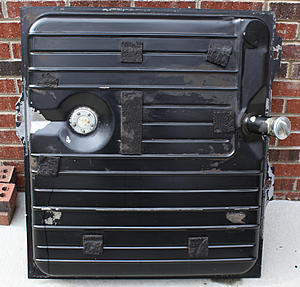
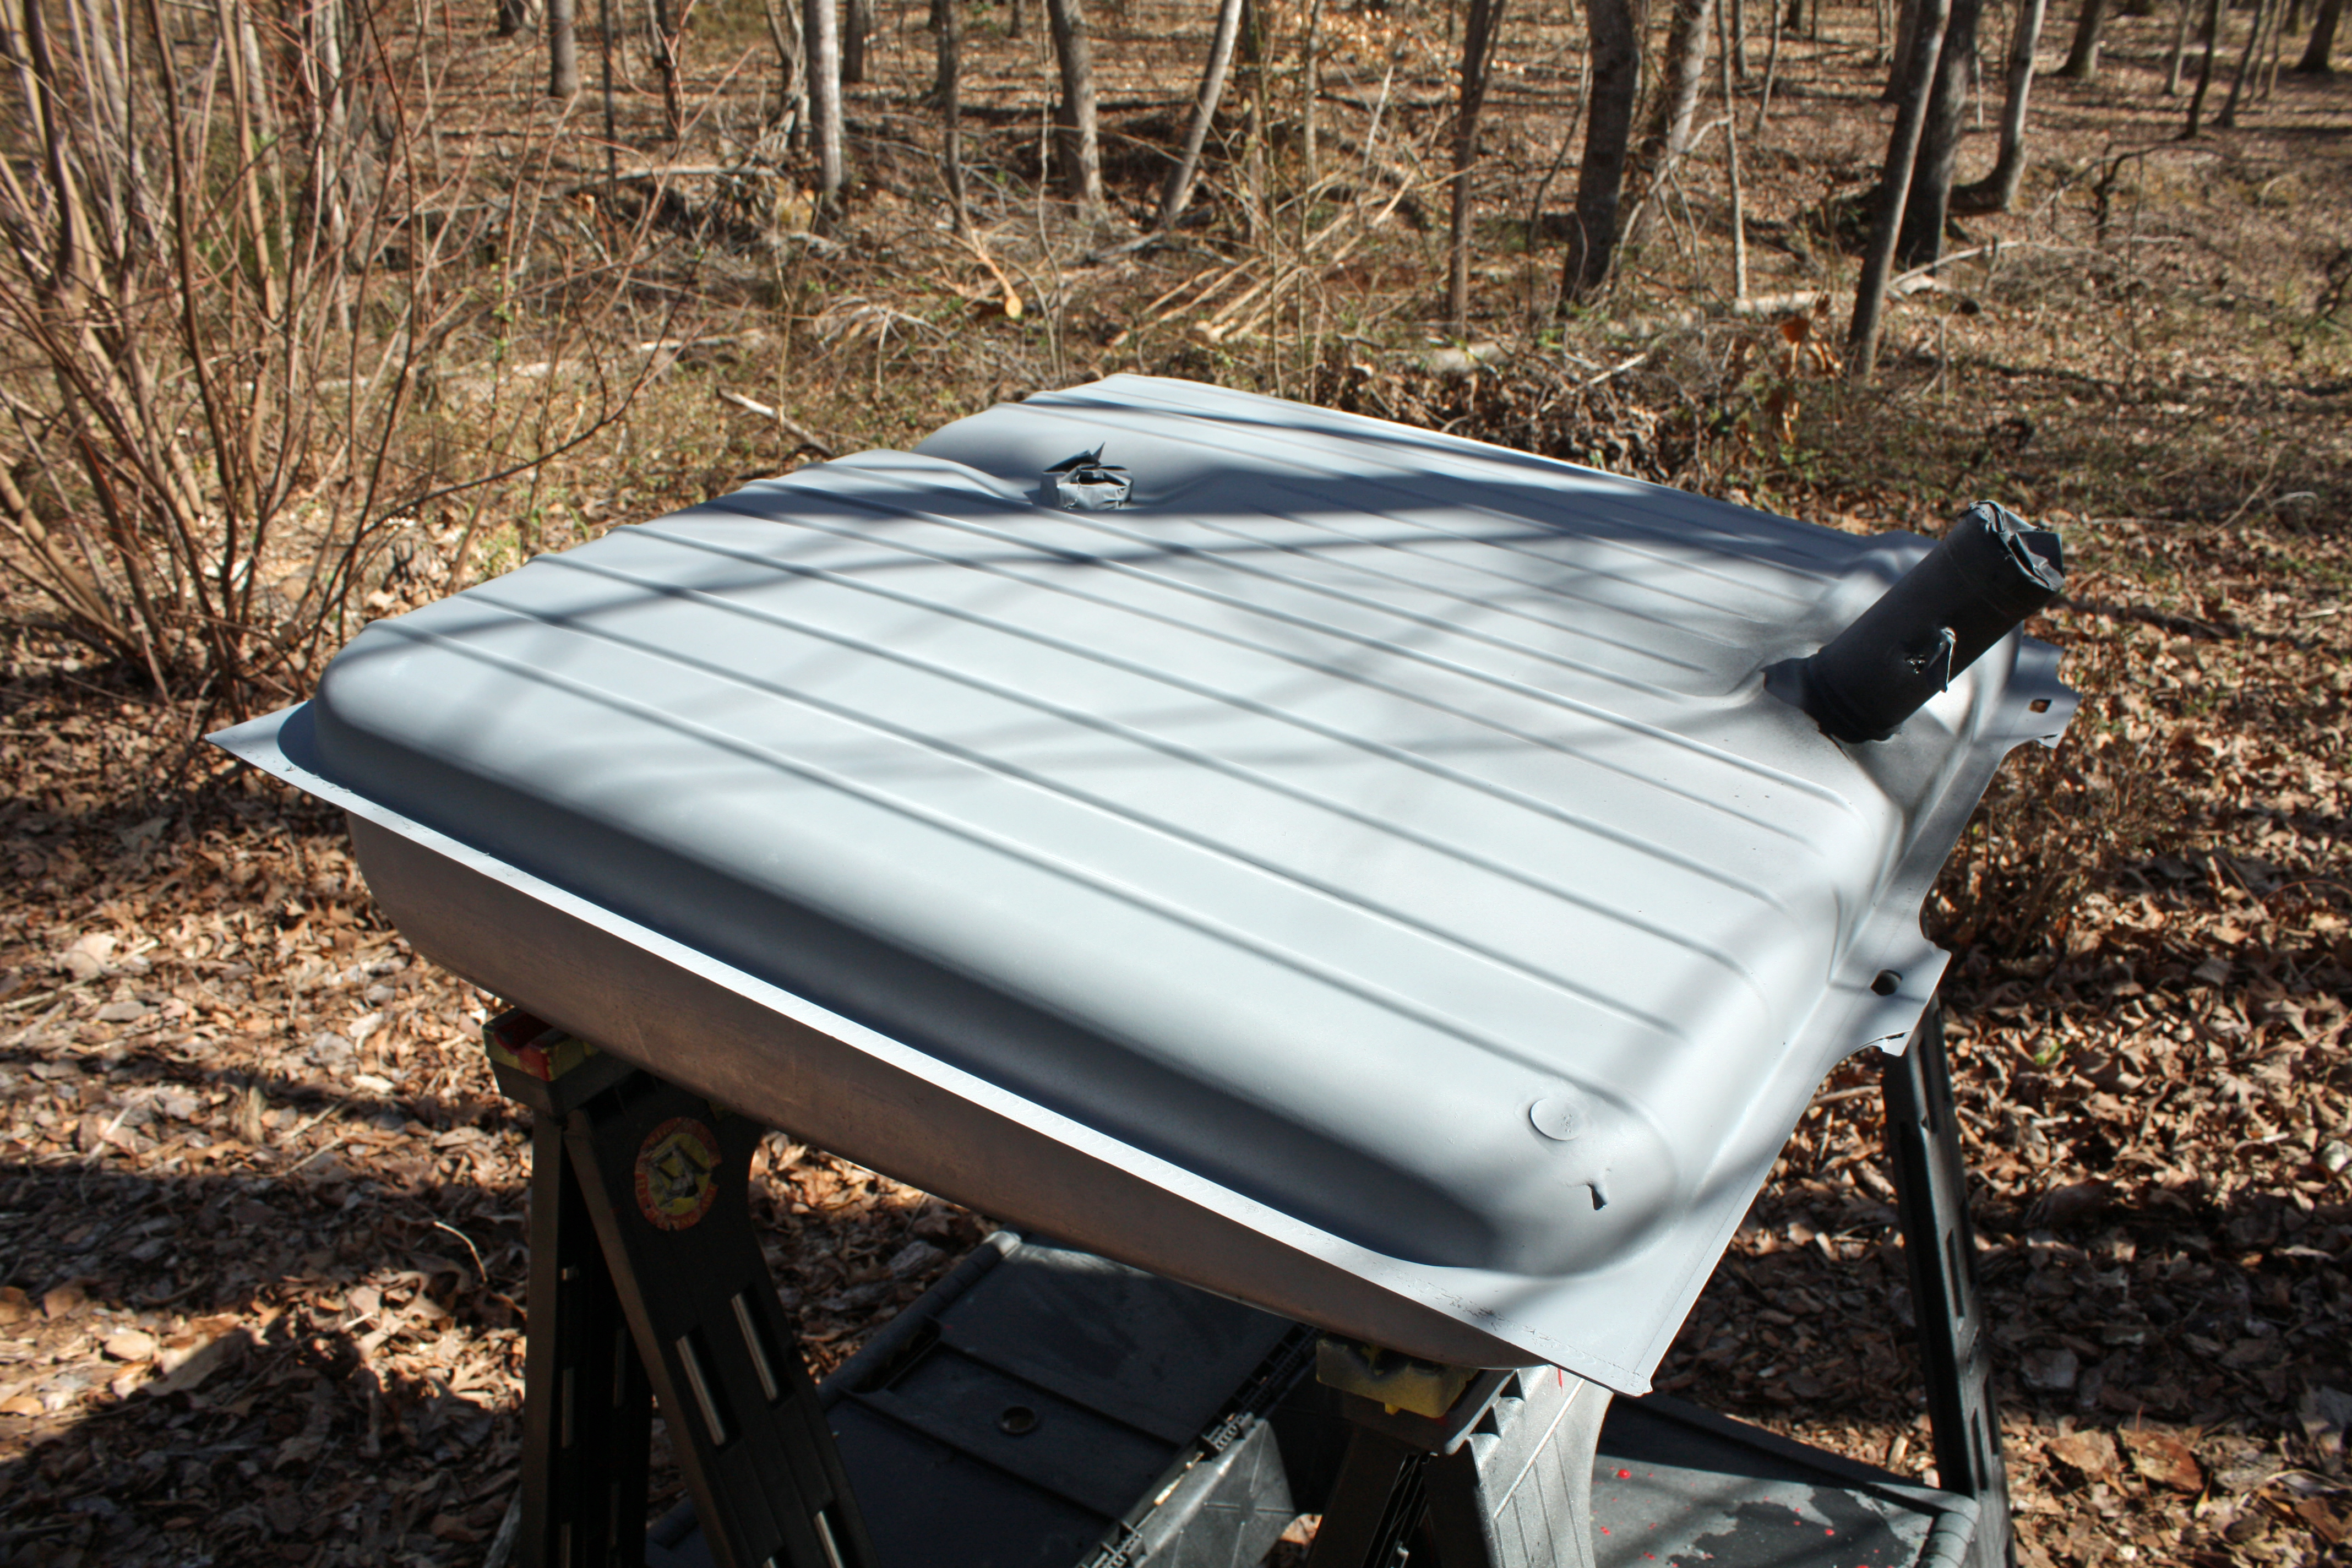
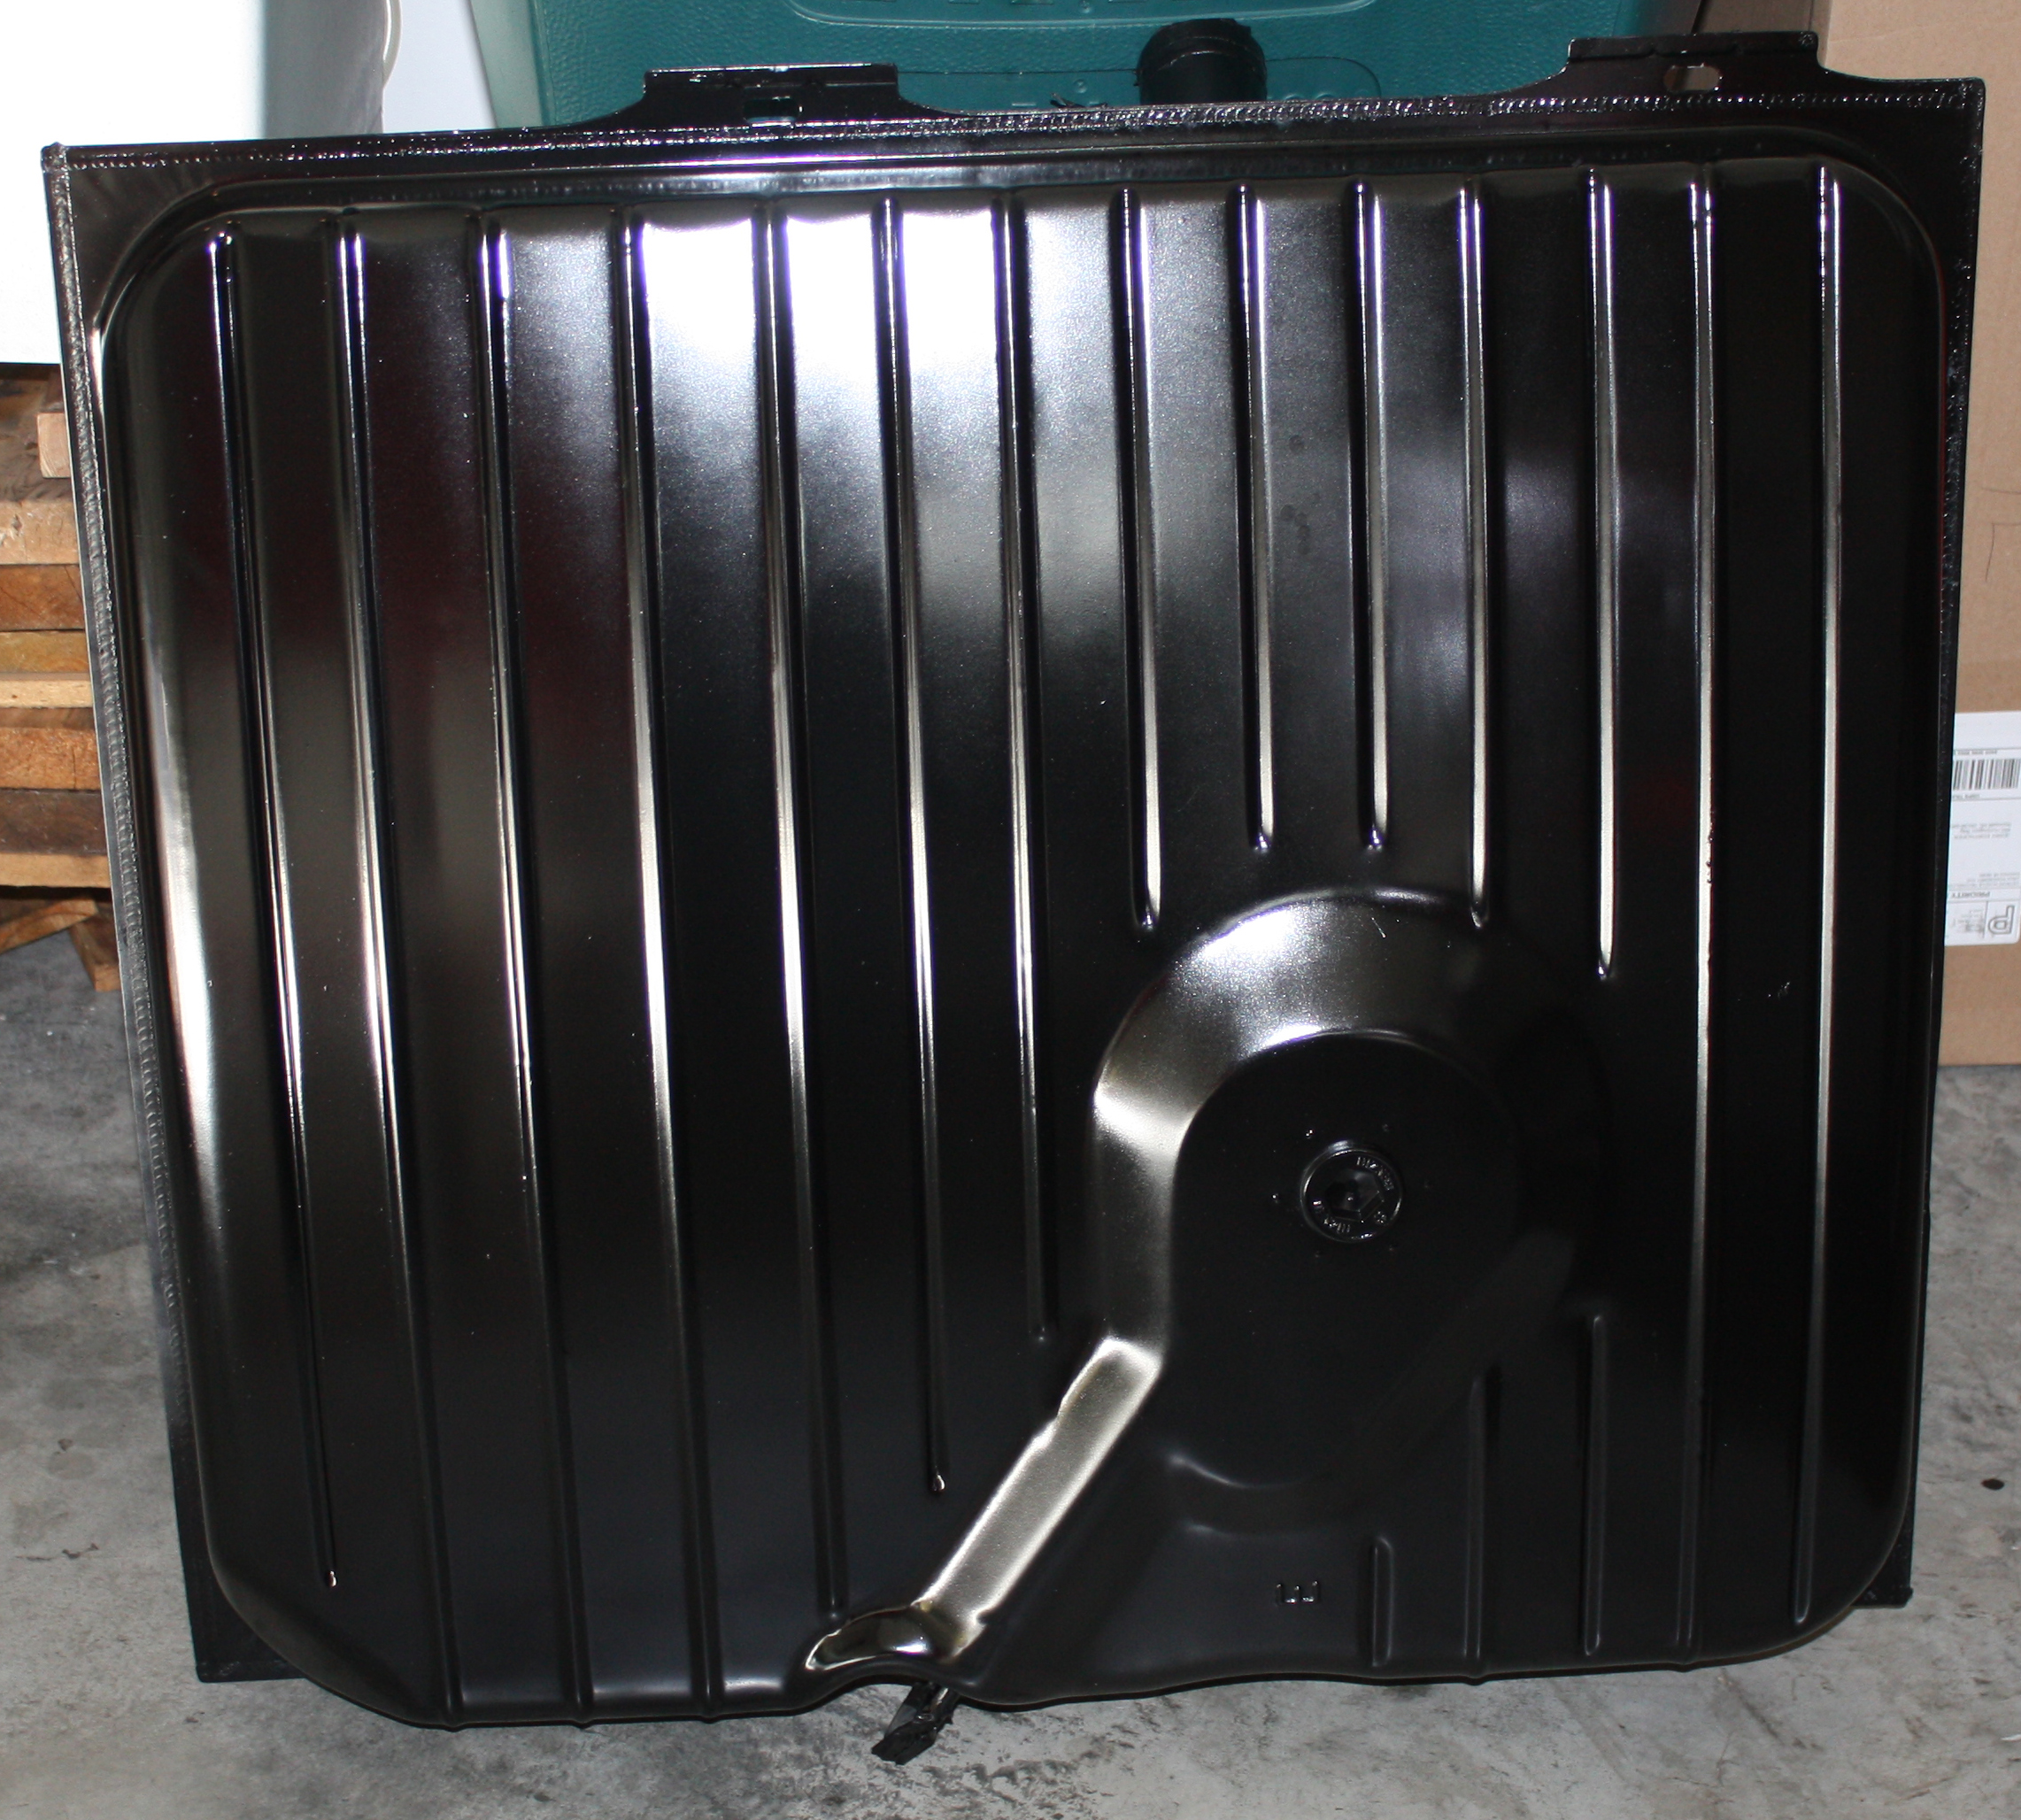
I picked up the gas tank this afternoon. There was no rust in the tank so there was no need to coat it. Due to the chemical process to clean the tank, most of the paint is gone. I cleaned off the remainder of the paint on the bottom of the tank. Tomorrow I will do the top and then paint the tank a satin black color.


In the engine bay I used tape to cover any holes and stuffed some plastic down alongside the motor. I still had some residue enter this area but it will only require some light cleaning. I also taped holes in the trunk.

The next step was spraying the entire bottom of the car with nine cans of engine degreaser.


I donned a Tyvek painter's suit and cut a hole in the bottom of a garbage bag and draped it over my head. And I still was entirely soaked by the end of the cleaning. It took me about two hours to pressure wash the bottom and another two hours to clean up my garage!!! In the middle of this the mail lady needed a signature for a package. She was somewhat hesitant to approach me and commented that I was really dirty. I then commented that a cleaning project like this is actually just transferring the dirt from the car to me and the garage. However, it does look much better and it will be easier to work on the bottom now. Most of the darker areas in the photos below is the cosmoline that was applied prior to shipping the car. For some reason there is more on the right side of the car than on the left side.


I picked up the gas tank this afternoon. There was no rust in the tank so there was no need to coat it. Due to the chemical process to clean the tank, most of the paint is gone. I cleaned off the remainder of the paint on the bottom of the tank. Tomorrow I will do the top and then paint the tank a satin black color.

 02-24-2017, 03:33 PM
#37
Member
Thread Starter

 02-24-2017, 10:04 PM
#38
Member
Thread Starter
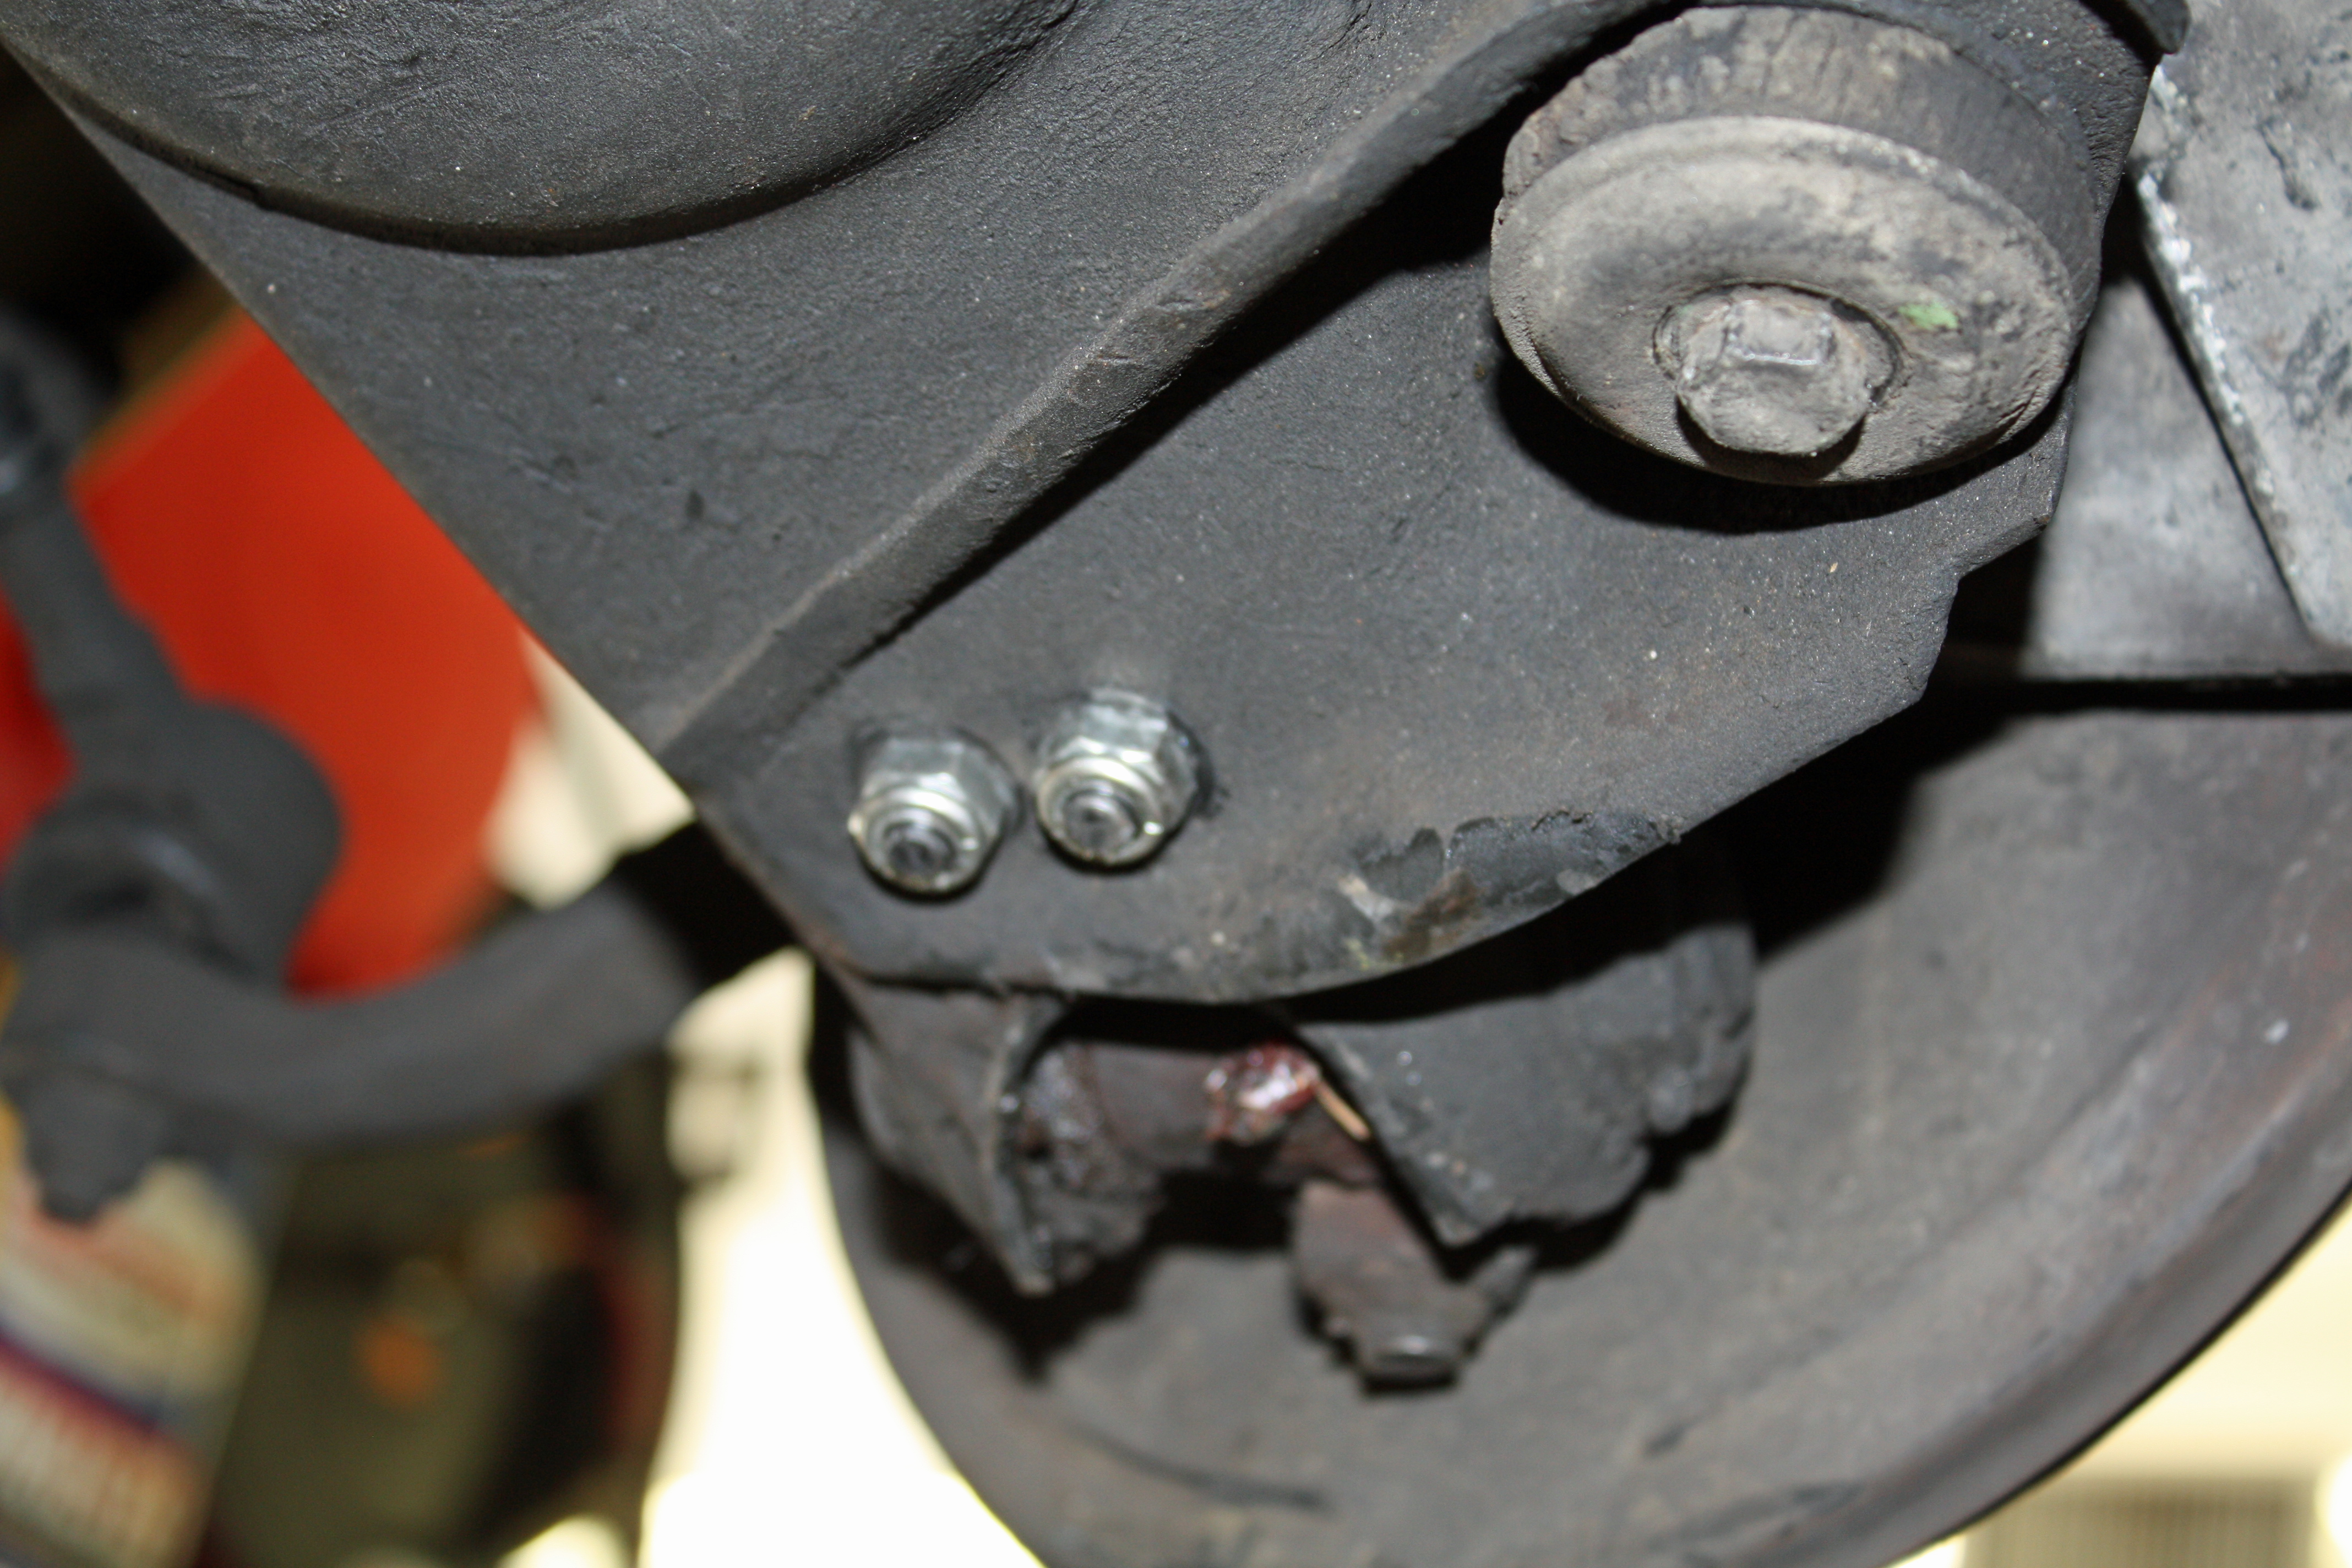
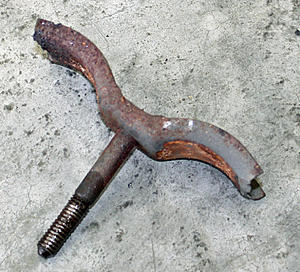
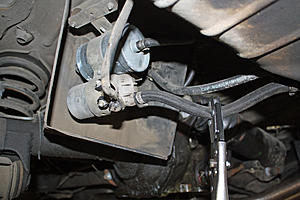
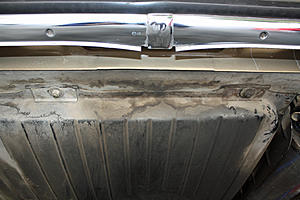
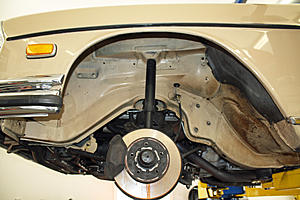
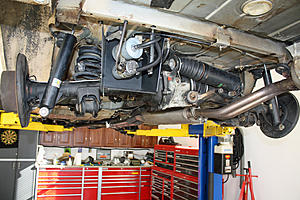
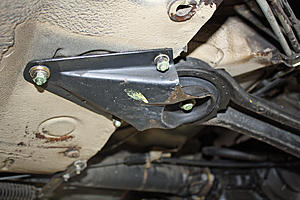
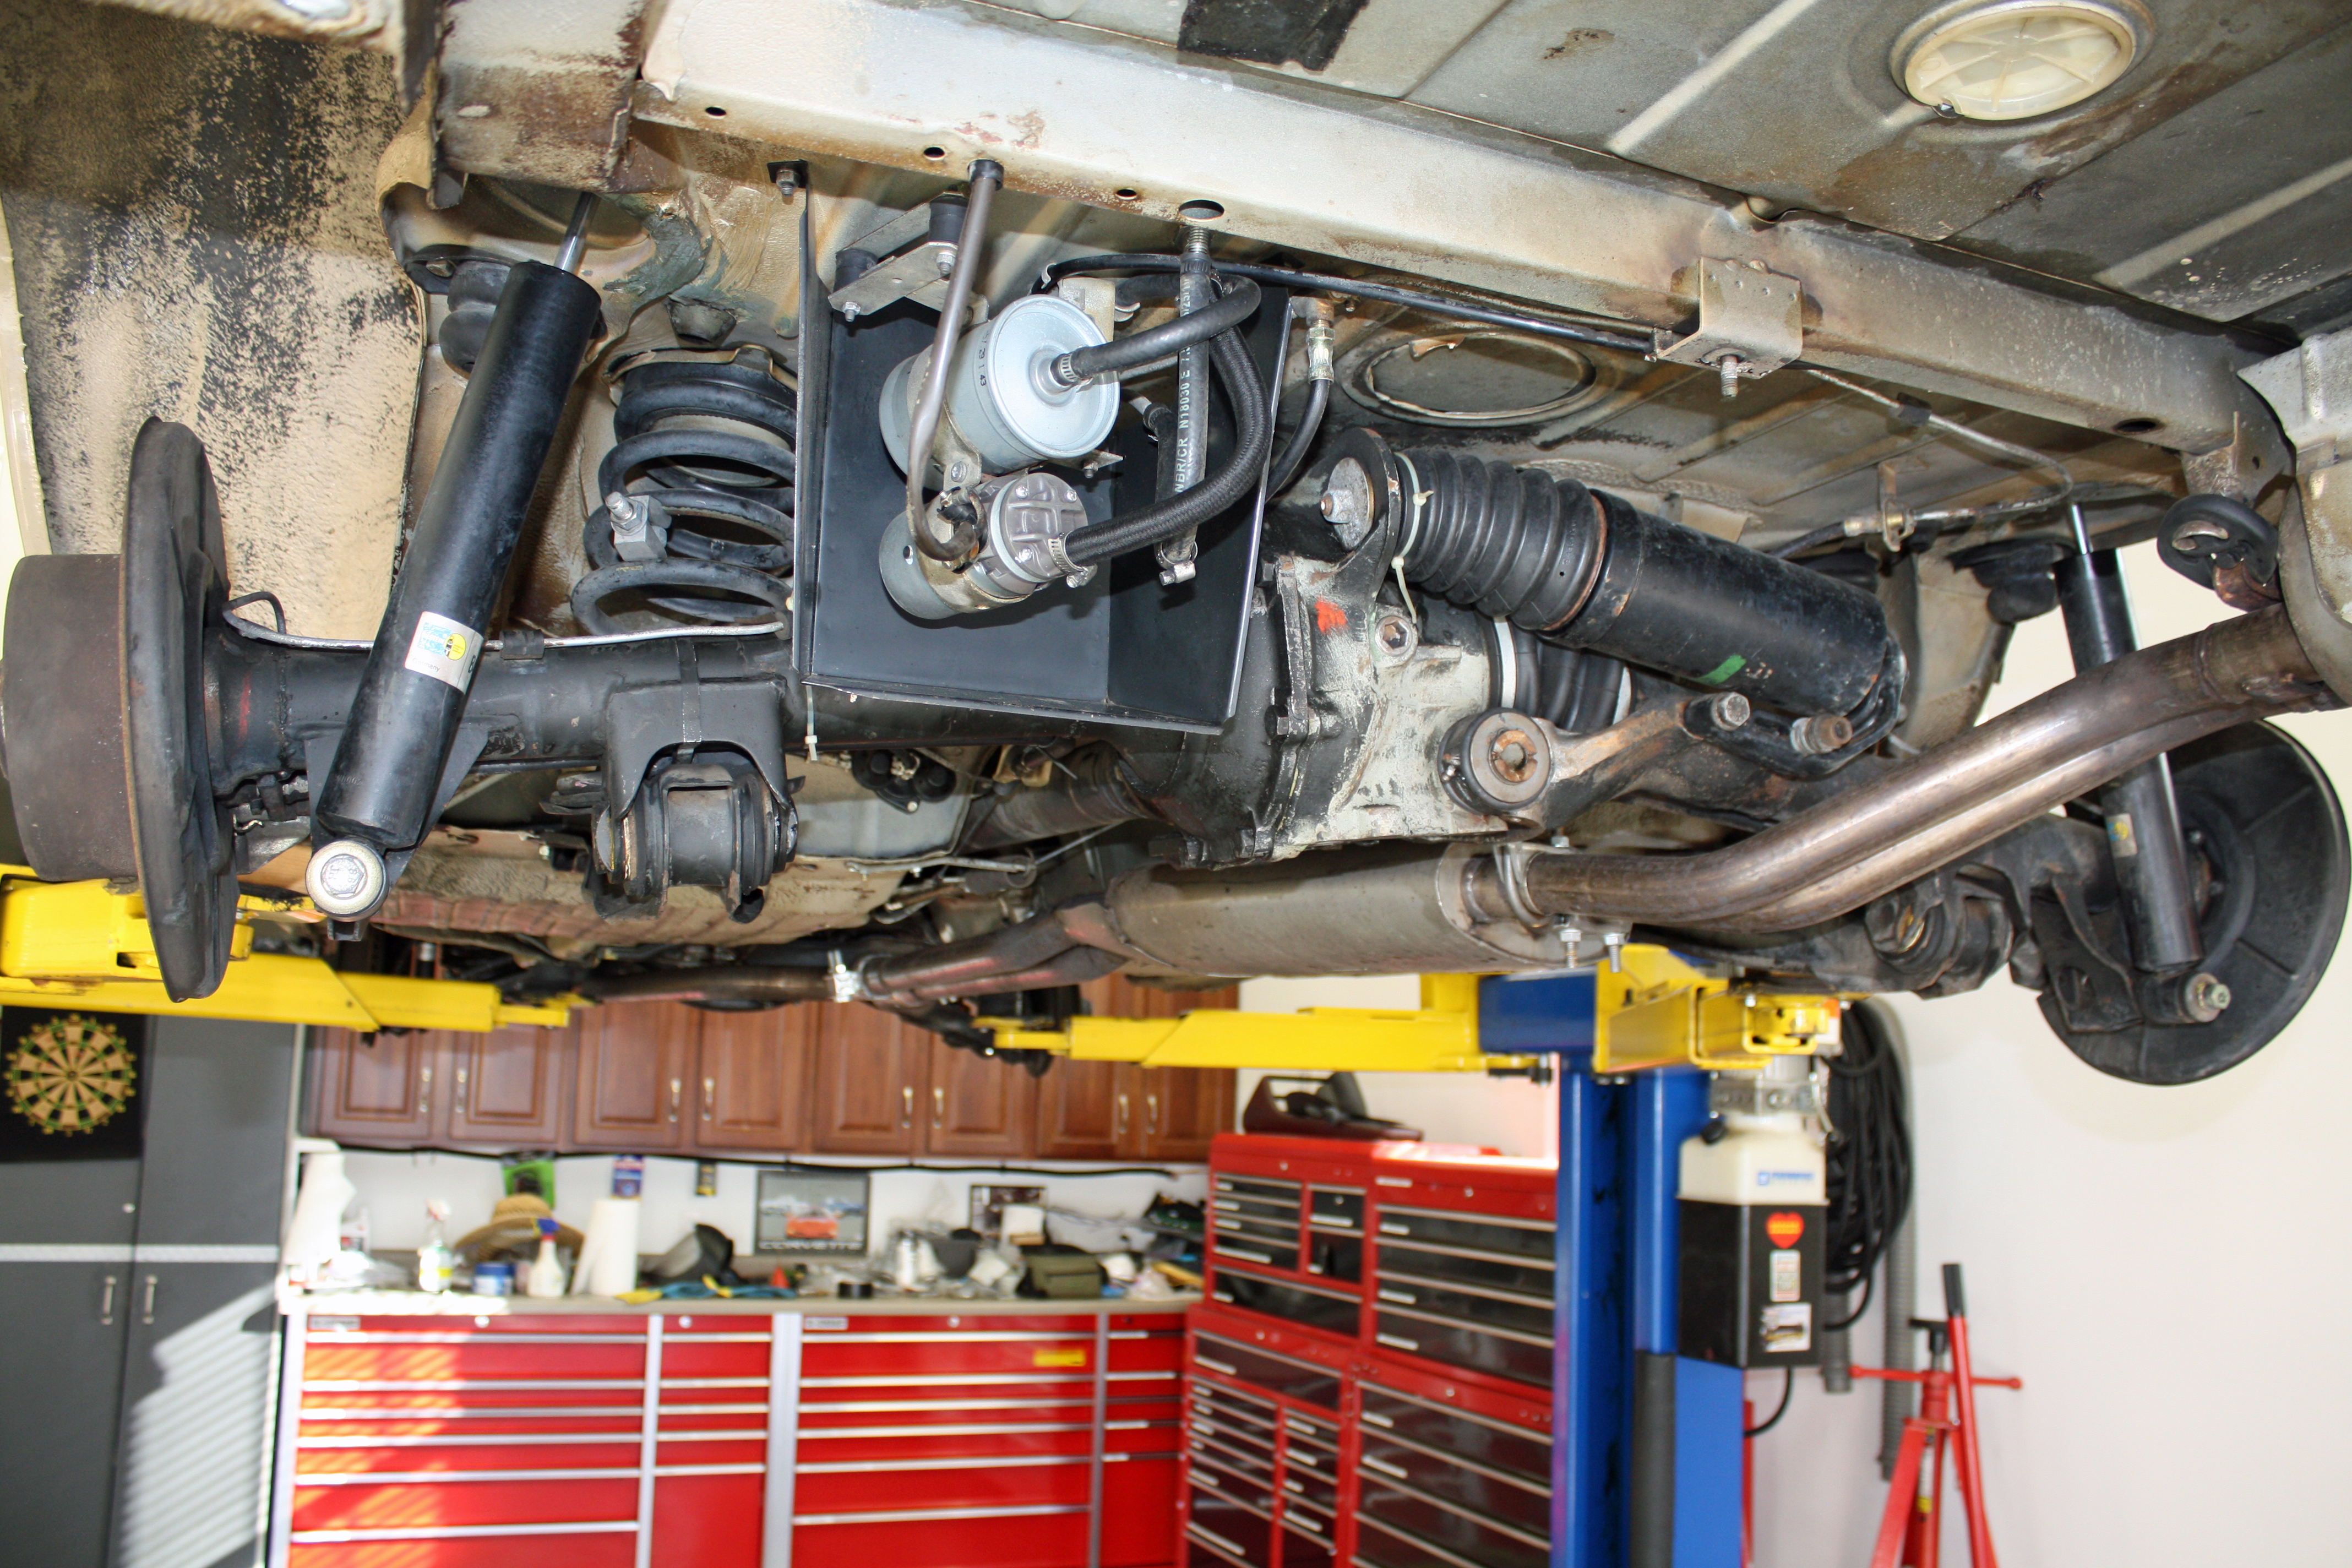
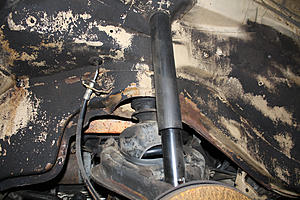
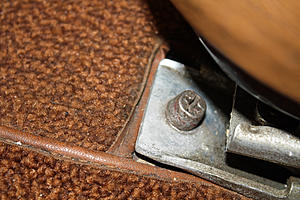
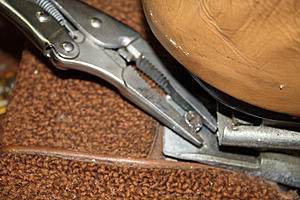
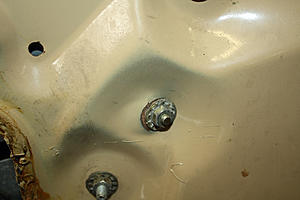
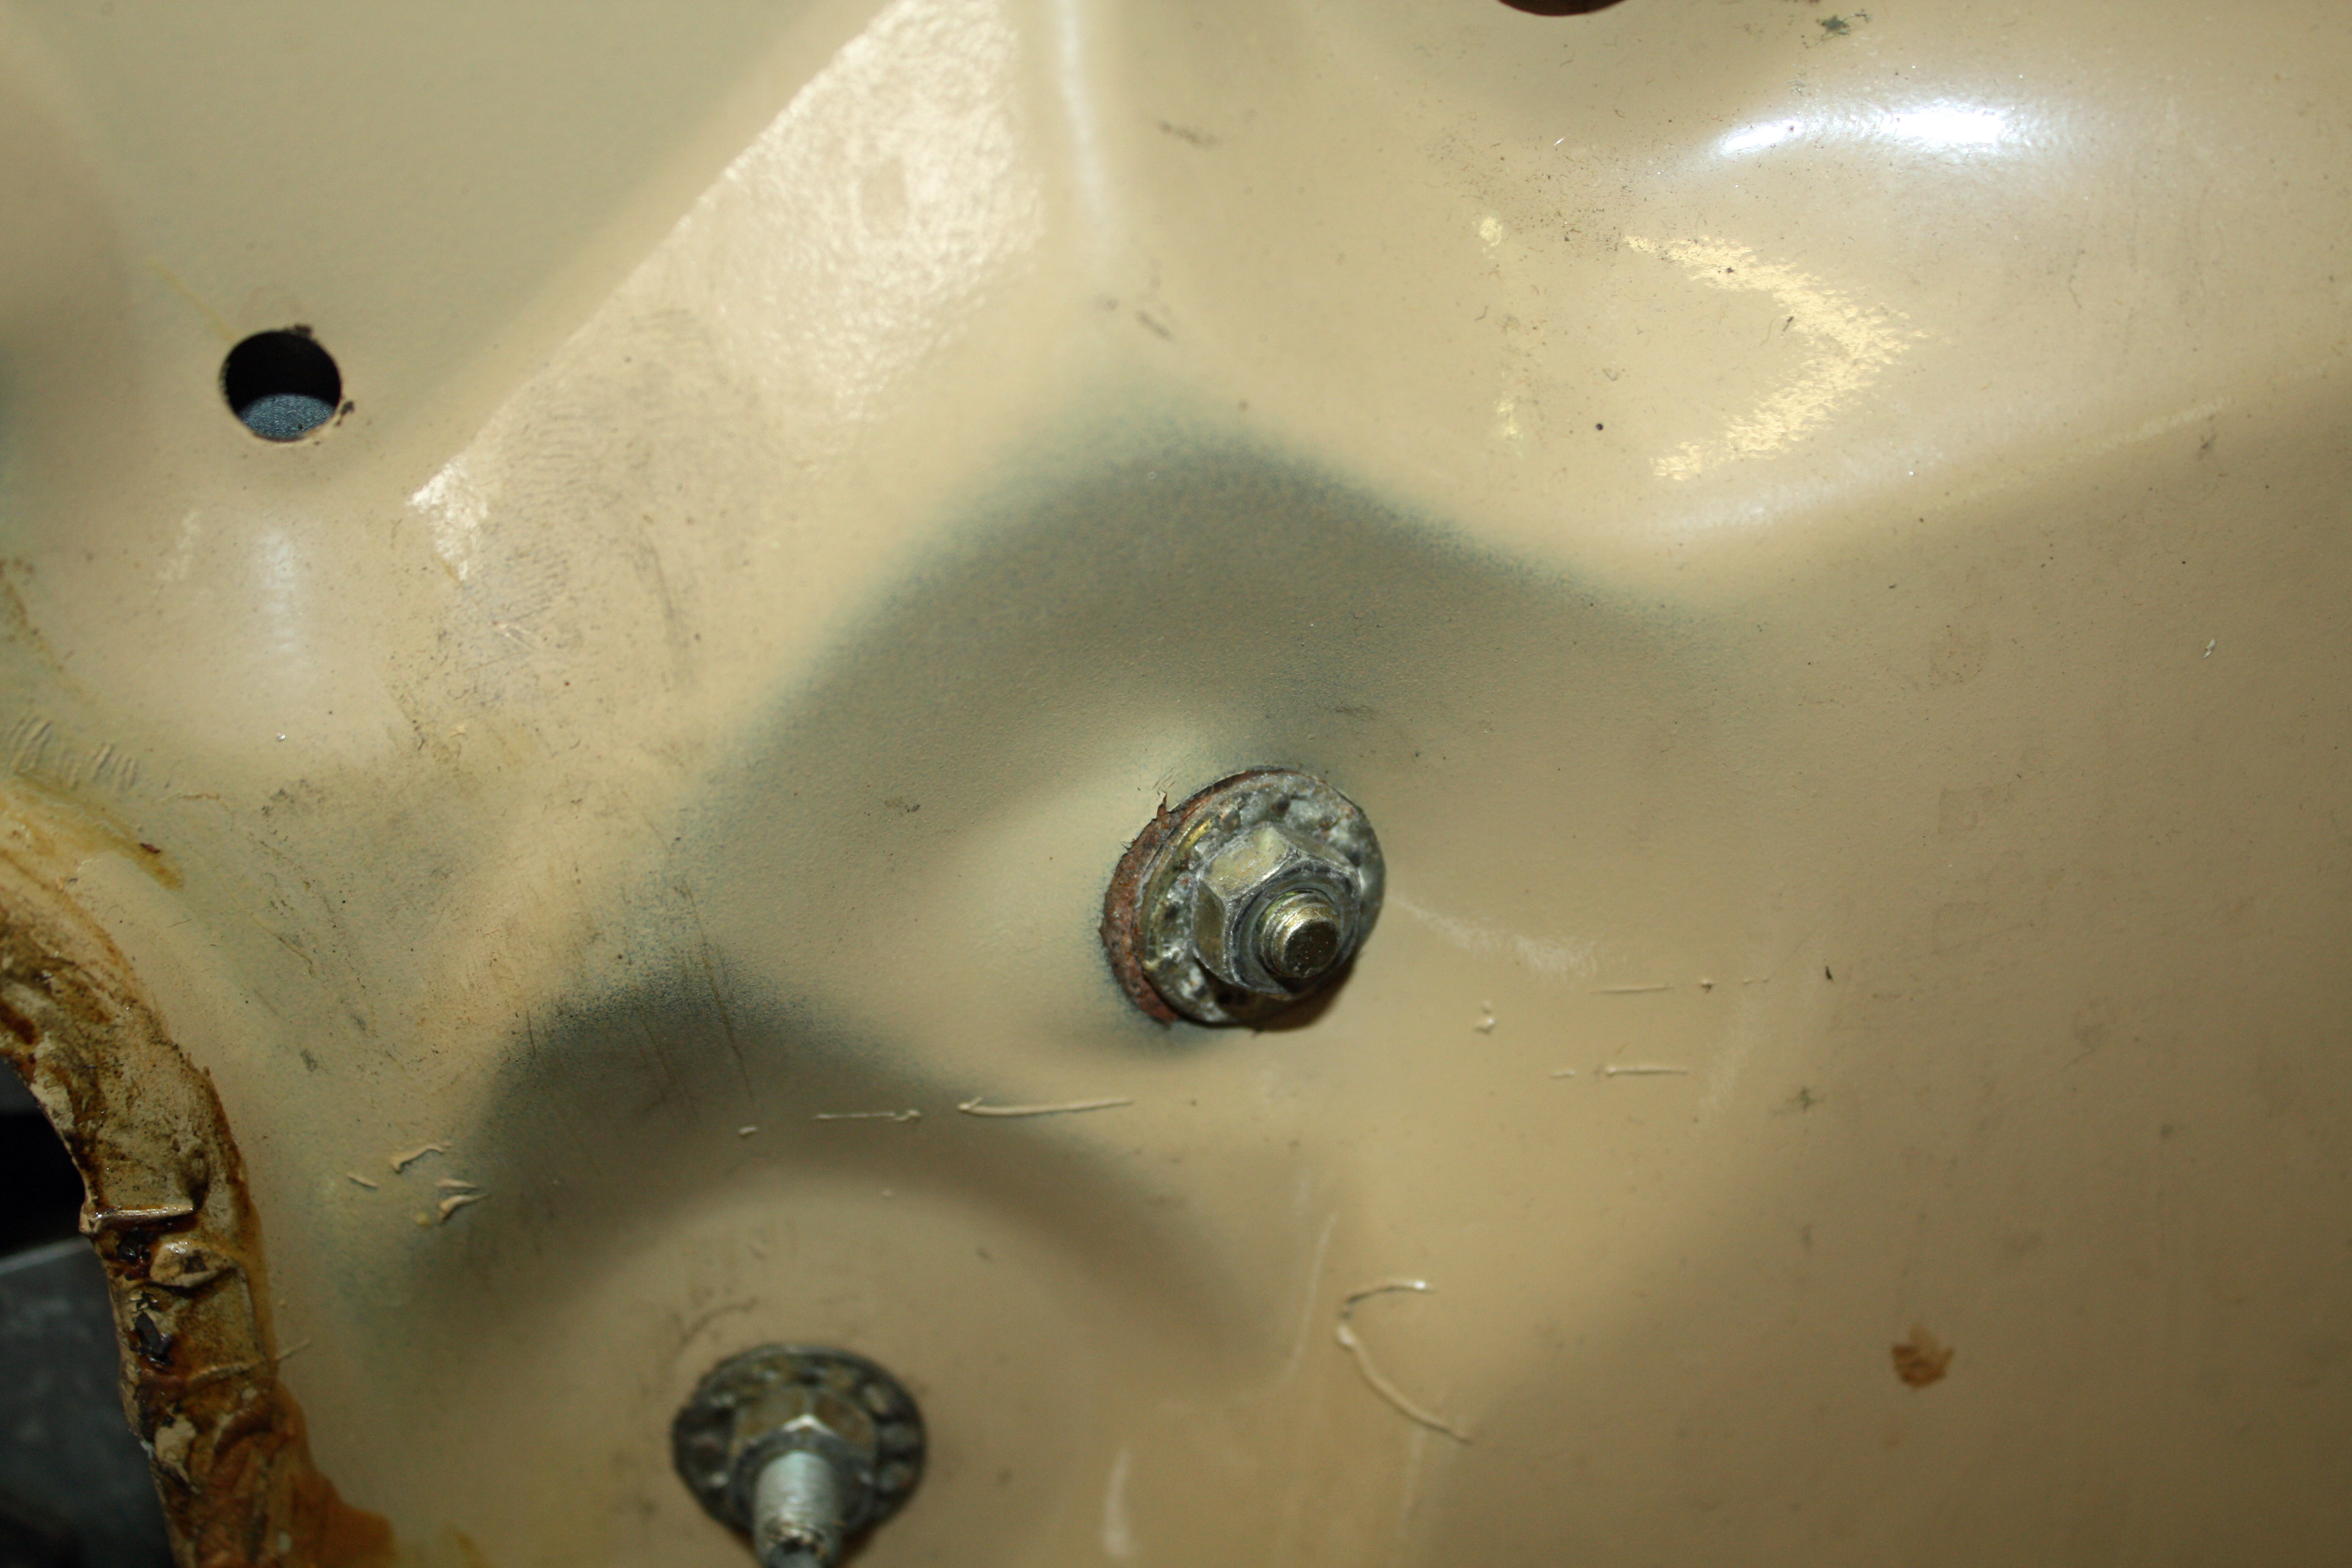
I have a question about the rear springs. Both of my rear springs have wedges to adjust the height.
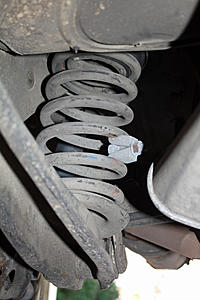
Would you suspect the spring has sagged or would you be looking at the compensator? I have been doing a bit of reading about the compensator and rear springs but I still am not sure how I check to see if my compensator is working.
For troubleshooting purposes, here is a photo of it prior to my cleaning it.
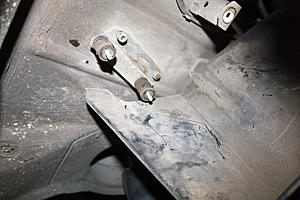
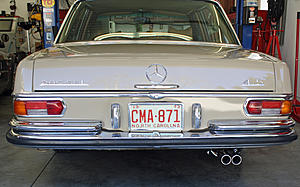
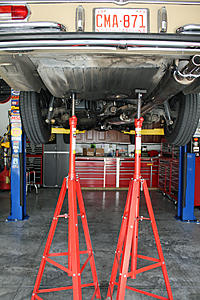
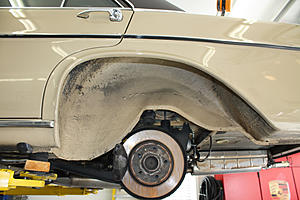
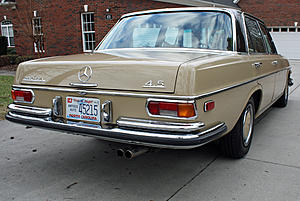
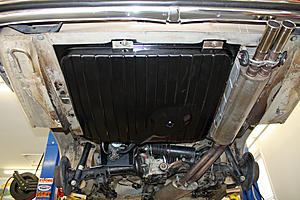
I don't have a shot directly from the rear to show camber but this photo will give you some idea of the camber. I haven't noticed anything unusual about the rear camber as I have walked up to the car. The second photo shows the current ride height. Keep in mind my driveway is slanted.


Would you suspect the spring has sagged or would you be looking at the compensator? I have been doing a bit of reading about the compensator and rear springs but I still am not sure how I check to see if my compensator is working.
For troubleshooting purposes, here is a photo of it prior to my cleaning it.

I don't have a shot directly from the rear to show camber but this photo will give you some idea of the camber. I haven't noticed anything unusual about the rear camber as I have walked up to the car. The second photo shows the current ride height. Keep in mind my driveway is slanted.

 02-27-2017, 06:58 PM
#39
Member
Thread Starter
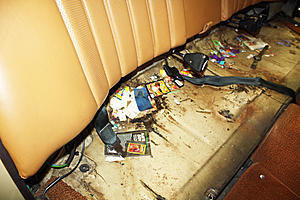
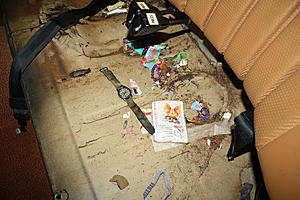
Yesterday afternoon I became bored watching the Daytona 500. I am ready to work on the interior this week so out came the rear seat. Lots of junk under it including some change and a watch!
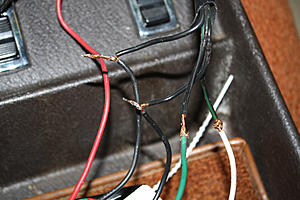
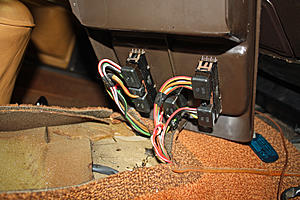
I removed the aftermarket Blaupunkt cassette radio too. All of the wiring junctions were wrapped with electrical tape. Peeling away the tape revealed all connections were made by twisting the wires together.
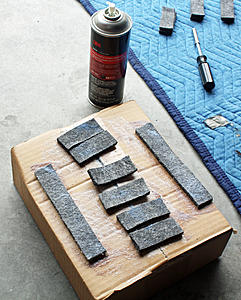
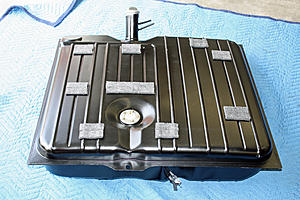
The fuel sender seal arrived today. I could now re-install the tank. Using a photo of the dirty tank for reference, I installed felt pads on the top side as close as I could to the original locations by using 3M spray adhesive. The rubber insulators on the pump wiring were gone when I originally installed the new pump and filter. The new ones arrived this past week. With another new fuel filter installed, it is now time to see if cleaning the tank solved my running issues.


 02-28-2017, 07:11 PM
#40
Member
Thread Starter
After cleaning the bottom, I searched for rust areas to be treated with POR15. The only place I found was in the right from wheel well which was caused by the battery above.
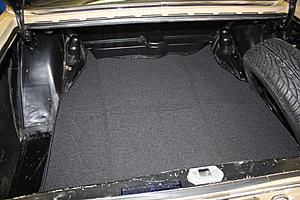
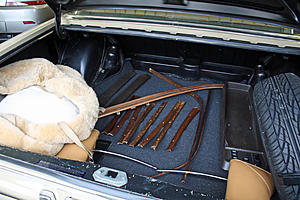
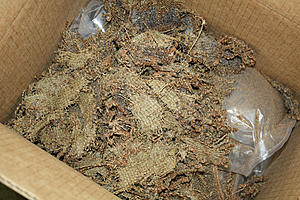
I had ordered carpet for the trunk on eBay right after getting the car. It was custom made by someone in the Netherlands and just arrived yesterday. I which they had rolled it instead of folding it. Hopefully the fold marks come out.
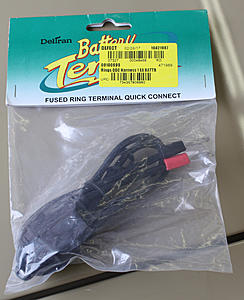
I worked on installing the Becker Europa II today. The original wiring harness had been cut so there was no obvious way to wire it. After figuring out the wiring details, I decided I needed a two prong plug to wire up the 12V and the output to the power antenna. I explained to the lady at the local Advance Auto that I was looking for the same type of plug used by my Battery Tenders. She knew exactly what I was looking for. She came back with a hard wire kit using that plug. I told her I would need two of these packages to make it work. When she rang up the two packages, the total was two dollars plus sales tax. I was surprised at the low price which she said was because they were being discontinued. I asked her if she had more at that price. She had a total of ten which I bought for future projects.
I wired the speaker output wires only to find that the wires pulled out of one of the plugs. A quick call to Becker has a couple new speaker wires on the way.
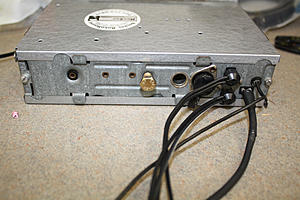
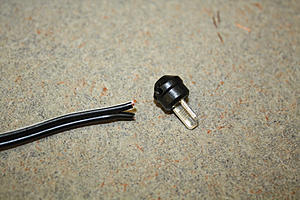
I had power to the radio and hooked up the one speaker wire that was whole. I did not have sound. Another call to Becker and I was made aware that the rubber plug for the accessory output must be plugged in as it has contacts on it that completes the speaker circuit. I had unplugged it in anticipation of hooking up the auxiliary input.


I had ordered carpet for the trunk on eBay right after getting the car. It was custom made by someone in the Netherlands and just arrived yesterday. I which they had rolled it instead of folding it. Hopefully the fold marks come out.

I worked on installing the Becker Europa II today. The original wiring harness had been cut so there was no obvious way to wire it. After figuring out the wiring details, I decided I needed a two prong plug to wire up the 12V and the output to the power antenna. I explained to the lady at the local Advance Auto that I was looking for the same type of plug used by my Battery Tenders. She knew exactly what I was looking for. She came back with a hard wire kit using that plug. I told her I would need two of these packages to make it work. When she rang up the two packages, the total was two dollars plus sales tax. I was surprised at the low price which she said was because they were being discontinued. I asked her if she had more at that price. She had a total of ten which I bought for future projects.


I wired the speaker output wires only to find that the wires pulled out of one of the plugs. A quick call to Becker has a couple new speaker wires on the way.

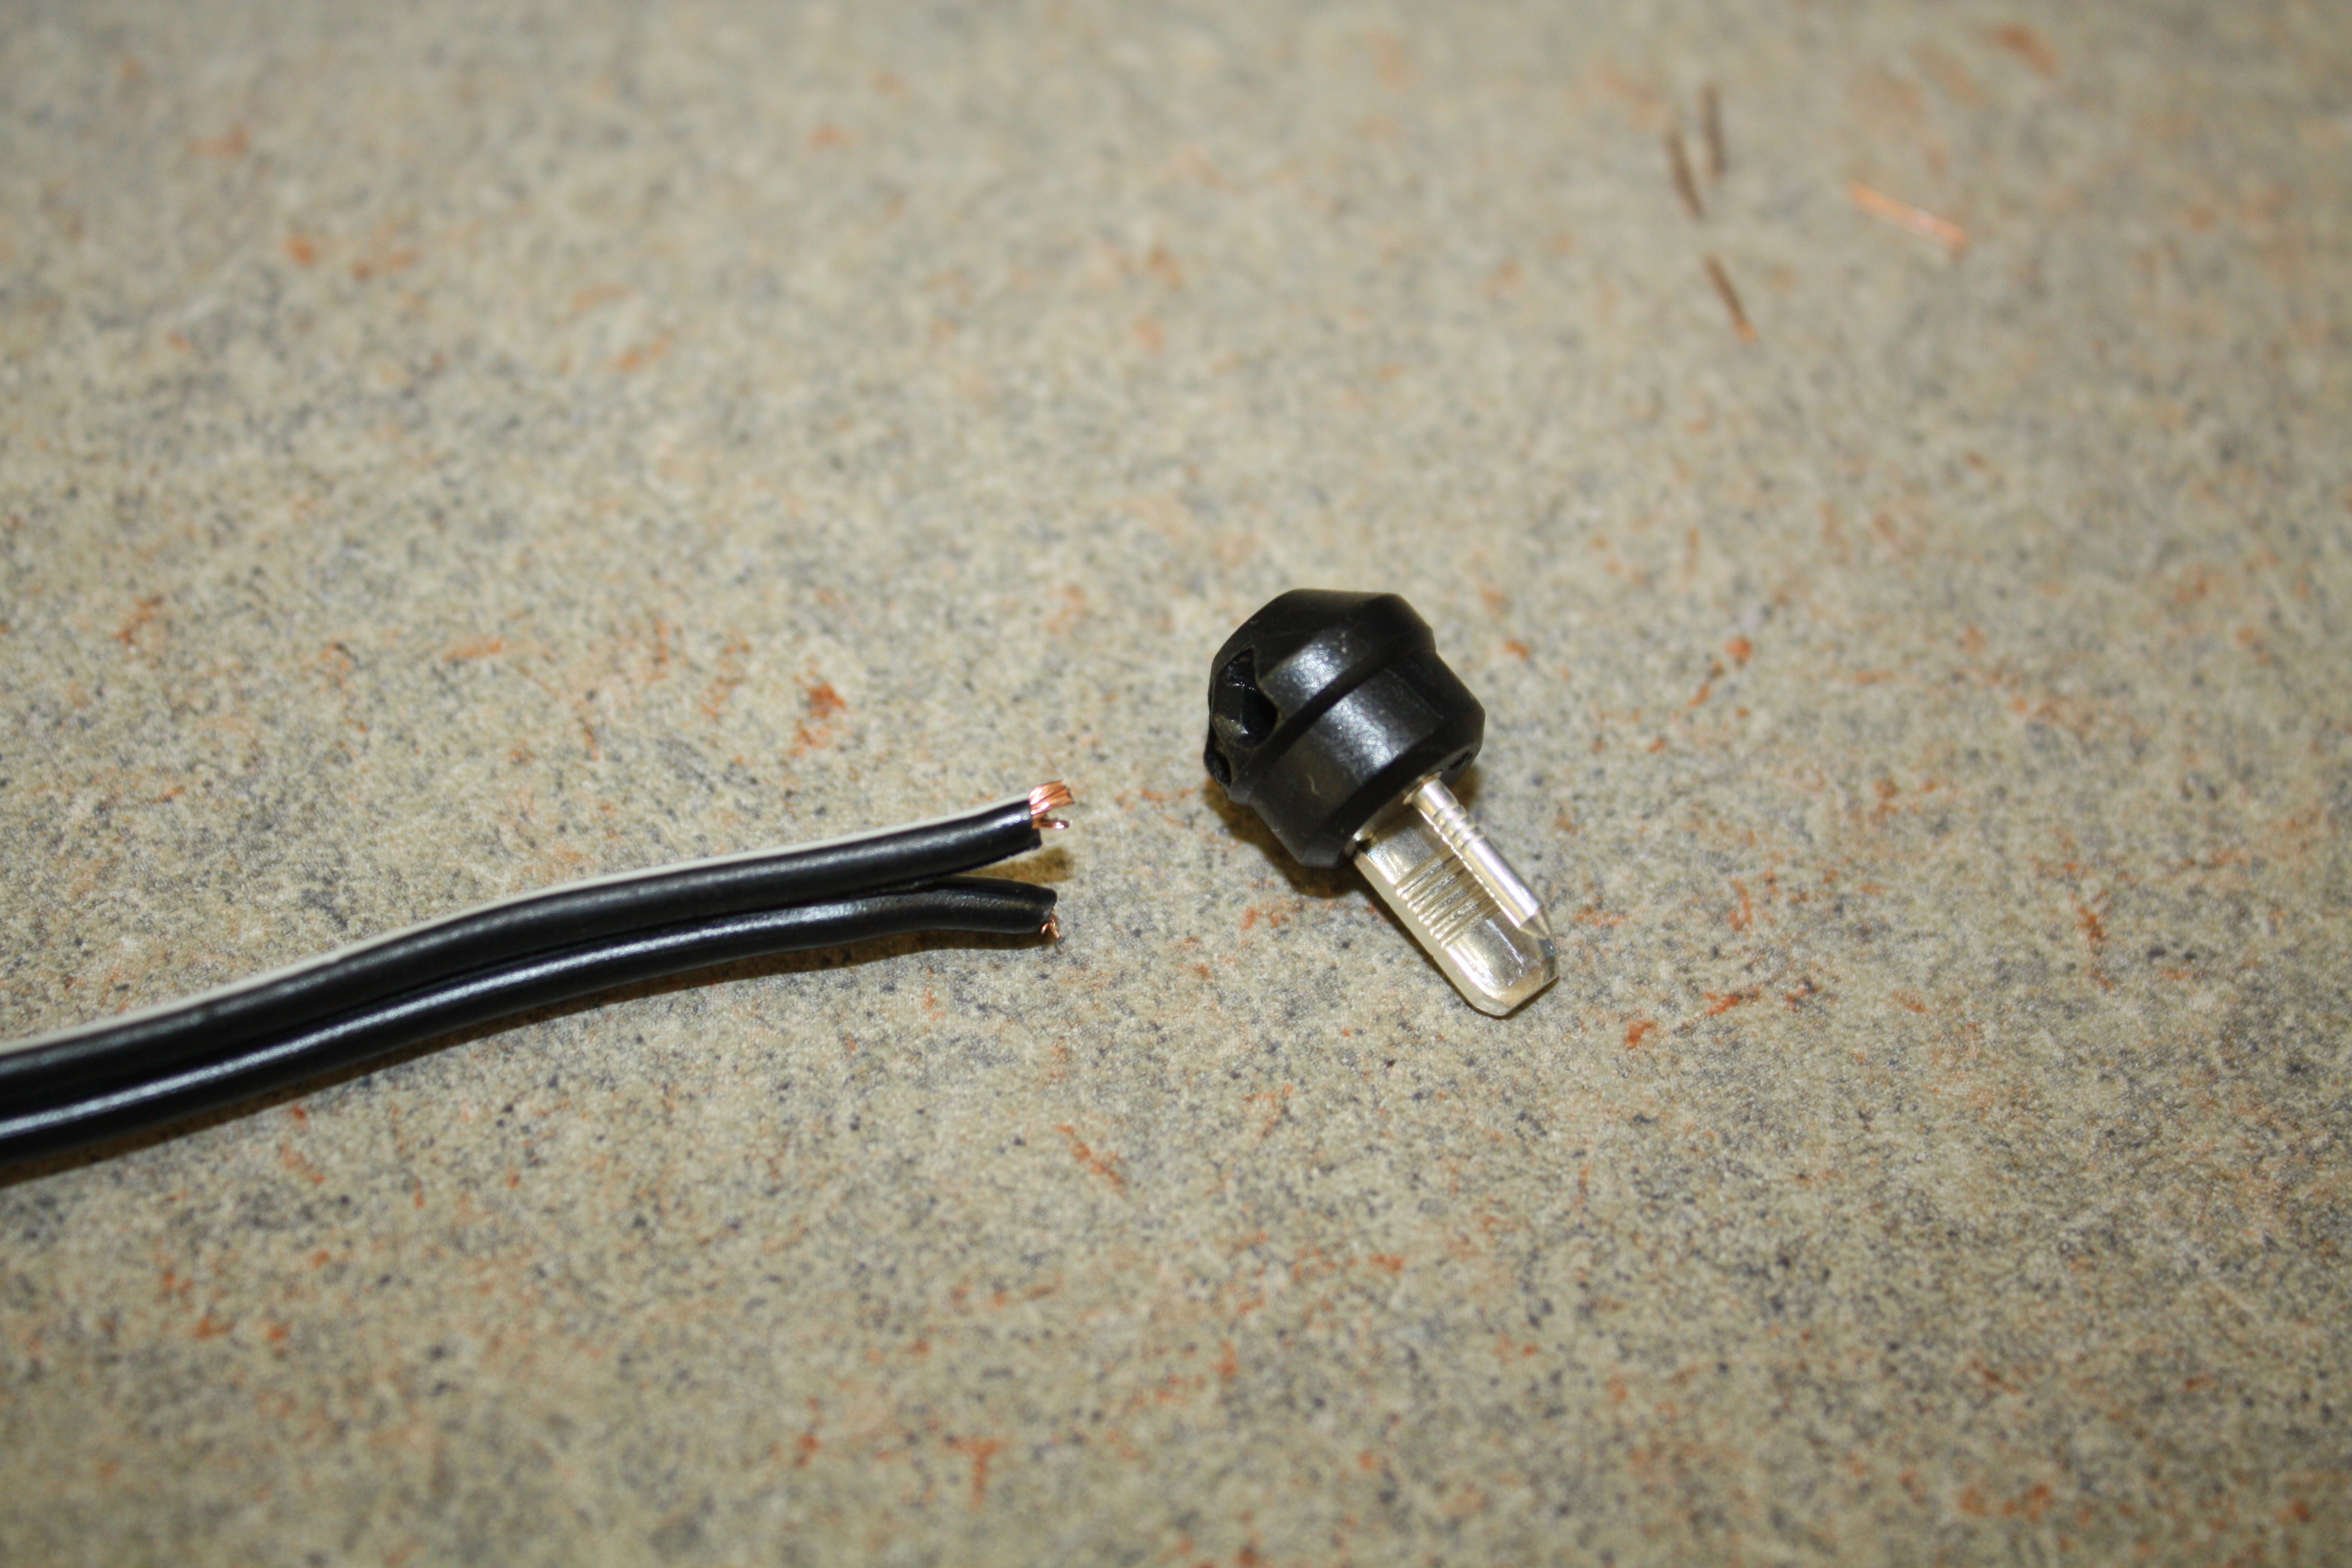
I had power to the radio and hooked up the one speaker wire that was whole. I did not have sound. Another call to Becker and I was made aware that the rubber plug for the accessory output must be plugged in as it has contacts on it that completes the speaker circuit. I had unplugged it in anticipation of hooking up the auxiliary input.
03-01-2017, 06:05 PM
#41
Member
Thread Starter
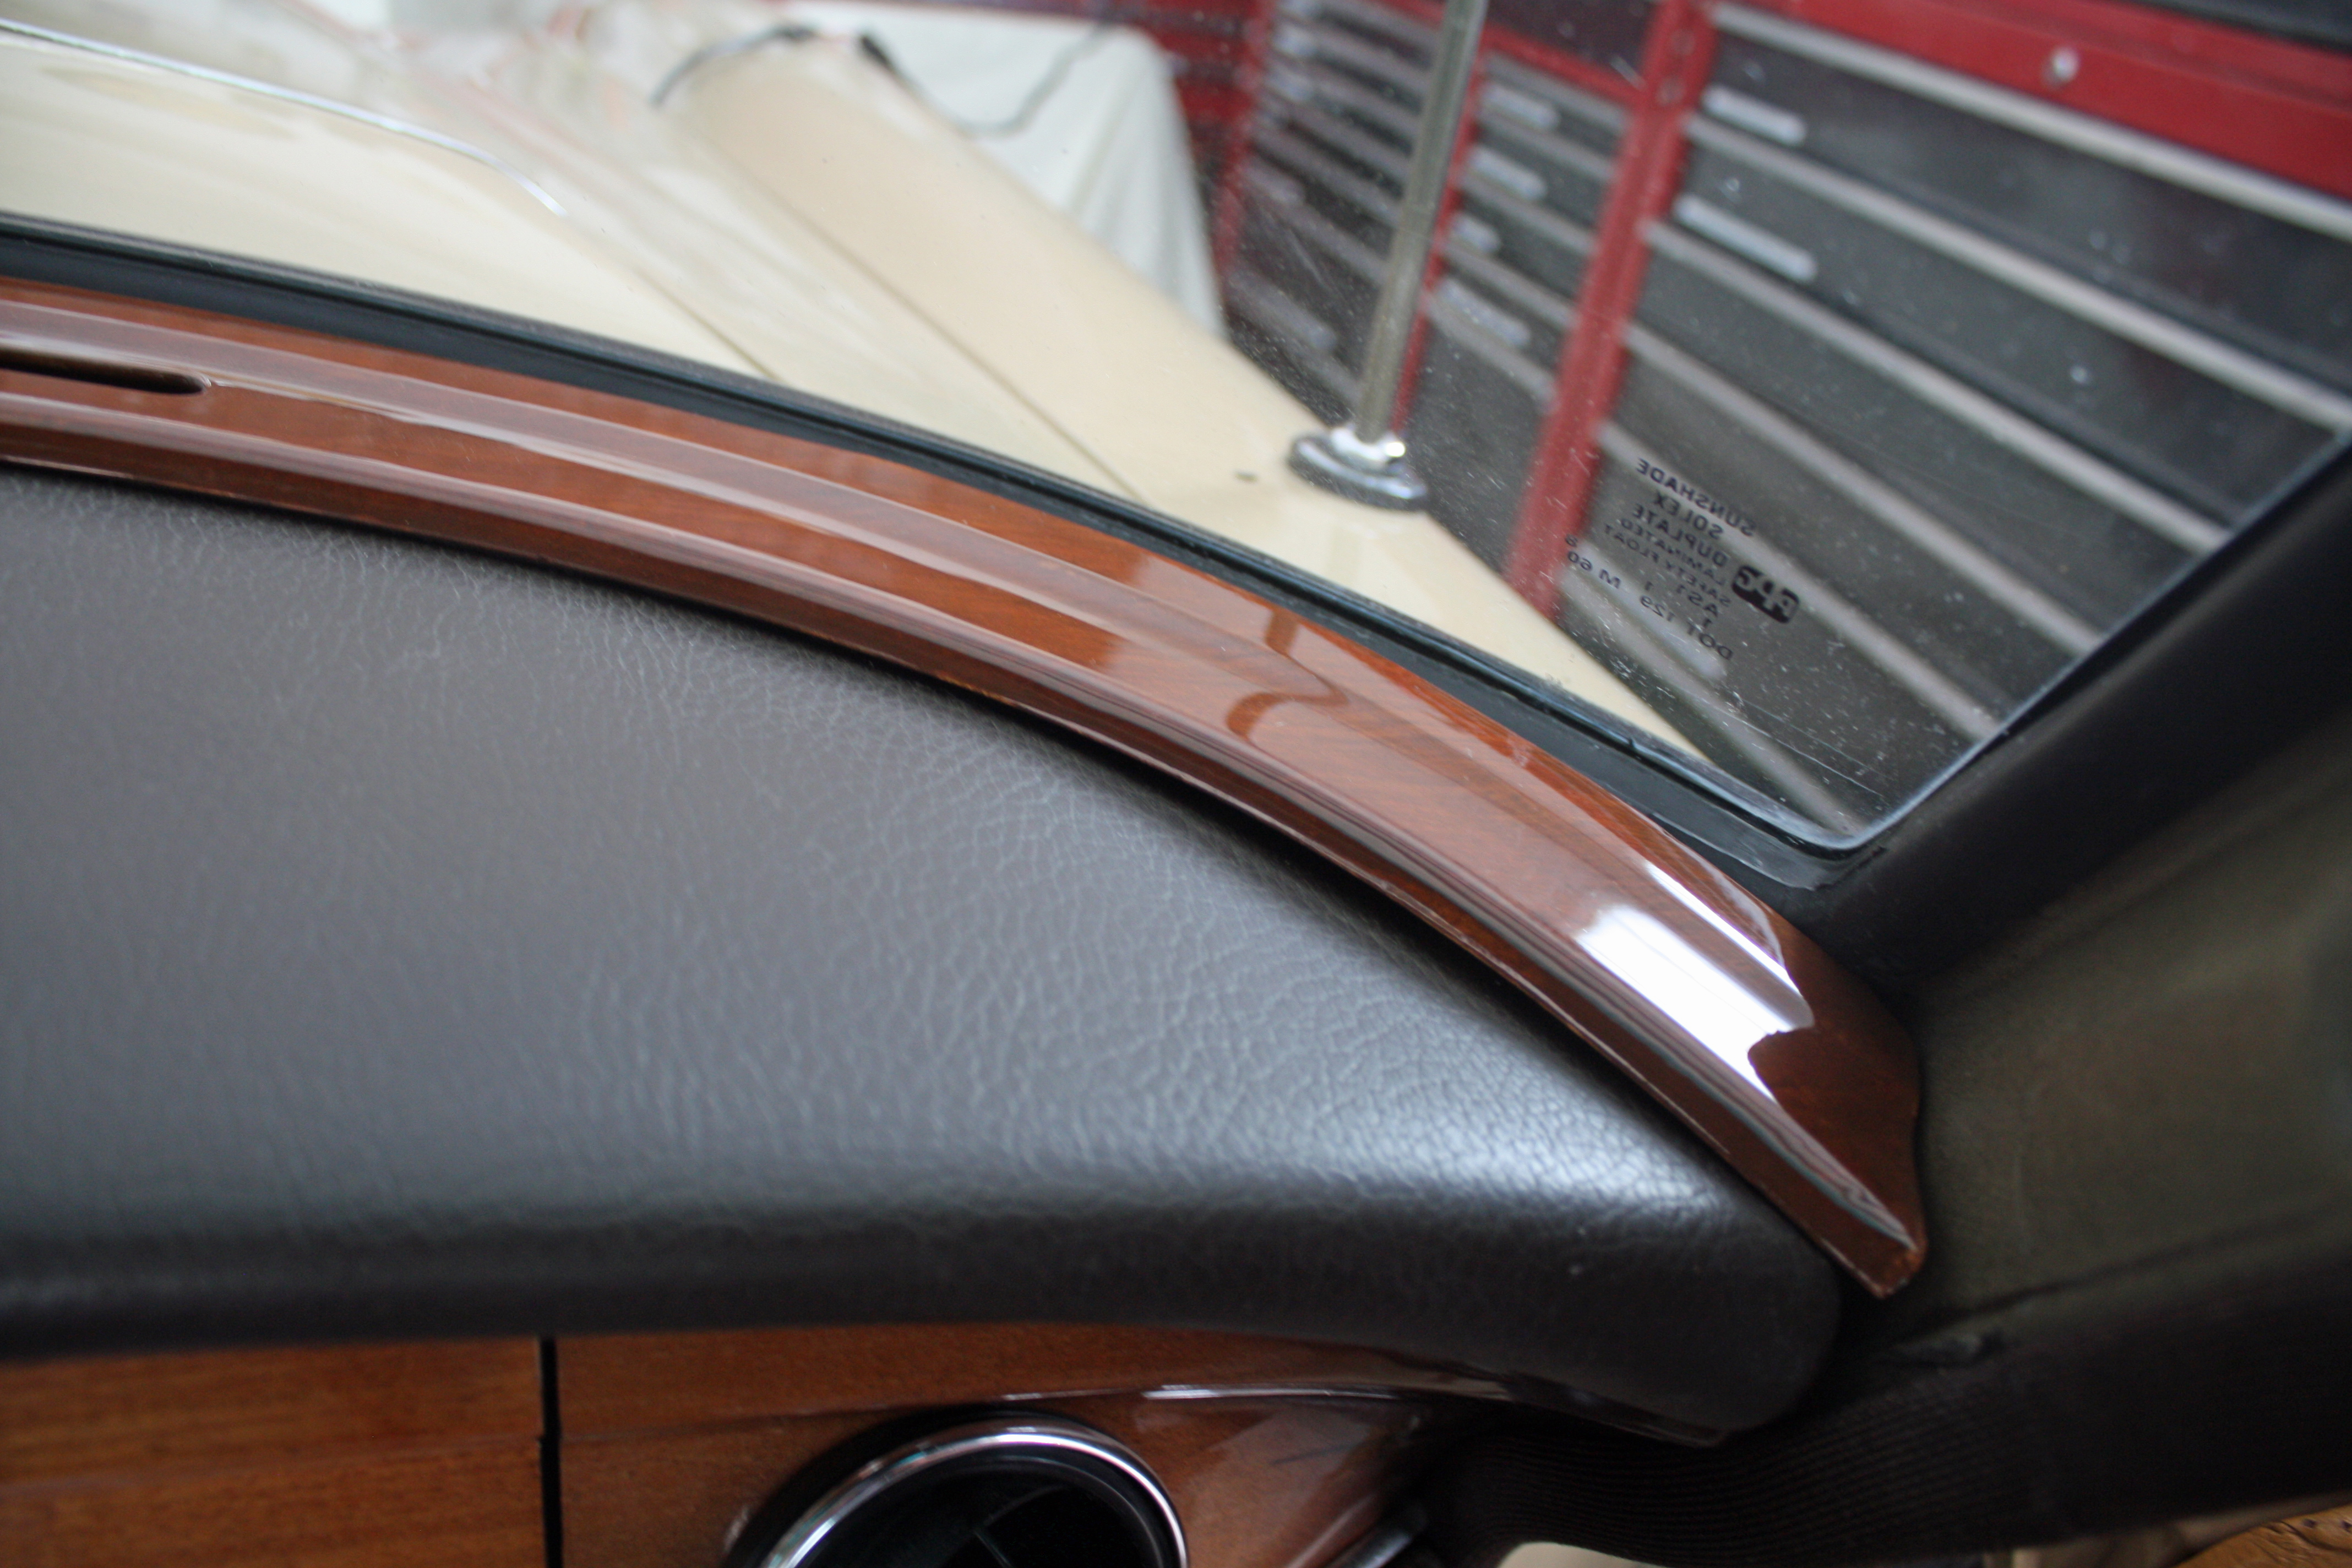
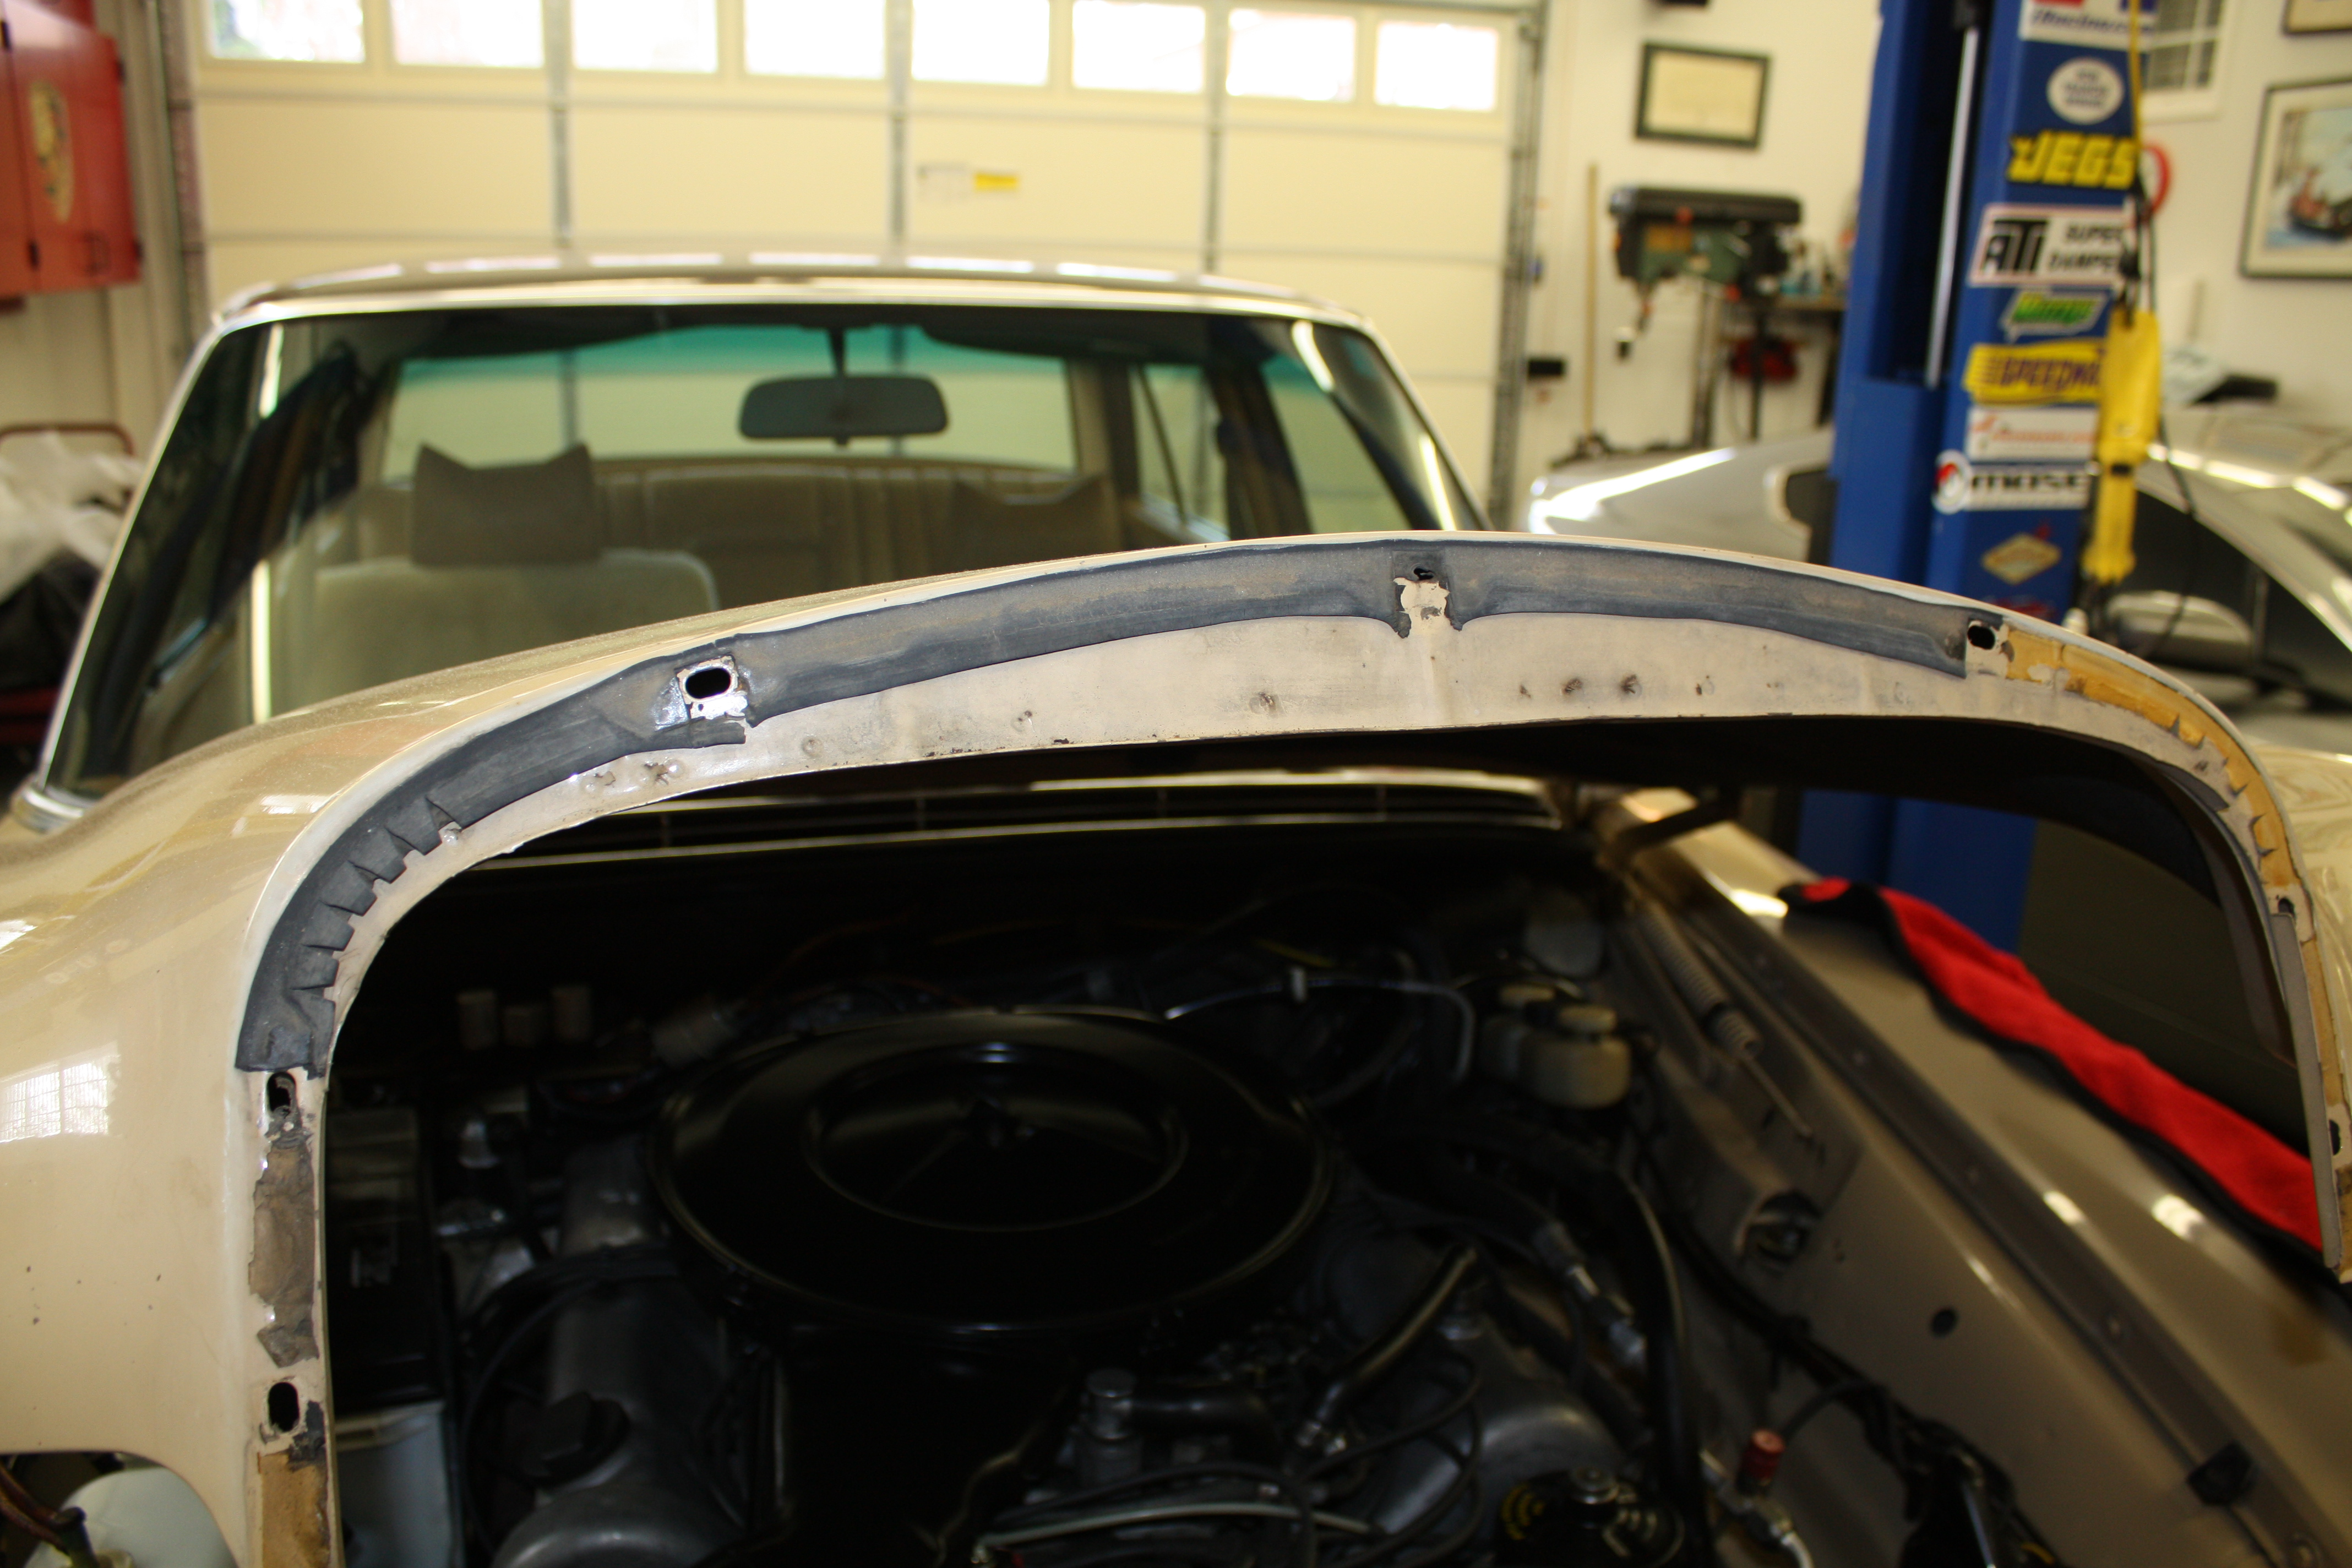
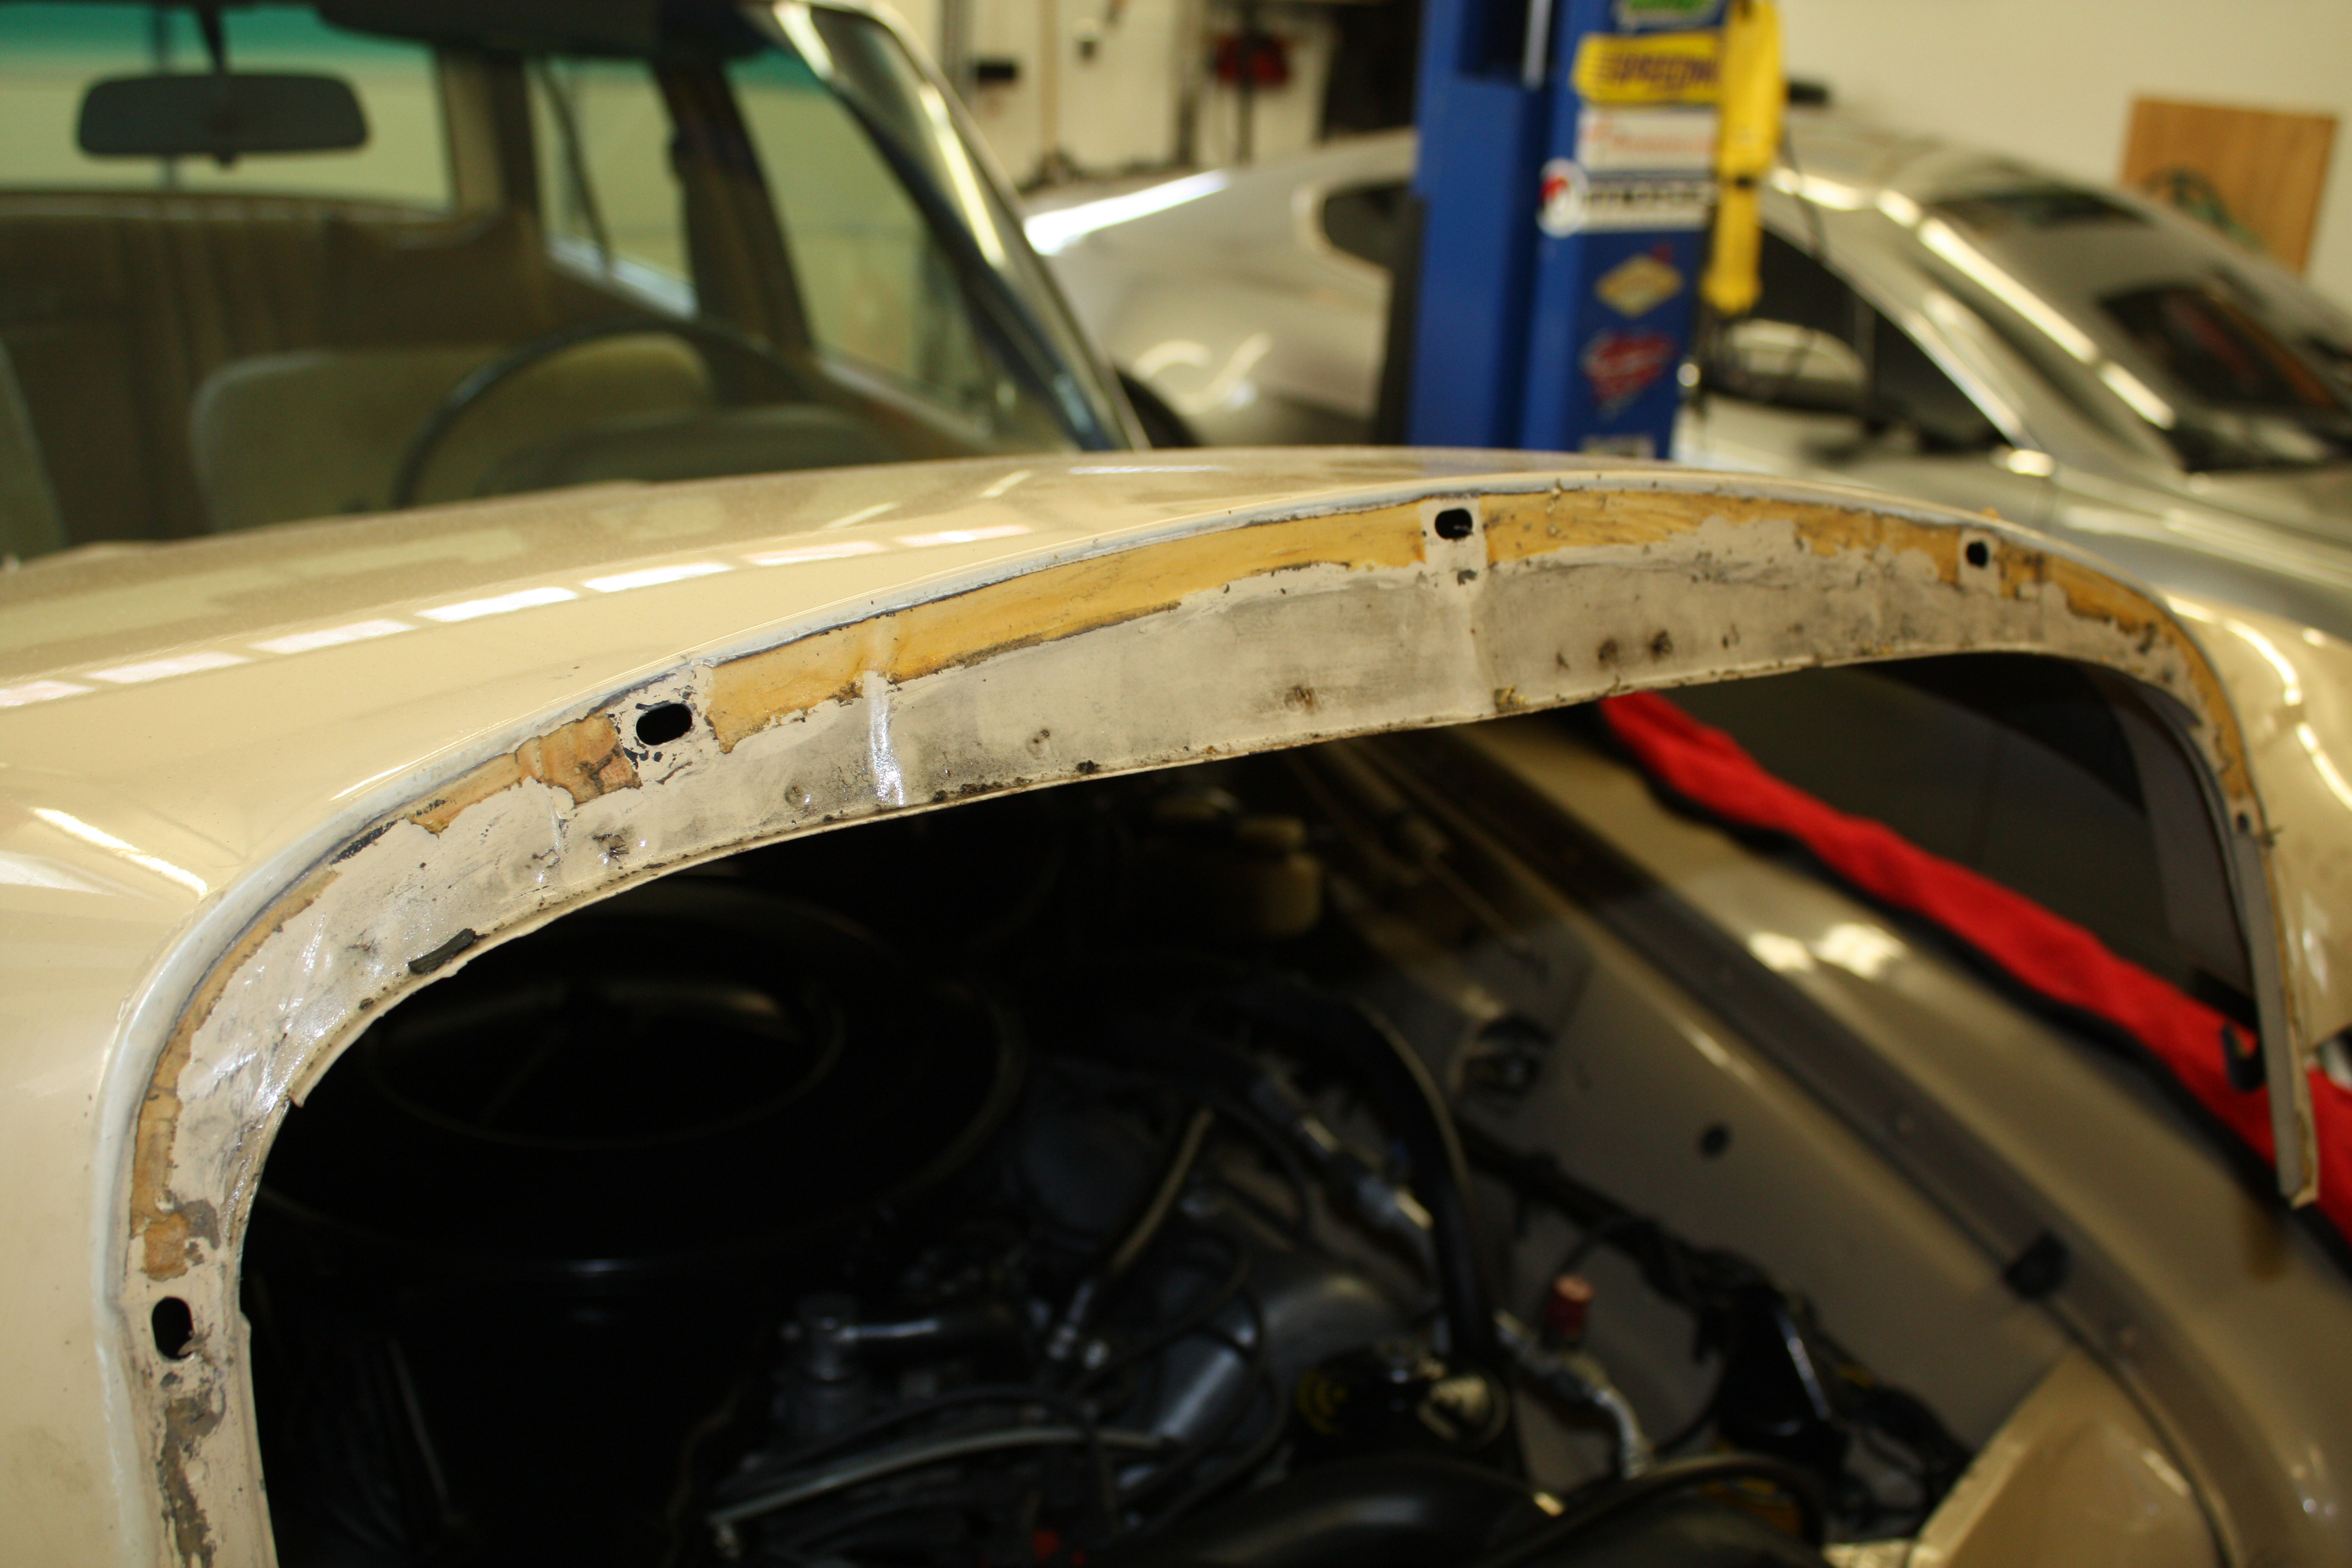
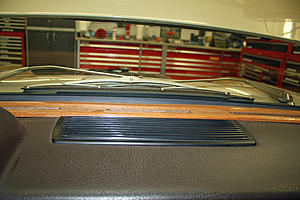
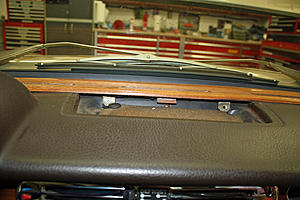
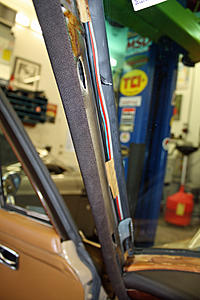
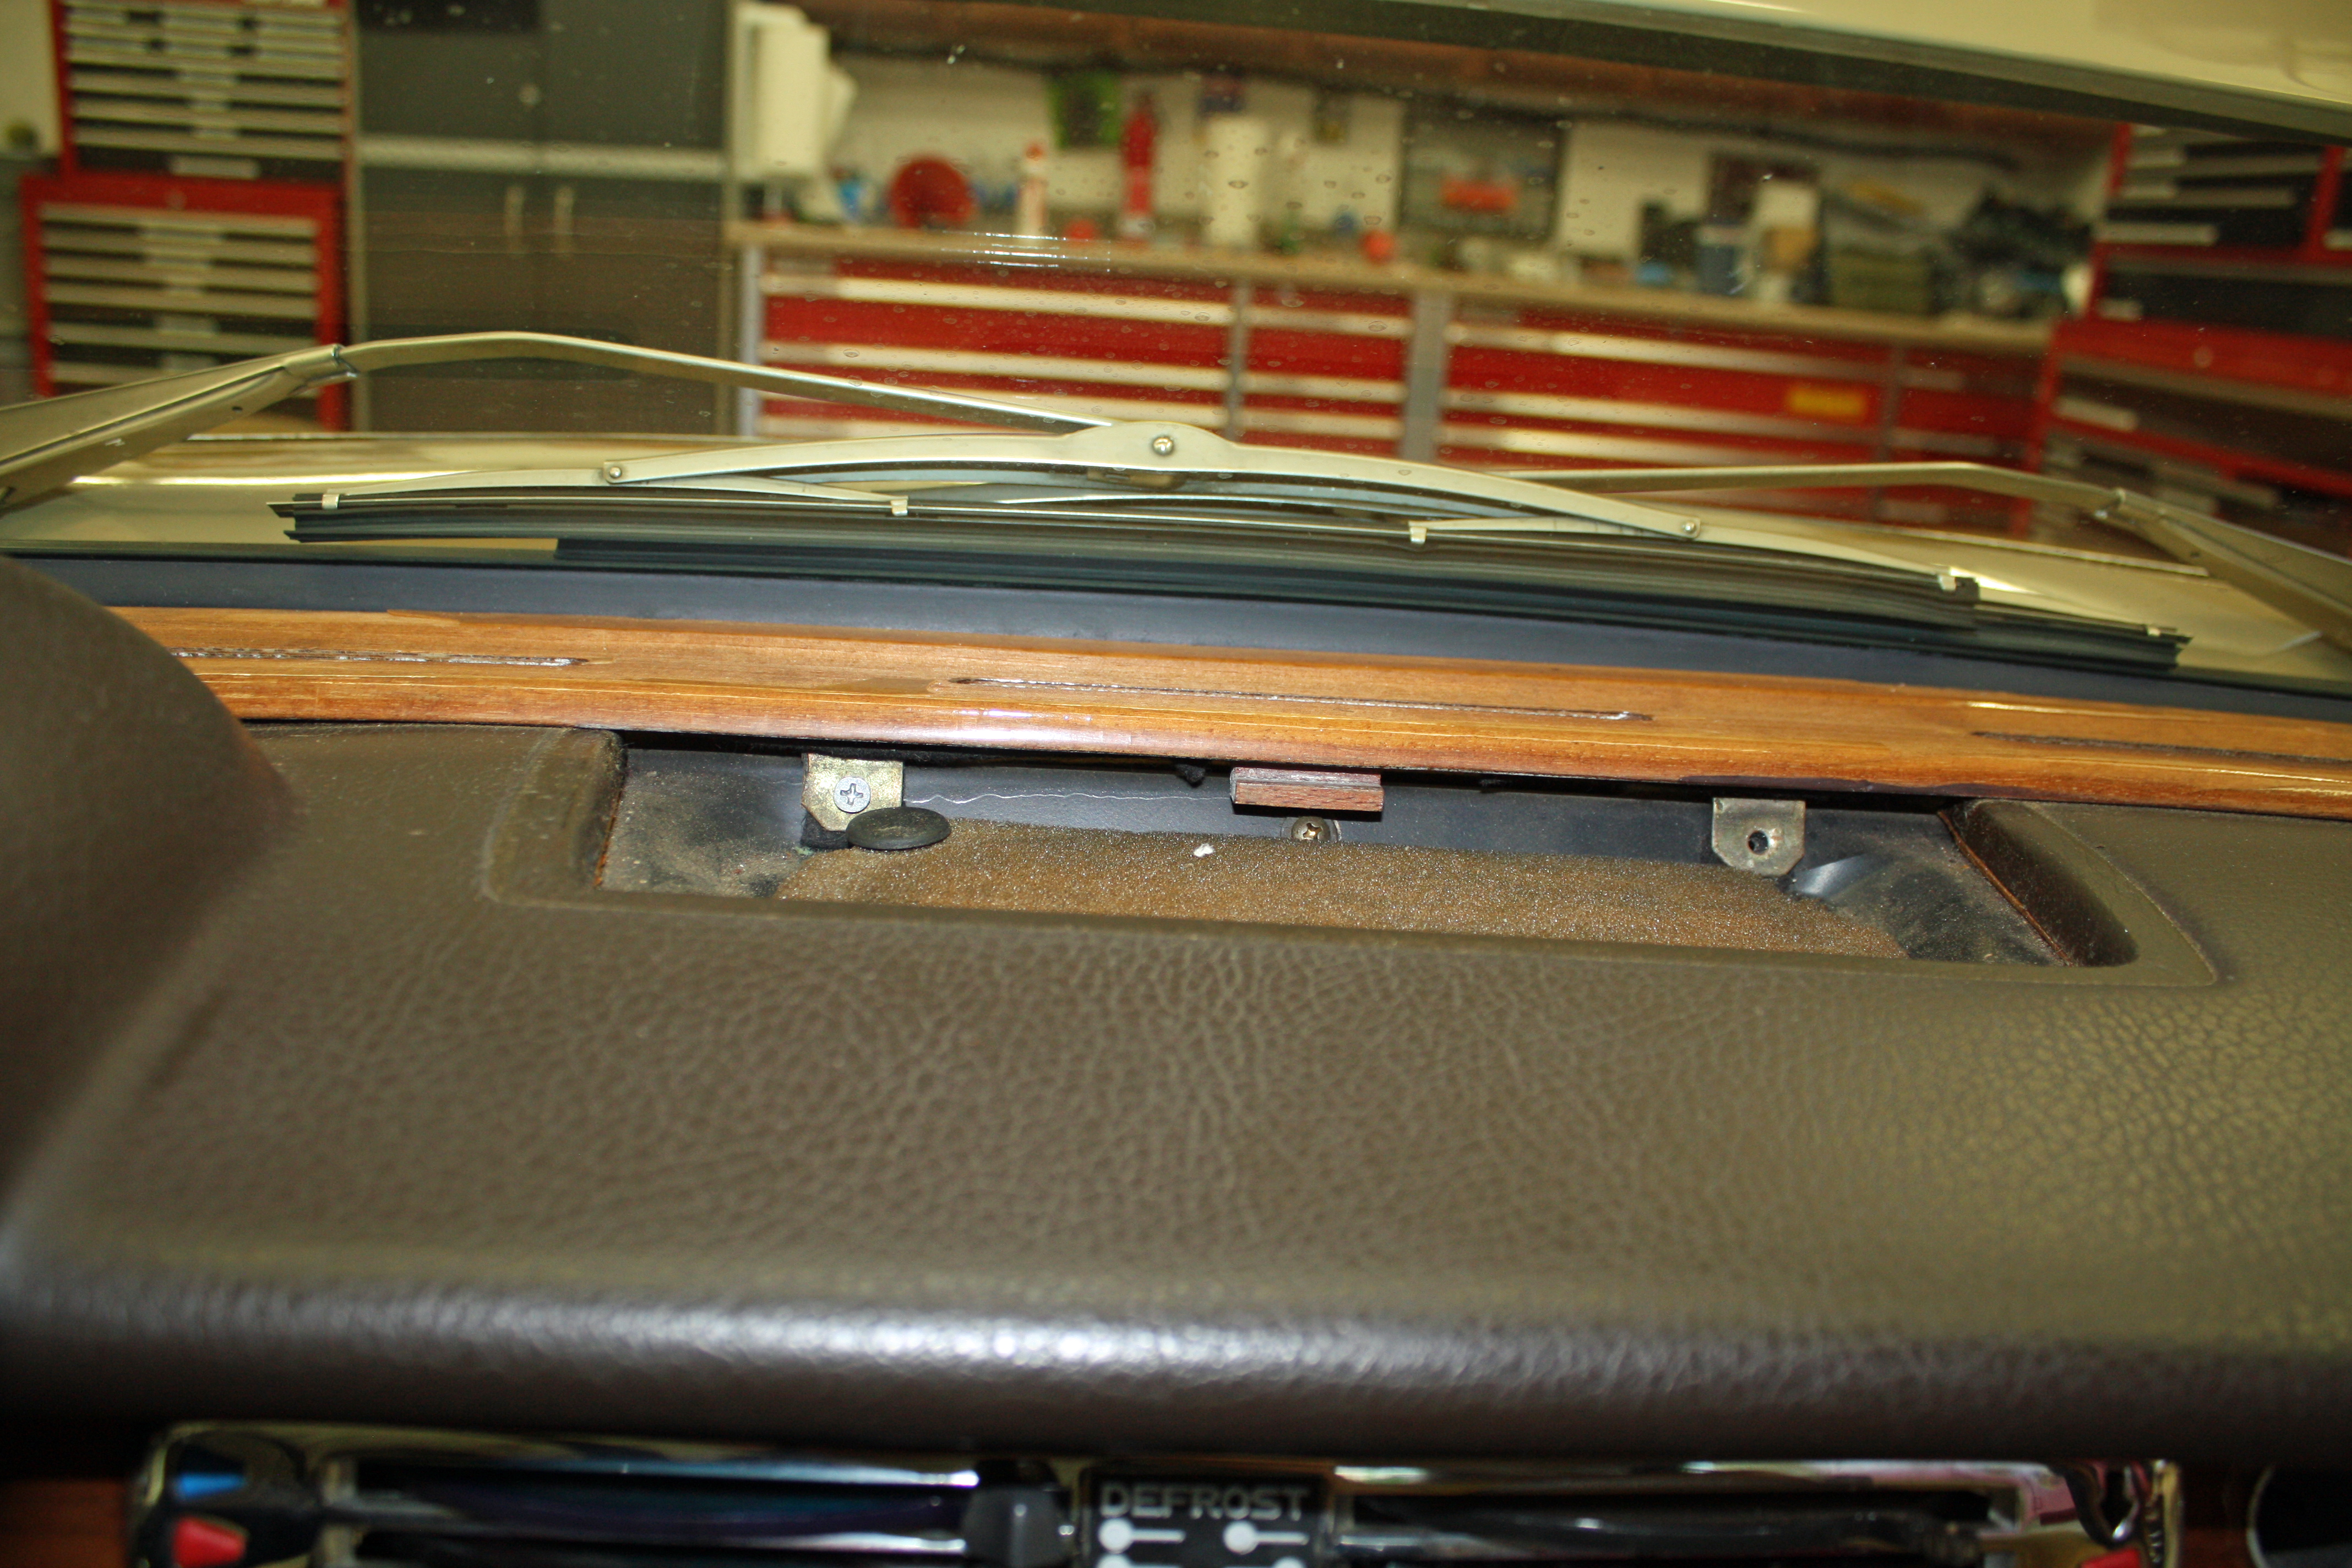
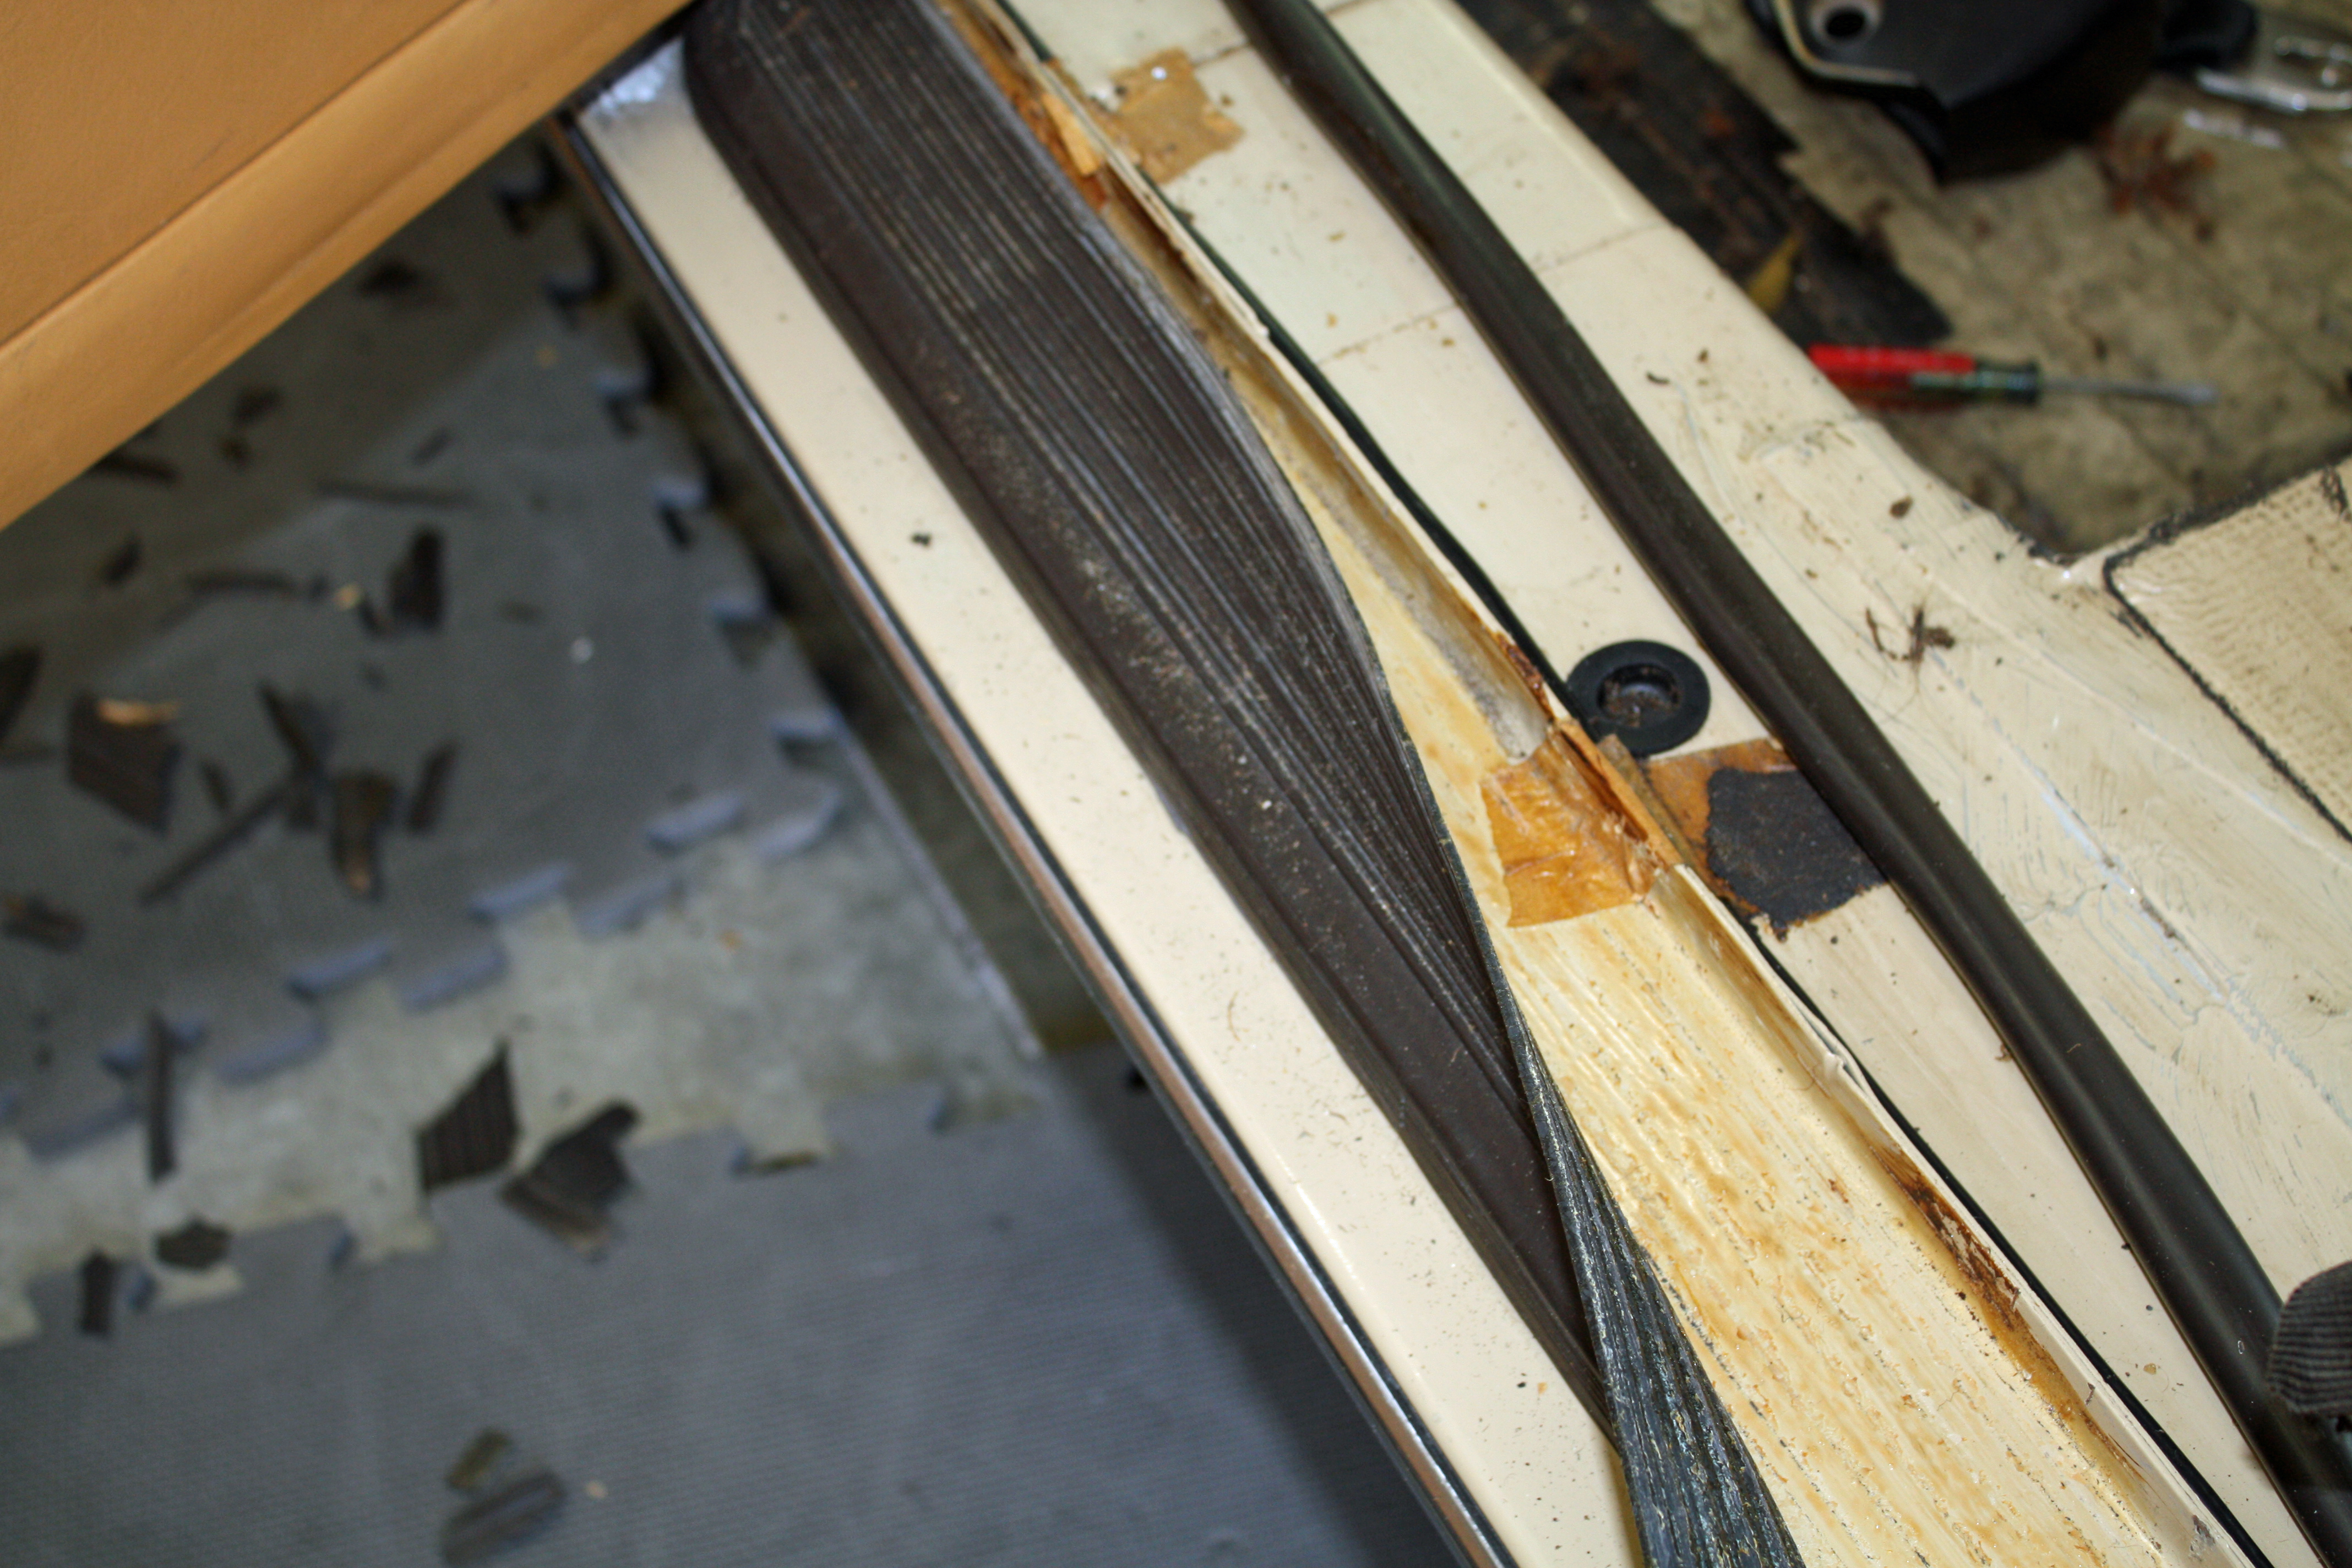
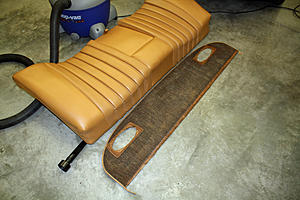
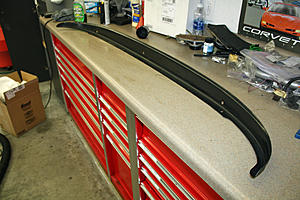
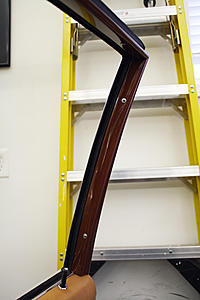
Worked on the interior today. My windshield bow trim needs to be refinished so I removed it today. Removing the front speaker grill exposes the two screws that secure the bow trim. After removing the windshield pillar trim, I very gingerly removed the trim.
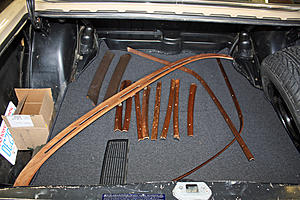
I also removed the wood trim around the door windows.

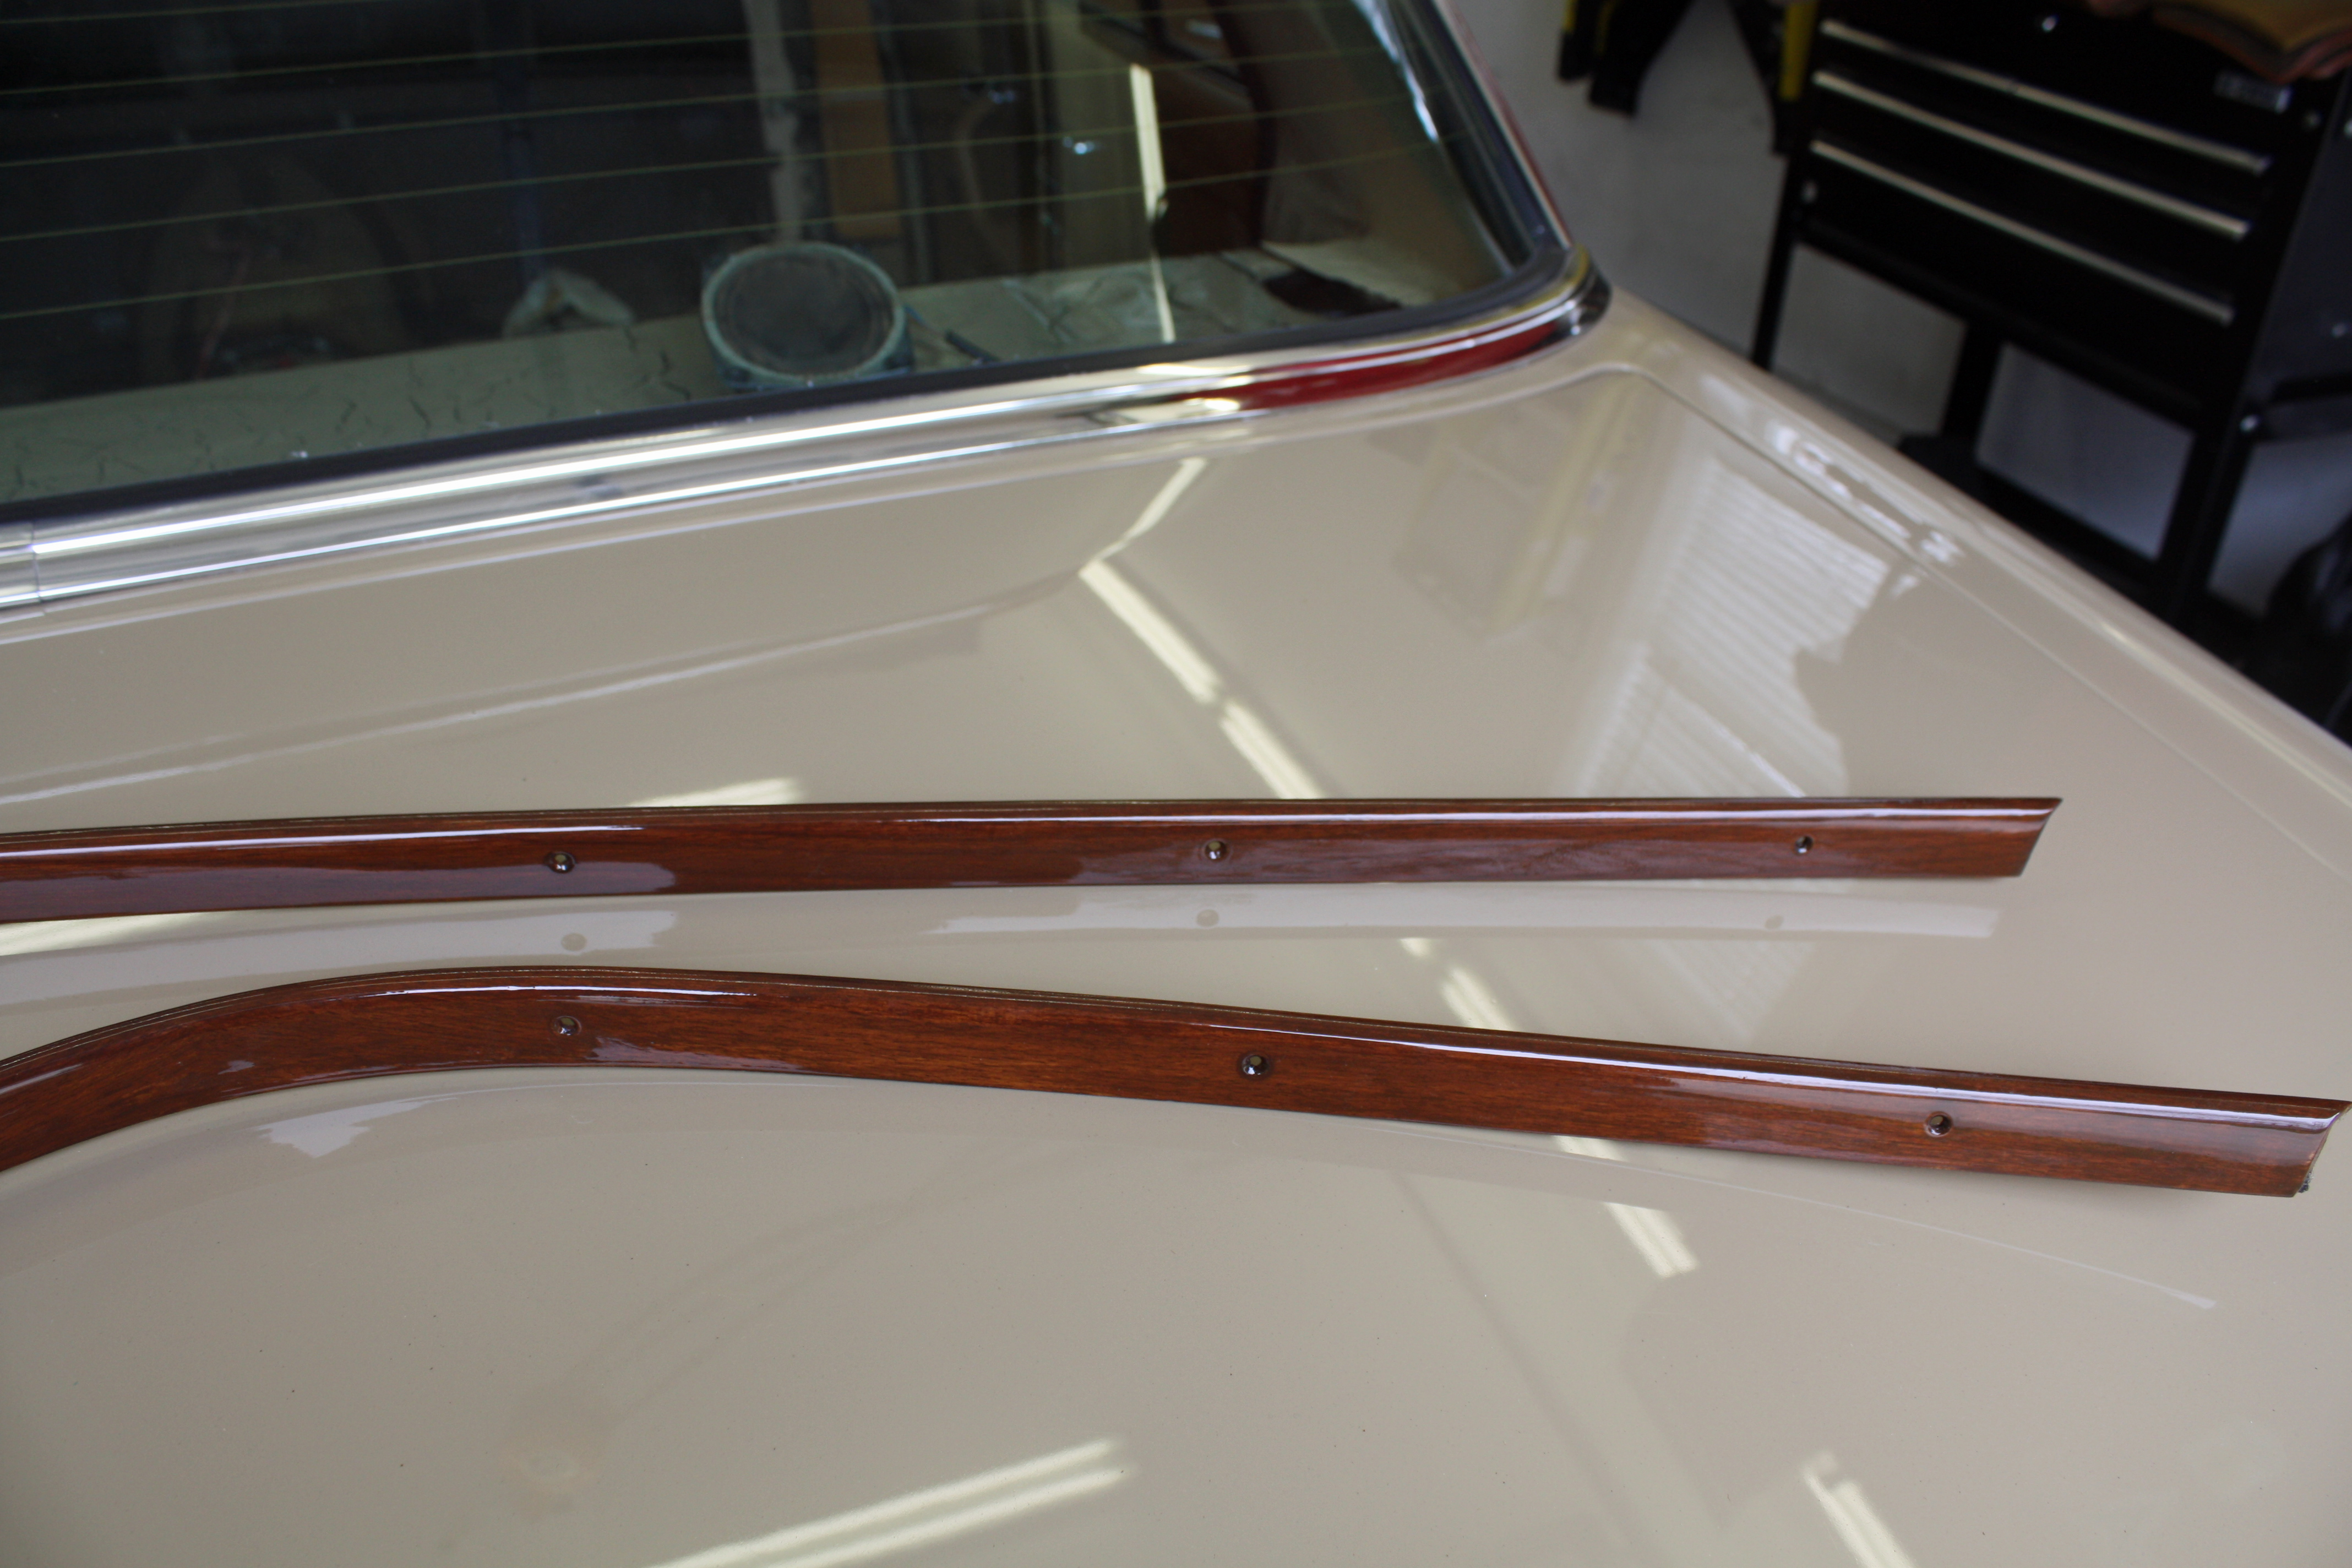
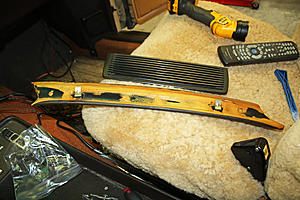
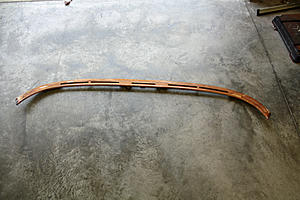
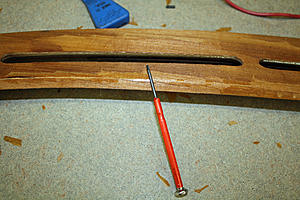
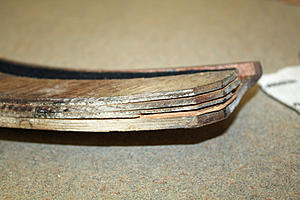
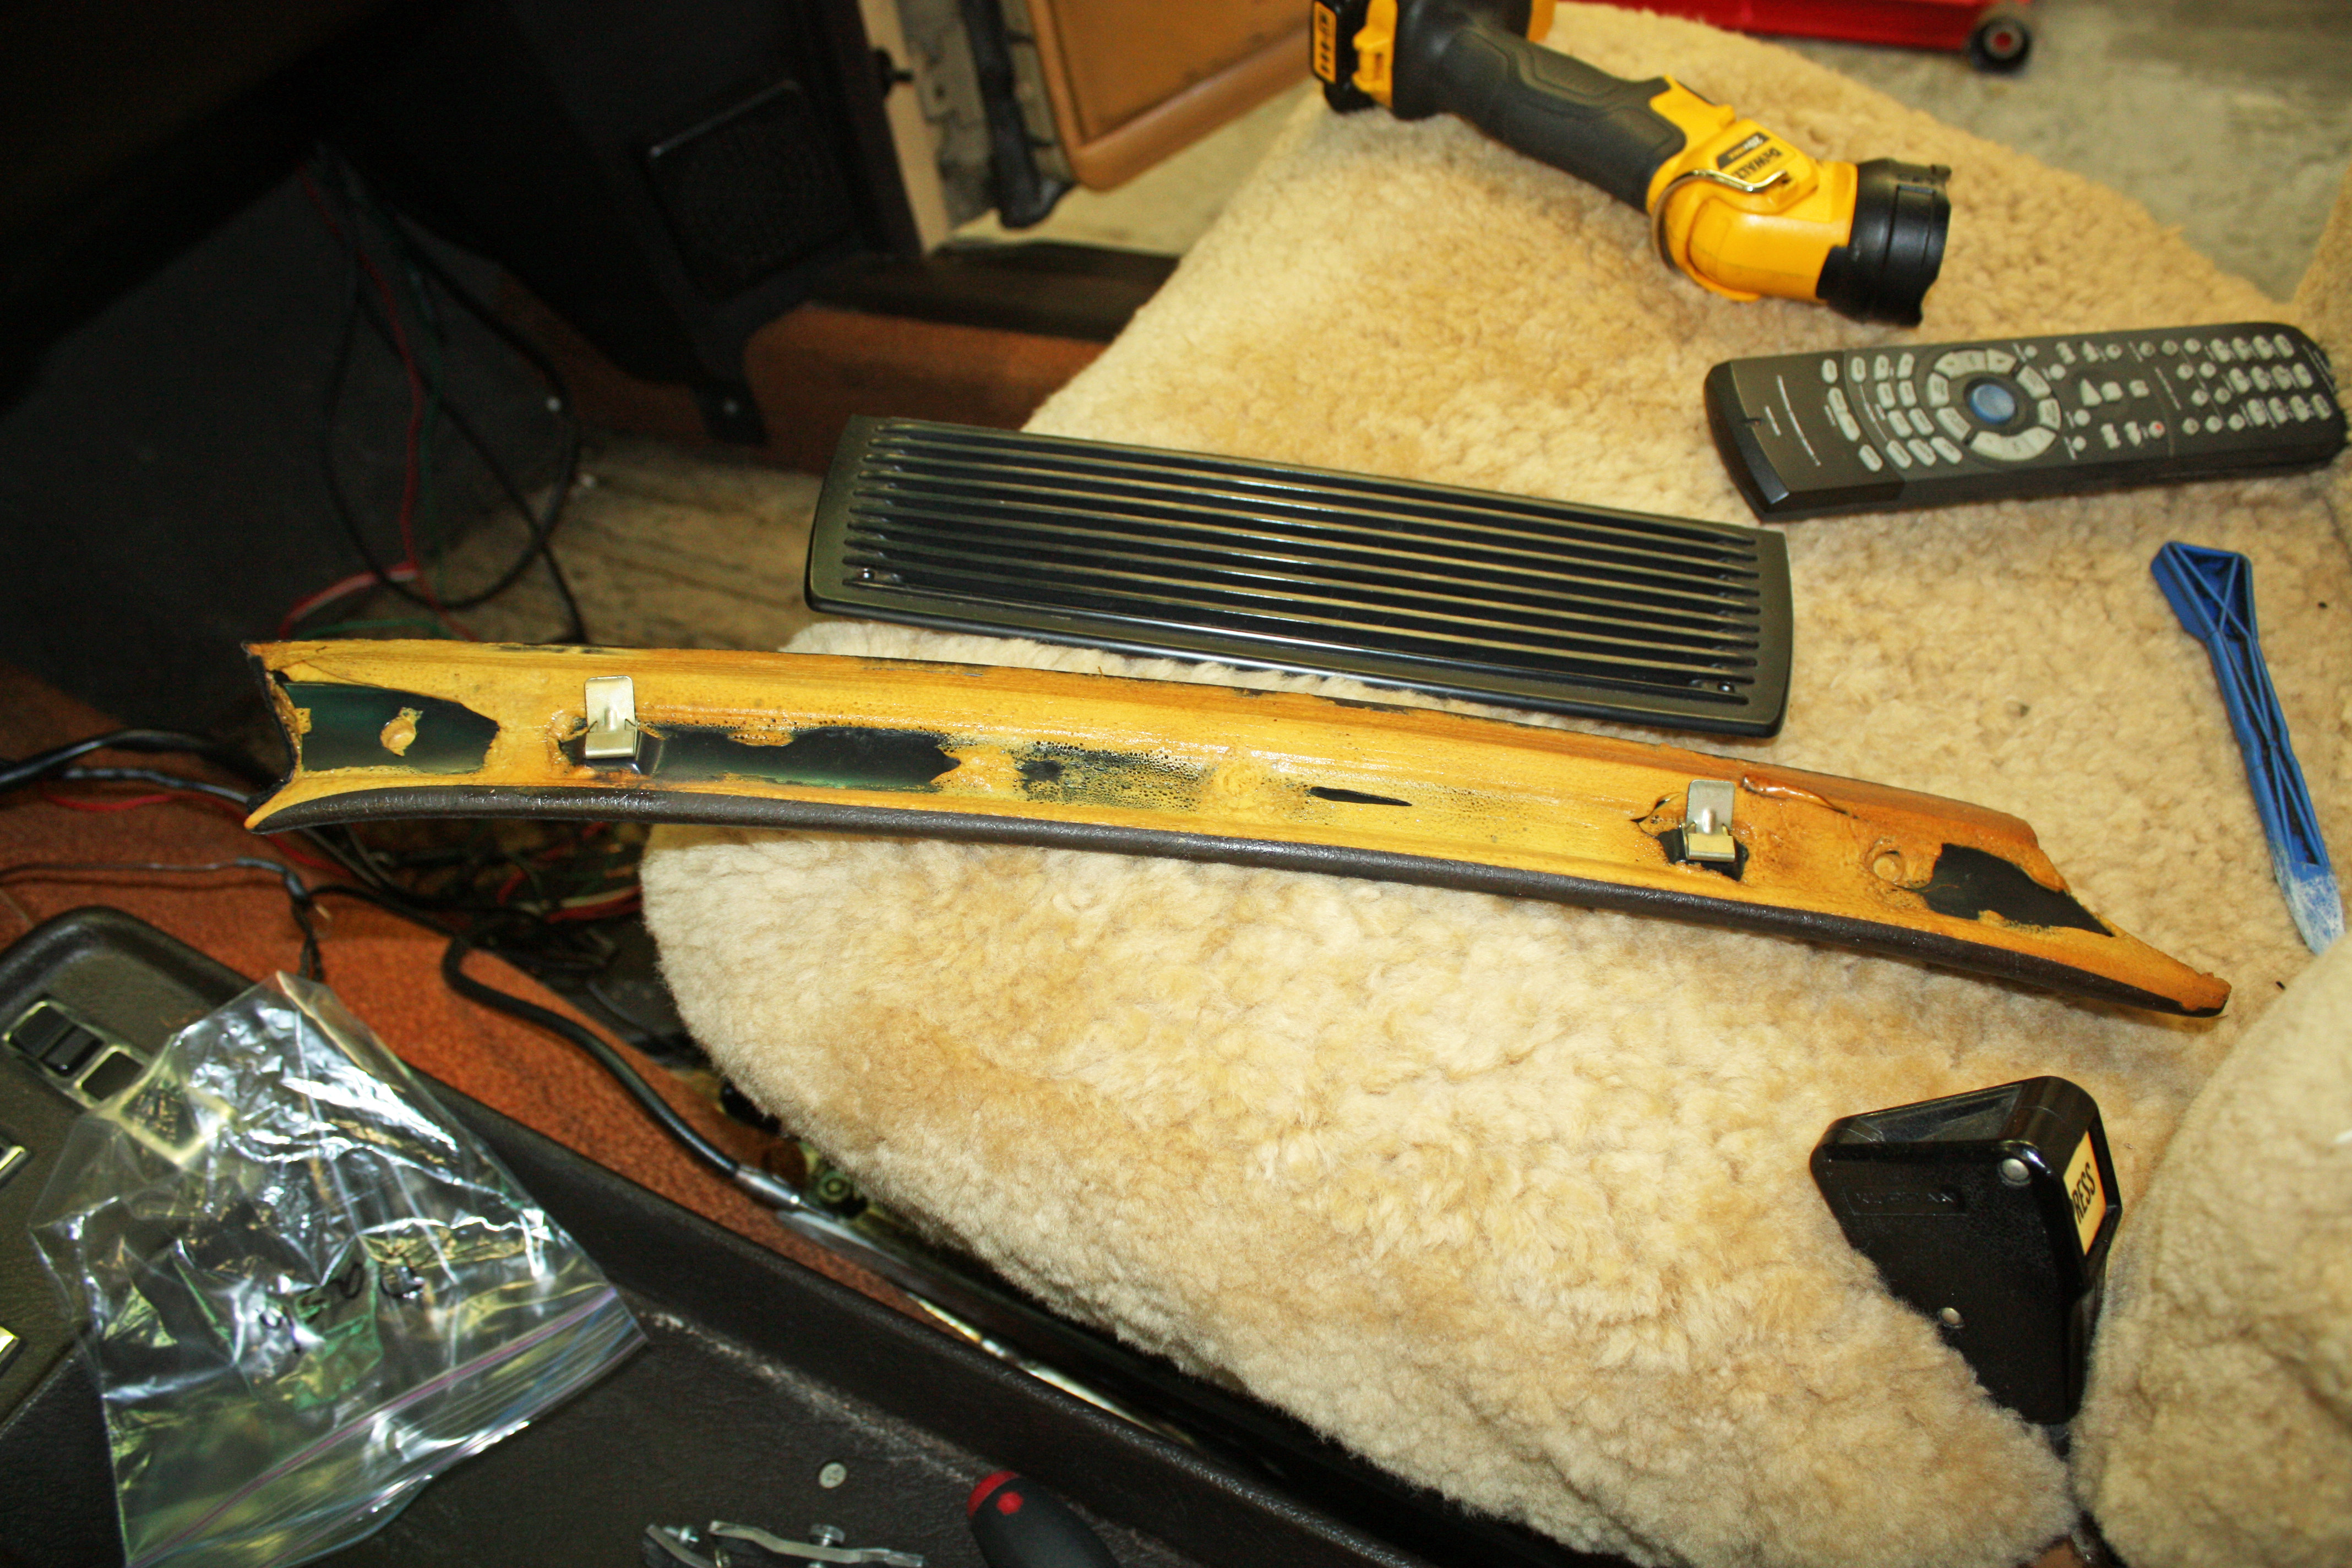
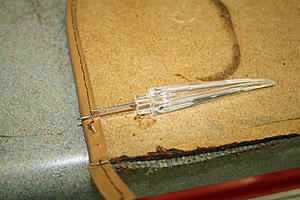
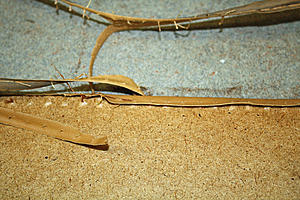
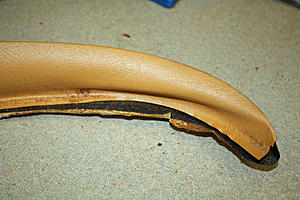
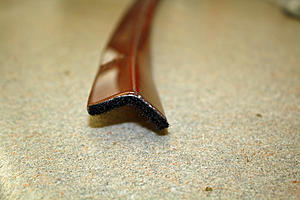
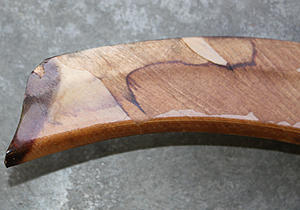
There were multiple problems with the bow trim. One was that the finish was flaking off. As you can see by the photos of the ends which were protected while under the windshield pillar trim, the original color was a dark brown that matched the door window trim. To get the rest of the flaking material off, I began by using my fingernails until that became painful! My final tool for removing the material was a jeweler's very small screwdriver. The procedure didn't involve scraping the finish off. Rather, I would place the tip of the screwdriver against the edge of the clear finish and press against it. This eventually resulted in forcing the material to flake off. I spent an hour and a half doing this.
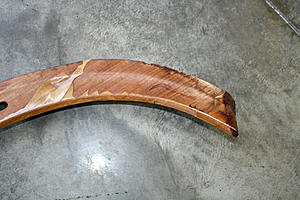

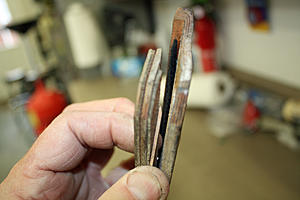
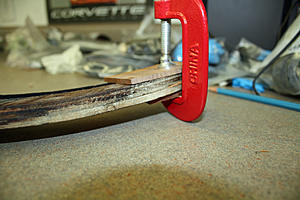
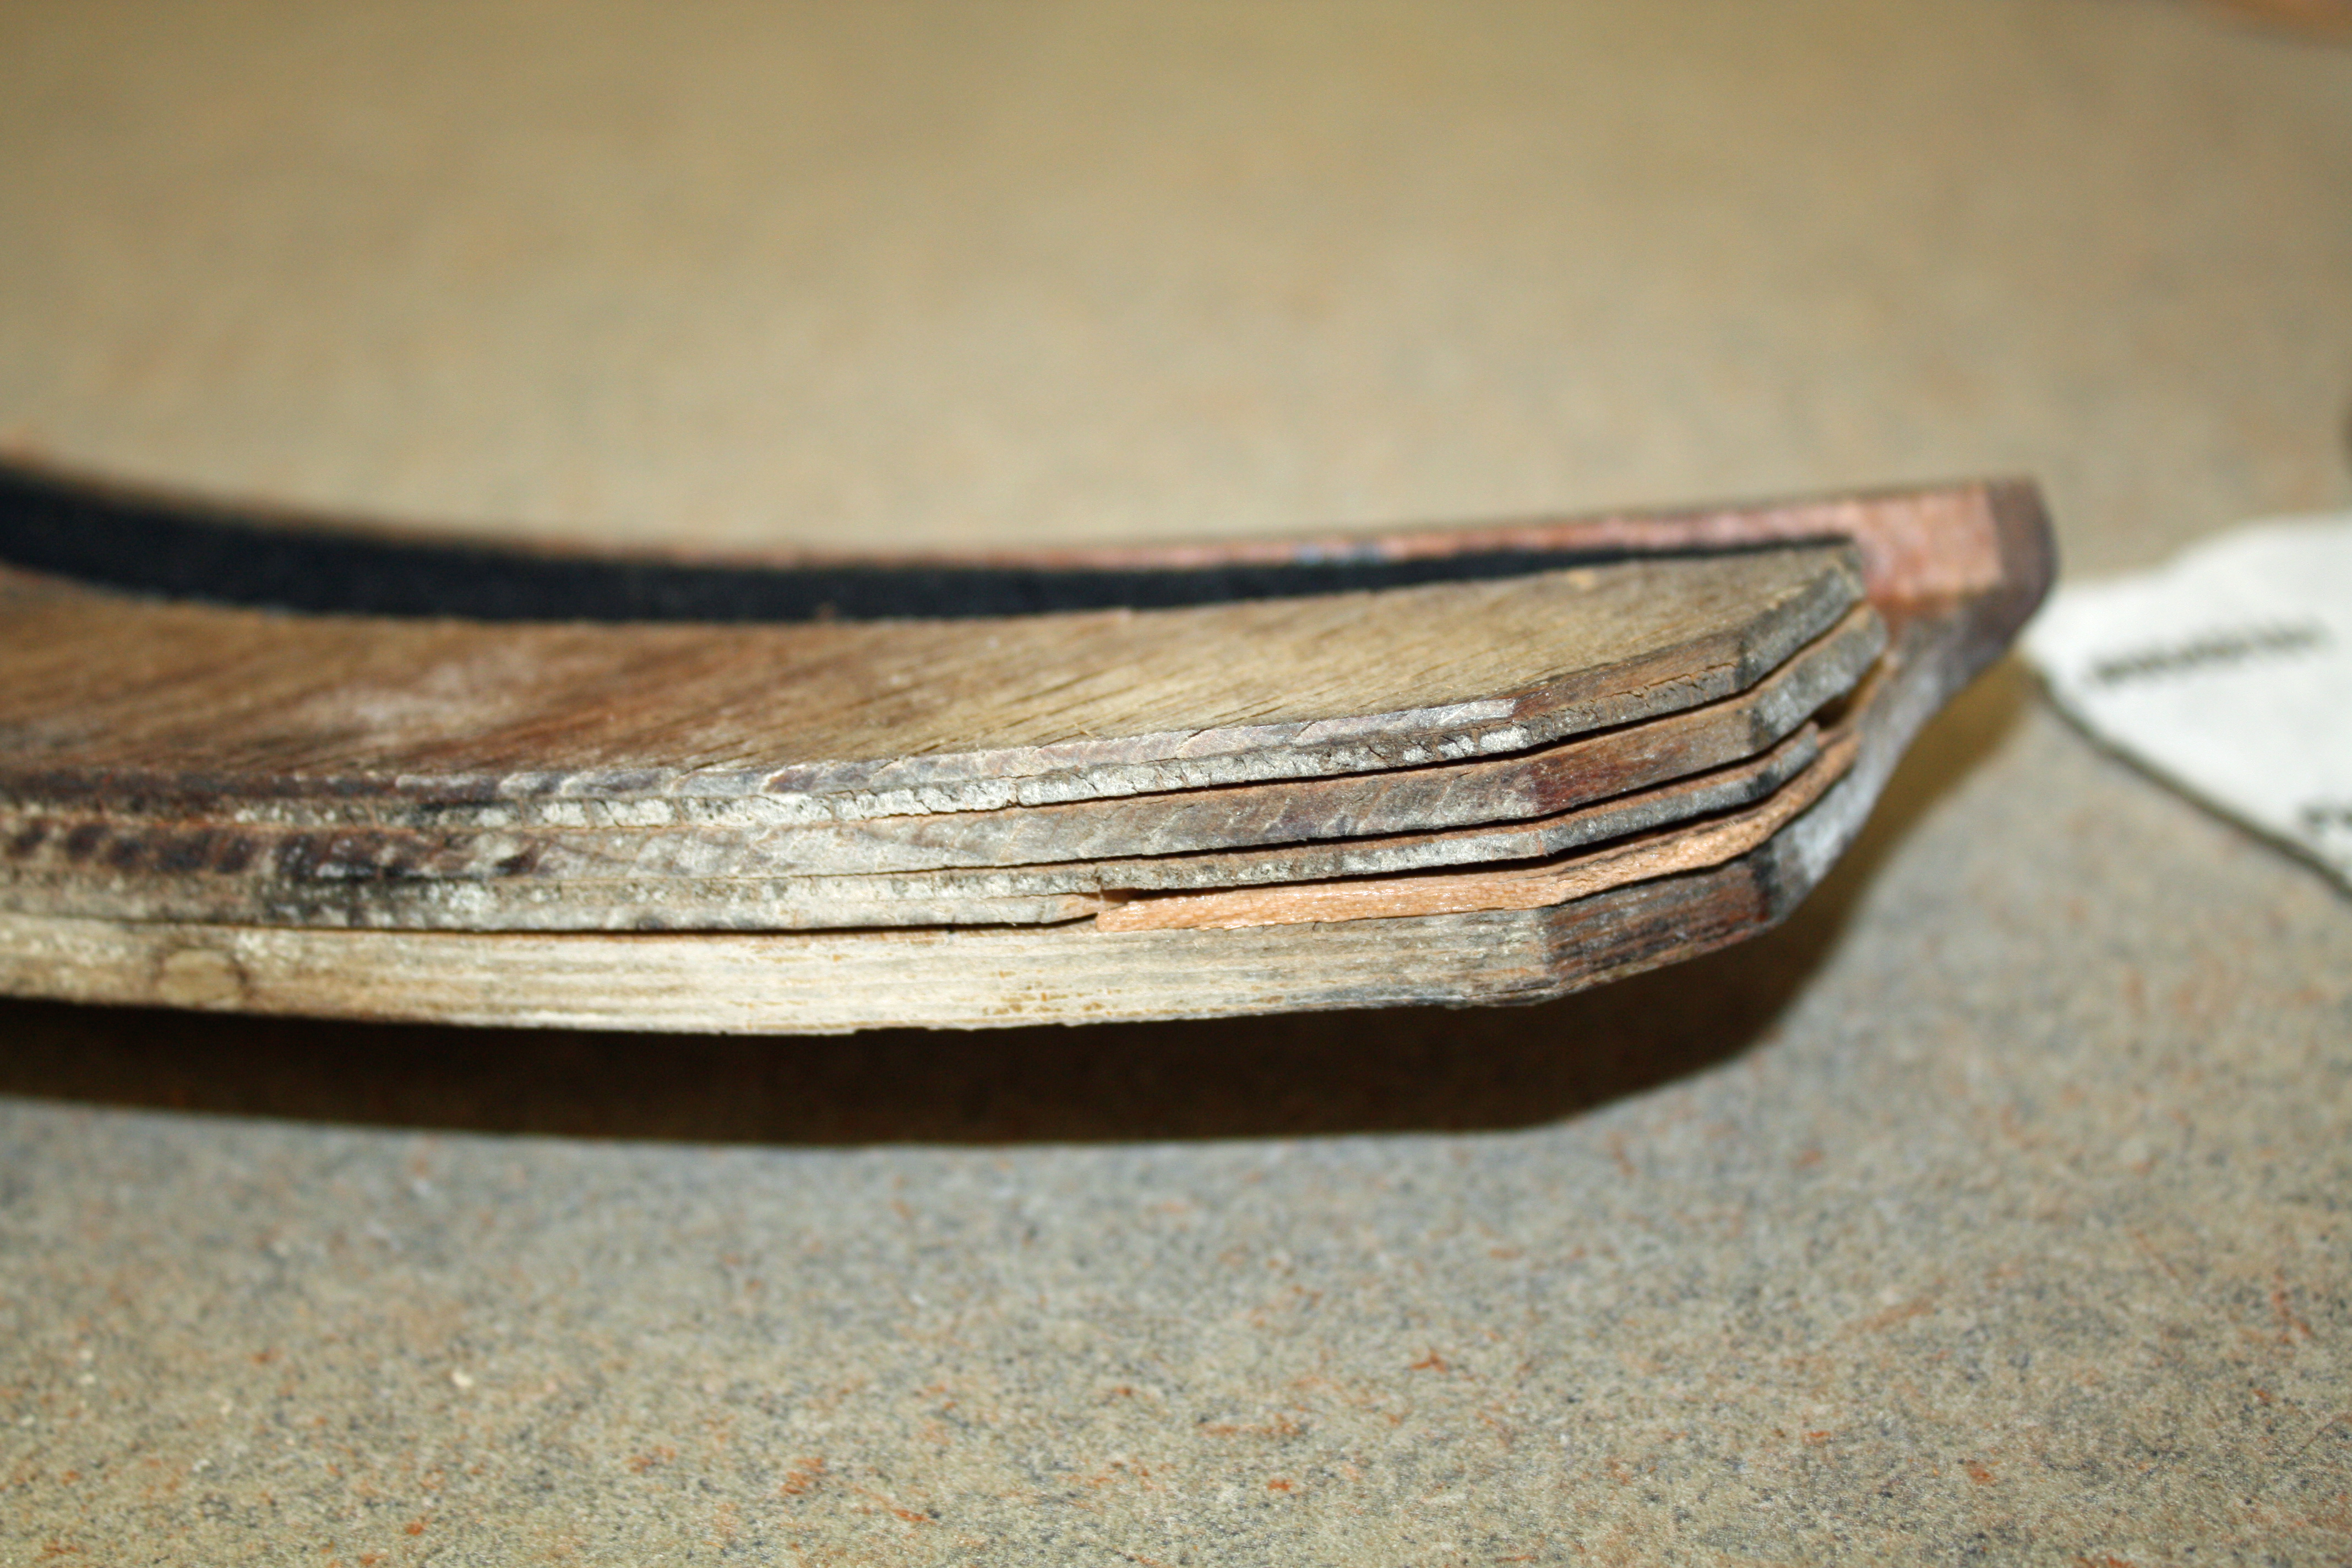
After removing all of the clear finish, I hauled all of the trim up to my buddy's house. He is a very experienced woodworker and has a full shop of tools. His first comment was that the material had delaminated on the ends due to being wet. On one end, there was a piece of the laminate that had broken off. I had some very thin shim material that was the correct thickness. I cut a piece to fit, applied wood glue and then clamped the trim.
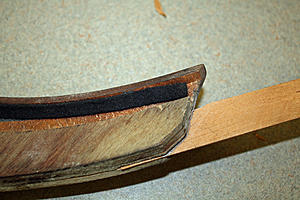
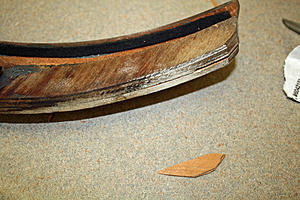
After looking at the most preserved finish on one of the window trim pieces, my buddy said he would recommend painting all of the trim a matching brown color. It was pretty shiny on that piece so we would assume all of the pieces were originally that color. I would be interested to know if anyone has knowledge about how these trim pieces were originally finished.


I also removed the wood trim around the door windows.

There were multiple problems with the bow trim. One was that the finish was flaking off. As you can see by the photos of the ends which were protected while under the windshield pillar trim, the original color was a dark brown that matched the door window trim. To get the rest of the flaking material off, I began by using my fingernails until that became painful! My final tool for removing the material was a jeweler's very small screwdriver. The procedure didn't involve scraping the finish off. Rather, I would place the tip of the screwdriver against the edge of the clear finish and press against it. This eventually resulted in forcing the material to flake off. I spent an hour and a half doing this.


After removing all of the clear finish, I hauled all of the trim up to my buddy's house. He is a very experienced woodworker and has a full shop of tools. His first comment was that the material had delaminated on the ends due to being wet. On one end, there was a piece of the laminate that had broken off. I had some very thin shim material that was the correct thickness. I cut a piece to fit, applied wood glue and then clamped the trim.


After looking at the most preserved finish on one of the window trim pieces, my buddy said he would recommend painting all of the trim a matching brown color. It was pretty shiny on that piece so we would assume all of the pieces were originally that color. I would be interested to know if anyone has knowledge about how these trim pieces were originally finished.
03-01-2017, 06:22 PM
#42
Member
Thread Starter
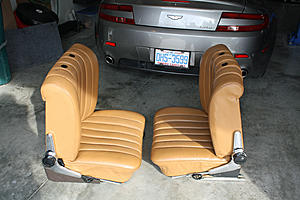
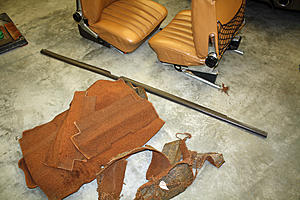
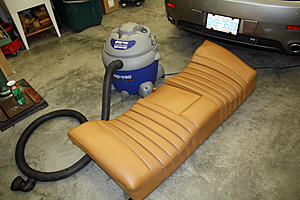
After setting the clamps on the trim, I removed the front seats. Before doing that I unfastened the seat belts and removed the center pillar trim. There was one electrical plug on the passenger seat as well. I also removed the sheepskins so I can properly clean and treat the leather on the front seats.
%20Benz%20280SEL%204point5/3-1-17%20trim%206_zps6xqtfotz.jpg.html]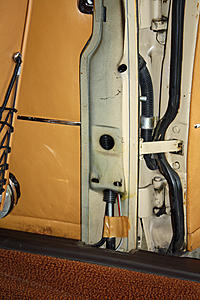 [/URL]
I began with the passenger seat and removed the rear bolts first. That was a mistake as it was very difficult to access the front bolts with the rear part of the seat loose. Eventually I was able to remove all four bolts. I spent an hour on that seat and ten minutes on removing the driver's seat. And that seat would have been removed even quicker if someone hadn't used a phillips screw instead of a bolt. You could not get a screwdriver squarely on that screw so I had to use a vice grips to get it off.
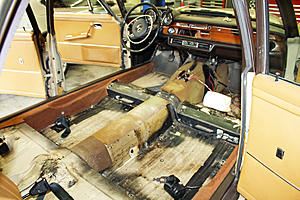
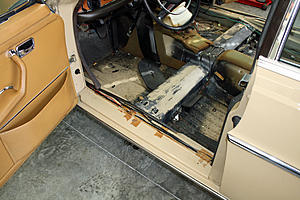
I removed the center console which required unplugging the window switches. With the console and the seats out, I began removing all of the carpet except on the sills. It was late in the day by this point and I decided I wanted to be fresh when I try to remove the sill trim which will allow me to remove the sill carpet. I want to take my time and be sure not to damage that plastic sill trim.

%20Benz%20280SEL%204point5/3-1-17%20trim%206_zps6xqtfotz.jpg.html]
 [/URL]
I began with the passenger seat and removed the rear bolts first. That was a mistake as it was very difficult to access the front bolts with the rear part of the seat loose. Eventually I was able to remove all four bolts. I spent an hour on that seat and ten minutes on removing the driver's seat. And that seat would have been removed even quicker if someone hadn't used a phillips screw instead of a bolt. You could not get a screwdriver squarely on that screw so I had to use a vice grips to get it off.


I removed the center console which required unplugging the window switches. With the console and the seats out, I began removing all of the carpet except on the sills. It was late in the day by this point and I decided I wanted to be fresh when I try to remove the sill trim which will allow me to remove the sill carpet. I want to take my time and be sure not to damage that plastic sill trim.


 03-02-2017, 04:24 PM
#43
Member
Thread Starter
There are two Mercedes restoration specialists in the area. I called both of them and the local wood restoration guy they had been using died. The second place I called said they used Madera Concepts for the first time recently and the results were outstanding. And expensive!! Plus I would have to ship everything to California.
So I began doing Google searches for wood refinishers, cabinet makers, etc. Then it hit me that a place that restored wooden boats would be ideal. They would use finishes that were weather resistant. A search turned up a place I had forgotten about in Mooresville, NC, about 35 miles from here.
Four years ago when I was doing the Corvette restoration, I bought a set of chrome ignition shields from this guy who restored wooden boats. I took the pieces to him this afternoon. Judging by the appearance of the boats he had in the shop, my trim should look great. He's a couple weeks or so out which will work great for me as we are leaving soon for a three week trip in our motorhome. I need to be concentrating on getting the motorhome ready this next week.
03-04-2017, 04:10 PM
#44
Member
Thread Starter
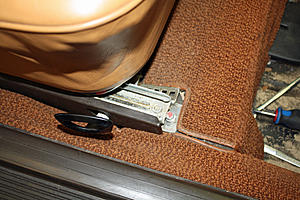
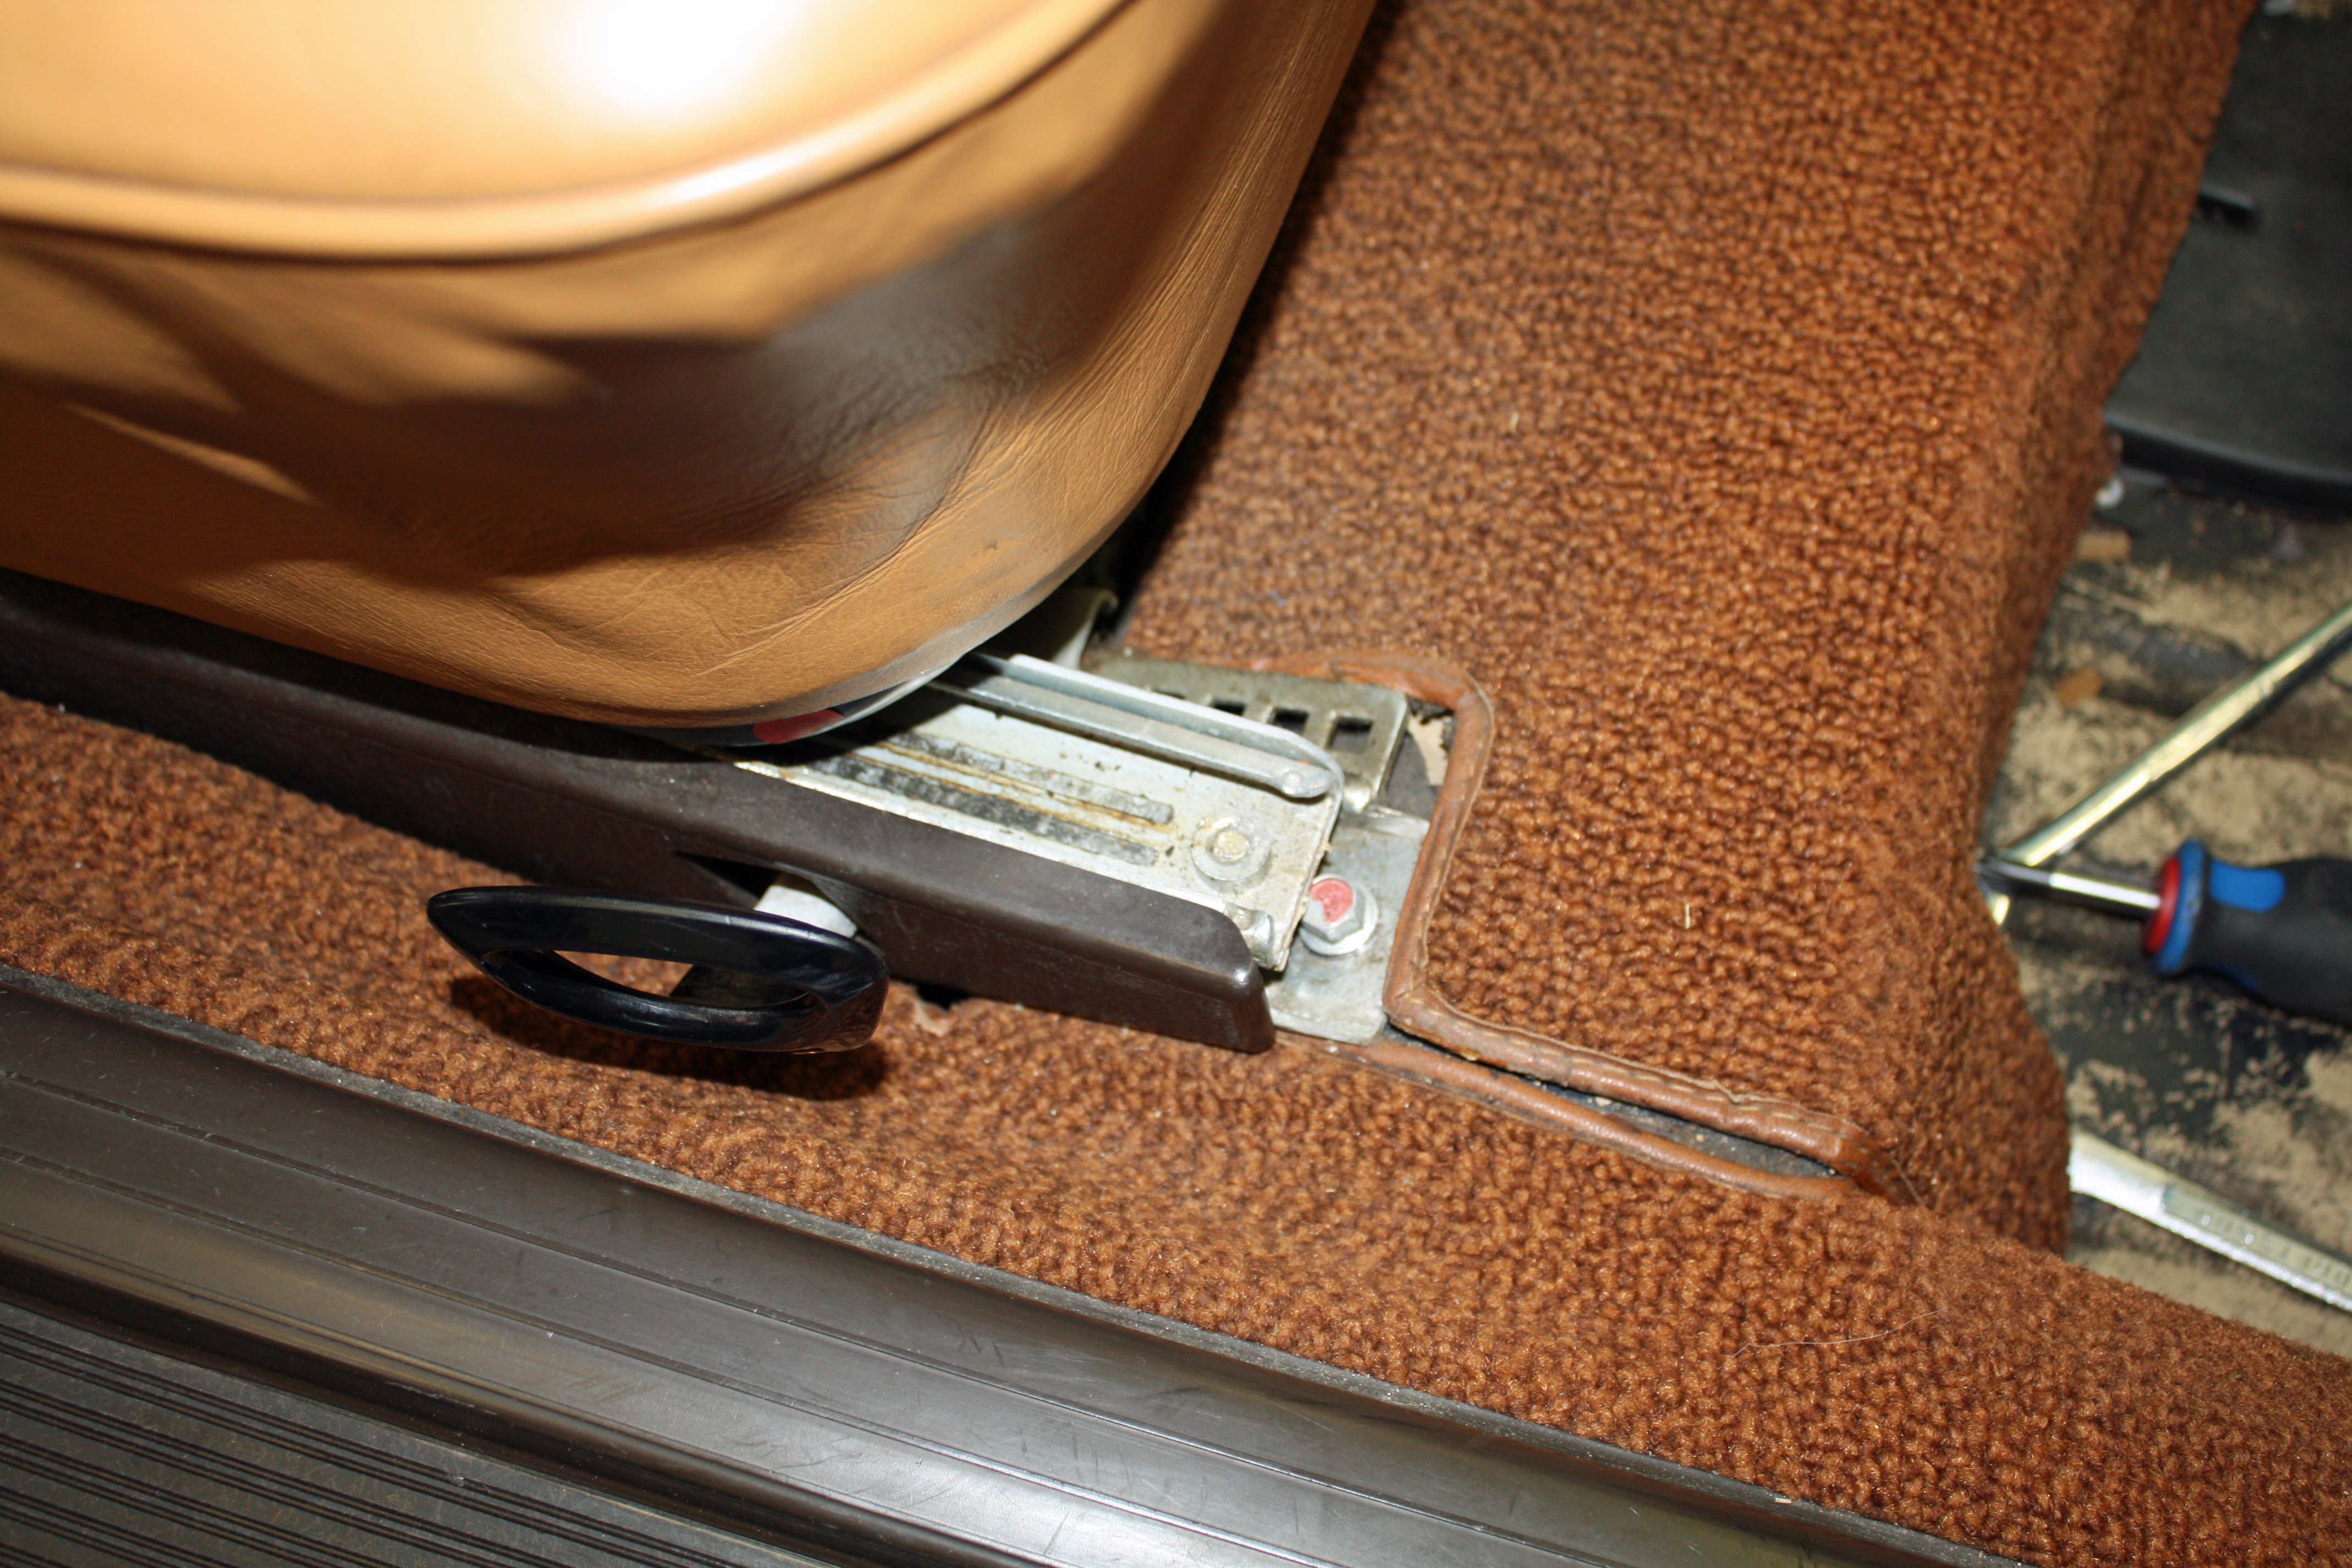
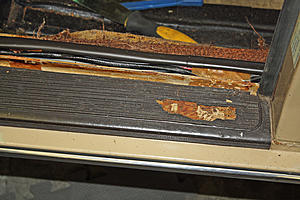
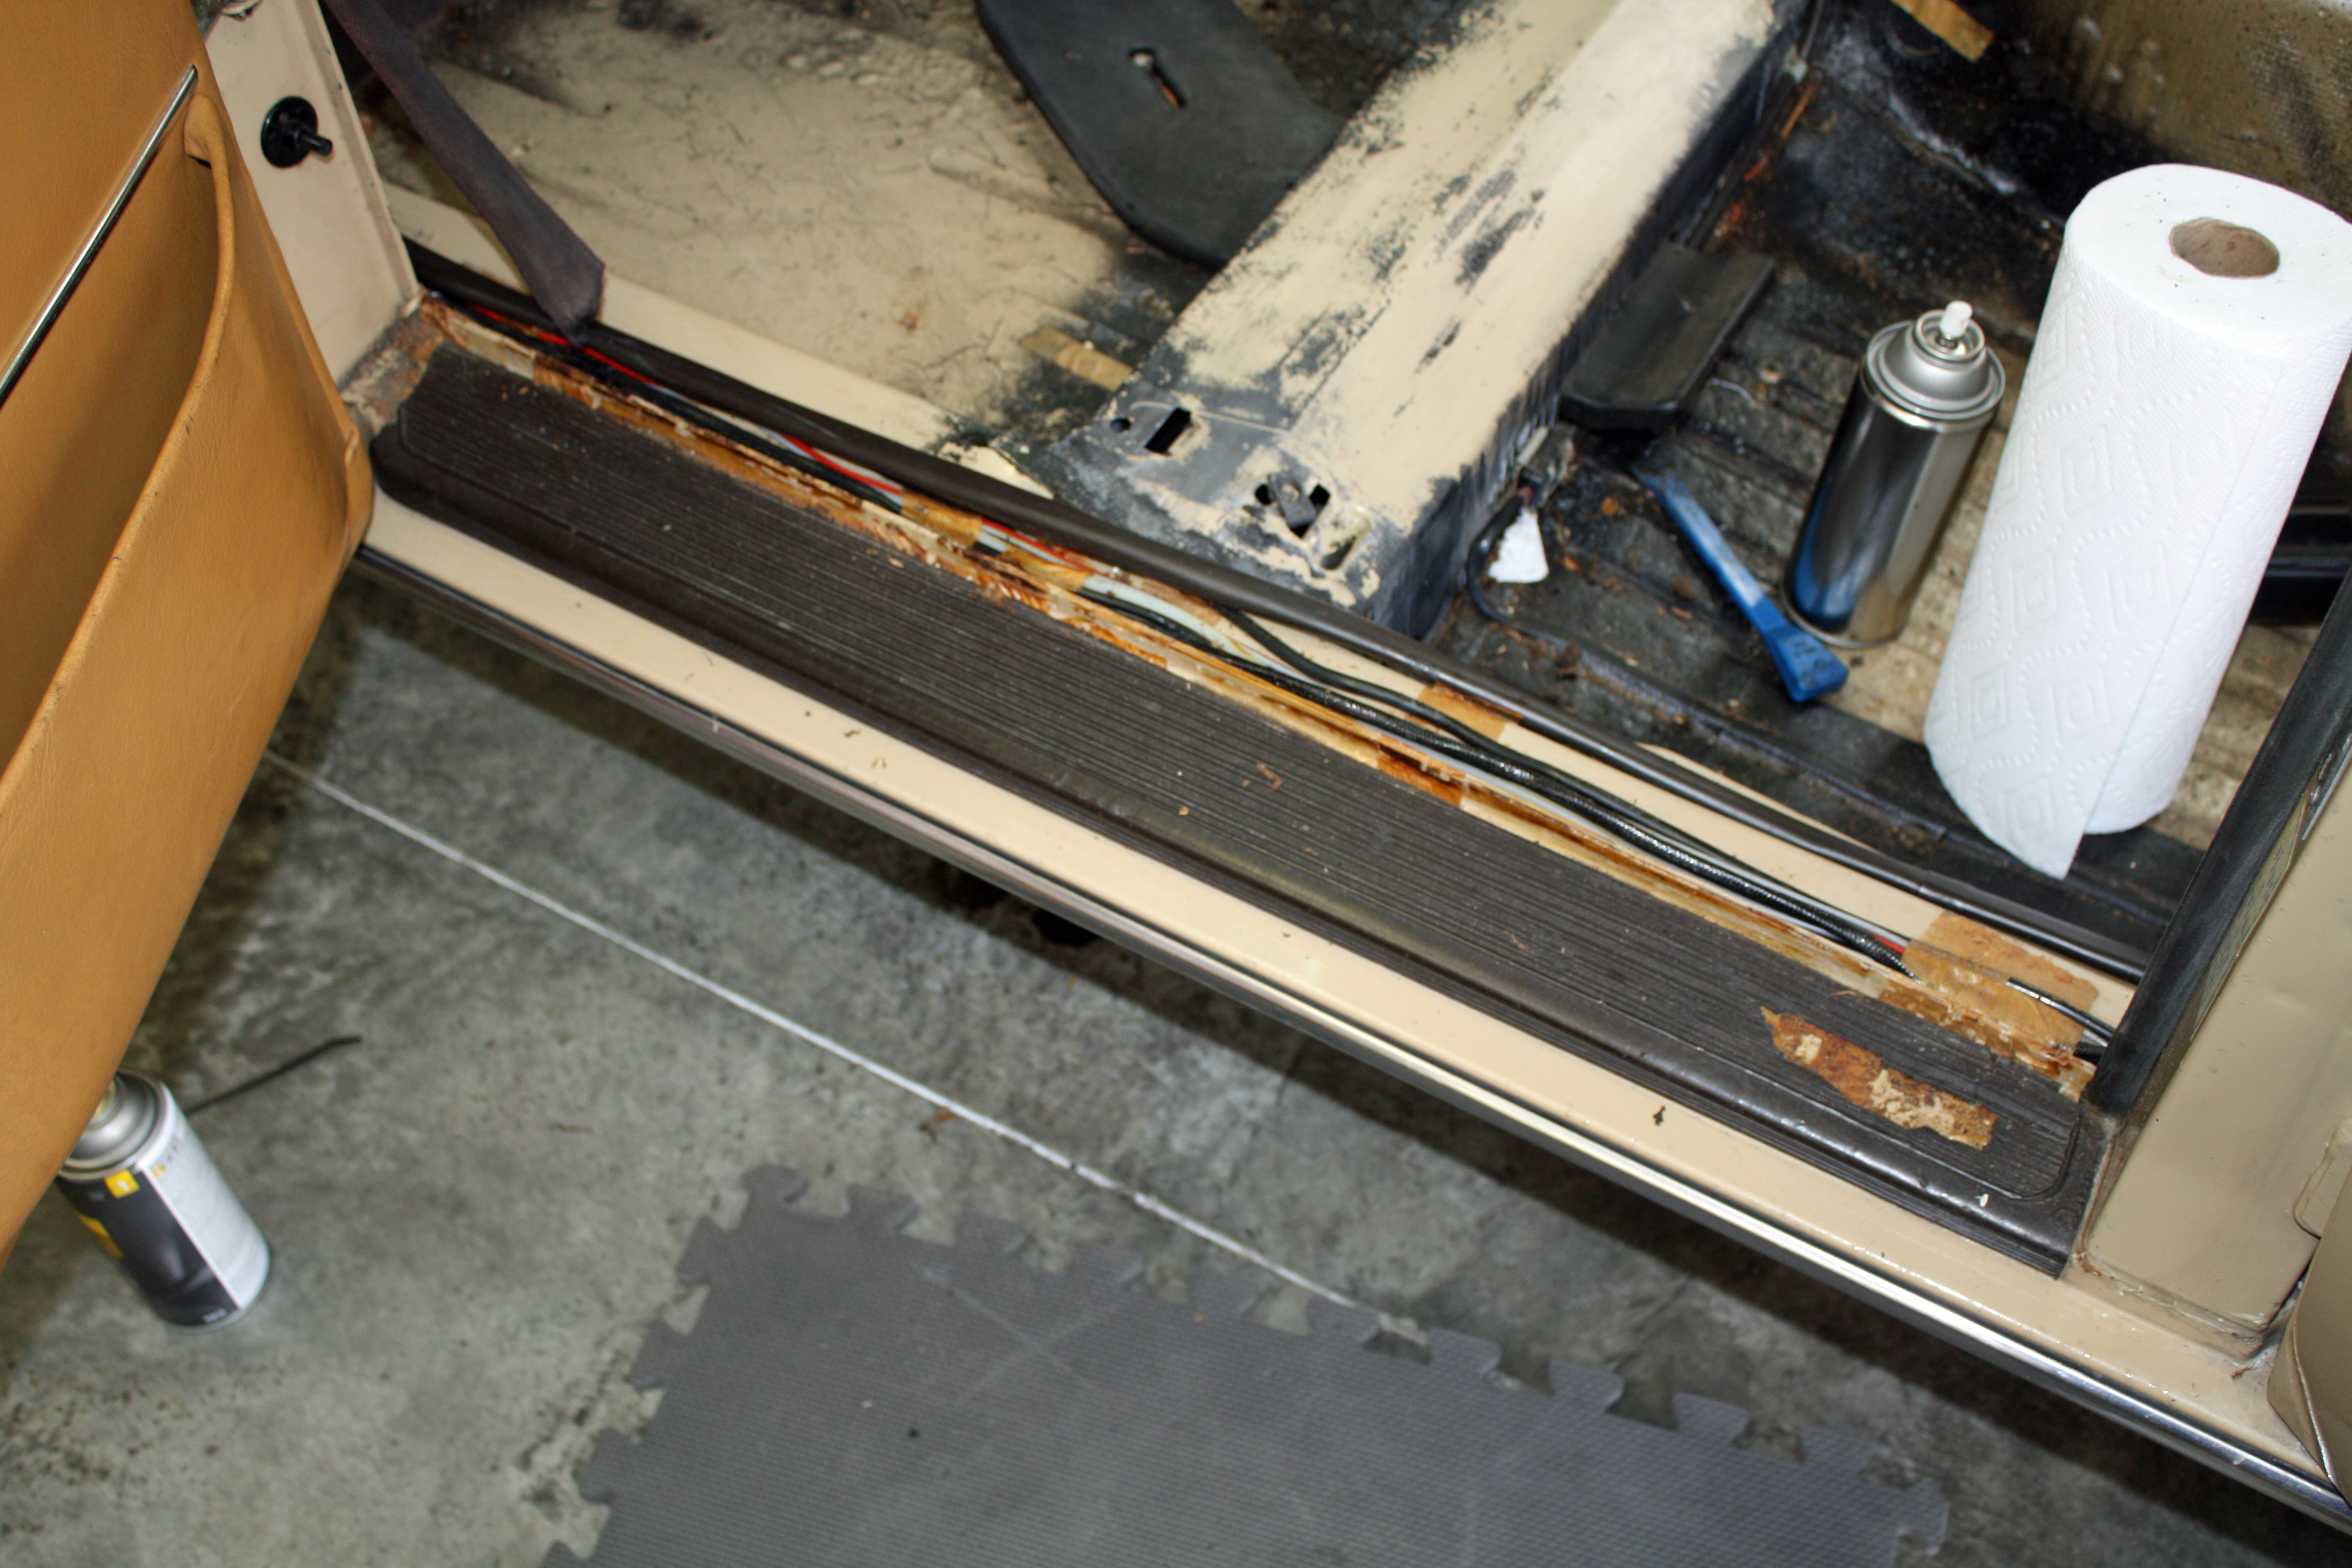
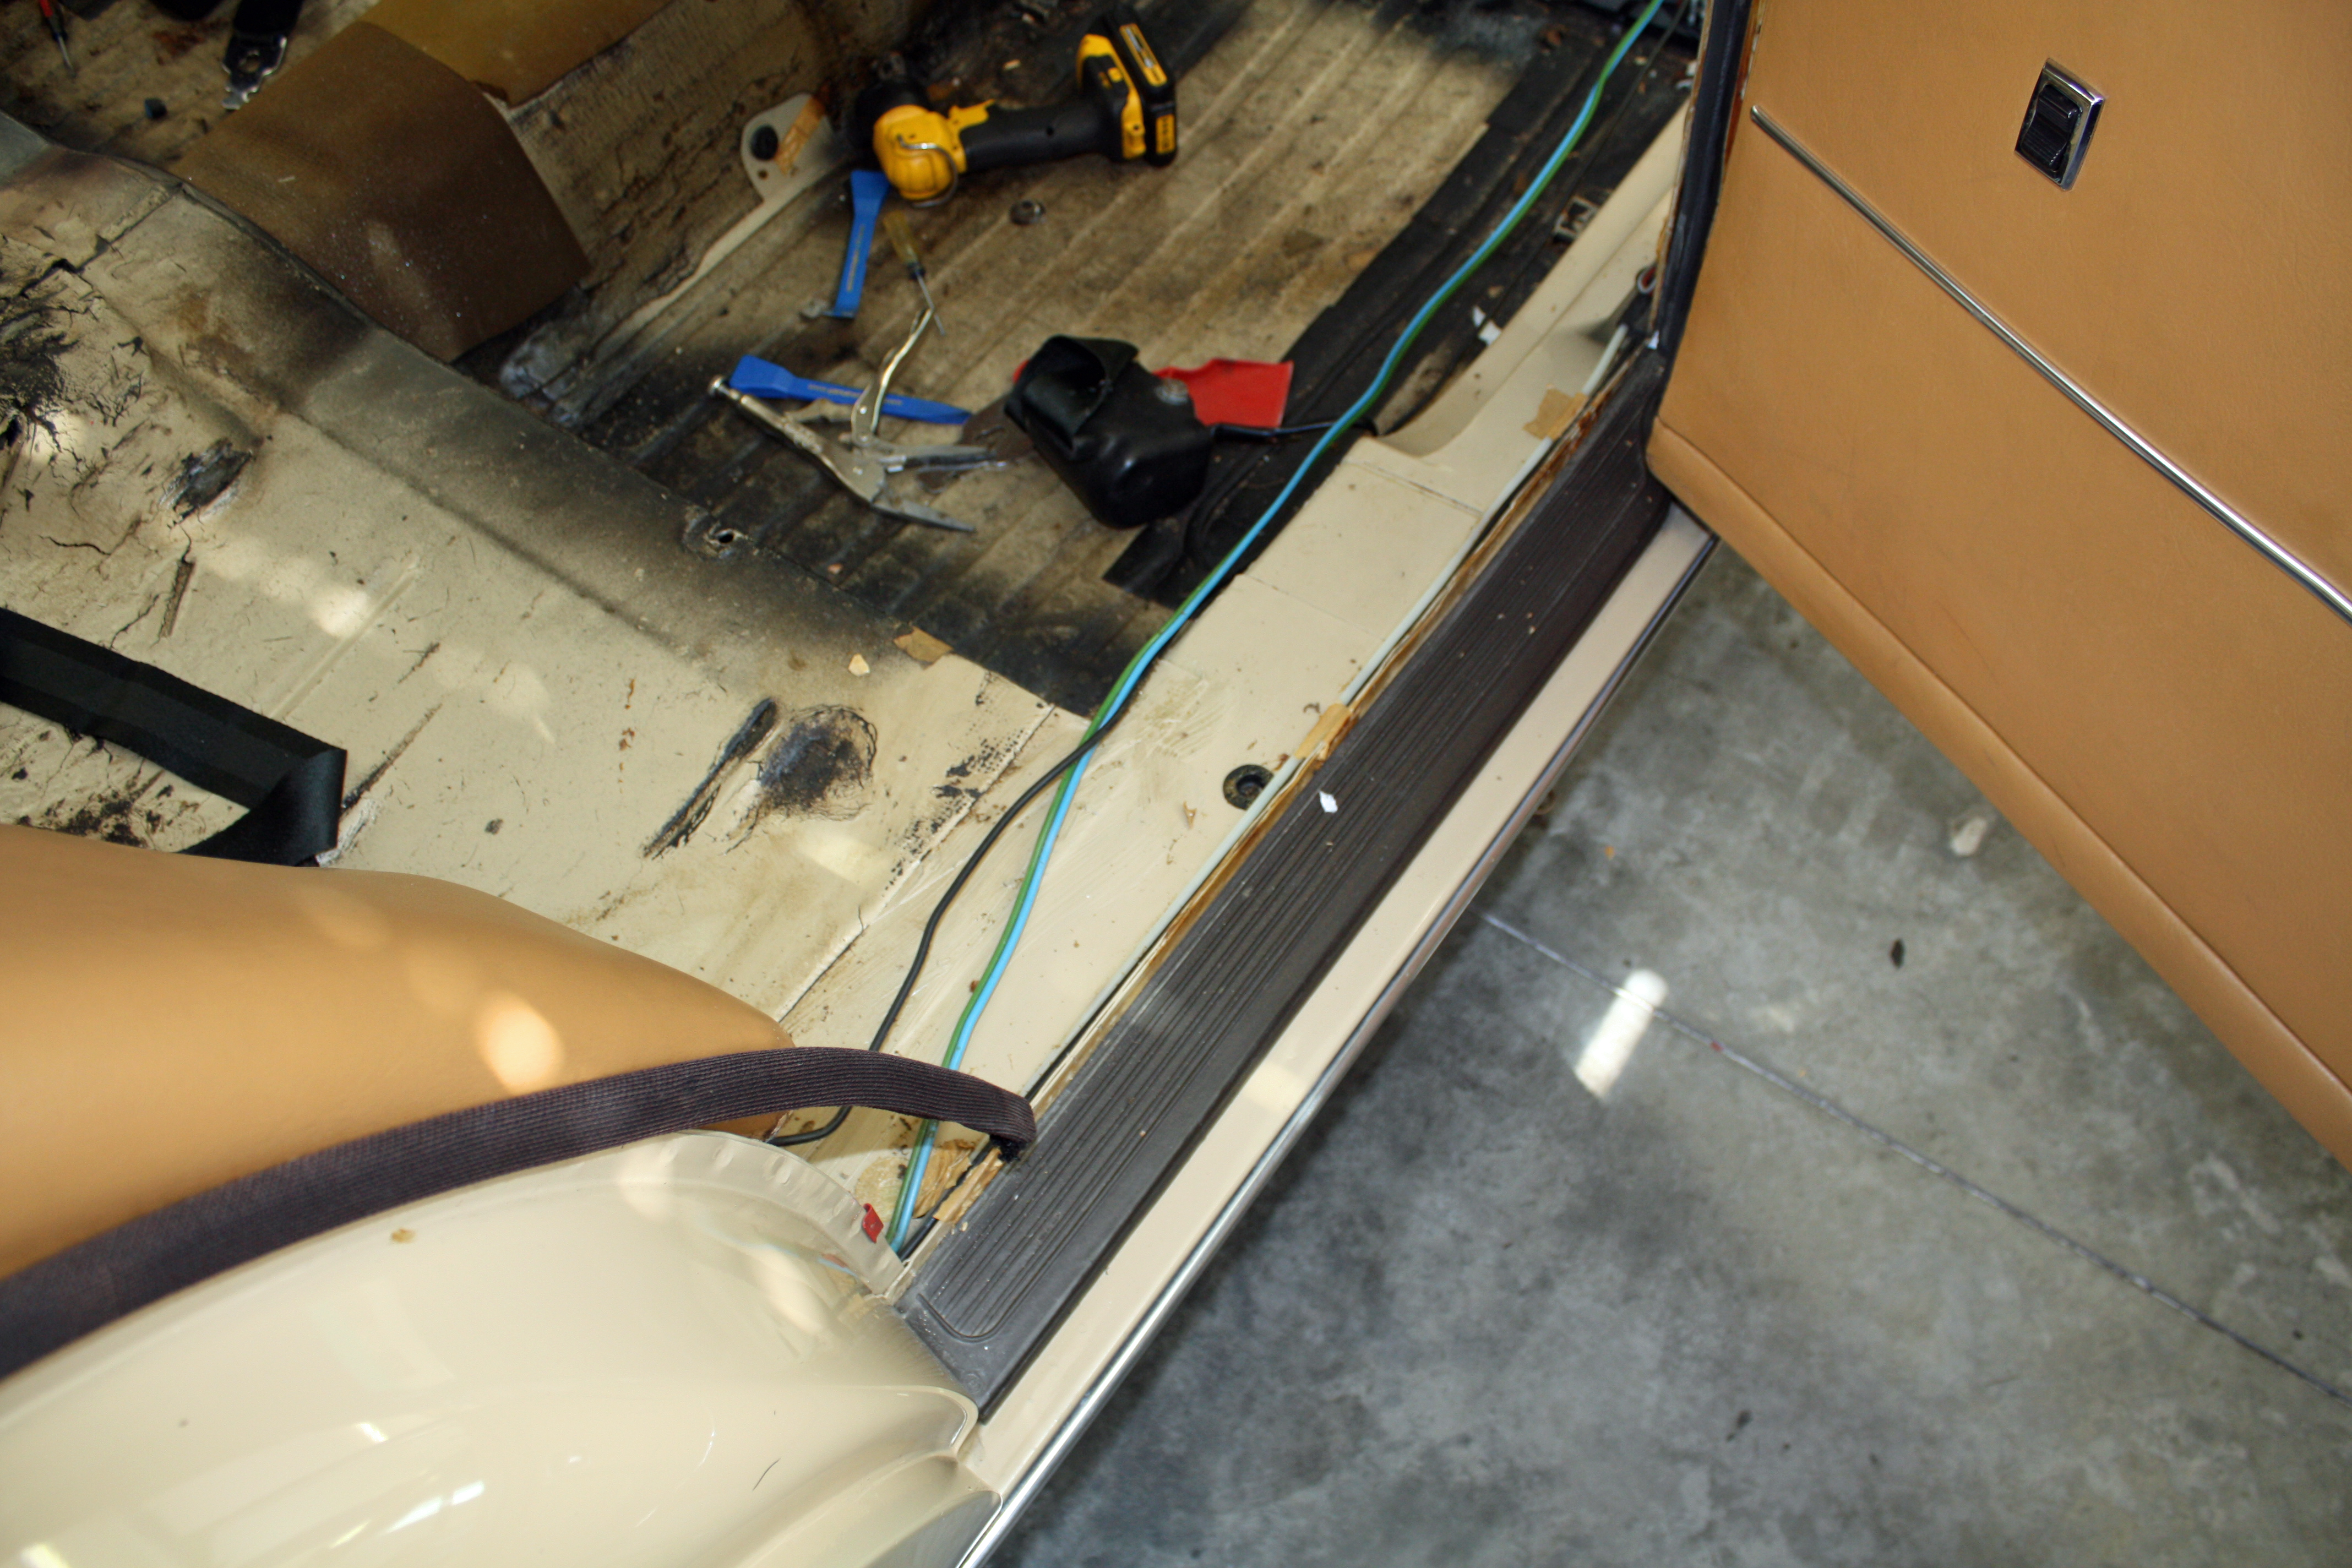
I spent all day removing the threshold carpet and rubber. The carpet did not come out easily. I was able to remove the plastic threshold covers on both sides without damaging them. I inserted a heavy duty scraper under the plastic cover and gently pried up to release it. I also had to pry the door trim away at the bottom to allow the plastic threshold piece to come out. Earlier I had removed the trim on the door pillar where the front and rear doors meet as it also is in the way.
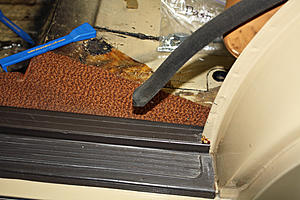
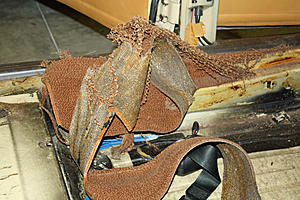
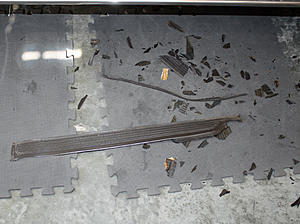
Both front rubber thresholds were damaged towards the rear. I am assuming the culprit here was the seat belt ends being caught in the door as there was no similar damage on the rear door threshold pieces. The front door threshold rubber was very brittle and was removed in pieces by using a plastic scraper and a small hammer. I would place the scraper against the edge of the moulding and then tap the scraper with the hammer. The rear door rubber was not as brittle and came off much easier.
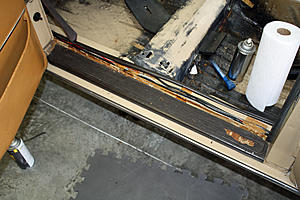
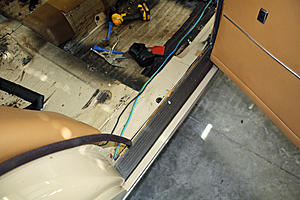
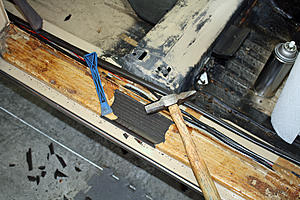
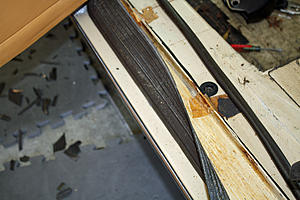
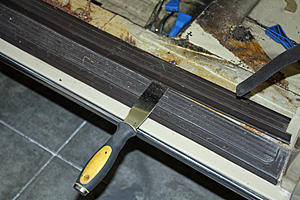
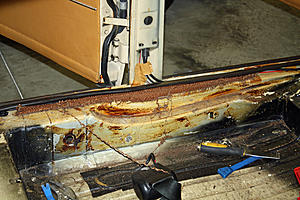
With the carpet and rubber removed, I spent the rest of the day removing the glue with the 3M adhesive remover.
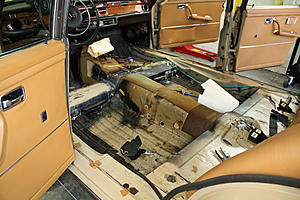
I ran out of time to clean up the rest of the interior floor. Once it is cleaned up I will be ready to install the carpet. One more nasty job done!!!


Both front rubber thresholds were damaged towards the rear. I am assuming the culprit here was the seat belt ends being caught in the door as there was no similar damage on the rear door threshold pieces. The front door threshold rubber was very brittle and was removed in pieces by using a plastic scraper and a small hammer. I would place the scraper against the edge of the moulding and then tap the scraper with the hammer. The rear door rubber was not as brittle and came off much easier.


With the carpet and rubber removed, I spent the rest of the day removing the glue with the 3M adhesive remover.


I ran out of time to clean up the rest of the interior floor. Once it is cleaned up I will be ready to install the carpet. One more nasty job done!!!
03-06-2017, 08:21 PM
#45
Member
Thread Starter
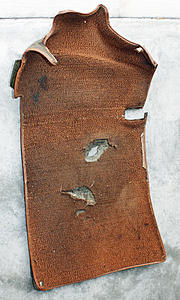
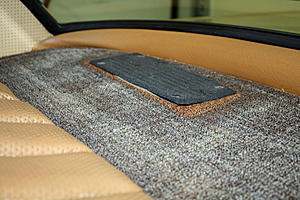
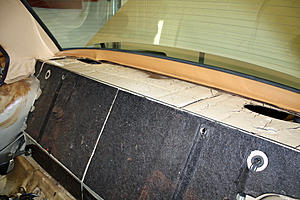
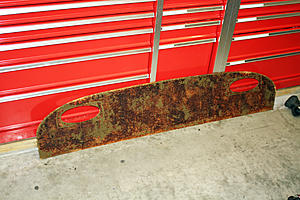
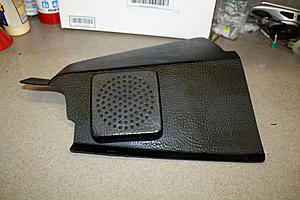
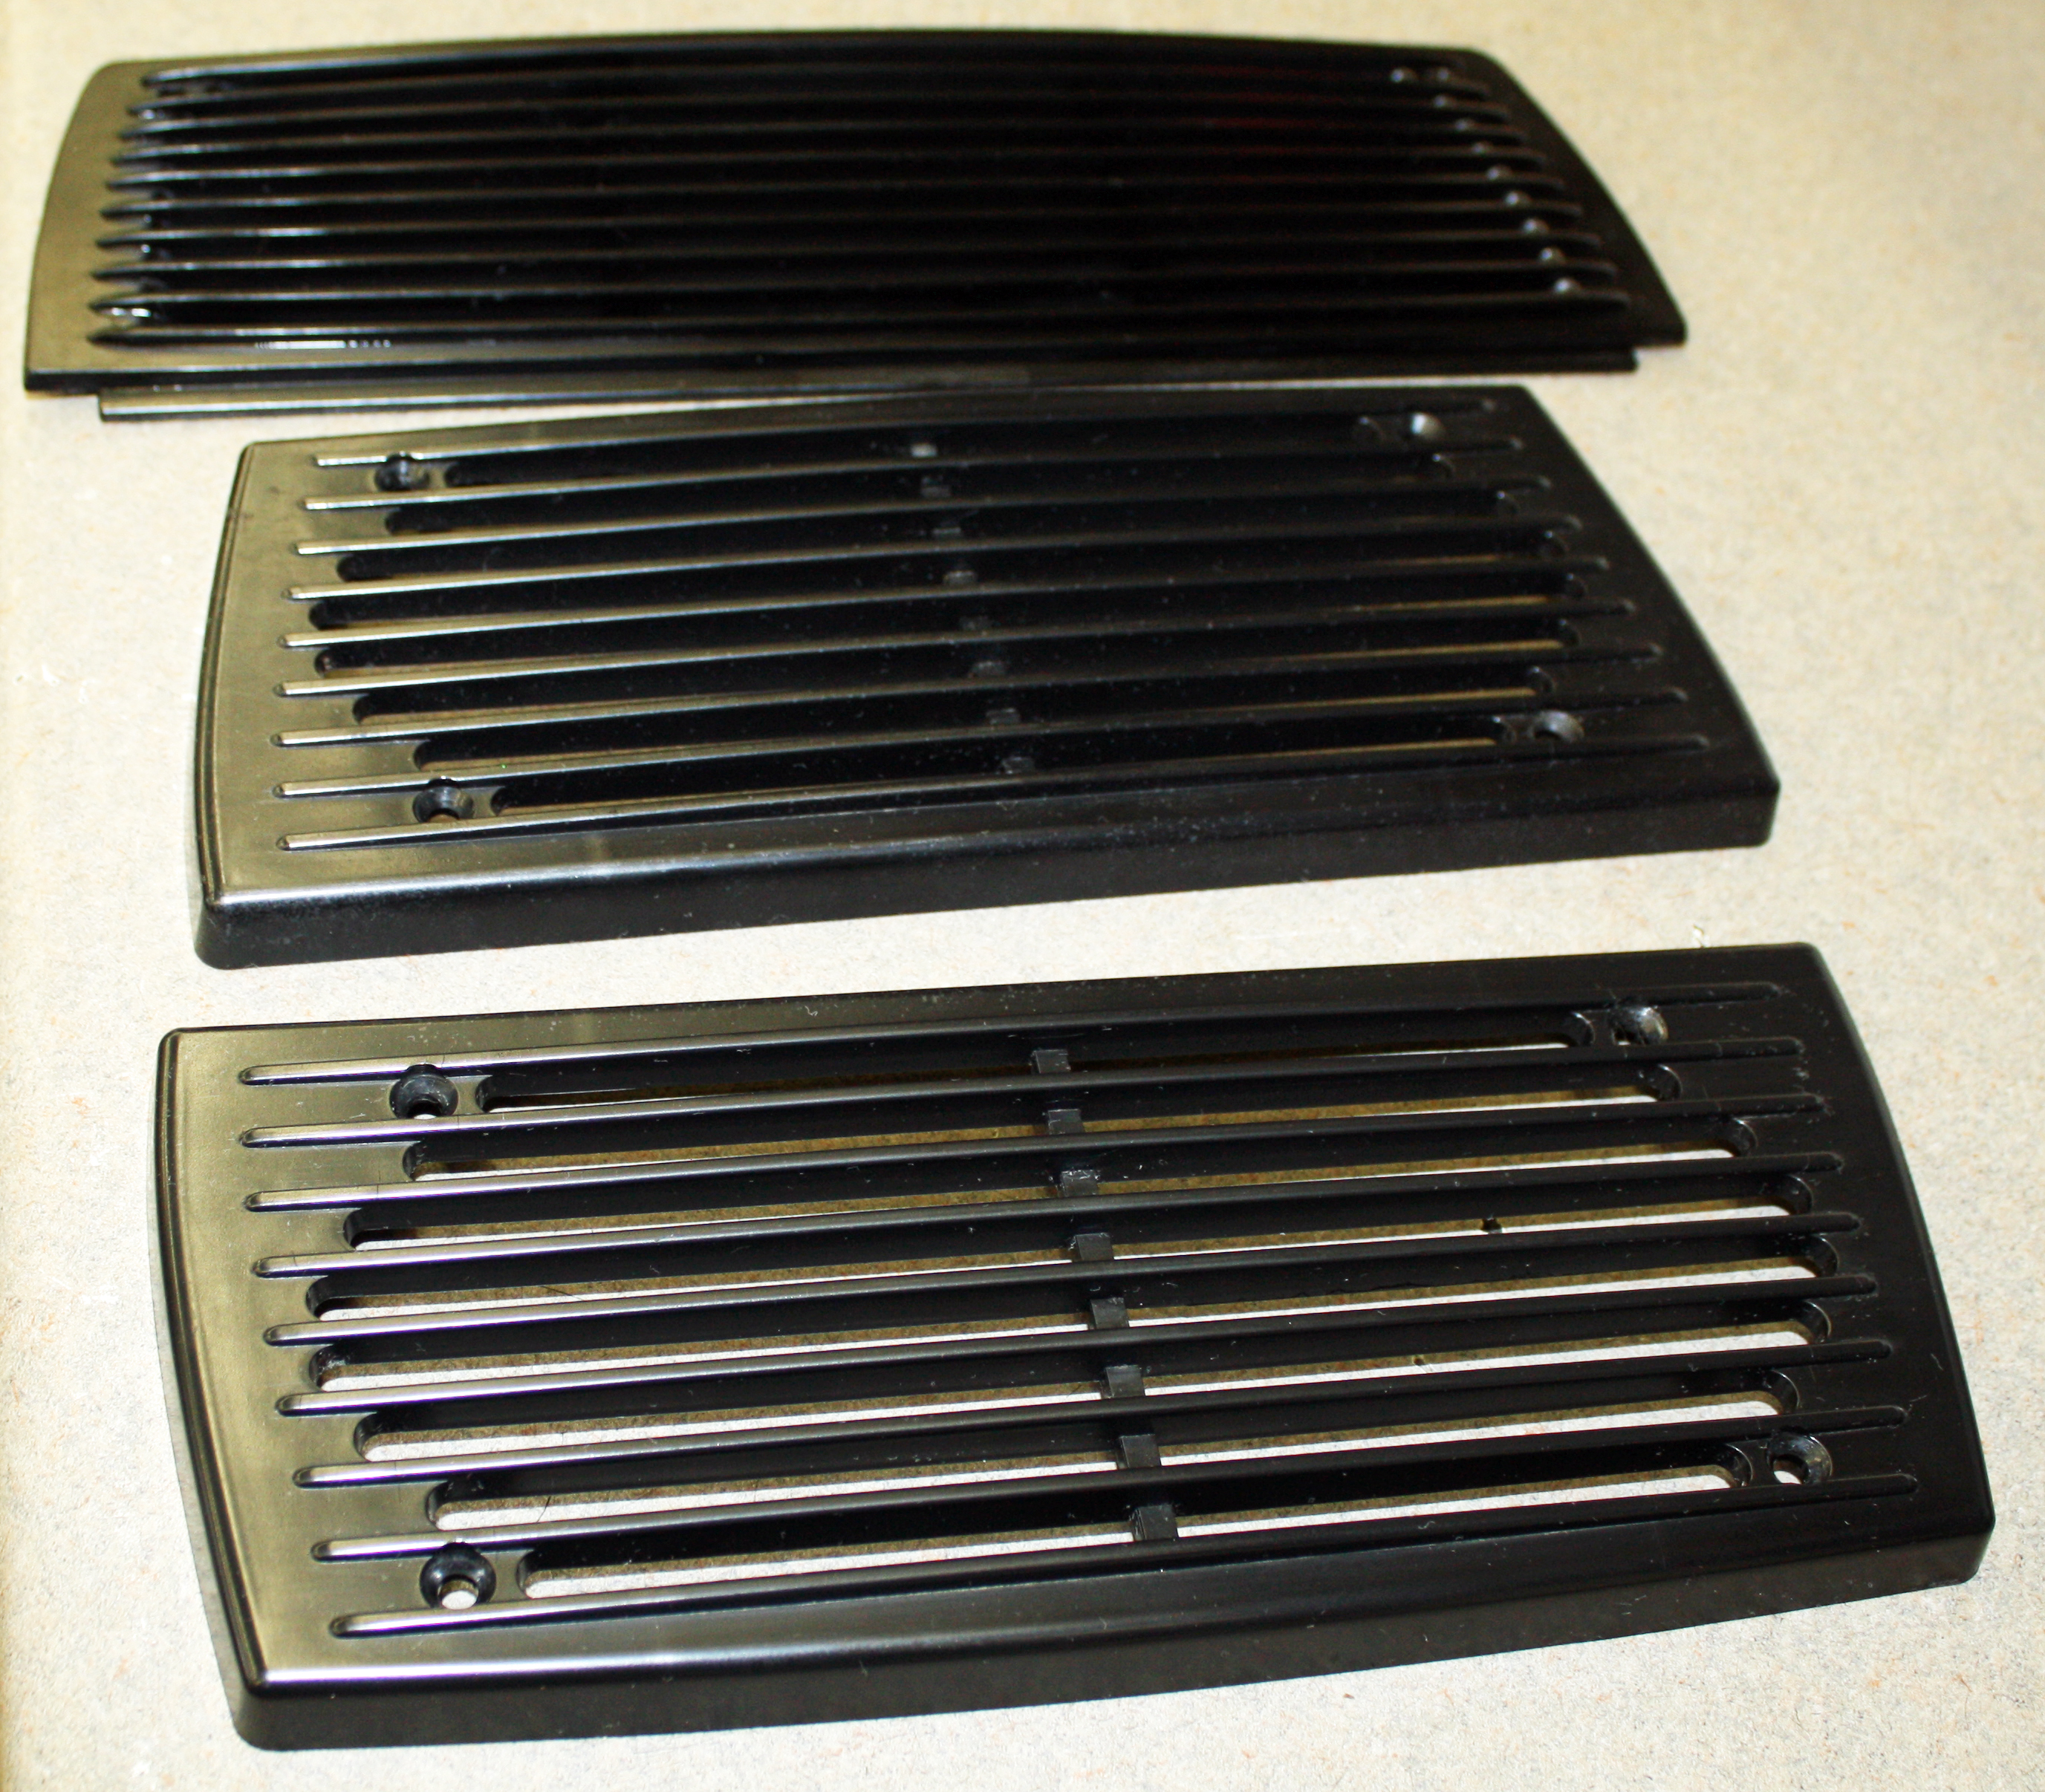
My goal was to clean the interior in anticipation of beginning to install the carpet. I began by wiping down the headliner. As I worked my way to the rear, I decided to remove the speaker grills to clean them. I was surprised to see the carpet color under the grill. I had no idea that the carpet on the parcel shelf was originally the same color as the floor. Having looked at the carpet kit prior to going to the garage, I now knew where this one piece went that I had a question about.
This meant the back part of the rear seat had to come out. I had fussed with this previously to no avail. This time I did a Google search and discovered that there are two 10mm nuts in the trunk that have to be removed. With those nuts removed, pull out at the top and then lift up to release the seat back.


Now I could remove the carpeted piece which also includes a piece of vinyl that covers a surround at the rear. The speakers lift out from the top and need to be unplugged. There are two blue plastic nuts in the trunk that hold this panel in place.
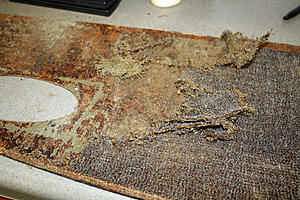
When I lifted that panel of the seat back, the seat back was covered in a find brown dust. Which is what the carpet had reverted to. When I placed the panel on the bench to remove the old carpet, I was surprised to find that the binding had been sewn to the fiberboard. So I had to raid my wife's sewing machine for her thread cutter.
The carpet came off in little dusty pieces. My plastic scraper came in handy again. I did not use the adhesive remover as the board is fragile. The vinyl trim came off the metal trim easily. There was a thin tape on the bottom of the trim. I did remove the glue on that trim. No rust on anything so the rear window seems to have been sealed well.

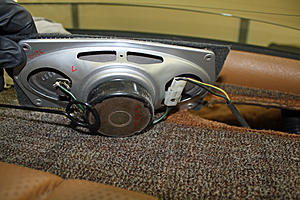
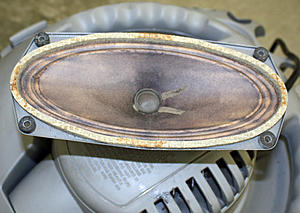
I finished cleaning up the speaker grills, the right front speaker, and the floor of the car. I thought ducting air to the rear seats was a fairly recent invention so I was surprised to see the AC ductwork. The W108 was ahead of its time.

This meant the back part of the rear seat had to come out. I had fussed with this previously to no avail. This time I did a Google search and discovered that there are two 10mm nuts in the trunk that have to be removed. With those nuts removed, pull out at the top and then lift up to release the seat back.


Now I could remove the carpeted piece which also includes a piece of vinyl that covers a surround at the rear. The speakers lift out from the top and need to be unplugged. There are two blue plastic nuts in the trunk that hold this panel in place.


When I lifted that panel of the seat back, the seat back was covered in a find brown dust. Which is what the carpet had reverted to. When I placed the panel on the bench to remove the old carpet, I was surprised to find that the binding had been sewn to the fiberboard. So I had to raid my wife's sewing machine for her thread cutter.


The carpet came off in little dusty pieces. My plastic scraper came in handy again. I did not use the adhesive remover as the board is fragile. The vinyl trim came off the metal trim easily. There was a thin tape on the bottom of the trim. I did remove the glue on that trim. No rust on anything so the rear window seems to have been sealed well.


I finished cleaning up the speaker grills, the right front speaker, and the floor of the car. I thought ducting air to the rear seats was a fairly recent invention so I was surprised to see the AC ductwork. The W108 was ahead of its time.


 03-07-2017, 10:09 PM
#46
Member
Thread Starter
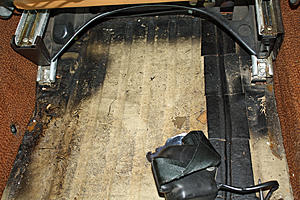
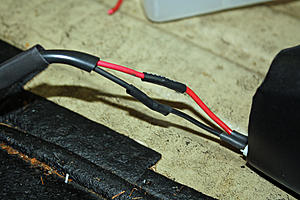
Yesterday while I was cleaning the floorpan area, I moved the seat belt retractor and the wires broke off. There was very little wire showing. To expose more wire I did two things. First I moved the plastic cover back as far as I could. Next I had to drill out the pop rivet for the plastic harness clamp.
After stripping back the outer harness covering, I soldered on two wires about 6" long. After covering them with shrink wrap, I pop riveted the harness clamp back in place.

Now I moved to the car to solder the pigtail extensions to the original harness. I shrink wrapped the entire pigtail to the original harness.
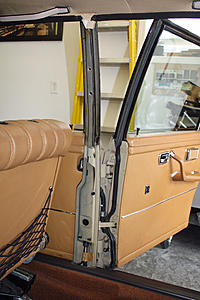
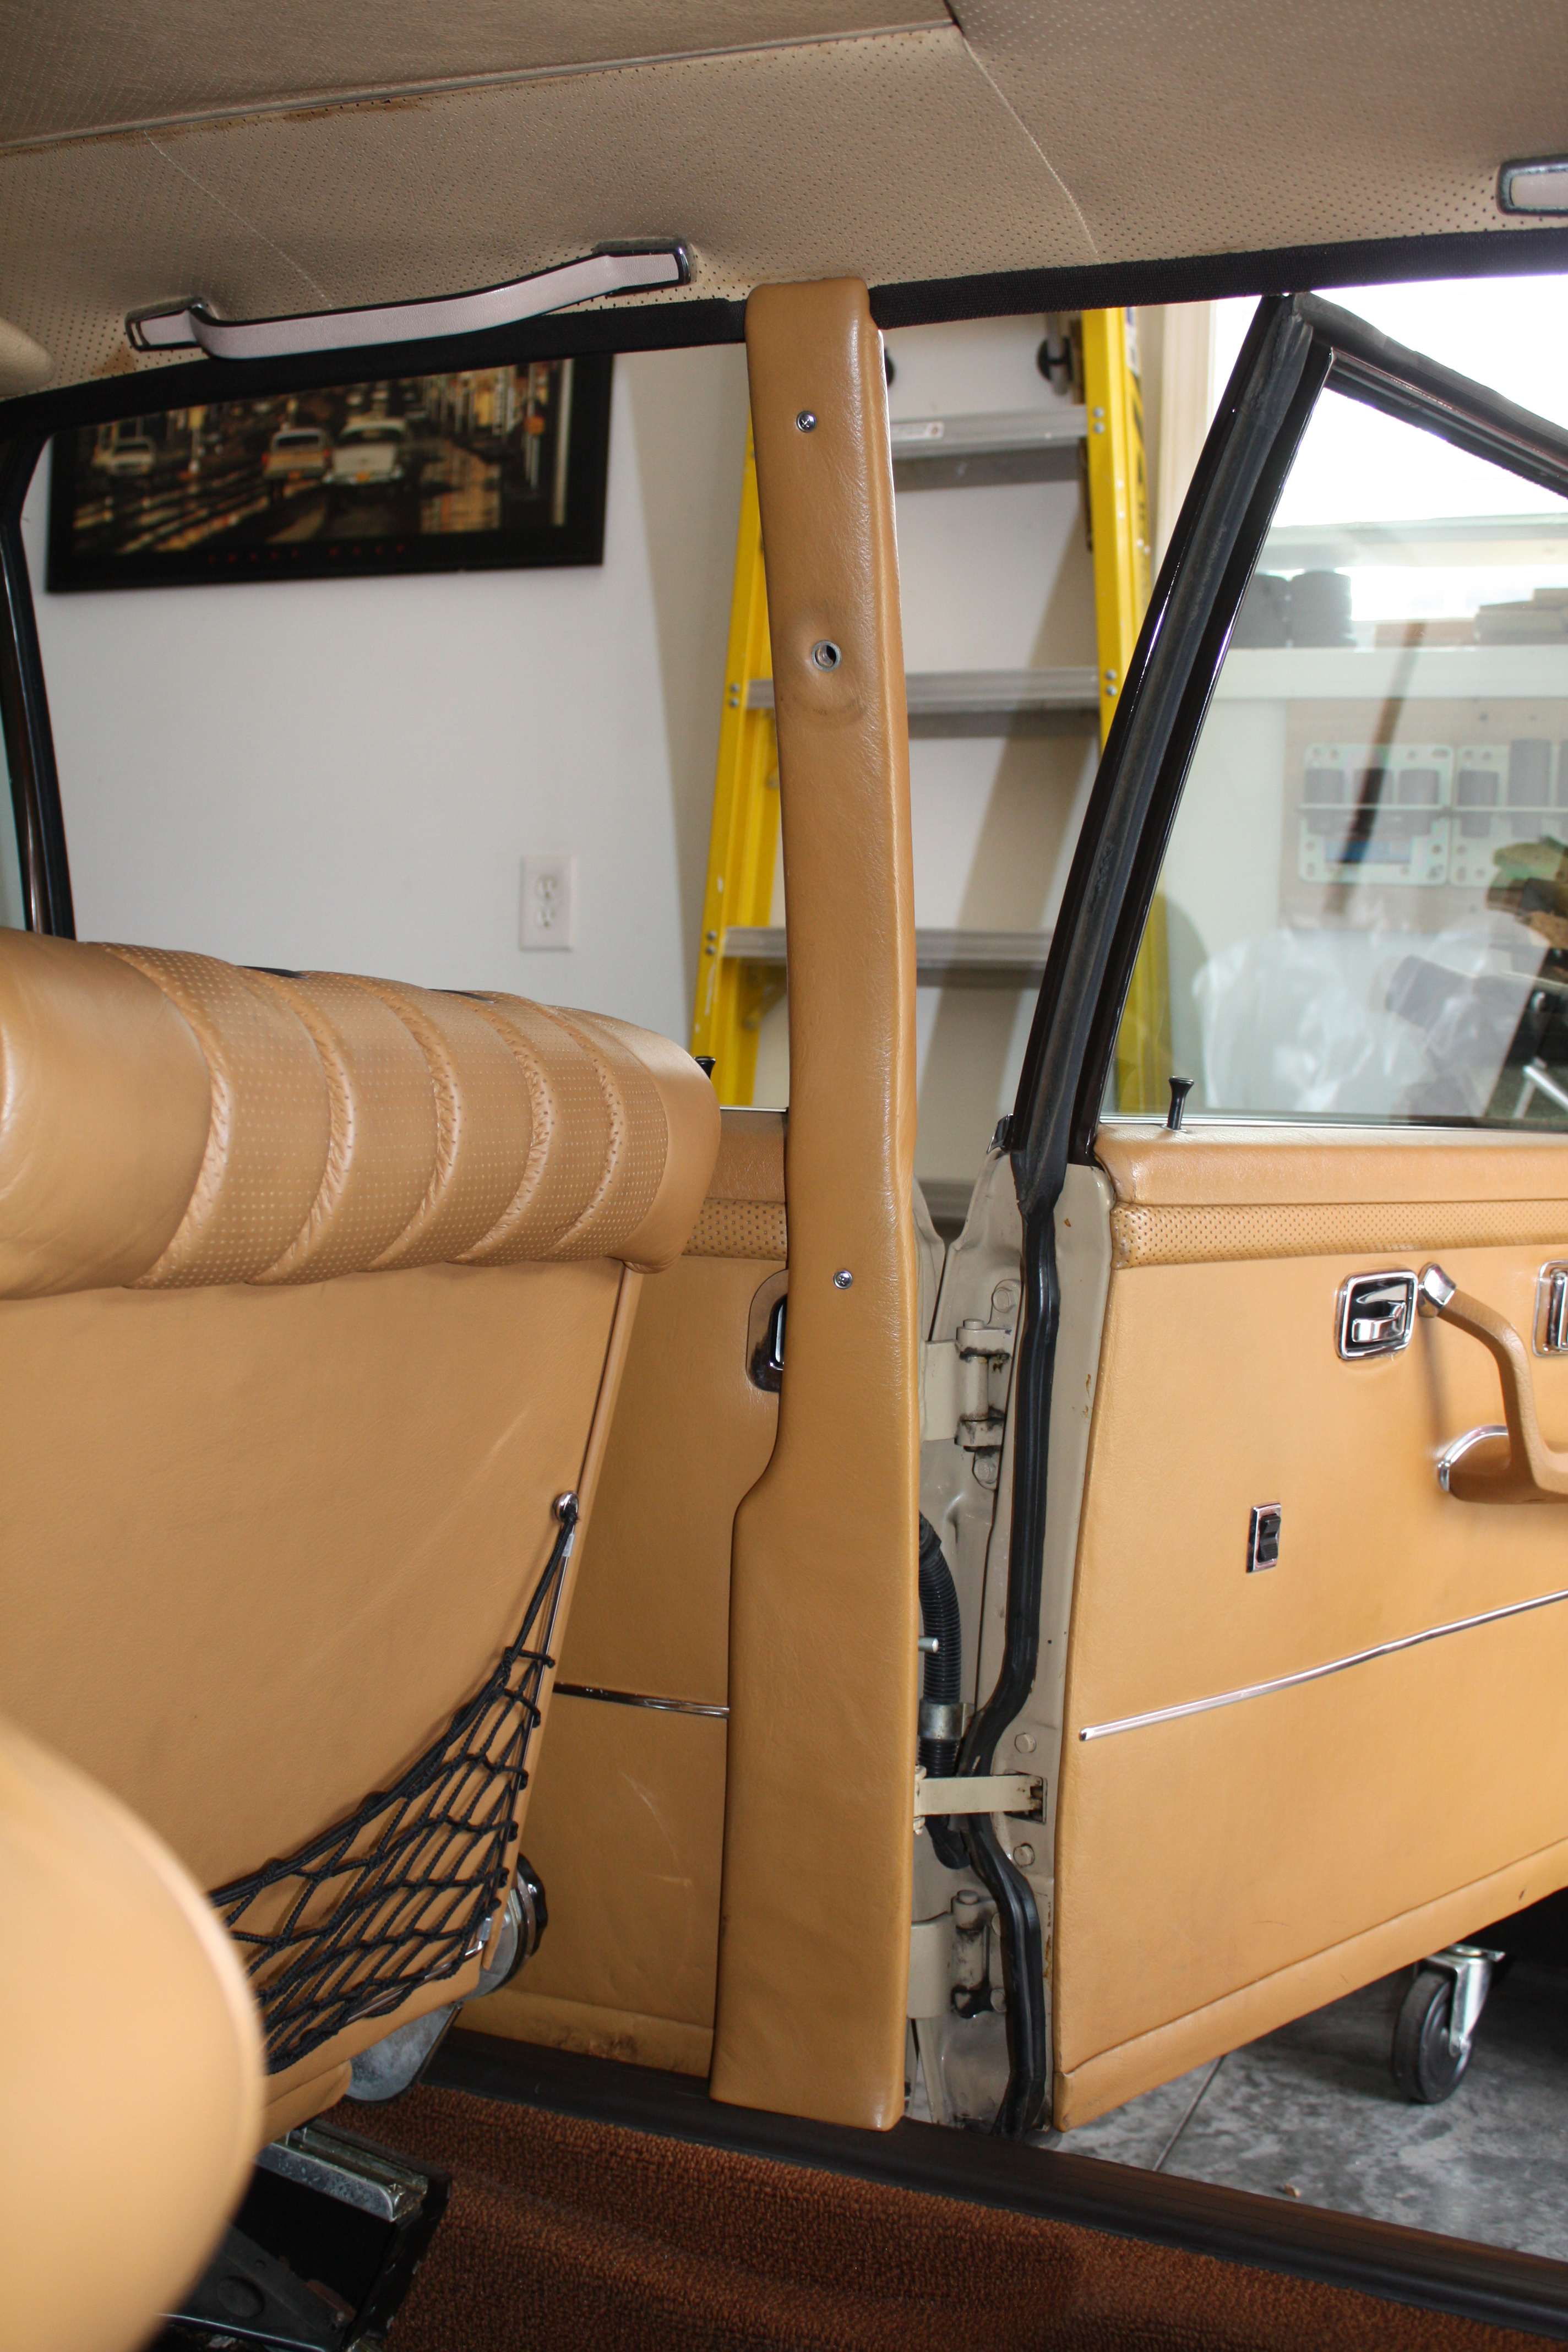
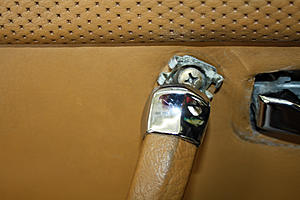
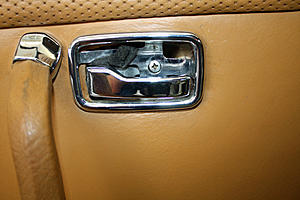
The left front door check strap is broken. New ones are $246 from Mercedes Classic I found a used one on eBay for $30 shipped. To install it, the door card must be removed. Since I had previously removed the wooden interior door trim to have it re-finished, removing the top part of the door card was as easy as unscrewing the door lock knob and lifting it up. There are three screws holding the armrest on. Two are underneath the armrest and the other one is at the top. To access it, one must slip the chrome trim piece back to expose the screw.
To remove the interior door latch, use a small screwdriver to pry out the black plastic part on the end opposite the door latch hinge. This exposes the screw that attaches the door latch.
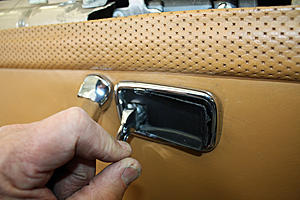
Now you can gently pull around the perimeter of the door card to release it. About halfway up on the right side is a metal retainer that slips into a slot. Once you have all of the fastening tabs released, pull up on the door card and off it comes.
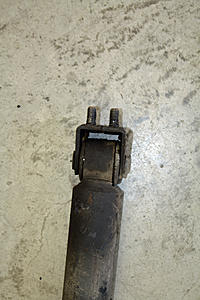
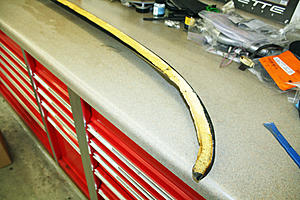
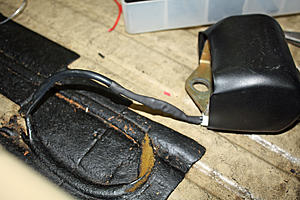
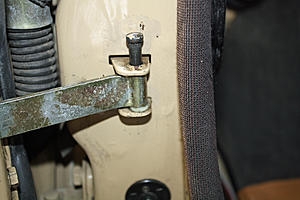
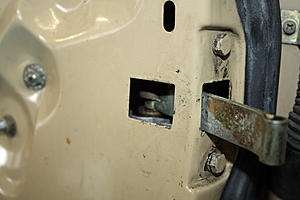
The first thing to do to remove the check strap is to remove the pin on the door jamb. The check strap is held on with two bolts on the inner side of the door and one nut on the face of the door. With those bolts removed, I struggled with removing the old one as the power window wiring harness was in the way. Eventually I became smarter than the harness by removing the two screws that attached the harness to the door regulator. Once those screws are removed, one can push the harness out of the way and the check strap is easily removed or installed.
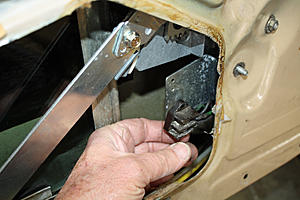
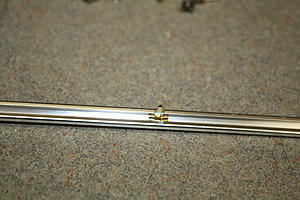
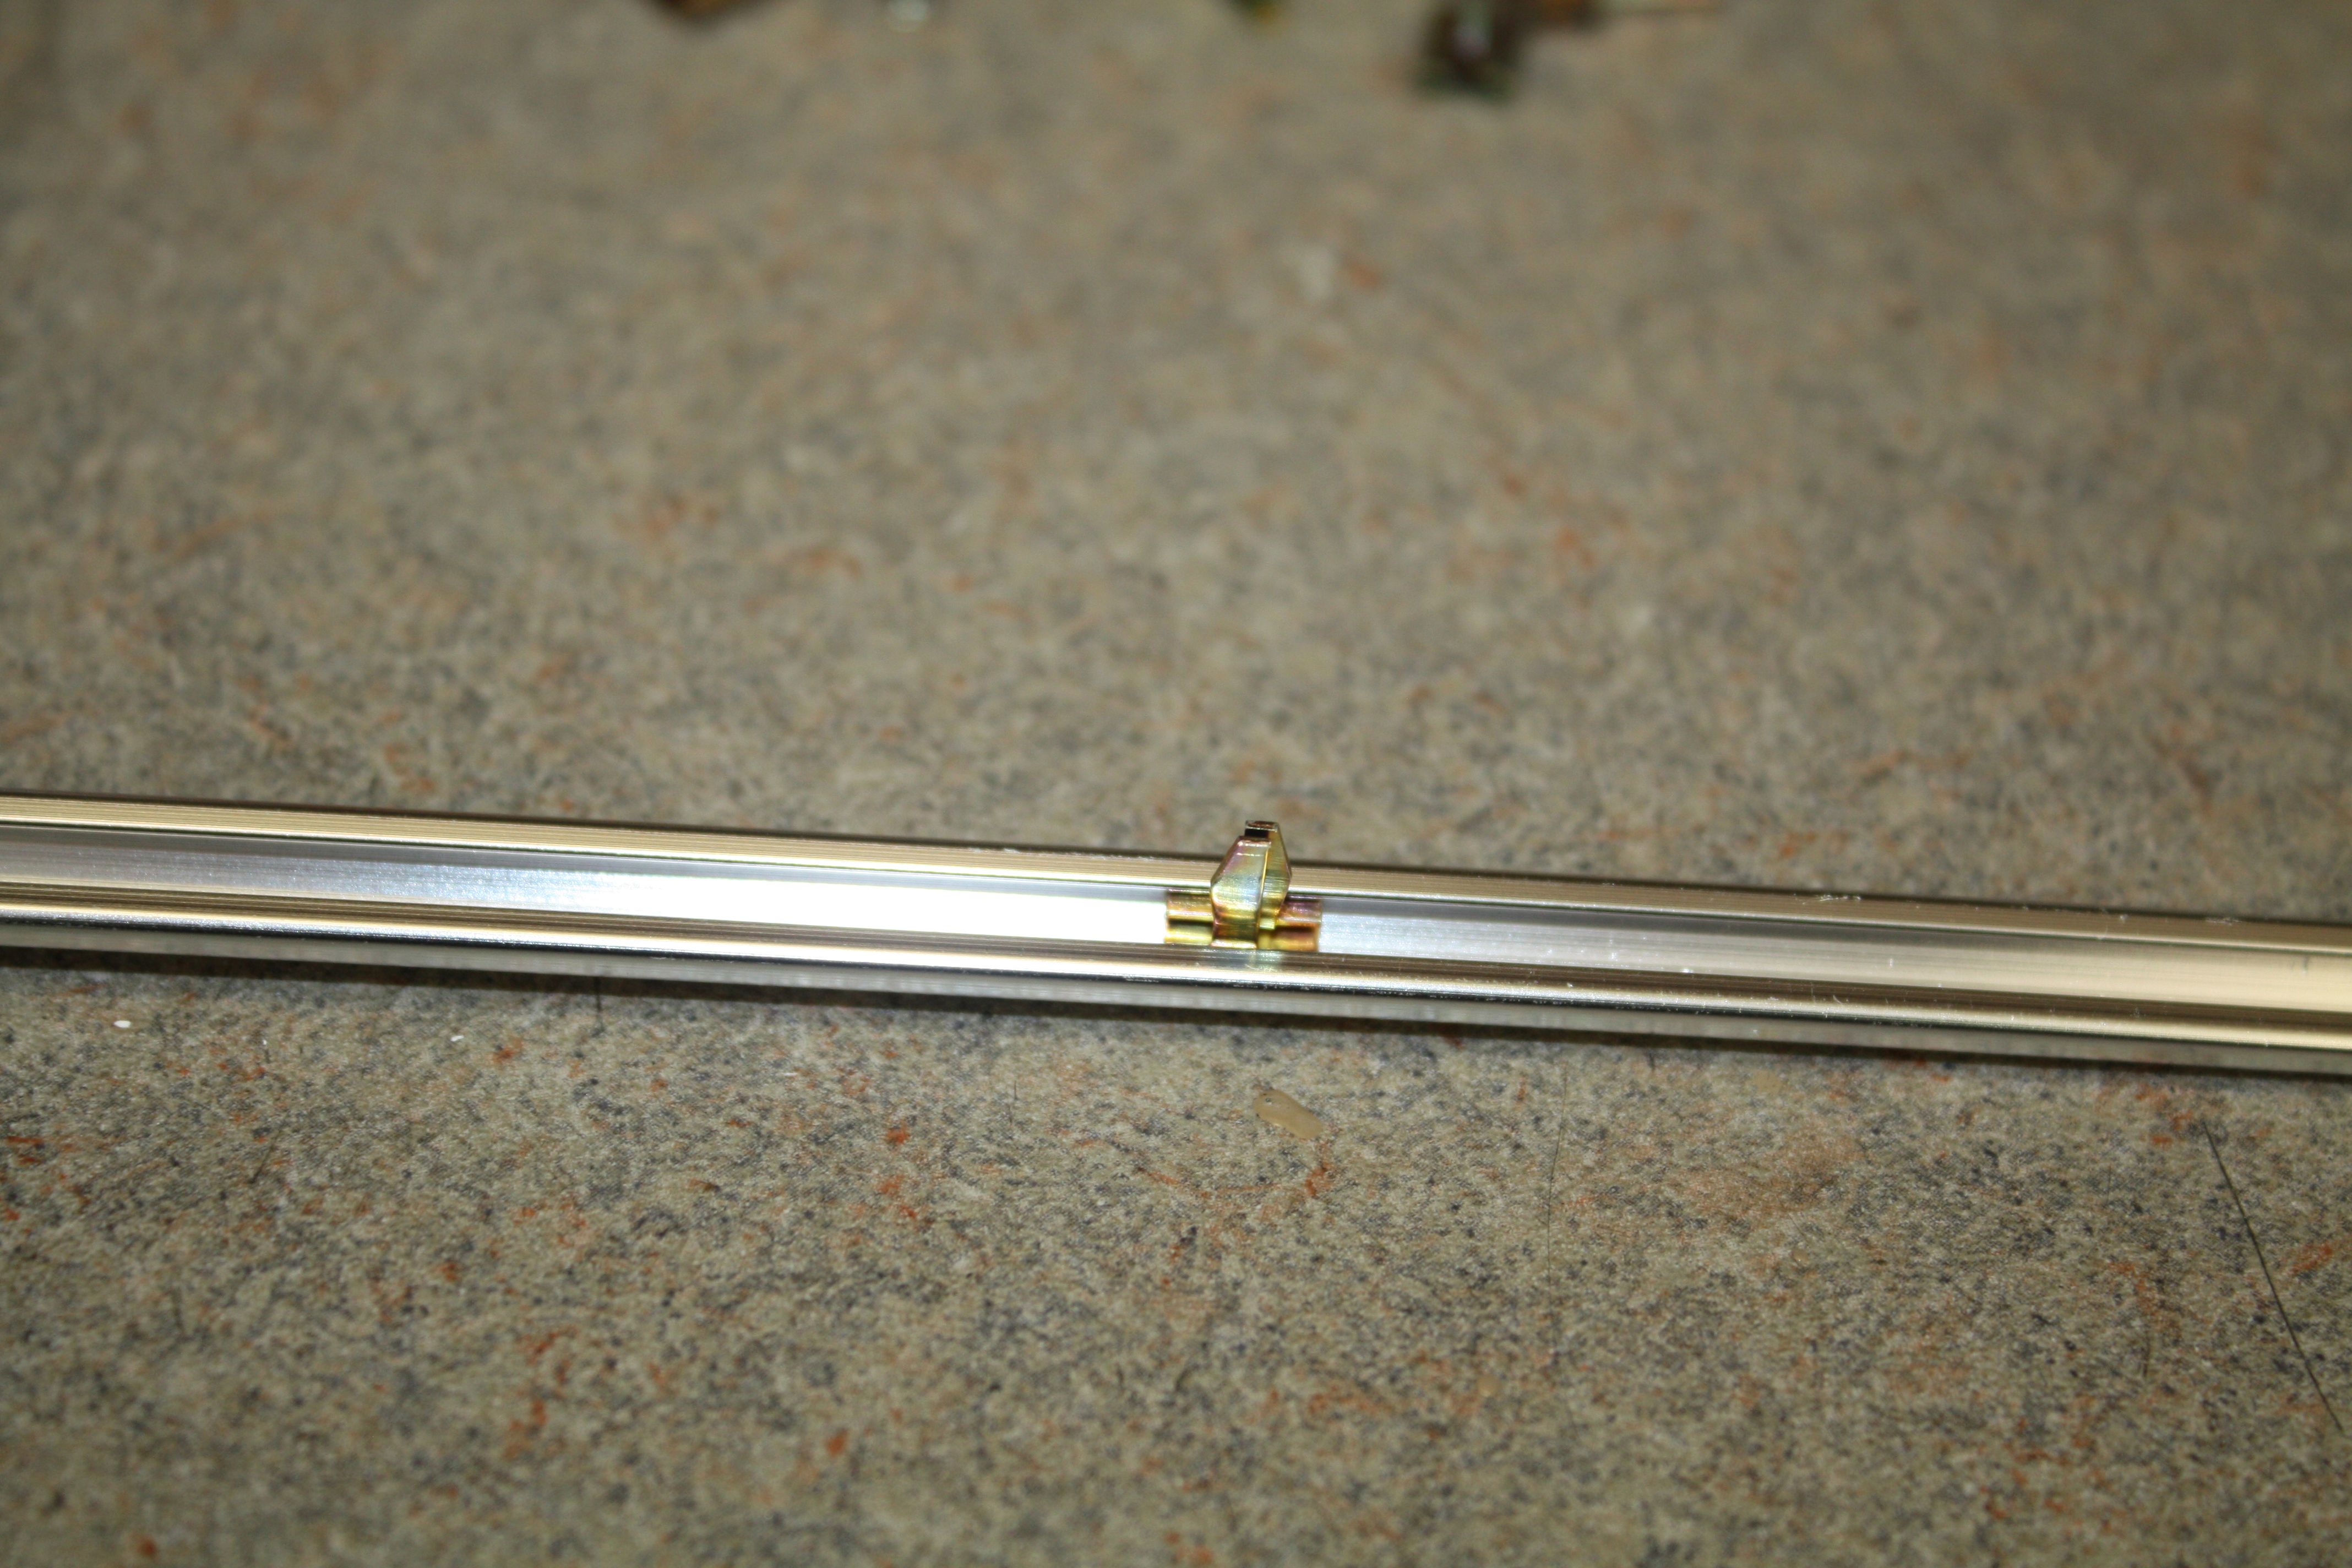
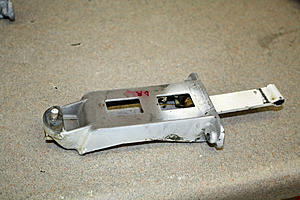
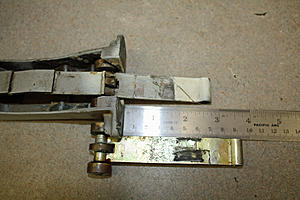
The old check strap broke at the rear. Below is the replacement part.
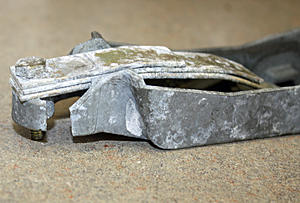
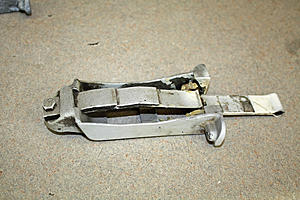
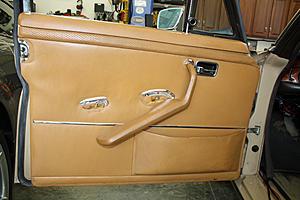
I had an issue after installing the replacement check strap. The part that attaches to the door jamb was 3/4" shorter than on the old one. This does not seem like a lot but it prevents the door from opening as far as it could. I have sent a message to the eBay seller to see if he has any check straps with the longer arms.
I did some cleaning around the dash area as well as using a leather cleaner and then a leather conditioner on the front and rear seats. The top of the rear seat back is not very pliable so I will hit it a few more times with the leather conditioner.


After stripping back the outer harness covering, I soldered on two wires about 6" long. After covering them with shrink wrap, I pop riveted the harness clamp back in place.


Now I moved to the car to solder the pigtail extensions to the original harness. I shrink wrapped the entire pigtail to the original harness.


The left front door check strap is broken. New ones are $246 from Mercedes Classic I found a used one on eBay for $30 shipped. To install it, the door card must be removed. Since I had previously removed the wooden interior door trim to have it re-finished, removing the top part of the door card was as easy as unscrewing the door lock knob and lifting it up. There are three screws holding the armrest on. Two are underneath the armrest and the other one is at the top. To access it, one must slip the chrome trim piece back to expose the screw.


To remove the interior door latch, use a small screwdriver to pry out the black plastic part on the end opposite the door latch hinge. This exposes the screw that attaches the door latch.


Now you can gently pull around the perimeter of the door card to release it. About halfway up on the right side is a metal retainer that slips into a slot. Once you have all of the fastening tabs released, pull up on the door card and off it comes.
The first thing to do to remove the check strap is to remove the pin on the door jamb. The check strap is held on with two bolts on the inner side of the door and one nut on the face of the door. With those bolts removed, I struggled with removing the old one as the power window wiring harness was in the way. Eventually I became smarter than the harness by removing the two screws that attached the harness to the door regulator. Once those screws are removed, one can push the harness out of the way and the check strap is easily removed or installed.


The old check strap broke at the rear. Below is the replacement part.


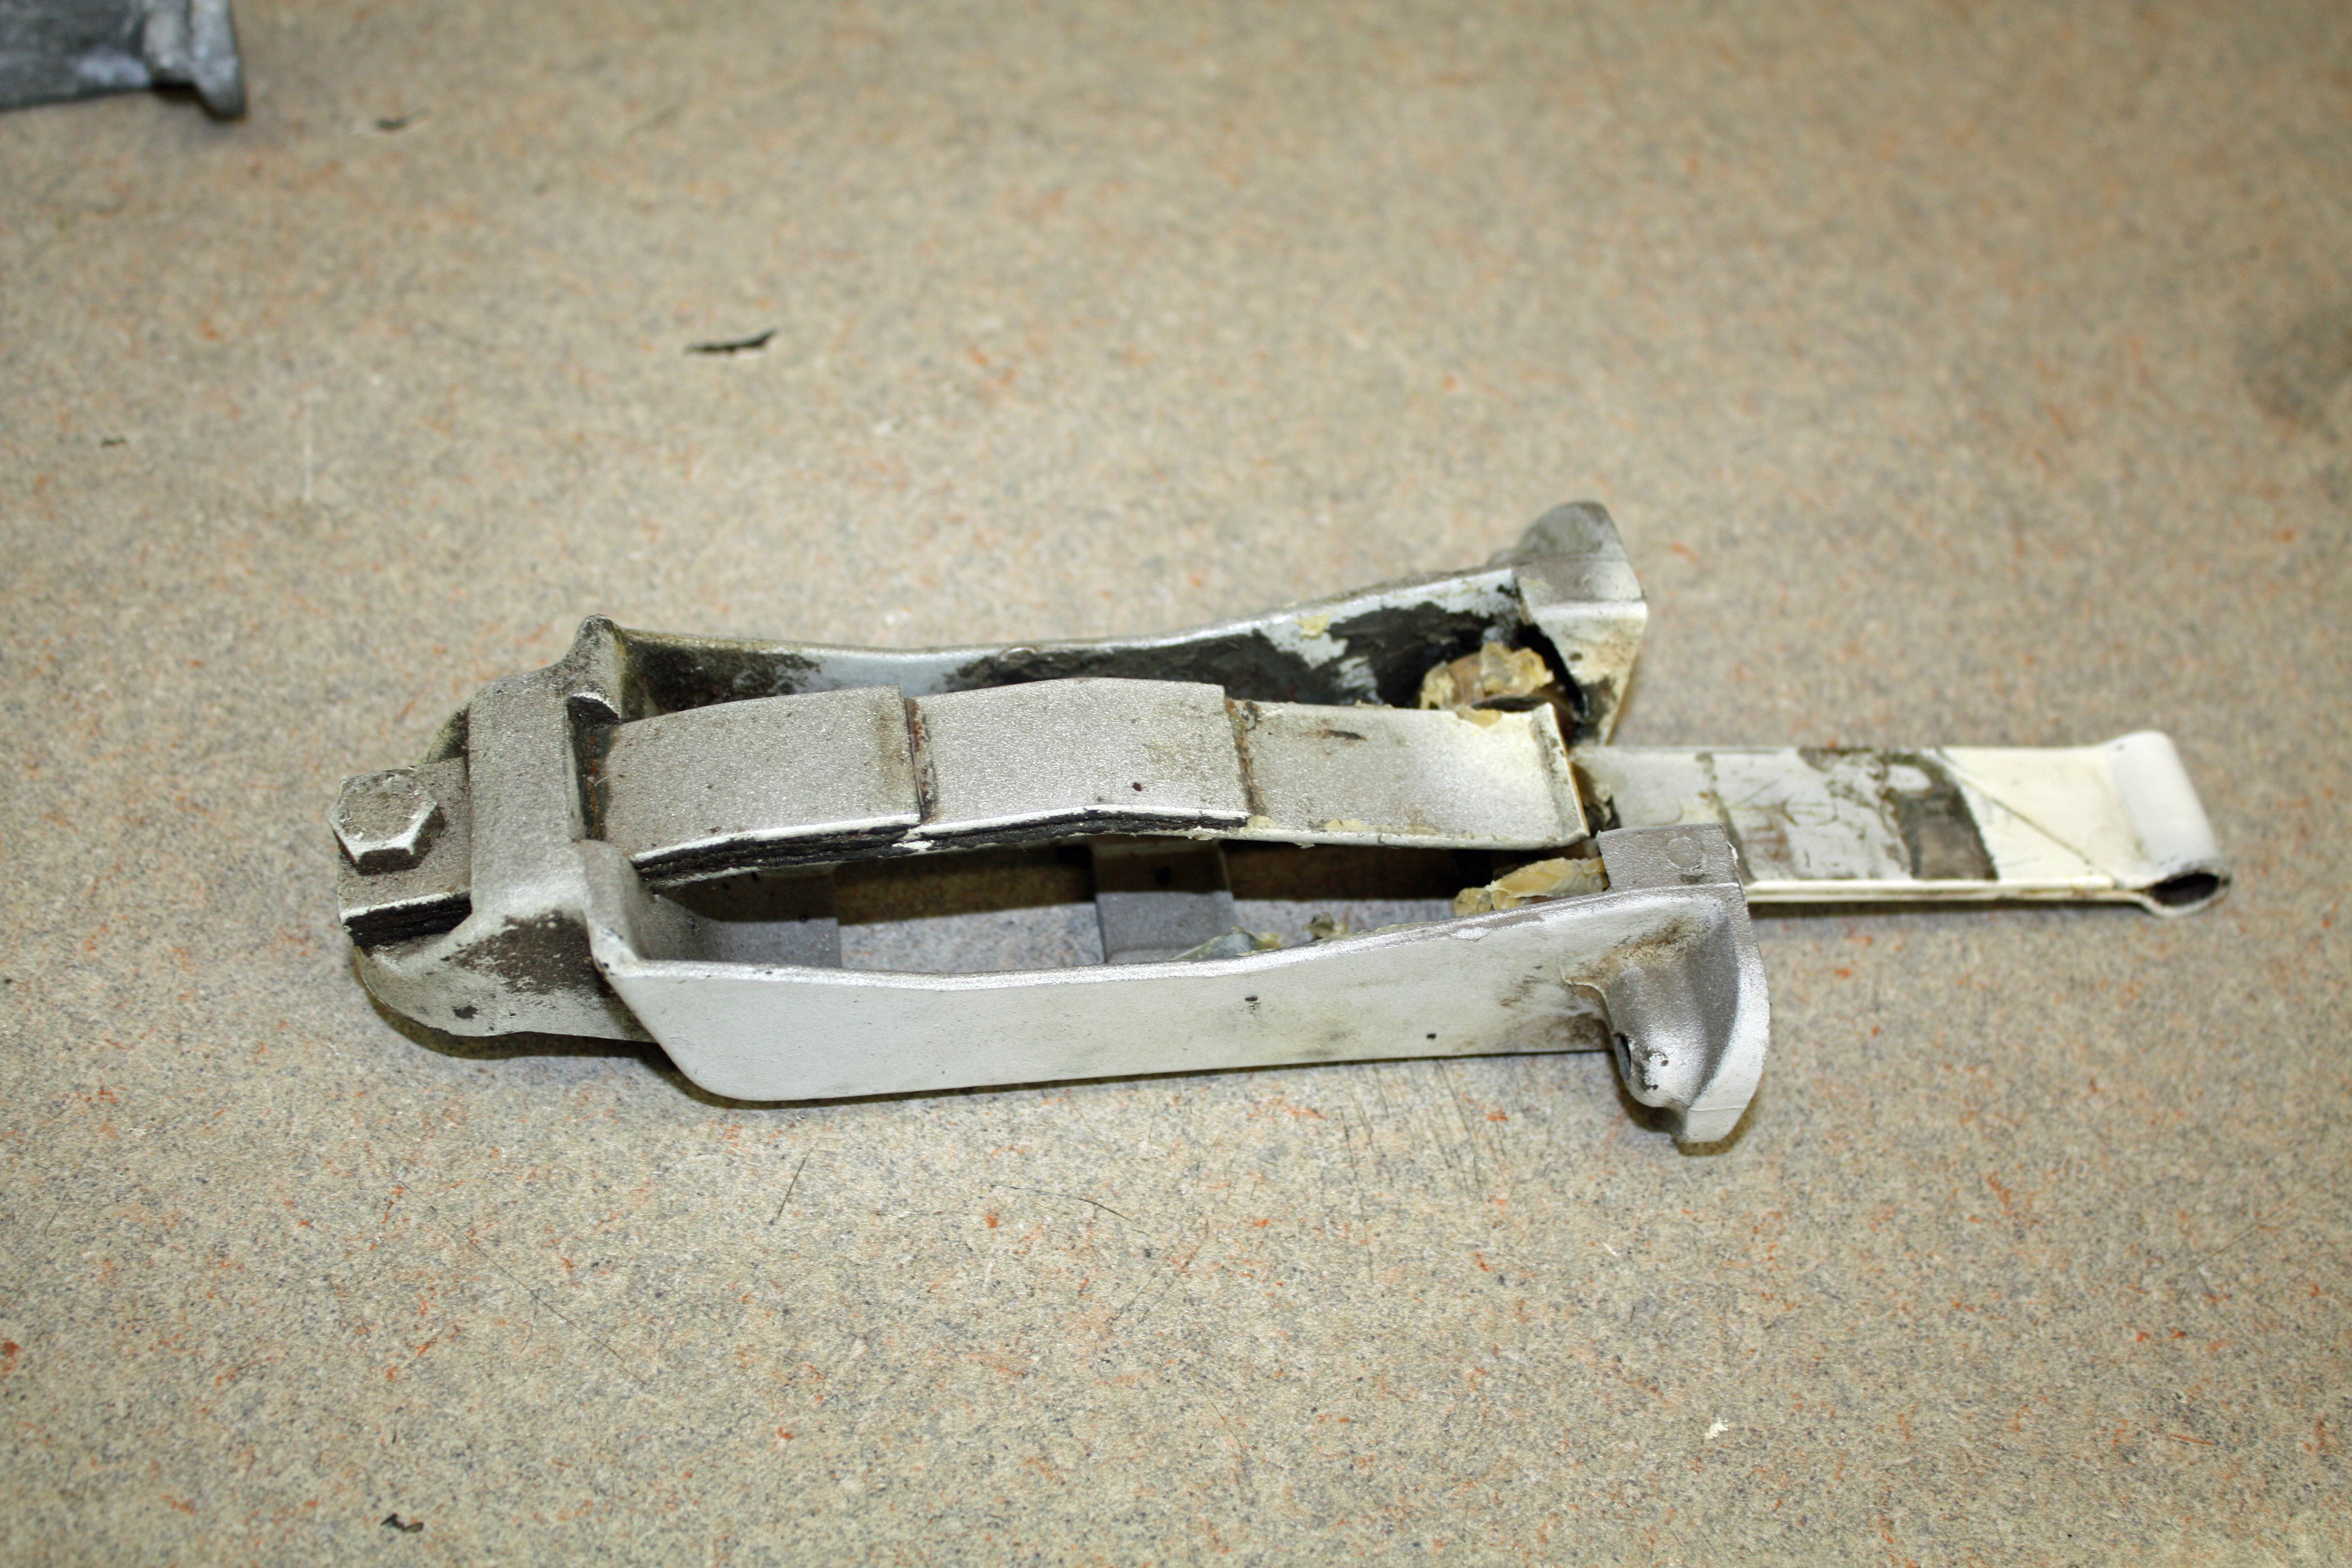
I had an issue after installing the replacement check strap. The part that attaches to the door jamb was 3/4" shorter than on the old one. This does not seem like a lot but it prevents the door from opening as far as it could. I have sent a message to the eBay seller to see if he has any check straps with the longer arms.

I did some cleaning around the dash area as well as using a leather cleaner and then a leather conditioner on the front and rear seats. The top of the rear seat back is not very pliable so I will hit it a few more times with the leather conditioner.
03-08-2017, 09:23 AM
#47
Senior Member

Hello Jerhofer,
Amazing work you are doing.
You are asking a question about the spring wedges. They are only a band aid fix covering for other problems. When I started the restoration on my W111 I had 4 of those on the rear springs. They were masking the fact that the hydropneumatic compensating spring (aka Boge) was gone. They do not last, apparently there is a business somewhere in Germany that rebuilds them but very expensive ($1000-2000). My solution was replacing it with a normal compensating spring that MB started using after a few years of the hydropneumatic. Most of the W113's and half of the W111's have the normal spring.
Take out the wedges and see how the car sits. If it's low I would check the Boge, if it shows no resistance to motion then it's gone. I blamed initially the rear springs to realize after I got new ones that they were in top condition and at original specs.
On another note, I have been chasing the fuel problem that you had for over a year. I realized that if these tanks have been sitting for many years without gasoline inside they will allow moisture to create rust on the inside walls. After a year of running OK such fine rust started coming loose from my tank's walls and was clogging the screen inside the pump with the same sputtering and stalling. It wasn't until I plumbed a fuel pressure gauge to the inside that I figured and started predicting when I should clean the screen . So every one or two tanks of gas I had to lift the car up and swap the pump. I actually got a second pump to automate this process. W111 tanks are expensive and opinions are split about cleaning/coating them. I think I got over the worst, I had 6 fill-ups already and the pressure is normal. I have a different pump in the car that has a screen in it, your newer pump may not have a screen so it will be the filter above it that would clog. I was surprised to hear that they didn't find any rust, hope it stays that way.
Good luck with the restoration.
Radu
03-08-2017, 04:23 PM
#48
Member
Thread Starter
Hello Jerhofer,
Amazing work you are doing.
You are asking a question about the spring wedges. They are only a band aid fix covering for other problems. When I started the restoration on my W111 I had 4 of those on the rear springs. They were masking the fact that the hydropneumatic compensating spring (aka Boge) was gone. They do not last, apparently there is a business somewhere in Germany that rebuilds them but very expensive ($1000-2000). My solution was replacing it with a normal compensating spring that MB started using after a few years of the hydropneumatic. Most of the W113's and half of the W111's have the normal spring.
Take out the wedges and see how the car sits. If it's low I would check the Boge, if it shows no resistance to motion then it's gone. I blamed initially the rear springs to realize after I got new ones that they were in top condition and at original specs.
On another note, I have been chasing the fuel problem that you had for over a year. I realized that if these tanks have been sitting for many years without gasoline inside they will allow moisture to create rust on the inside walls. After a year of running OK such fine rust started coming loose from my tank's walls and was clogging the screen inside the pump with the same sputtering and stalling. It wasn't until I plumbed a fuel pressure gauge to the inside that I figured and started predicting when I should clean the screen . So every one or two tanks of gas I had to lift the car up and swap the pump. I actually got a second pump to automate this process. W111 tanks are expensive and opinions are split about cleaning/coating them. I think I got over the worst, I had 6 fill-ups already and the pressure is normal. I have a different pump in the car that has a screen in it, your newer pump may not have a screen so it will be the filter above it that would clog. I was surprised to hear that they didn't find any rust, hope it stays that way.
Good luck with the restoration.
Radu
Amazing work you are doing.
You are asking a question about the spring wedges. They are only a band aid fix covering for other problems. When I started the restoration on my W111 I had 4 of those on the rear springs. They were masking the fact that the hydropneumatic compensating spring (aka Boge) was gone. They do not last, apparently there is a business somewhere in Germany that rebuilds them but very expensive ($1000-2000). My solution was replacing it with a normal compensating spring that MB started using after a few years of the hydropneumatic. Most of the W113's and half of the W111's have the normal spring.
Take out the wedges and see how the car sits. If it's low I would check the Boge, if it shows no resistance to motion then it's gone. I blamed initially the rear springs to realize after I got new ones that they were in top condition and at original specs.
On another note, I have been chasing the fuel problem that you had for over a year. I realized that if these tanks have been sitting for many years without gasoline inside they will allow moisture to create rust on the inside walls. After a year of running OK such fine rust started coming loose from my tank's walls and was clogging the screen inside the pump with the same sputtering and stalling. It wasn't until I plumbed a fuel pressure gauge to the inside that I figured and started predicting when I should clean the screen . So every one or two tanks of gas I had to lift the car up and swap the pump. I actually got a second pump to automate this process. W111 tanks are expensive and opinions are split about cleaning/coating them. I think I got over the worst, I had 6 fill-ups already and the pressure is normal. I have a different pump in the car that has a screen in it, your newer pump may not have a screen so it will be the filter above it that would clog. I was surprised to hear that they didn't find any rust, hope it stays that way.
Good luck with the restoration.
Radu
I had to do some running around this morning and then mowed the lawn, so not much time to work on the car. The next two days I will be concentrating on preparing the motorhome.
The speaker leads arrived from Becker so I decided to finish installing the radio as I already had most of it done. It works well and looks great in the dash. The speaker fader switch on the dash works like it should.


 03-30-2017, 09:28 PM
#49
Member
Thread Starter
We arrived home from our RV trip on Saturday. After fixing a few things in the RV and then cleaning the interior and exterior, it has been safely put away in the storage building. Time to work on the car again.
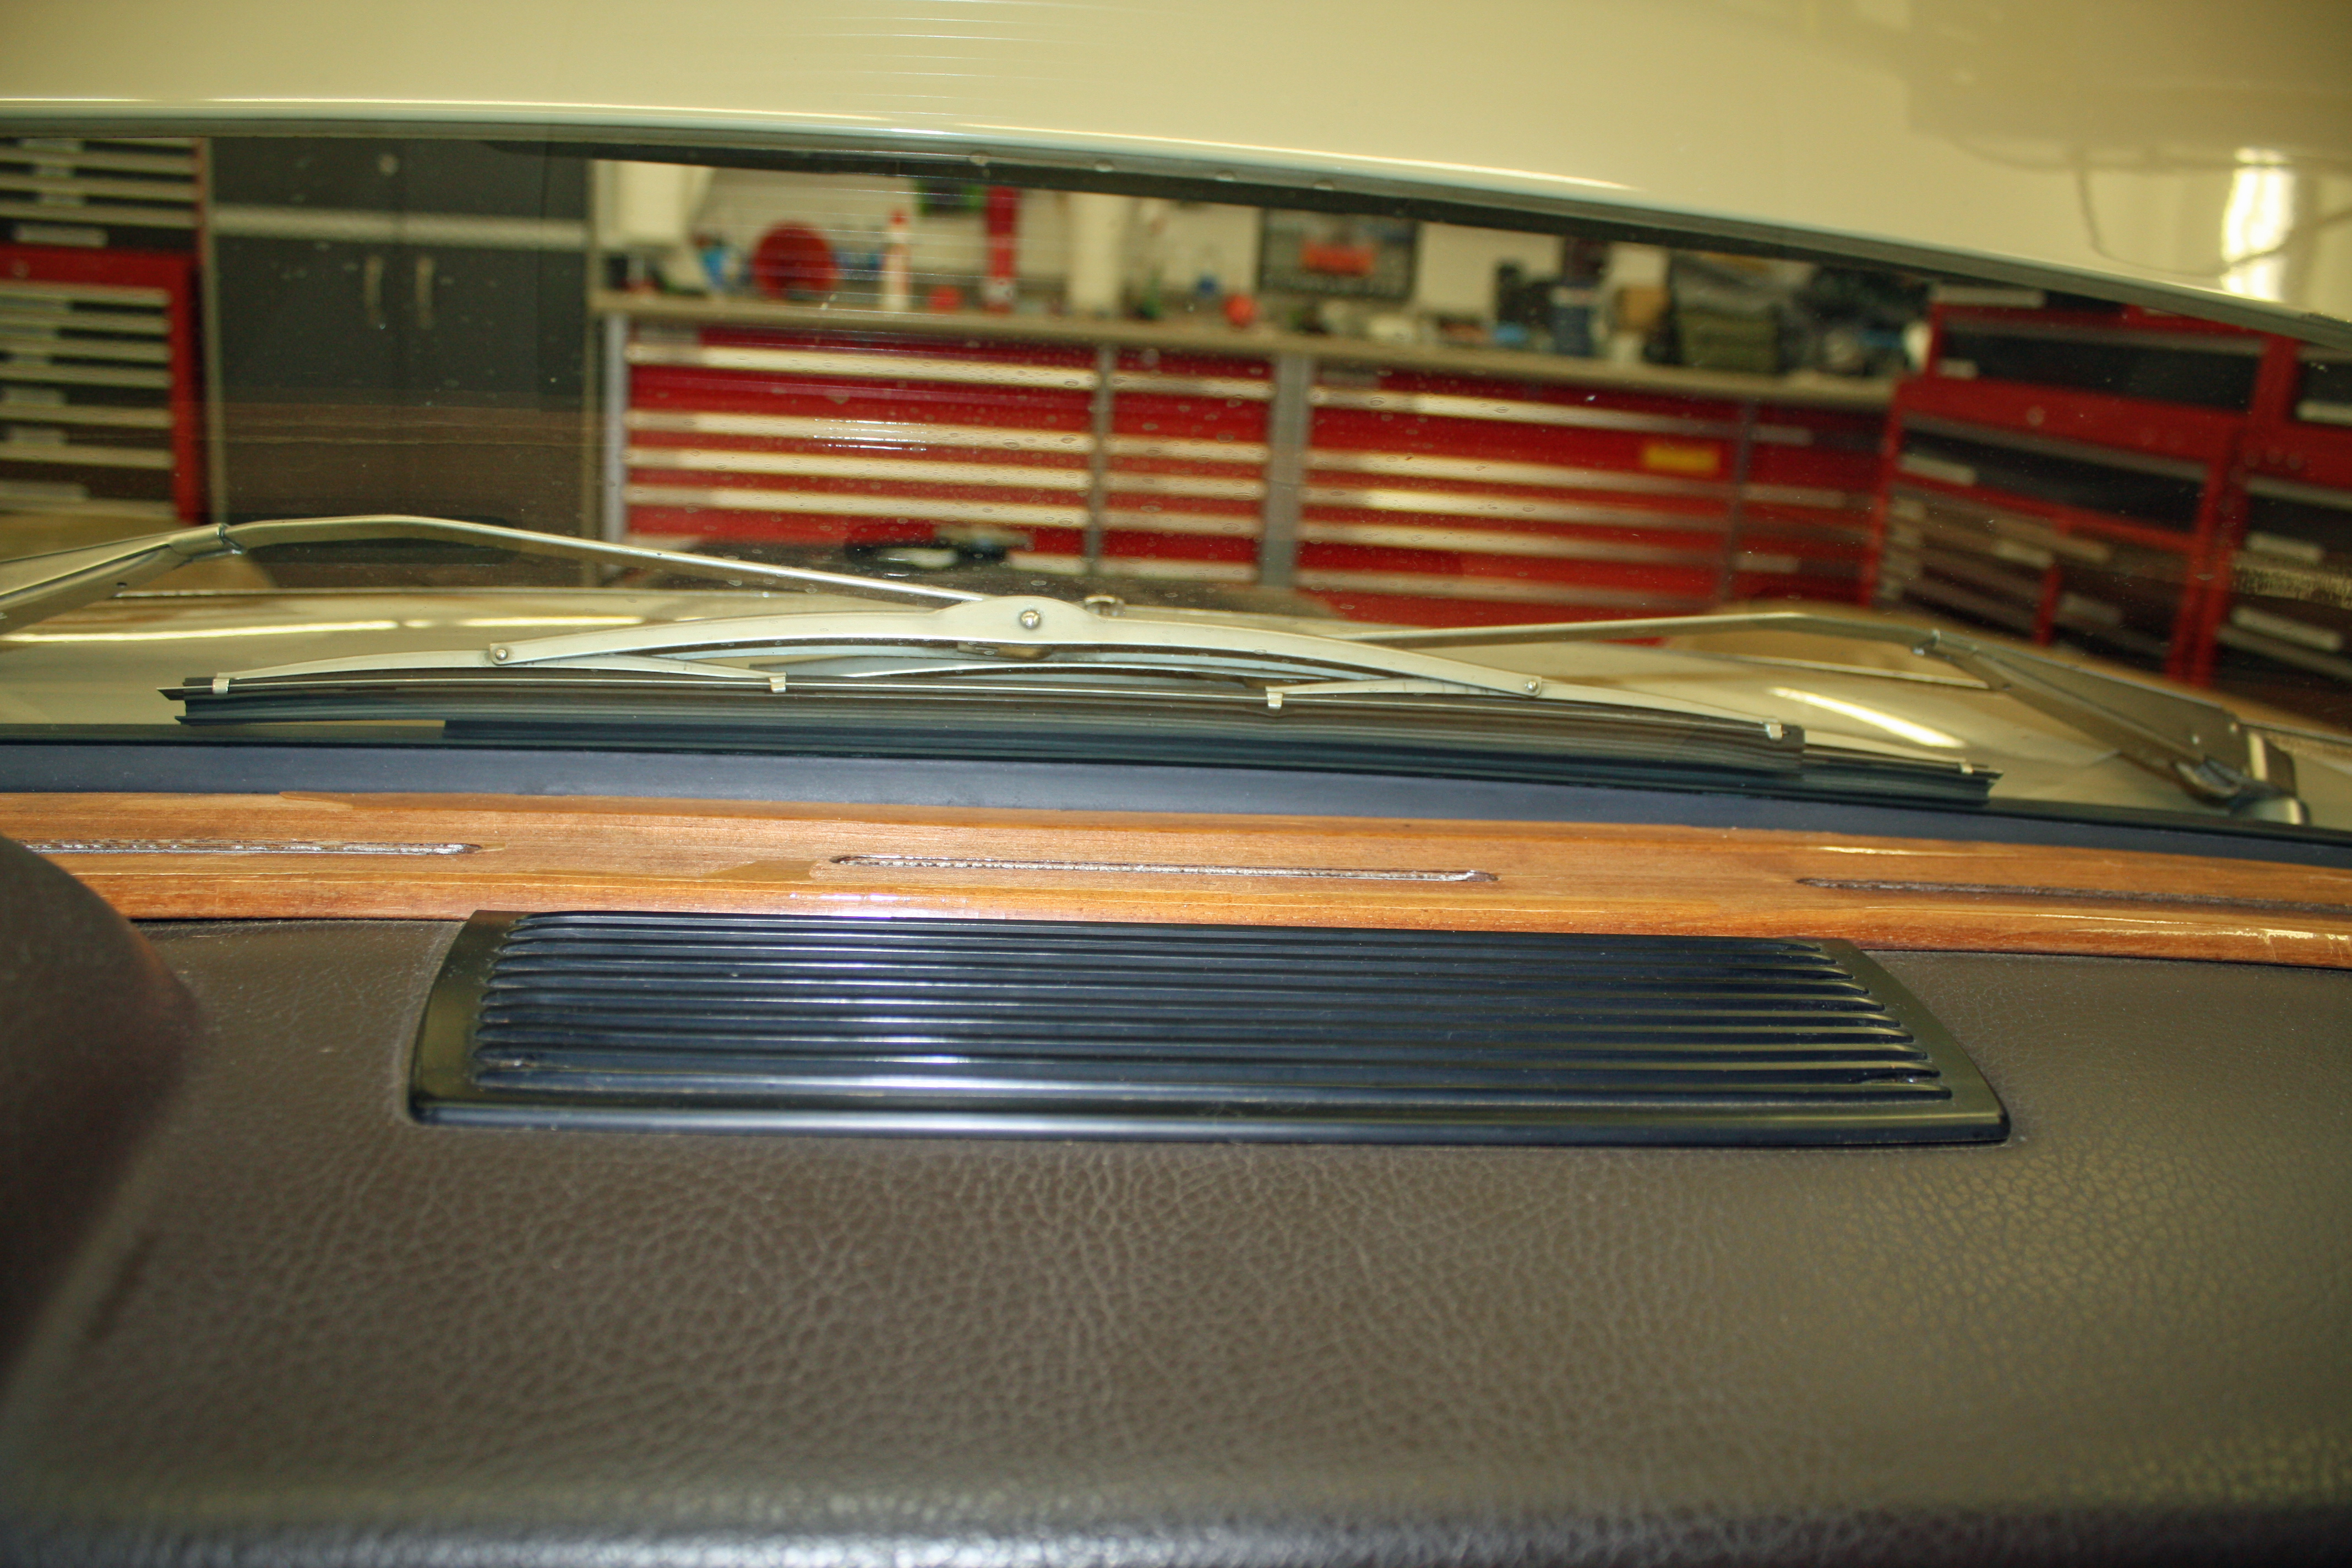
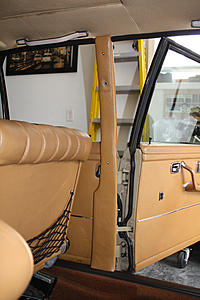
I picked up the restored dash bow and door trim on Monday from the wooden boat restoration shop and re-installed it today. Big improvement. Much slower putting it back in than taking it out! There was felt on the ends of the trim door trim that had to be replaced. After thinking about what I might have that would work, I came up with the fuzzy half of Velcro. It worked well.
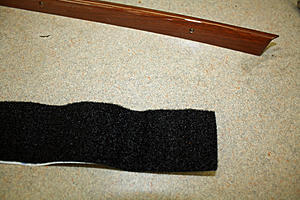


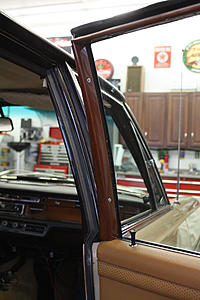
I picked up the restored dash bow and door trim on Monday from the wooden boat restoration shop and re-installed it today. Big improvement. Much slower putting it back in than taking it out! There was felt on the ends of the trim door trim that had to be replaced. After thinking about what I might have that would work, I came up with the fuzzy half of Velcro. It worked well.