
Projects on my new, to me, 1973 280SEL 4.5
 01-18-2017, 10:30 PM
#1
Member
Thread Starter

Projects on my new, to me, 1973 280SEL 4.5
Since 1978 I have been a PCA member and have owned a number of Porsches over the years. During that time I have had three previous Mercedes; a 1984 190, a 1986 190 2.3-16, and a 2012 Sprinter based motorhome.
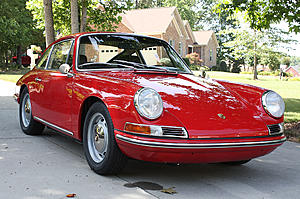
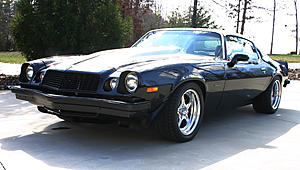
Since I retired eight years ago, I have kept myself busy by buying a good vintage car and then trying to make it better. Four years ago I did a body off restoration on a 1964 Corvette coupe, two years ago I did a partial restoration of a '67 Porsche 912 with a 1983 SC motor, and I did a pro-touring Camaro with a LS1 motor about seven years ago. And there have been smaller projects along the way.


Since I currently did not have a project, the search was on through Craigslist, eBay, Bring a Trailer, Autotrader, etc. For something different, I decided I wanted a big four door sedan. The search soon was narrowed to Mercedes. I really like the W126 cars but ultimately settled on an earlier car.
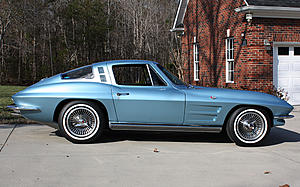
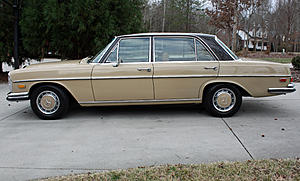
The US government was kind enough to send me to Germany for 26 months back in the mid sixties. The W108's came out during my time there and I have always loved the clean looks. Fortunately, the car pictured here was for sale only a couple hours away.
It is a 1973 280SEL 4.5. The car had always been a California car until about a year ago. The first owner sold it in 1991 with 96K on the odometer (I have a copy of the bill of sale). The second owner sold it to the North Carolina owner a little over a year ago with the mileage being 174K. I have all the original manuals with the service manual showing service stamps through 20K miles.
The second owner, who lived overseas, kept all of his records from the time he bought it. It was regularly serviced and stored at a Mercedes specialist with the storage instructions stating the car was to be stored with the cover on and was to be driven at least 20 miles every month. When the owner was going to be in town, he would call the specialist to have him service and clean the car so it would be ready to go.
At 132K the heads were done and the timing chains replaced. Four thousand miles and seven years ago the valves were adjusted. The bill shows that the timing chains and guides were inspected at this time and were in good shape.
In 2000 the car was rear ended with evidently slight damage as the estimate was for $2860. Since the car now has a base/clear finish, I would assume the entire car was painted at that time. They did an excellent job and evidently removed the trim as I cannot find evidence of overspray.
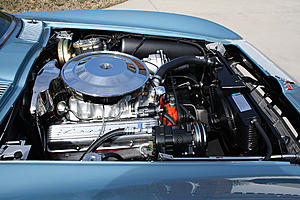
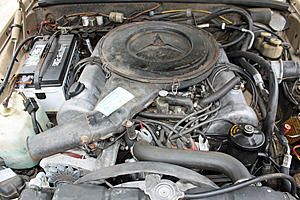
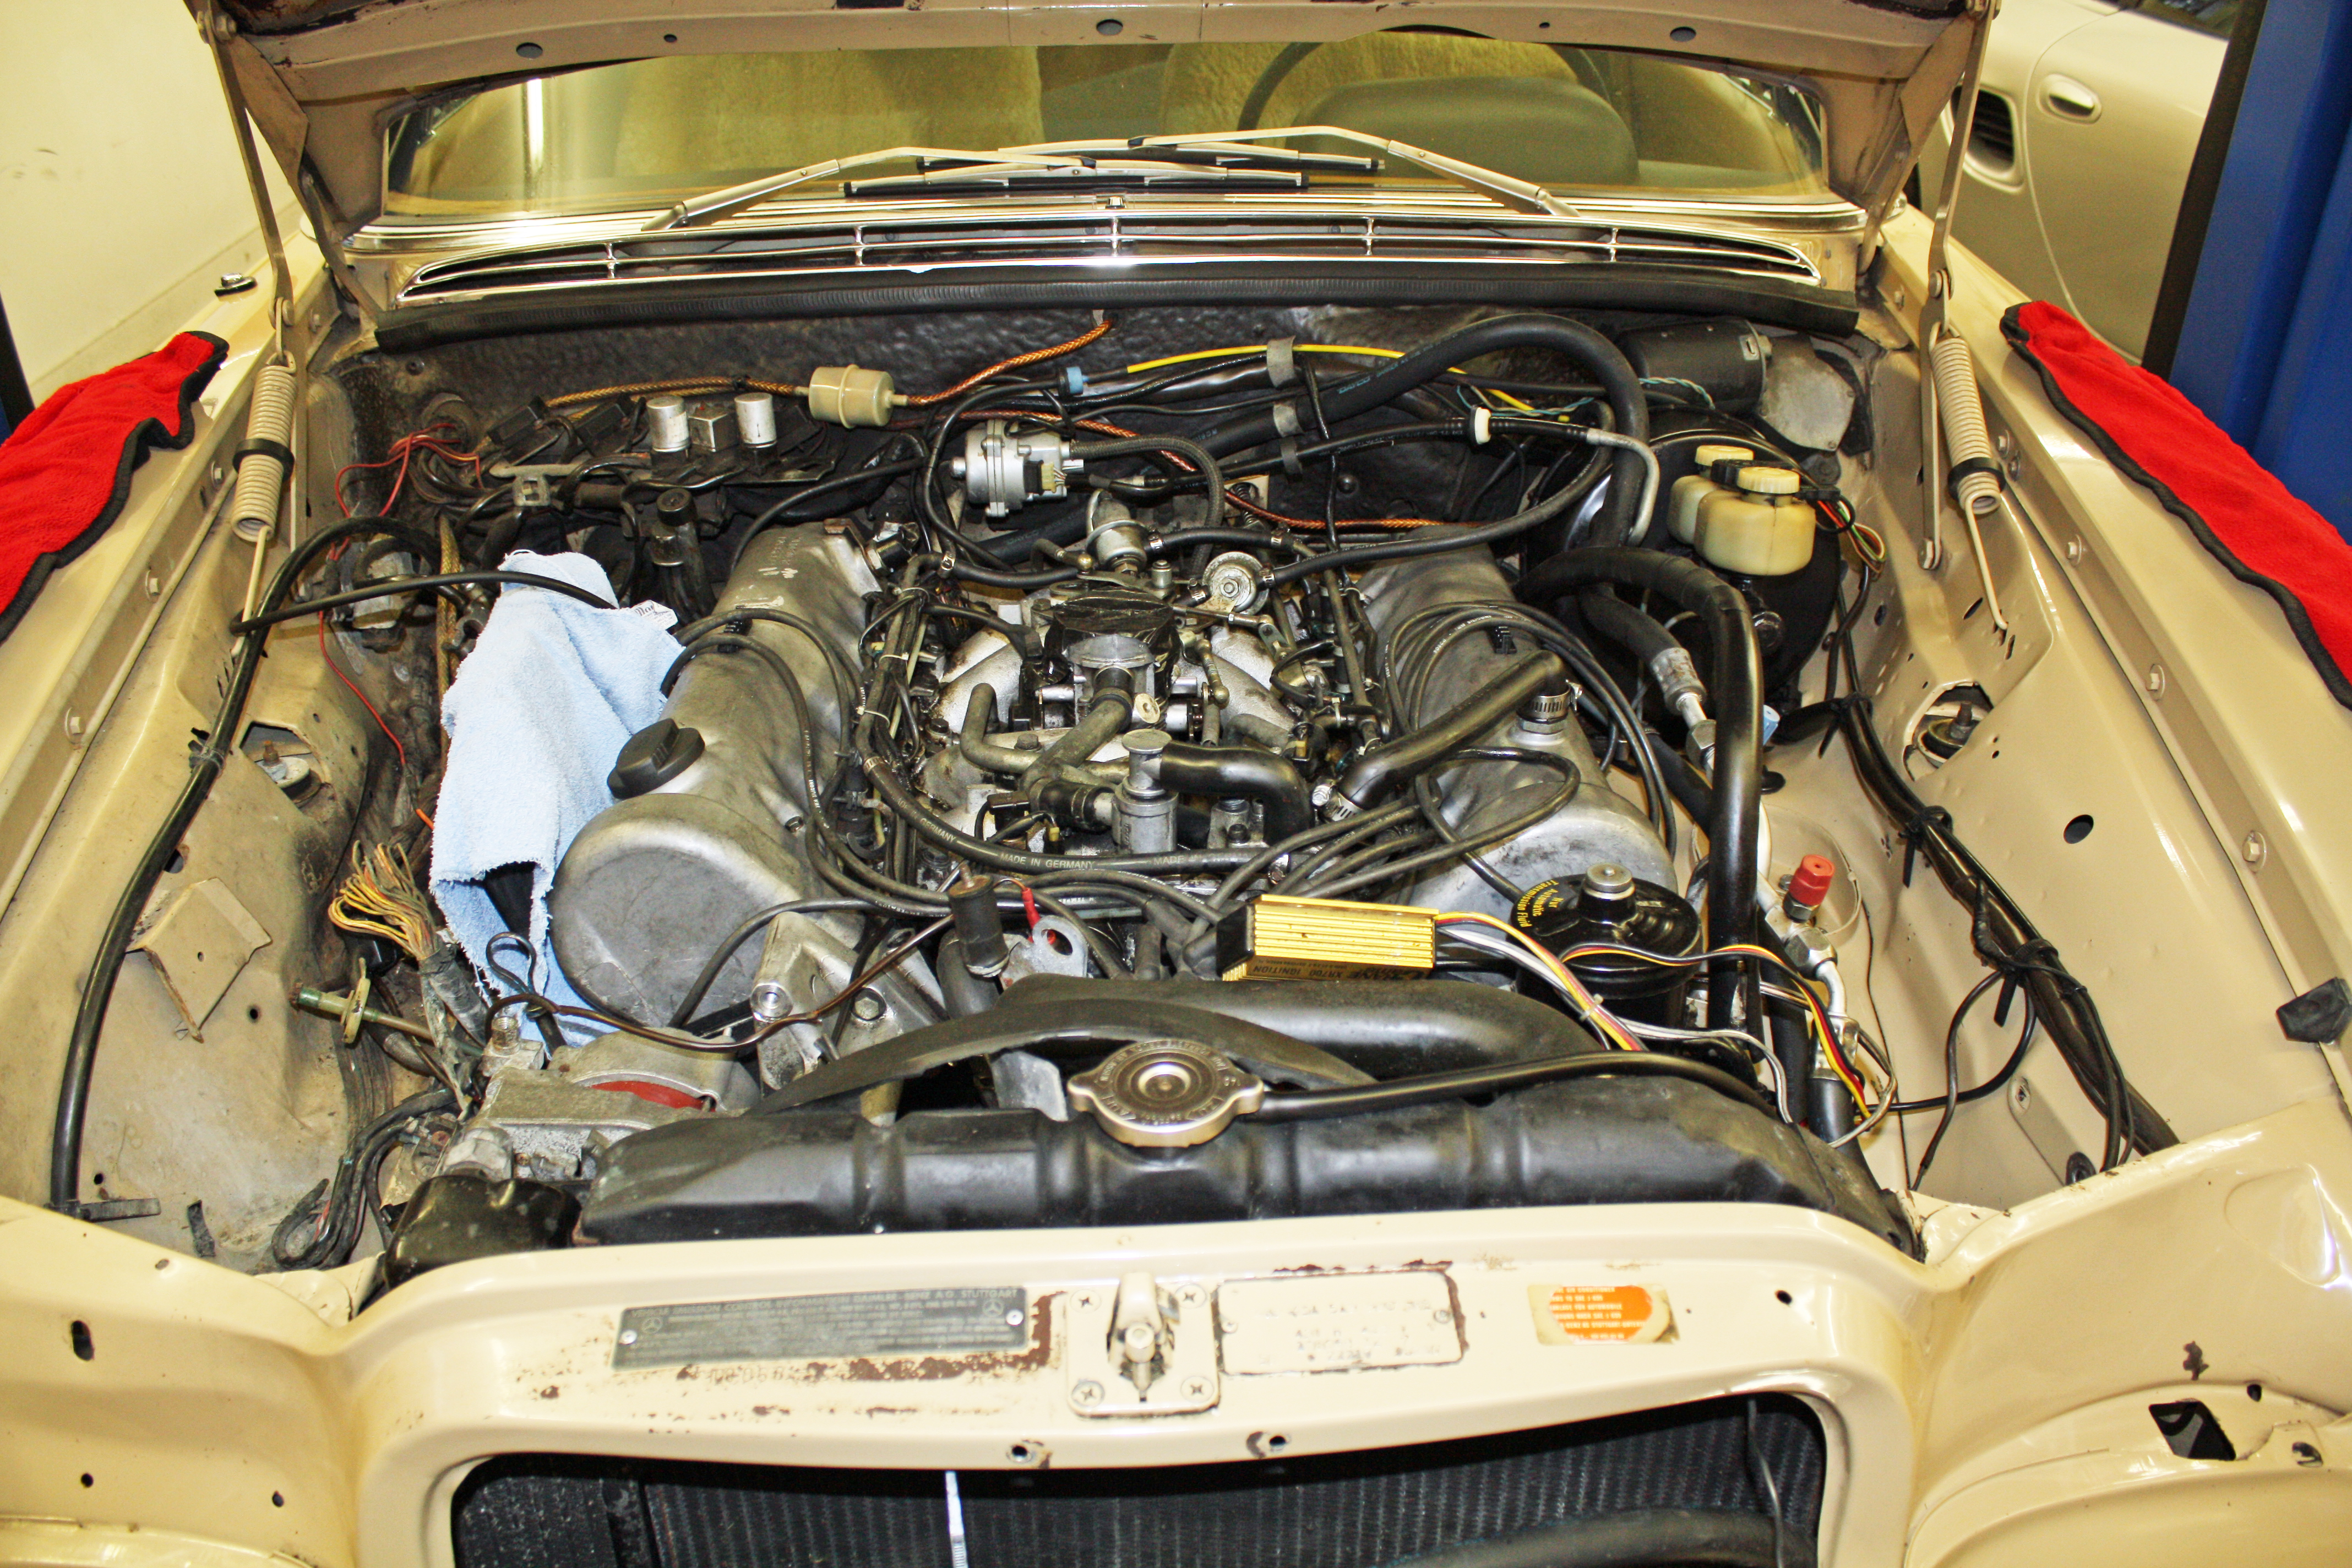
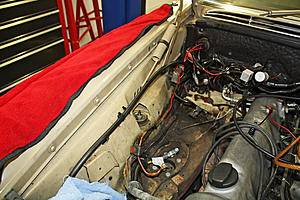
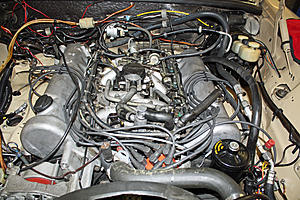
As with most old cars, it does have some needs. I will be addressing those in the coming months. I also am very open to any advice on items discussed in this thread. As you will see in the photos below, the engine bay needs attention and I will begin there.


Since I retired eight years ago, I have kept myself busy by buying a good vintage car and then trying to make it better. Four years ago I did a body off restoration on a 1964 Corvette coupe, two years ago I did a partial restoration of a '67 Porsche 912 with a 1983 SC motor, and I did a pro-touring Camaro with a LS1 motor about seven years ago. And there have been smaller projects along the way.


Since I currently did not have a project, the search was on through Craigslist, eBay, Bring a Trailer, Autotrader, etc. For something different, I decided I wanted a big four door sedan. The search soon was narrowed to Mercedes. I really like the W126 cars but ultimately settled on an earlier car.
The US government was kind enough to send me to Germany for 26 months back in the mid sixties. The W108's came out during my time there and I have always loved the clean looks. Fortunately, the car pictured here was for sale only a couple hours away.
It is a 1973 280SEL 4.5. The car had always been a California car until about a year ago. The first owner sold it in 1991 with 96K on the odometer (I have a copy of the bill of sale). The second owner sold it to the North Carolina owner a little over a year ago with the mileage being 174K. I have all the original manuals with the service manual showing service stamps through 20K miles.
The second owner, who lived overseas, kept all of his records from the time he bought it. It was regularly serviced and stored at a Mercedes specialist with the storage instructions stating the car was to be stored with the cover on and was to be driven at least 20 miles every month. When the owner was going to be in town, he would call the specialist to have him service and clean the car so it would be ready to go.
At 132K the heads were done and the timing chains replaced. Four thousand miles and seven years ago the valves were adjusted. The bill shows that the timing chains and guides were inspected at this time and were in good shape.
In 2000 the car was rear ended with evidently slight damage as the estimate was for $2860. Since the car now has a base/clear finish, I would assume the entire car was painted at that time. They did an excellent job and evidently removed the trim as I cannot find evidence of overspray.
As with most old cars, it does have some needs. I will be addressing those in the coming months. I also am very open to any advice on items discussed in this thread. As you will see in the photos below, the engine bay needs attention and I will begin there.


Last edited by jerhofer; 01-18-2017 at 10:34 PM.
 01-19-2017, 12:09 PM
#4
Member
Thread Starter
Since picking up the car Sunday afternoon, I have been busy.
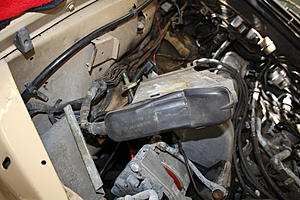
As I mentioned in my first post, my first project will be making the engine bay look better and repair any issues I find. Since the nasty looking air cleaner dominated the engine bay, it was removed and placed in my bead blaster. The bracket for the electric fan was the next bead blast victim followed closely by the battery tray. Good news here was that there was lots of dirt but zero rust below the battery tray. During my previous projects I found a guy locally who powder coats very reasonably. The parts were taken then to him this afternoon.


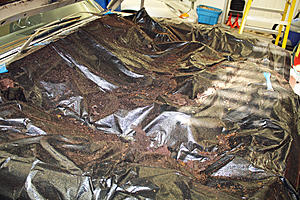
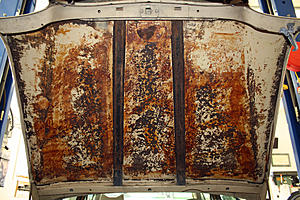
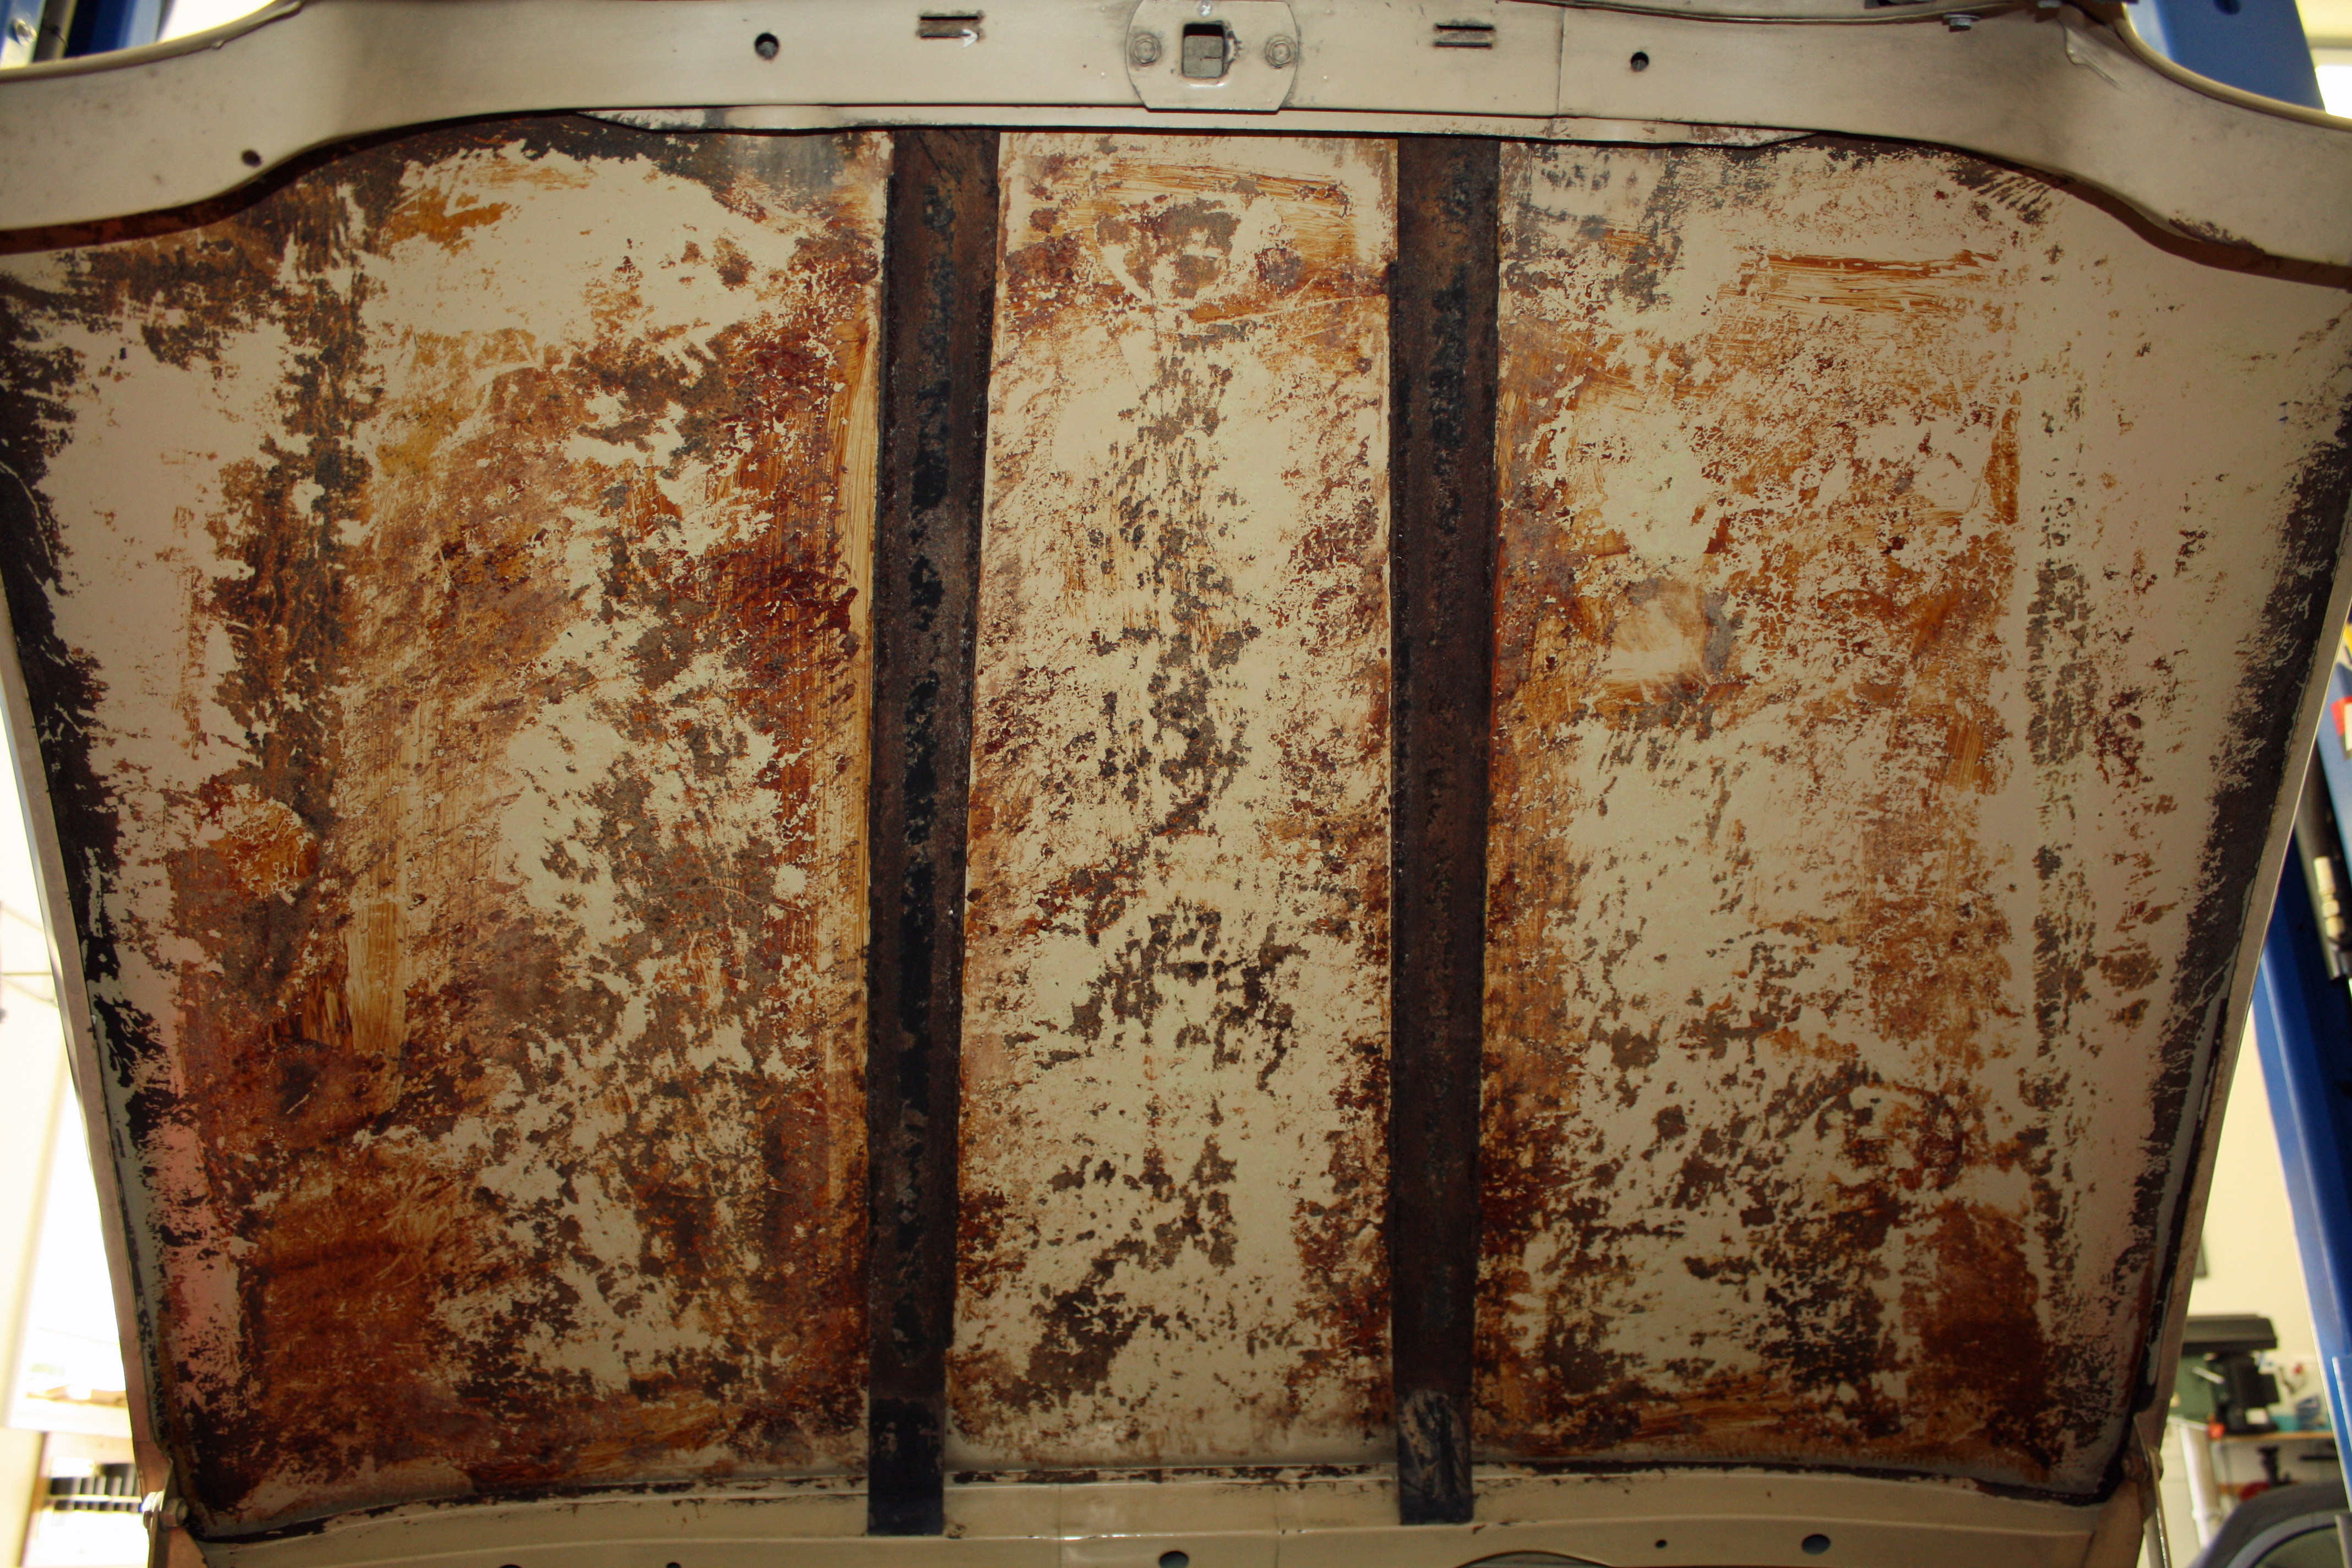
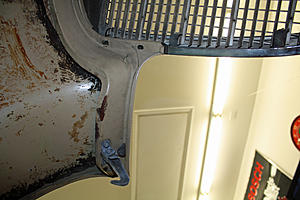
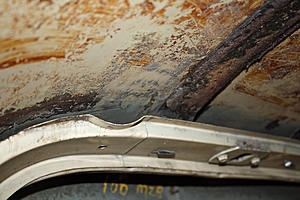
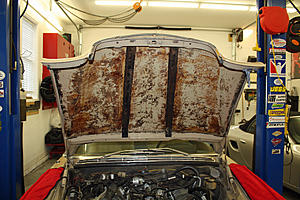
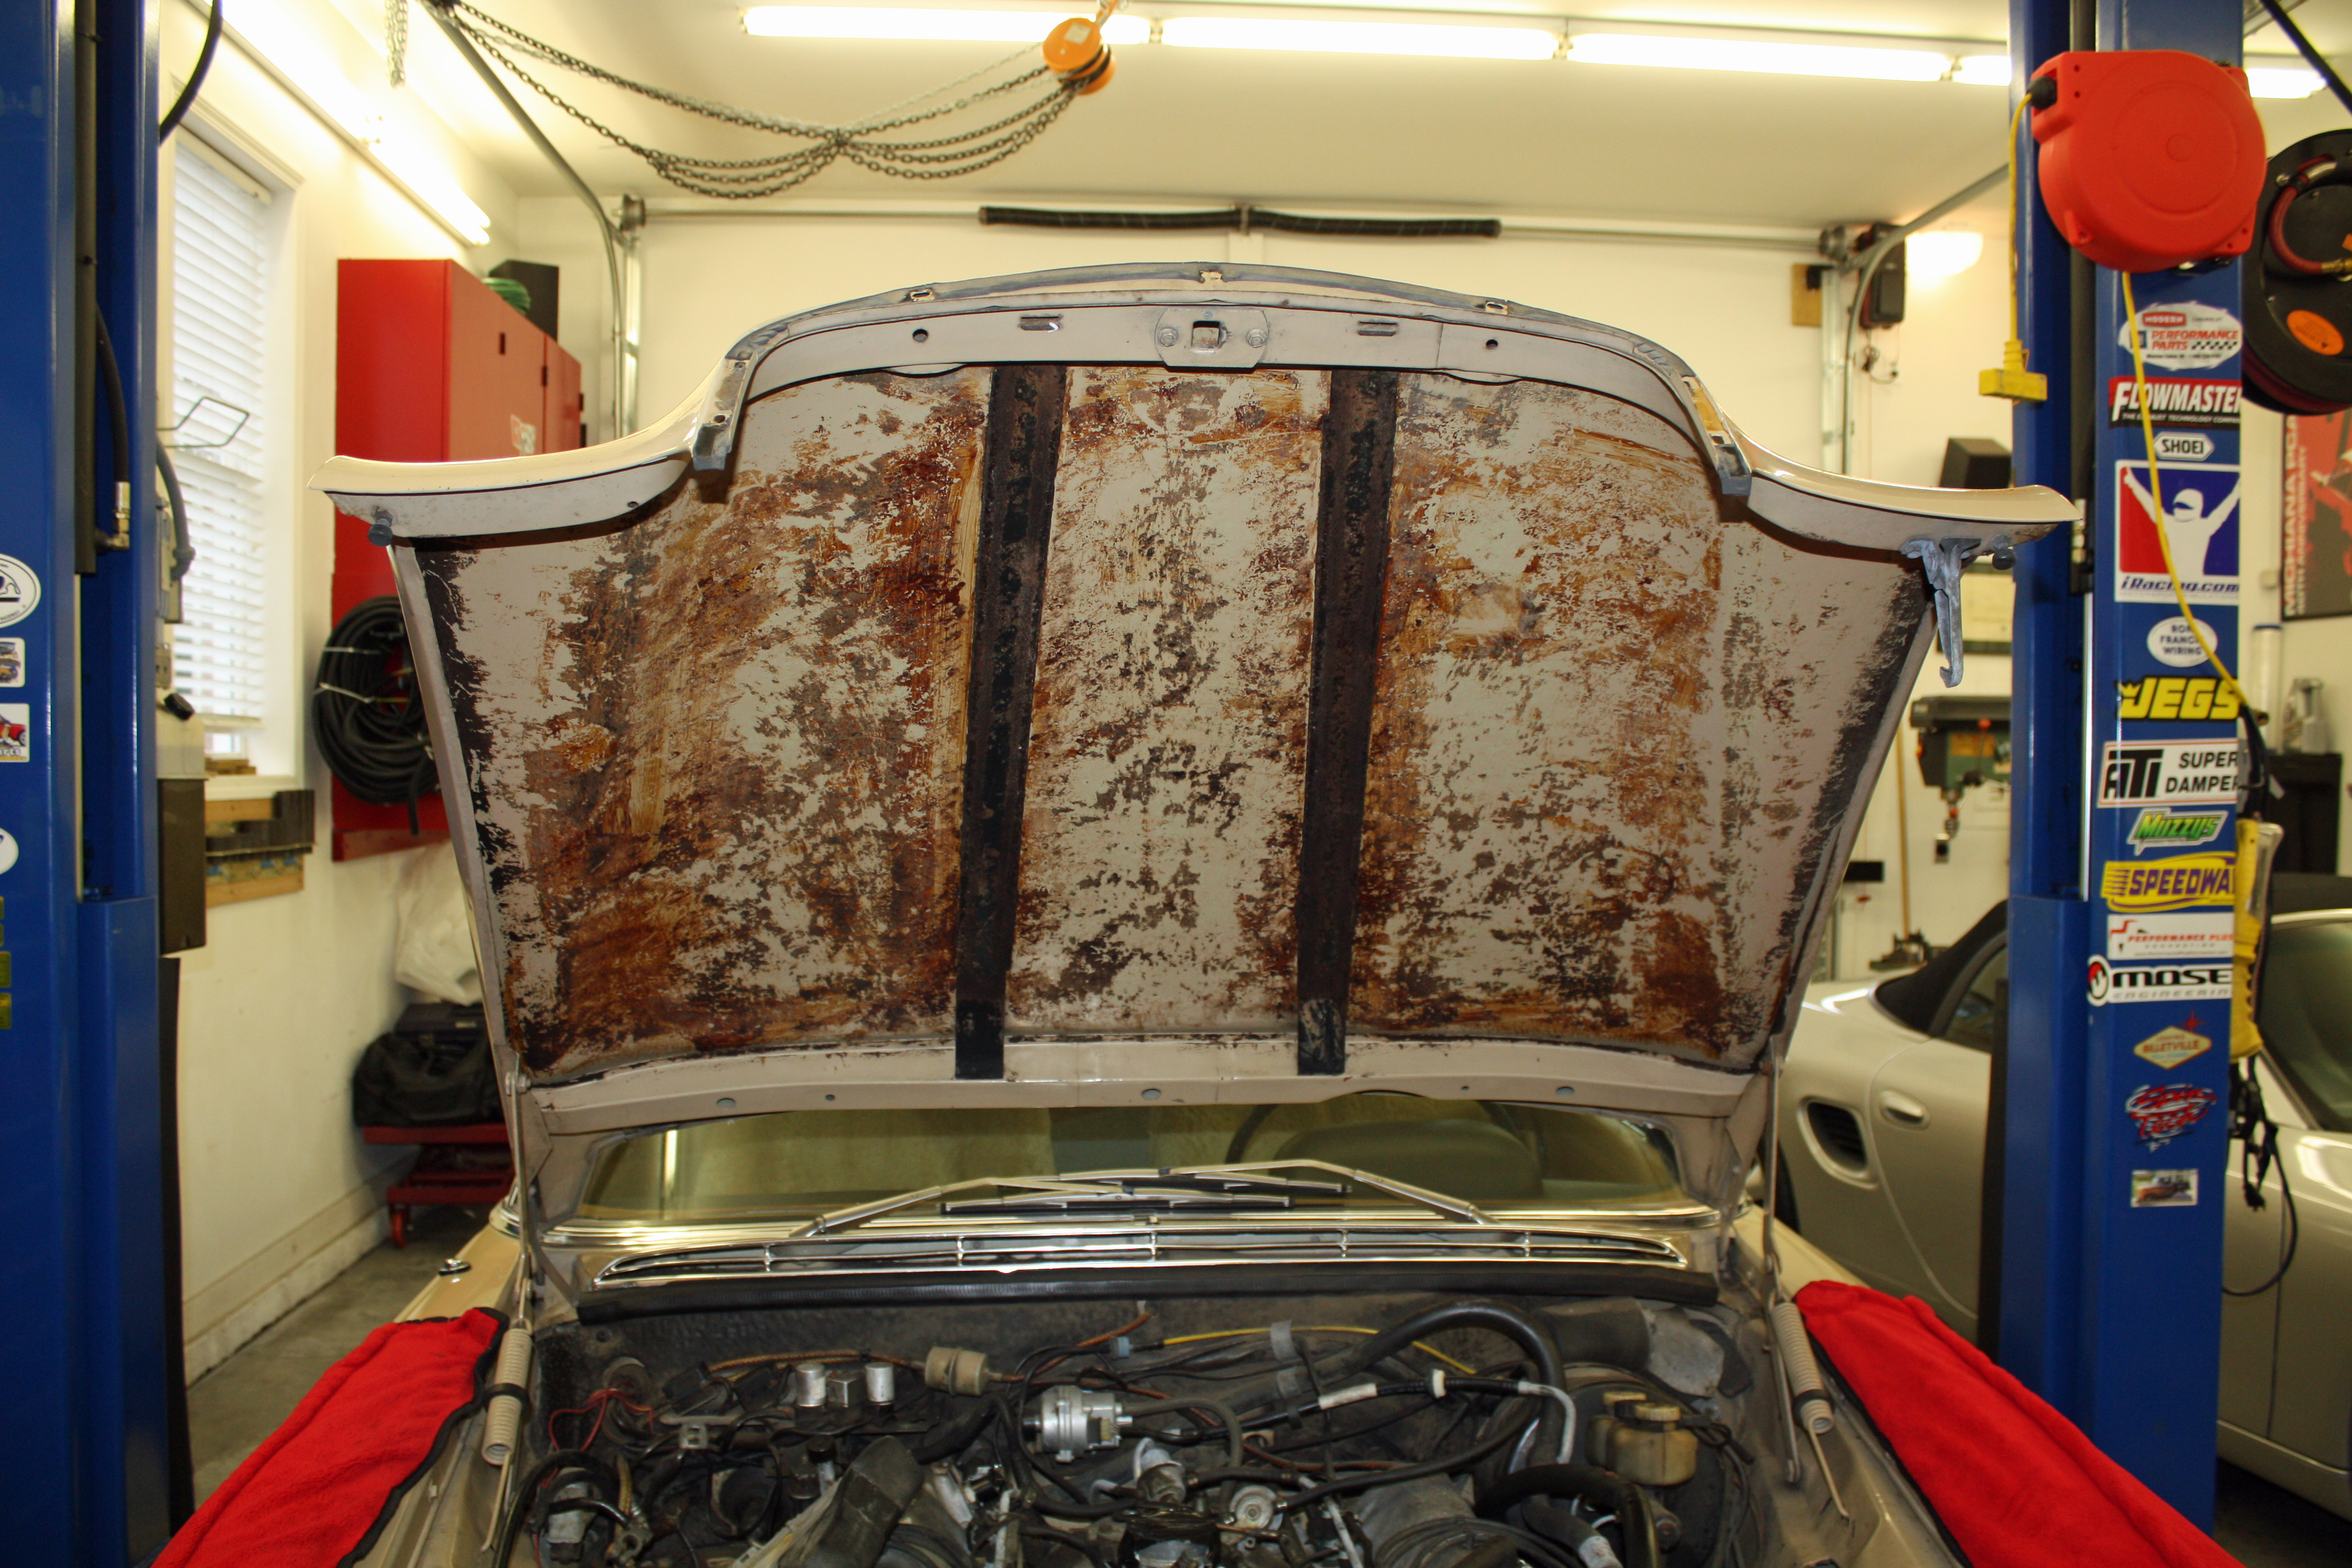
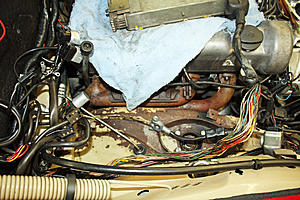
I spent most of the other day using the bead blast machine. As I walked towards the car, I discovered that the hood pad was lying on top of the motor. I pulled off all of the remaining small pieces. Since I want to replace the pad, I knew the next step involved lots of scraping to prepare the hood for glue application.
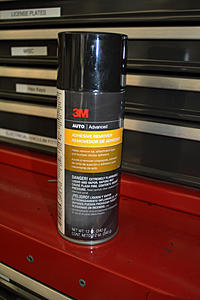
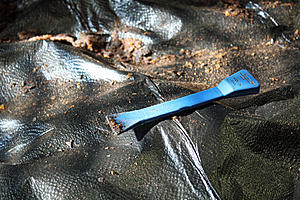
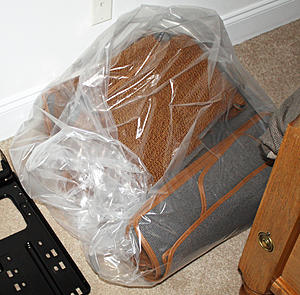
Knowing that I was about to create a huge mess, most of which would be falling on the motor, I covered the engine bay with plastic bags. Now I was ready to use a plastic scraper to remove the remaining loose material. That was followed by liberal application of 3M adhesive remover and more scraping. I still have more to do but progress has been made.


As I mentioned in my first post, my first project will be making the engine bay look better and repair any issues I find. Since the nasty looking air cleaner dominated the engine bay, it was removed and placed in my bead blaster. The bracket for the electric fan was the next bead blast victim followed closely by the battery tray. Good news here was that there was lots of dirt but zero rust below the battery tray. During my previous projects I found a guy locally who powder coats very reasonably. The parts were taken then to him this afternoon.


I spent most of the other day using the bead blast machine. As I walked towards the car, I discovered that the hood pad was lying on top of the motor. I pulled off all of the remaining small pieces. Since I want to replace the pad, I knew the next step involved lots of scraping to prepare the hood for glue application.
Knowing that I was about to create a huge mess, most of which would be falling on the motor, I covered the engine bay with plastic bags. Now I was ready to use a plastic scraper to remove the remaining loose material. That was followed by liberal application of 3M adhesive remover and more scraping. I still have more to do but progress has been made.


 01-19-2017, 09:53 PM
#5
Member
Thread Starter
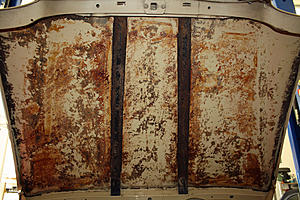
I spent all morning scraping glue on the hood. It should be ready for installing the new pad. Lots of fun!!!
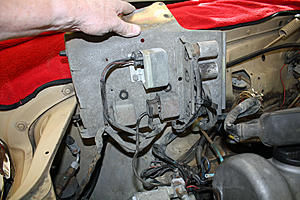
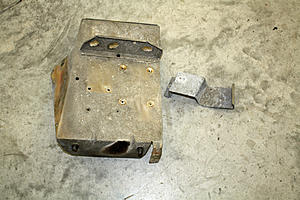
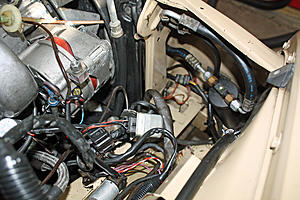
The mount for the engine ECM was originally finished in zinc yellow color. I know a guy who can apply that finish so I removed the ECM and the mount today. It is located in the right front corner of the engine bay. It is a two piece mount with the top part securing the ECM in place while the one side of the larger piece has a number of electrical components mounted on it.
After removing the top part of the mount and removing the ECM from its cubbyhole, I could remove the lower part. There are two 10mm socket size bolts located on the inner part of the radiator support and one 8mm socket size bolt located at the bottom. With those out of the way, I snaked the mount out of the hole and then removed the attached electrical components. The lower components are fastened either with bolts or screws while the upper parts slide into a slot. To remove the upper parts, you insert a screwdriver at one end and push the part back so it can be released from the hole. Pretty simple. I spent most of the rest of the afternoon driving about 50 miles to the plater. I should have them back in a week or so. I found the size of the ECM to be interesting. It is huge. I have had a number of 944's over the years and their ECM is half the size of this one. That in a car that came out 10 years later.


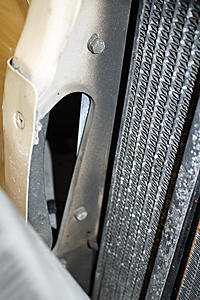


The drier for the AC is also in this cubbyhole.
The mount for the engine ECM was originally finished in zinc yellow color. I know a guy who can apply that finish so I removed the ECM and the mount today. It is located in the right front corner of the engine bay. It is a two piece mount with the top part securing the ECM in place while the one side of the larger piece has a number of electrical components mounted on it.
After removing the top part of the mount and removing the ECM from its cubbyhole, I could remove the lower part. There are two 10mm socket size bolts located on the inner part of the radiator support and one 8mm socket size bolt located at the bottom. With those out of the way, I snaked the mount out of the hole and then removed the attached electrical components. The lower components are fastened either with bolts or screws while the upper parts slide into a slot. To remove the upper parts, you insert a screwdriver at one end and push the part back so it can be released from the hole. Pretty simple. I spent most of the rest of the afternoon driving about 50 miles to the plater. I should have them back in a week or so. I found the size of the ECM to be interesting. It is huge. I have had a number of 944's over the years and their ECM is half the size of this one. That in a car that came out 10 years later.


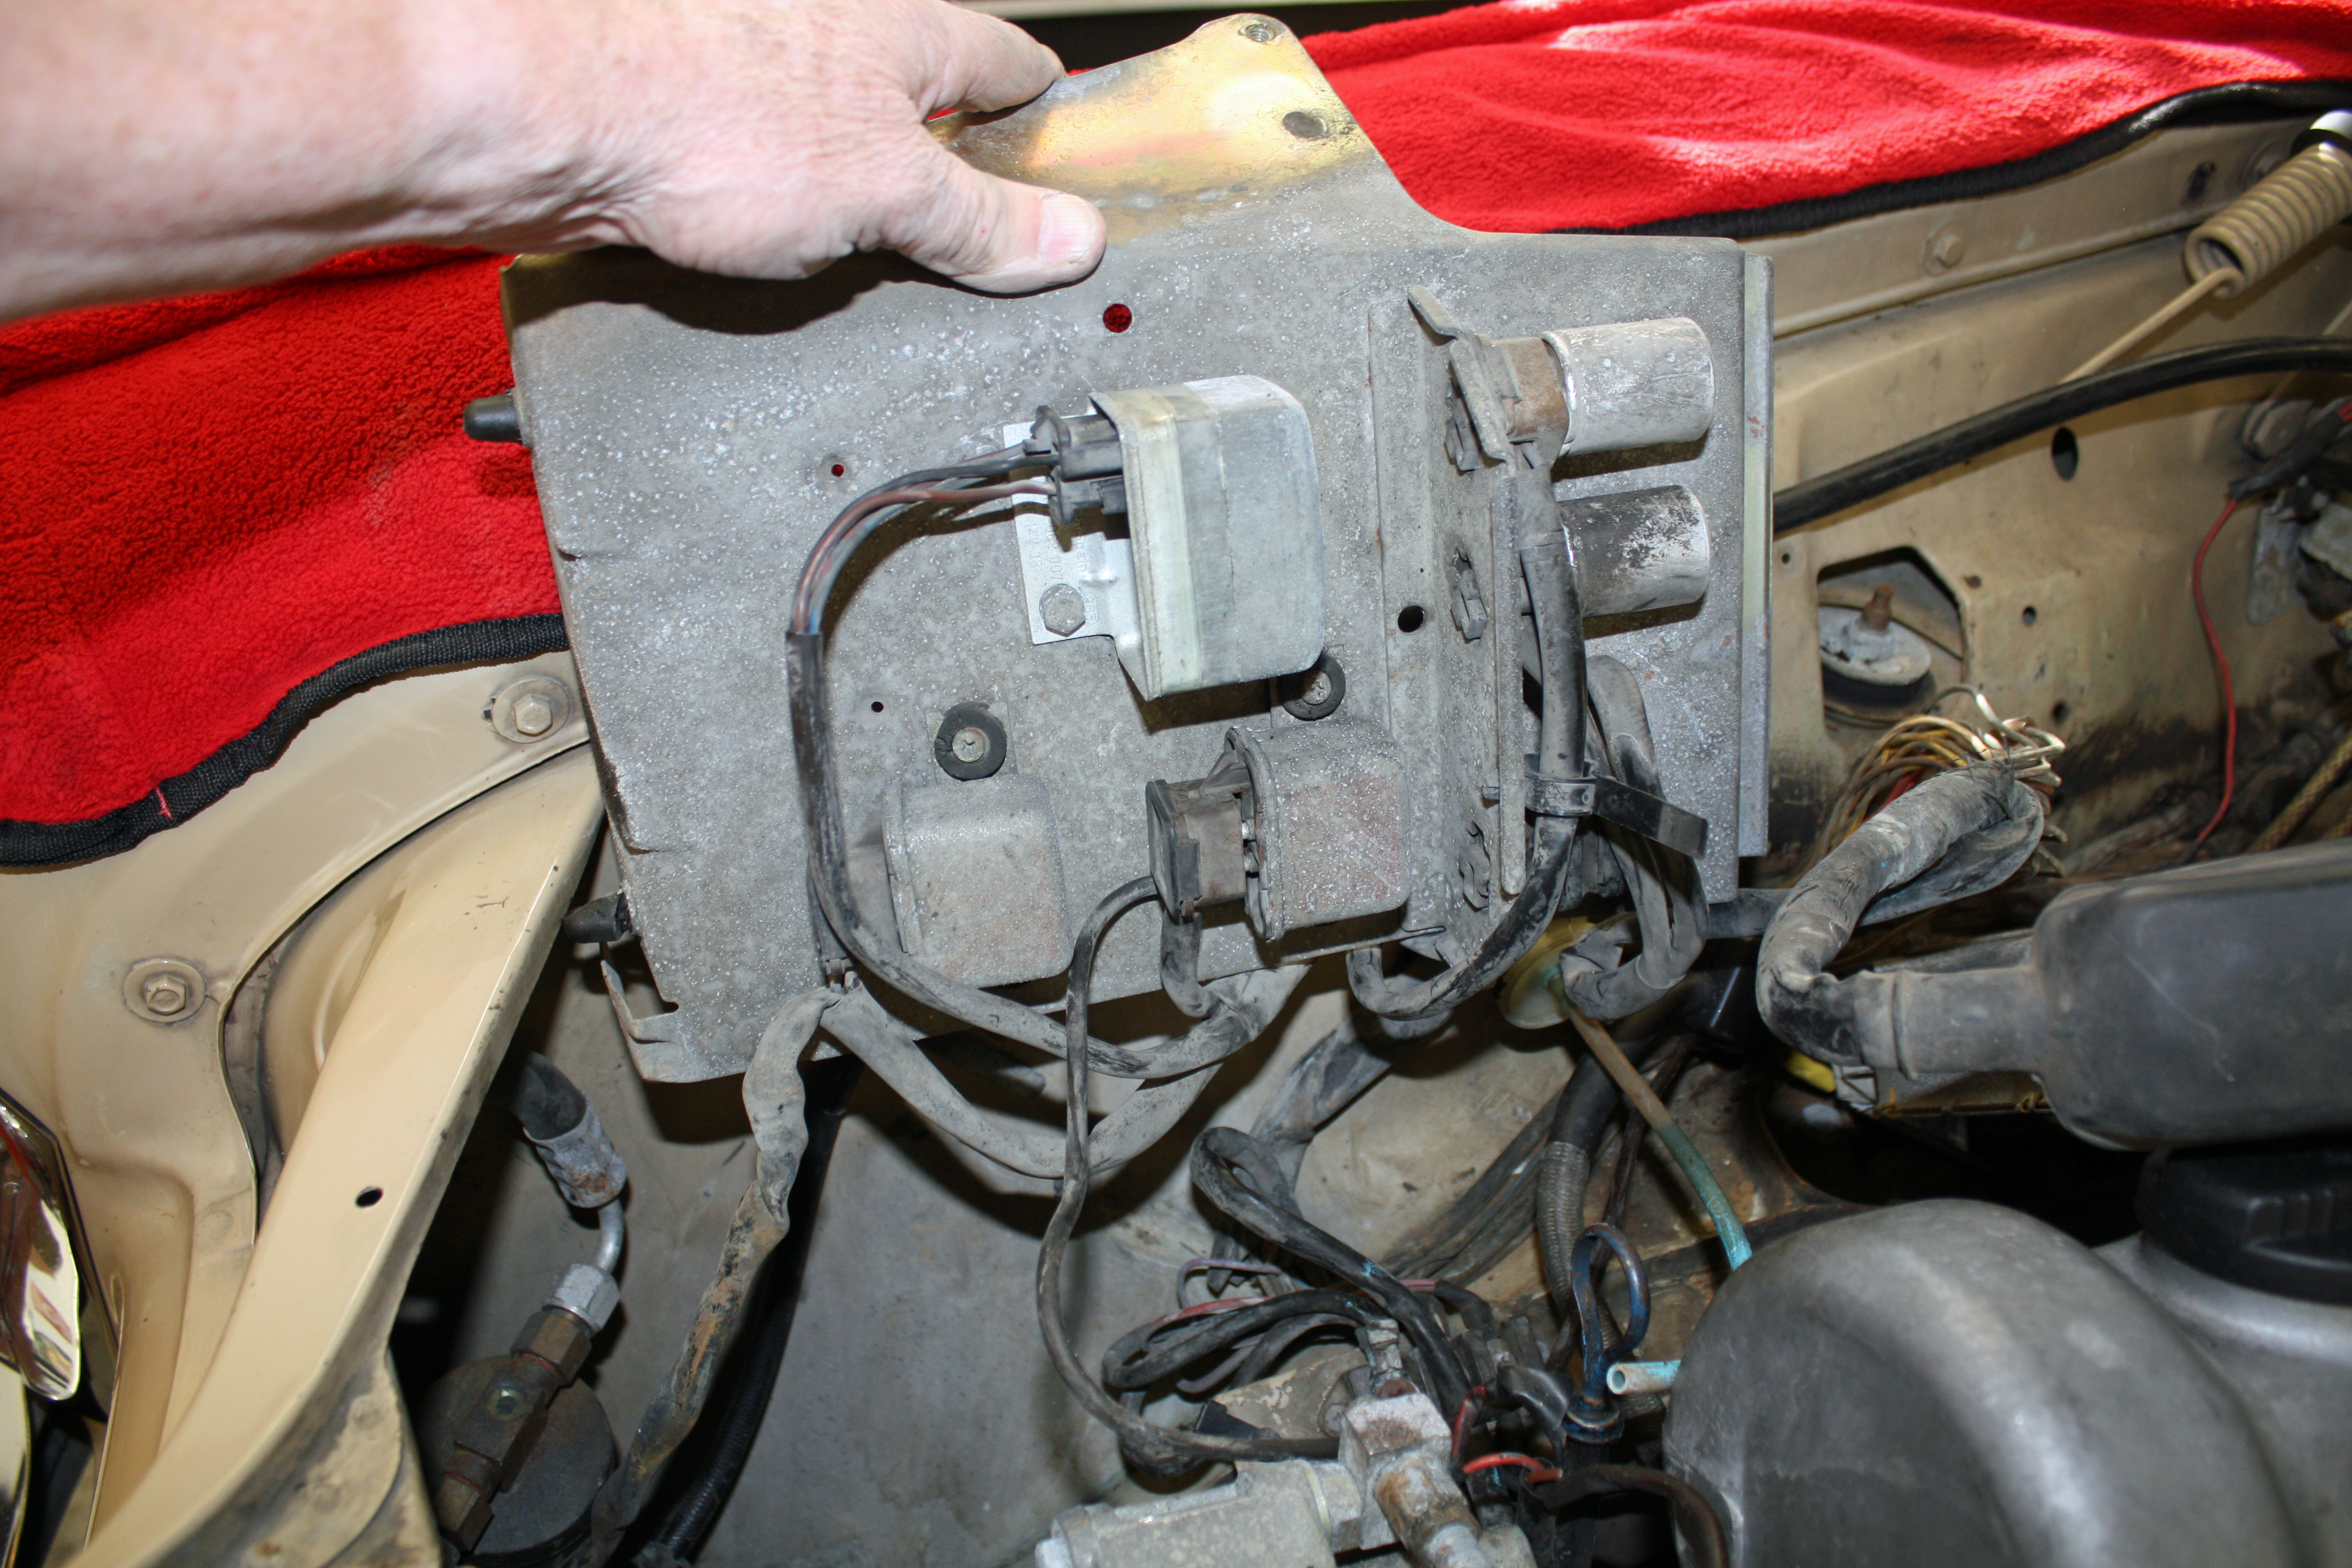


The drier for the AC is also in this cubbyhole.

 01-21-2017, 04:12 PM
#7
Member
Thread Starter
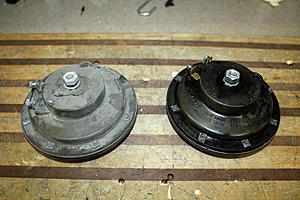
After a day off yesterday, I was back at it today. I had removed the horns when I removed the electric fan bracket. I cleaned them up today.
As I was preparing to work on the engine bay, I removed the aftermarket cruise control that was installed back in 1977. It does not work but I have the original manual which contains the installation information. Later I will see if I can figure out why it doesn't work. If I determine that it is not repairable, I will probably buy a new unit to replace it as I have the "restless leg syndrome" which means my legs do not long stretches on the accelerator. I have installed after market cruise controls on a few cars as well as some motorcycles.

I had been working on cleaning the engine bay for only a few minutes when I bumped my head on the grill for the umpteenth time!! Time to remove it. There are two bolts on each side on the bottom. The other two bolts are accessed from the front of the hood. There are two raised areas where you can insert a 8mm nut driver to remove the bolts. The grill will remain in the trunk until I am finished working on the engine bay.

In the engine bay I began by cleaning the intake manifold and the firewall behind it. I wasn't going for a concours level job and an intake is very difficult to clean when attached to the motor so I got it the best I could knowing that most of it will be covered when the air cleaner is installed. I then cleaned up the left fender area. Again, not concours ready, but cleaner than it was.


As I was preparing to work on the engine bay, I removed the aftermarket cruise control that was installed back in 1977. It does not work but I have the original manual which contains the installation information. Later I will see if I can figure out why it doesn't work. If I determine that it is not repairable, I will probably buy a new unit to replace it as I have the "restless leg syndrome" which means my legs do not long stretches on the accelerator. I have installed after market cruise controls on a few cars as well as some motorcycles.

I had been working on cleaning the engine bay for only a few minutes when I bumped my head on the grill for the umpteenth time!! Time to remove it. There are two bolts on each side on the bottom. The other two bolts are accessed from the front of the hood. There are two raised areas where you can insert a 8mm nut driver to remove the bolts. The grill will remain in the trunk until I am finished working on the engine bay.


In the engine bay I began by cleaning the intake manifold and the firewall behind it. I wasn't going for a concours level job and an intake is very difficult to clean when attached to the motor so I got it the best I could knowing that most of it will be covered when the air cleaner is installed. I then cleaned up the left fender area. Again, not concours ready, but cleaner than it was.


Trending Topics
01-22-2017, 11:51 PM
#8
Member
Thread Starter


 01-22-2017, 11:53 PM
#9
Member
Thread Starter


 01-22-2017, 11:54 PM
#10
Member
Thread Starter
These are some of the other items I found in the manual packets. The original data card was there.


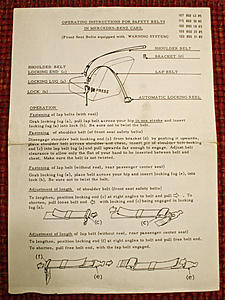
There were seat belt instructions.

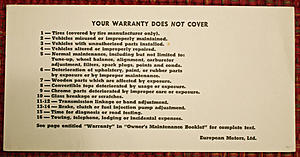
The selling dealer's promise.

Owner's and service manuals.


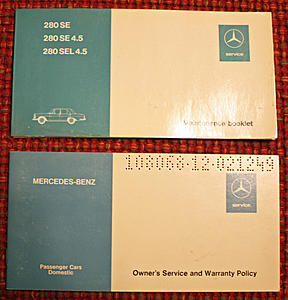


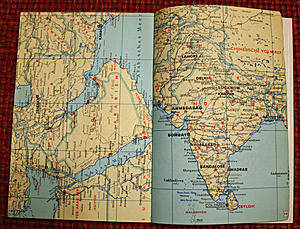
Where to receive service including maps.


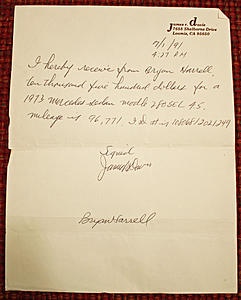
Bill of sale showing that it was sold to the second owner on July 1, 1991 at 4:27PM.


There were seat belt instructions.


The selling dealer's promise.


Owner's and service manuals.


Where to receive service including maps.


Bill of sale showing that it was sold to the second owner on July 1, 1991 at 4:27PM.
 01-23-2017, 08:58 PM
#11
Member
Thread Starter
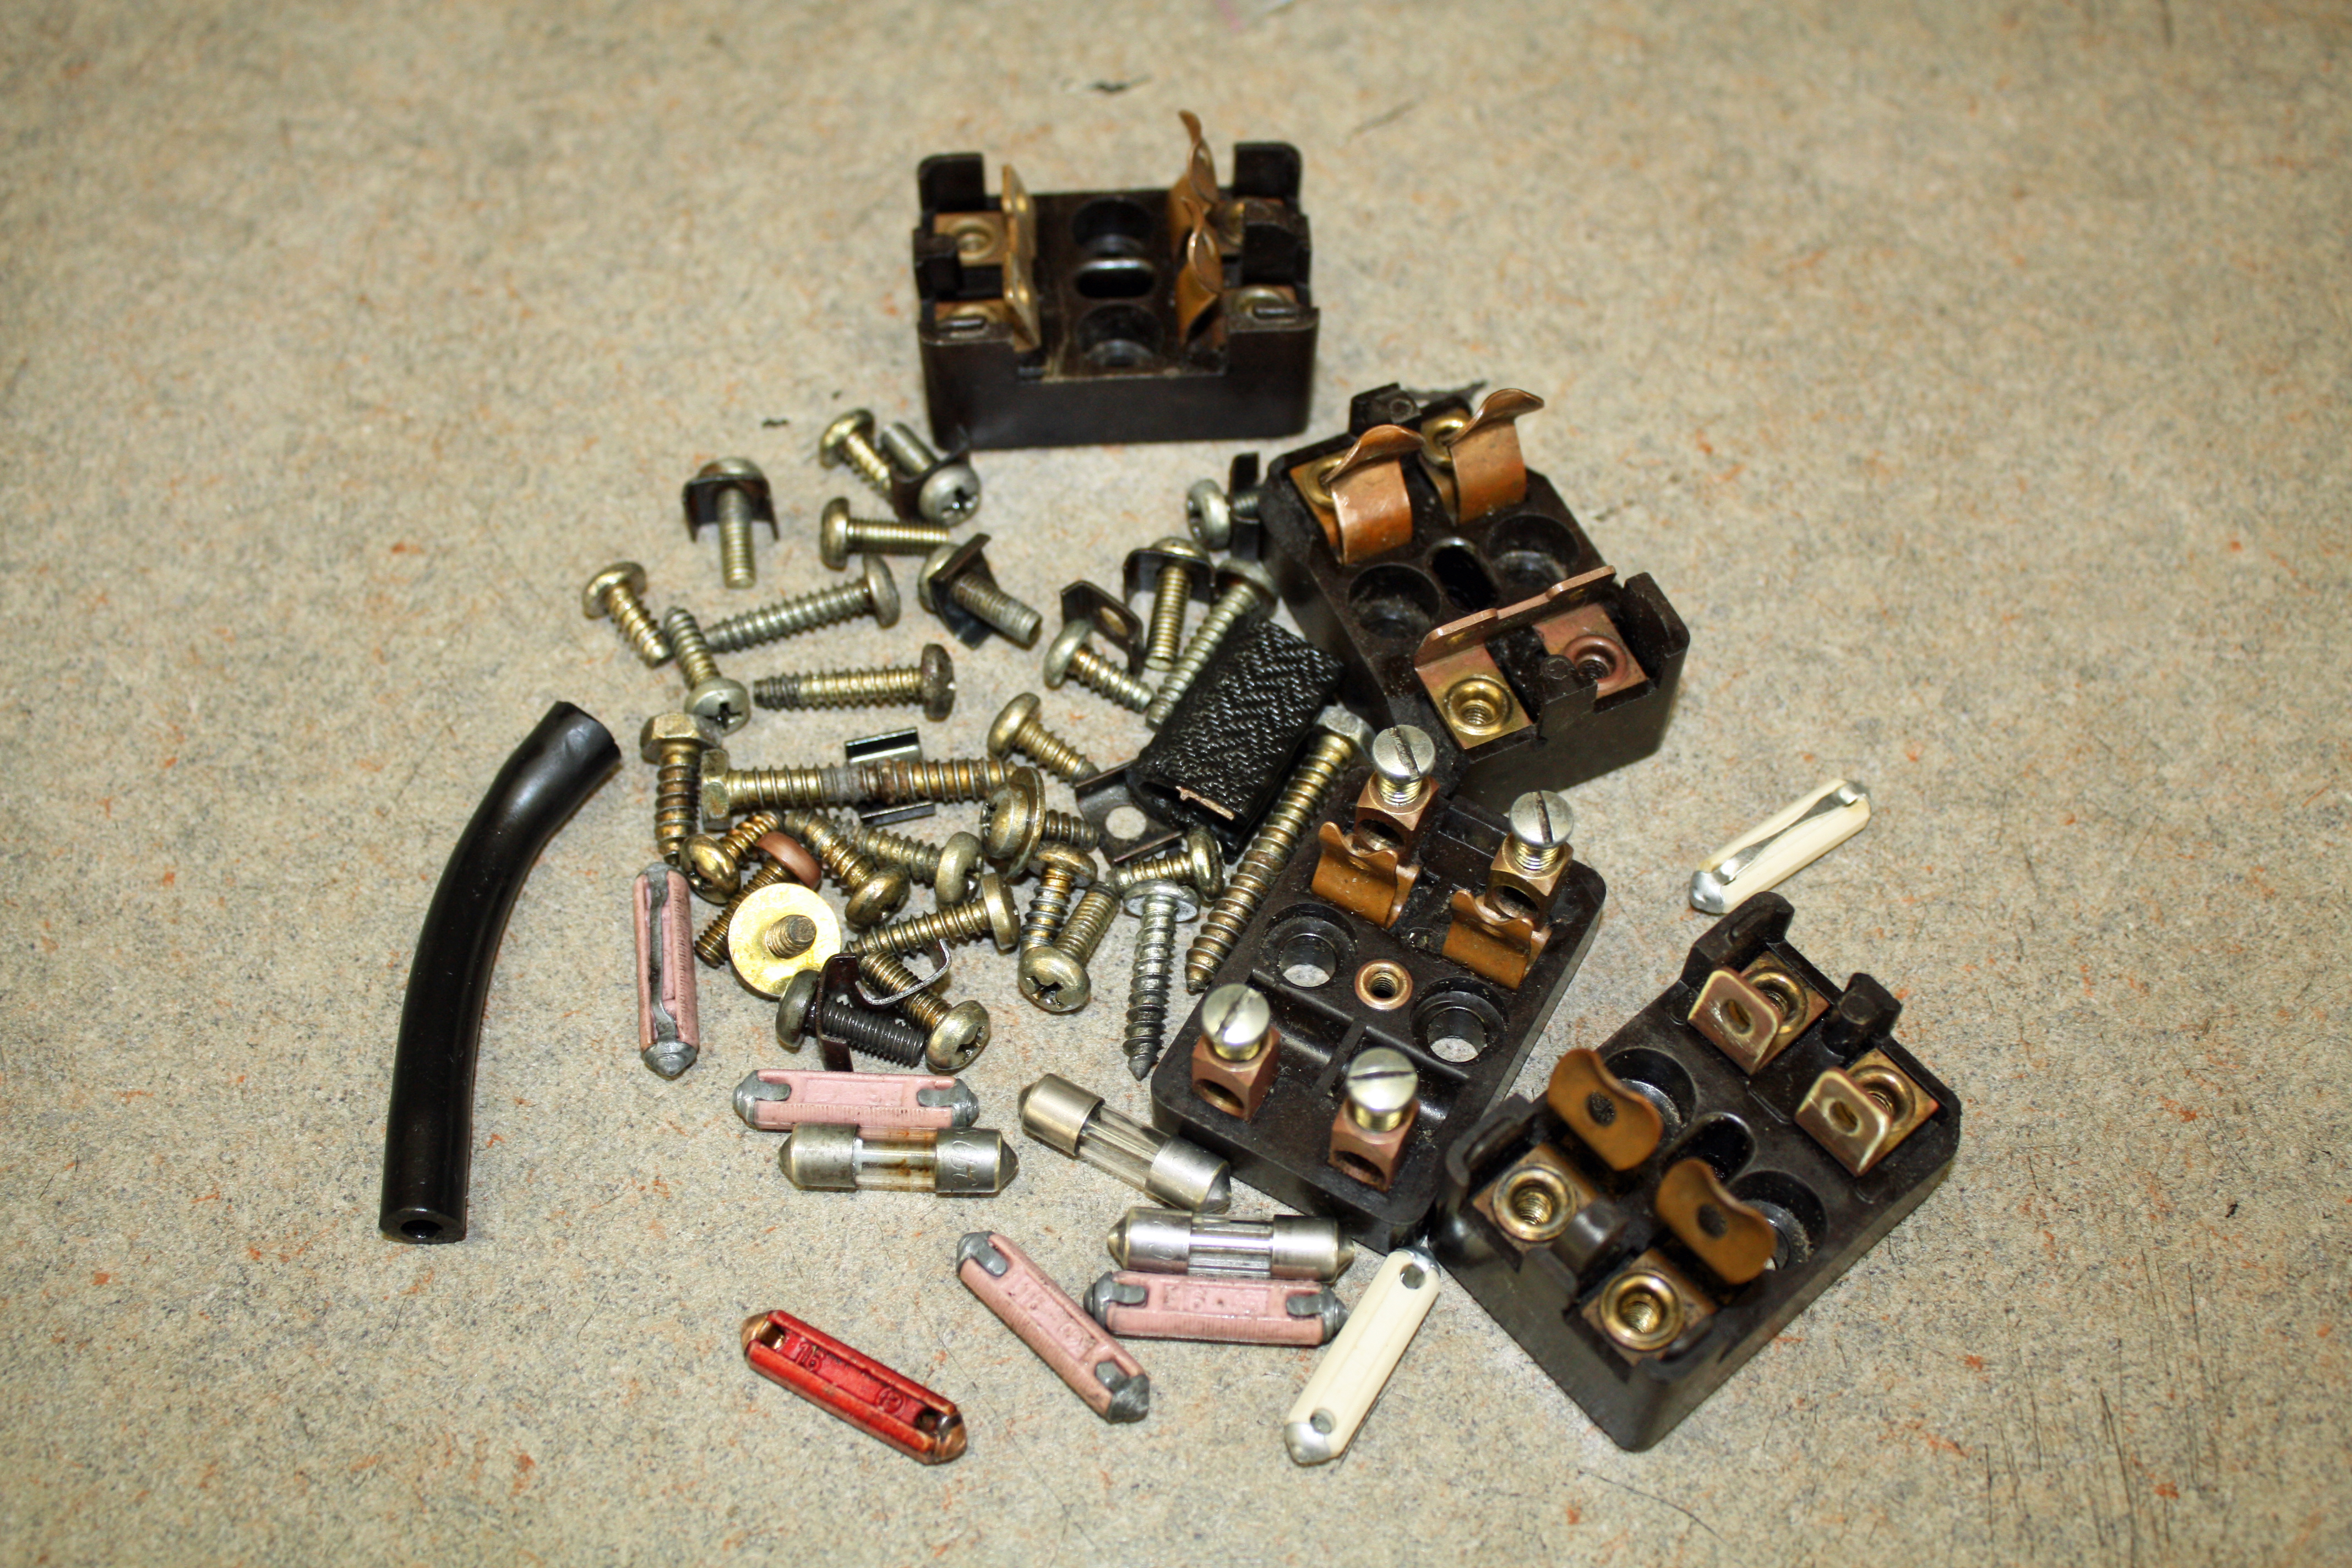
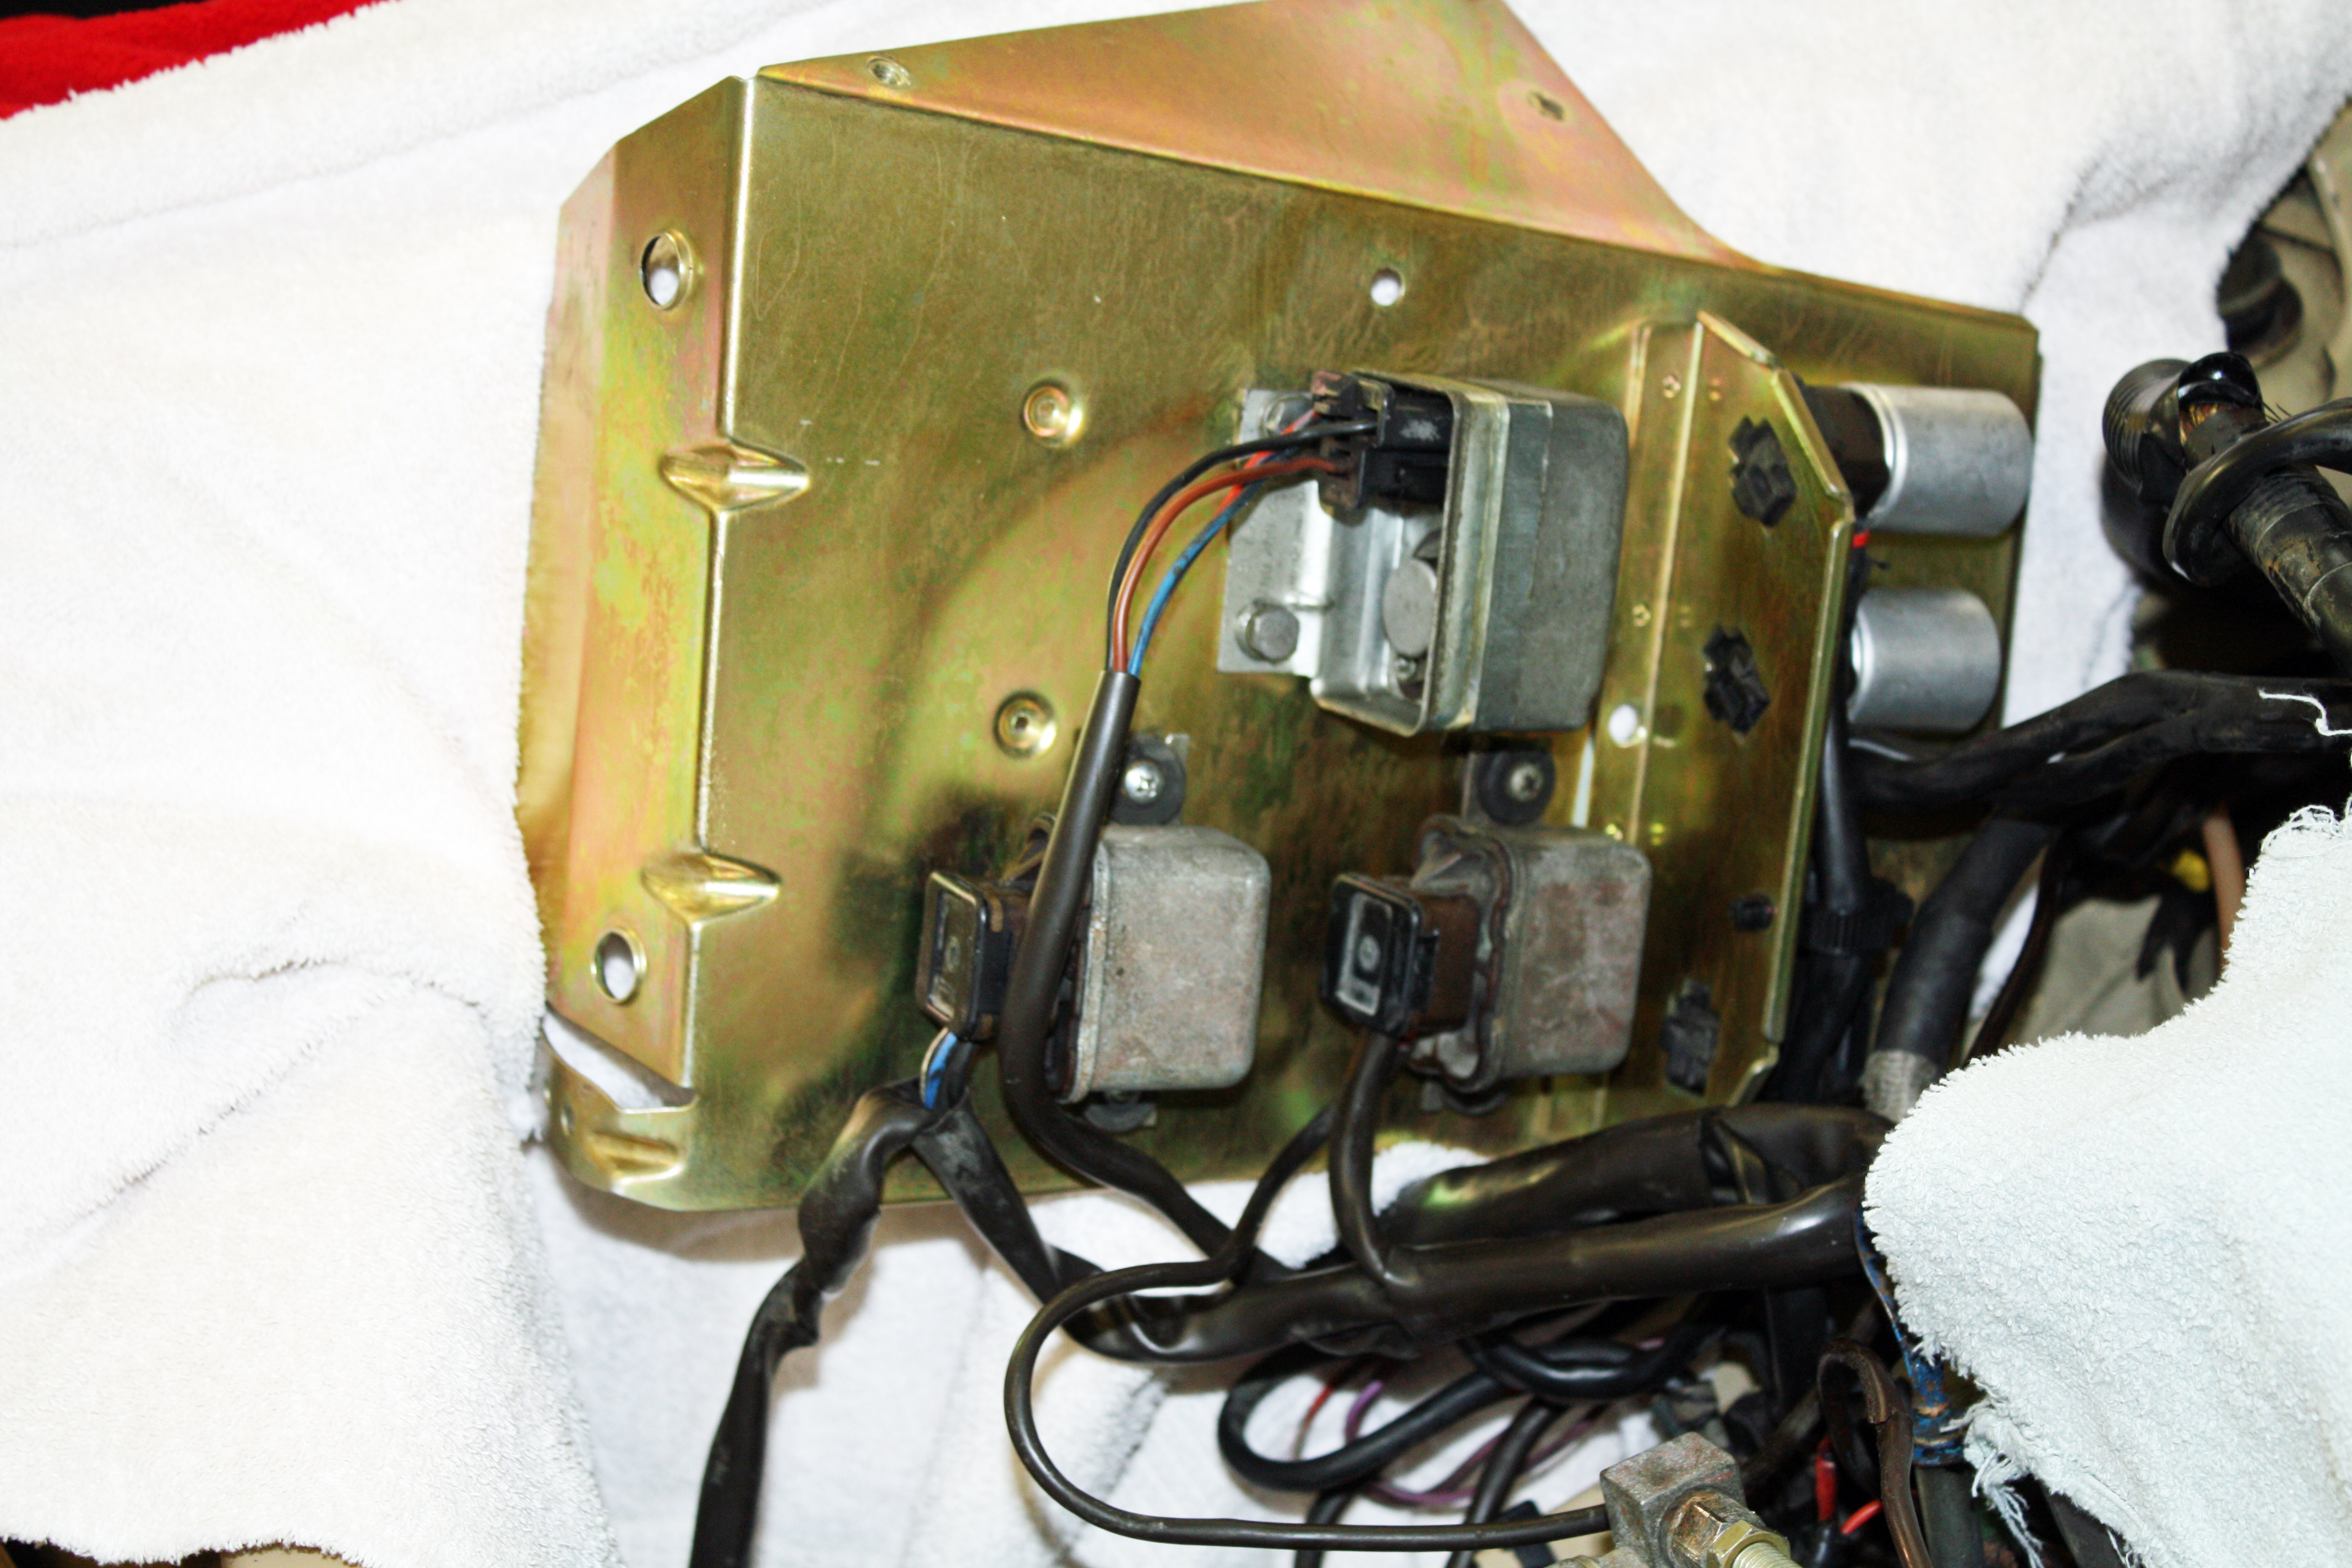
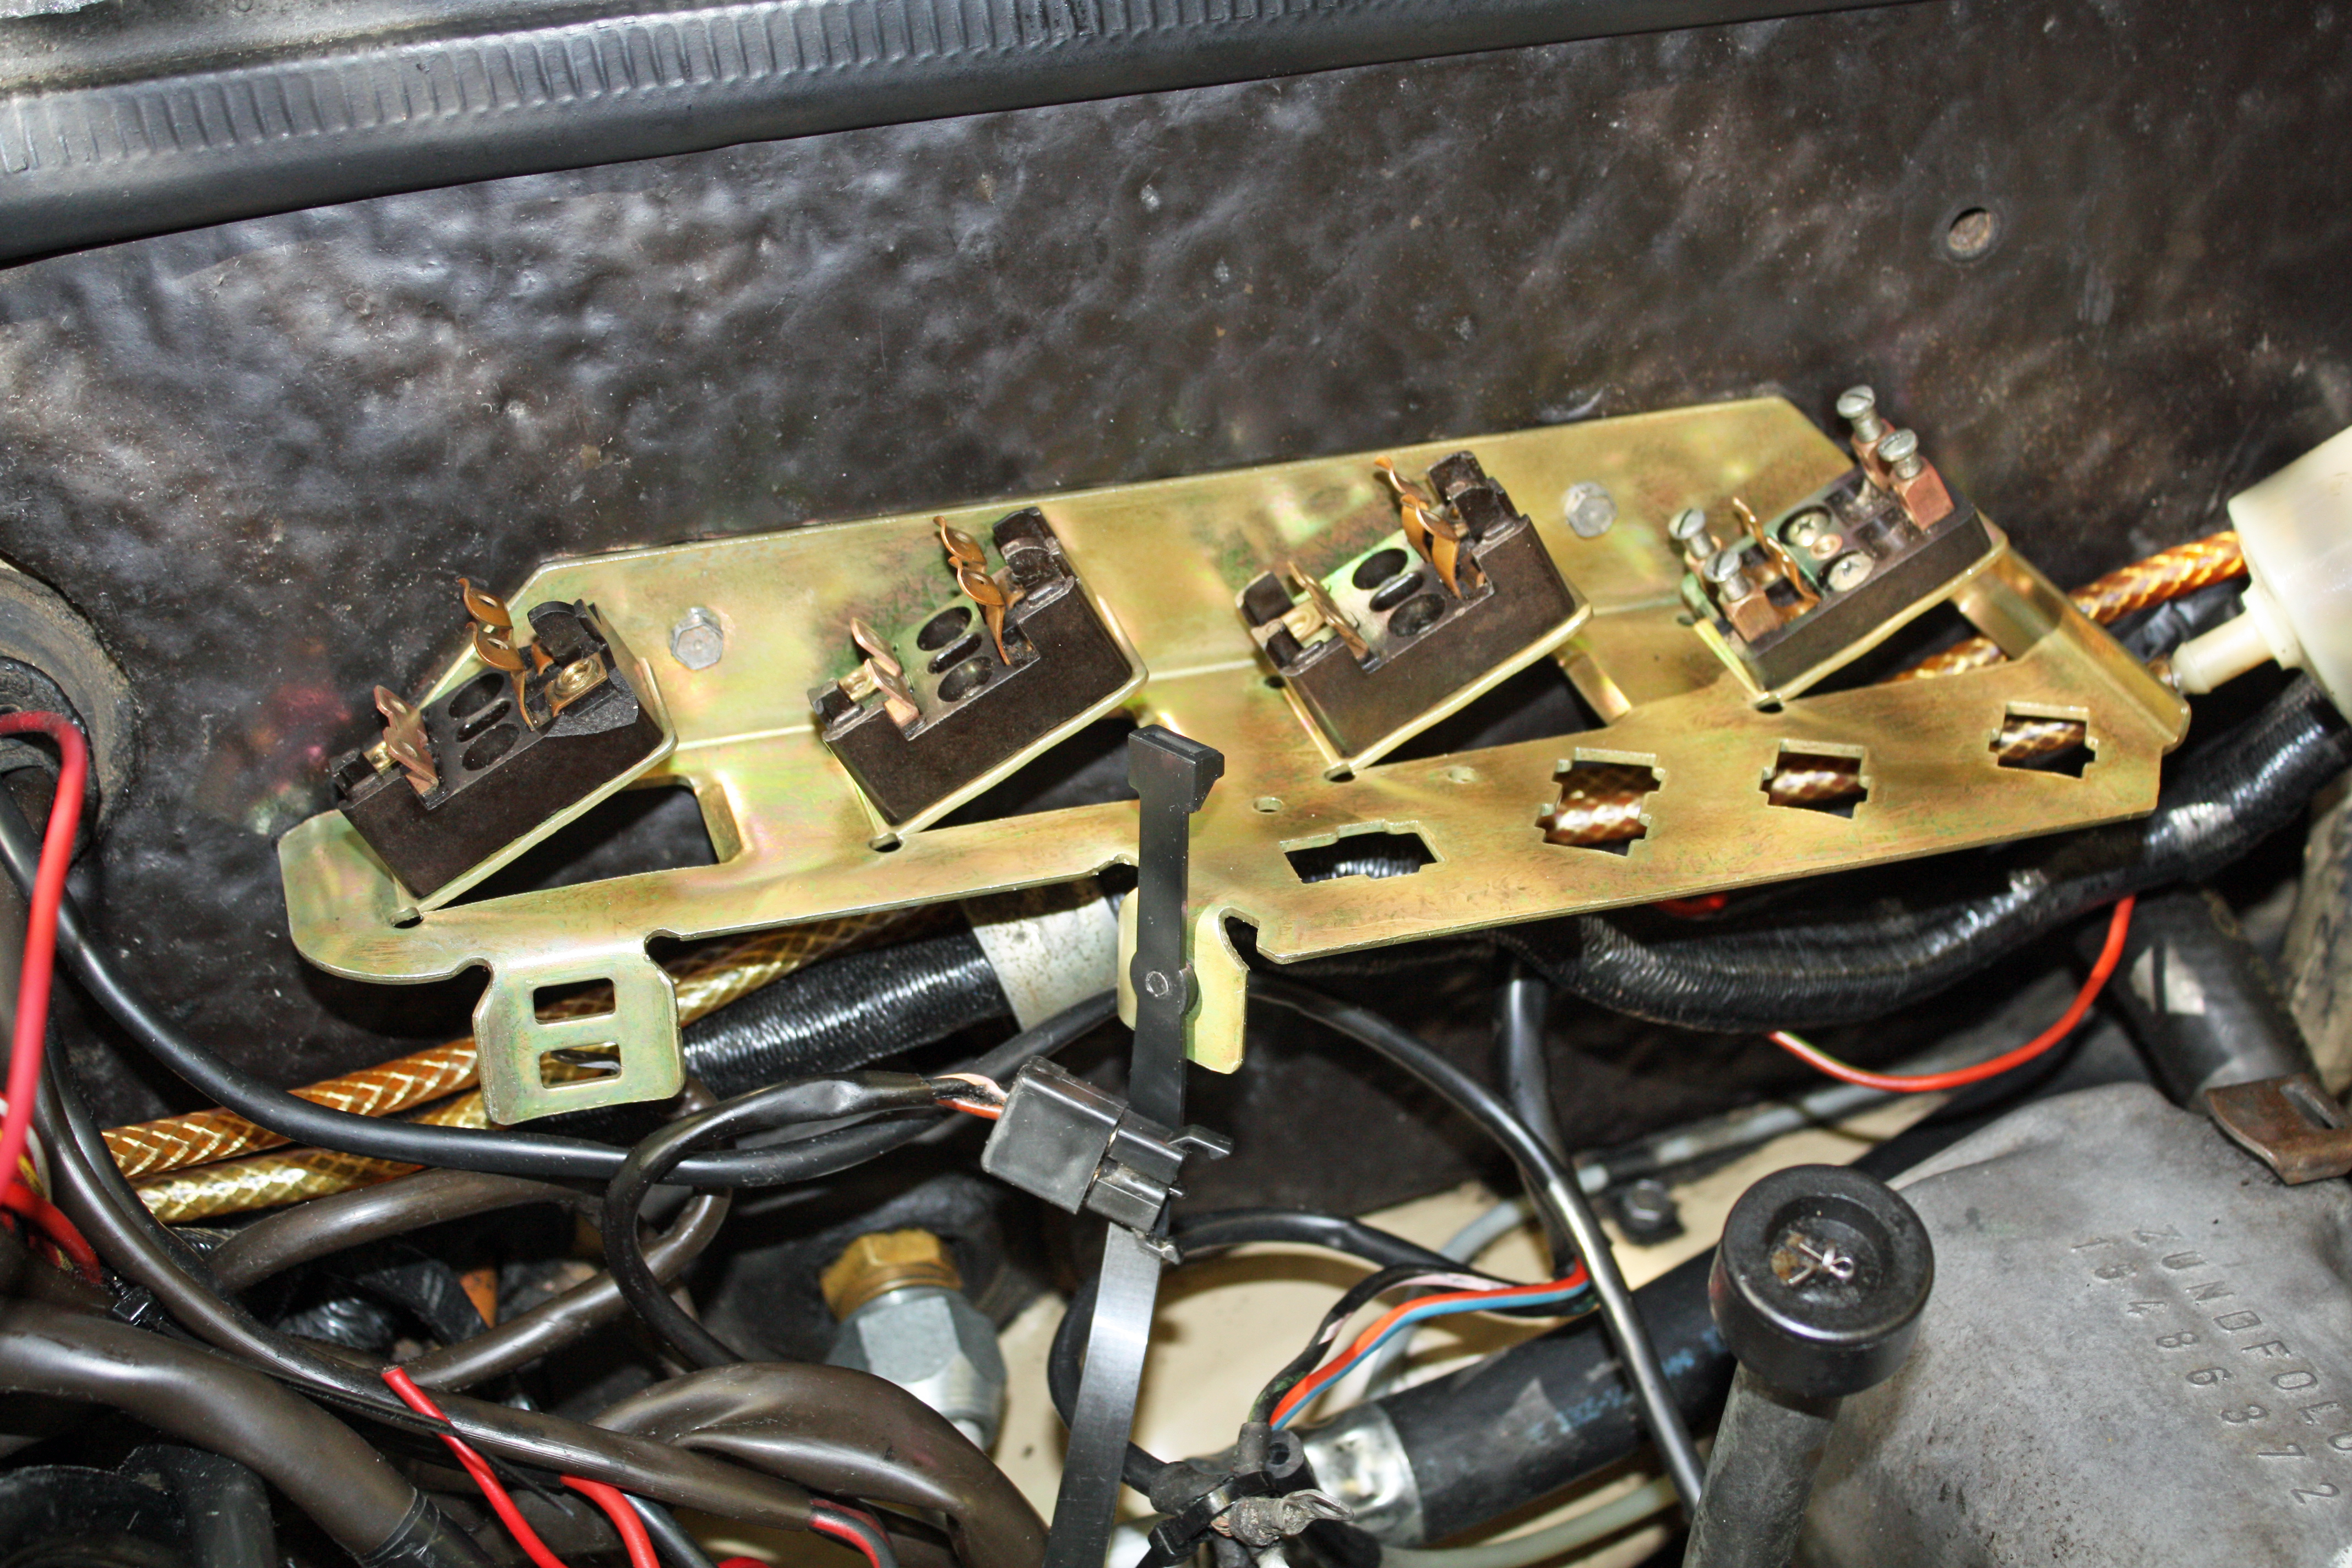
Today I began working on the right side of the cowl area which contains a bracket that holds fuse blocks and relays. My first inclination was to clean it in place but I could soon see that would be very difficult. So I took it all apart. Once I had the bracket clean I could see that it needed to be refinished. It is now at the refinishing place. I am looking for a cover for one of the fuse blocks because one is missing.

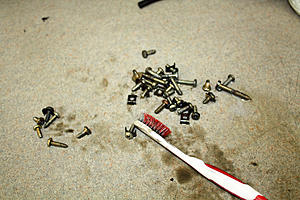
The bracket is held to the firewall with two screws. Each of the fuse blocks is fastened to the bracket with two screws. I took a bunch of photos to make sure I re-attach the wires correctly. After taking the photos and removing the wires from the fuse block, I zip tied the wires together for each fuse block. Should make it easier to put everything back together.

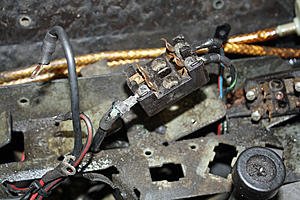


The bracket is held to the firewall with two screws. Each of the fuse blocks is fastened to the bracket with two screws. I took a bunch of photos to make sure I re-attach the wires correctly. After taking the photos and removing the wires from the fuse block, I zip tied the wires together for each fuse block. Should make it easier to put everything back together.


 01-24-2017, 05:41 PM
#12
Member
Thread Starter
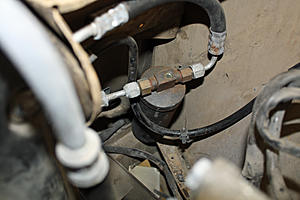
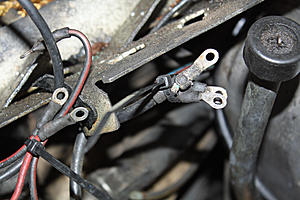
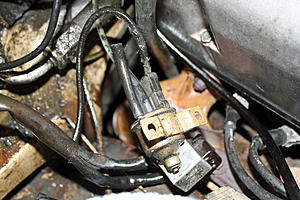
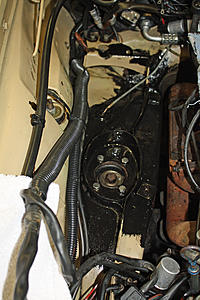
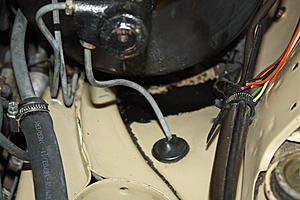
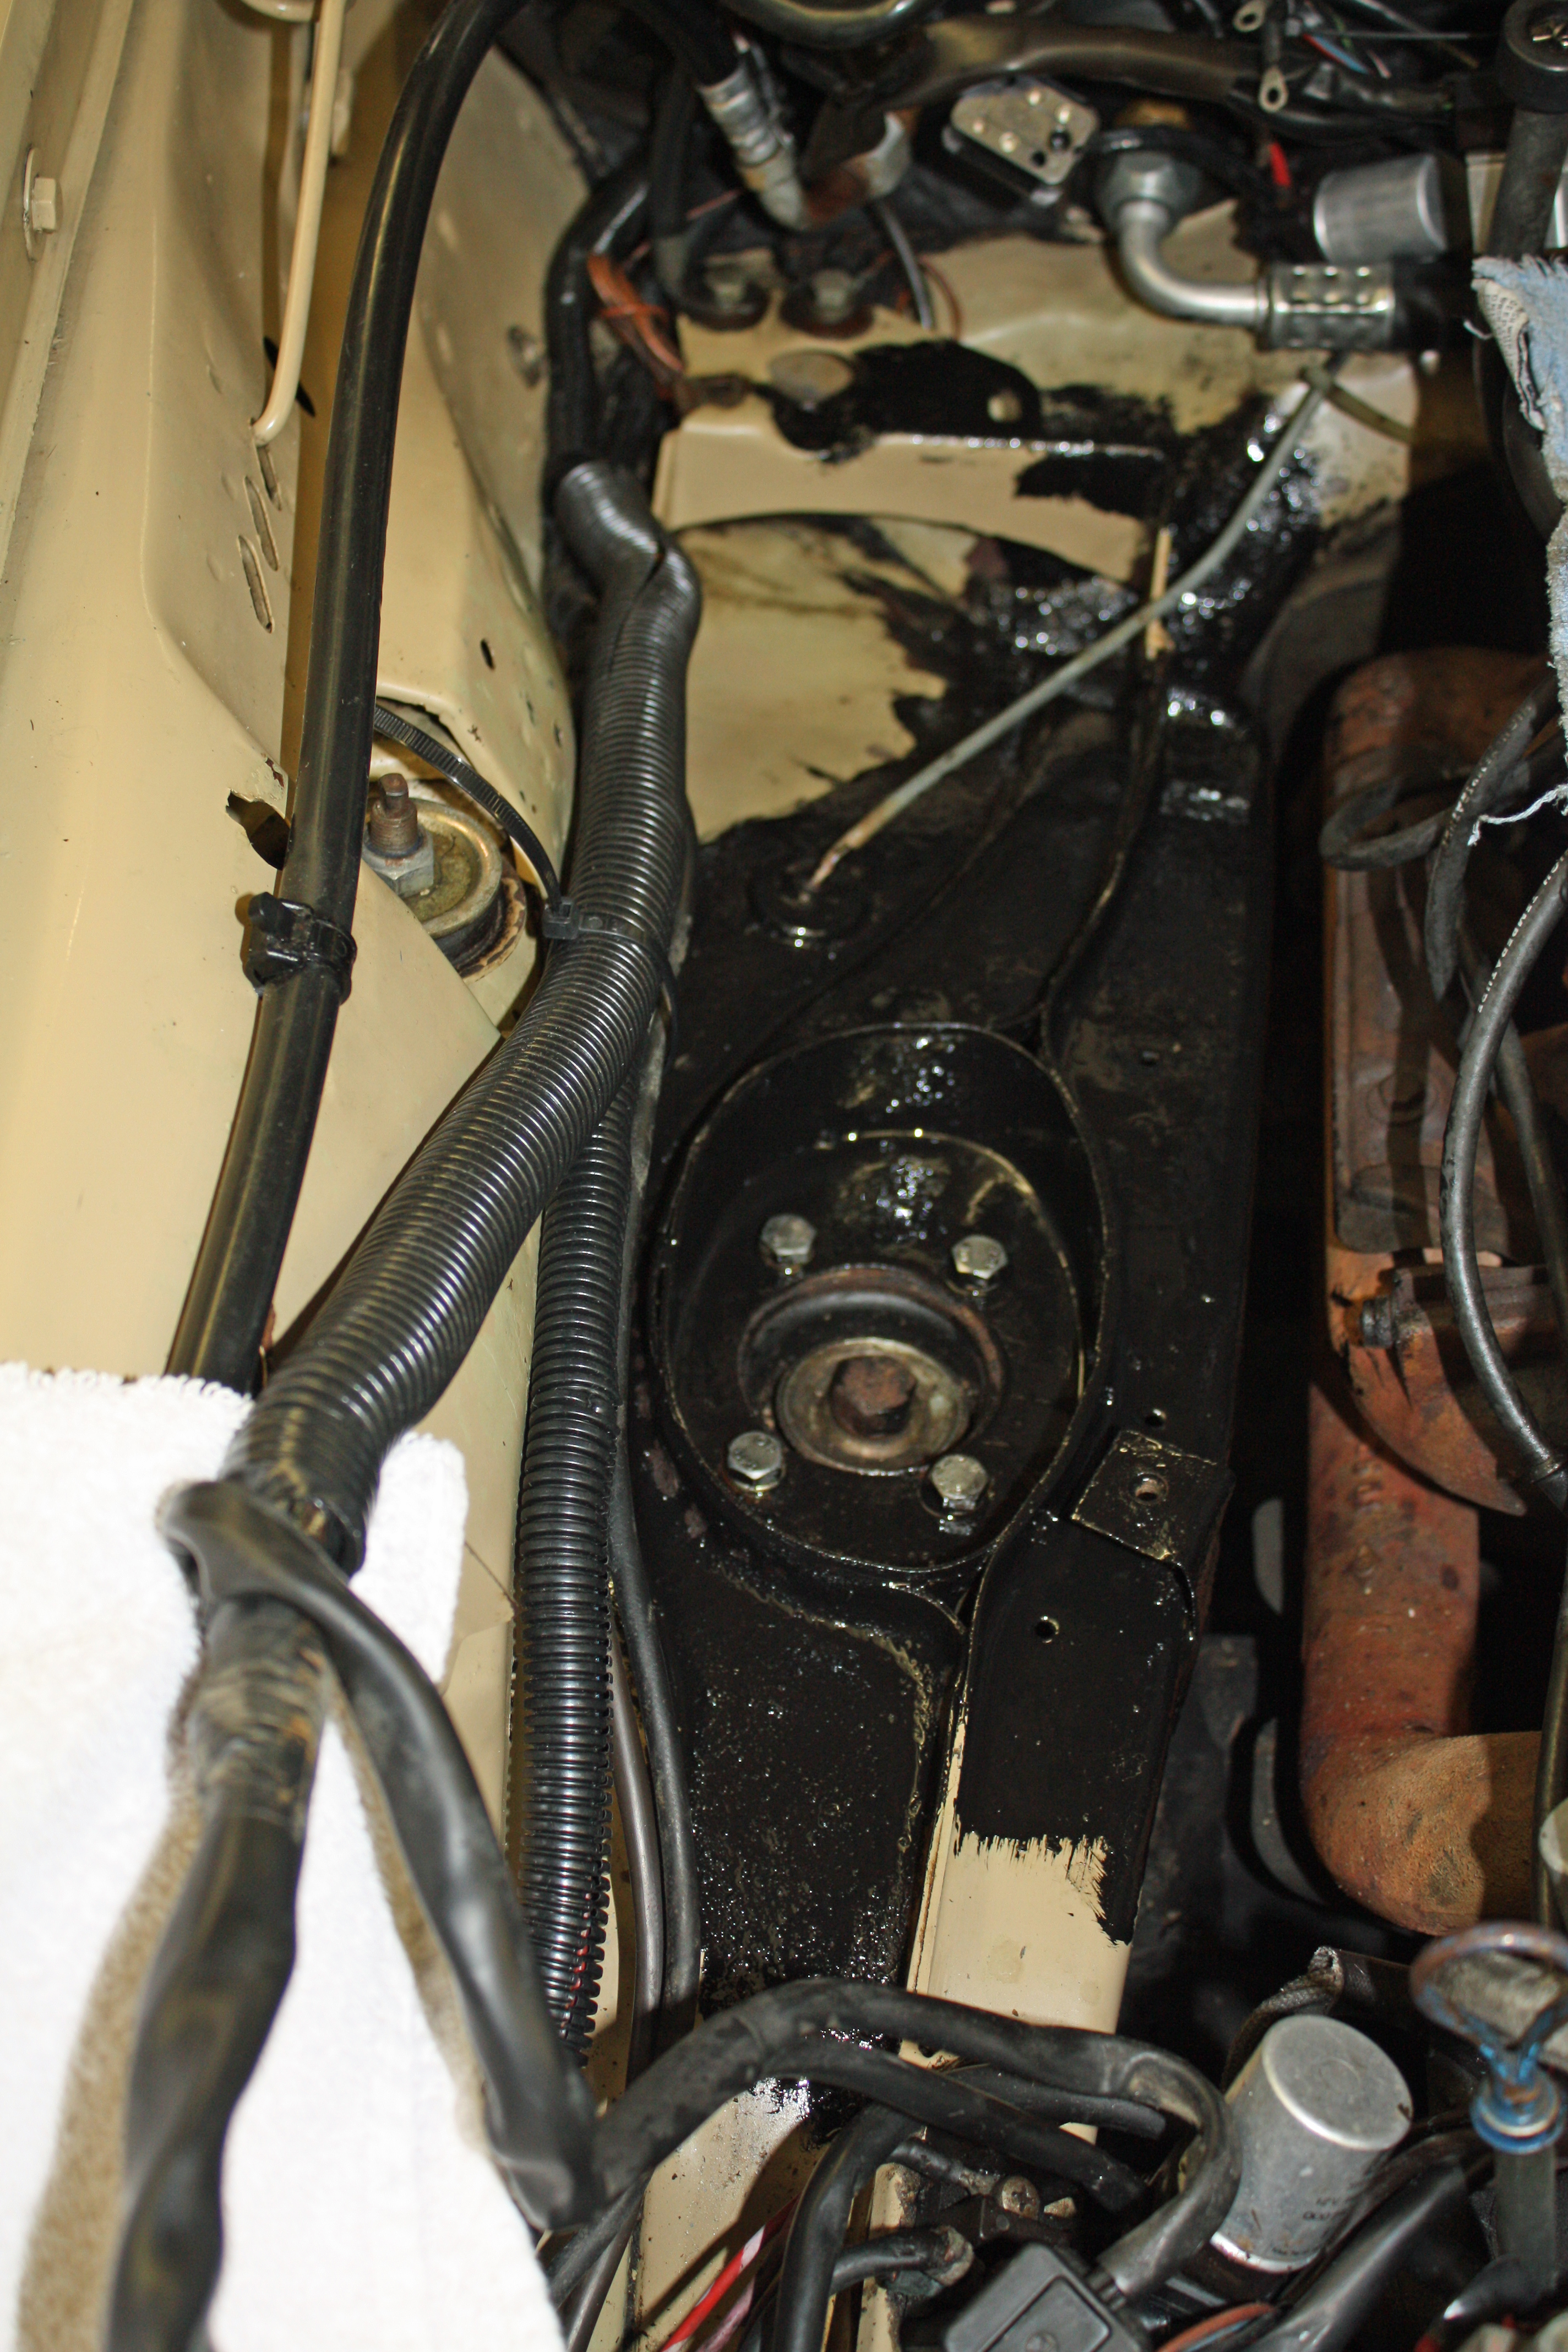
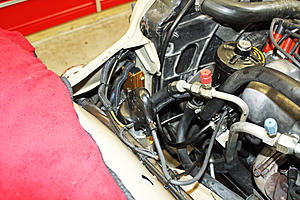
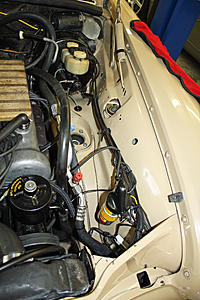
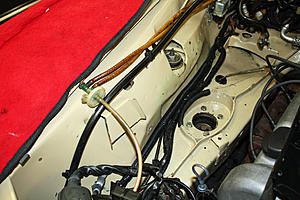
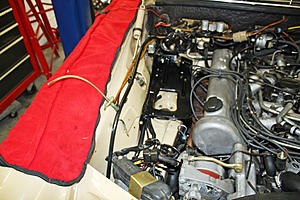
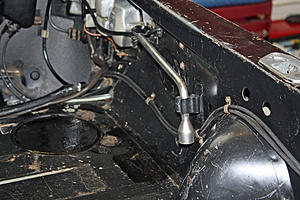
I worked on the right side of the engine compartment today. I did find some rust that would have been under the battery tray. It is surface rust which I will treat with POR 15. Probably due to brake fluid leakage, there is also an area where the paint is gone under the brake booster on the other side.
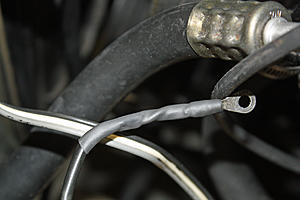
As you can see in the photos, the covering on the wiring harness was also harmed by the battery acid. I used some convoluted tubing to protect those areas. I didn't have time to do any polishing of the painted surfaces today.


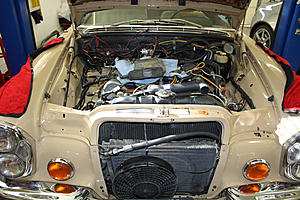
Gratuitous garage photo!

As you can see in the photos, the covering on the wiring harness was also harmed by the battery acid. I used some convoluted tubing to protect those areas. I didn't have time to do any polishing of the painted surfaces today.
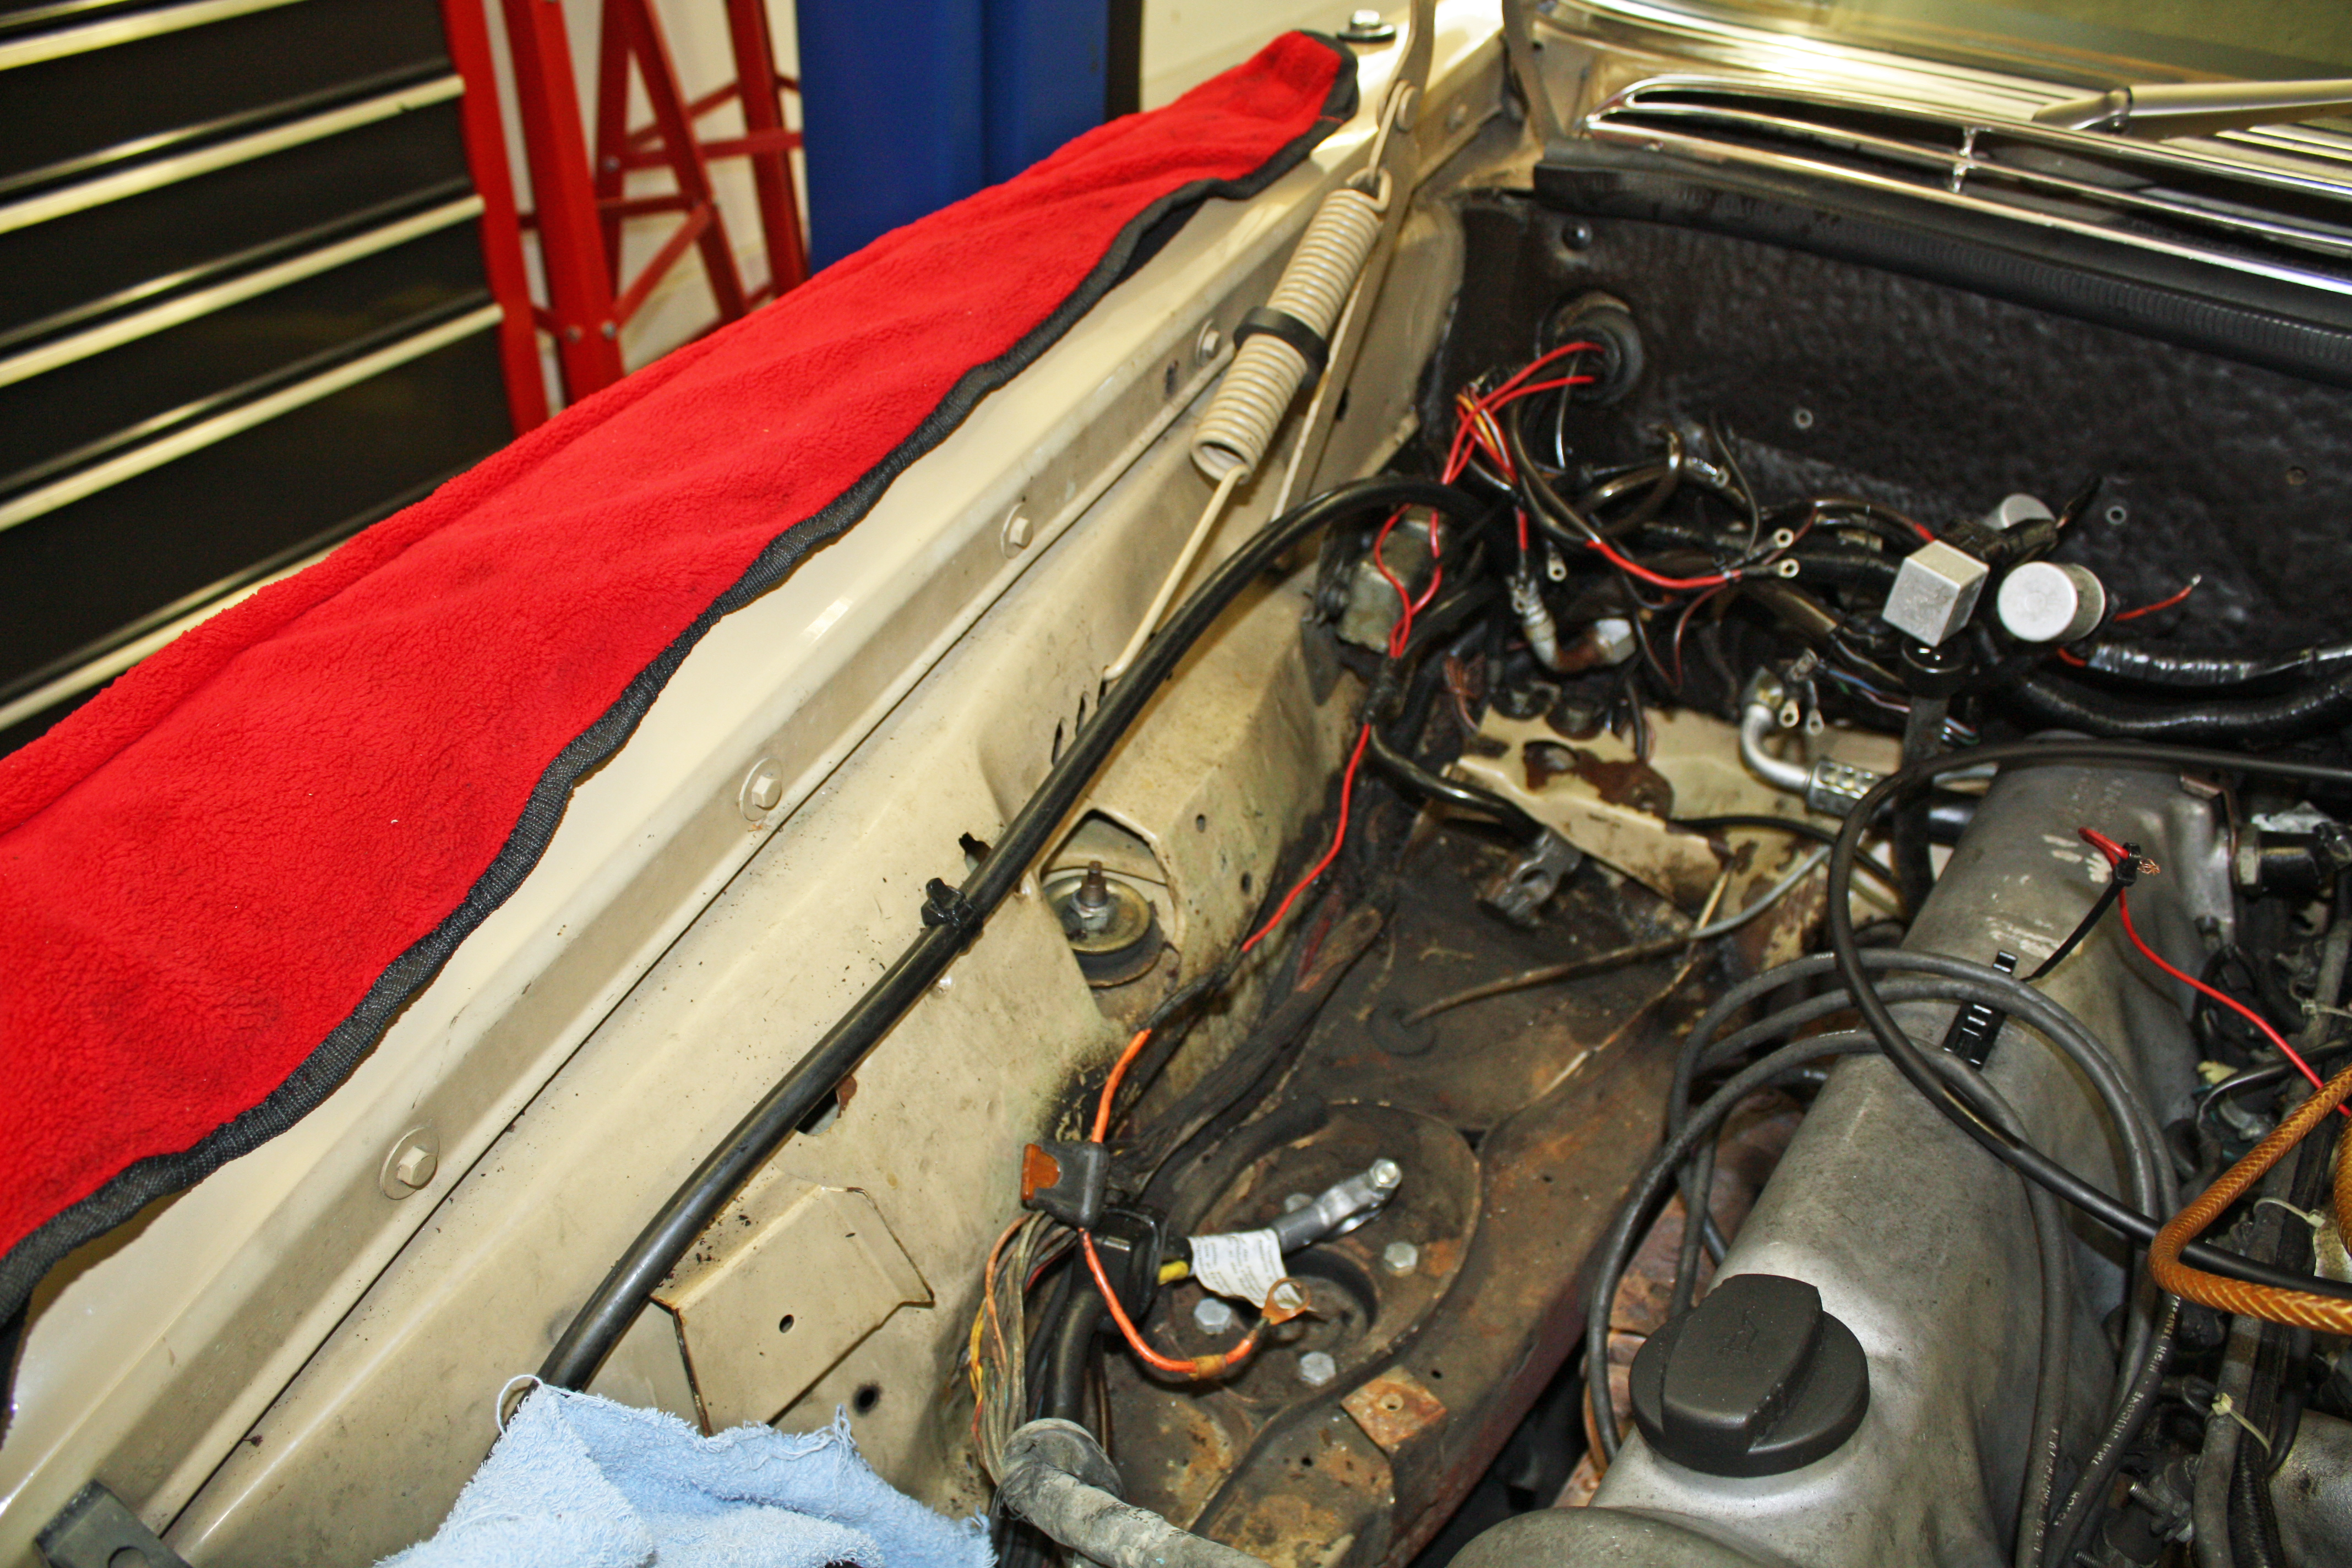


Gratuitous garage photo!
 01-29-2017, 10:30 PM
#13
Member
Thread Starter
The work has been on a hiatus the past three or four days as I had a project to do on my motorhome. Since the weather is supposed to be nice for the next week or so, I cleaned up our daily drivers today.
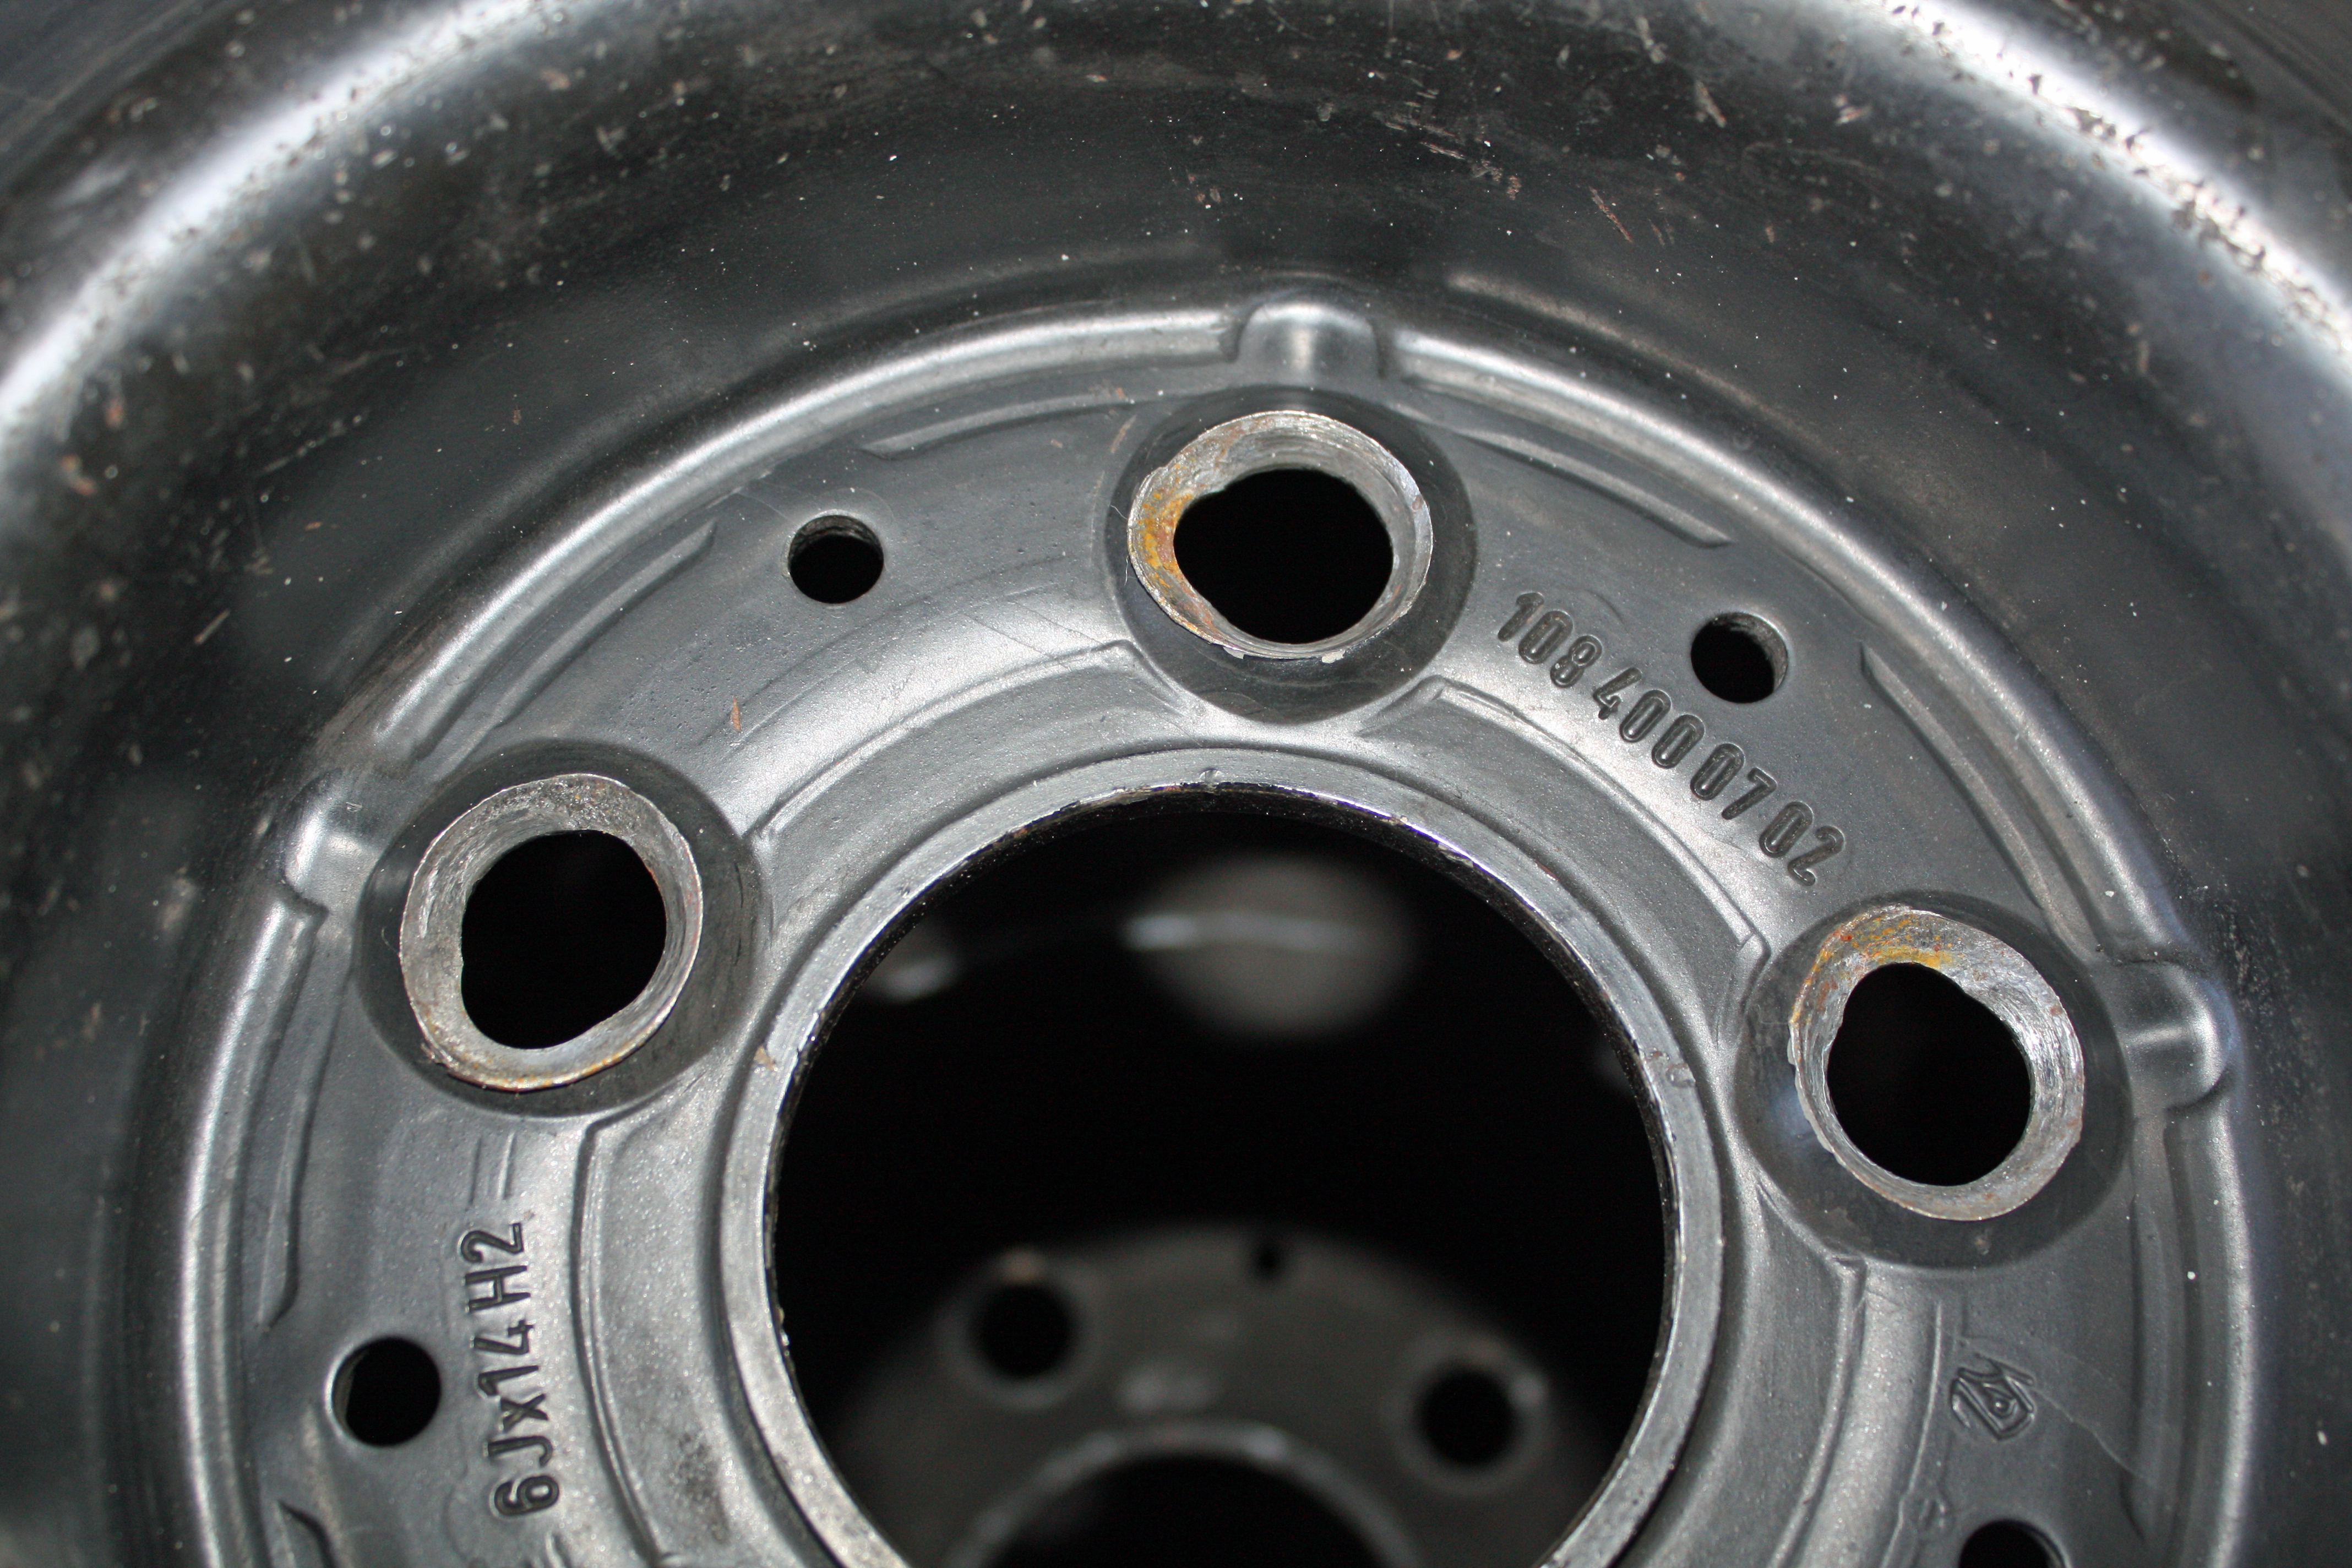
It is cool here today so I washed the cars in the lower garage with the lift. That's also where the furnace, TV and sound system are. To give me a bit more head room (and to avoid hitting said head on the low hanging tires), I removed the wheels and tires today. I had a balance issue on the drive home so I cleaned the wheel and tires so I can haul them to the tire place and not make a huge mess in my station wagon.
The exhaust needs to be replaced. On eBay I found a used Borla stainless steel exhaust for a 4.5. It is in the stock configuration and in very good shape. It was also cleaned up today in preparation for its installation.
In Microsoft Access I created a database containing all of the service records that I have for the car. Those date back to 1991 when the second owner purchased it with 96K on the clock. The very first record is for a PPI done prior to purchase. The second record is a work order fixing those issues found on the PPI. The car was sold in 2015 so the guy owned it 24 years. The total dollar figure for the 24 years was $48K and change. So his average cost per year was about $2K.
The most interesting part of entering the information was how the costs have changed. The same shop was used for most of the repairs over that period of time with the hourly rate going from $45 per hour to $90 per hour. But the cost of the oil filter remained at $9.35 until about 2005 when it went to $11. However, the third owner (the guy I bought the car from) was only charged $10.50 for an oil filter back in December, 2016.
The oil of choice over all of those years of ownership was Pennzoil 10W40. There were many oil changes over the years. The third owner used Valvoline synthetic. I may go back to Pennzoil the next time I change the oil just for old times sake!!
Now that I have the data very accessible, I will take the time to hit some highlights on a future post. My impression was that the second owner fixed whatever needed to be fixed. The one thing that is not there is a bill for a paint job. There is an estimate for $2800 for rear end accident damage in the year 2000 and there is a reference in one of the service bills about taking the car to the body shop for repair. But no bill.
Another quirk happened in the year 2000. If you recall, there was much consternation about what would happen with computer dating during that year. Evidently it affected the computer at the repair place. I had placed the work orders in a three leaf binder in order. As I came upon three entries for the year 2011, I discovered a discrepancy in the mileage figures. After looking over the entire work order, I found where someone had hand written the date of the receipt of payment and it was in the year 2000. I made some notes on the affected work orders for future owners.
01-29-2017, 10:30 PM
#14
Member
Thread Starter
Below are some highlights from the service records.
174K-1/17 - Current mileage
174K-1/16 - Speedometer repair
172K-3/15 - New set of Michelin tires
170K-5/11 - New plugs, valve adjustment, inspect chains and guides, adjust timing and fuel ratio, replace fuel hose at rear of car, new battery (still in the car)
168K-3/09 - replaced alternator
166K-8/07 - Replaced driver's door window regulator, installed new driver's door window
165K-7/06 - Resealed transmission, replaced rear main seal, replaced transmission cooler hoses & PS hose, new radiator core, Sealed PS box
164K-5/05 - Replaced windshield with PPG unit, new windshield seal (The seal cost more than the windshield!!)
159K-1/05 - replaced exhaust manifold gaskets, installed electronic ignition, replaced swing axle boot
157K-12/04 - replaced both rear brake calipers & pads, replaced front pads and sensors, installed new rear wheel bearings, replaced rear brake hoses, replaced both front door weather strips
153K-8/04 - Replaced fuel tank sending unit, replaced brake booster vacuum line, installed new heater control wheels
148K-7/03 - Replaced throttle valve & switch, replaced brake booster, replaced AC compressor, drier, expansion valve, replaced front flex disc, installed radiator mounting kit, replaced all fuel hoses
141K-12/00 - replaced rear shocks and hydraulic compensator, installed sub frame mounting kit, replaced front springs, installed new exhaust system, replaced driver's door check, Replaced RF window regulator
138K-6/00 - resealed PS pump
136K-7/99 - replace brake master cylinder
135K-6/99 - Valve job on heads, replaced timing chain and guides, replaced AC blower motor
131K-7/98 - replaced steering damper, tie rods
127K-6/97 - replaced fan clutch
8/96 - New leather and pads for front seats, new rear seat foam
114K-7/96 - Replaced auxiliary fan
107K-6/95 - Replaced ECU, converted to R-134a, replaced all AC hoses, drier
102K-6/94 - Replaced water pump, belts, radiator, thermostat
01-29-2017, 10:31 PM
#15
Member
Thread Starter
On the day after I cleaned up the right side of the engine bay, I coated all of the rust areas with POR 15. This product is meant to be applied directly over rust to seal the area. When dry, it has a very hard, durable finish. I had some left over from a previous project. I applied it with a brush being sure to make sure it was thoroughly soaked into the seams. I also applied it to the area under the brake booster.


While the POR15 will do its job of sealing the rust areas, I couldn't leave those areas black, even though much of the right side area will be covered by the battery tray. We have a local old time auto parts store in Salisbury. Been there forever as has their paint guy, who is considered to be one of the best in the area for mixing paint.
I told him I was working with a '73 Mercedes and gave him the paint code number. He said he would have to go to his archives which turned out to be a bunch of dusty old auto paint books from years past. Once he found the one for imported cars in 1973, he found the paint code to match the car. He then proceeded to mix a single stage paint to match the car. We had no idea how good the match would be. He said if it did not match perfectly I should bring him a gas door so he could make it perfect.
Since it is not in a highly visible area, I asked him about the possibility of using a brush. He said brushes don't normally work with auto paint but that I might have a shot here as the only paint he could use to mix the paint was his best premium paint. Because the paint it so good, he said brushing should work. It was $40 for a 1/2 pint!
Believe it or not but I have experience with painting an engine with a brush as I painted the engine bay in the red 912 in that manner and it turned out great. One advantage I had with the 912 was that the surface was textured. In this car I would be painting a totally flat surface.
I bought the best 1" brush I could find and it worked great. The paint covered in one coat and looks great. I forgot to take a photo of the area under the brake booster.

I now have plenty of paint left for touching up any chips on the car.
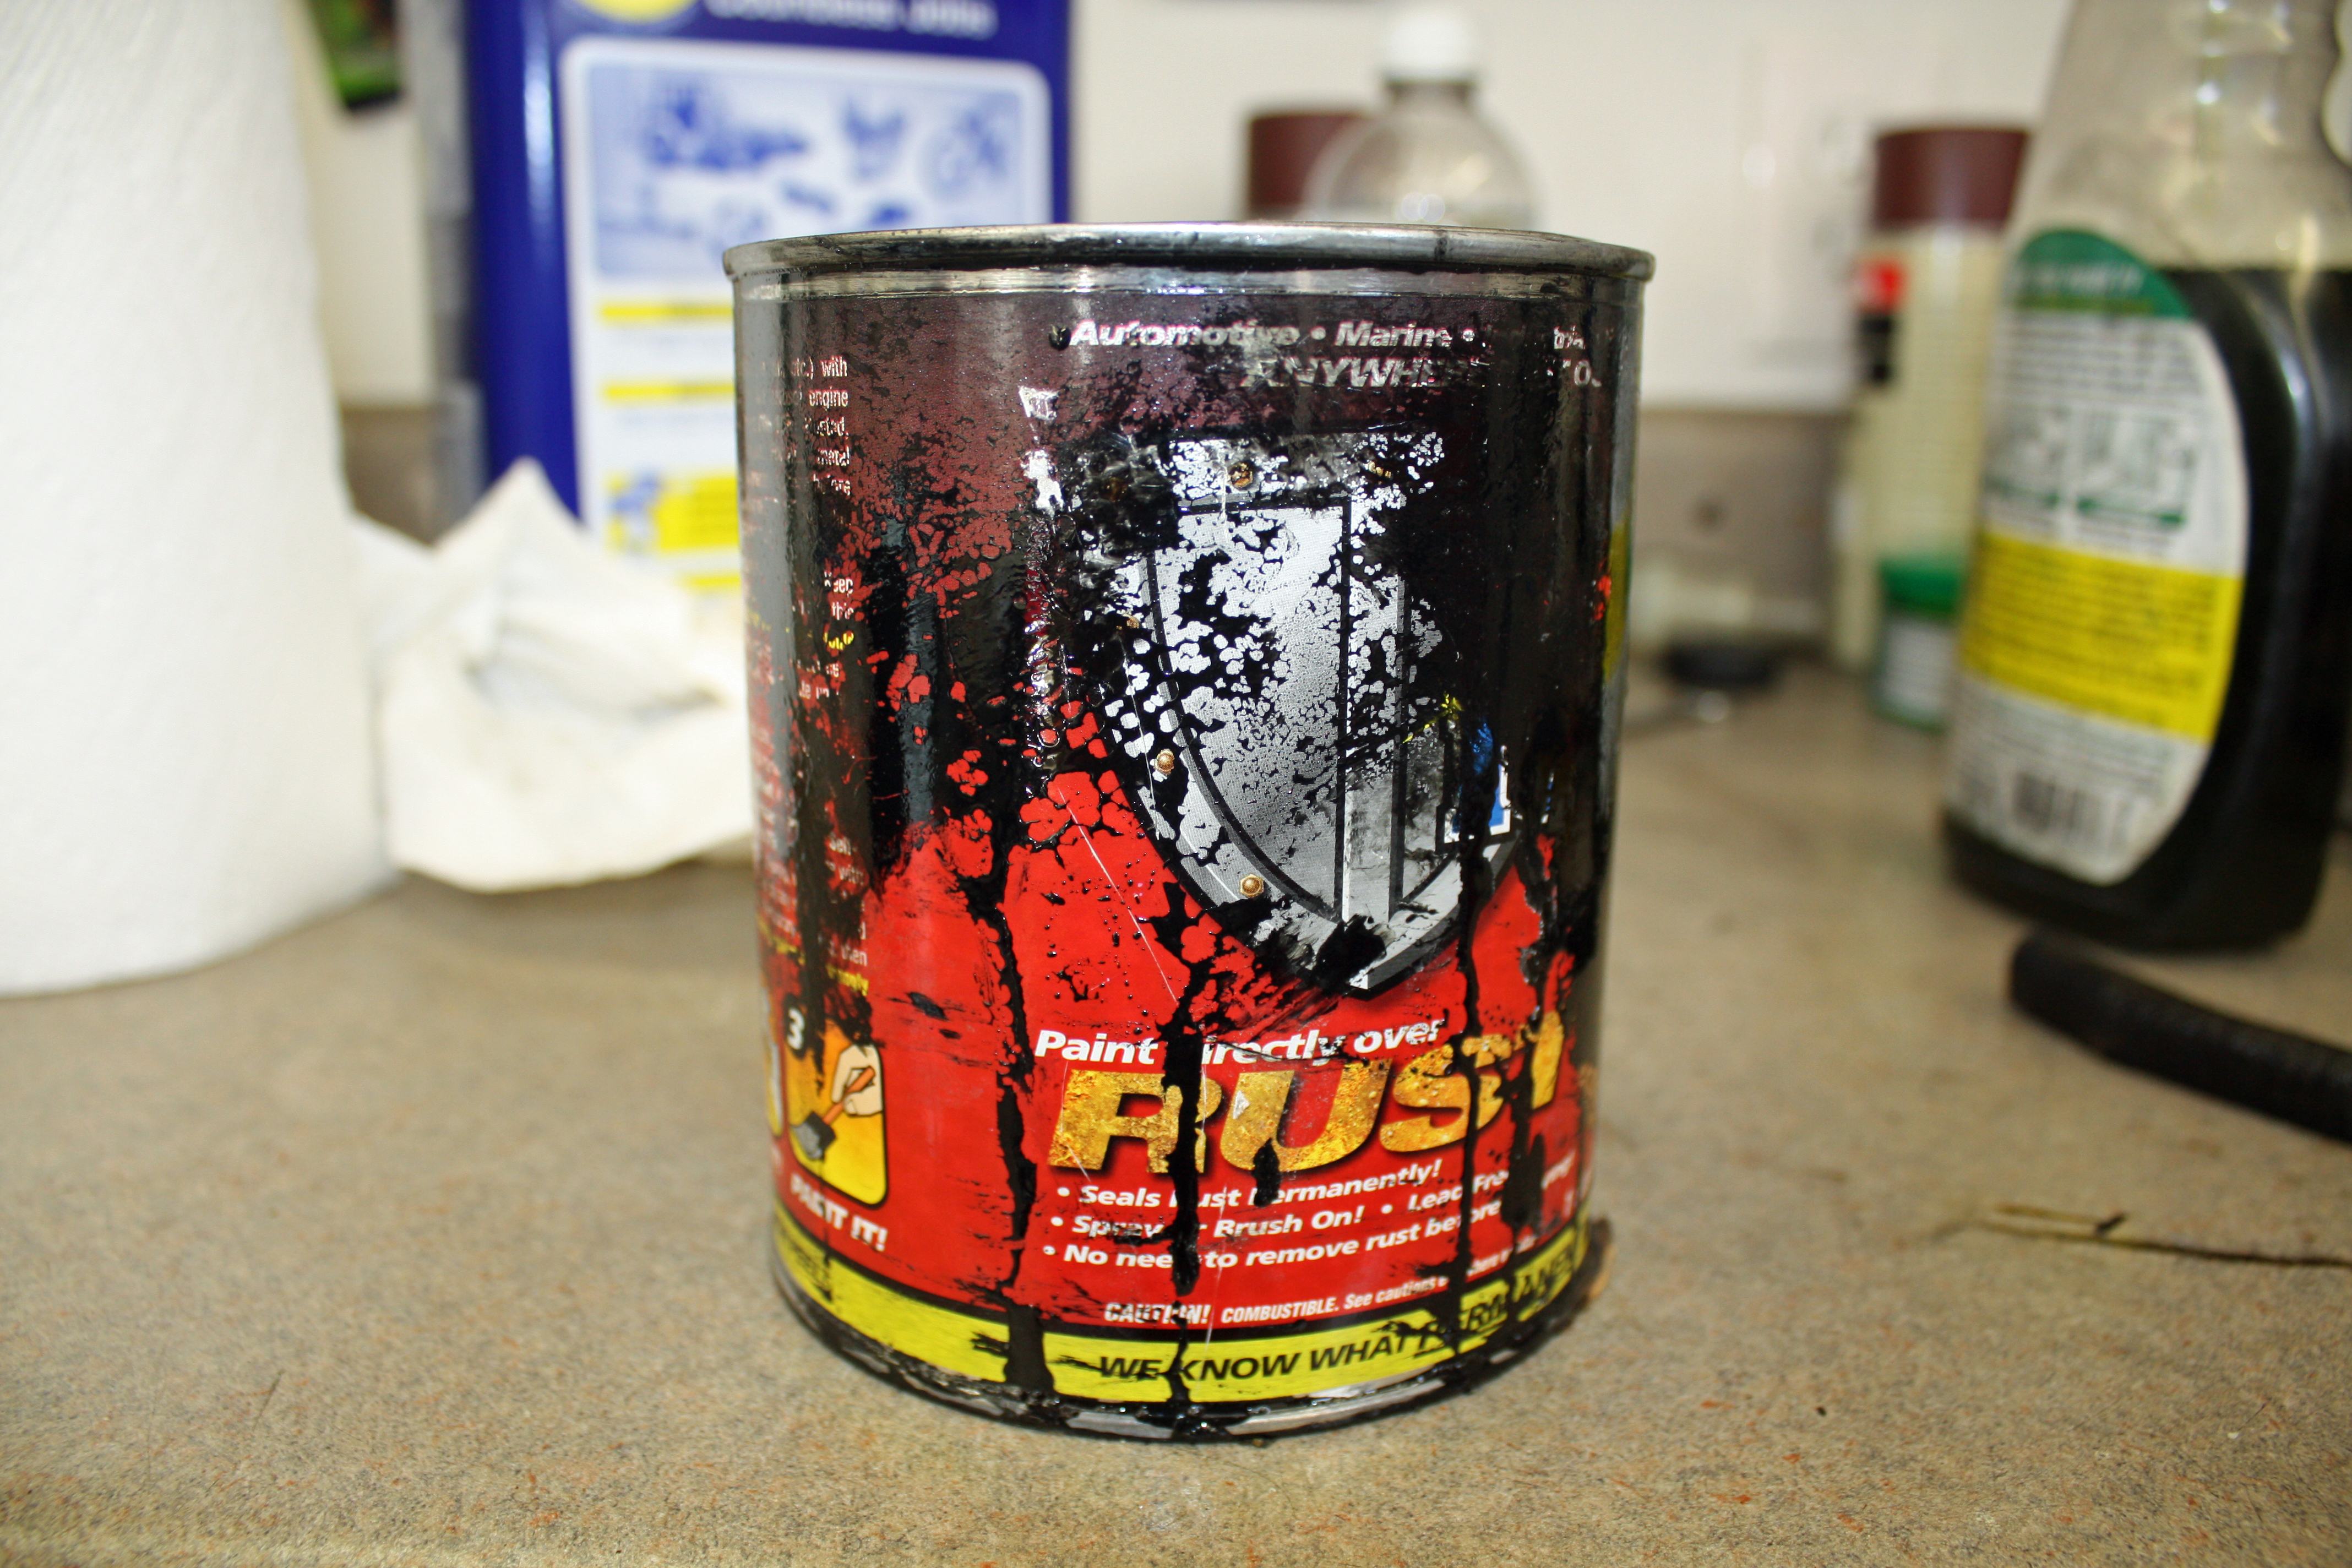
01-30-2017, 04:52 PM
#16
Member
Thread Starter
I finished cleaning up the engine bay today. I polished the right side as I had done on the left side. However, because of the battery being there, the finish wasn't as good on that side. After completing the polish, I waxed everything including the edges of the hood and the fenders as well as the radiator support.

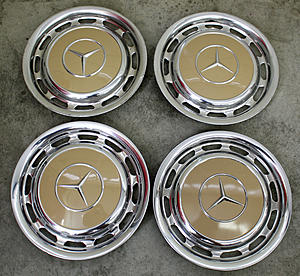
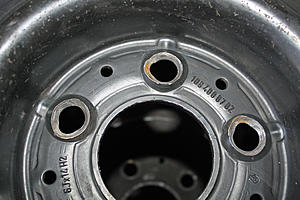
Since I had the hub caps off the car, I spent some time on cleaning them up today. Three of them are aluminum with one being steel. I used chrome polish on the steel hub cap and aluminum polish on the other three as well as paint polish on the painted areas. I then waxed all four of them. Two of the aluminum caps has some curb rash and the paint is different on the steel cap, the lower right one in the photo below.
Last Thursday, I picked up the parts that had been refinished in yellow zinc. Tomorrow I can pick up the powder coated parts and I will be ready to put the engine bay back together.

In anticipation of replacing the exhaust, I have sprayed penetrating oil on the exhaust bolts.


Since I had the hub caps off the car, I spent some time on cleaning them up today. Three of them are aluminum with one being steel. I used chrome polish on the steel hub cap and aluminum polish on the other three as well as paint polish on the painted areas. I then waxed all four of them. Two of the aluminum caps has some curb rash and the paint is different on the steel cap, the lower right one in the photo below.

Last Thursday, I picked up the parts that had been refinished in yellow zinc. Tomorrow I can pick up the powder coated parts and I will be ready to put the engine bay back together.

In anticipation of replacing the exhaust, I have sprayed penetrating oil on the exhaust bolts.

 01-31-2017, 06:02 PM
#17
Member
Thread Starter
I took the wheels to a local tire place to have them balanced. We soon found out why I had some vibration as, on one of the wheels, the bolt holes had been hogged out so much that the wheel probably would not center. The spare wheel was fine but the tire was a different brand from the four others, so we switched tires. I am looking for a wheel if anyone has a good one.
Between running around getting the tires balanced and picking up the freshly powder coated pieces, I didn't have a lot of time to spend working on the car. The powder coated pieces look great. Also, my new carpet kit arrived today. These parts as well as the new hood pad are being stored in my bedroom.


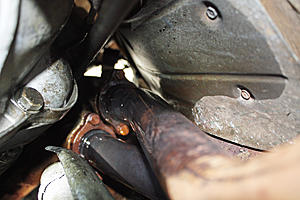
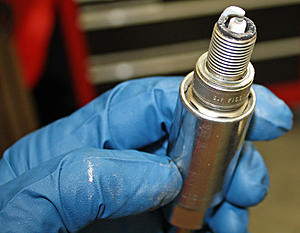
I did have time to install a new set of plug wires as well as a new distributor cap. I had also ordered a new rotor but the one on my distributor was different and, I assume, part of the electronic ignition. I will have to see where I can get one like it. The old plug wires were not in very good condition. Since the spark plugs were replaced only four thousand miles ago, I did not replace them. However, I did pull all eight plugs to see that they looked like. They all looked like the one in the photo below and I was pleased with that.
 '
'


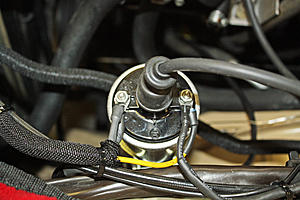
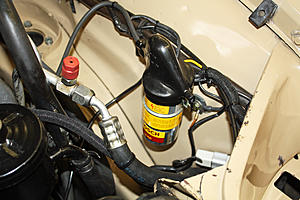
I did have time to re-locate the ignition box. I found a great place on the side of the radiator support. I ran out of time to finish it up as it was time for my wife, the dog and I to take our two mile walk.


Between running around getting the tires balanced and picking up the freshly powder coated pieces, I didn't have a lot of time to spend working on the car. The powder coated pieces look great. Also, my new carpet kit arrived today. These parts as well as the new hood pad are being stored in my bedroom.


I did have time to install a new set of plug wires as well as a new distributor cap. I had also ordered a new rotor but the one on my distributor was different and, I assume, part of the electronic ignition. I will have to see where I can get one like it. The old plug wires were not in very good condition. Since the spark plugs were replaced only four thousand miles ago, I did not replace them. However, I did pull all eight plugs to see that they looked like. They all looked like the one in the photo below and I was pleased with that.
 '
'


I did have time to re-locate the ignition box. I found a great place on the side of the radiator support. I ran out of time to finish it up as it was time for my wife, the dog and I to take our two mile walk.

 02-01-2017, 06:52 PM
#19
Member
Thread Starter
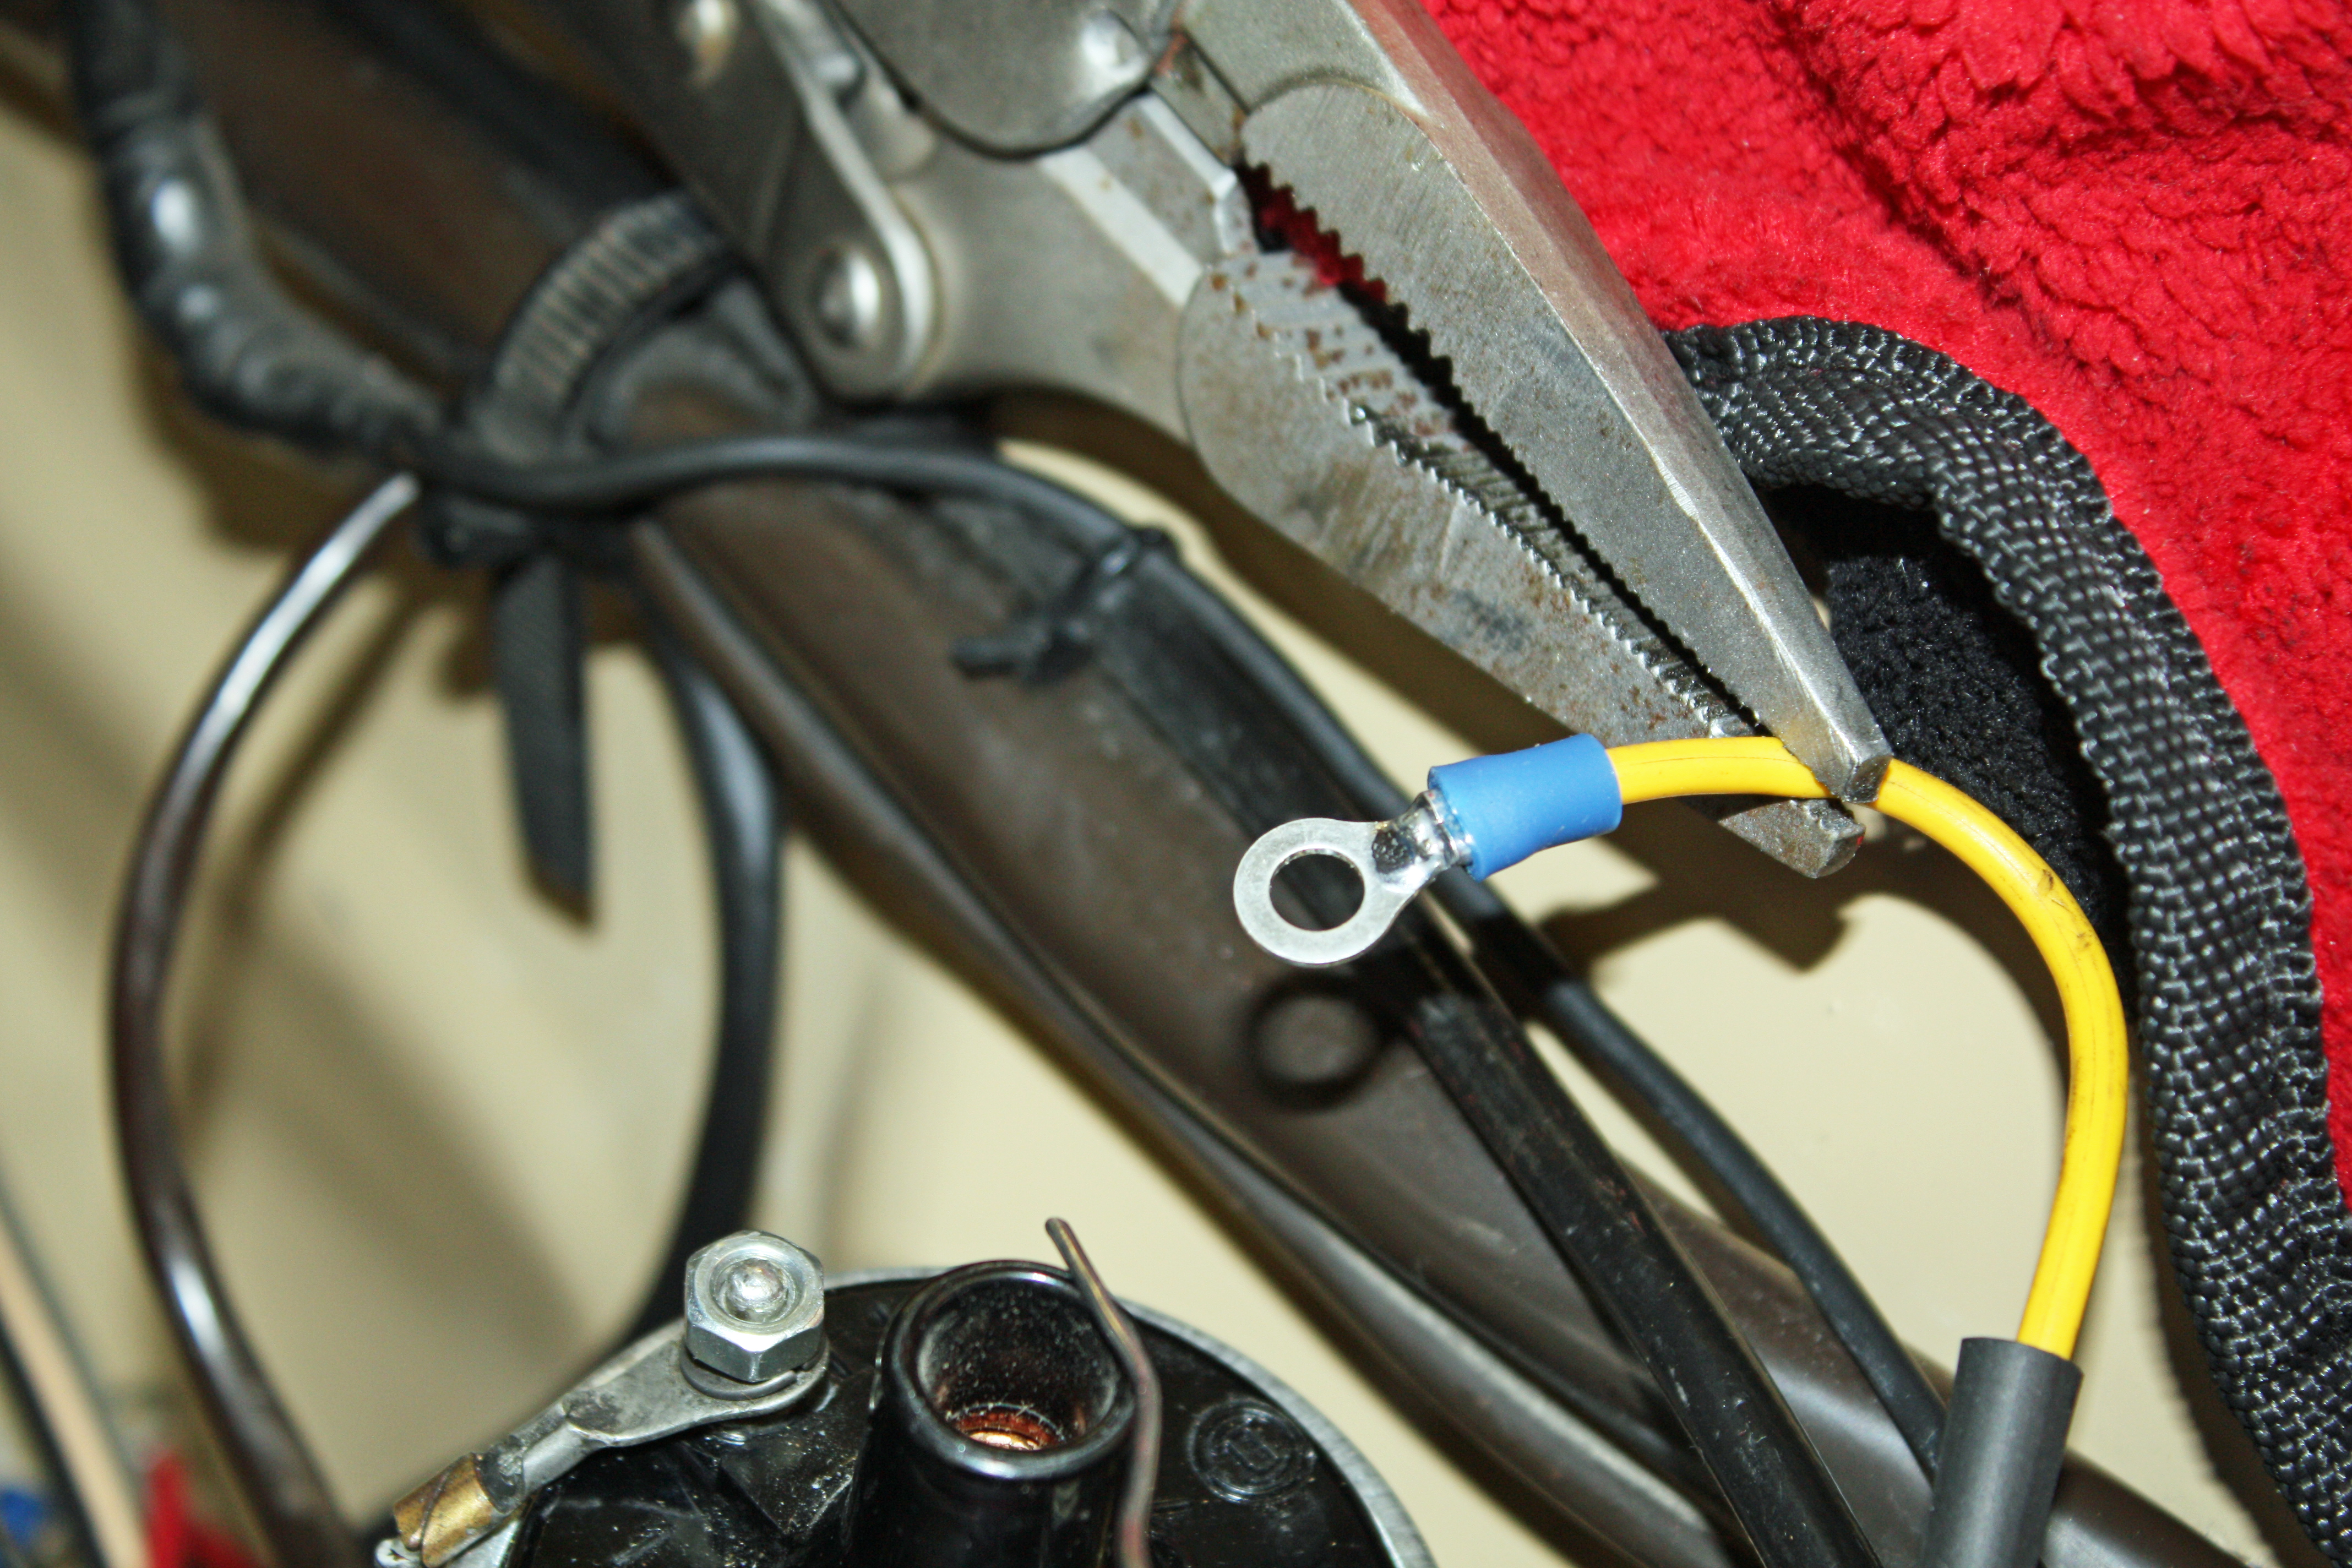
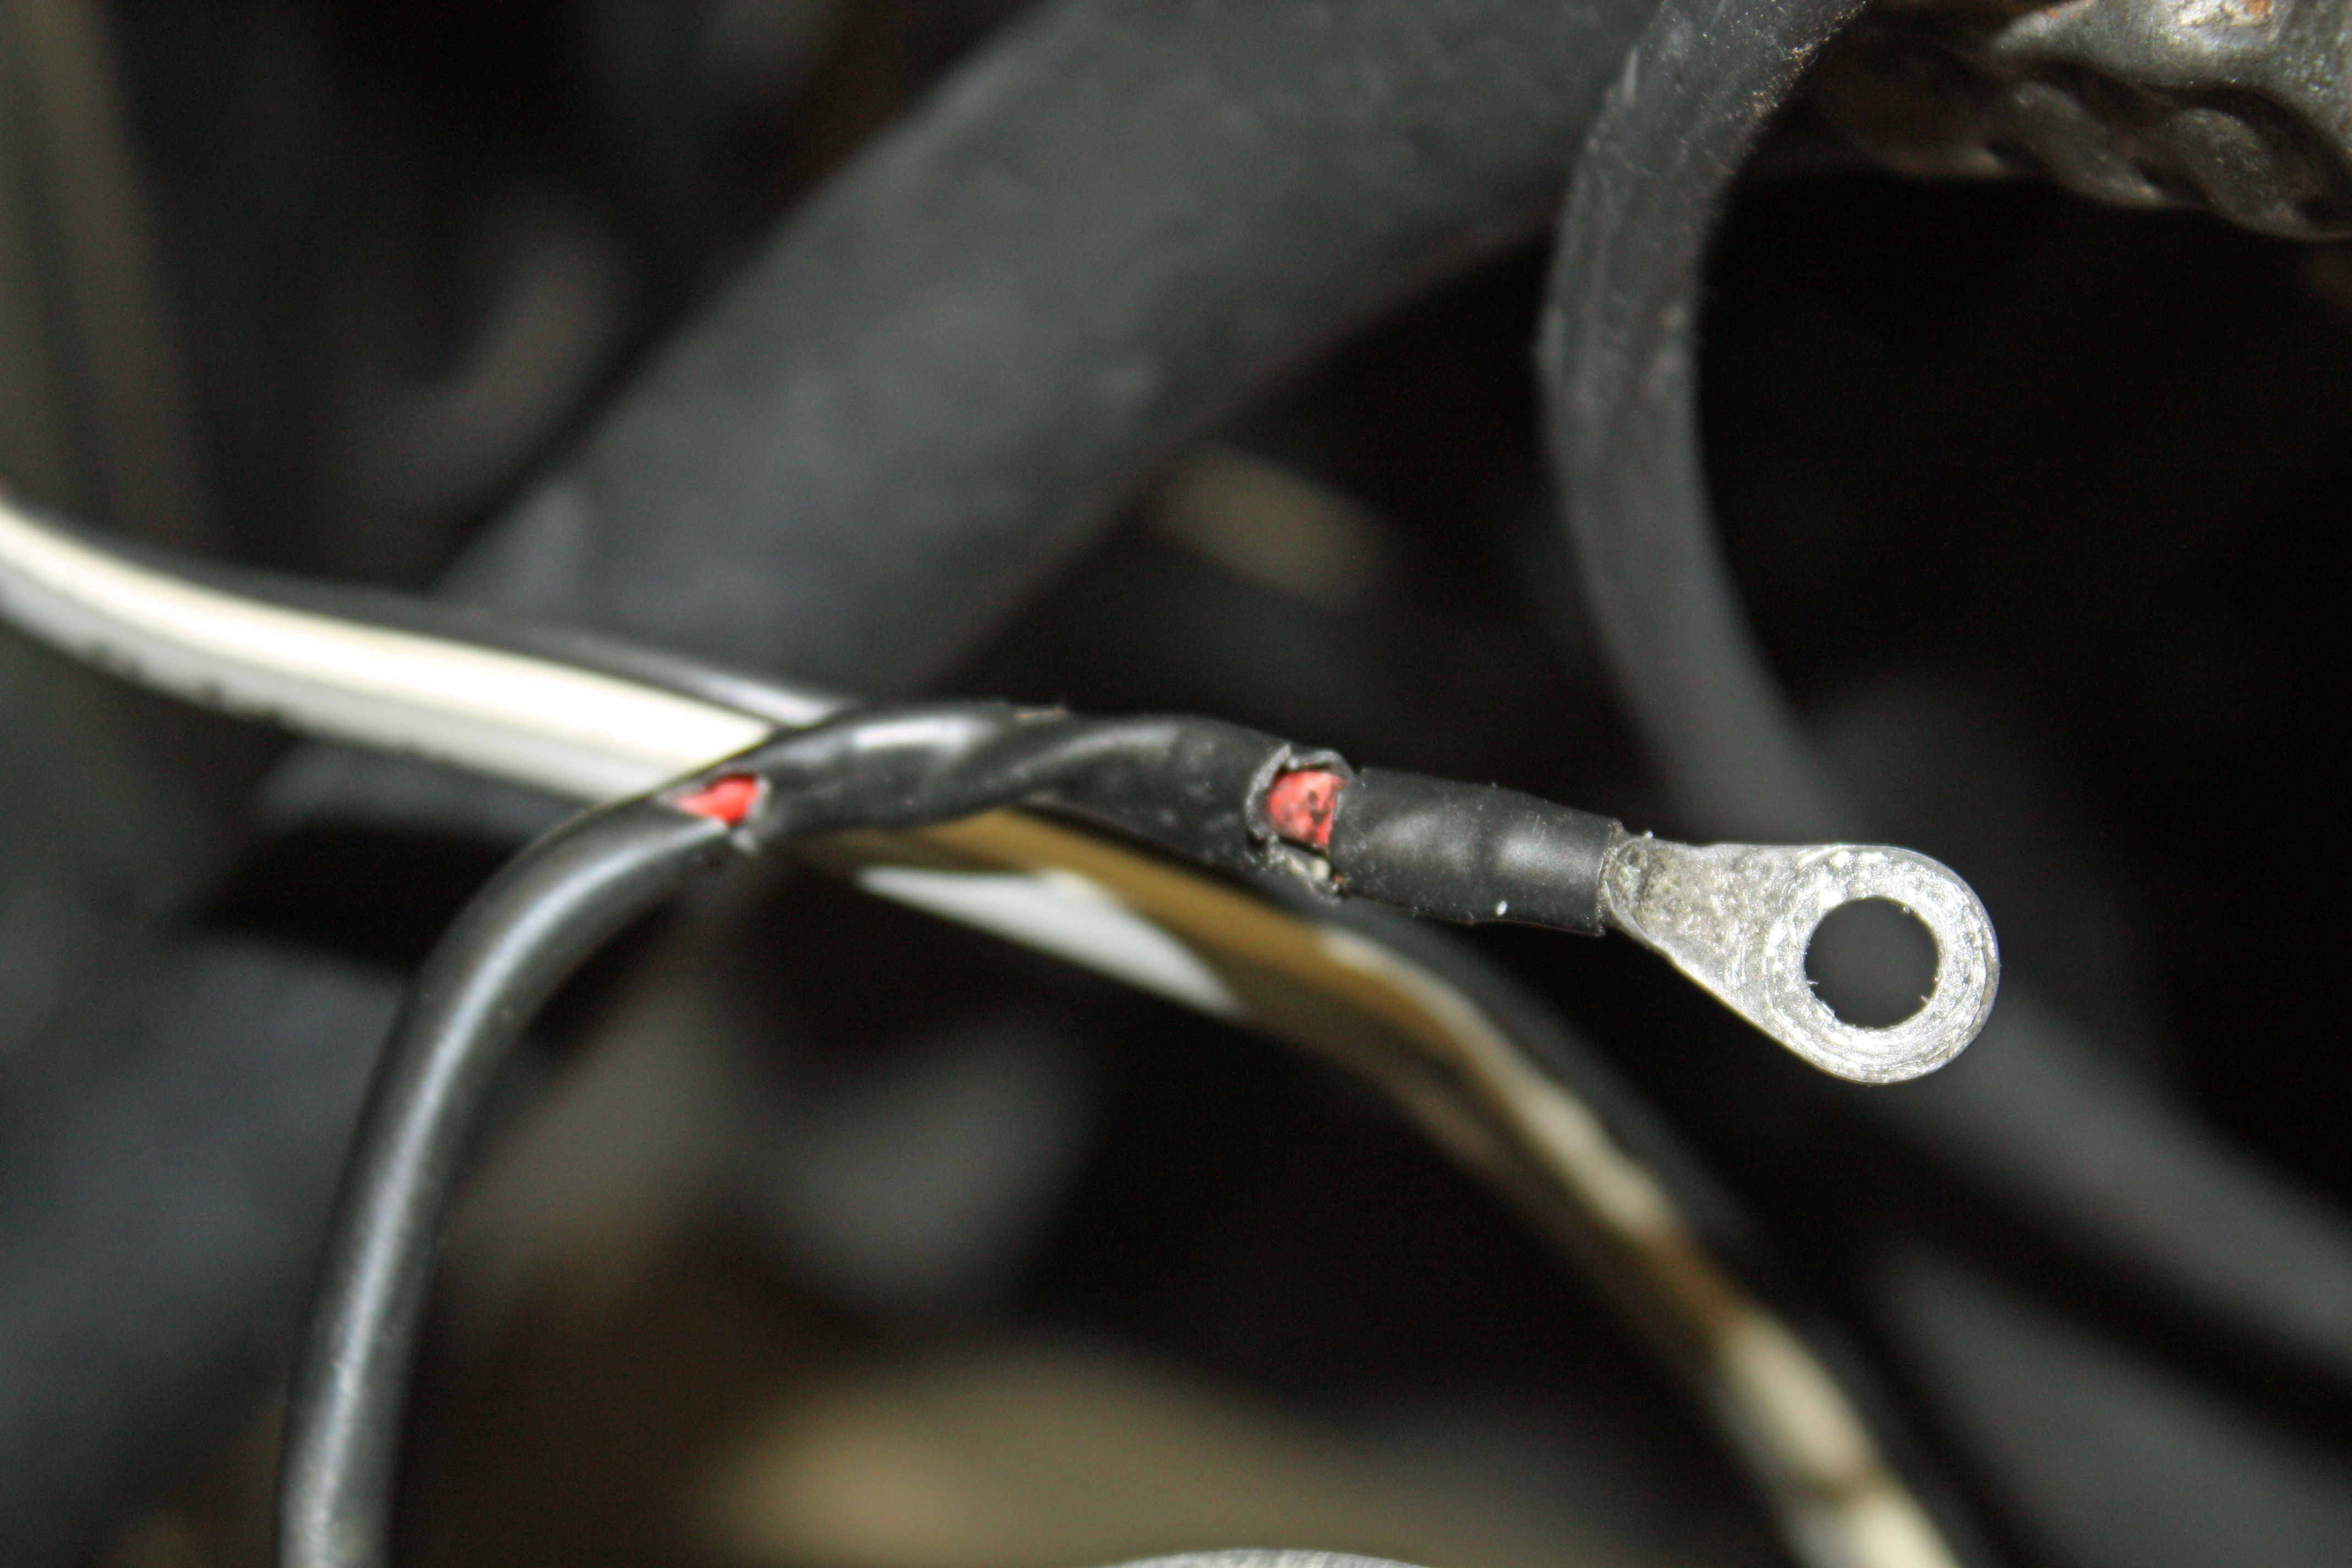
It was "fiddly" day today. First up was finishing the wiring on the ignition box. Whoever installed it coiled up the excess wire rather than cut it to size. After doing the measuring, I both crimped and soldered the new connections. These connections were made at the coil and a separate harness that went to the distributor. On previous Porsche's, I had experienced plastic covers for the coil. Mercedes has one for their coils as well. I also used shrink wrap on some of the existing harness that had cracking protective coverings.


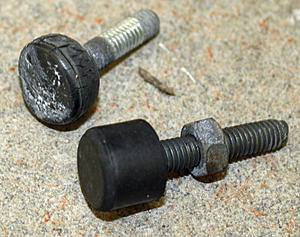
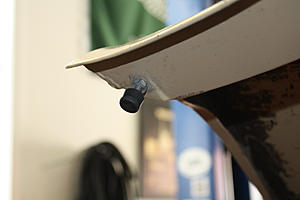
With that side finished, it was time to move on. Among the parts I have ordered were new hood bumper stops as the old ones were, as they say on "Wheeler Dealers", perished. As was the air cleaner mount.

Two of the emission hoses also needed to be replaced. According to the records, the fuel hoses are not very old and they all appeared to be in good condition.


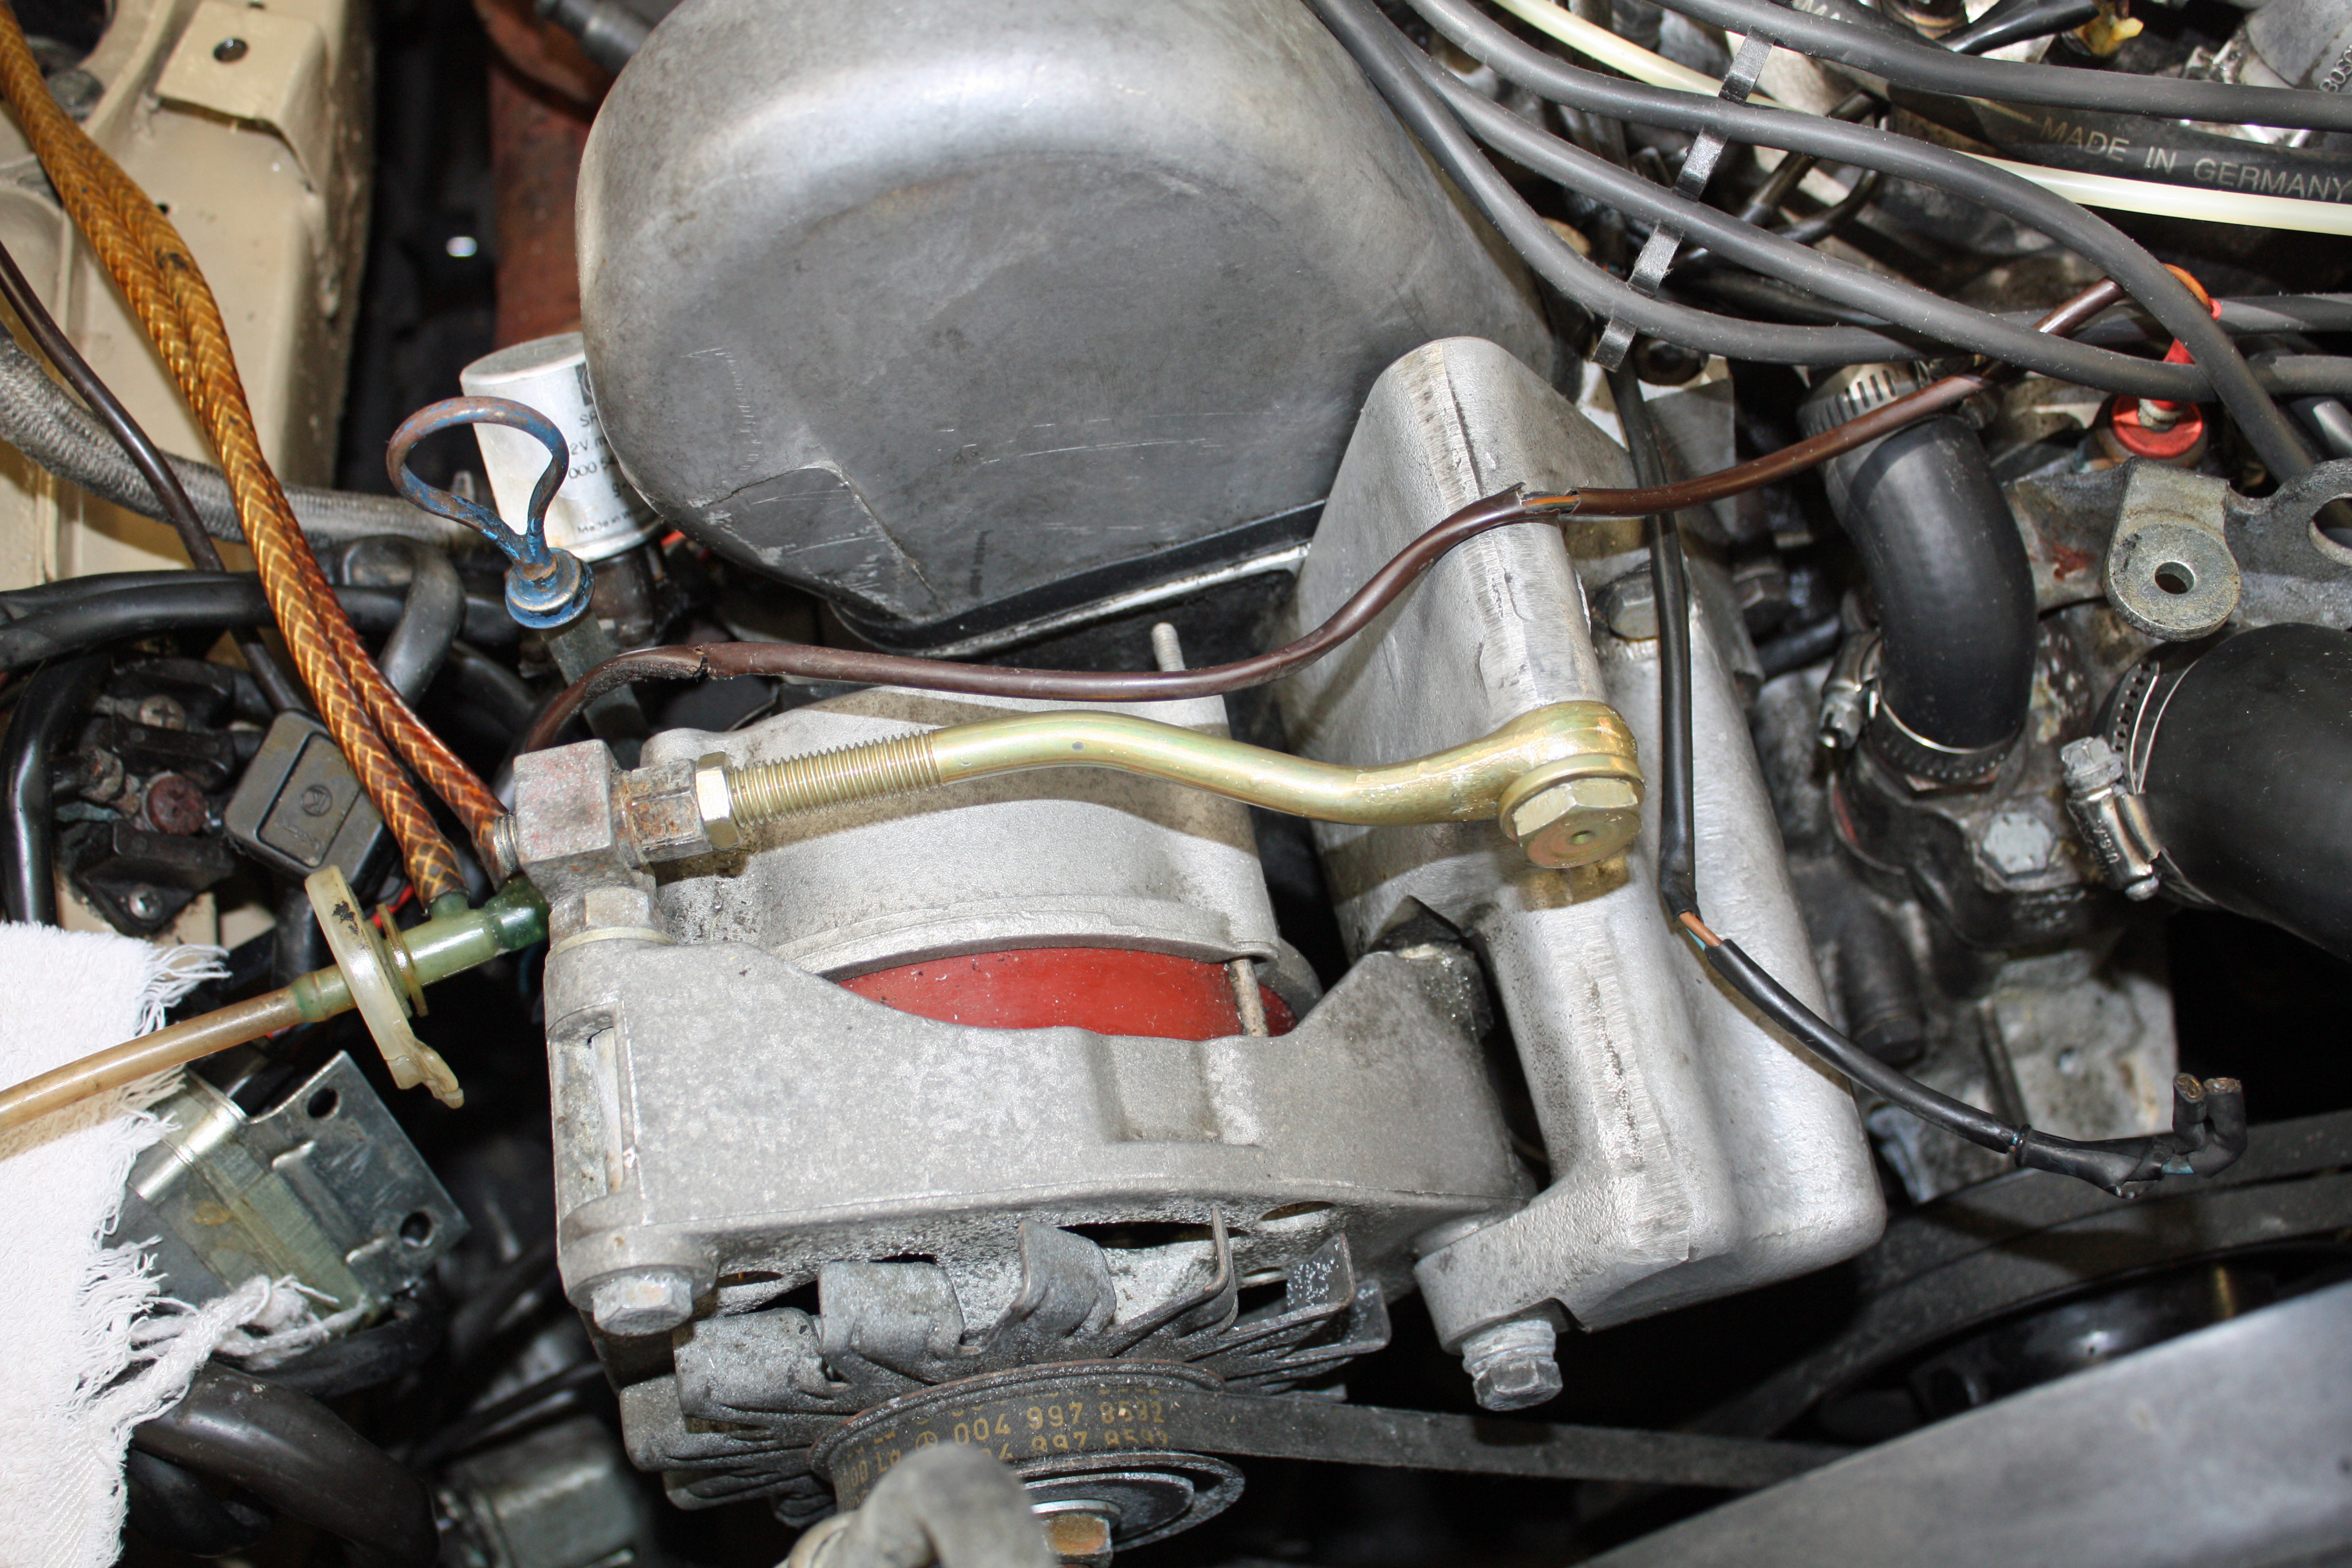
The alternator arm was one of the pieces that I had coated with yellow zinc.

In preparation for working on the right side of the engine bay, I spent the remainder of the day cleaning up the hardware.


With that side finished, it was time to move on. Among the parts I have ordered were new hood bumper stops as the old ones were, as they say on "Wheeler Dealers", perished. As was the air cleaner mount.


Two of the emission hoses also needed to be replaced. According to the records, the fuel hoses are not very old and they all appeared to be in good condition.


The alternator arm was one of the pieces that I had coated with yellow zinc.
In preparation for working on the right side of the engine bay, I spent the remainder of the day cleaning up the hardware.

 02-02-2017, 05:47 PM
#20
Member
Thread Starter
The first task today was installing the ECU. Before I could mount the bracket, I had to install the various electrical components on the side of the bracket. With that done, the bracket was installed and the ECU mounted.


Next up was installing the fuse rack. After mounting the rack to the firewall, I mounted the fuse holders and then did the wiring. The other components were then added. I did not install the fuses. After looking at the manual and receiving a reply from Tomguy, I knew that the fuses that had been used were not necessarily the correct ones. The owners manual says there was only one 25 amp fuse but there were three being used on my car. While the manual tells me what sizes of fuses should be used, it does not tell me physically where they go. If anyone can post a photo of the engine bay fuses, I would be appreciative. Since the fuses are color coded, I would know where the fuses should be.


I was ready to install the battery tray. My earlier wrapping of the exposed wiring harness now caused a problem as the new wrapping was too bulky to allow the battery tray to fit. I removed the convoluted tubing from the larger wiring harness and wrapped it with electrical tape. That did the trick and the tray was installed.
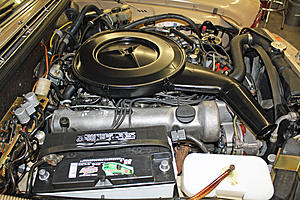
I was now getting close to finishing up the engine bay. In went the battery and the new windshield washer reservoir as well as the air cleaner.


I still have to re-install the auxiliary fan bracket, the hood pad and some detail work. Getting closer to having this part of the project finished.


Next up was installing the fuse rack. After mounting the rack to the firewall, I mounted the fuse holders and then did the wiring. The other components were then added. I did not install the fuses. After looking at the manual and receiving a reply from Tomguy, I knew that the fuses that had been used were not necessarily the correct ones. The owners manual says there was only one 25 amp fuse but there were three being used on my car. While the manual tells me what sizes of fuses should be used, it does not tell me physically where they go. If anyone can post a photo of the engine bay fuses, I would be appreciative. Since the fuses are color coded, I would know where the fuses should be.


I was ready to install the battery tray. My earlier wrapping of the exposed wiring harness now caused a problem as the new wrapping was too bulky to allow the battery tray to fit. I removed the convoluted tubing from the larger wiring harness and wrapped it with electrical tape. That did the trick and the tray was installed.


I was now getting close to finishing up the engine bay. In went the battery and the new windshield washer reservoir as well as the air cleaner.


I still have to re-install the auxiliary fan bracket, the hood pad and some detail work. Getting closer to having this part of the project finished.

 02-02-2017, 07:42 PM
#22
MBWorld Fanatic!

 02-03-2017, 04:04 PM
#23
Member
Thread Starter
When late in the afternoon yesterday I was so close to seeing the engine bay complete, I skipped one step. That was to install a seal around the inside of the air cleaner cover. I took care of that this morning.


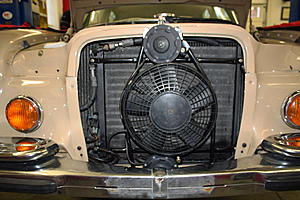
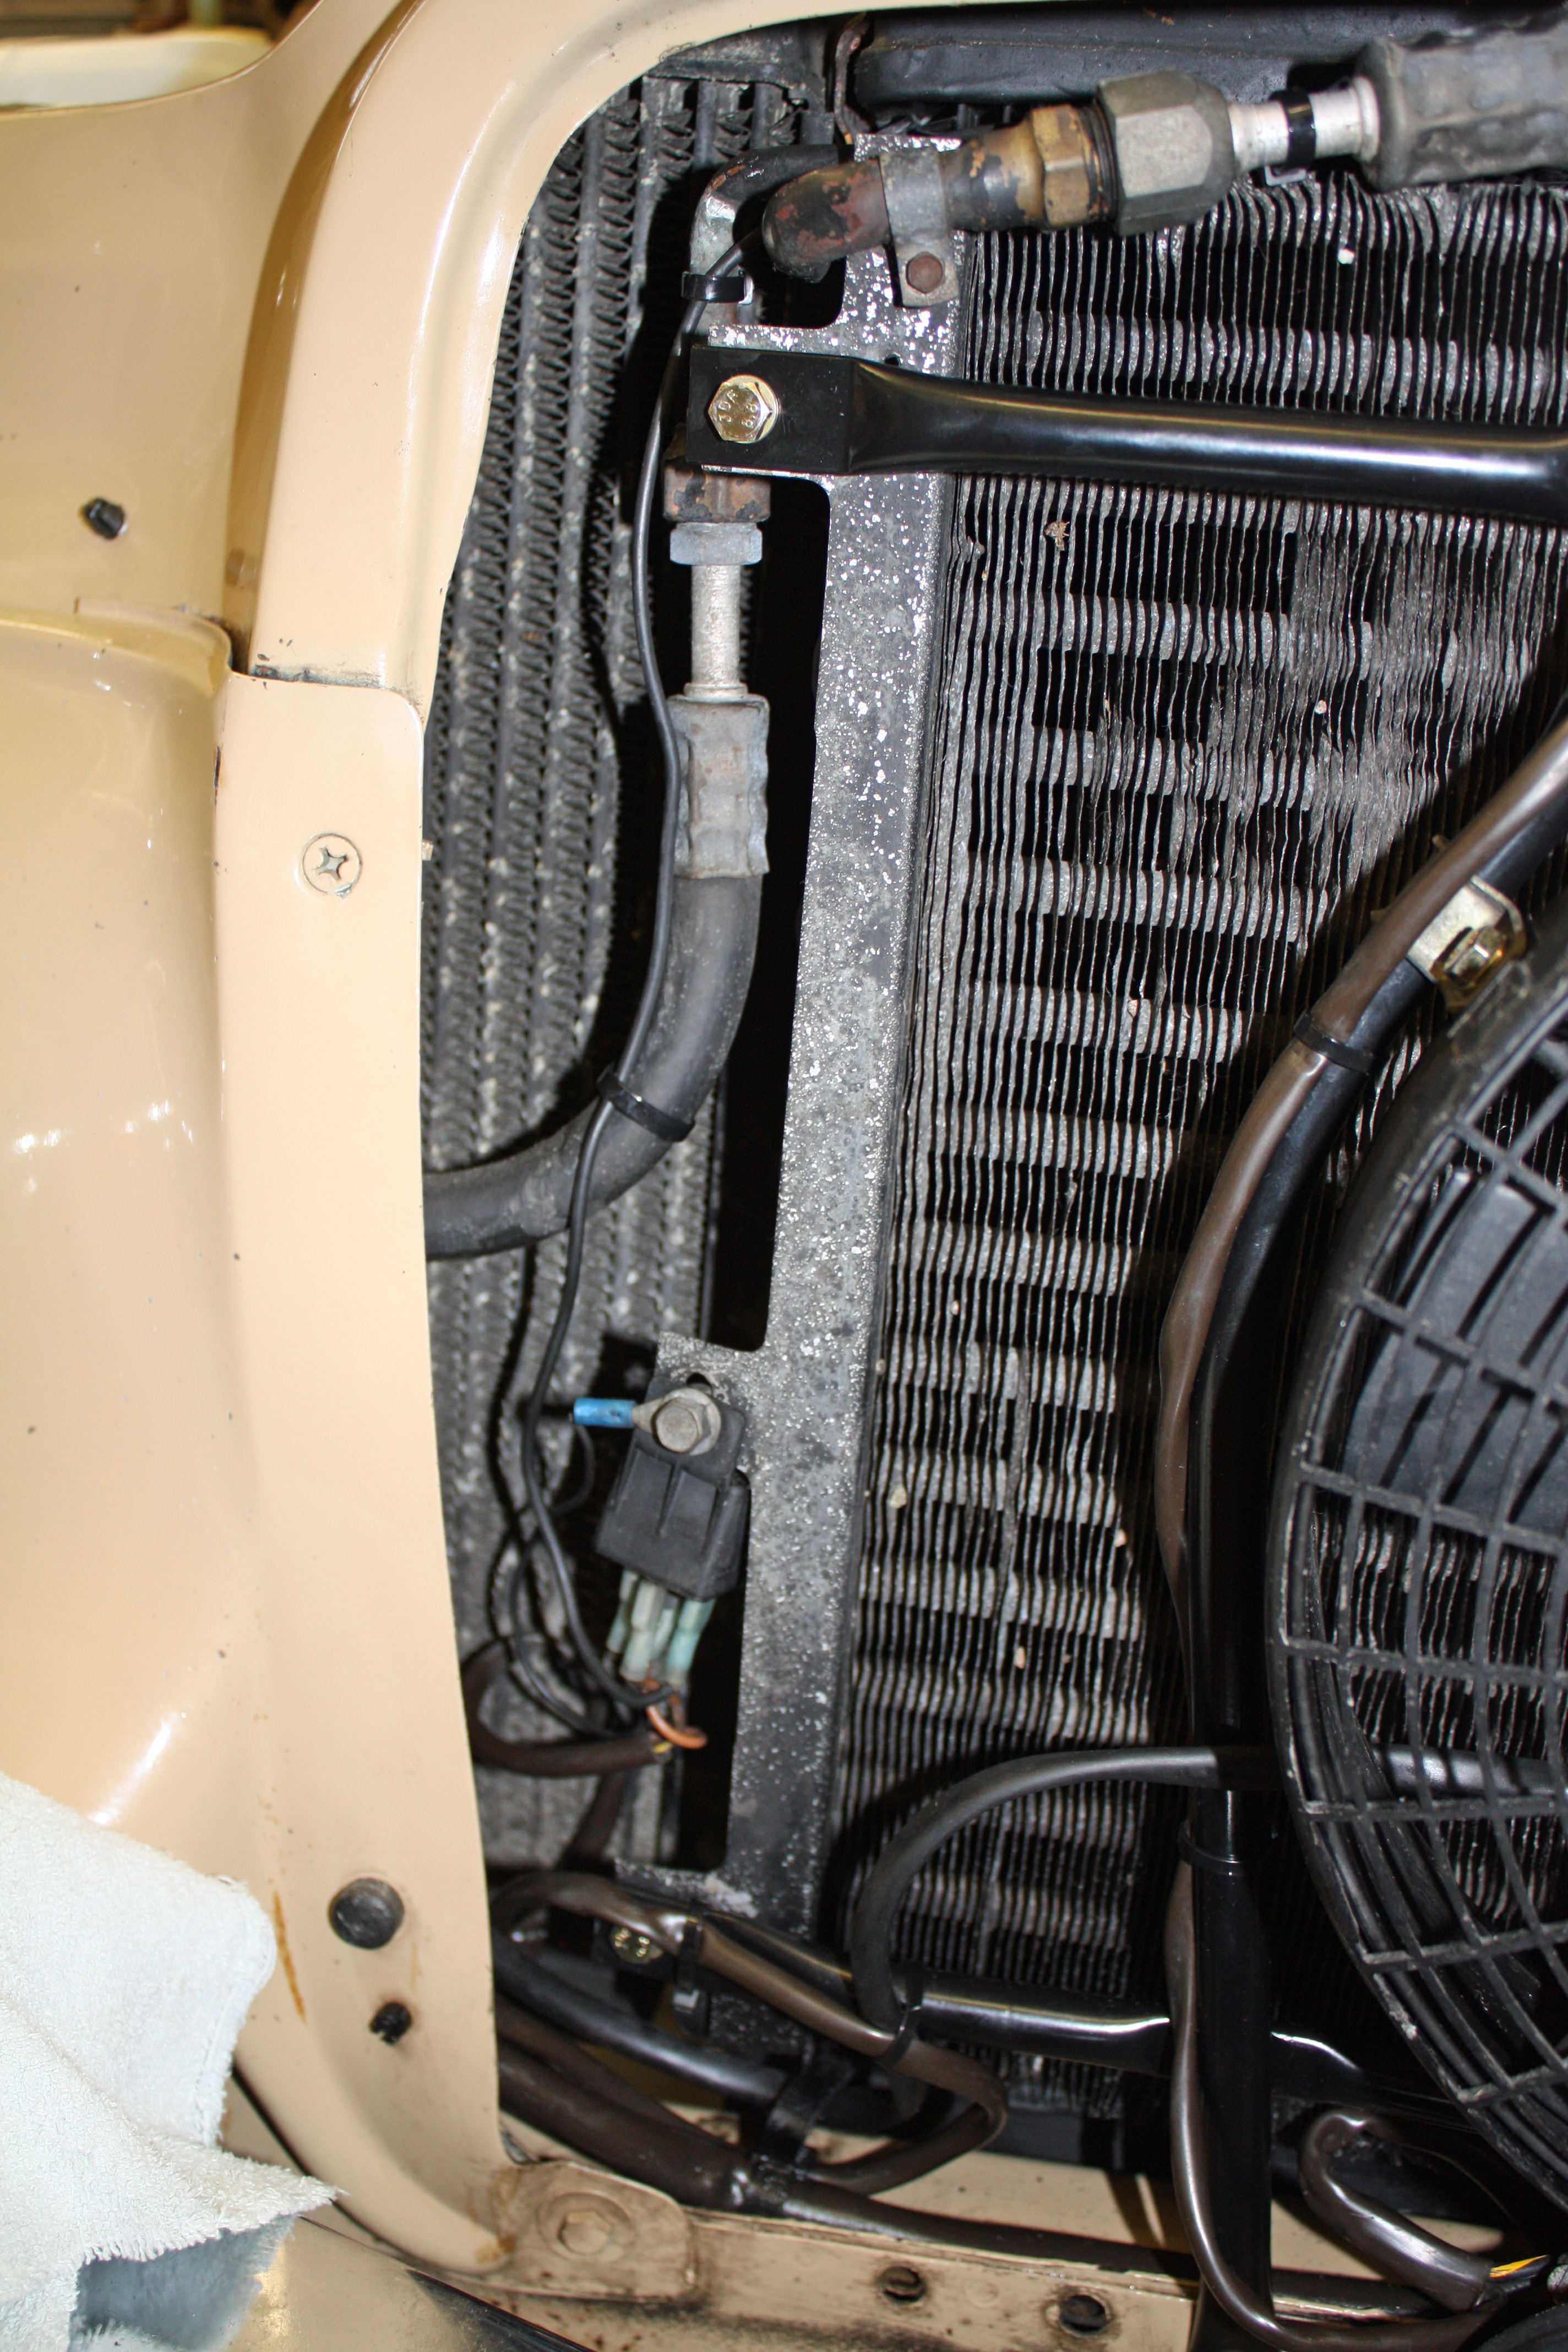
Now it was time to put the auxiliary fan and horns back on the car. I had the bracket powder coated. After cleaning everything, the result was that the edges of the condenser looked like they were sandblasted. My wife is an artist and she gave me her hand me down small brushes which really come in handy for touch up work. I painted the edges of the condenser with one of the brushes which really helped the overall look.


After having so much apart, I was apprehensive about starting up the car. Turned the key and it immediately started. Hooray!!!
All that remains in the engine compartment is replacing the hood pad. My buddy is going to help with that. We have a cool front going through this weekend but next week it is supposed to be back in the sixties. Since the glue has such a strong odor, we want to do it when we can have the garage door, windows and man door open.
02-04-2017, 09:42 PM
#24
Member
Thread Starter
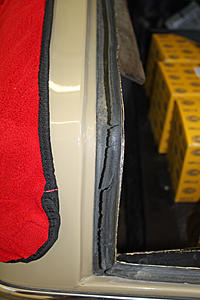
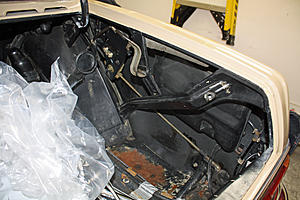
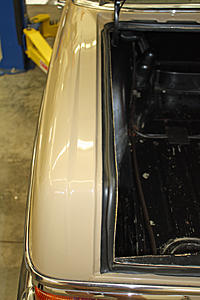
I had a few hours to work on the car today. The next victim was the trunk seal which was in the worst shape I have ever seen. It was so dry that it came off in chunks. After some scraping and using the adhesive remover, I had it ready to accept the new seal. I am putting off installing the new seal until after I clean up the trunk.

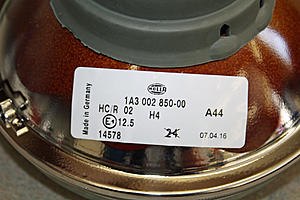
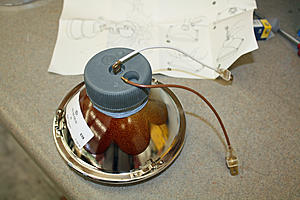
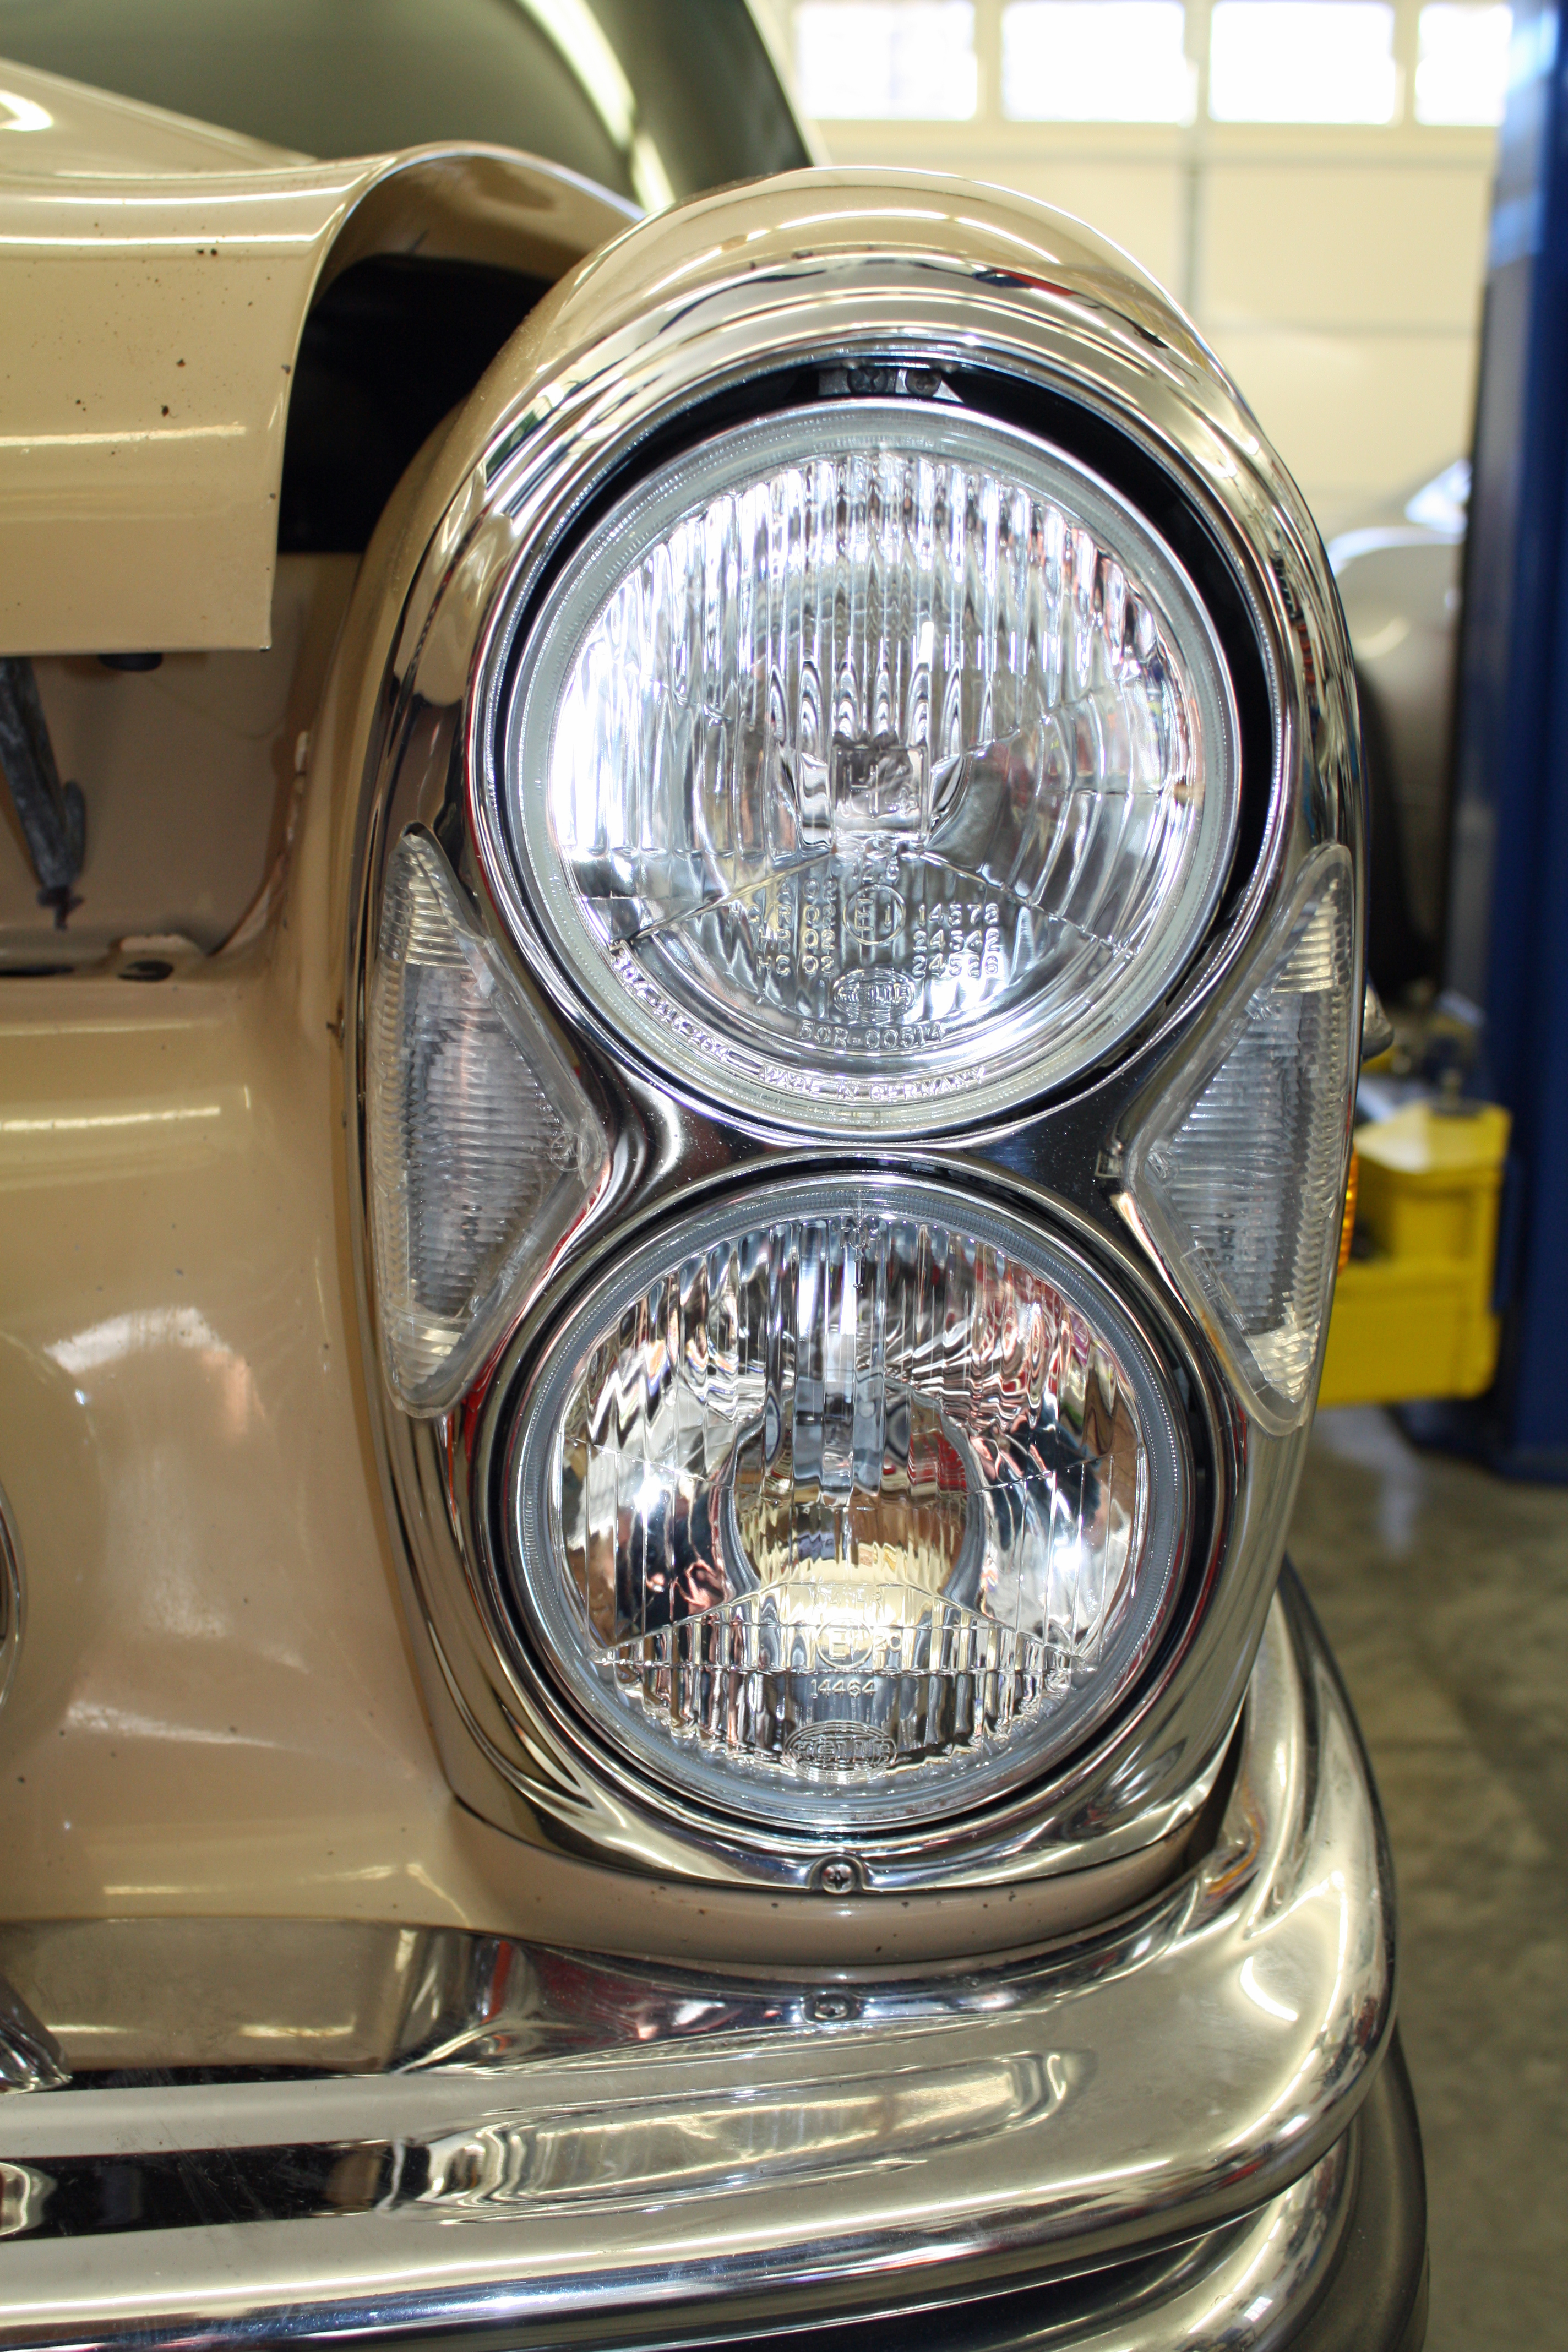
My next job brought me back to the seventies and eighties. The first thing I used to do when I bought a car back then was to change out the sealed beam headlights for European halogen lights. I did it because the lights were much brighter and the beam pattern was leagues ahead of the then current lights. My light of choice back then was usually Cibie. All of those lights were not DOT legal and, to my surprise, are still not legal today. I couldn't find Cibie lights but I did find a set of Hella lights that fit the bill.


The lights that were on the car were all Halogen but there were three different brands and they were still sealed beam.


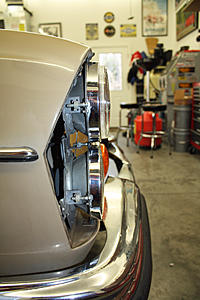
First I removed the headlight surrounds and used chrome polish on them. I then removed the headlight rings and polished them. I found it interesting that of the twelve screws on the four rings, after 45 years all but one still had the nylon retainer on the rear of the screw.

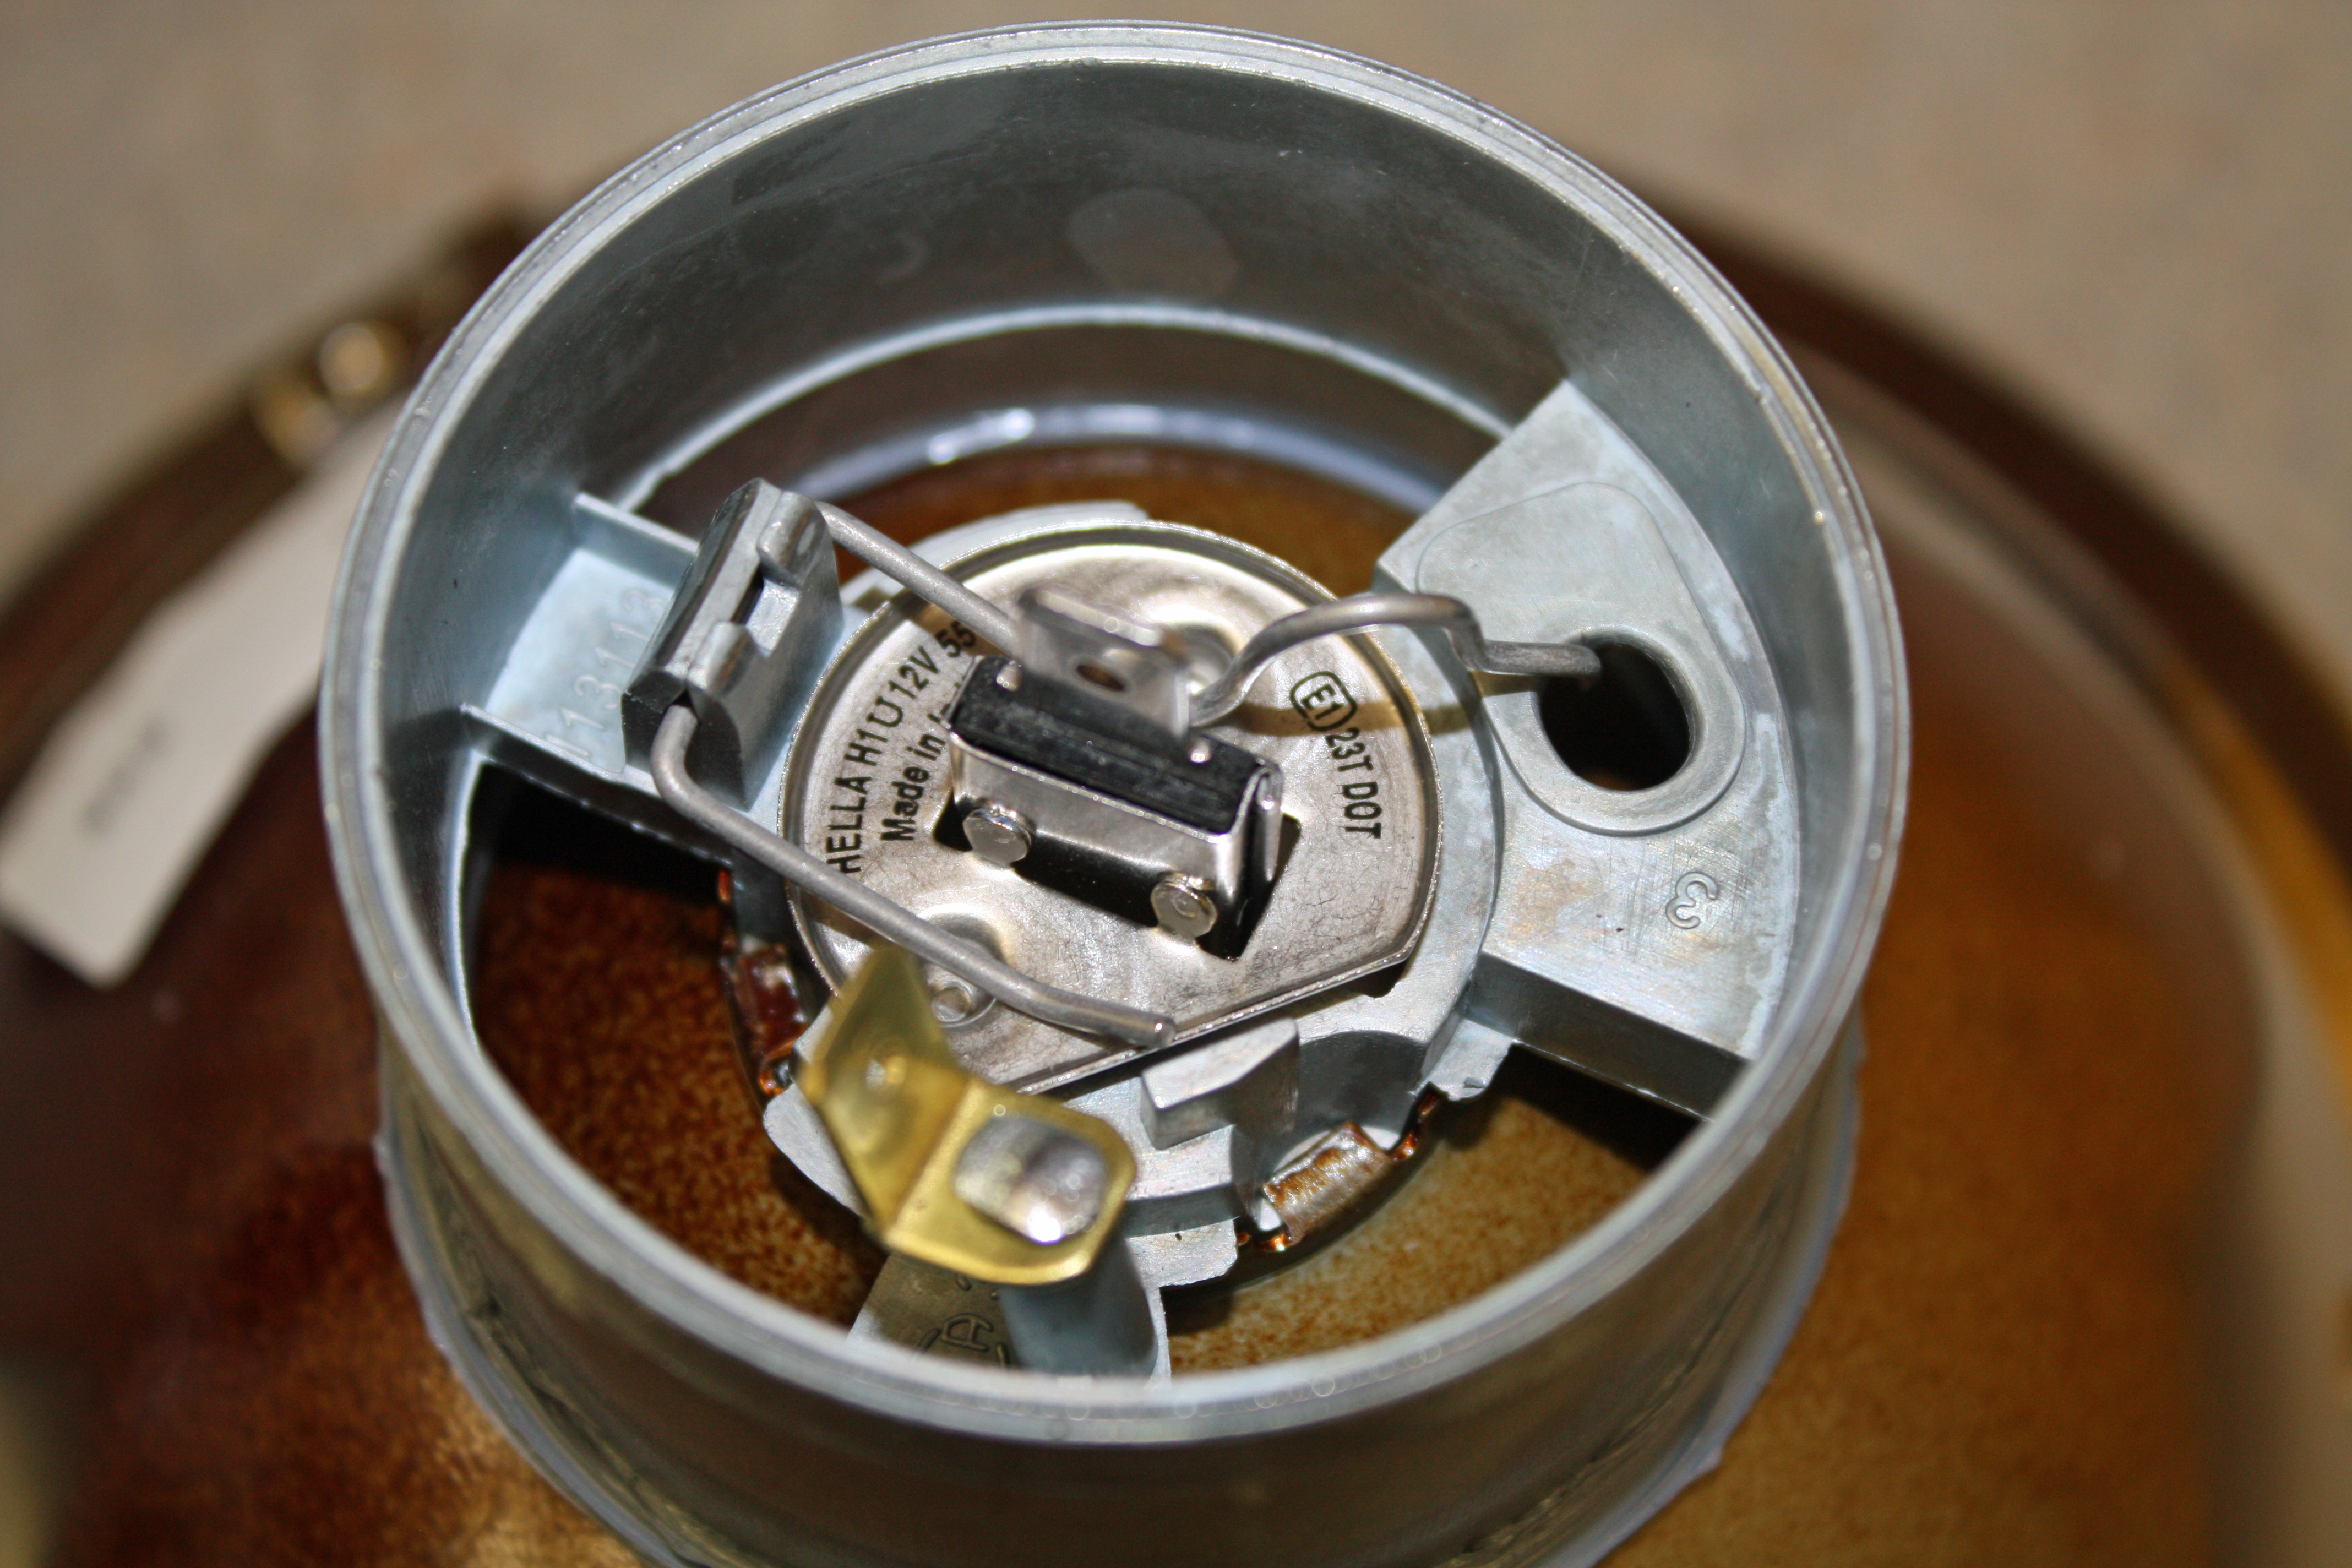
The upper headlight uses a H4 bulb that gives both a low and high beam.

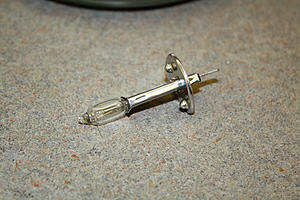
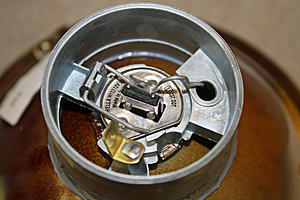
The lower headlight used a H1 bulb which requires adapter wires. This light will only come on with the high beams. Back in the day I would have used a 100 watt bulb but settled for 55 watt this time. With the 100 watt bulb, when high beams were engaged, the night was lit up big time.


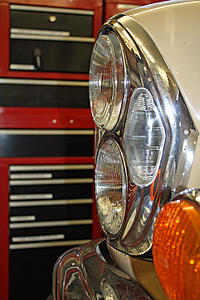
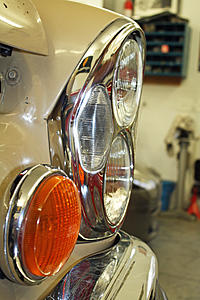
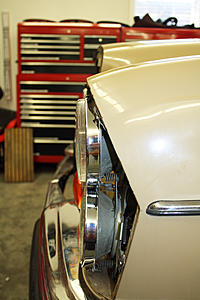
I have one issue with the headlights. The right front upper bulb protrudes out from the headlight surround further than the left one. I had noticed this with the old bulbs. I ran out of time to figure out why I have this situation. When I look at the headlights with the surrounds off, the two upper bulbs appear to have same relation to the lower bulbs on both sides. More head scratching will ensue tomorrow!!!


My next job brought me back to the seventies and eighties. The first thing I used to do when I bought a car back then was to change out the sealed beam headlights for European halogen lights. I did it because the lights were much brighter and the beam pattern was leagues ahead of the then current lights. My light of choice back then was usually Cibie. All of those lights were not DOT legal and, to my surprise, are still not legal today. I couldn't find Cibie lights but I did find a set of Hella lights that fit the bill.


The lights that were on the car were all Halogen but there were three different brands and they were still sealed beam.


First I removed the headlight surrounds and used chrome polish on them. I then removed the headlight rings and polished them. I found it interesting that of the twelve screws on the four rings, after 45 years all but one still had the nylon retainer on the rear of the screw.

The upper headlight uses a H4 bulb that gives both a low and high beam.


The lower headlight used a H1 bulb which requires adapter wires. This light will only come on with the high beams. Back in the day I would have used a 100 watt bulb but settled for 55 watt this time. With the 100 watt bulb, when high beams were engaged, the night was lit up big time.


I have one issue with the headlights. The right front upper bulb protrudes out from the headlight surround further than the left one. I had noticed this with the old bulbs. I ran out of time to figure out why I have this situation. When I look at the headlights with the surrounds off, the two upper bulbs appear to have same relation to the lower bulbs on both sides. More head scratching will ensue tomorrow!!!
02-05-2017, 07:13 PM
#25
Member
Thread Starter
I still don't understand why the upper right headlight protrudes. It is nearly a 1/2" further out than the left one. The framework that holds the headlight buckets looks the same on both sides with no evidence of damage. I looked under the fender on both sides and they look exactly the same. I can see no evidence of damage repair. The only difference I can see is that the center portion of the right framework appears to be stuck out more than the left side. I have thought of pushing it in but worry about being able to adjust the headlights. Kind of baffling.
I did have time to polish the front bumper where the license plate had been. Looks much better.

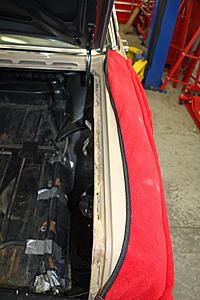
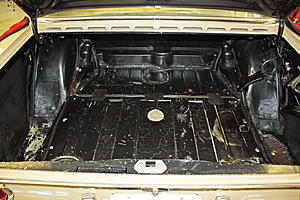
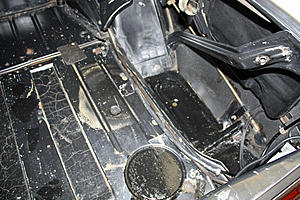
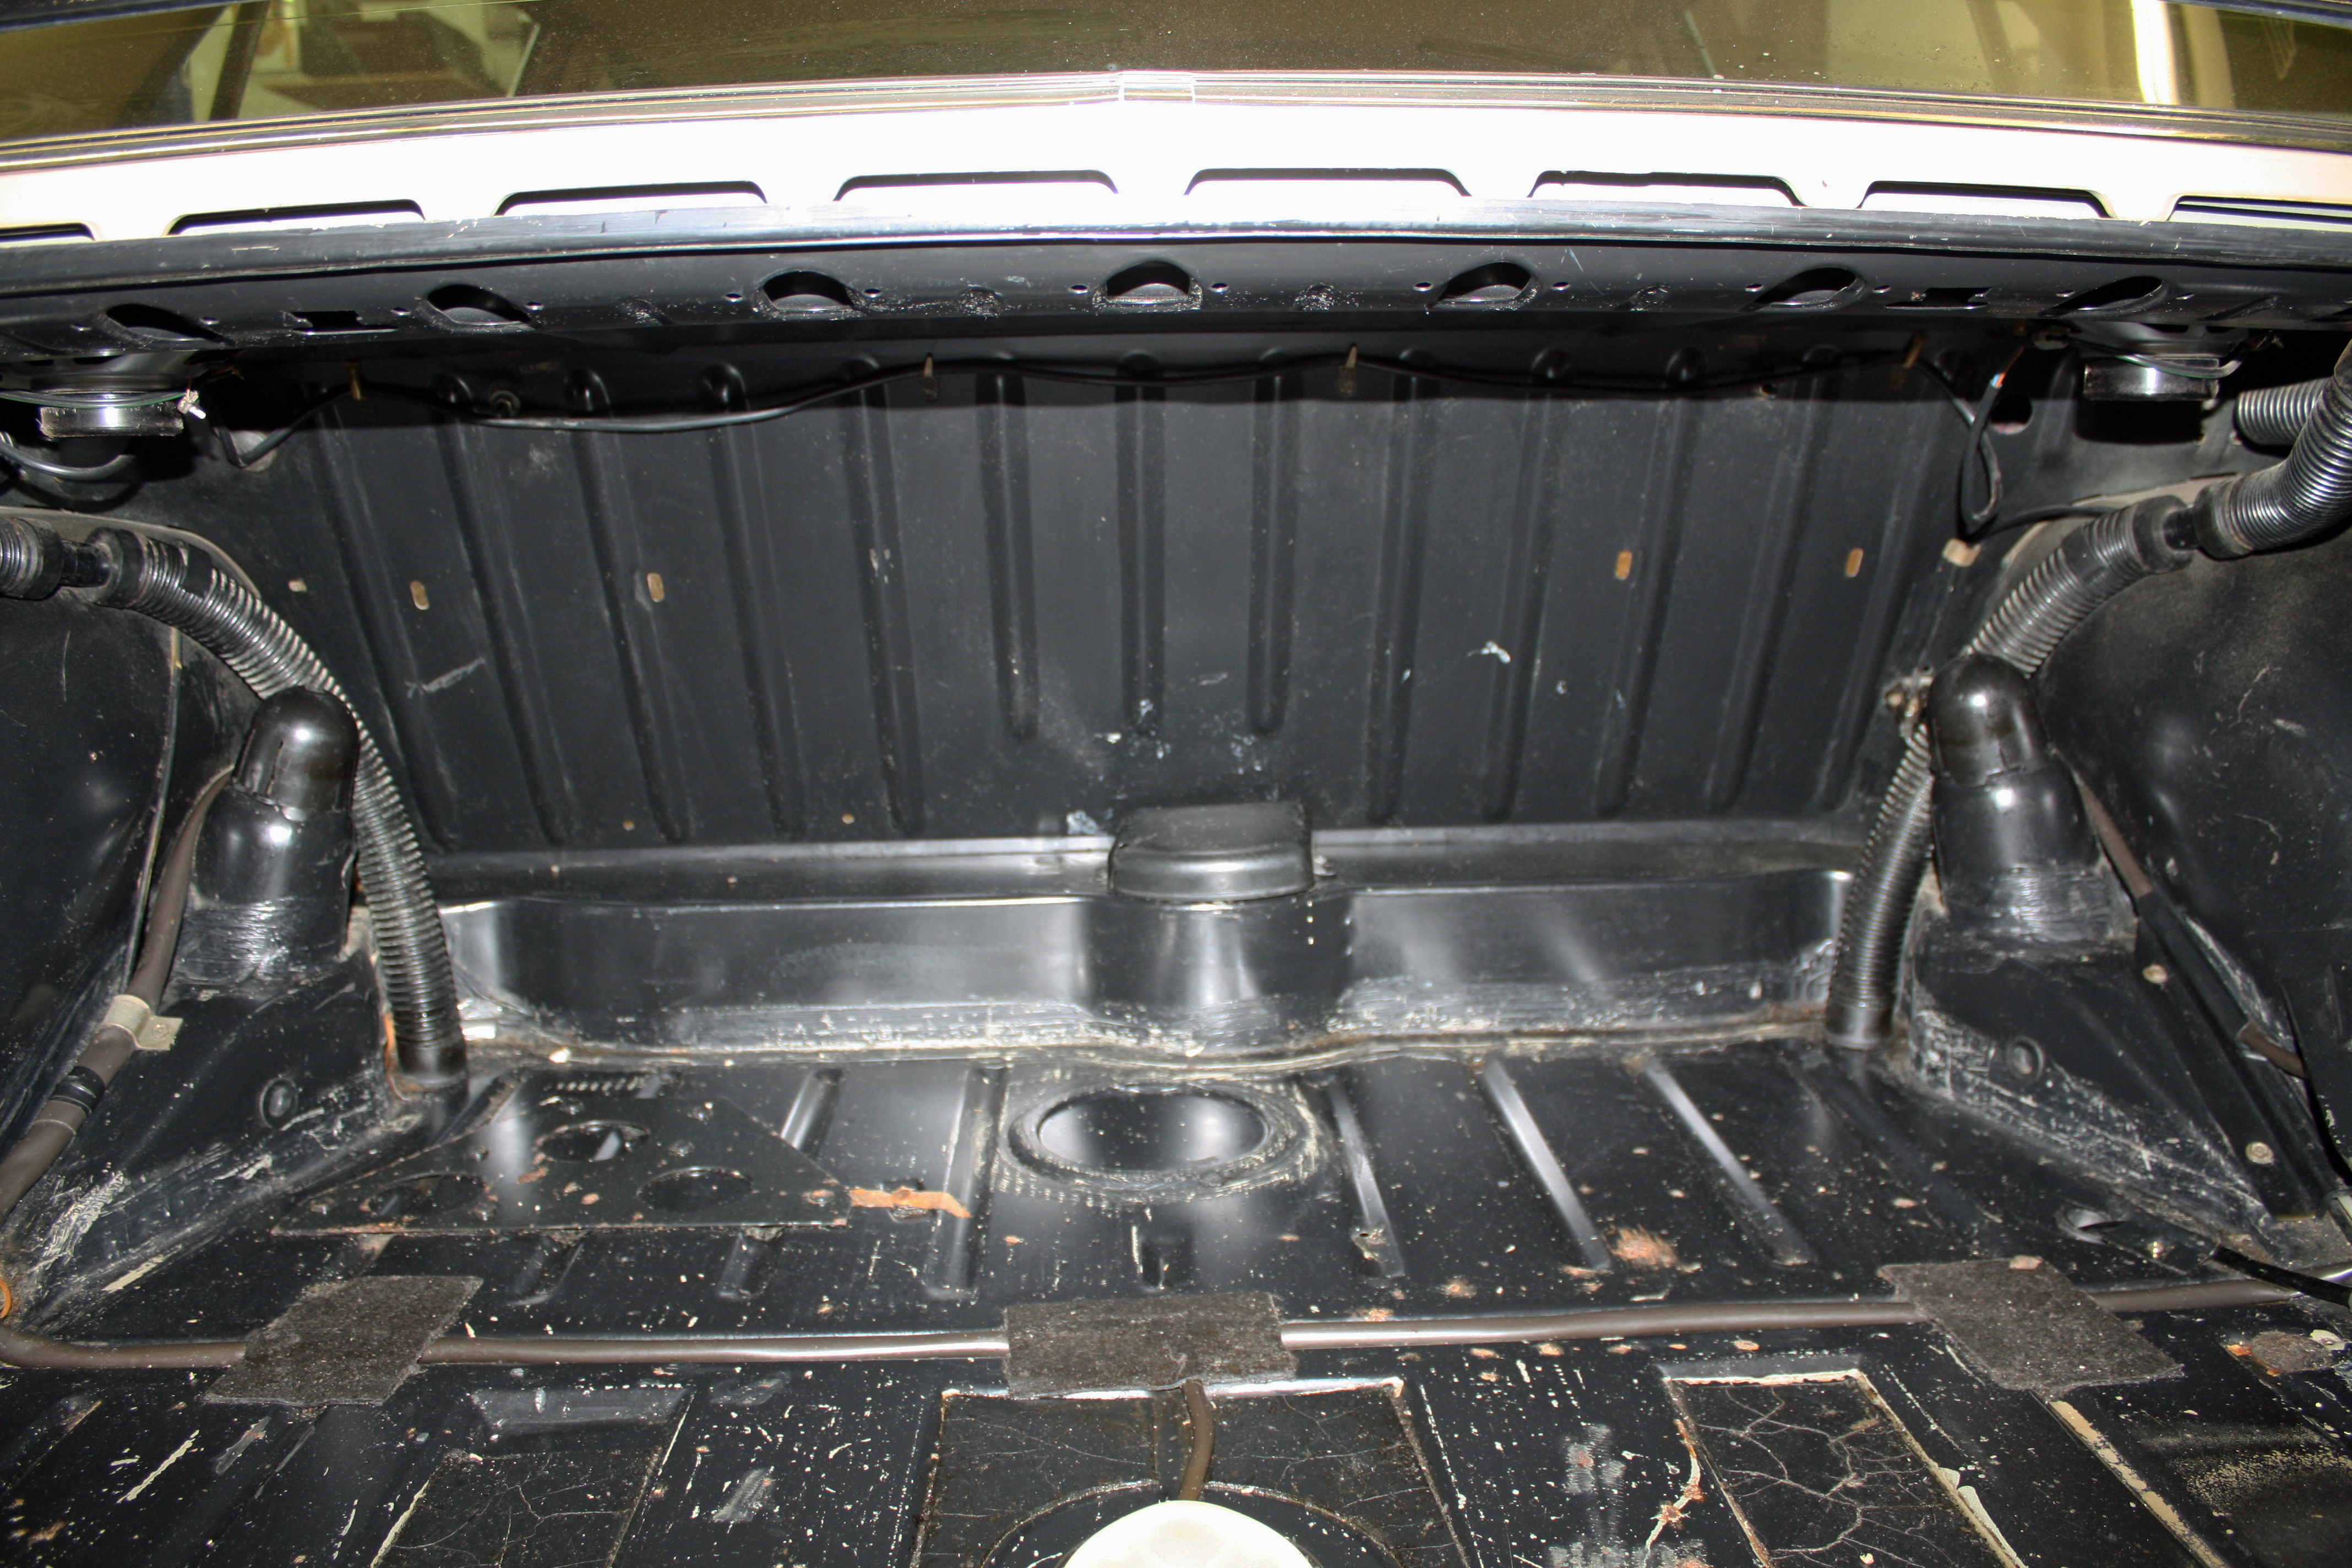
Now it was time to work on the trunk. Due to the bad trunk seal, I am sure water was leaking into the trunk. The worst area was under the spare tire. I used my angle grinder to clean up both that area, the lower area on the left side and a couple of small spots of surface rust on the upper area. It was all surface rust as all of the metal was solid. There are drain holes in both of those lower areas and there was an additional small hole that had a rubber plug in it on the right side lower area.
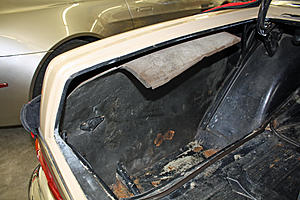
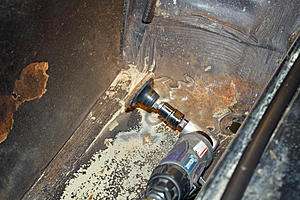
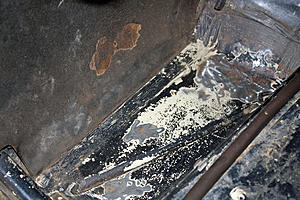

Once I was finished grinding, I cleaned up the entire trunk area. With everything clean, I applied the POR15 to the rusty areas. I don't plan on painting the entire trunk floor as I have a carpet pad coming for it.
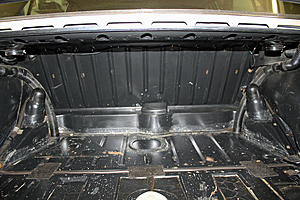

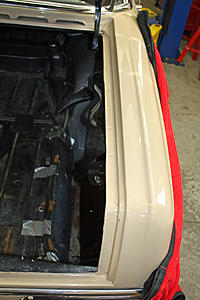
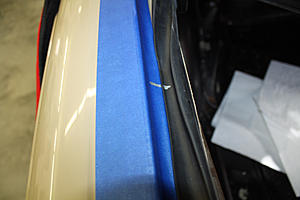
The trunk seal was the next job. I masked off the entire area before proceeding.

I test fitted the seal and it fit well. However, the test fitting showed that the seal did not want to lay in the channel on the rear rounded corners because of the tension. So I marked the seal on each side about 8" from the corner and began applying the adhesive to the rear part of the seal first. I lined up those marks on both sides and carefully inserted the seal in the channel. Once I had the rear part in place, I let it set for a bit before installing the rest of the seal. That procedure worked well.

One of the things I removed from the trunk yesterday prior to working on it was the took kit. I used the "delicate" setting on the washer to wash the tool bag. The tools are in great shape.


I plan on installing the hood pad tomorrow. I have new front shocks and the exhaust to do next. Once those items are done, I will be installing carpet.


I did have time to polish the front bumper where the license plate had been. Looks much better.

Now it was time to work on the trunk. Due to the bad trunk seal, I am sure water was leaking into the trunk. The worst area was under the spare tire. I used my angle grinder to clean up both that area, the lower area on the left side and a couple of small spots of surface rust on the upper area. It was all surface rust as all of the metal was solid. There are drain holes in both of those lower areas and there was an additional small hole that had a rubber plug in it on the right side lower area.


Once I was finished grinding, I cleaned up the entire trunk area. With everything clean, I applied the POR15 to the rusty areas. I don't plan on painting the entire trunk floor as I have a carpet pad coming for it.


The trunk seal was the next job. I masked off the entire area before proceeding.

I test fitted the seal and it fit well. However, the test fitting showed that the seal did not want to lay in the channel on the rear rounded corners because of the tension. So I marked the seal on each side about 8" from the corner and began applying the adhesive to the rear part of the seal first. I lined up those marks on both sides and carefully inserted the seal in the channel. Once I had the rear part in place, I let it set for a bit before installing the rest of the seal. That procedure worked well.


One of the things I removed from the trunk yesterday prior to working on it was the took kit. I used the "delicate" setting on the washer to wash the tool bag. The tools are in great shape.


I plan on installing the hood pad tomorrow. I have new front shocks and the exhaust to do next. Once those items are done, I will be installing carpet.


