
Command Auxiliary Cable Install


Thread Starter
Junior Member
Joined: Aug 2017
Posts: 31
Likes: 21
From: Southcentral Indiana
2007 GL320 CDI, 2002 Jetta TDI, 1999.5 Audi A4 4.2
Command Auxiliary Cable Install
I recently purchased an '07 w164 with the Comand headunit and the Rear Entertainment System. On this vehicle, the headunit's auxiliary input is simply the rear entertainment audio output. Therefore, there is no 3.5mm headphone jack in the glovebox nor an ipod 30-pin connector (I have android anyway). Ideally, and in the future, I will likely purchase a modern replacement headunit. But for now I've decided to simply install a cheap 3.5mm auxiliary cable and get by the old and cheap way. I searched around forums a bit and found some information on how-to, and the part to get -but I couldn't find a clear and concise method with pictures: so I am posting my experience here to help someone else with this. Overall, I simply disconnected the aux connector from the back of the headunit (coming from the RES output) and connected my 3.5mm wire's connector. By doing this I obviously can't listen to the RES audio through the vehicles speakers, but I'm not interested in doing that anyway. Alternatively, I think I may have come across a T-harness that will allow one to connect two auxiliary sources to the head-unit. Since I'm only interested in swapping the connectors/cables, that's all I'll cover here.
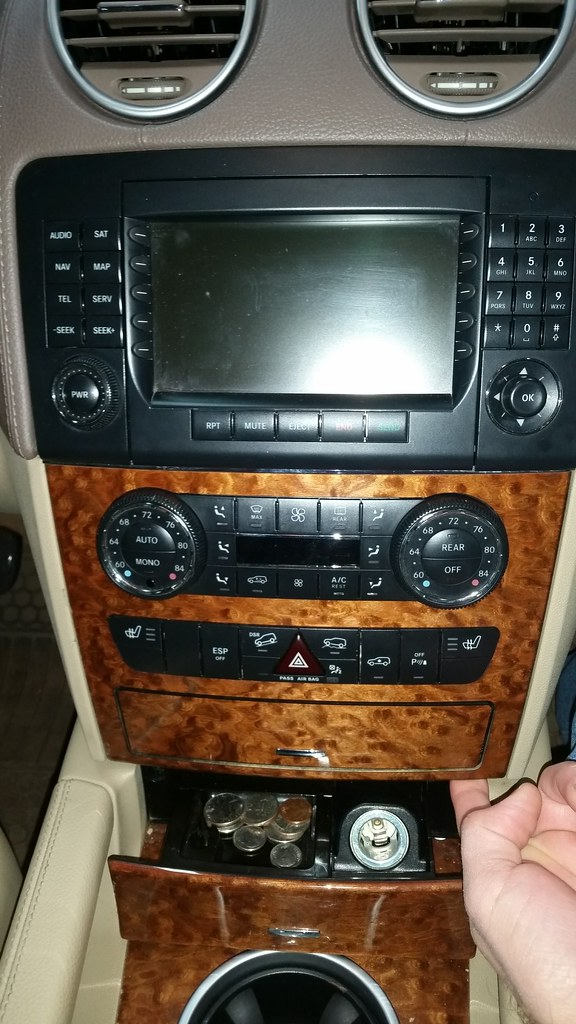
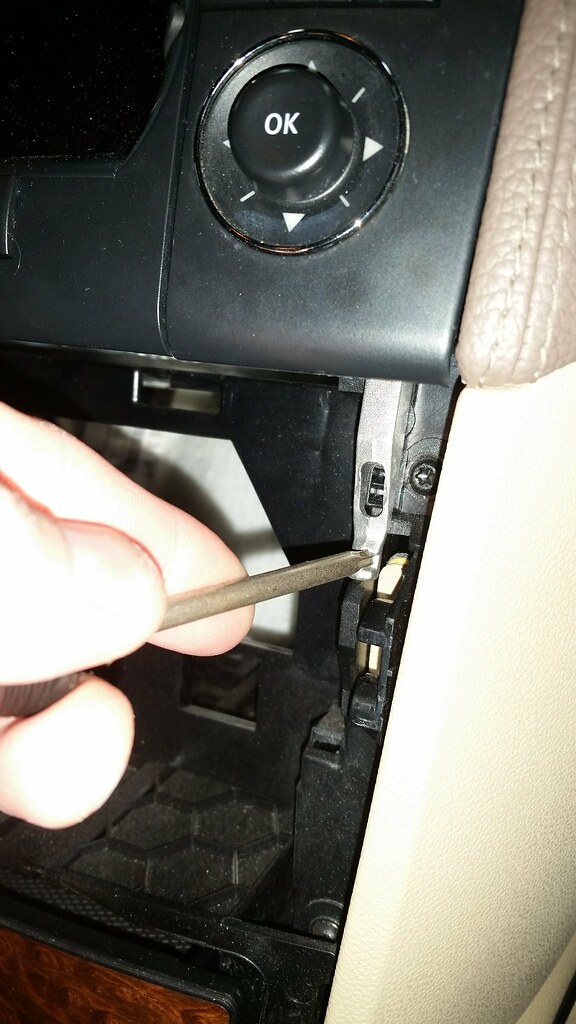
I started off by opening the ash tray and pulling back on the bottom two corners of the climate control panel. Pull both sides at the same time. I only show one finger pulling 'cause the other is holding the camera!
Once pulled back, it must slide down slightly and then can be pushed over to the side for the headunit to clear it when it is pulled out. It is best to place a cloth under the panel so it doesn't scratch interior bits.
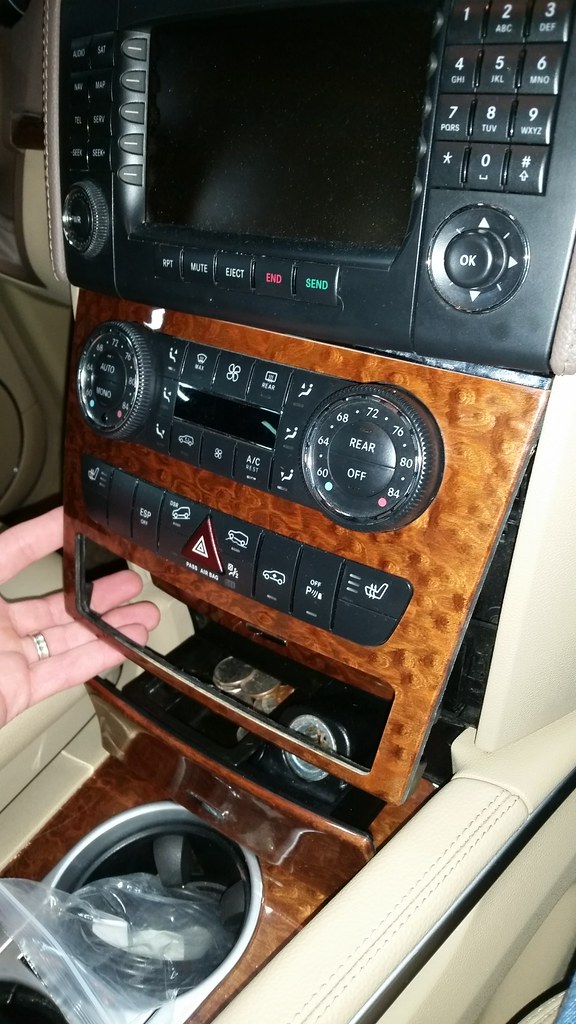
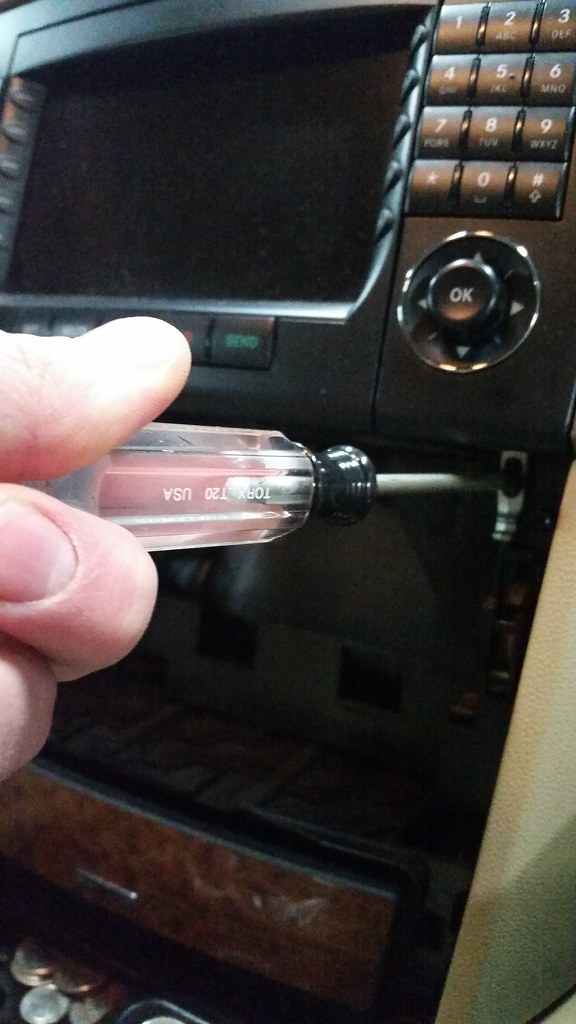
There are two T20 torx bolts that must be removed, and then the metal locking clips can be pulled down.
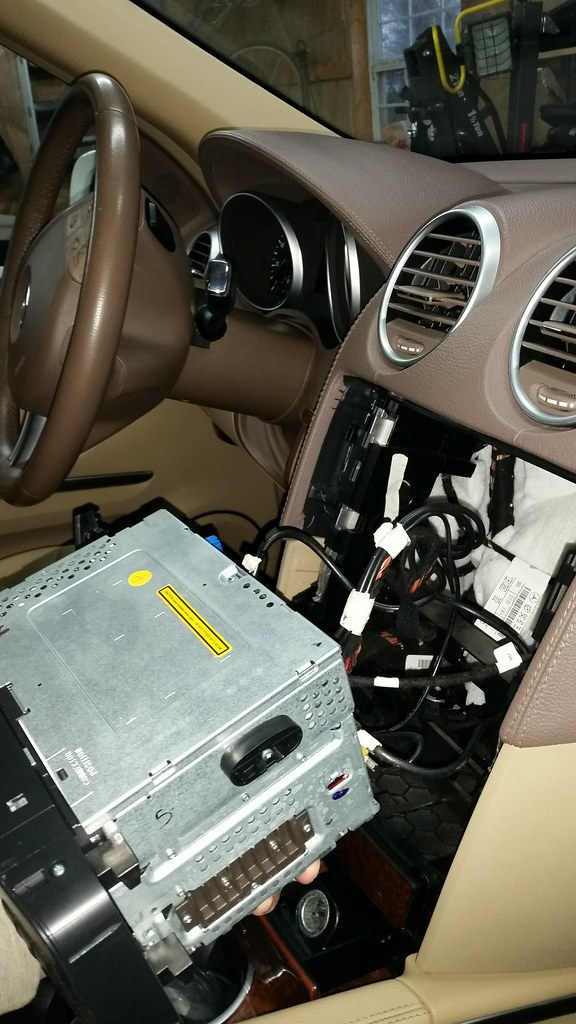
The headunit can then be pulled from its slot. Pull from the bottom sides, not the middle. The screen's gears can be ruined if the screen is pulled on.
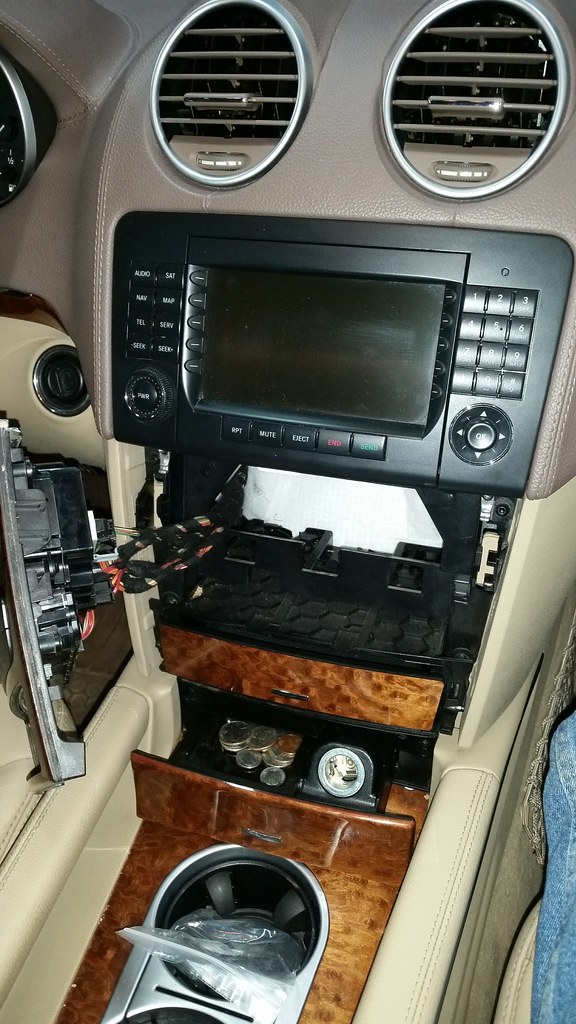
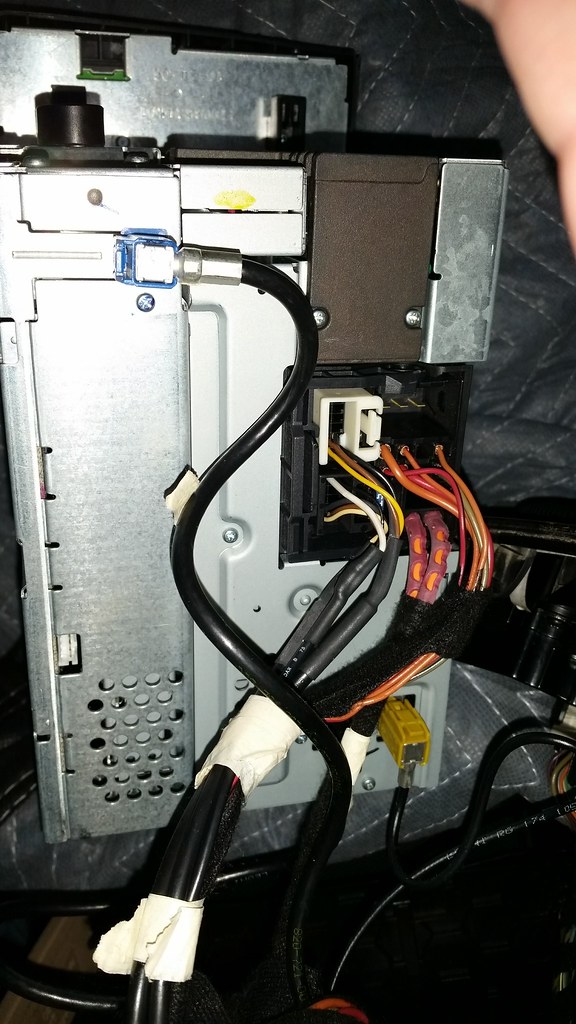
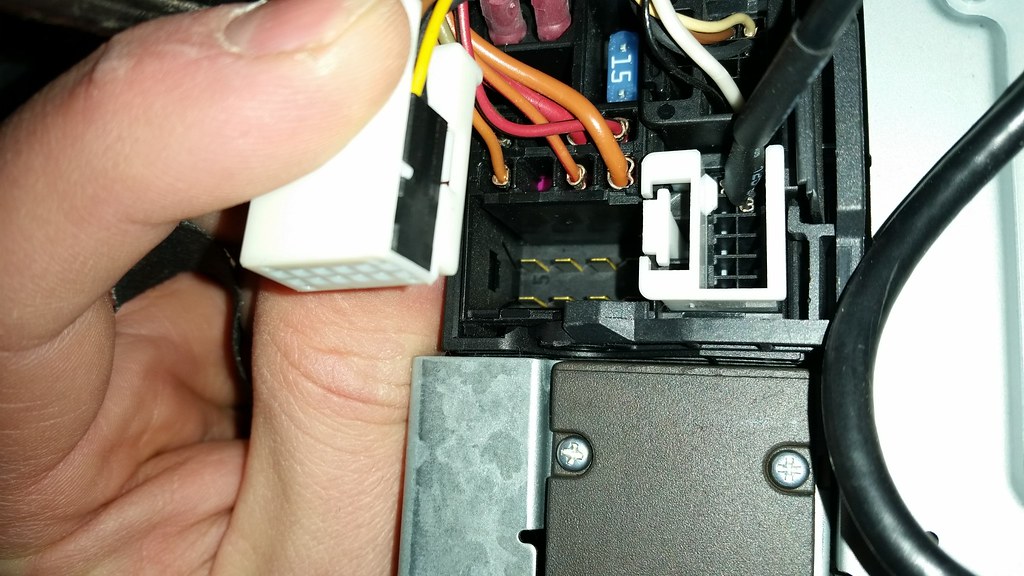
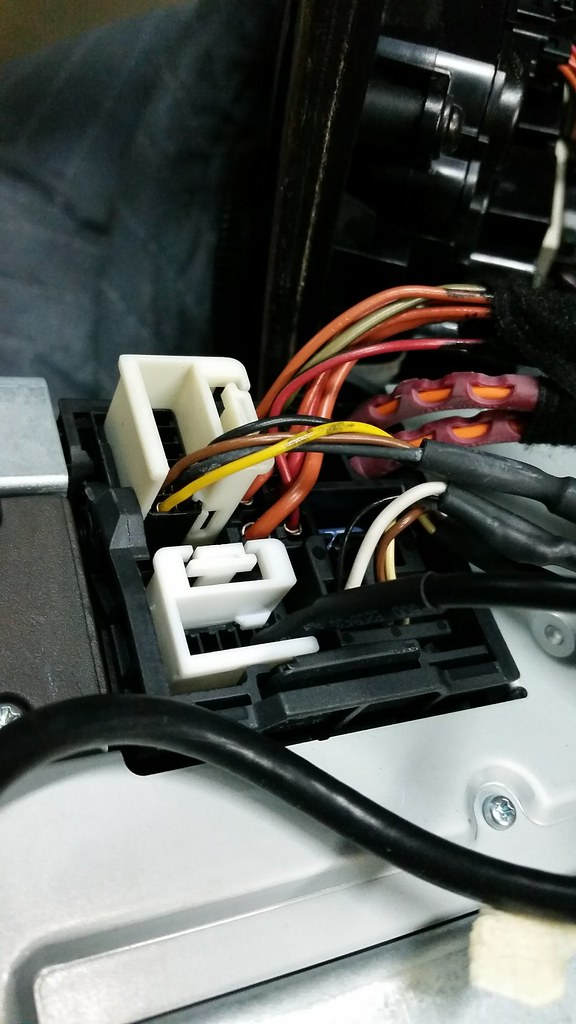
The auxiliary connector is the white one:
THIS is the auxiliary cable I purchased.
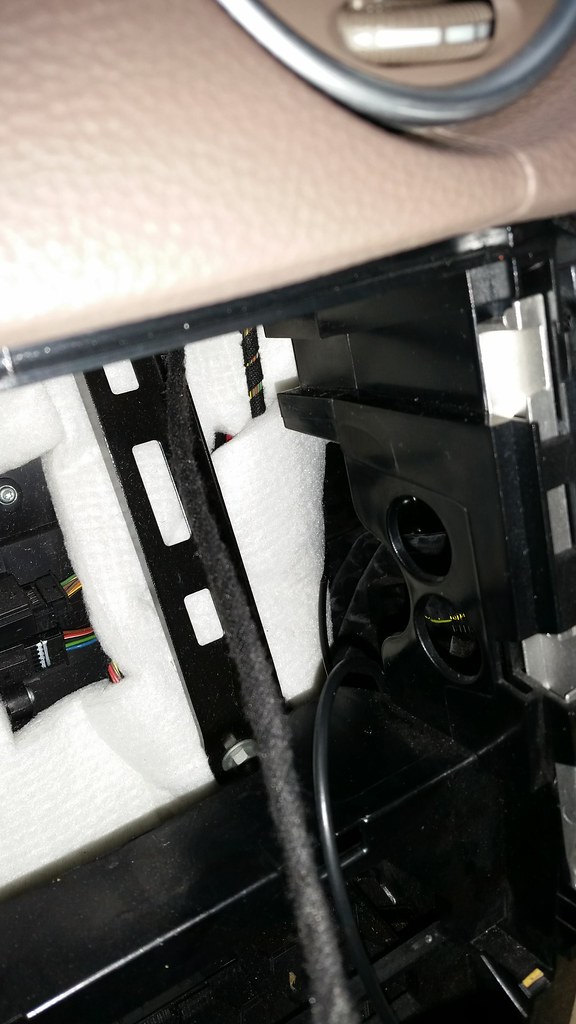
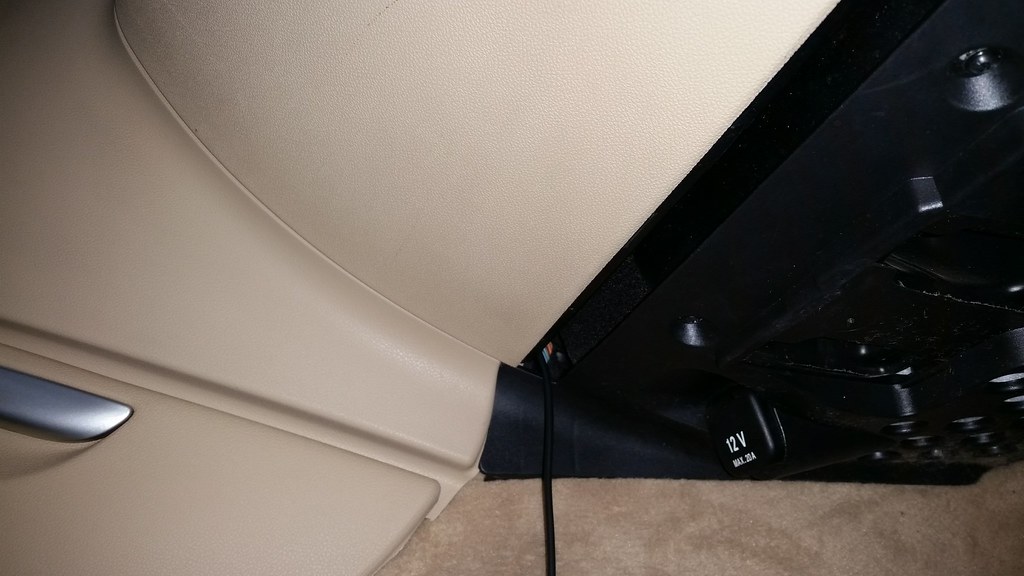
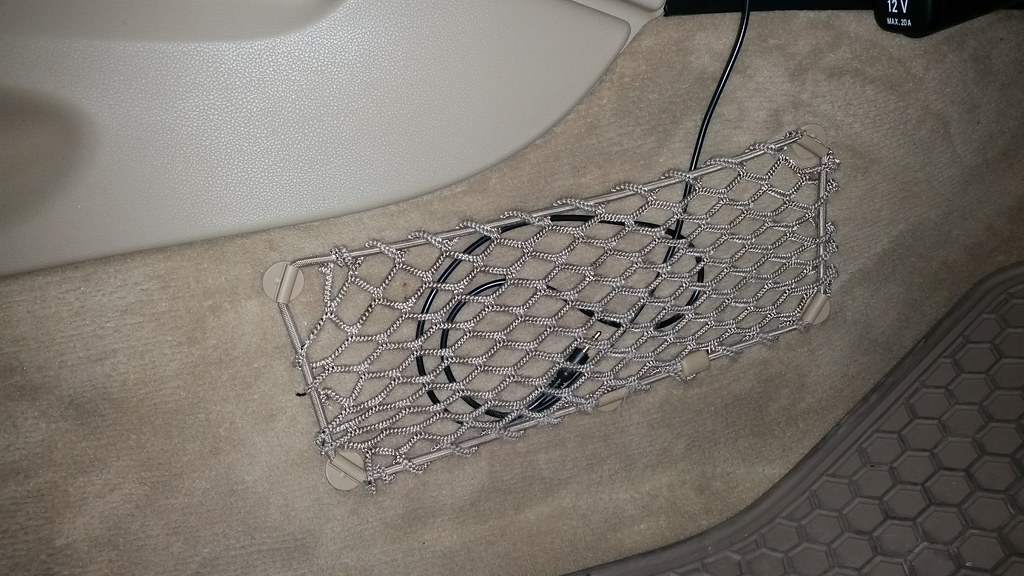
It doesn't have a part number. It's just a generic Chinese version of the real part number 2104405005. The authentic version has the wide input (female) jack-end that can be mounted in the glove box as intended. But then you'd have to place your device (phone) in the glovebox or run the cable out of the glovebox. Don't be a knucklehead and buy a 3-wire auxiliary cable for $50+ from whoever's selling them. It's a simple cable worth only the $3 - $5 it sells for on ebay. Then, one can choose where to run the cable. I chose to run it out by the passenger's feet, by the hidden power outlet. For now I can simply connect my phone and set it near the ash tray. In the near future I'll probably purchase a bluetooth adapter that will connect to the 3.5mm jack and allow my phone to stream music via bluetooth A2DP. I can connect power to the bluetooth adapter with a 12V to 5V cigarrette lighter style adapter, although I haven't yet checked to see if this power outlet is switched power or if it is powered even without ignition on. If I find it is powered all the time, I will just forgo the bluetooth adapter and get a 3.5mm cable extension so I can mount my phone to the windshield with a mount for use of Google maps on road trips. This would all be until I switched to the more elegant solution of an android headunit. But until budget allows, this aux cable method will suffice.
After connecting the new auxiliary connector to the head unit, I could've just left the old connector (signal from the RSE) hanging there, but I wanted to avoid any rattling if it started hitting the rear of the headunit on bumpy roads. Instead I slid it into an open slot that is meant for a different connector. Since the pinout didn't match there's no worry of any pins touching where they shouldn't, and the connector slid in easily and stayed there without having to jam it in. Perfectly fine place to park it.
So that's my experience with some detail. I hope it helps someone with their auxiliary cable install.
I started off by opening the ash tray and pulling back on the bottom two corners of the climate control panel. Pull both sides at the same time. I only show one finger pulling 'cause the other is holding the camera!
Once pulled back, it must slide down slightly and then can be pushed over to the side for the headunit to clear it when it is pulled out. It is best to place a cloth under the panel so it doesn't scratch interior bits.
There are two T20 torx bolts that must be removed, and then the metal locking clips can be pulled down.
The headunit can then be pulled from its slot. Pull from the bottom sides, not the middle. The screen's gears can be ruined if the screen is pulled on.

The auxiliary connector is the white one:
THIS is the auxiliary cable I purchased.
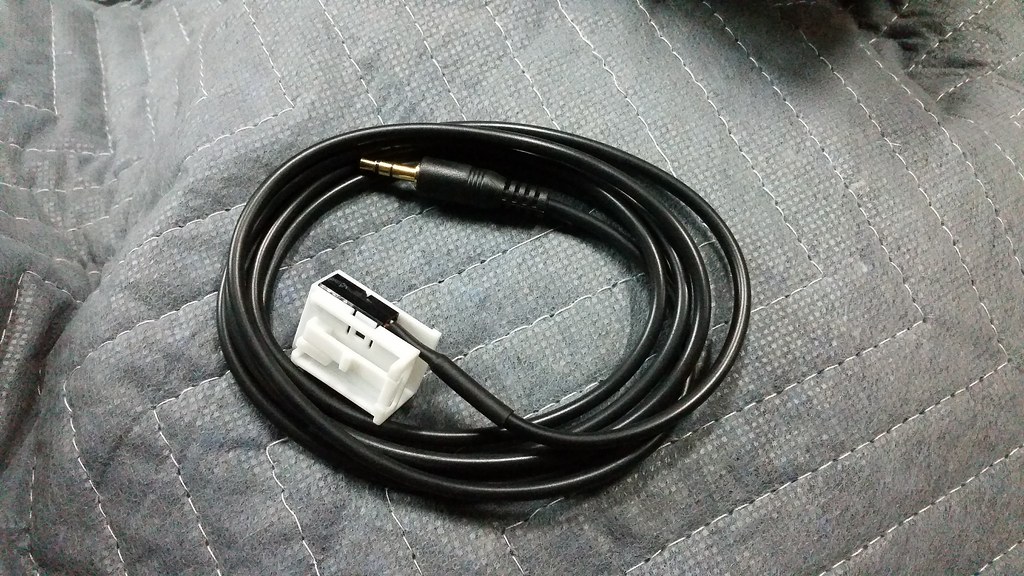
It doesn't have a part number. It's just a generic Chinese version of the real part number 2104405005. The authentic version has the wide input (female) jack-end that can be mounted in the glove box as intended. But then you'd have to place your device (phone) in the glovebox or run the cable out of the glovebox. Don't be a knucklehead and buy a 3-wire auxiliary cable for $50+ from whoever's selling them. It's a simple cable worth only the $3 - $5 it sells for on ebay. Then, one can choose where to run the cable. I chose to run it out by the passenger's feet, by the hidden power outlet. For now I can simply connect my phone and set it near the ash tray. In the near future I'll probably purchase a bluetooth adapter that will connect to the 3.5mm jack and allow my phone to stream music via bluetooth A2DP. I can connect power to the bluetooth adapter with a 12V to 5V cigarrette lighter style adapter, although I haven't yet checked to see if this power outlet is switched power or if it is powered even without ignition on. If I find it is powered all the time, I will just forgo the bluetooth adapter and get a 3.5mm cable extension so I can mount my phone to the windshield with a mount for use of Google maps on road trips. This would all be until I switched to the more elegant solution of an android headunit. But until budget allows, this aux cable method will suffice.
After connecting the new auxiliary connector to the head unit, I could've just left the old connector (signal from the RSE) hanging there, but I wanted to avoid any rattling if it started hitting the rear of the headunit on bumpy roads. Instead I slid it into an open slot that is meant for a different connector. Since the pinout didn't match there's no worry of any pins touching where they shouldn't, and the connector slid in easily and stayed there without having to jam it in. Perfectly fine place to park it.
So that's my experience with some detail. I hope it helps someone with their auxiliary cable install.
Last edited by 4loops; Dec 4, 2017 at 02:15 PM.

Junior Member
Joined: Feb 2020
Posts: 16
Likes: 5
2008 E350 4MATIC, 1985 300TD, 2009 ML63 AMG
Hello, I've looked all over for a post like this, and yours is the only one I have found so thank you for this DIY! I was able to finish installing my cable as you described, but I don't get any sound when plugging in my phone and playing music through Spotify.
I'd like to know which option you choose under 'Audio'. I see a 'Rear' and 'Aux' option, and the 'Aux' option itself has two additional options to choose from. I've tried all of them, but I still do not hear any sound. My normal radio plays just fine. Any advice at all would be greatly appreciated!
I'd like to know which option you choose under 'Audio'. I see a 'Rear' and 'Aux' option, and the 'Aux' option itself has two additional options to choose from. I've tried all of them, but I still do not hear any sound. My normal radio plays just fine. Any advice at all would be greatly appreciated!

MBWorld Fanatic!


Joined: Jan 2010
Posts: 3,119
Likes: 784
NGL450 w/EORP, S550
Nice work a nice write up. Did your car not have the Premium 2 package?
Just wondering where the discriminator was on getting the iPod and aux jack in and on what package level that might�ve been. But it�s sort of moot since you solved it more elegantly anyway!
Just wondering where the discriminator was on getting the iPod and aux jack in and on what package level that might�ve been. But it�s sort of moot since you solved it more elegantly anyway!


