When you click on links to various merchants on this site and make a purchase, this can result in this site earning a commission. Affiliate programs and affiliations include, but are not limited to, the eBay Partner Network.
Yeah, I get the same thing in my Miata whenever it's time for an oil change, and I used to get it in my E-150 when it got a little low on oil. When I put the lifters in, it took them a little while to pump up so I got some legitimate lifter tick. That noise was actually much quieter than the ticking that the car is making that I'm trying to solve.
When I find out what the problem is, I will make sure to post it here because the bane of my existence is searching on the internet, finding someone that has the same problem I have, and then never posting what the fix was!
I decided to let the dealer diagnose it for me. I had it towed in last Wednesday and the dealer promptly lost the car. They found it this morning, but now the key is also lost. So... I dropped off my other key around lunchtime and hopefully they'll be able to get me an answer.
Dealer just called. They say it's something in the bottom end on the right bank and are recommending a reman engine for the low, low price of only $21,000. So that's not going to happen.
I suppose my next step is to get it towed back to my shop and get the head off and take a look in there. Complicating matters, of course, is that I suspect that it's designed such that the engine should drop out the bottom, so this could get fun.
Throw in the towel already. Some of these diesels are absolute lemons, and you gotta know when to hold em and when to fold em. I dumped mine in July halfway through a 7500 mile family roadtrip when the transmission started leaking and overheating; and the nearest dealer quoted $5000 for repairs they "hoped" would solve the problem. But when asked, they didn't actually know what or where the leak was.
That was after the oil cooler, engine mounts, airbags, adblue tank and countless other problems, most of which we coming around again after only 80,000 miles. I did the math at $5k every year on repairs and maintenance, and traded it in on a Ford Expedition which is not a sporty a drive but came with a 7 year extended warranty, and the assurance that my wife and kids can go off on a long trip without being stranded by mechanical failure.
Honestly, I almost kept the GL so I could wrap it like a lemon and have it go viral on social media as an example of how Mercedes does not support customers who get stuck with their failures.
I have the exact same problem 2013 with 95k miles. Dealer told me the crankshaft is loose and that I need a new engine--$27k including taxes and labor. Keep the posts coming on your findings. I think the engine comes out from the top on the 2013's.
at this point i would look for a donor motor. even if you find the culprit (sounds to me like a piston bearing) whatever caused it will remain hidden and will do it again (to the new part).
Just got confirmation from the indy shop that I went to for a second opinion that something has let loose, likely in the bottom end. They're seeing metal shavings in the oil, so bad news all around.
I've looked around a little bit and haven't seen any motors worth buying for under about 8 or 9k. Lots of pretty high-mileage stuff out there. The interchange is a little tough to sort out, though -- it looks like there's a lot of commonality between the GL350's version of the OM642 and the Sprinter for the major parts, but I can't find a part number for the crankshaft or the block itself. If memory serves, one of the cams is different on the GL from the sprinter, but if I could widen my search a bit and get a donor short block, I could send my heads out to the machine shop to be cleaned up and then put it all together, I suppose. The real challenge is finding a place to keep and work on it -- my shop is a little bit small for the GL and I don't think it would fit in my garage at all.
So I sat on this thing for the last... uh... year and a half? I moved in to a new shop where I have more room and the Stupidmobile has been taking up a large corner of the place for the last year. I found a 2000 Excursion with the V10 to use for towing duties, so not having this wagon has been irritating but not life impacting. On a side note, when people ask me how I like my Ex, I smile and tell them that in my experience, it drives better than a Mercedes!
Since I've got time on my hands right now, I finally decided to jump in and take a look. Here's what we've got so far/
First off, let me say that I totally understand the desire to delete the EGR. The amount of soot and crap that gets sucked into this engine thanks to that is just terrible.
Getting the chain guide pins out requires a Mercedes Special Tool. They want $91.20 for it. I made mine with a Harbor Freight slide hammer, a couple bolts, a coupler, and a washer from the hardware store. Not counting the slide hammer, it was about $6 and also works for the valve covers and injectors when combined with the "normal" slide hammer. The 6" 3/8 bolt fits between the front of the engine and the fan.
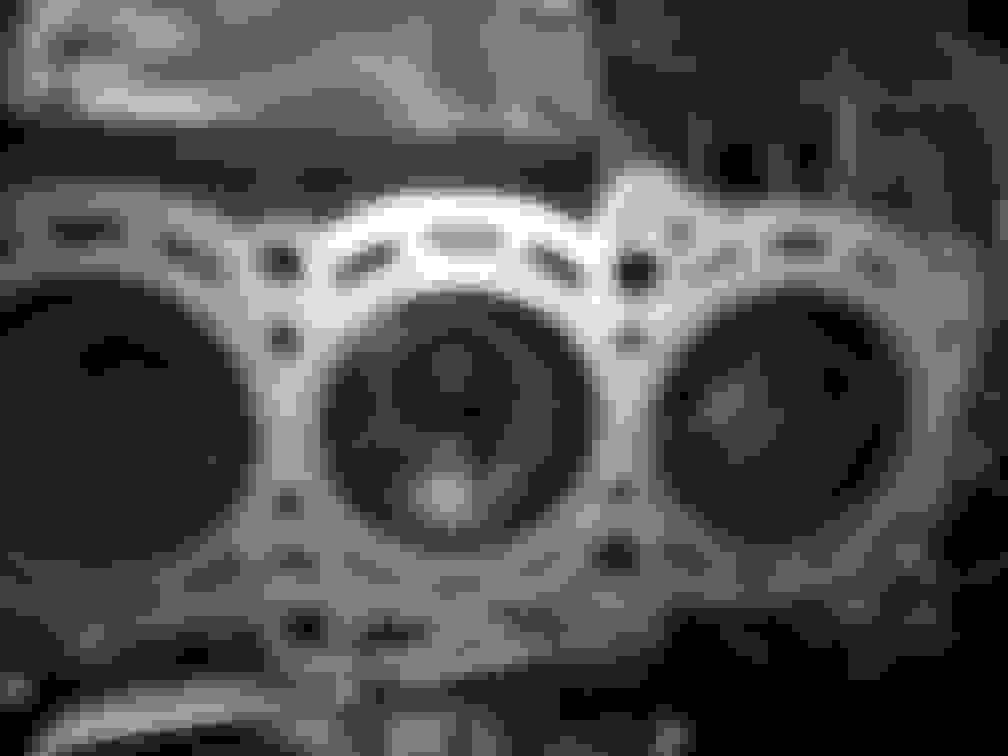
I went ahead and took the right head off
Right side of block, head removed Right side head
Interestingly, the guy in the middle had little to no carbon on the head and the piston itself was a bit cleaner. Hard to see in the pictures, but there are indentations on the exhaust valves and the piston has marks that match the dimples on the exhaust valves. There is also some pitting on the surface of the head around the valves. It is very minor and doesn't extend into the headgasket area or near the edges of the valves, but it's there.
I stopped on it for the day because I need to decide if I want to go ahead and pull the left head at this point or if I want to go ahead and pull (what's left of) the motor out so I can put it on the stand, flip it over, and peek at the bearings. If I don't have to open up the other head, I can save a couple bucks' worth of gasket, but at this point I feel like I might as well go all the way with it: Send it off to the machine shop to be dipped, checked, line honed, and all that; new timing chain; new main seals; new rod bearings; new mains; new swirl motor; new oil cooler seals.
Anybody ever dive in to one of these before? My guess is that if that piston had a loose wrist pin or a loose big-end bearing, it could have had a chance to move up more than it should have and start contacting the valves.
Bring the center piston (clean one) up to its highest point in the bore and see if the piston protrudes past the deck. If it does, that may be be your noise.
Its cleaner than the others for a reason and in racing engines if its not a headgasket issue, valvetrain issue, or sticking injector, its usually because the piston and/or rod has stretched through mismatched heat growth rate and is slightly contacting the head. .
There has definitely been contact between the piston and the exhaust valves. It doesn't photograph very well with my phone's camera and the available light in that corner of the shop, but I can catch a fingernail on both valves and it follows a pattern that matches the edge of the piston. It hasn't been a lot of hard contact - I've seen that a few times and this is basically nothing compared to a timing failure, for example - but it is definitely more contact than is supposed to be happening. That piston is not following social distancing guidelines!
The head gasket looks good, there's no visible trace of oil in coolant, coolant in oil, or leaks between the block and the head. I know that a visual inspection isn't really the end-all, be-all, but I've never seen a motor that had a sealing problem bad enough to make noise that didn't also have some visible trace on the gasket and while I admit I am loosing my diesel virginity with this thing, I would assume that given the higher compression, a diesel would be more likely to show trace there than a low-comp gasser.
I haven't been back over to the shop since, but I think you're right about the next discovery step. I need to get the timing chain up and out of the way so I can rotate the crank without losing the chain down in the block or getting it jammed up and then I'll see what I can get. I've never seen a piston crown like these before, though, and the big advantage is that there's something to grab a hold of once it's to TDC so I can apply some light leverage to see if it wants to continue travel up into the valve space.
I went ahead and took the left head off last night. This job really needs a 1/2" drive E18 socket. My E18 is a deepwell 3/8" drive so I'm putting that on a 3/8-1/2 adapter and then sticking that on my 24" breaker bar. There's enough slack in all of that to make it really hard to keep the socket square on the head while also pulling on the end of the bar with all my might to break these loose. Also, don't forget that you need to bring up the tightening sequence from WIS and loose them in the reverse order in stages to avoid damaging the aluminum head. I'm using one hand on the socket to keep it square and the other at the tip of the breaker bar. If you have to use a drive adapter, make sure it's a quality one. I had one that I got from the Hammer Store and it just twisted the 3/8" drive portion of the adapter without turning the bolt by even a fraction of a degree.
I cleaned up the head a little bit (it's going to get actually clean before it goes back together, but I wanted to be able to see what I was dealing with), but I forgot to take a "before" picture. Imagine in your mind's eye a head that looks like your basic 125,000 mile head. In other words, the carbon build up was present as expected on all three pots, but nothing excessive or unusual. For comparison, here are the two heads:
Left head Right head
And here's a picture of the left bank of cylinders:
Cylinders, left bank
If you look at the pistons, you'll notice that the crown has a cavity in it. I'm sure that those evil geniuses in Stuttgart have some fancy names for it, but we're going to call it the pointy-thing which is down in the hole and around that hole we have the rim. Now we're on the same page, cool? Cool.
Focusing on cylinder number 2 (that's the middle pot, right bank) on the head, you'll notice that a very distinctive circular pattern has developed in the center of the top of the combustion chamber. The other 5 cylinders also have a very distinctive pattern on them which is from combustion, but 1, 3, 4, 5, and 6 are all very different-looking from 2. The top of #2 also has some very minor pitting and the #2 piston is the only one that has developed markings from the dimples on the exhaust valves. Number 2 was also the one and only chamber that was basically free of carbon build-up on the head.
While keeping the timing chain out of the way, I turned the crank by hand to get the piston to make its full sweep of the cylinder and it doesn't appear to be coming up past the top of the deck, and applying a little leverage to the rim of the piston doesn't seem to make it extend, but there's a really big delta in the amount of force that I can - and am willing - to put on the piston and the force that is applied when the assembly is rotating, so I'm not willing to say that there's nothing wrong there. So far, all the evidence is pointing towards a failed rod bearing or wrist pin.
The main reason that I wanted to tear down the motor to this point before deciding what to do was that I'm worried about the block itself. If things are moving around enough or if there's enough metal circulating through the oil, my concern is that the bores could be trashed. I've found a source for .5mm oversized pistons, but at two bills each, I really don't think it's worth dropping the $1,200 for 6 new pistons plus the machine shop work to bore the block out. I'm already looking at around $2k in re-assembly parts and another $2k on top of that doesn't really thrill me. To keep it in perspective, my Excursion only cost me $4,500 and it's twice the truck this thing is. So we come to the question of "how is the block?" All of the cylinder walls still have factory cross-hatch visible, so not very much wear, which is what I would expect. I've torn down cheap 200k+ mile gas engines that still have crosshatch, so I fully expected to see that and I did, so good. Here's what I didn't want to see though:
A small vertical mark near the bottom of the bore, center of picture
It is really hard to see in the picture, but down towards the bottom of the bore, there's a little vertical line. Clocked about 180 degrees from that, and not visible in the picture, is a matching one. Obviously, that's not what I was hoping to find. I'm going to measure the bores once I have the block out of the truck and all the pistons out to see if they're otherwise in spec. If so, I think the block is actually going to be okay and not need to be bored. With my gloves off, I can run my fingernail all the way around the cylinder without catching it even the slightest amount and I've always been taught that if you can't catch a nail on it, it's not enough to worry about. I'll give it a hone and see if it cleans up, but I'm inclined to say that while it's not ideal, it's also not that bad. Now, if the journals are all eaten up, that's another story, but so far, I think this block is going to be okay enough.
The next step in the process is to get the block out of the truck. Looks like it's pretty straightforward: Pull the drive shafts, pull the TC, pull the trans back, unbolt the motor mounts, and Robert is your Father's brother. I'm not sure if I have enough reach on my crane to clear the core as everything sits right now, but that's nothing that a few OSHA violations can't fix.
I spent a whole bunch of time in the shop last night getting ready to accommodate the OM642 block. My engine stand had a 2.4 for a friend's PT Cruiser on it so it needed to find a new temporary home. If you've ever seen the old Bert and Ernie sketch from Sesame Street where they go through the whole thing with the broken sugar jar or whatever, then you have a good picture of what my night in the shop was like. I had to find a place to put the wood lathe so I could put the race car suspension parts there so I could use the table that they were on for the engine so I could have a place to put the block. Plus the race car is on casters but in the way a little bit so I had to move it around way more than my back would have liked. Add some Yakkity Sax as the soundtrack and I think you'd have an accurate picture of the process. But in the end, I was able to free up the engine stand and get the engine crane out of its storage spot. And I avoided the emergency room.
When all that was done, I was finally able to get back to the project at hand. In the end, all I accomplished on the GL was to pull the six torque converter bolts out and bag them up. Next time I have a chance to work on it, I'm going to need to drain the rest of the oil, drain and preserve the coolant which is priced as though it comes from freshly pressed virgin unicorn tears, pull the fan and shroud off, and put in something to protect the radiator. Then it should be a simple matter of unbolting the transmission and the mounts and out we go.
I don't know what they put in the water in Kentucky (aside from Limestone), but Ya'll aren't afraid of anything. I've only been to visit a few times, since I have a buddy there. He calls his racing team "Hillbilly Motorsports." He also has a Ford V10 for towing, so the similarities are piling up.
Anyway, I'm following and hoping things go well for you.
Haha! Whatever's in the water it makes us pretty subborn folk, that's for sure! Although I prefer my water to have been filtered through a little corn mash and popped into a barrel for a couple years before I drink it, so that might have an effect.
Shop time got spent doing a couple small paying jobs but I got back to it tonight. The most annoying part about this is that I apparently lost some of the less-common E-Torx sockets so every once in a while I run in to one of those odd-duck sizes and it takes me 20 minutes to get a single bolt out.
Tonight, I was able to drain the oil and coolant, pull the A/C compressor off to the side, put the power steering pump next to it, disconnected all the plumbing and electrical, and got the core support and fan removed.
Pardon the sawdust that got kicked up. I figured that everything is going to get cleaned up so it's not a big deal right now. But now I should be able to protect the radiator with some coroplast, unbolt the transmission, unbolt the motor mounts, and then life the block forward and up. WIS says that the transmission is supposed to be removed first, but I'm going to see if I can cheat.
Your timing chain is stretched beyond service life and when it gets bad it can break the bottom of the chain tensioner guides and other side guide, ive got pictures on my phone and it looks exactly like yours, im a mb tech ive done 6 timing chains on the 642 motor some only had 71,000 miles others 139 k miles, mb makes a tool that you use by removing the stock chain tensioner and insert the test tensioner in order to determine if its stretched, but I can tell you ive measured 30 degrees of chain stretch and maybe the pistons do hit the valves,, and one motor made the clicking type noise that was cured by new timing chain, you can remove the front lower cover behind pulley to inspect for broke rails if needed, after the chain all the engines with new chains regained there performance especially torque.
Greetings and salutations, fellow sufferers of Stockholm Syndrome!
I know it's been a hot minute, but I've had some other projects that jumped the queue a bit and had to be dealt with. Renovating a pole fitness studio for a friend, building new motor mounts for the race car, some emissions related repairs on the RV, and of course trying to stay sane through a pandemic. The other night, though, I went ahead and got the bell housing bolts and the motor mount bolts pulled. Honestly, I was expecting way more of a fight with this than I got:
My next expectation was that I'd need to drop der Schei�ewagen off the jack stands or maybe even pull the wheels so that the ridiculous oil pan on der Schei�motor would clear the radiator. Imagine my surprise when this happened:
I need to stop the story for a minute right here because the next picture you're going to see represents an error. Those of you who are familiar with engines and the stands upon which they can be mounted might be used to hanging the motor in front of the stand and then using some of the bolt holes that are normally reserved for bolting the transmission to the engine. You might also be accustomed to trying to more-or-less evenly space those bolts. In this case, you might create a little extra work for yourself as I did. See, for reasons that I can only attribute to some sort of retribution for losing a couple wars, the upper oil pan has some bolt holes in it that would typically be connected to the transmission bell housing. Bolt holes which find themselves in a position such that you might think they would be excellent candidates for use in attaching the block to the engine stand. At any rate, now the engine is on the stand and we can continue:
That was the other night. Again, other stuff going on, blah blah, sit and wait. This morning, however, I awoke at about 0500 for some reason that remains unknown to me but I had some motivation to go do something, so I decided to jump in the Miata and fly over to Toiletbird Industries to try to finally solve the puzzle.
I put down a couple garbage bags and a whole pile of sawdust to catch the oil and coolant that I knew would drain from the block as I rotated it and started unbolting things. Good thing, too, because there was a ton of oil left in there! Step one was to rotate it over and take off the lower portion of the oilpan:
The oil level sensor had to be removed as did the pickup tube. Inside the pickup tube, I found this:
Not a good sign. Once those were removed the upper part of the pan needed to come off but to do that, the flexplate had to be removed along with the rear main. So, back off the engine stand and flexplate off:
Given the amount of oil that der Schei�ewagen leaked constantly, I assumed that the rear main would make the Valdez look like a little drip, but oddly enough it wasn't that bad. So, I'm still baffled as to where all the damned oil was coming from. The rear main is part and parcel of that whole cover you see around the crank and it is not a re-usable part. I pulled that off and then found some new boltholes to use to attach the block back to the stand.
There are approximately 3,287 bolts used to connect the oil pan to the block and they come in 5 different sizes. This is also where WIS starts telling lies and half-truths. The good news is that WIS shows you where each of the 5 types of bolts go. Great. Except they show the oil pan diagram from the top, so you have to sort of flip it over in your head. Which is pretty stupid since if you're putting bolts in or taking bolts out you pretty much have to be facing the oil pan from the bottom. Whatever. The other problem is that there are more bolts than WIS shows. Hopefully I get those right later. If there is a later....
Anyway, after the bolts come off, a couple whacks with a rubber mallet persuaded the Loctite sealant to let go and I had the pan off. Seriously guys... would it kill you to use a regular gasket once in a while?
The pan was pretty sludgey and I got a few more metal shards out of there as well. Fun times. Next, the oil pump cover came out, followed by the oil pump. Watch out for the little bolt in the back. WIS tells you that it's there, but if you were just marching forward without guidance, it would be easy to miss. Once the oil pump was out of the way, it was time to knock out piston #2. I also took the one next to it on the crank, #5, so I'd have something to compare against. I will take all of them out, of course, but I neglected to resupply the coffee at TBI, so getting home was becoming a priority.
So this is the part we've all been waiting for. The unveiling of the answer to "what is causing that ticking sound". I've had plenty of guesses and conjecture but now the rubber meets the road - metaphorically speaking of course. Keep in mind that we're talking about an eight-year-old diesel engine with only 125k on the odometer and service records that indicate regular oil changes. I present to you The Problem:
No disrespect, but I don't think the timing chain was the problem. And, yes, I think this confirms that "brutal" really is an appropriate word to use and not some sort of crazy hyperbole. Top picture is the rod bearing for #2. Bottom picture is the crankshaft with #5 on the left and #2 on the right. That ain't good. By way of comparison, here are the #2 bearings next to the ones from #5:
I think Adam Savage said it best when he said, "Well, there's your problem!"
Obviously the bearing is absolutely trashed. The crank isn't looking so great either. There are two things that I don't know about that damage: First, is if there is enough crank left to have it turned down and run an oversize bearing. Or undersized? Whatever. Second, what is the cost of that work, if it can be done, what is the cost of a replacement crank, and are either of those costs worth it? Fine, that's more like four questions, but you get the idea. Let's call it two questions where one of them is a question in three parts. Either way, I don't think that's one of those situations where the words "emery cloth" would be appropriate!
For now, I've put the engine to bed so I could come home and have some coffee and do some recreational plumbing, but my next steps will be to remove the rest of the pistons and then get the crank removed. In the meantime, I'm going to look up my options for a replacement crankshaft.
Last edited by wae; 08-22-2020 at 02:00 PM.
Reason: minor formatting
Wow. I'm not at the same level as you are in regards to working on engines... heck, I'm not even on the same level as you are at getting up at 0500 and getting to work right away!!! But, yeah, I'll 100% give you the "brutal" thing! I did enjoy your post, though - I appreciated the levity and humor that you added in here and there, too.
Wow. I'm not at the same level as you are in regards to working on engines... heck, I'm not even on the same level as you are at getting up at 0500 and getting to work right away!!! But, yeah, I'll 100% give you the "brutal" thing! I did enjoy your post, though - I appreciated the levity and humor that you added in here and there, too.
Brother, if I didn't laugh about it I'd have no choice but to cry!
Thanks for the kind words. With the factory service manual and the right set of sockets, it's just different bits that all screw together. The machine shop guy is the one that gets the difficult work!
My guess is that you're going to need to find a used crank rather than machining this one. If the damage to the crank is half as bad as that bearing, then I doubt they make bearings oversize enough to fill that gap. Now the question of course becomes, why is that journal so bad when the rest are generally OK? Plugged oil passageway? Weak oil pump (seems unlikely if you weren't getting low pressure warning.)
My guess is that you're going to need to find a used crank rather than machining this one. If the damage to the crank is half as bad as that bearing, then I doubt they make bearings oversize enough to fill that gap. Now the question of course becomes, why is that journal so bad when the rest are generally OK? Plugged oil passageway? Weak oil pump (seems unlikely if you weren't getting low pressure warning.)
It appears that I can get a brandy-new crankshaft for around $2k, but that's pretty much in "ain't worth it" territory. I was thinking that the OM642 was in the Jeep Grand Cherokee mated to some 5-speed MB transmission, and that same transmission was in the Magnum SRT-8 with the 6.1 Hemi, which should mean that the 6.2 Hellcrate engine may have the same bell housing pattern. Hello H�llewagen! (I kid.. I kid... If I did anything, it would be a 6 litre LS2 mated to the 4L70-E and its associated AWD bits). Seriously, though, I can get standard, .25 oversized, and .50 oversized big end bearings so it's worth driving it over to my machinist to see if he thinks it can be turned down. The probability that it can be machined is low in my opinion, but it won't cost anything to get him to evaluate it with an expert eye.
My assumption is a clogged oil passage. There was a not-insignificant amount of sludge in the oil pan -- oil pans? -- so I wouldn't be surprised to find that there was some starvation to the #2 rod journal. Once I have the crank out of the block I'll be able to take a closer look. You're absolutely correct in that if oil pressure was generally insufficient I would have had a warning and the other bearings would show some signs. The #5 bearing looks more of what I would expect from a healthy engine, though - it's got some signs of usage but nothing that I would call "wear". The other four might give more clues but based on the noises that I was getting, I don't expect them to look problematic. Another part to the answer will be the mains and how they look, although I expect they will look similar to the rod bearings. At one point in this grand adventure, it was explained to me that the version of the OM642 that was used in the Sprinter had "better oiling". I didn't get any clarification on that, but if it is true, then it makes sense as to why those seem to go forever while the GLs are.... (be nice... be nice...) so, uh, problematic. Those 10,000 mile oil change intervals with the absolutely terrible oil spec that they have for these combined with the injection of all that nasty diesel exhaust from the EGR system all conspire to produce some sludging that is reminiscent of the V6 in the Camry. Draining that oil every 3-5k and putting in fresh would probably forestall these issues such that you might get reliability closer to par with a Vortec or Triton motor. Unfortunately, I was only in control of the oil change interval for the last 20-30k miles so I think the damage was already done and it was a ticking time bomb.
I totally forgot to get pictures, but the other rod bearings weren't great. They hadn't come apart, but there was significant streaking and scoring going on. The mains weren't so fresh-looking either:
I've never seen coked up oil clogging things up like this before. In the following picture, the chunk of coked-up oil sitting on the cap surface came from the passage in the block where the bearing sits. This is the block with the bearing removed, note the scoring that is present. A line hone will probably clean that up, but it's definitely not a normal wear pattern:

 10-16-2018, 03:06 PM


 But, yeah, I'll 100% give you the "brutal" thing! I did enjoy your post, though - I appreciated the levity and humor that you added in here and there, too.