Aftermarket HID Installation with pics!!
 02-09-2011, 12:45 PM
#1
Member
Thread Starter
Join Date: Dec 2010
Posts: 89
Likes: 0
Received 0 Likes
on
0 Posts
2010 Ford Mustang, 2011 Mercedes Benz GLK 350 & 2010 Harley Davidson Custom Cafe Racer Style Sportst
Aftermarket HID Installation with pics!!
TOOLS REQUIRED: None but maybe extra patience.
NOW LET'S START INSTALLING:
First, you need to check if the lights work. Follow the instructions on the kit and test it out first. By the way, YELLOW wire is positive and the TWO BROWN wires are negative. So Yellow on Red wire then Brown on Black wire. If everything is working, then you can proceed.
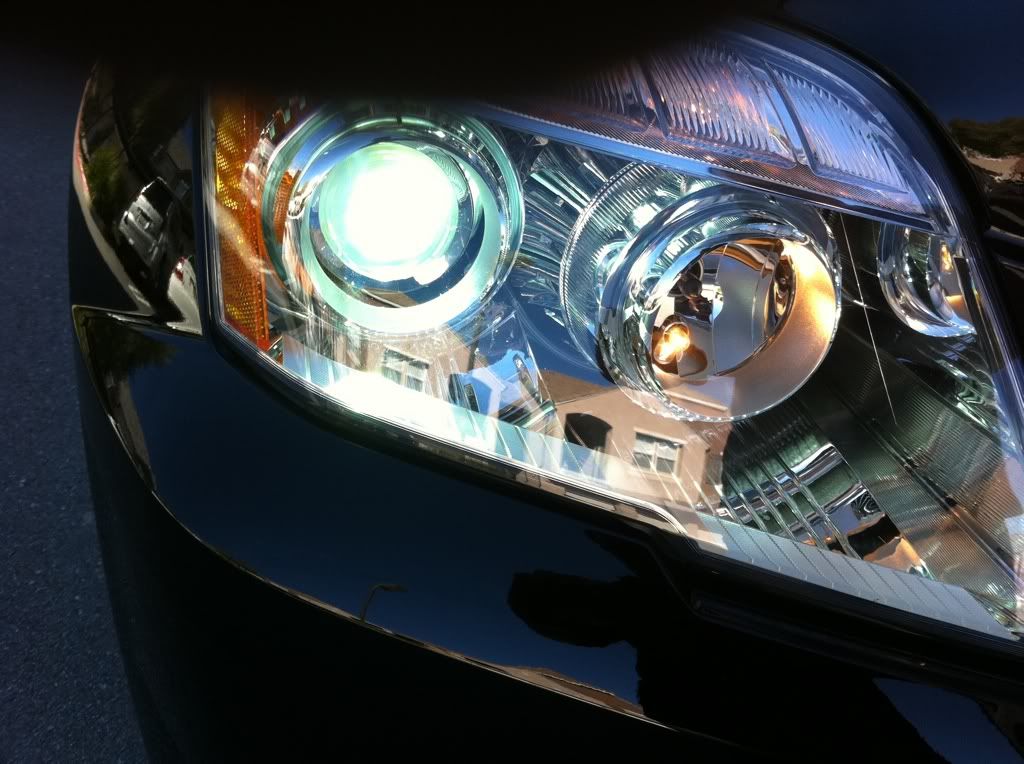
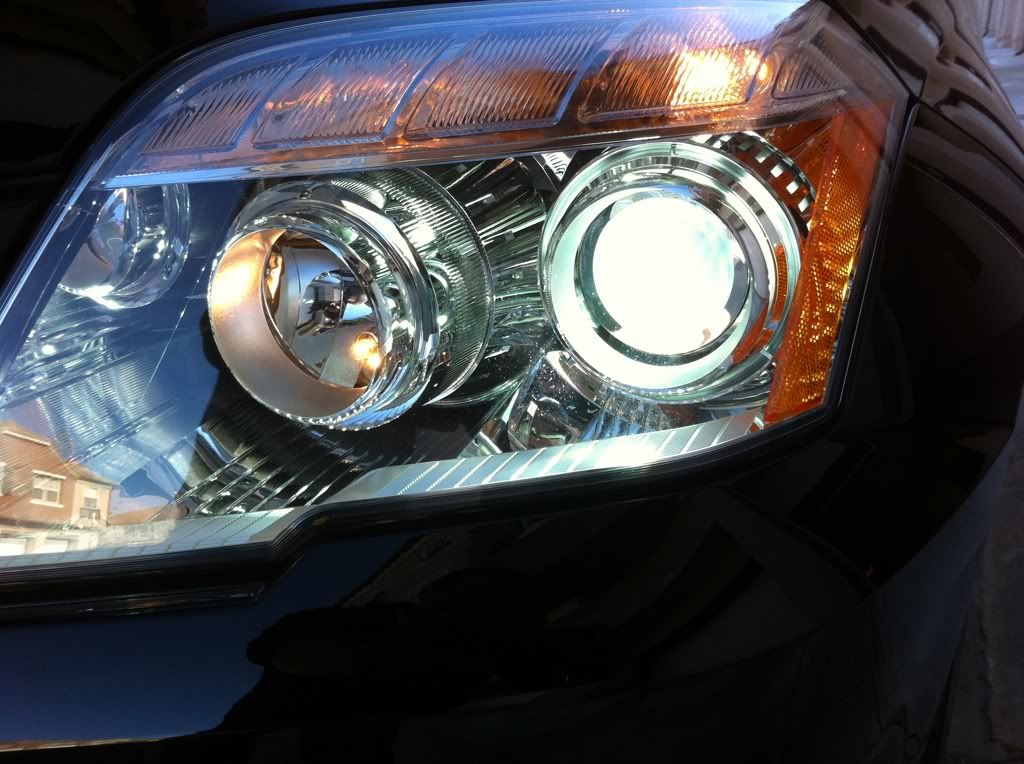
First of, take out the Low Beam cover. Refer to your owners manual if you don't know where it is. Now, this is how the bulbs are secured onto the housing. By pulling the pins up CAREFULLY, this will disengage the bulb. Make sure u don't pull the pins out or you'll have a hard time putting it back. Just simply slowly pull it up. Take out the OEM bulb, put the H7 HID bulb. Secure it in place while pulling down the pin and there you go. Honestly, the driver side was easier to put than the passenger side. Everyone else was saying it was harder on the driver side. Note: Use your left hand on the driver side to make your life easier. Here is how the bulbs would look:
Passenger Side:
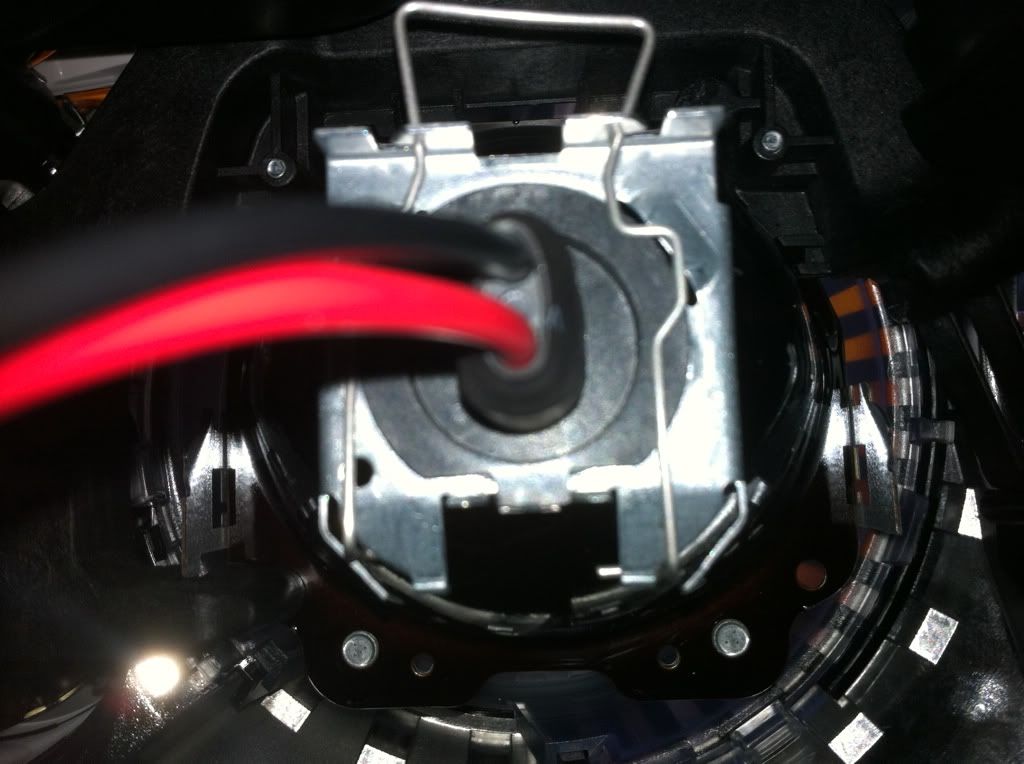
Driver Side:
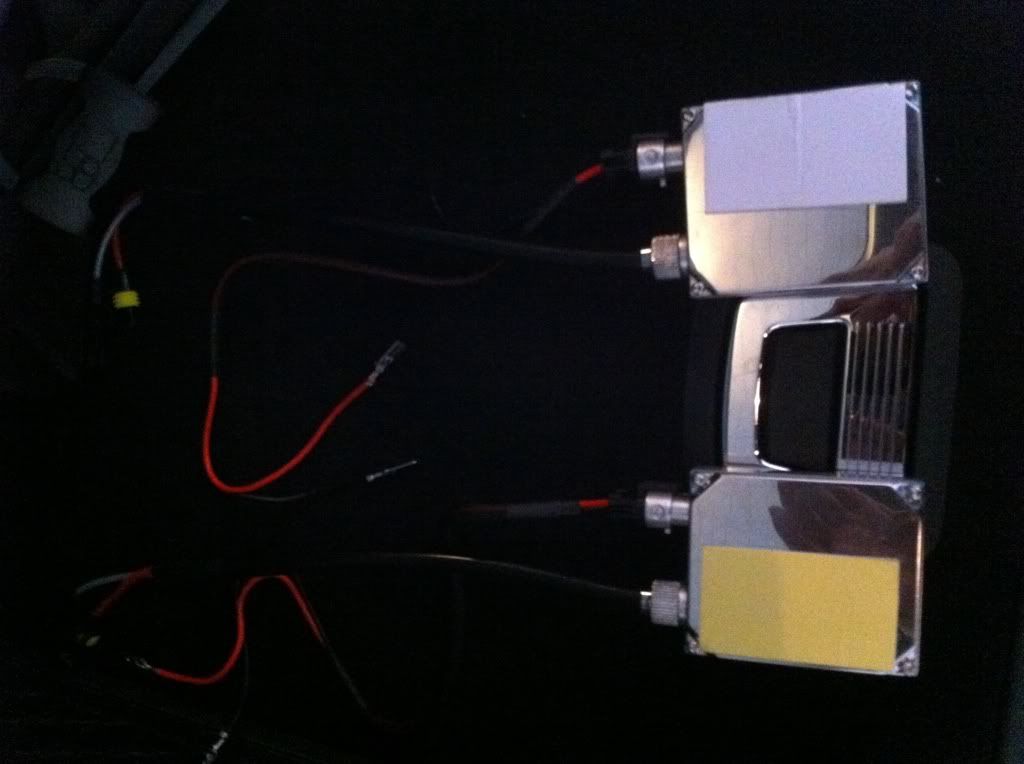
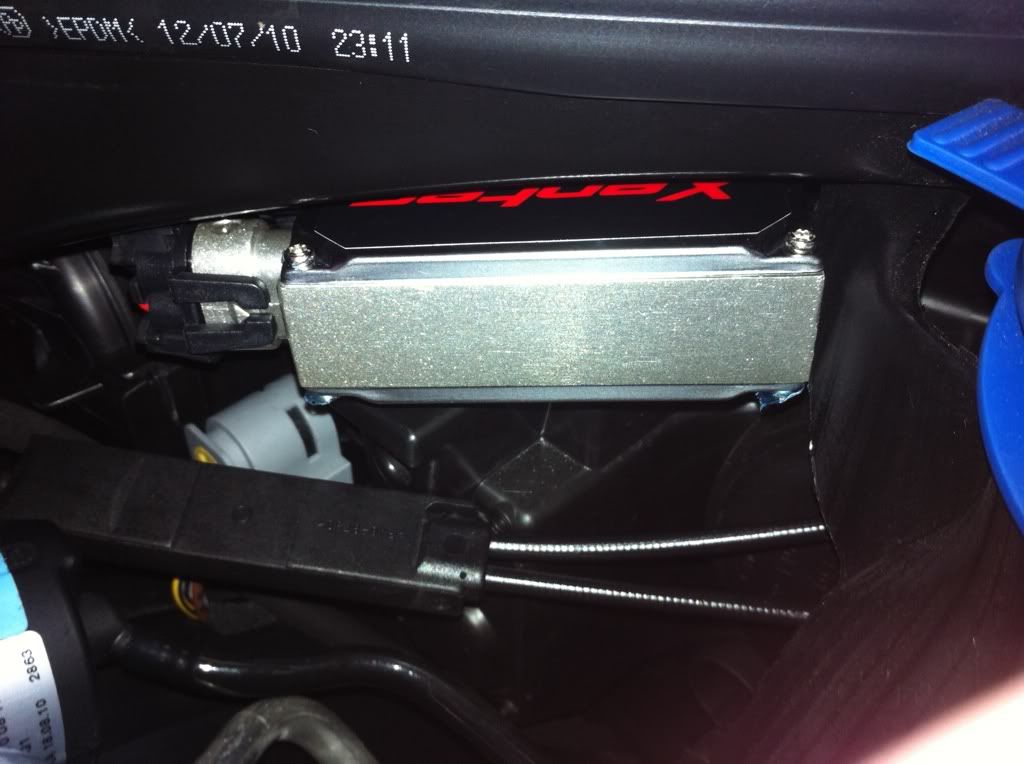
Then look for a secure place to put the ballast. I put mine on top of the headlight housing. Mine came with a double sided industrial grade tape. Some have the screw on housing. This is the pic of the top housing. Plenty of space and the Xentec ballast is fairly small so it's a perfect fit.
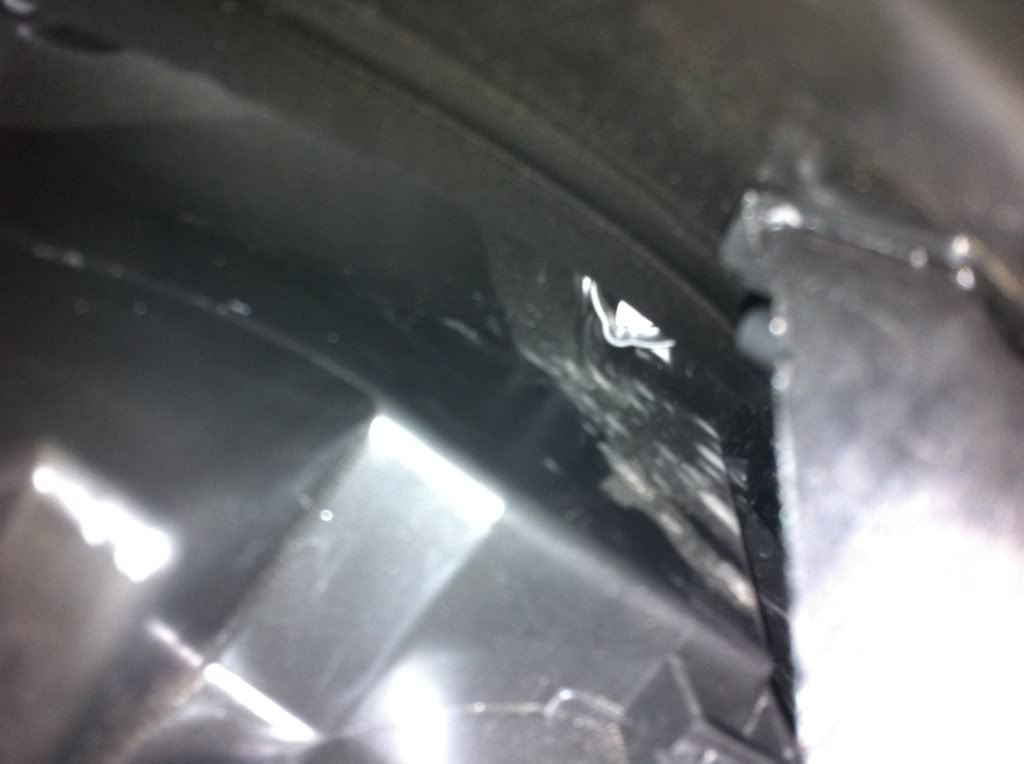
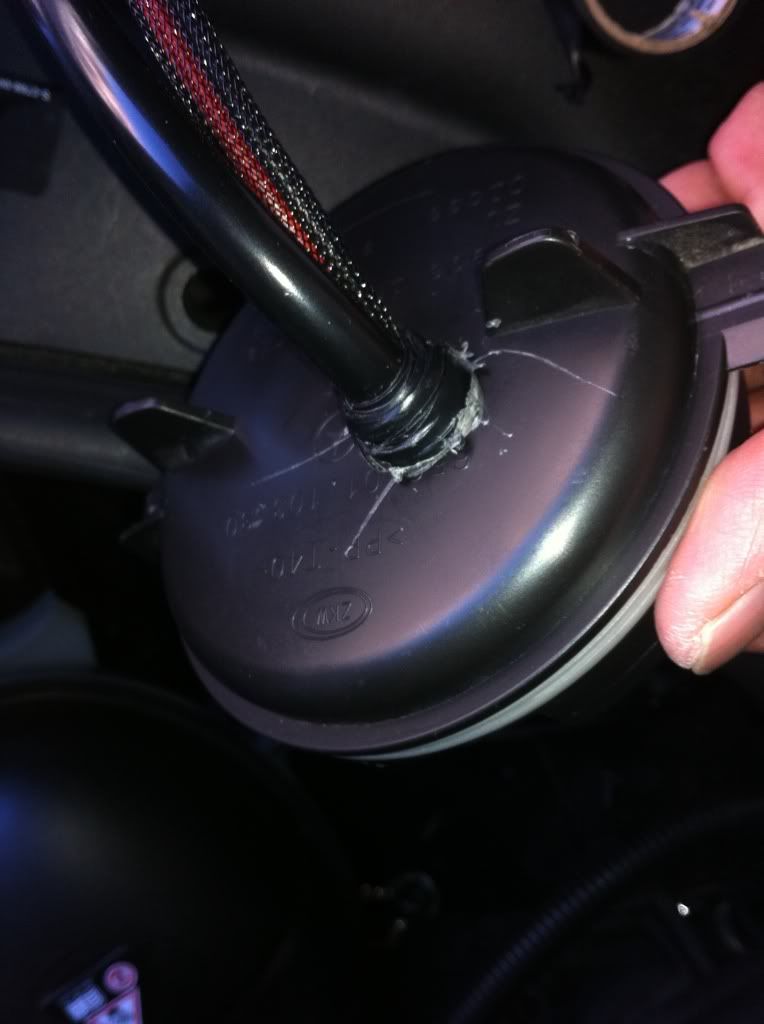
Assemble all the parts needed. Also, take the low beam cover and drill a hole in it enough to put the plastic socket and the wires in it for installation. The bulb wire are in the housing so it is necessary to put a hole in the cover.
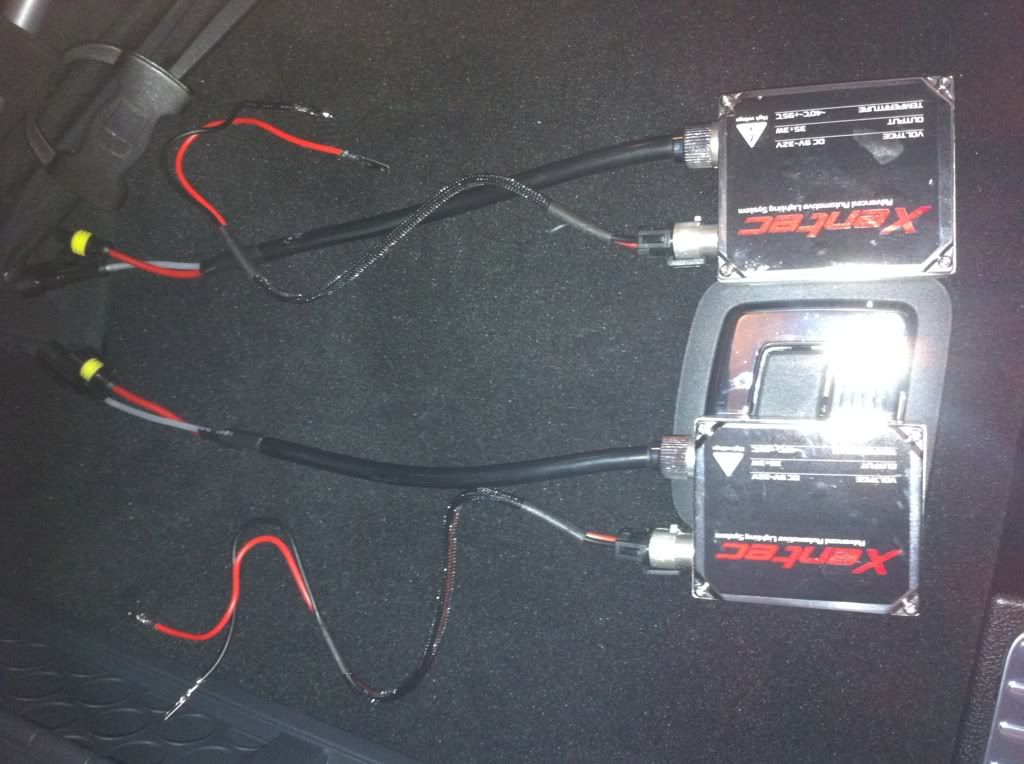
Here is the one with the double sided tape on:
Put it on all the wiring. Everything is plug and play so it should be easy. Remember, yellow wire = red wire & two brown wires = black wire. Secure everything with an electric tape. As you can see, on mine, I put a roll of electric tape around the wiring and used that to cover the hole that I drilled on the cover. This will prevent leaking. You can also buy those plastic sealants and put it in there. Those are scratches on the cover, by the way. It's not cracked because of drilling. I was too lazy to buy a 3/4 drill so I just used the biggest one I had and drilled it until the hole got bigger. I was slipping hence the scratches.
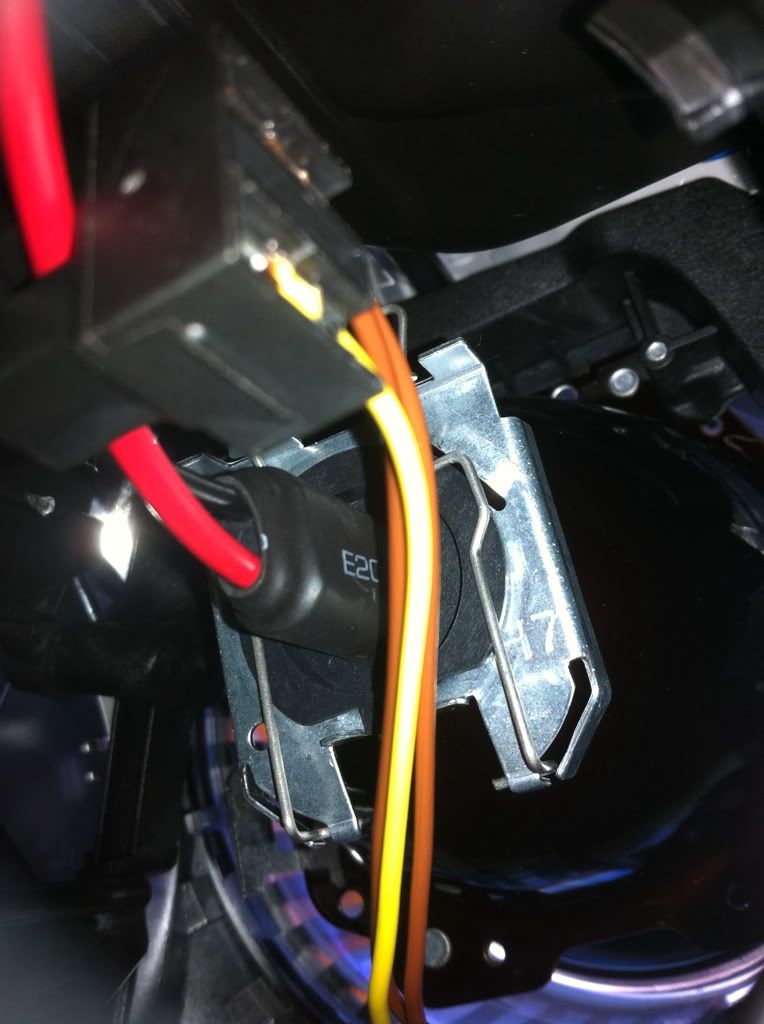
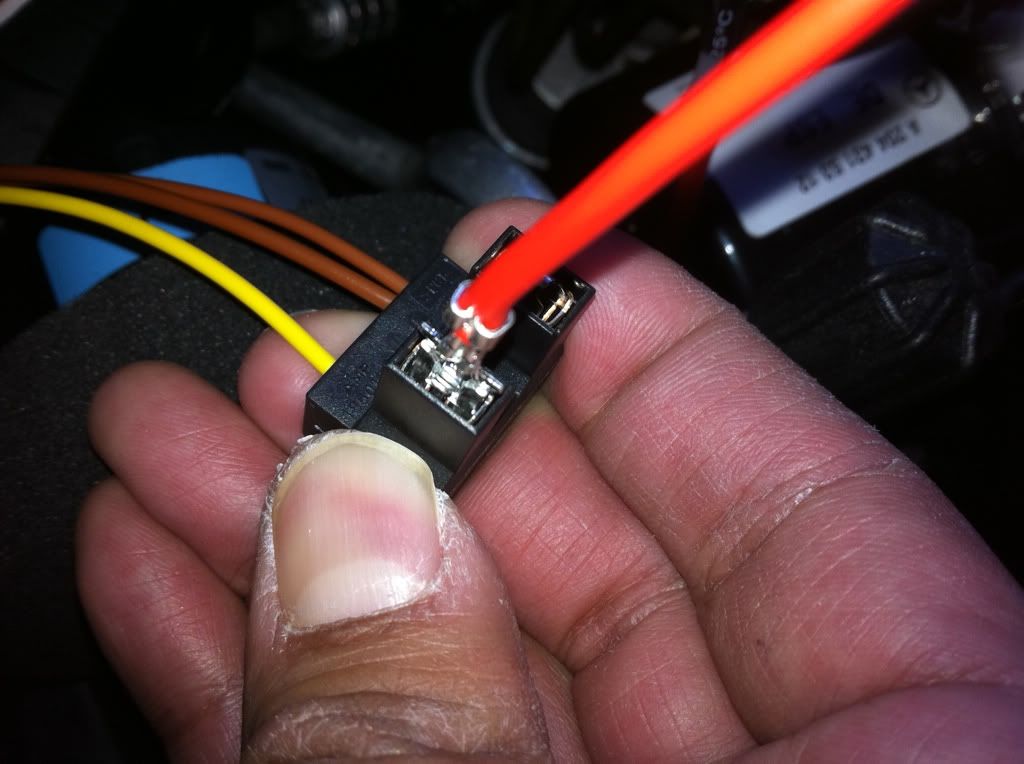
Here's an example of the Yellow and Brown Wire. Sorry, my hands look crusty. Its dry season here in Socal.
Electric Tape everything:
Test it out first before you put the cover back. If everything is working, put the cover back and secure the ballast in place.
Here is how it will look like:
NOW LET'S START INSTALLING:
First, you need to check if the lights work. Follow the instructions on the kit and test it out first. By the way, YELLOW wire is positive and the TWO BROWN wires are negative. So Yellow on Red wire then Brown on Black wire. If everything is working, then you can proceed.
First of, take out the Low Beam cover. Refer to your owners manual if you don't know where it is. Now, this is how the bulbs are secured onto the housing. By pulling the pins up CAREFULLY, this will disengage the bulb. Make sure u don't pull the pins out or you'll have a hard time putting it back. Just simply slowly pull it up. Take out the OEM bulb, put the H7 HID bulb. Secure it in place while pulling down the pin and there you go. Honestly, the driver side was easier to put than the passenger side. Everyone else was saying it was harder on the driver side. Note: Use your left hand on the driver side to make your life easier. Here is how the bulbs would look:
Passenger Side:
Driver Side:
Then look for a secure place to put the ballast. I put mine on top of the headlight housing. Mine came with a double sided industrial grade tape. Some have the screw on housing. This is the pic of the top housing. Plenty of space and the Xentec ballast is fairly small so it's a perfect fit.
Assemble all the parts needed. Also, take the low beam cover and drill a hole in it enough to put the plastic socket and the wires in it for installation. The bulb wire are in the housing so it is necessary to put a hole in the cover.
Here is the one with the double sided tape on:
Put it on all the wiring. Everything is plug and play so it should be easy. Remember, yellow wire = red wire & two brown wires = black wire. Secure everything with an electric tape. As you can see, on mine, I put a roll of electric tape around the wiring and used that to cover the hole that I drilled on the cover. This will prevent leaking. You can also buy those plastic sealants and put it in there. Those are scratches on the cover, by the way. It's not cracked because of drilling. I was too lazy to buy a 3/4 drill so I just used the biggest one I had and drilled it until the hole got bigger. I was slipping hence the scratches.
Here's an example of the Yellow and Brown Wire. Sorry, my hands look crusty. Its dry season here in Socal.
Electric Tape everything:
Test it out first before you put the cover back. If everything is working, put the cover back and secure the ballast in place.
Here is how it will look like:
 02-09-2011, 06:39 PM
#2
Junior Member

Join Date: Nov 2007
Location: NJ
Posts: 28
Likes: 0
Received 0 Likes
on
0 Posts
2013 cls550 & 2014 E550
Did you have to adjust the headlights
If so how do you do it. I see the one for up and down but is there an adjustment for side to side? How did they work in the stock projectors?
02-09-2011, 07:04 PM
#3
Member
Thread Starter
Join Date: Dec 2010
Posts: 89
Likes: 0
Received 0 Likes
on
0 Posts
2010 Ford Mustang, 2011 Mercedes Benz GLK 350 & 2010 Harley Davidson Custom Cafe Racer Style Sportst
Not sure what you meant by "how do you do it". The picture shows it all. If you have the kits, you'd understand what you'll be dealing with. Adjustments? There is nothing to adjust since they fit snug like the OEM bulbs. That's why these kits are plug and play. It's not as complicated as you think except for putting in the bulbs to the headlight housing.
02-09-2011, 08:29 PM
#4
Junior Member
Join Date: Nov 2007
Location: NJ
Posts: 28
Likes: 0
Received 0 Likes
on
0 Posts
2013 cls550 & 2014 E550
Ok so you didnt need to adjust the height of the projectors as usualy when you drop HIDS in I thought you needed to as they are much brighter and when put into the regular projectors thought they would blind on coming cars. If you dont need to then even better and it doesnt sound like you needed to. Using the stock projectors is the light pretty focused?
02-09-2011, 08:36 PM
#5
Member
Thread Starter
Join Date: Dec 2010
Posts: 89
Likes: 0
Received 0 Likes
on
0 Posts
2010 Ford Mustang, 2011 Mercedes Benz GLK 350 & 2010 Harley Davidson Custom Cafe Racer Style Sportst
Ok so you didnt need to adjust the height of the projectors as usualy when you drop HIDS in I thought you needed to as they are much brighter and when put into the regular projectors thought they would blind on coming cars. If you dont need to then even better and it doesnt sound like you needed to. Using the stock projectors is the light pretty focused?
 yeah, do don't be afraid to install these suckers in. You're definitely missing out without them HID's. They are awesome especially with projector headlights. I have a kit i'm selling for $32 shipped if you're interested.
02-09-2011, 09:19 PM
yeah, do don't be afraid to install these suckers in. You're definitely missing out without them HID's. They are awesome especially with projector headlights. I have a kit i'm selling for $32 shipped if you're interested.
02-09-2011, 09:19 PM
#6
MBWorld Fanatic!
Join Date: Oct 2009
Posts: 2,071
Likes: 0
Received 18 Likes
on
14 Posts
Nissan GT-R BE / '12 Ducati-1199 Panigale S / '12 C300-4M Loaded/GLK350-4M Loaded
Nice! They don't turn I take it?
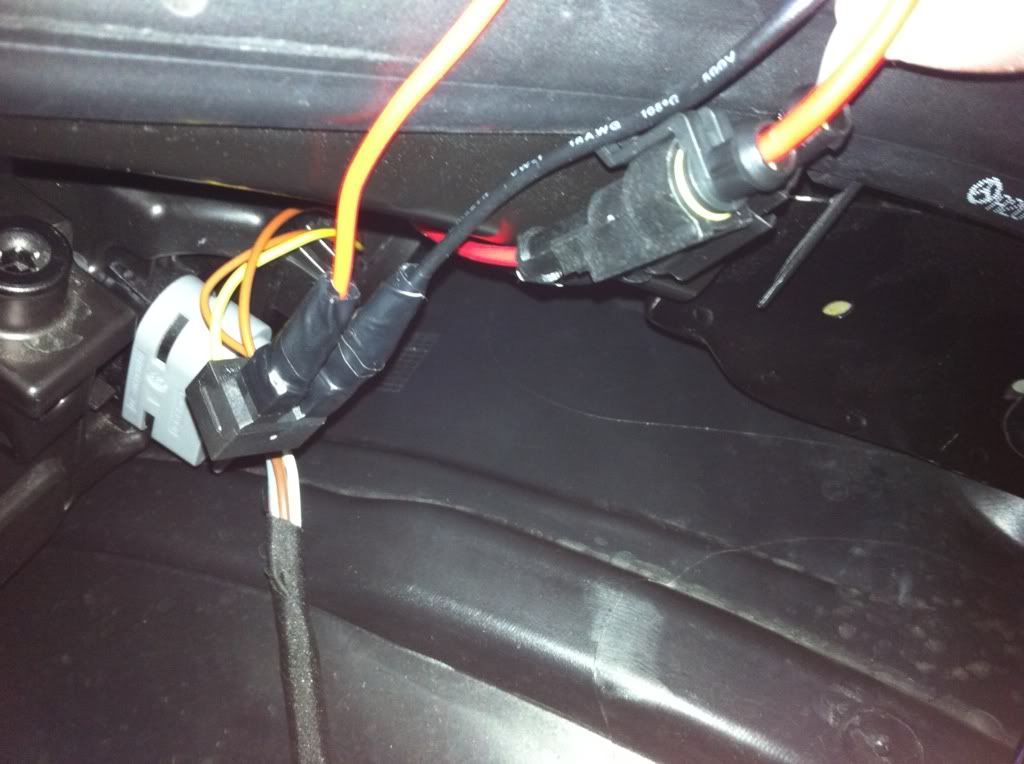
Plus, the electrical tape in this pic should go! Use shrink wrap instead. To secure the wires, I would use black zip-ties with self stick anchors. More professional looking and less prone to heat and water penetration.
In this pic, I would substitute black urethane sealant. The use of clear GE silicone sealant will eventually fail.
02-10-2011, 01:59 PM
#7
MBWorld Fanatic!
I was thinking the same thing about shrink-wrap and cable ties; electrical tape is a temporary solution, especially under the hood.
I can't imagine why they would turn; it's just a bulb swap w/ ballasts, no additional mechanicals.
So, carval23; this is only for the low-beams, right? Is there another kit for the highs? I would think they are different colors; wouldn't you want them to match?
I can't imagine why they would turn; it's just a bulb swap w/ ballasts, no additional mechanicals.
So, carval23; this is only for the low-beams, right? Is there another kit for the highs? I would think they are different colors; wouldn't you want them to match?
Trending Topics
02-10-2011, 04:24 PM
#8
Member
Thread Starter
Join Date: Dec 2010
Posts: 89
Likes: 0
Received 0 Likes
on
0 Posts
2010 Ford Mustang, 2011 Mercedes Benz GLK 350 & 2010 Harley Davidson Custom Cafe Racer Style Sportst
Nice! They don't turn I take it?
Plus, the electrical tape in this pic should go! Use shrink wrap instead. To secure the wires, I would use black zip-ties with self stick anchors. More professional looking and less prone to heat and water penetration.
In this pic, I would substitute black urethane sealant. The use of clear GE silicone sealant will eventually fail.

FYI, i did put black urethane sealants on it, made a big mess and then one of the bulbs died, imagine how much cussing I had to do to take those off. What I did is I bought one of those black rubber hoses with a hole in the middle for electrical wirings and shoved the two wires in there voila!!! Easy to take off and put back on in case the bulbs goes dead on ya.
02-11-2011, 05:46 PM
#9
MBWorld Fanatic!
I think MBRedux's point is that electrical tape just falls off after a while due to under hood temperatures, and a good splash through a puddle could short out the exposed wires.
Besides, no offense meant but I wouldn't want such shoddy-looking work on any of my cars.
It's a late model Mercedes, not an old Pinto...
Besides, no offense meant but I wouldn't want such shoddy-looking work on any of my cars.
It's a late model Mercedes, not an old Pinto...
02-11-2011, 07:25 PM
#10
Member
Thread Starter
Join Date: Dec 2010
Posts: 89
Likes: 0
Received 0 Likes
on
0 Posts
2010 Ford Mustang, 2011 Mercedes Benz GLK 350 & 2010 Harley Davidson Custom Cafe Racer Style Sportst
I think MBRedux's point is that electrical tape just falls off after a while due to under hood temperatures, and a good splash through a puddle could short out the exposed wires.
Besides, no offense meant but I wouldn't want such shoddy-looking work on any of my cars.
It's a late model Mercedes, not an old Pinto...
Besides, no offense meant but I wouldn't want such shoddy-looking work on any of my cars.
It's a late model Mercedes, not an old Pinto...

Besides, no offense meant but I wouldn't want such shoddy-looking work on any of my cars.
I'll try to take a pic of the finish install and you'll see what I mean.
02-14-2011, 10:20 PM
#11
Super Member
Join Date: May 2009
Location: Vancouver, (BC) Best City on Planet Earth
Posts: 507
Likes: 0
Received 1 Like
on
1 Post
GLK 350X :0
carval, thanks for the post.
I guess a bit of excitement does not hurt....
just the guys are expressing their 2cents in improving the looks and quality of install. ... now that is my 2cents too

I guess a bit of excitement does not hurt....
just the guys are expressing their 2cents in improving the looks and quality of install. ... now that is my 2cents too
02-14-2011, 10:58 PM
#13
Member
Thread Starter
Join Date: Dec 2010
Posts: 89
Likes: 0
Received 0 Likes
on
0 Posts
2010 Ford Mustang, 2011 Mercedes Benz GLK 350 & 2010 Harley Davidson Custom Cafe Racer Style Sportst
 To everyone, good luck with the DIY! I promise you'll have fun.
02-15-2011, 12:21 PM
To everyone, good luck with the DIY! I promise you'll have fun.
02-15-2011, 12:21 PM
#14
Member
Thread Starter
Join Date: Dec 2010
Posts: 89
Likes: 0
Received 0 Likes
on
0 Posts
2010 Ford Mustang, 2011 Mercedes Benz GLK 350 & 2010 Harley Davidson Custom Cafe Racer Style Sportst
02-15-2011, 05:15 PM
#15
Member
Thread Starter
Join Date: Dec 2010
Posts: 89
Likes: 0
Received 0 Likes
on
0 Posts
2010 Ford Mustang, 2011 Mercedes Benz GLK 350 & 2010 Harley Davidson Custom Cafe Racer Style Sportst
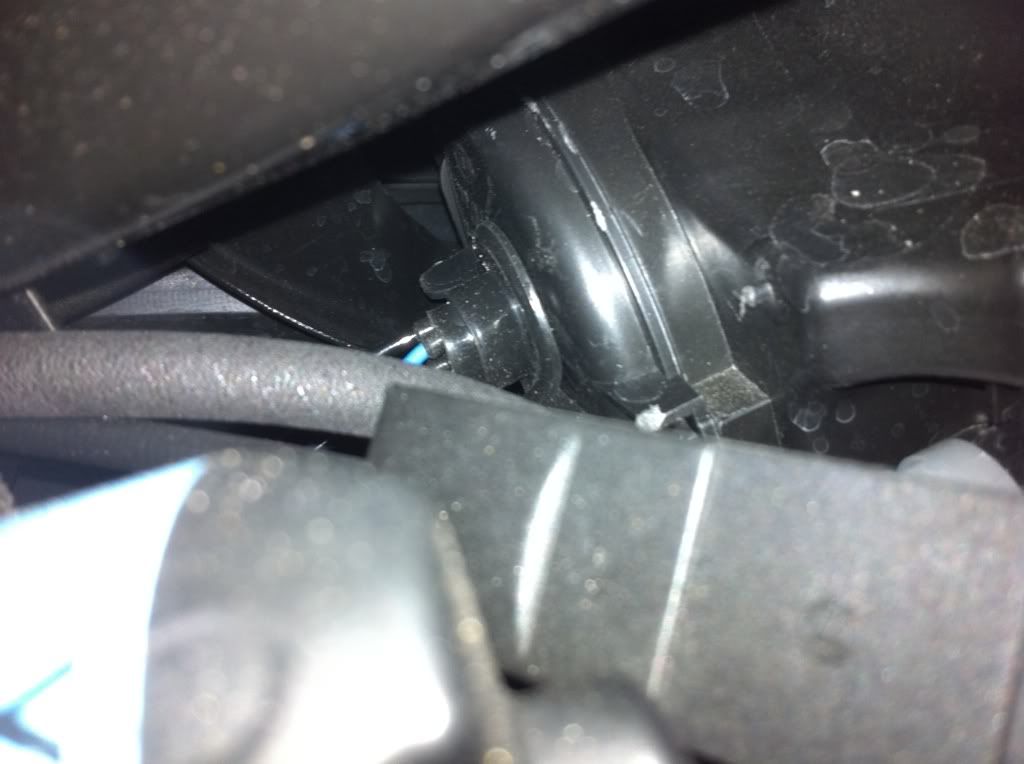
Pics of the drilled caps with rubber hose for wires
Here's how it looks like cleaned up. Every wire is hidden and looks professionally done. All the wire go in the headlight housing and your left with two short wires that you can hide with the ballast on top of the housing itself. See, no need for zip ties or sealants.
Last edited by carval23; 02-15-2011 at 05:21 PM.
02-16-2011, 11:30 AM
#17
Member
Thread Starter
Join Date: Dec 2010
Posts: 89
Likes: 0
Received 0 Likes
on
0 Posts
2010 Ford Mustang, 2011 Mercedes Benz GLK 350 & 2010 Harley Davidson Custom Cafe Racer Style Sportst
02-20-2012, 09:49 PM
#18
Super Member
Join Date: Mar 2006
Location: Waikele, Oahu, Hawaii
Posts: 769
Likes: 0
Received 6 Likes
on
6 Posts
2011 GLK350 P1, Multi-media & AMG Pkg; 2010 E350 w/ prem 2; 2018 4Runner SR5 Prem. 4x4
I noticed my lowbeams are pointing downwards...towards the ground....about 40 ft away...anyone adjusted it up higher? is so, how to do that?
03-10-2012, 12:59 PM
#19
Newbie

Join Date: May 2007
Posts: 5
Likes: 0
Received 0 Likes
on
0 Posts
I installed my B-Class HIDs with all electrical tape to cover the hole i drilled in the headlight (black) cap. No issues with moisture at all in the projector lense. I'll be removing that kit out to install into the GLK after we pick it up from the dealership. Did you get any flickering or need resistors? I did on the B, so I guess I'll just transfer everything over to the GLK.
03-10-2012, 07:23 PM
#20
MBWorld Fanatic!

Join Date: Sep 2011
Location: East Texas
Posts: 1,522
Likes: 0
Received 3 Likes
on
3 Posts
2004 Volvo XC70; 2012 GLK 350 4matic
What exactly are thes HID thingies? Why do they need a ballast? What is the color temperature? Are they only dipped (low) beams? What do they do?
Wayne
Wayne
01-11-2013, 03:27 PM
#21
Junior Member

Join Date: Jan 2013
Posts: 41
Likes: 0
Received 0 Likes
on
0 Posts
civic corrado glk
not really digging why the seller of the hid kits did not include or supply you with the female nylon connectors. It looks butt ugly and even if you heat shrink the male connectors that you insert into the original plug screams half ***. I got a bunch of all sorts of connectors from my days installing hids that I will use to make it a true plug and play kit. just take the connector and plug and voila. Just my 2 cents
all you need is two nylon H7 female connectors and 4 male brass terminal on the ends of the power and ground on the hid ballasts.
electrical tape for the two terminal


all you need is two nylon H7 female connectors and 4 male brass terminal on the ends of the power and ground on the hid ballasts.
electrical tape for the two terminal
Last edited by packardbell; 01-14-2013 at 05:32 PM.
01-14-2013, 05:23 PM
#22
Member

Join Date: Jan 2013
Location: Kirkland WA
Posts: 87
Likes: 0
Received 0 Likes
on
0 Posts
E350
good job
seems like a clean job
02-13-2013, 08:20 PM
#24
Junior Member

Join Date: Nov 2008
Posts: 25
Likes: 0
Received 0 Likes
on
0 Posts
2001 SLK320
On the GLK, it's the perfect height and the HID actually kinda spreads even better than the stock halogen. U wouldn't even need the fog lamps anymore. Actually, the newer manufactured Aftermarket HID kits are decent compared to the older ones. I think the issue with the high light projection was fixed. yeah, do don't be afraid to install these suckers in. You're definitely missing out without them HID's. They are awesome especially with projector headlights. I have a kit i'm selling for $32 shipped if you're interested.
yeah, do don't be afraid to install these suckers in. You're definitely missing out without them HID's. They are awesome especially with projector headlights. I have a kit i'm selling for $32 shipped if you're interested.
02-16-2013, 10:12 PM
#25
Newbie

Join Date: Feb 2013
Posts: 10
Likes: 0
Received 0 Likes
on
0 Posts
2013 GLK 350 Polar White
Hey guys, i am not the expert on those HIDS lights and could never install them myself i am afraid...but i love the look of them!
i am the owner of a 2013 GLK and have 3 questions about this:
1) can you also exchange the inner head lights?
2) as a non-expert, what do i need to look for when buying the kit? i thought that the low beams were reflectors and not projectors. is this part of the kit? can anyone offer a link to a suitable, good quality kit?
3) does this do anything to your warranty if you mess with the lights?
thanks!


