When you click on links to various merchants on this site and make a purchase, this can result in this site earning a commission. Affiliate programs and affiliations include, but are not limited to, the eBay Partner Network.
Installed my valentine one gen2 in my GLS this past week.
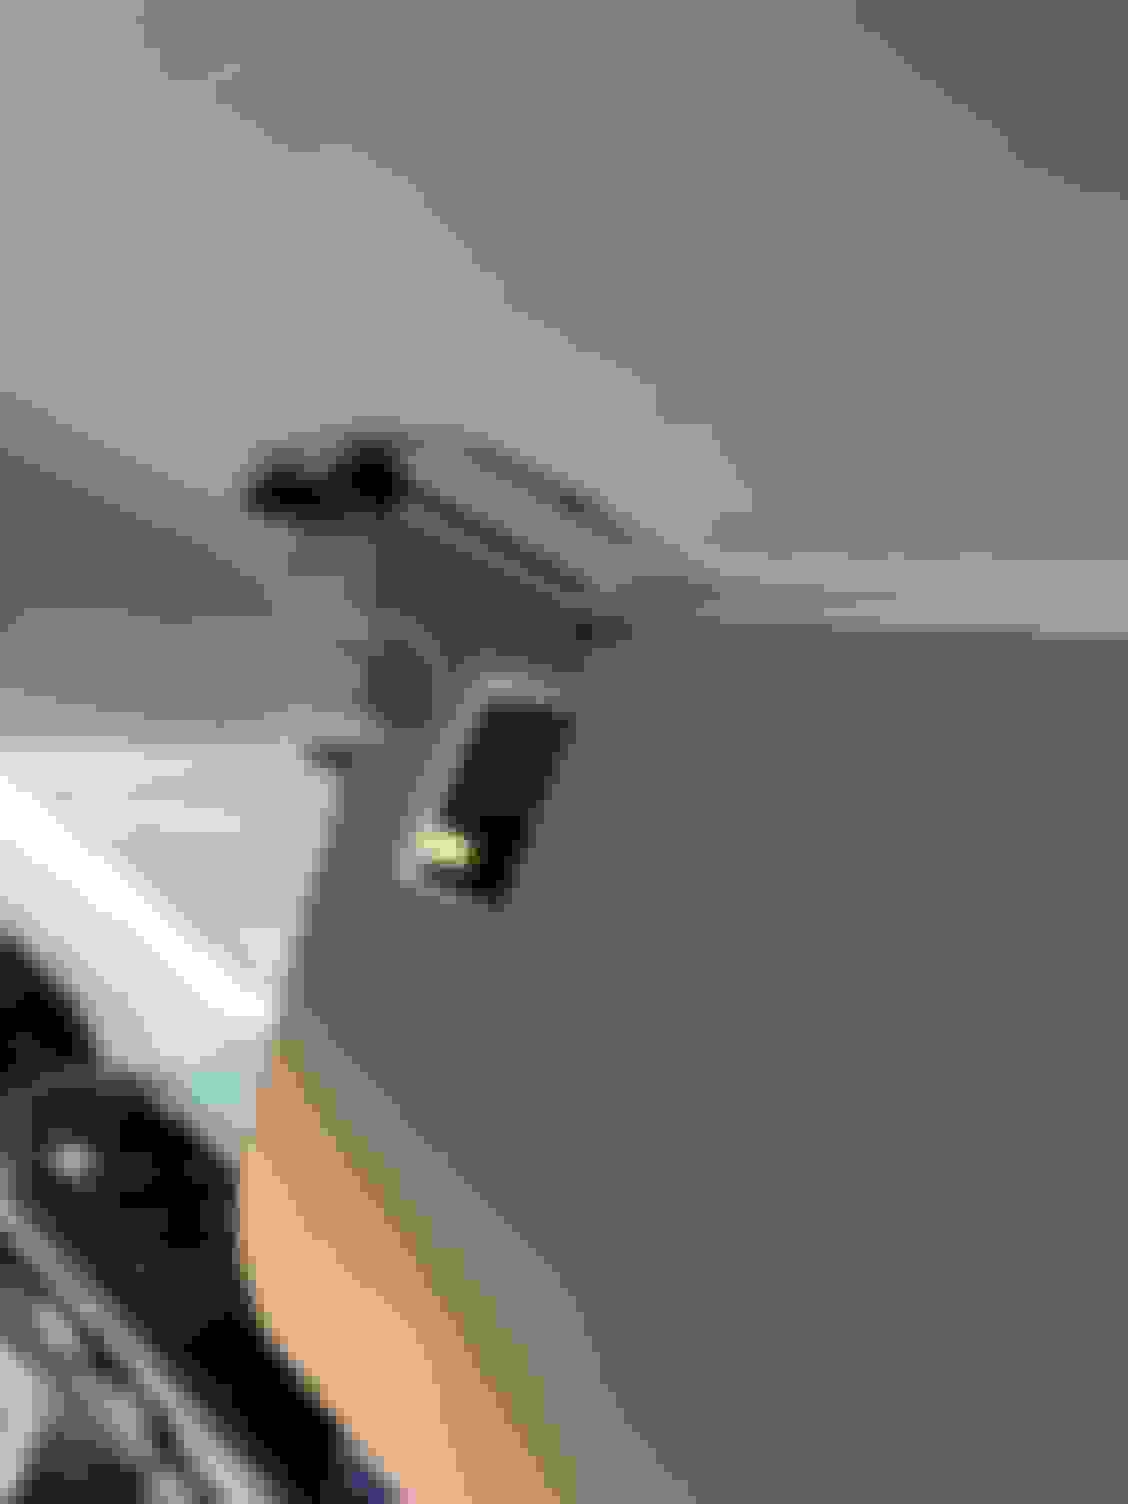
I don’t like suction cup mounts so retro fitted a radar mount I got off Amazon and clamped it to the sun visor mount. This gets it off the windshield and close to the IR coating “window”.
Just had to add some longer screws so it could get around the visor mount. Then I also flipped the attachment point on the valentine clip so I could get a better angle for mounting.
I’m going to try and retro fit a blend mount next as they are a little more streamlined but waiting on parts to do that. I’m hoping this wall also let me get the detector another inch or so higher.
I also hard wired it by running a wire down the passenger side pillar and then running another wire all the way to the rear fuse panel, going under the door sill trim and carpet. I used a add a circuit fuse for the rear and connected to the 12v socket fuse which is switched .
Then used valentines hard wire kit behind the front fuse panel to connect the 2 wires together.
Nice Job. I have hardwired all of my cars for the past 20 years for the V1 and this was the first one that I looked at and said FTS and handed it over to my expert mechanic to install for me. Also had to have him install a Blackvue which was simply a pain to do in this vehicle.
Mercedes needs to read this and see that their openings in the insulted windshields are horribly placed, they really need another one on the drivers side high up. Additionally that one at the bottom center is worthless, they need one at the bottom drivers side as no carwash RFID sticker works in any spot in this vehicle.
Is there no option to use a MirrorTap to connect the radar? There has to be 12v switched power in the mirror or overhead In that area.
Everything I found when researching was no switched 12v at the mirror but I actually didn’t test it myself. Running a wire to the back fuse box was easy and took 10-15 minutes.
Installed my valentine one gen2 in my GLS this past week.
I don’t like suction cup mounts so retro fitted a radar mount I got off Amazon and clamped it to the sun visor mount. This gets it off the windshield and close to the IR coating “window”.
Just had to add some longer screws so it could get around the visor mount. Then I also flipped the attachment point on the valentine clip so I could get a better angle for mounting.
I’m going to try and retro fit a blend mount next as they are a little more streamlined but waiting on parts to do that. I’m hoping this wall also let me get the detector another inch or so higher.
I also hard wired it by running a wire down the passenger side pillar and then running another wire all the way to the rear fuse panel, going under the door sill trim and carpet. I used a add a circuit fuse for the rear and connected to the 12v socket fuse which is switched .
Then used valentines hard wire kit behind the front fuse panel to connect the 2 wires together.
Which mount and wire (link?) from Amazon did you chose?
Which mount and wire (link?) from Amazon did you chose?
This is the mount.
Radar Mount Mirror Mount Bracket for Valentine V1 Radar Detectors - V1 (3001004) https://a.co/d/bC9U0jl
I just had to get longer screws to clamp around the visor mount. I believe they were 70 or 80mm long.
I then reversed the mirror part of the bracket so the flat part was against the visor mount instead of the rounded part that would normally be against the mirror post.
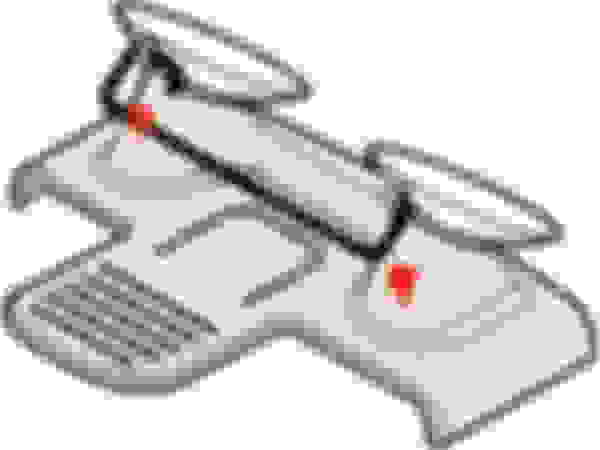
I also changed where the Amazon mirror mount attached to the valentine detector. Just had to drill 2 small holes for the screws to go through. (Marked in red on attached pic)
I used the valentine straight cable (8’ long) from the detector down to the passenger side footwell. At that panel, I used the valentine direct wire power adapter they sell and from that point, I just ran an 18 gauge automotive power cable back to the rear fuse panel. At the rear fuse panel , I used a standard add a circuit fuse from an auto parts store. Like this:
Uriveusa 12V Car Add-A-Circuit Fuse TAP Adapter Fuse Holder with 10A, 20A Fuse [Upgraded Fuses] - (2 Pack) (Mini Fuse) https://a.co/d/eDBJV51
Is there no option to use a MirrorTap to connect the radar? There has to be 12v switched power in the mirror or overhead In that area.
Nope. The power signals while they are 12V, they are pulse width modulated which means they cannot power the detector. I tried and when it didn't work, I took it to Best Buy who did the hard wire to the rear and they confirmed there is only PWM power at the front of the vehicle (even the fuse boxes). I had them do a rear camera which involved dismantling tail gate fascia and radar detector install for a very reasonable $159.
This is the mount.
Radar Mount Mirror Mount Bracket for Valentine V1 Radar Detectors - V1 (3001004) https://a.co/d/bC9U0jl
I just had to get longer screws to clamp around the visor mount. I believe they were 70 or 80mm long.
I then reversed the mirror part of the bracket so the flat part was against the visor mount instead of the rounded part that would normally be against the mirror post.
I also changed where the Amazon mirror mount attached to the valentine detector. Just had to drill 2 small holes for the screws to go through. (Marked in red on attached pic)
I used the valentine straight cable (8’ long) from the detector down to the passenger side footwell. At that panel, I used the valentine direct wire power adapter they sell and from that point, I just ran an 18 gauge automotive power cable back to the rear fuse panel. At the rear fuse panel , I used a standard add a circuit fuse from an auto parts store. Like this:
Uriveusa 12V Car Add-A-Circuit Fuse TAP Adapter Fuse Holder with 10A, 20A Fuse [Upgraded Fuses] - (2 Pack) (Mini Fuse) https://a.co/d/eDBJV51
Excellent! Thanks for the information. Glad to learn this before I wasted hours trying to find power in the mirror. Love the stealthy mount and since I go through cars to often it doesn't make sense for me to get the permanent install detectors.
Thanks for the kit ideas. Got the same one but for the Uniden R7. Extension screws needed are M4 and 70 mm long or #6 x 3” will work ok. also able to mount the EZ Pass above in the location recommended my Merc for least ration interference.
Now I just need to remove the A pillar and run the wires.
Any difficulty removing any panels? Any advice for running the wire back to the rear fuse panel? Pic of wired panel? Thanks.
Last edited by Vyper340vb; Jun 26, 2022 at 11:33 AM.
Thanks for the kit ideas. Got the same one but for the Uniden R7. Extension screws needed are M4 and 70 mm long or #6 x 3” will work ok. also able to mount the EZ Pass above in the location recommended my Merc for least ration interference.
Now I just need to remove the A pillar and run the wires.
Any difficulty removing any panels? Any advice for running the wire back to the rear fuse panel? Pic of wired panel? Thanks.
No difficulty, just takes a little fiddling to figure out the best way to remove the panels.
On the A pillar, you pop the airbag plug out first then pull the cover away and out. The one below also just pulls straight back and out.
I popped off the 2 door threshold pieces also. The rest I just used a small plastic fish tape I had and fed it through the other areas to snake the wire through.
Here’s a pic of the rear fuse panel with the add a fuse on the bottom.
In case you didn’t know , at the top of the rear fuse panel is a printed sheet with all the fuse locations and descriptions. It’s folded up and tucked in a slot at the top.
I know this is an older post but I just had to wire the radar detector in my wife 21 GLS 580 and found that if you remove the wood panel with the touch pad in the center console you can access the section with the grab handles and under that is the power for the 12 accessory socket.
You unsnap the cover from the palm rest remove the 2 bolts then you can pull the back up of wood panel to remove the panel. 4 more bolts hold the grab handles and the power for the accessory socket is now visible.
I know this is an older post but I just had to wire the radar detector in my wife 21 GLS 580 and found that if you remove the wood panel with the touch pad in the center console you can access the section with the grab handles and under that is the power for the 12 accessory socket.
You unsnap the cover from the palm rest remove the 2 bolts then you can pull the back up of wood panel to remove the panel. 4 more bolts hold the grab handles and the power for the accessory socket is now visible.
Hopefully no one here ever has to get into their dash but the same mechanic records this entire process. It's worth bookmarking just for reference of getting into other parts of the GLE/GLS:
Mercedes SLR McLaren 722 S Is Extremely Rare Example Modified by McLaren
Slideshow: A one-of-one U.S.-spec Mercedes-Benz SLR McLaren Roadster became even rarer after a factory-backed transformation at McLaren's headquarters.