


R350 Tailgate Failure
Super Member
Joined: May 2008
Posts: 699
Likes: 25
From: Warrington, PA
08 R350, 12 Mercedes R350

Newbie
Joined: Jun 2010
Posts: 9
Likes: 0
R350
No service... I'm ready to get rid of it. I think because others don't know it's automAtic and they force it down, it now won't open all the way. I tried turning off the limiter, worked like a charm!! Thank you all so much!

Newbie
Joined: Dec 2009
Posts: 3
Likes: 1
R350
So I spent a few days looking for instructions on how to remove the rear tailgate/hatch panel on the R-Class and found very little. I think it has more to do with the R-Class being a rare bird to begin with. Anyway, I decided to go on my own since I needed the hatch to be locked when the car is parked. The locking mechanism quit!
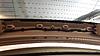
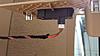
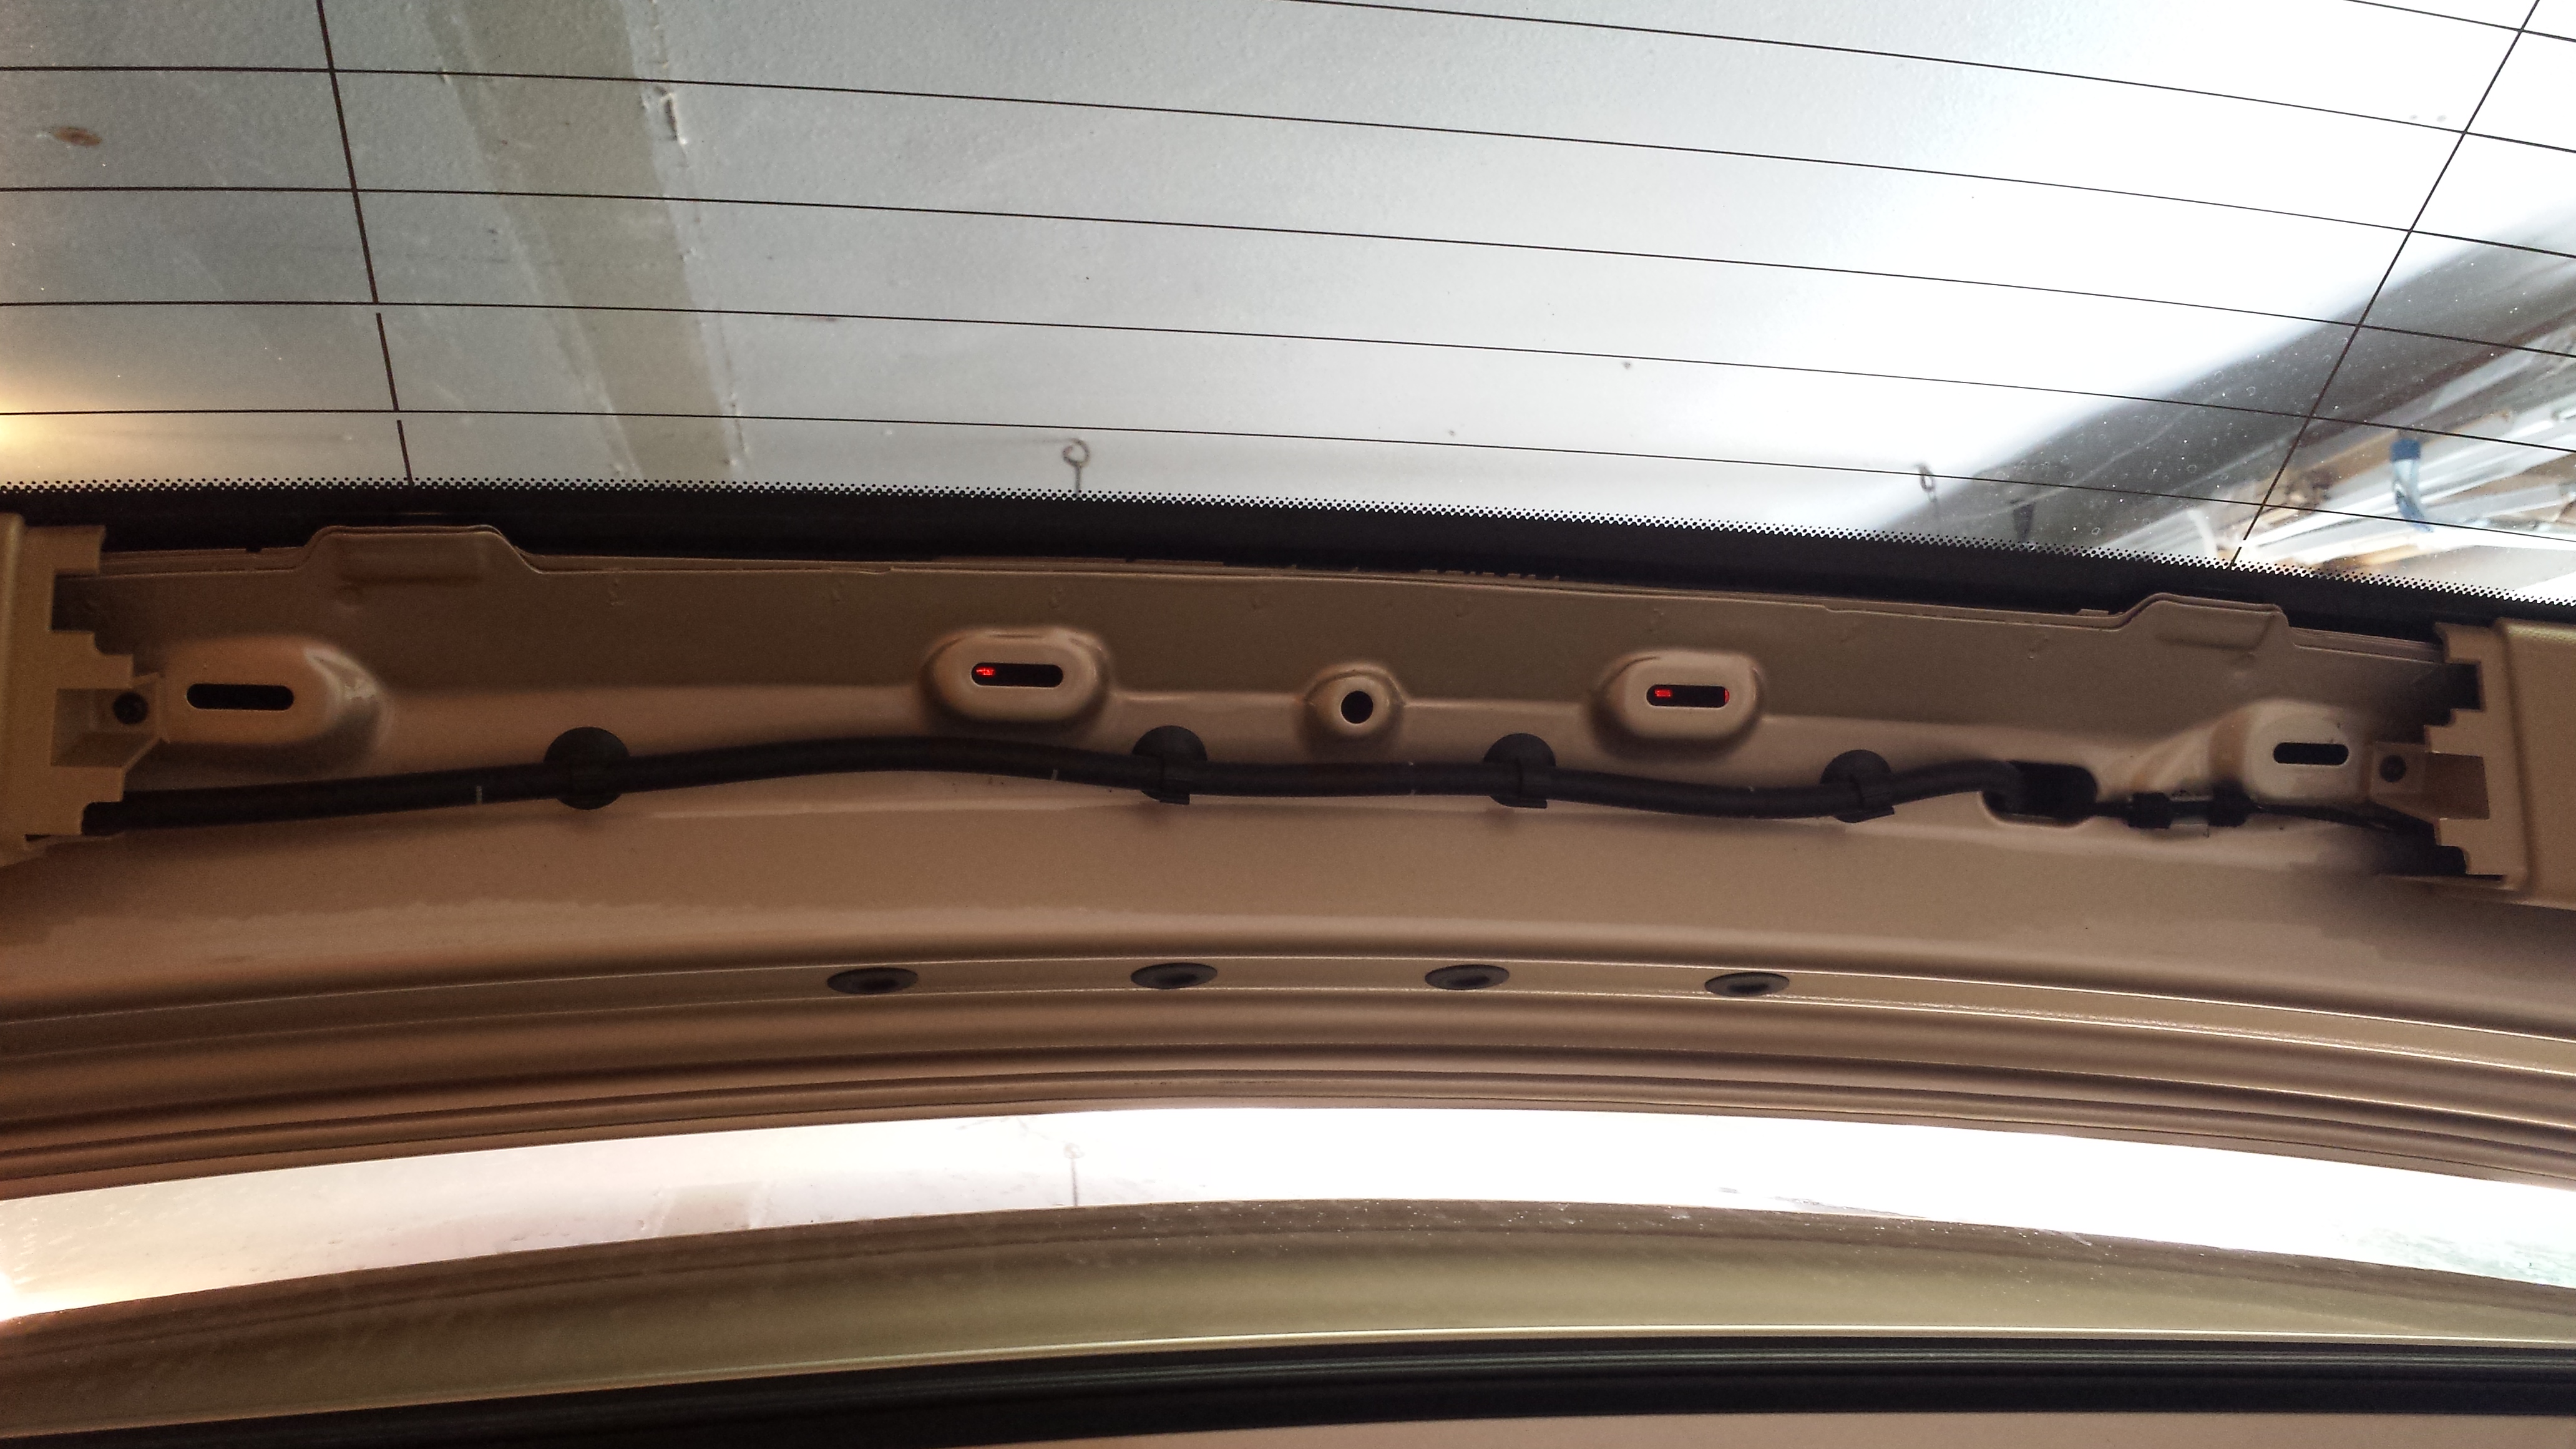
1) The first panel that should be removed is the long strip of plastic located above the rear window. It has 6 clips.
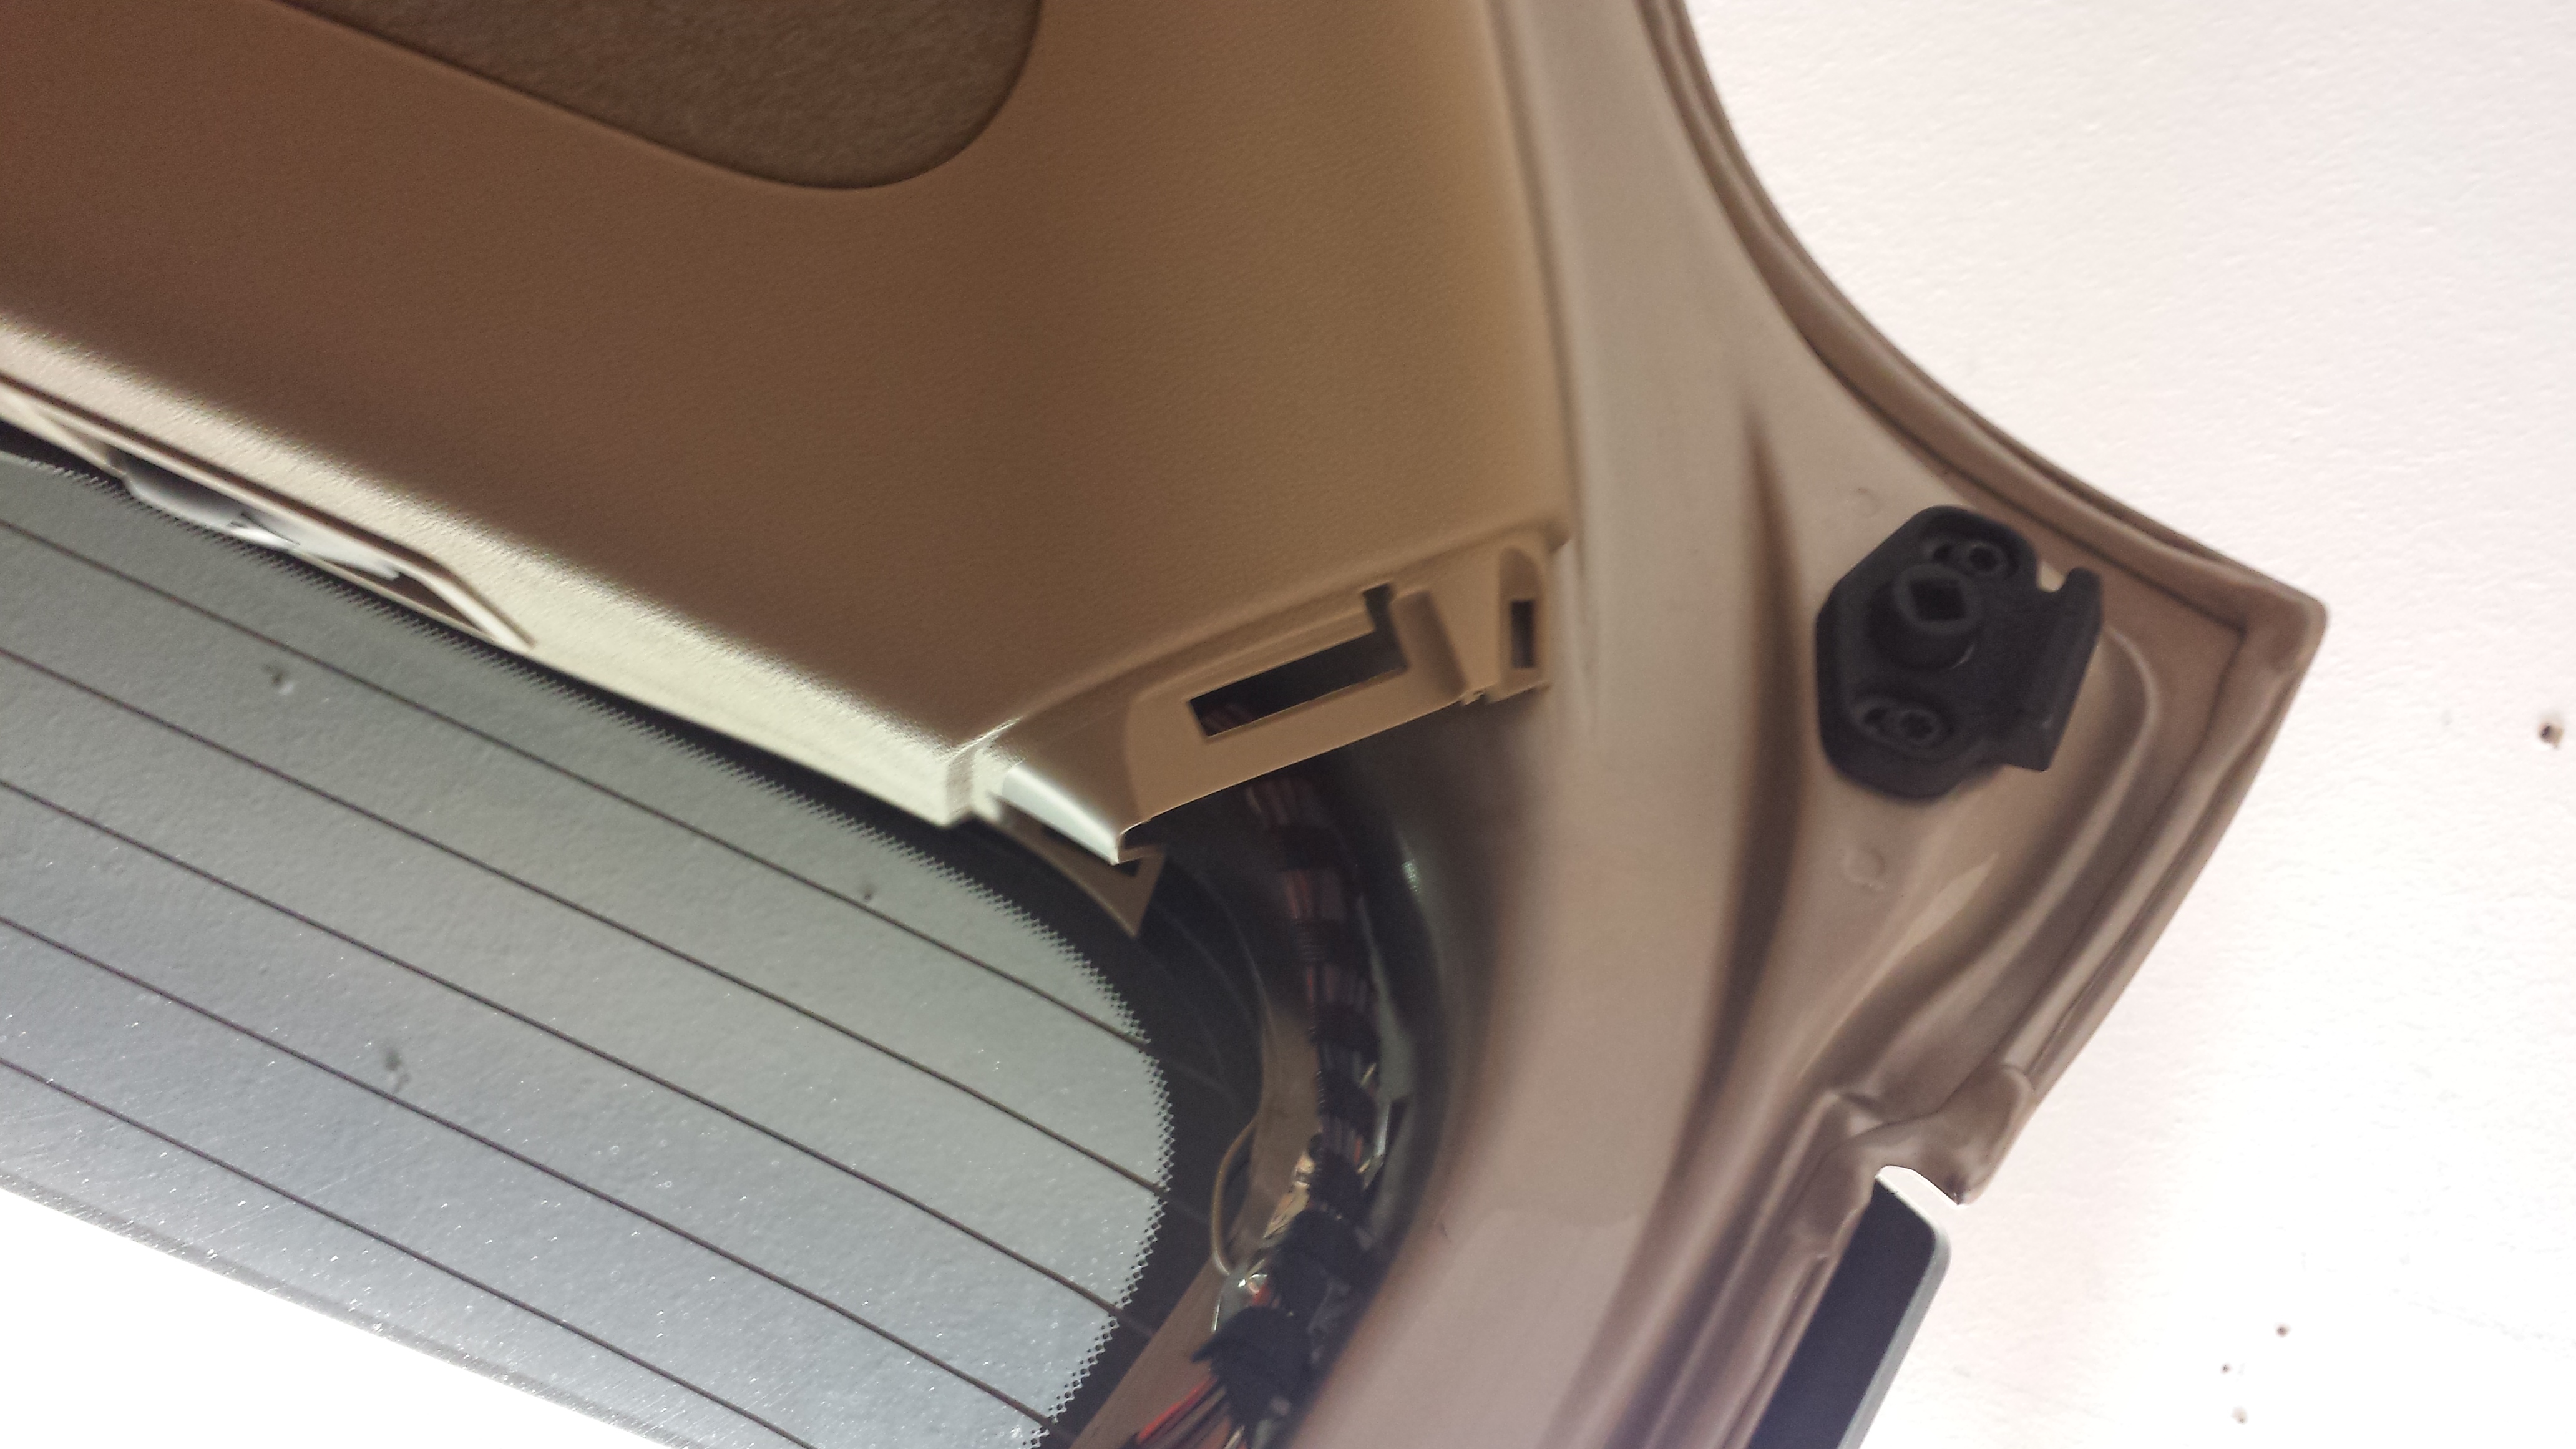
2) then remove the curved plastic panels. These are the ones located to the left and right of the rear window. It has once screw at the top and one clip in the middle. If you are removing the one on the left, gently pull it towards the right.
3) The long plastic at the bottom of the panel is next. This is the one with the red button that you push to close the tailgate. I started on the right side. Once I was able to take a peek at the first clip, I used a ling flat head to undo the clips and moved my way across. These are held by 6 clips.
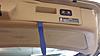
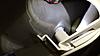
4) Remove the bezel located on the manual door release. I used 2 credit cards and lifted the bezel carefully one side at a time.
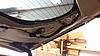
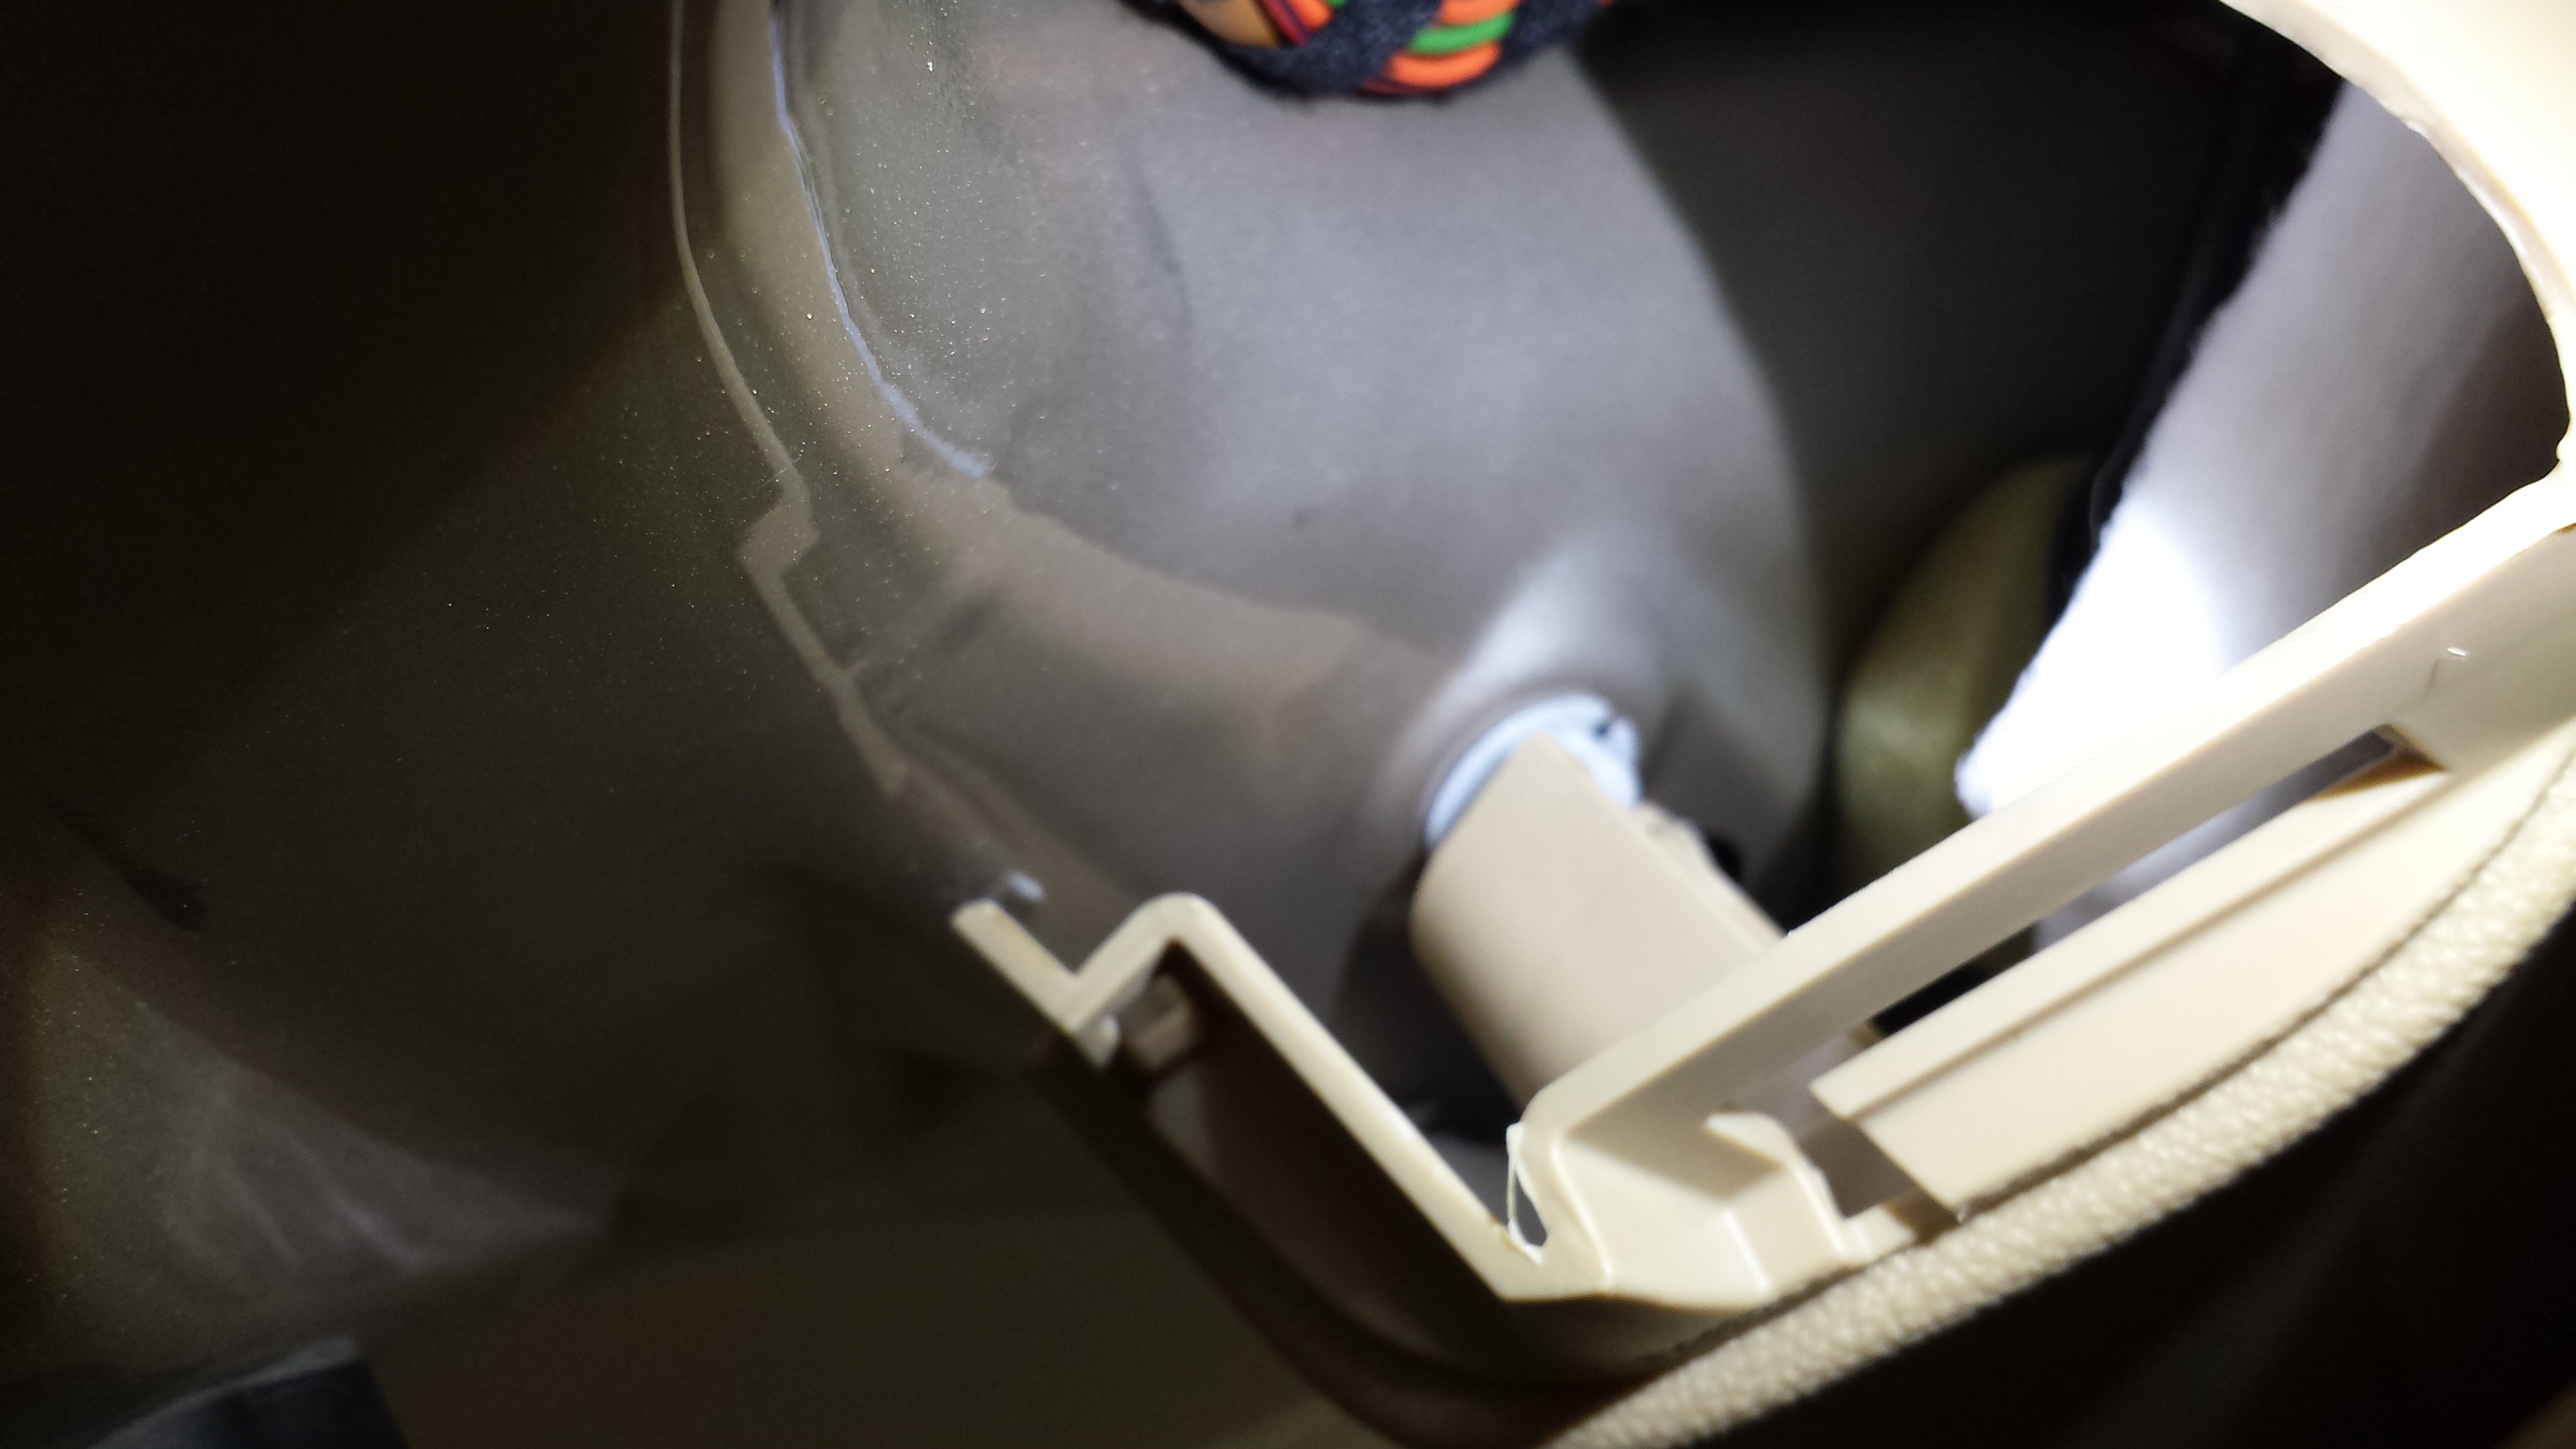
5) Now for the big carpeted panel. It was a PITA. No way around it. I broke all the clips! all 14 of them (it cost $7 for a set of new ones from the dealer).
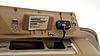
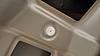
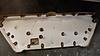
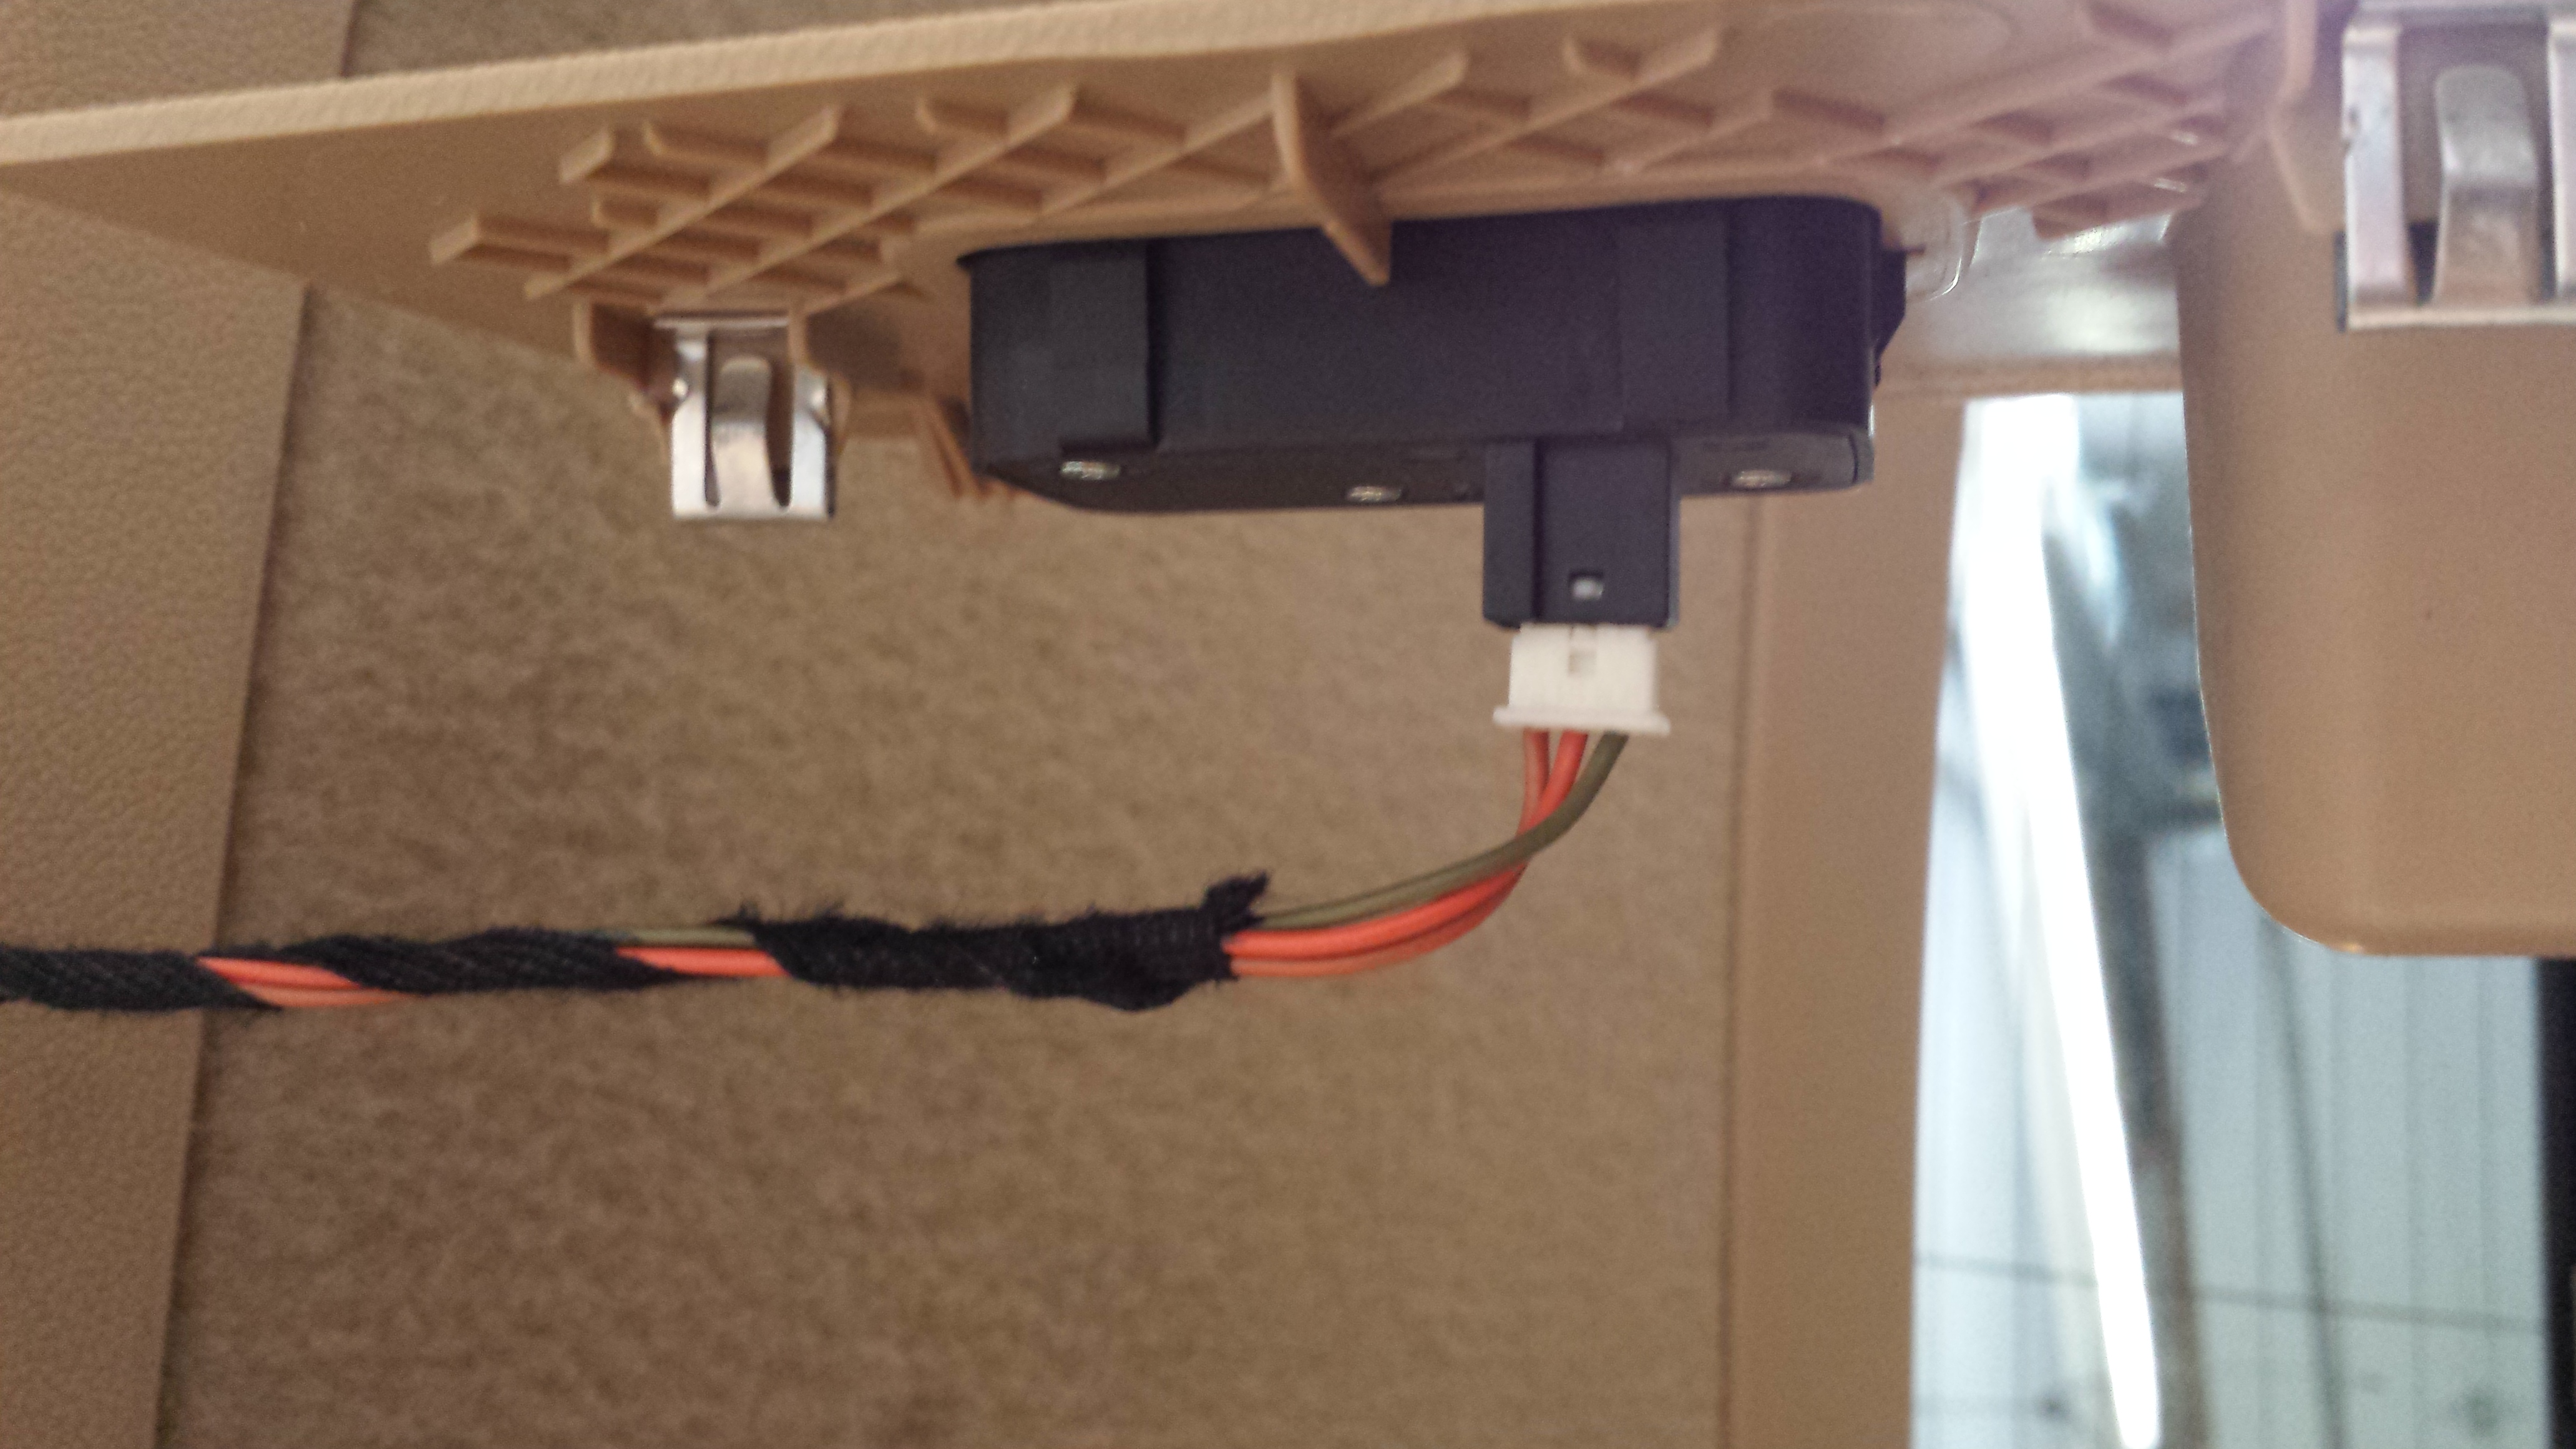
Once the plastic panels were removed, it was a matter of unhooking the cable and unscrewing 3 torx screw and the actuator is off. New one installed.
The best part is putting the thing back together which took about 10 minutes!
1) The first panel that should be removed is the long strip of plastic located above the rear window. It has 6 clips.
2) then remove the curved plastic panels. These are the ones located to the left and right of the rear window. It has once screw at the top and one clip in the middle. If you are removing the one on the left, gently pull it towards the right.
3) The long plastic at the bottom of the panel is next. This is the one with the red button that you push to close the tailgate. I started on the right side. Once I was able to take a peek at the first clip, I used a ling flat head to undo the clips and moved my way across. These are held by 6 clips.
4) Remove the bezel located on the manual door release. I used 2 credit cards and lifted the bezel carefully one side at a time.
5) Now for the big carpeted panel. It was a PITA. No way around it. I broke all the clips! all 14 of them (it cost $7 for a set of new ones from the dealer).
Once the plastic panels were removed, it was a matter of unhooking the cable and unscrewing 3 torx screw and the actuator is off. New one installed.
The best part is putting the thing back together which took about 10 minutes!
Super Member
Joined: May 2008
Posts: 699
Likes: 25
From: Warrington, PA
08 R350, 12 Mercedes R350
So I spent a few days looking for instructions on how to remove the rear tailgate/hatch panel on the R-Class and found very little. I think it has more to do with the R-Class being a rare bird to begin with. Anyway, I decided to go on my own since I needed the hatch to be locked when the car is parked. The locking mechanism quit!
1) The first panel that should be removed is the long strip of plastic located above the rear window. It has 6 clips.
2) then remove the curved plastic panels. These are the ones located to the left and right of the rear window. It has once screw at the top and one clip in the middle. If you are removing the one on the left, gently pull it towards the right.
3) The long plastic at the bottom of the panel is next. This is the one with the red button that you push to close the tailgate. I started on the right side. Once I was able to take a peek at the first clip, I used a ling flat head to undo the clips and moved my way across. These are held by 6 clips.
4) Remove the bezel located on the manual door release. I used 2 credit cards and lifted the bezel carefully one side at a time.
5) Now for the big carpeted panel. It was a PITA. No way around it. I broke all the clips! all 14 of them (it cost $7 for a set of new ones from the dealer).
Once the plastic panels were removed, it was a matter of unhooking the cable and unscrewing 3 torx screw and the actuator is off. New one installed.
The best part is putting the thing back together which took about 10 minutes!
Btw, I did not have any problem with my hatch, just removed the hatch back to install the aftermarket rear camera.
Last edited by AsianR350; Mar 22, 2016 at 09:30 PM.
MB World Stories
The Best of Mercedes & AMG

6 Mercedes Models That Did NOT Age Well (But Are Somehow Still Cool)
Verdad Gallardo
Manual Mercedes? 6 Times Sindelfingen Let Drivers Have All The Fun
Verdad Gallardo
Mercedes SLR McLaren 722 S Is Extremely Rare Example Modified by McLaren
Verdad Gallardo
8 Classic Boxy Mercedes Designs That Have Aged Like Fine Wine
Verdad Gallardo
Flawlessly Restored Mercedes 190E Evo II Heads to Auction
Verdad Gallardo
Electric Mercedes C-Class Unveiled: 11 Things You Need to Know
Verdad Gallardo
Mercedes EQS Gets A Major Update: Everything You Need to Know
Verdad Gallardo
5 Underrated Mercedes-Benz Models That Don't Get the Love They Deserve
Verdad Gallardo
Mercedes 300D Has Pushed Well Past 1 Million Miles and It Ain't Stopping
Verdad Gallardo
Newbie
Joined: May 2016
Posts: 2
Likes: 0
R350
Plastic clips R350, question on cost and how to reuse
So I spent a few days looking for instructions on how to remove the rear tailgate/hatch panel on the R-Class and found very little. I think it has more to do with the R-Class being a rare bird to begin with. Anyway, I decided to go on my own since I needed the hatch to be locked when the car is parked. The locking mechanism quit!
1) The first panel that should be removed is the long strip of plastic located above the rear window. It has 6 clips.
2) then remove the curved plastic panels. These are the ones located to the left and right of the rear window. It has once screw at the top and one clip in the middle. If you are removing the one on the left, gently pull it towards the right.
3) The long plastic at the bottom of the panel is next. This is the one with the red button that you push to close the tailgate. I started on the right side. Once I was able to take a peek at the first clip, I used a ling flat head to undo the clips and moved my way across. These are held by 6 clips.
4) Remove the bezel located on the manual door release. I used 2 credit cards and lifted the bezel carefully one side at a time.
5) Now for the big carpeted panel. It was a PITA. No way around it. I broke all the clips! all 14 of them (it cost $7 for a set of new ones from the dealer).
Once the plastic panels were removed, it was a matter of unhooking the cable and unscrewing 3 torx screw and the actuator is off. New one installed.
The best part is putting the thing back together which took about 10 minutes!
1) The first panel that should be removed is the long strip of plastic located above the rear window. It has 6 clips.
2) then remove the curved plastic panels. These are the ones located to the left and right of the rear window. It has once screw at the top and one clip in the middle. If you are removing the one on the left, gently pull it towards the right.
3) The long plastic at the bottom of the panel is next. This is the one with the red button that you push to close the tailgate. I started on the right side. Once I was able to take a peek at the first clip, I used a ling flat head to undo the clips and moved my way across. These are held by 6 clips.
4) Remove the bezel located on the manual door release. I used 2 credit cards and lifted the bezel carefully one side at a time.
5) Now for the big carpeted panel. It was a PITA. No way around it. I broke all the clips! all 14 of them (it cost $7 for a set of new ones from the dealer).
Once the plastic panels were removed, it was a matter of unhooking the cable and unscrewing 3 torx screw and the actuator is off. New one installed.
The best part is putting the thing back together which took about 10 minutes!
Also, I only broke 4 so anyway I can get the other 10 out to reuse?
Super Member
Joined: May 2008
Posts: 699
Likes: 25
From: Warrington, PA
08 R350, 12 Mercedes R350
Trim clip p/n A 000 991 63 98. It comes in a bag of 20. I do not remember how much I paid but it is not $7 a piece. (May be less than $20)
Last edited by AsianR350; May 27, 2016 at 06:55 AM.
Newbie
Joined: May 2016
Posts: 2
Likes: 0
R350
Clips
If it helps anyone I went to auto zone and found the Nissan Maxima clips to be almost identical. We used a piece of tape to hold them in place while putting it back together but once they were snapped in they were tight. $3 for a 4 pack.

Newbie
Joined: Nov 2010
Posts: 1
Likes: 0
2006 R350
Just wanted to post a quick thank you to everyone who's contributed to this topic. I had the nice occurrence of having our hatch stop locking in the wintertime .. found a source online for the part at less than $300, and it took about 30 minutes start to finish.
Happy New Year.
Happy New Year.

Newbie
Joined: Jul 2017
Posts: 2
Likes: 0
2008 Mercedes Benz R350
Good day All,
I am a newbie to the Mercedes Benz world. I live in Nigeria.
I just bought a 2008 Mercedes Benz R350 4matic from the US (Copart) but unfortunately it did not come with the Owner's manual. This has been a serious concern to me.
Can anyone kindly assist me with a printed (hard) copy of Owner's manual for 2008 Mercedes Benz R350 4matic.
My email is ferdinardebohon@yahoo.co.uk. Would appreciate a favorable feedback.
Agbons.

Super Member


Joined: Jul 2009
Posts: 938
Likes: 53
From: Montreal, Canada
2005 C240 2011 R350
Good day All,
I am a newbie to the Mercedes Benz world. I live in Nigeria.
I just bought a 2008 Mercedes Benz R350 4matic from the US (Copart) but unfortunately it did not come with the Owner's manual. This has been a serious concern to me.
Can anyone kindly assist me with a printed (hard) copy of Owner's manual for 2008 Mercedes Benz R350 4matic.
My email is ferdinardebohon@yahoo.co.uk. Would appreciate a favorable feedback.
Agbons.
I am a newbie to the Mercedes Benz world. I live in Nigeria.
I just bought a 2008 Mercedes Benz R350 4matic from the US (Copart) but unfortunately it did not come with the Owner's manual. This has been a serious concern to me.
Can anyone kindly assist me with a printed (hard) copy of Owner's manual for 2008 Mercedes Benz R350 4matic.
My email is ferdinardebohon@yahoo.co.uk. Would appreciate a favorable feedback.
Agbons.
https://www.mbusa.com/mercedes/servi...owners_manuals
there may be UK site but I dont know.

Newbie
Joined: Jul 2017
Posts: 1
Likes: 1
From: Bremerton, WA
2006 R500
My experience replacing the lock actuator
I want to thank everyone who has contributed to this thread. I successfully replaced the lock actuator on our R500. It took about 1.5 hours for me, but mostly because I was worried about breaking my trim pieces and was more cautious than I needed to be. Now that I know how, I think it would be more like 30 minutes. I want to share my experiences to answer some of the questions that I had.
First off, I had some confusion while trying to order the correct part number. I found 2 part numbers that seems to be equivalent to each other. The latest part number, which I ordered, is 164-740-03-00. I got it for about $350. The original actuator is 164-740-07-35. Who knows if I over thought this detail or not, but I feel better knowing that I got the �latest� part number. FWIW, I couldn�t tell a physical difference between my original and the new part, but maybe MB made some internal fixes. Why else would there be a different part number � who knows? If anyone knows more about it, I�d be interested.
As for the actual replacement, I used xoxocal�s write up as a guide. I found them to be very helpful, but here are a few more details that may help others.
Tools:
T15, T30, Trim removal tool, plastic prybar
Step 1
Use the trim tool to apply outward pressure behind the clip locations. It should come out rather easily but will require firm pressure. Start from one side and work toward the other.

Step 2
Use T15 bit to unscrew each curved plastic panel. Use the trim tool to free the metal clip in roughly the middle of each panel. There are 3 separate plastic tabs on each end that will pop out with downward pressure. Don�t worry about breaking it, they are quite sturdy.

Step 3
I just used a small plastic prybar for this. Work your way around the perimeter of the panel and it will come out quite easily. Remove the electrical connector using a small screwdriver to release the locking tab.
Step 4
Again I used a small plastic prybar for this. No tips to add.
Step 5
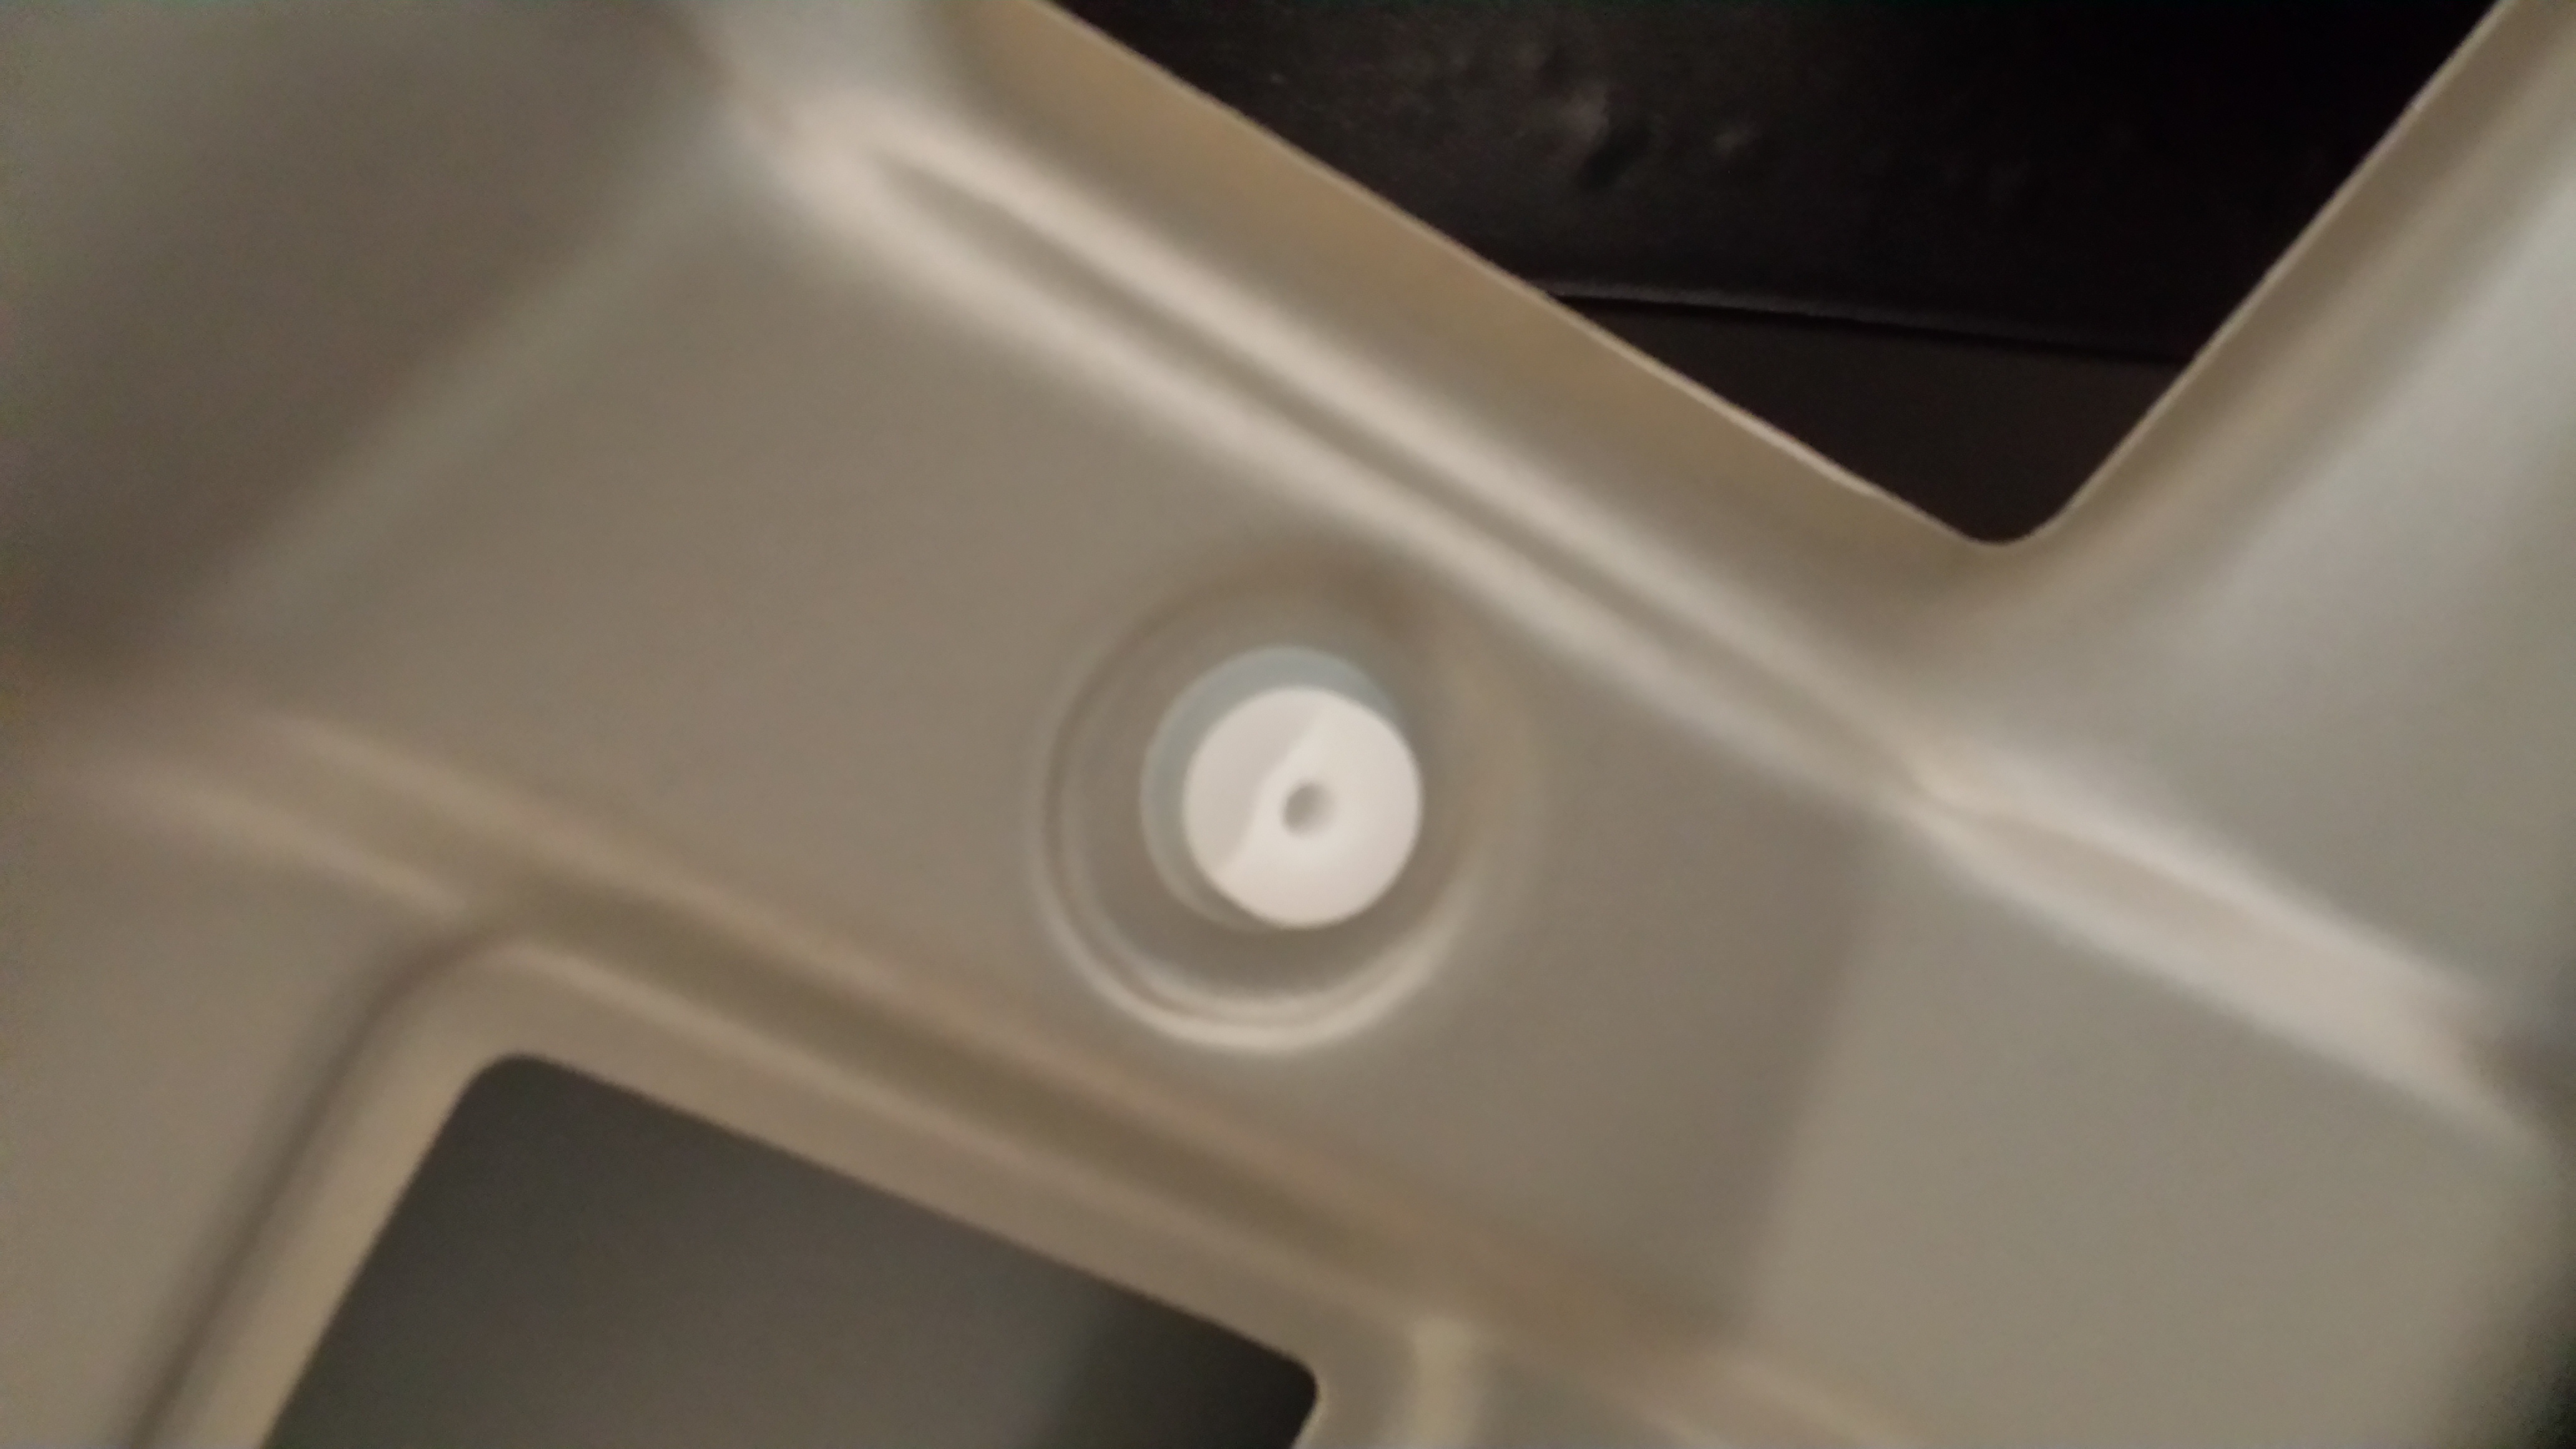
I spent the most time on step 5, removing the carpeted trim piece. In addition to the 14 push retainers, there are 6 metal clips that hold the trim in place. I heeded everyone�s advice and tried to be extremely careful not to damage the white push retainers. However in the end I still broke 4. Some were only partially broken, but still good enough to do the job.
I started by using my plastic prybar to release the metal clips. I had to pry against the windshield, so this is why I used aplastic prybar. Once those were released, I was able to pull the each end of the trim outward to undo the first plastic clip.
Once that was done, I just used my prybar around the perimeter of the panel behind each white retainer. In the end brute force was the only thingthat worked. There doesn�t seem to be any other way. Straight downward pressure should help to prevent breakage.
Step 6
The actual lock actuator install is very straight forward. Use T30 bit to remove the screws. Follow the manual release cable and undo the metal ball. There aren�t many tips to offer here, just pay attention during the removal.
Step 7 Reinstallation of carpet trim
If you are fortunate, none of your plastic retainers will break, but some will be stuck in the frame. The intent is for these to be installed in the trim panel first before pushing up to lock in place. So you will need to remove them all and this is when you will break them. The exception will be the far outside ones since you can pull on the panel to hook it in place. I put my good ones just around the perimeter of the panel, omitting the inner center ones. Everything still looks good for me. So if you only break a few retainers, you may try to omit them as it doesn�t affect the look of the trim and still feels quite sturdy.
The remaining installation of the trim was rather straight forward and there aren�t many extra tips I can offer.
Hopefully this helps someone.
nick
First off, I had some confusion while trying to order the correct part number. I found 2 part numbers that seems to be equivalent to each other. The latest part number, which I ordered, is 164-740-03-00. I got it for about $350. The original actuator is 164-740-07-35. Who knows if I over thought this detail or not, but I feel better knowing that I got the �latest� part number. FWIW, I couldn�t tell a physical difference between my original and the new part, but maybe MB made some internal fixes. Why else would there be a different part number � who knows? If anyone knows more about it, I�d be interested.
As for the actual replacement, I used xoxocal�s write up as a guide. I found them to be very helpful, but here are a few more details that may help others.
Tools:
T15, T30, Trim removal tool, plastic prybar
Step 1
Use the trim tool to apply outward pressure behind the clip locations. It should come out rather easily but will require firm pressure. Start from one side and work toward the other.

Step 2
Use T15 bit to unscrew each curved plastic panel. Use the trim tool to free the metal clip in roughly the middle of each panel. There are 3 separate plastic tabs on each end that will pop out with downward pressure. Don�t worry about breaking it, they are quite sturdy.

Step 3
I just used a small plastic prybar for this. Work your way around the perimeter of the panel and it will come out quite easily. Remove the electrical connector using a small screwdriver to release the locking tab.


Step 4
Again I used a small plastic prybar for this. No tips to add.
Step 5
I spent the most time on step 5, removing the carpeted trim piece. In addition to the 14 push retainers, there are 6 metal clips that hold the trim in place. I heeded everyone�s advice and tried to be extremely careful not to damage the white push retainers. However in the end I still broke 4. Some were only partially broken, but still good enough to do the job.
I started by using my plastic prybar to release the metal clips. I had to pry against the windshield, so this is why I used aplastic prybar. Once those were released, I was able to pull the each end of the trim outward to undo the first plastic clip.
Once that was done, I just used my prybar around the perimeter of the panel behind each white retainer. In the end brute force was the only thingthat worked. There doesn�t seem to be any other way. Straight downward pressure should help to prevent breakage.

Step 6
The actual lock actuator install is very straight forward. Use T30 bit to remove the screws. Follow the manual release cable and undo the metal ball. There aren�t many tips to offer here, just pay attention during the removal.
Step 7 Reinstallation of carpet trim
If you are fortunate, none of your plastic retainers will break, but some will be stuck in the frame. The intent is for these to be installed in the trim panel first before pushing up to lock in place. So you will need to remove them all and this is when you will break them. The exception will be the far outside ones since you can pull on the panel to hook it in place. I put my good ones just around the perimeter of the panel, omitting the inner center ones. Everything still looks good for me. So if you only break a few retainers, you may try to omit them as it doesn�t affect the look of the trim and still feels quite sturdy.
The remaining installation of the trim was rather straight forward and there aren�t many extra tips I can offer.
Hopefully this helps someone.
nick
Last edited by Nick Klein; Jul 14, 2017 at 02:46 PM. Reason: typos & formatting

Newbie
Joined: Oct 2017
Posts: 2
Likes: 0
2006 R350
Hi, new to the site but already appreciate and have benefited from the posts. Saved a ton by reading posts on replacing climate blower fan! Next up on wife's R350 is the tailgate. Has anyone experienced a power tailgate motor failure? That is what I think has happened but want to make sure before ordering parts. When tailgate open/close function is started, you hear the mechanism engage, the lock unlock and then nothing happens but a grinding noise. The tailgate does not open or close, just the grinding noise. Any insight will be greatly appreciated. Thanks
I will pay for shipping and a reasonable fee for your troubles.
Thanks

Newbie
Joined: Dec 2017
Posts: 1
Likes: 0
R350
Hi Everyone:
I have a 2007 R350 and while I love this car and have not experienced many issues, there has been 1 reoccurring issue with my vehicle---- the REAR TRUNK LATCH. After taking it into the Dealer approx. 7-8 times to get it fixed, it continues to break. Sometimes it's the latch itself, other times it's the latch motor. It got so bad that while my car was still under warranty I asked the Dealer to convert my automatic trunk latch to a manual trunk latch. They refused. Now it has broken down again and I am requesting MB USA to comp it. I'll let you know how I make out. I believe this to be a manufacturer defect, and quite honestly if MB USA does not fix my trunk latch for free then I will no longer be on this forum because I will no longer be a MB owner. :>)
I have a 2007 R350 and while I love this car and have not experienced many issues, there has been 1 reoccurring issue with my vehicle---- the REAR TRUNK LATCH. After taking it into the Dealer approx. 7-8 times to get it fixed, it continues to break. Sometimes it's the latch itself, other times it's the latch motor. It got so bad that while my car was still under warranty I asked the Dealer to convert my automatic trunk latch to a manual trunk latch. They refused. Now it has broken down again and I am requesting MB USA to comp it. I'll let you know how I make out. I believe this to be a manufacturer defect, and quite honestly if MB USA does not fix my trunk latch for free then I will no longer be on this forum because I will no longer be a MB owner. :>)


