


My W221 project..
Thread Starter
MBWorld Fanatic!


Joined: Oct 2009
Posts: 3,433
Likes: 212
From: Sweden, Stockholm
W222 S63L, ML/GLE350
FOR WANTING FACELIFT MIRRORS please check here:
https://mbworld.org/forums/new-s-cla...ml#post5093910
https://mbworld.org/forums/new-s-cla...ml#post5093910
Thread Starter
MBWorld Fanatic!
Joined: Oct 2009
Posts: 3,433
Likes: 212
From: Sweden, Stockholm
W222 S63L, ML/GLE350
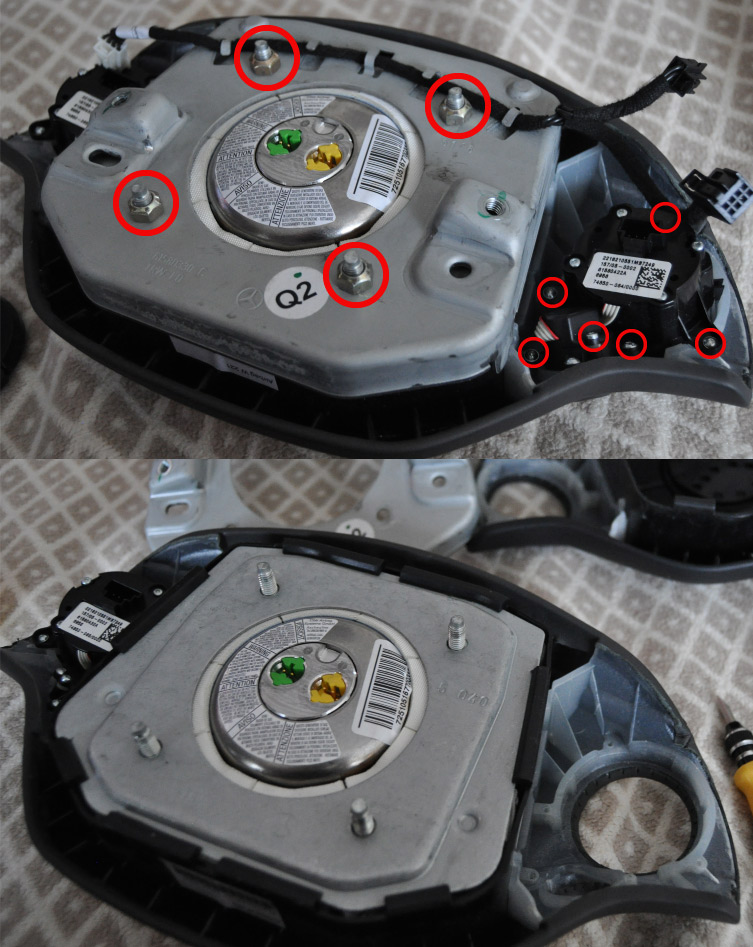
So it is time to replace the old grey leather cover and buttons to the new ones in black. Had to losen all these screws and then peal of the metal cover from the back of the airbag. Then you have to take out the airbag. A little force was needed. And remeber these are explosives..PUH!!
")
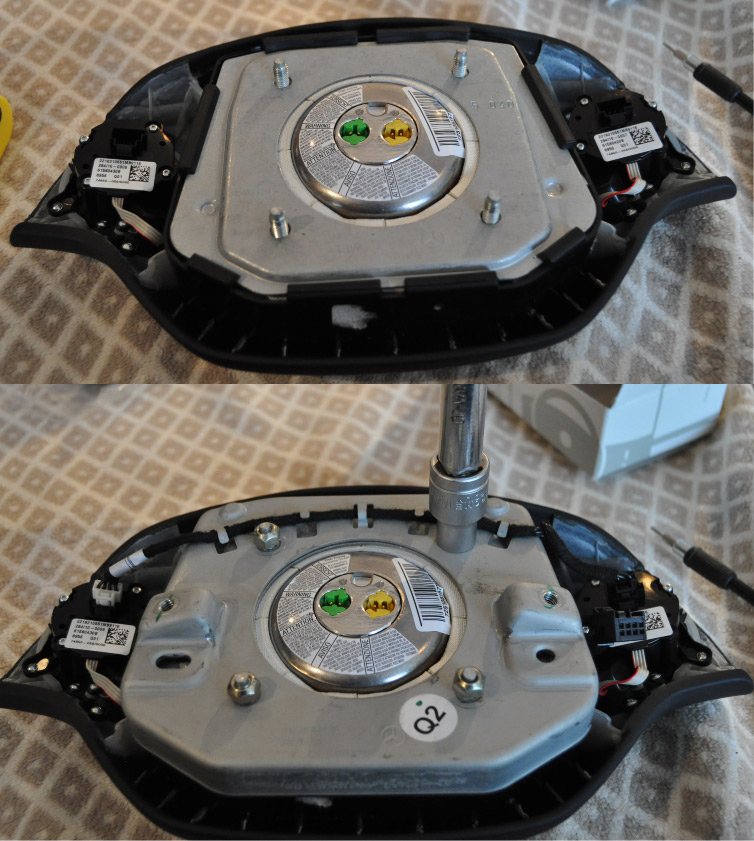
Then it was just to put it all in there again in the new cover the reverse way.
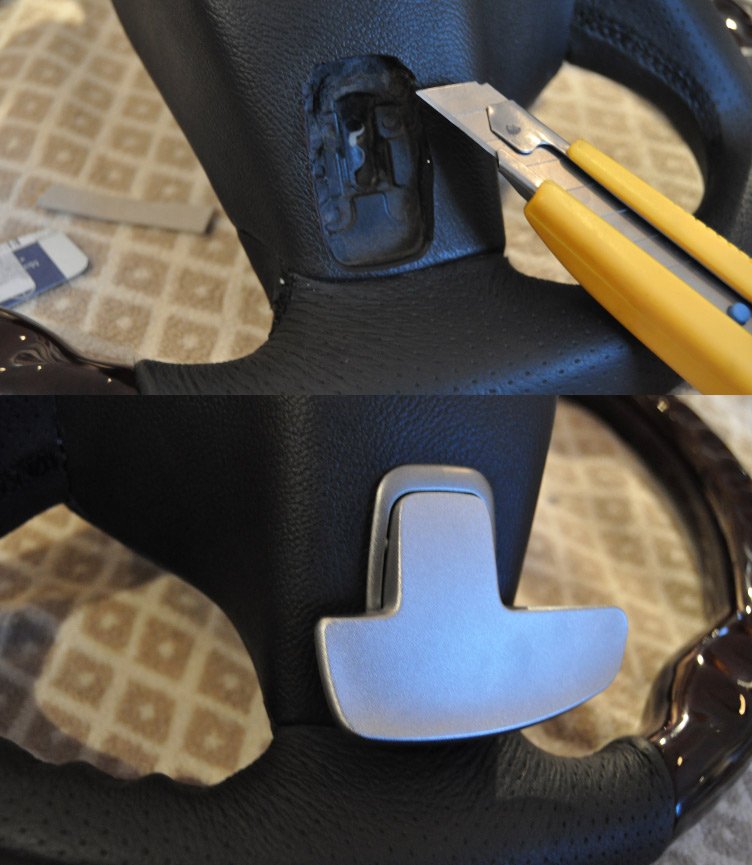
Then time for the metal paddles. I actually only used the carpet knife to cut out. Pretty simple and no Dremel dust. Then Cables was Plug n play. Nothing had to be modified.


So here we go......

That feels so GOOD!!!! Hated the old wheared buttons.

Senior Member
Joined: May 2005
Posts: 324
Likes: 0
From: London UK
S500 LWB ( W221 ) - CL63 Biturbo ( W216 ) CL 55 Kompressor ( W215 Sold ) C43 AMG ( W202 Sold )
So it is time to replace the old grey leather cover and buttons to the new ones in black. Had to losen all these screws and then peal of the metal cover from the back of the airbag. Then you have to take out the airbag. A little force was needed. And remeber these are explosives..PUH!!
Then it was just to put it all in there again in the new cover the reverse way.
Then time for the metal paddles. I actually only used the carpet knife to cut out. Pretty simple and no Dremel dust. Then Cables was Plug n play. Nothing had to be modified.
So here we go......
That feels so GOOD!!!! Hated the old wheared buttons.
I have the same wear on my CL55 buttons. Can you replace them with new ones ?

Super Member

Joined: Mar 2005
Posts: 531
Likes: 17
'08 CL600 with 152k km; '01 E430 4Matic with 433k km; '17 Porsche Cayenne with 130k km
Chris, you're doing a wonderful job with your 500! I, myself, am planning on getting a pre-facelift W221 when the W222 comes out. I'm feeling more confident on working on the W221 by looking at all that you've done to your ride. Gives me some great ideas if I ever need to put in some illuminated sill covers, etc. I'm definitely following this thread 
MB World Stories
The Best of Mercedes & AMG

7 Craziest Things AMG Gas Ever Built
Verdad Gallardo
New Electric Mercedes-AMG GT 4-Door Coupe Unveiled: 10 Things You Need to Know
Verdad Gallardo
6 Mercedes Models That Did NOT Age Well (But Are Somehow Still Cool)
Verdad Gallardo
Manual Mercedes? 6 Times Sindelfingen Let Drivers Have All The Fun
Verdad Gallardo
Mercedes SLR McLaren 722 S Is Extremely Rare Example Modified by McLaren
Verdad Gallardo
8 Classic Boxy Mercedes Designs That Have Aged Like Fine Wine
Verdad Gallardo
Flawlessly Restored Mercedes 190E Evo II Heads to Auction
Verdad Gallardo
Electric Mercedes C-Class Unveiled: 11 Things You Need to Know
Verdad Gallardo
Mercedes EQS Gets A Major Update: Everything You Need to Know
Verdad GallardoSenior Member
Joined: Mar 2008
Posts: 340
Likes: 0
1999 E320 & 2008 S550 Designo
Off subject..but I need your input. I need to replace the quarter window (small triangular) in the rear passenger side. Is it difficult to replace and can I reuse all the rubber seals or have ro get new ones? The current one has small little bubbles in the glass and it is bugging me.
Last edited by mistertonyn; Mar 17, 2012 at 11:49 AM.
Senior Member
Joined: Jun 2004
Posts: 382
Likes: 4
From: LI, NY
(1960) 300d, S550 AMG S500 S600 560SEL
Off subject..but I need your input. I need to replace the quarter window (small triangular) in the rear passenger side. Is it difficult to replace and can I reuse all the rubber seals or have ro get new ones? The current one has small little bubbles in the glass and it is bugging me.
Thread Starter
MBWorld Fanatic!
Joined: Oct 2009
Posts: 3,433
Likes: 212
From: Sweden, Stockholm
W222 S63L, ML/GLE350

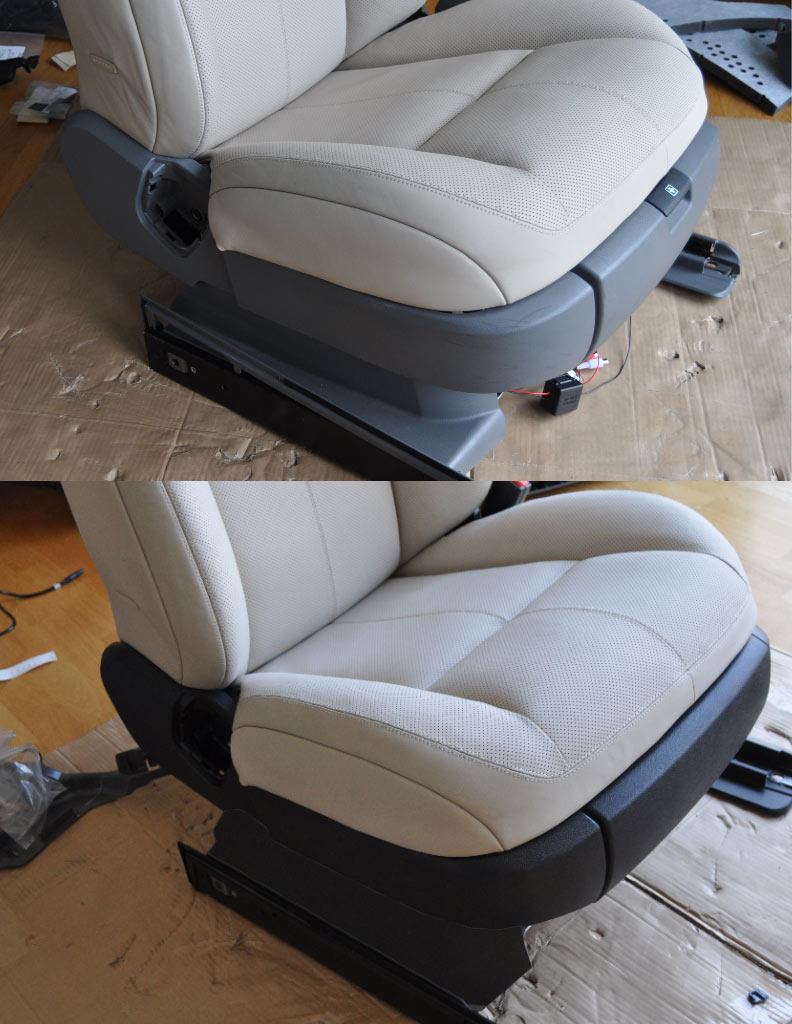
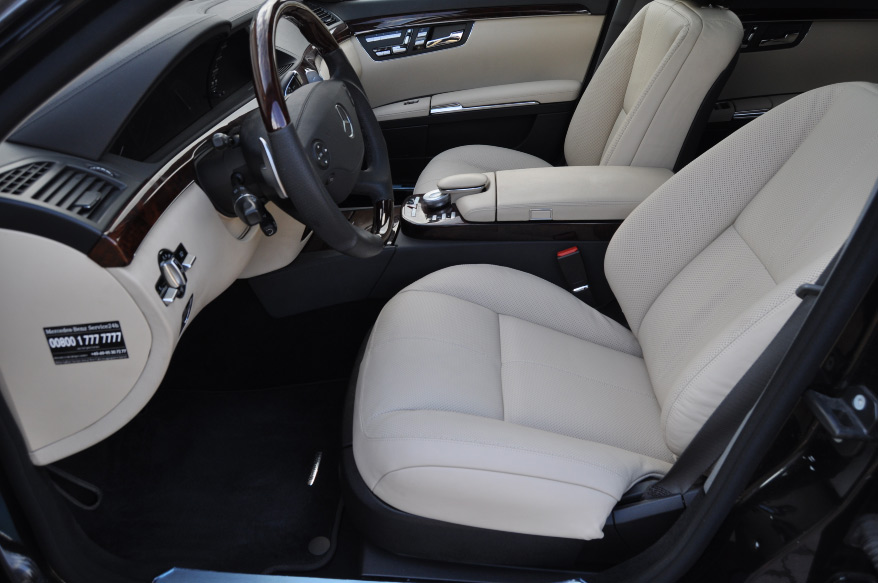
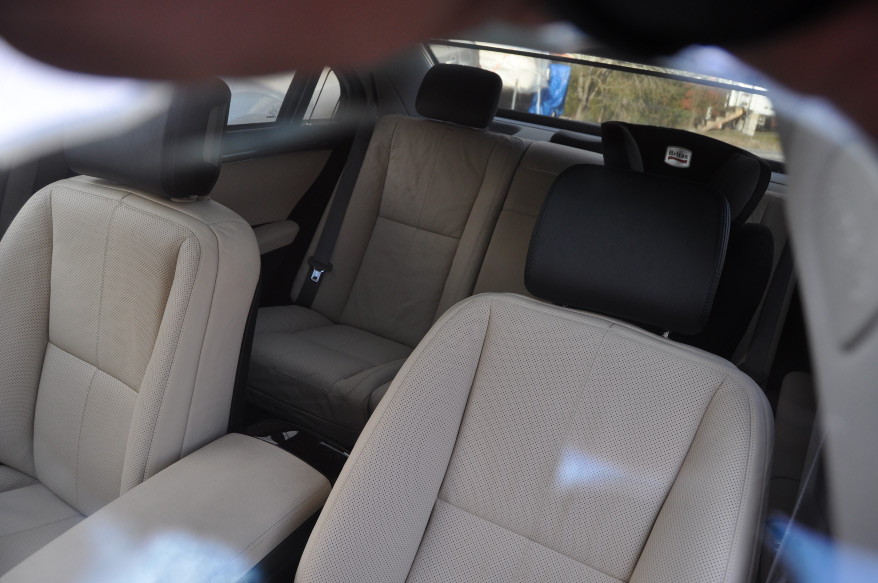
So here we go..Just strip it all...
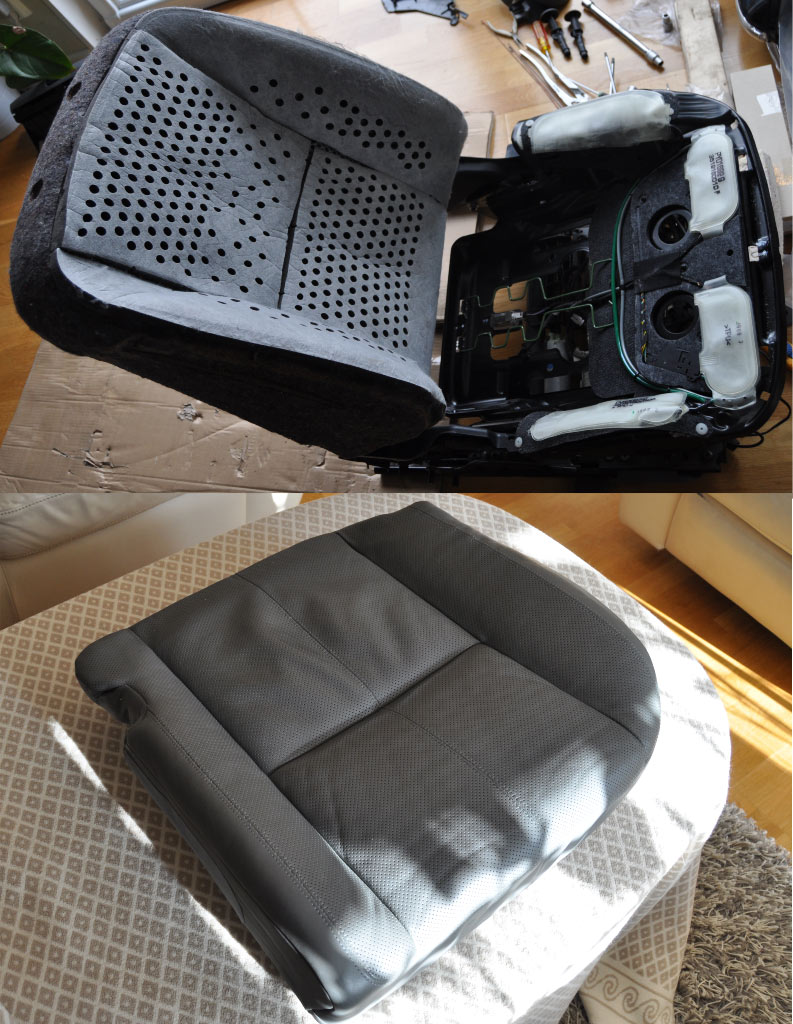
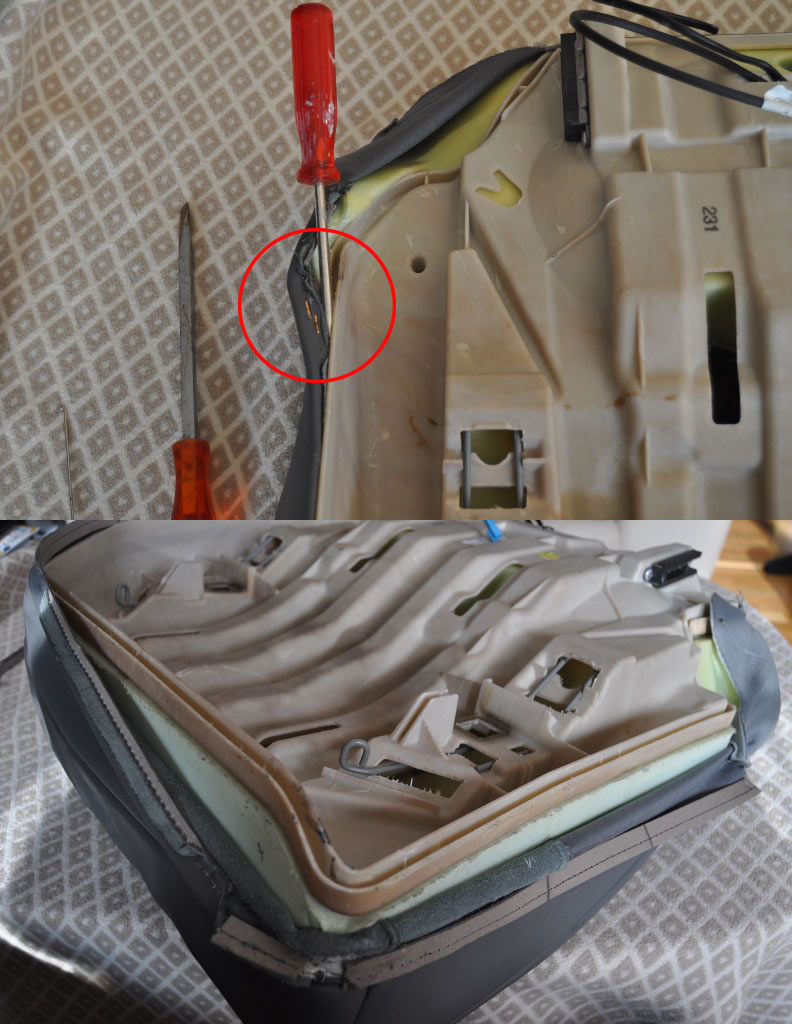
I take of the old leather..
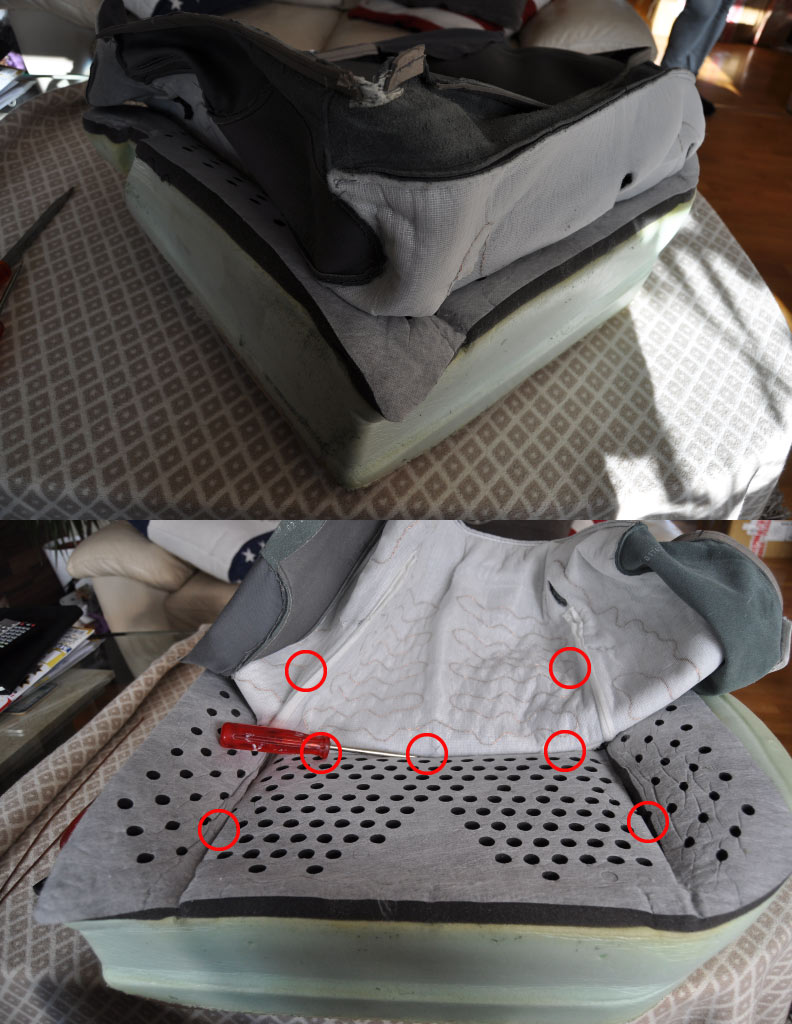
here are the clips located.Very easy to remove and re-install.

Then it is just to install it in tha same way it was stripped.

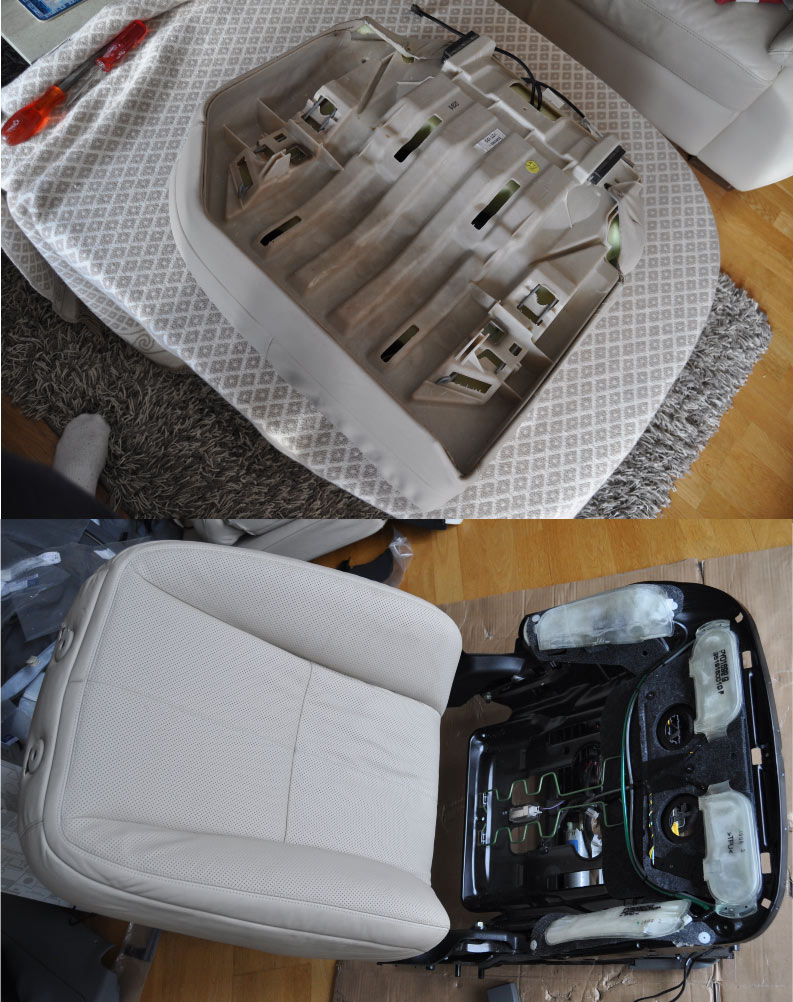
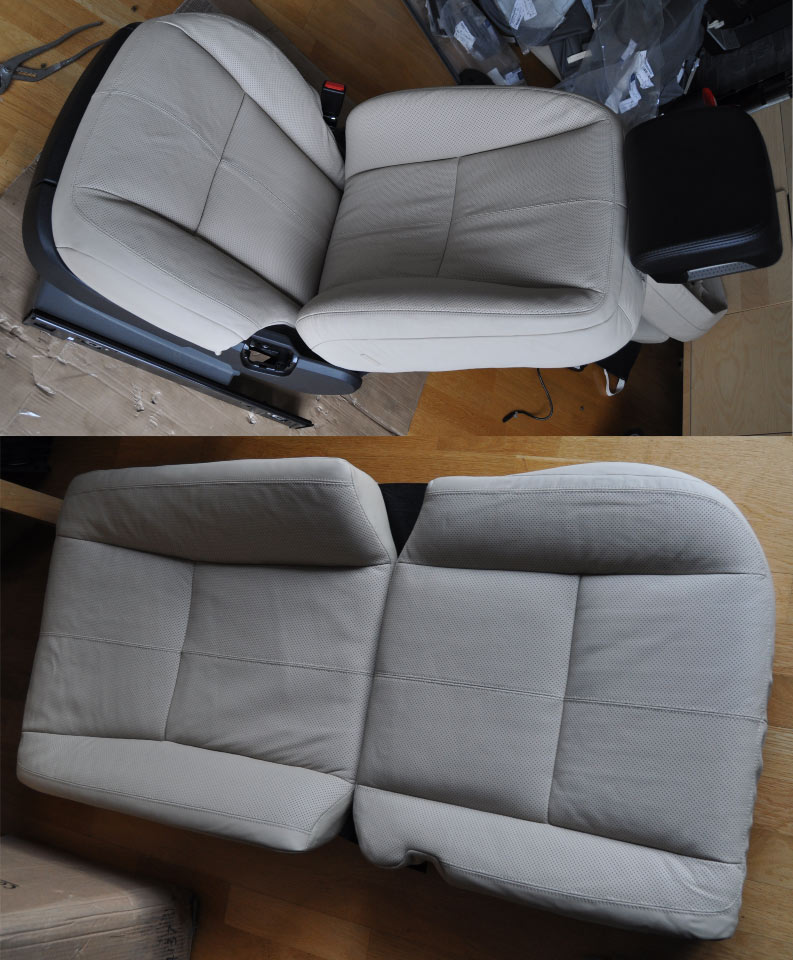
Front and rear!
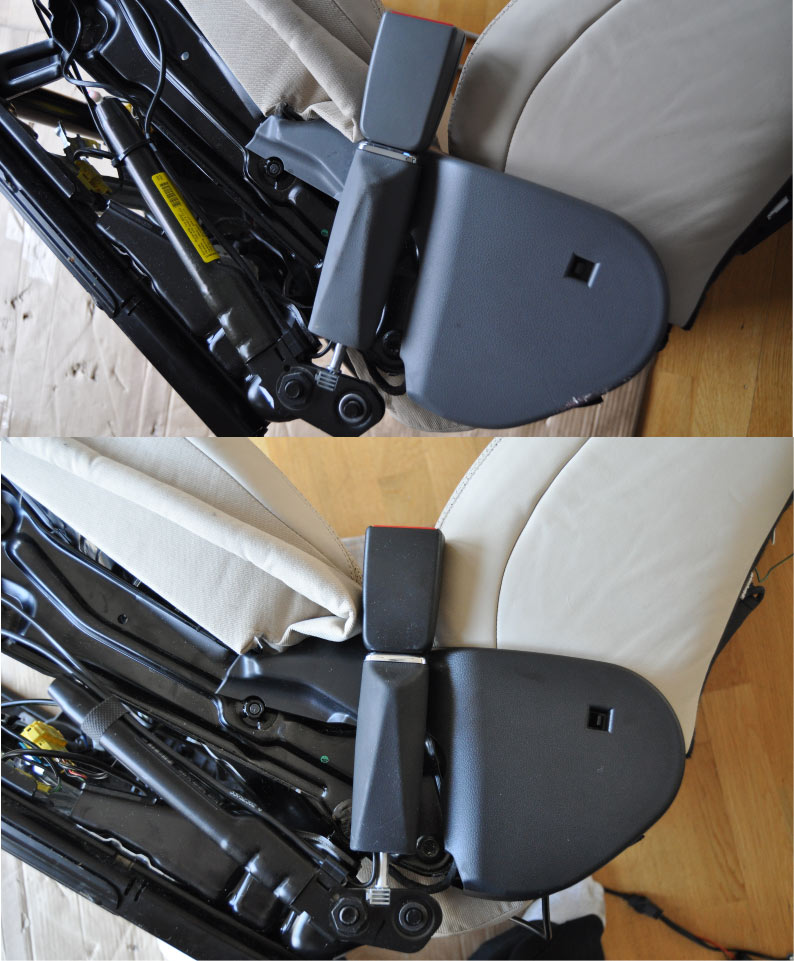
All grey panels needed to be replaced icn these expensive seatbelt fasteners..Wow how much I would have saved if the interiour was black from the beggining instead og grey.
Thread Starter
MBWorld Fanatic!
Joined: Oct 2009
Posts: 3,433
Likes: 212
From: Sweden, Stockholm
W222 S63L, ML/GLE350
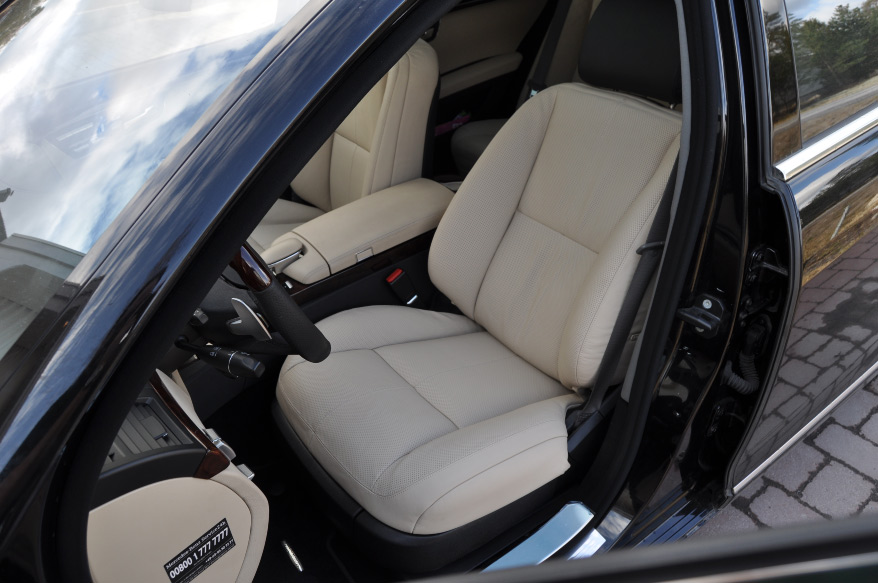
Same here. Not so good looking in grey�
 '
'Here I install the cables for the illuminated sills. Goes through the backwall into the luggage compartment.

Cables in back for the sills.
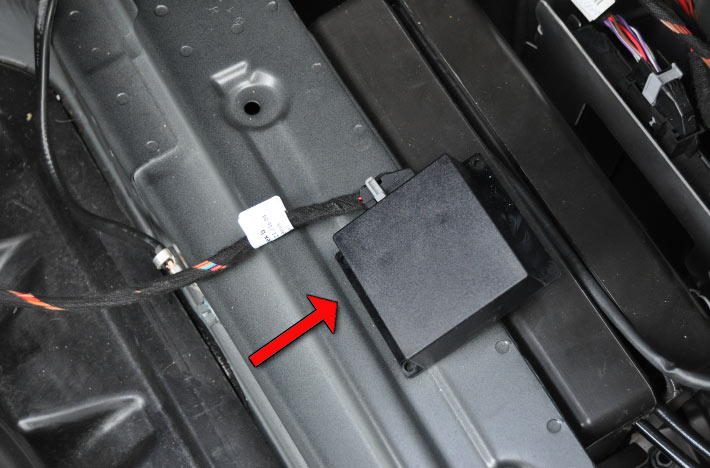
The control unit for the sills in the back.
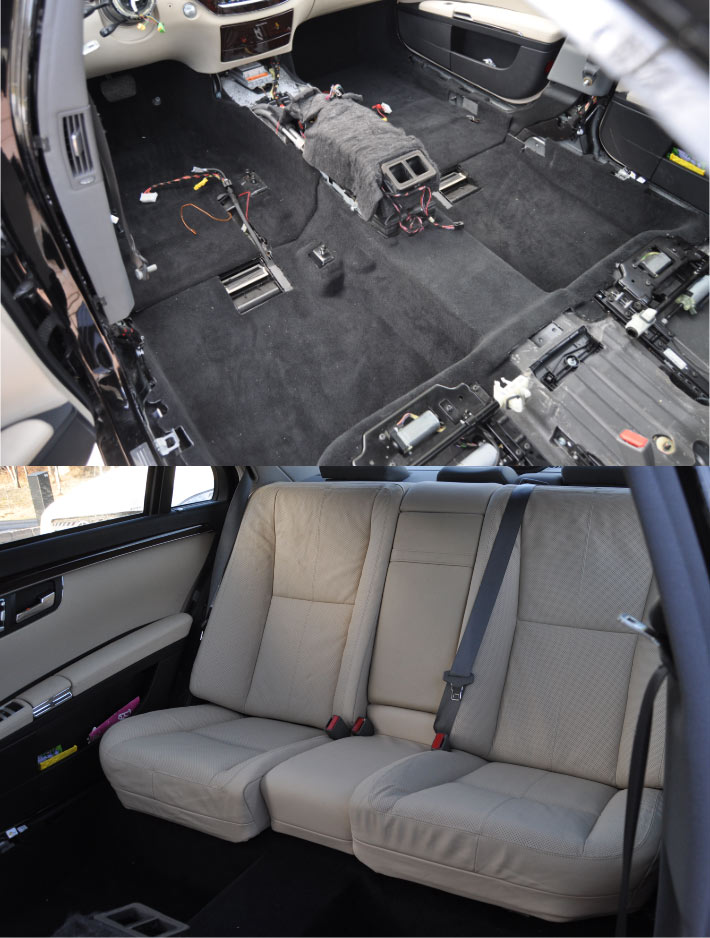
New black floormats inplace. Also the backseat in place.

More irritating grey panels replaced with black ones.

And all is done!!!!!! Enjoy.
Thread Starter
MBWorld Fanatic!
Joined: Oct 2009
Posts: 3,433
Likes: 212
From: Sweden, Stockholm
W222 S63L, ML/GLE350
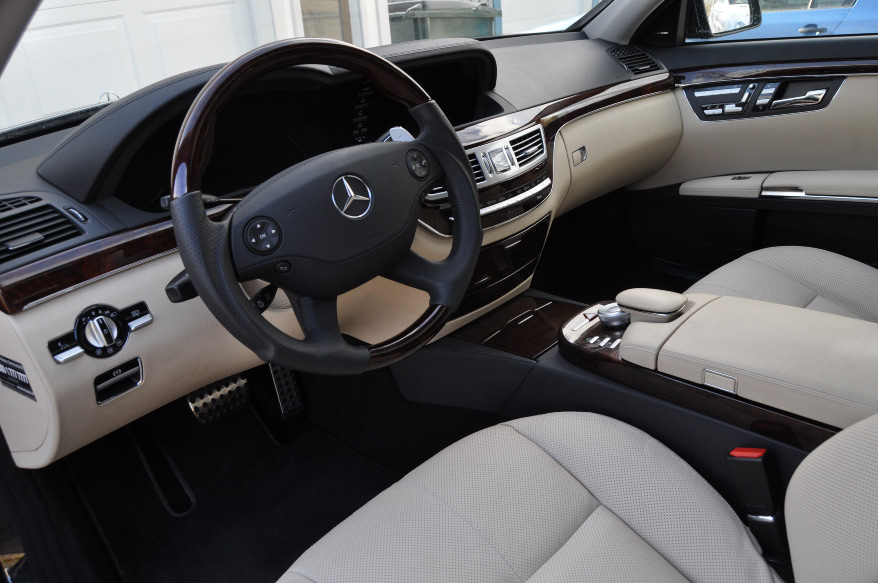


New sport pedals off course. Quick and Easy install !
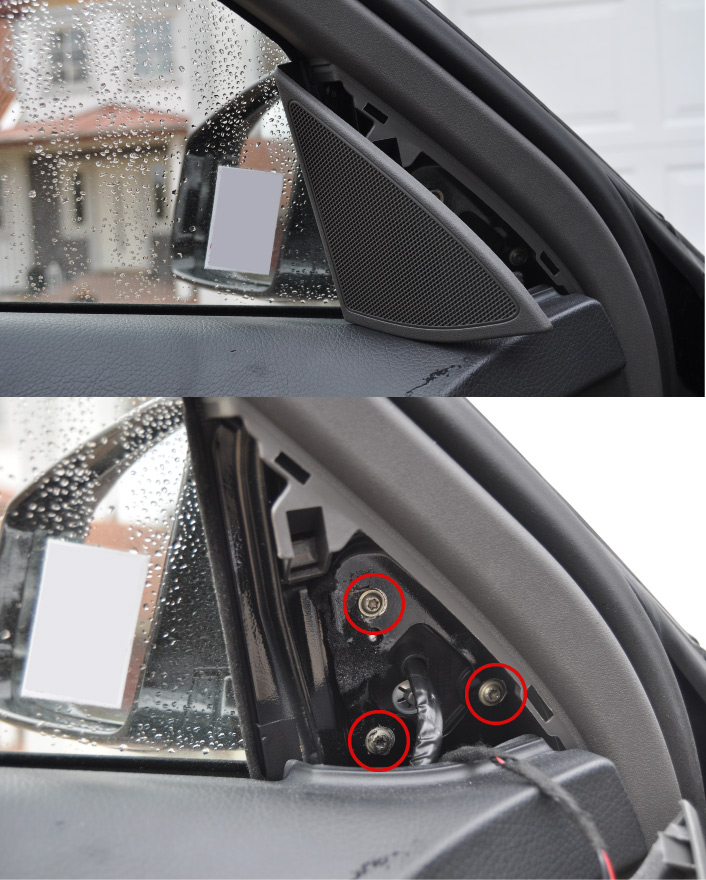
Installation of facelift mirros..Very easy! Just losen the speaker cover and the 3 screws.

Open the lid on the doorpanel and just take out the 2 conesctors. Then just install it the same way..Done!!
Thread Starter
MBWorld Fanatic!
Joined: Oct 2009
Posts: 3,433
Likes: 212
From: Sweden, Stockholm
W222 S63L, ML/GLE350
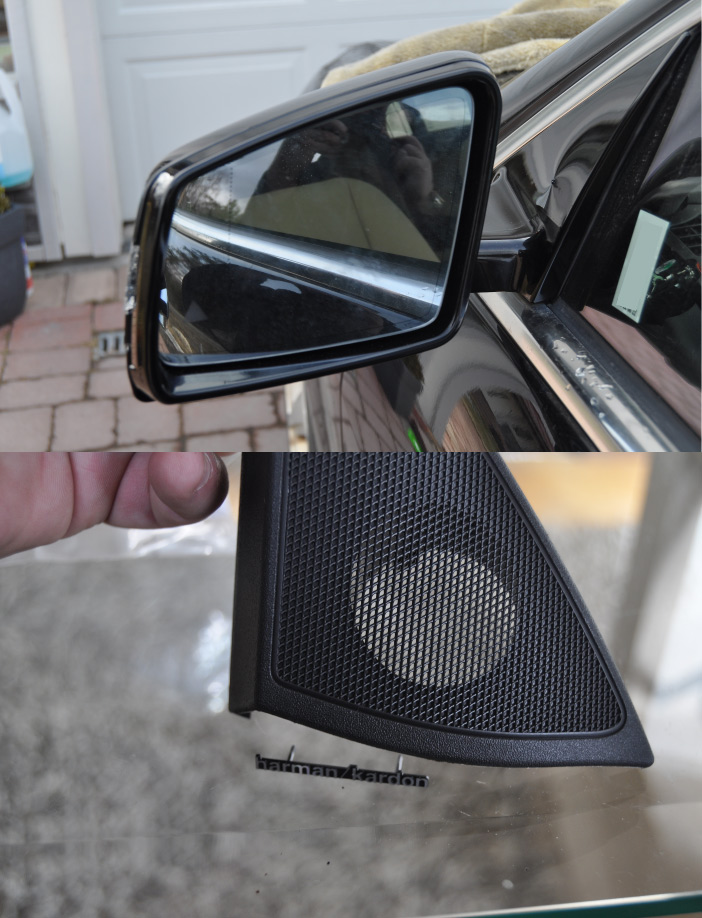
Also replace the grey speaker cover and ad i little nice touch to them with the H/K logo in metal.
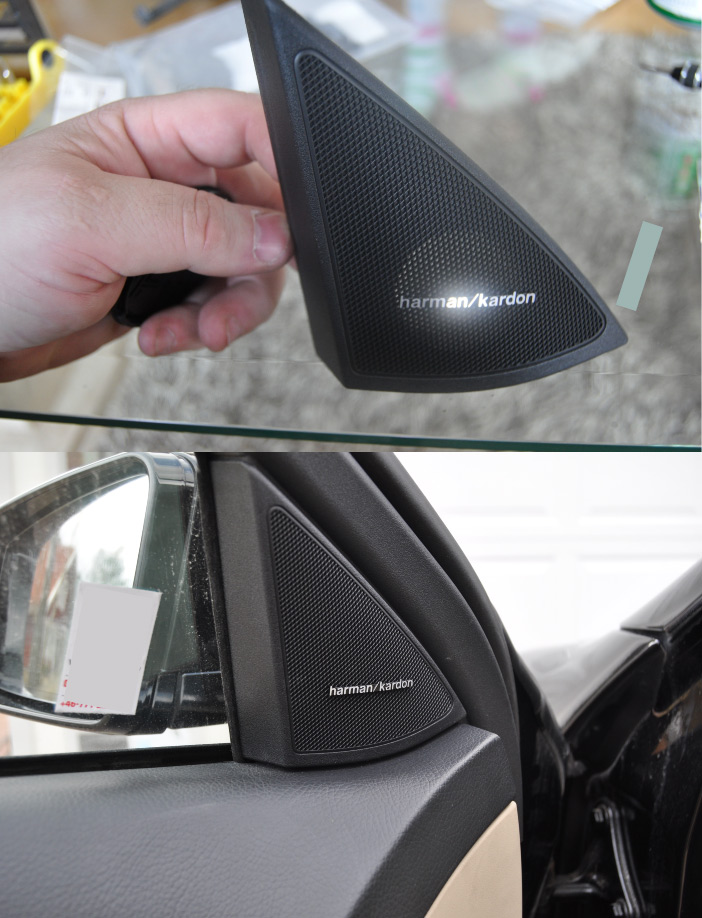
Really like it!!!

Also instelled the new mirror covers with LED light instead of the OLD bulb style.

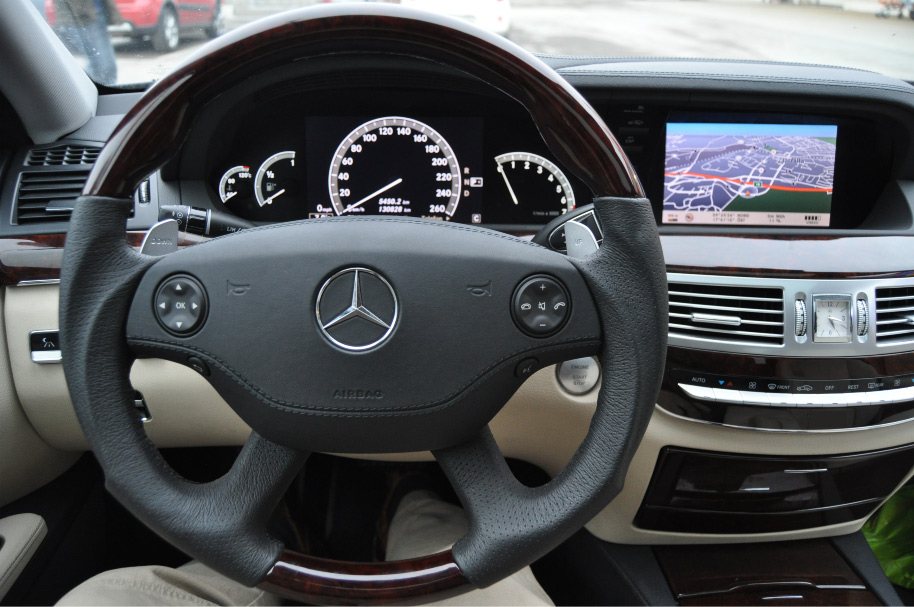
Updated Comand with Brid view.
So..Just all the outside styling left now......To be continued....


MBWorld Fanatic!
Joined: Mar 2005
Posts: 2,034
Likes: 20
From: Toronto
MY17 E43 Matte Selenite/Macchiato Beige, MY16 GLE350d Tenorite/Crystal Grey, MY17 B250
Crazy work, I'm impressed! What's your plan for the headrests?
Looks like the lower part of this mirror isn't clipped to the frame:
Looks like the lower part of this mirror isn't clipped to the frame:


Thread Starter
MBWorld Fanatic!
Joined: Oct 2009
Posts: 3,433
Likes: 212
From: Sweden, Stockholm
W222 S63L, ML/GLE350
Exctly...I let them sit and get used a couple of weeks then if needed I stretch them a bit. This so they will fit perfectly and dont get to tensioned in the beggining.


