Engine & Transmission Mounts
#1
Junior Member
Thread Starter
Engine & Transmission Mounts
Guys,
I have an 07 S550. I need to change the motor mounts and the transmission mount. I think i can do it myself, I have all the tools. Does anyone have a DIY tutorial and how hard is the job?
Thanks guys
I have an 07 S550. I need to change the motor mounts and the transmission mount. I think i can do it myself, I have all the tools. Does anyone have a DIY tutorial and how hard is the job?
Thanks guys
#2
Out Of Control!!
Join Date: Jul 2003
Location: North Scottsdale, AZ
Posts: 15,903
Received 4,448 Likes
on
3,155 Posts
'71 Pinto
Front part # 2202403317
http://workshop-manuals.com/mercedes..._engine_mount/ + next pages
Rear 2212400918
http://workshop-manuals.com/mercedes...unt/page_5508/ + next page
http://workshop-manuals.com/mercedes..._engine_mount/ + next pages
Rear 2212400918
http://workshop-manuals.com/mercedes...unt/page_5508/ + next page
#3
Super Member
was present when mechanic did mine. transmission mount was a piece of cake. so was one side of the engine mounts (can't remember which side though). The other engine mount was very very hard. so i hope you not only have the tools but patience and manpower.
#4
SPONSOR
Here is a great DIY for Engine Mount Replacement.
Here is a great DIY for Transmission Mount Replacement.
If you're needing parts, you can get Engine Mounts here and transmission mounts here.
-Luccia
Here is a great DIY for Transmission Mount Replacement.
If you're needing parts, you can get Engine Mounts here and transmission mounts here.
-Luccia
#5
Junior Member
Thread Starter
Guys,
So i think im ready to tackle the job today. im planning on changing the transmission mount and the EASY side engine mount first. Does anyone know which engine mount side is the easiest to take out? Left or right? Any additional tips will also be appreciated. Thanks
So i think im ready to tackle the job today. im planning on changing the transmission mount and the EASY side engine mount first. Does anyone know which engine mount side is the easiest to take out? Left or right? Any additional tips will also be appreciated. Thanks
#6
I recently had a mechanic replace my engine mounts and transmission mounts. I am not clear which engine mount is more difficult (search should bring up posts on this). I can tell you that for my car (07 S550 RWD) he had to remove the exhaust while the car was on the lift. I got the Lemforder engine mounts on ebay ($150 for 2) and trans mount on a parts site.
Trending Topics
#8
Here is a great DIY for Engine Mount Replacement.
Here is a great DIY for Transmission Mount Replacement.
If you're needing parts, you can get Engine Mounts here and transmission mounts here.
-Luccia
Here is a great DIY for Transmission Mount Replacement.
If you're needing parts, you can get Engine Mounts here and transmission mounts here.
-Luccia
#9
Super Member
Join Date: Dec 2005
Location: Rochester, NY
Posts: 806
Likes: 0
Received 18 Likes
on
18 Posts
2009 S550 AMG sport pckg. 2014 Ford F-150 Lariat Supercrewcab
Hello, I've tackled this project before. I did it my own modified way that did not involved removing the exhaust or steering column like the official procedure says. First you need an engine hoist. This is a must. Next remove the airbox. You will see a big metal loop in the front of the engine, attach the hoist to this loop only not the rear ones. Do not put any tension yet on it. Now remove the 4 bolts (either 15 or 16mm) that hold the mounts to the crossmember. Now raise the engine. But if you have 4matic be careful not to lift the engine too high. Initially as you raise the car, the car will rise quite a bit. Do not worry that is just the springs unloading. Then you will get to a point where the springs have unloaded and only the engine raises. At this point be very careful because the drive goes through both the oilpan and the engine crossmember. If you raise the engine too high the the oil pan/driveaxle will bear the weight and can be damaged. You only have to raise it about 2 inches.
Next there are 2 torx screws per mount. These hold the heat shields on and are a ***** to get off. One is in plain sight but the other faces towards the back of the car and is located behind the mount. You have to snake your arm between the firewall and the exhaust manifold and the contort your hand with a ratchet in it to get this little ******* off. I left mine off and installed the one i could see after. If you push the engine hoist over to the opposite side it will tip and move the engine over a bit for you and this helped me get my arm in but I had numerous scrapes/bruises on my arm after. If you have big arms dont bother doing it. Next take the heat shield out.
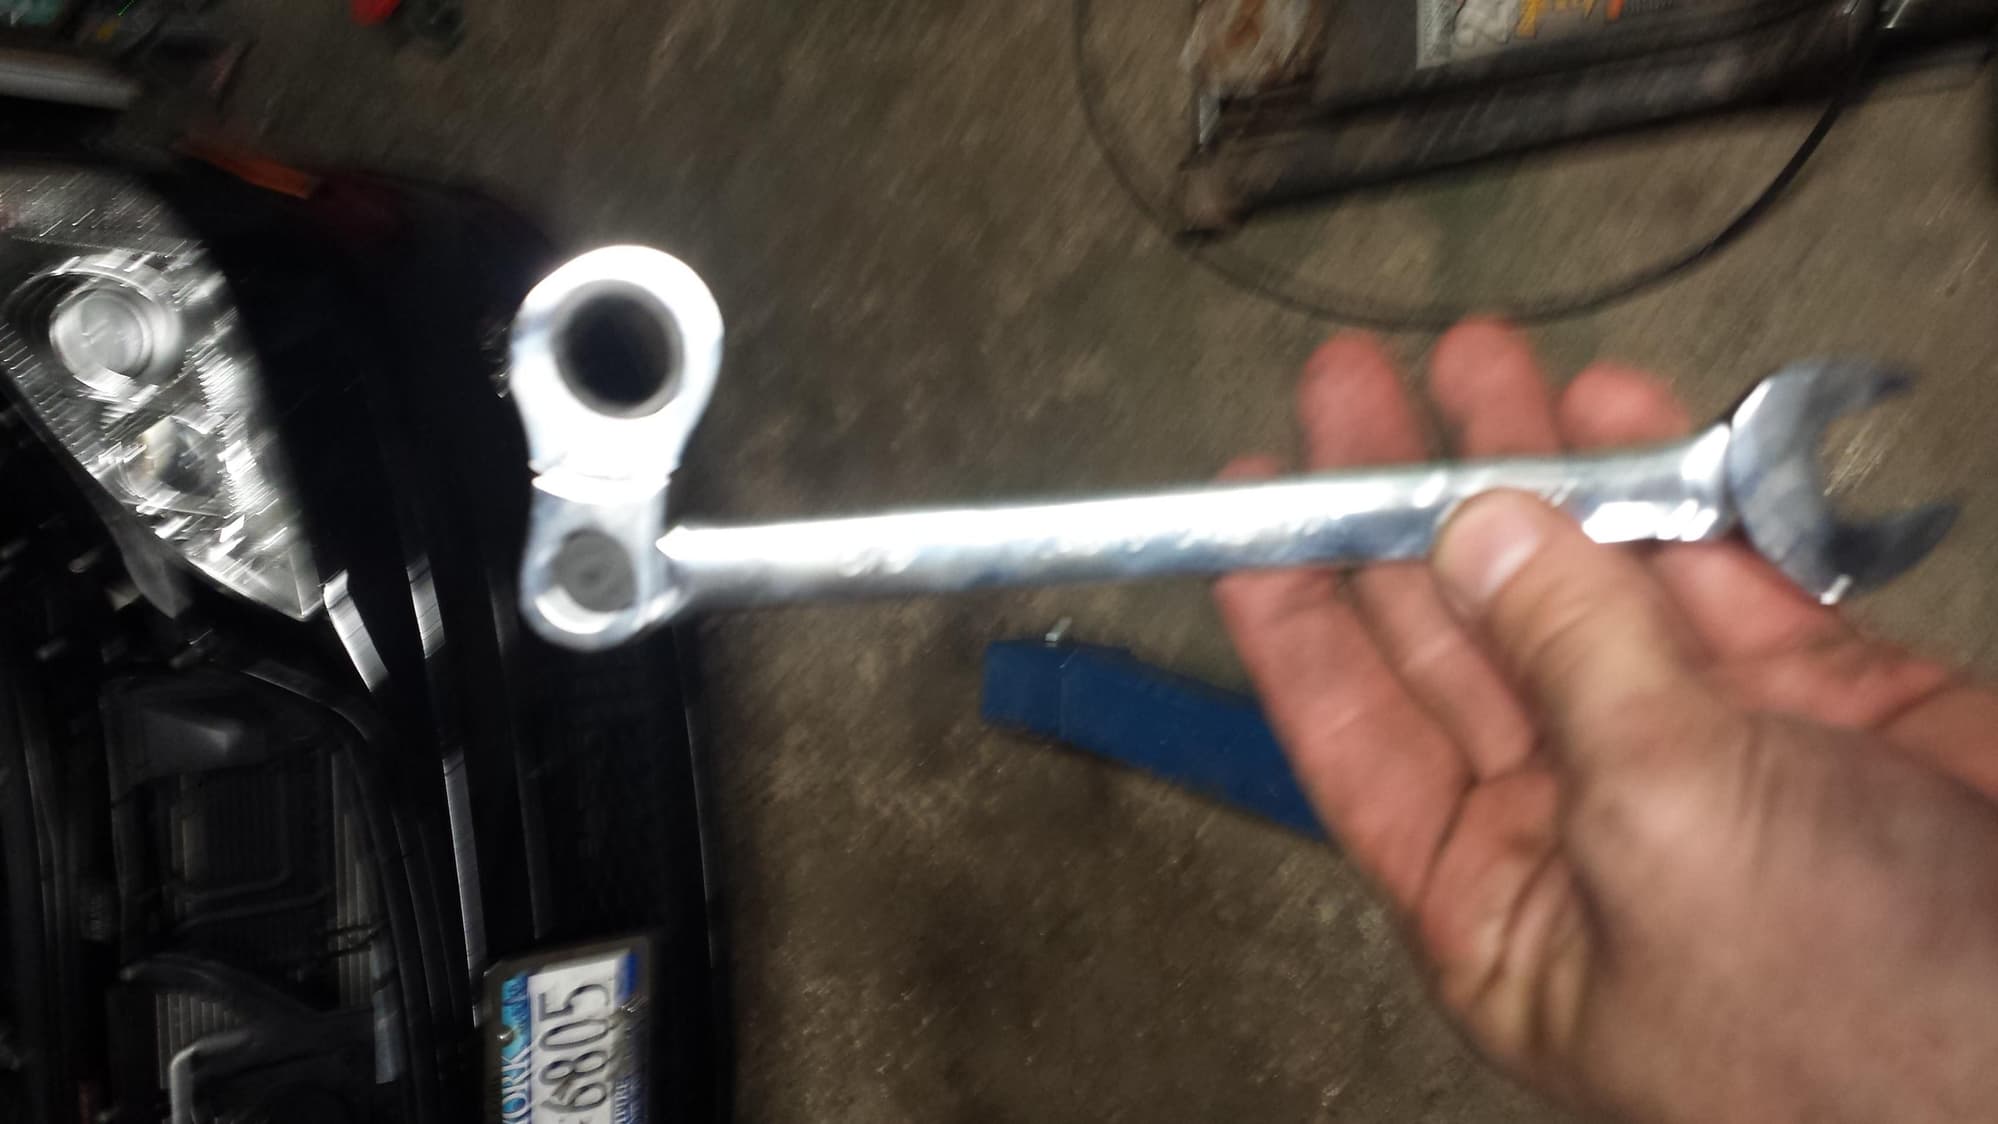
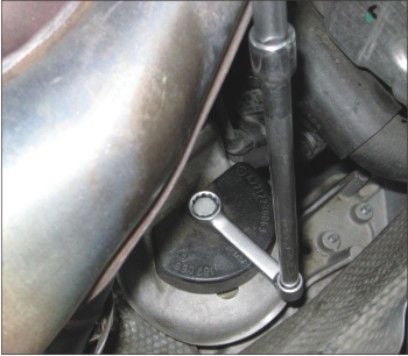
You will have now exposed the top bolt that holds the engine bracket to the mount. This sits pretty far under the manifold so you have to feel where it is and then put a wrench in there by feel. It has to be a stubby wrench, or I will show you a pic of a wrench I got from sears that did the trick. So now the mounts should fall right down into the crossmember and you might think "oh ****". But dont worry, just grab a coathanger and catch it on the bolt hole and fish it out. As you fish it out you have to pull the mount up vertically on the drivers side over by where the coolant reservoir/emissions control purge valve solenoid is located. You just move the purge valve solenoid tubing over and also move the engine hoist to move the engine to make more room. If the mount doesnt want to quite come out take a 3 foot long pipe and pry a bit between the body and the timing case and it should pop out. Install is the reverse.
Passenger side seemed impossible with the alternator there but there is a way to snake it out right in back of the alternator. You will have to finagle it and pry on the engine a bit to make some room but it should come out. then drop the new one in.
Ok so now the new ones wont want to stay in place so you have to first start threading the top bolt so its not quite tight yet, but it should move around still. then install the heatshields but back. Now this is kind of tricky because as you lower it, there are beveled edges that protrude out under the bolt holes and the mount actually sits at an angle with the crossmember. If the bevels hit the hole right and line up engine should look level, if not then one of the bevels did not align. On mine one did not and then I heard and pop and it popped into place. You may need to lift and ower a couple of times. Then tighten the crossmember to mount bolts.... DONE
#12
Super Member
Join Date: Dec 2005
Location: Rochester, NY
Posts: 806
Likes: 0
Received 18 Likes
on
18 Posts
2009 S550 AMG sport pckg. 2014 Ford F-150 Lariat Supercrewcab
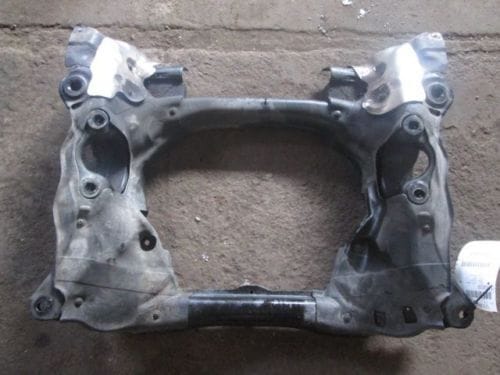
pay attention to the passageways on the side of the frame where the drive axles go through. The drive axles should not bear any weight by stopping against the top. The two holes above each passageway are the crossmember to mount holes for the bolts
#14
Super Member
Join Date: Dec 2005
Location: Rochester, NY
Posts: 806
Likes: 0
Received 18 Likes
on
18 Posts
2009 S550 AMG sport pckg. 2014 Ford F-150 Lariat Supercrewcab
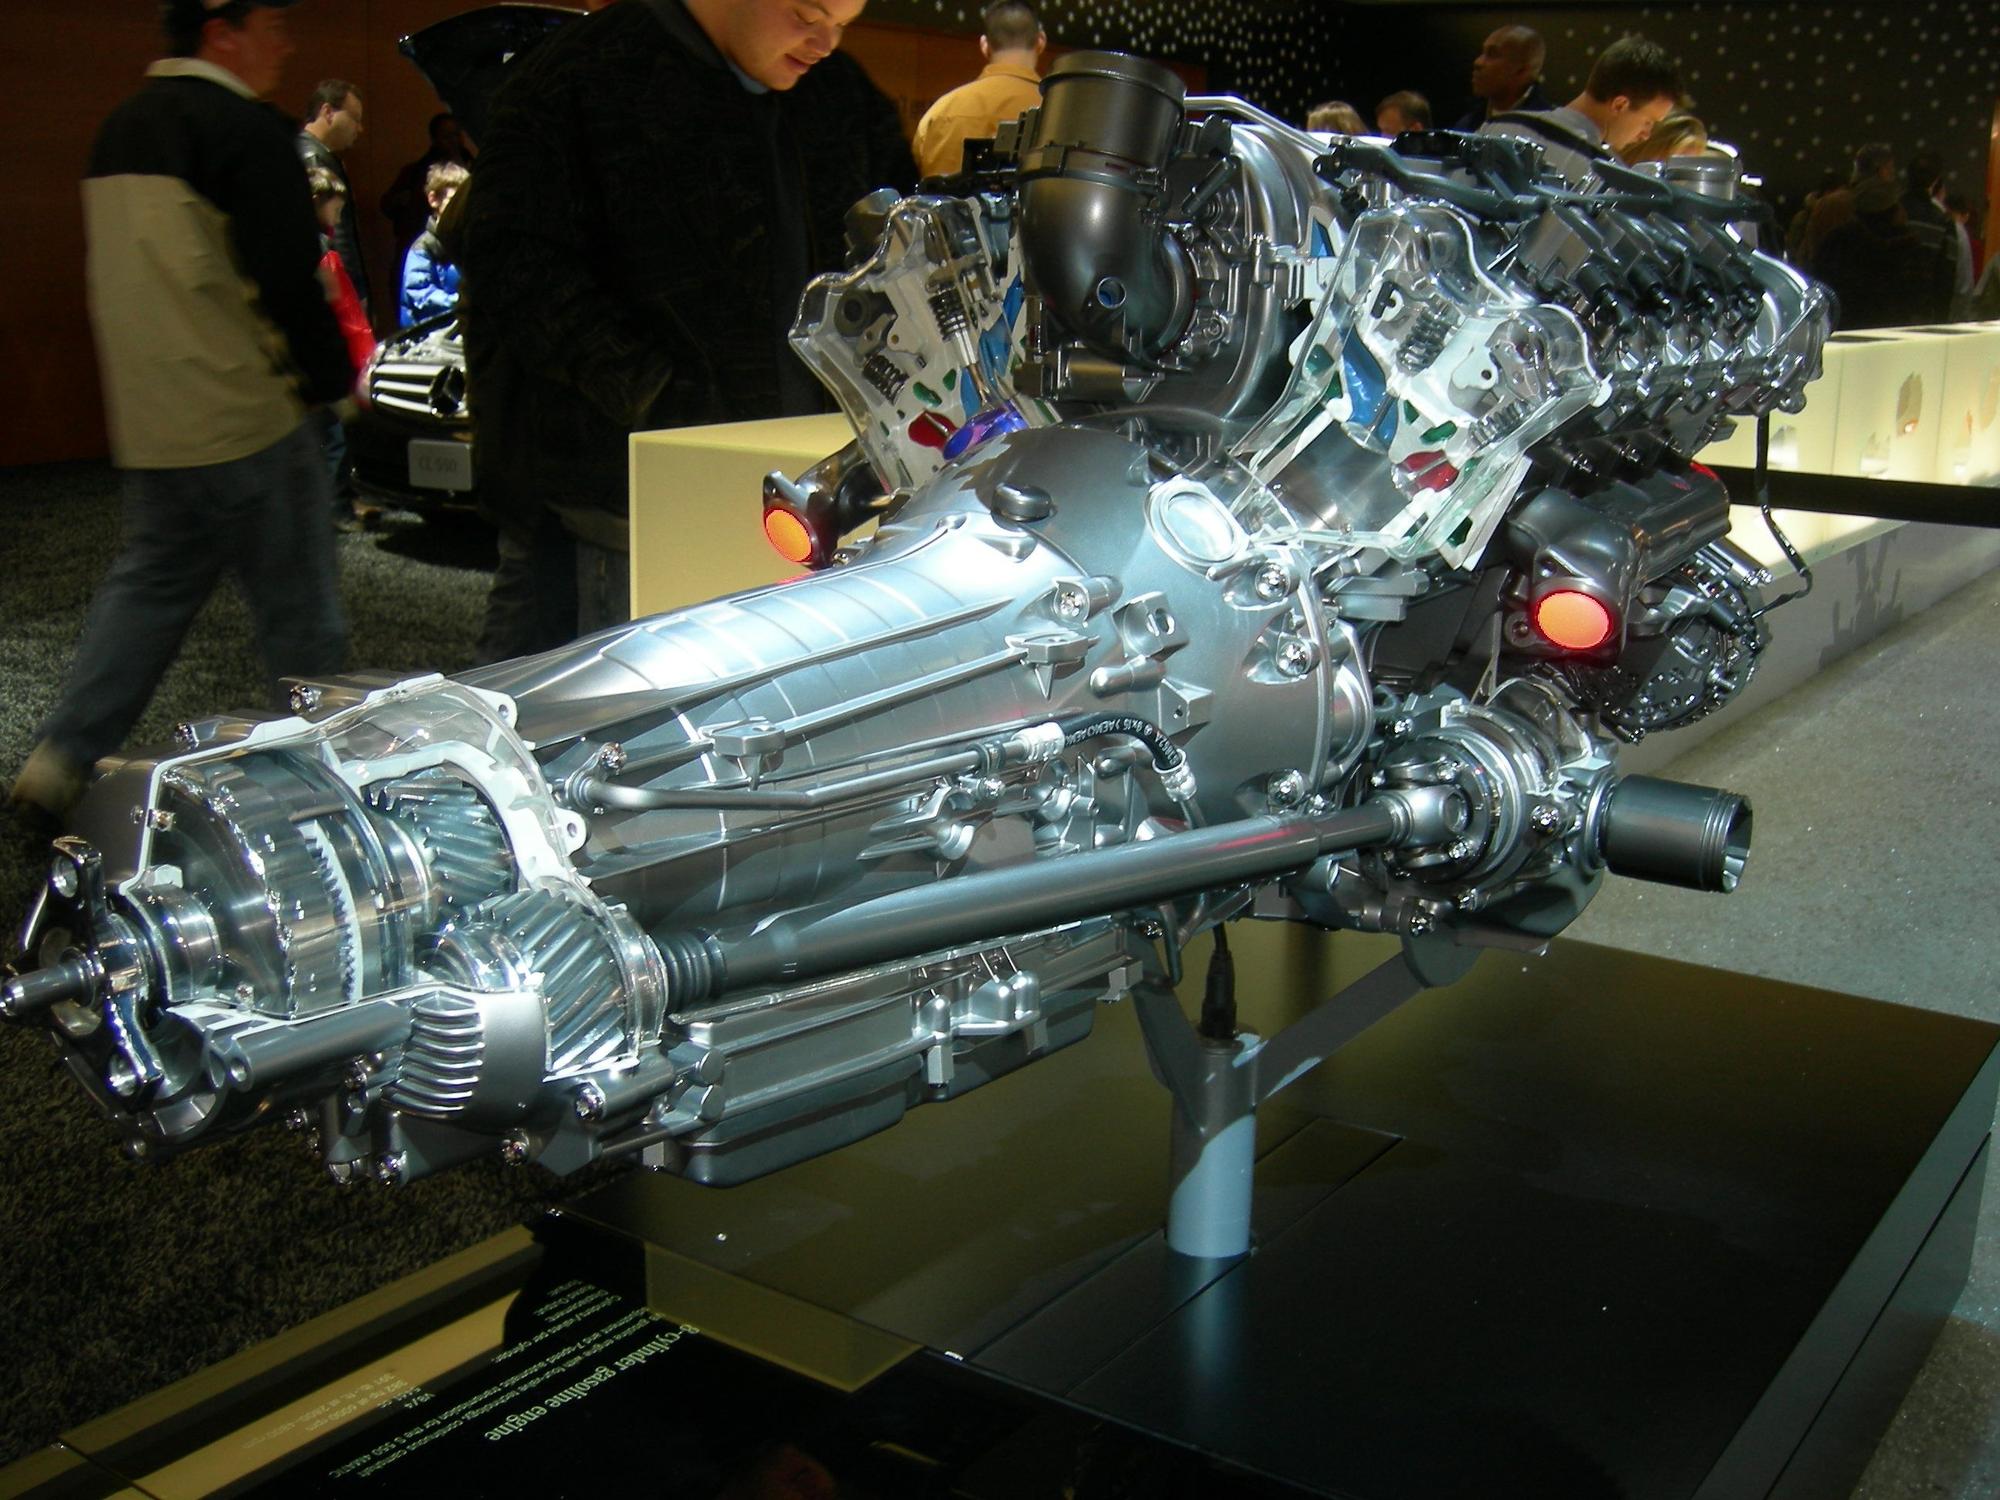
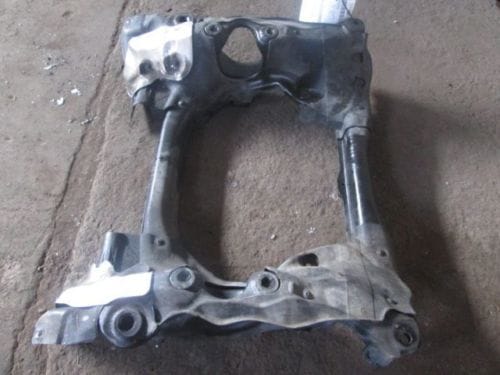
pay attention to where the driveaxle comes out of the differential. That black cylinder sticking out of the side of the diff is part of the drive axle. The drivers side goes through the oil pan so try not to bear any weight on these parts by accidentally raising the engine too high
#15
Super Member
Join Date: Dec 2005
Location: Rochester, NY
Posts: 806
Likes: 0
Received 18 Likes
on
18 Posts
2009 S550 AMG sport pckg. 2014 Ford F-150 Lariat Supercrewcab
And finally if you're going to do transmission mount too, do that last. Do the engine mounts first. Just my personal opinion because by lifting up the engine you can possibly deform the tranny mount so if you replace the front mounts first and deform the old one then put in new, who cares. Also
I have a link on DIY tranny mount
I have a link on DIY tranny mount


