When you click on links to various merchants on this site and make a purchase, this can result in this site earning a commission. Affiliate programs and affiliations include, but are not limited to, the eBay Partner Network.
This Monday my mechanic swapped out my leaky radiator for a new OEM unit. I can confirm that this solved the coolant leak issue, so it's safe to say it wasn't a leaky hose causing pools of expensive MB coolant under my vehicle.
Here's the old radiator. It was certainly due for a change:
Here's the crack where it was leaking:
After feeding the CLK some expensive fluids, I can confirm that it runs well without any weird signs of overheating or leaks. That said, when one problem is fixed three more seemingly pop up.
One of auxiliary hood latches broke. The one circled in red:
Now the hood won't close completely. I ordered a used set of latches off eBay for ~$18. They'll arrive on Monday.
Monday night I went to test the car after the radiator swap and also managed to break both interior door handles. Yes, the plastic inner handle supports and the outer handle covers. It's amazing how expensive these dumb parts can be, even on eBay (~$100 for inner/outer per door).
Finally, I need to find a plastic backing cover for one of the front lights (the smaller inner parking/bright) because I discovered it's missing. I don't want water to get into the housing or compromise the bulb.
Stay tuned for an EGR overhaul update as well as a diff. fluid flush! I also ordered a burlwood dash piece with a cutout for the rear shade as well as another upper burlwood dash piece since the last one was damaged during shipping.
Last edited by 03basesedan; Mar 23, 2016 at 12:48 PM.
Finally, I need to find a plastic backing cover for one of the front lights (the smaller inner parking/bright) because I discovered it's missing. I don't want water to get into the housing or compromise the bulb.
I found the similar issue with mine. Bought a 2nd hand one from salvage yard for R100. Sorry to hear bout the issues you had with the bonnet latch and the door handles. Both are a PITA. Be careful with the bonnet and refrain from high speeds. Don't want to be replacing windscreen now.
I find it strange that your water tank on the right looks like it has MB coolant in it. Is the one on the left not your expansion tank? The one on right being a windshield washer system? The W209 don't have those.
Anyway, looking forward to your updates man. I was started to wonder where'd you run off to as I didn't see post from you for some time up here.
Alright W208 friend, it's been a while since my last update.
Here's what happened:
-Radiator went in, no problems under last week, now the car has a coolant leak from somewhere. The expansion tank is cracked, so I have a new one that'll be going in over the next few days. Hopefully that cures the problem.
-The aux. hood latch was replaced and fixed.
-Rear diff. fluid was replaced with MB fluid.
-Discovered that the serpentine belt is cracked, new one going in soon.
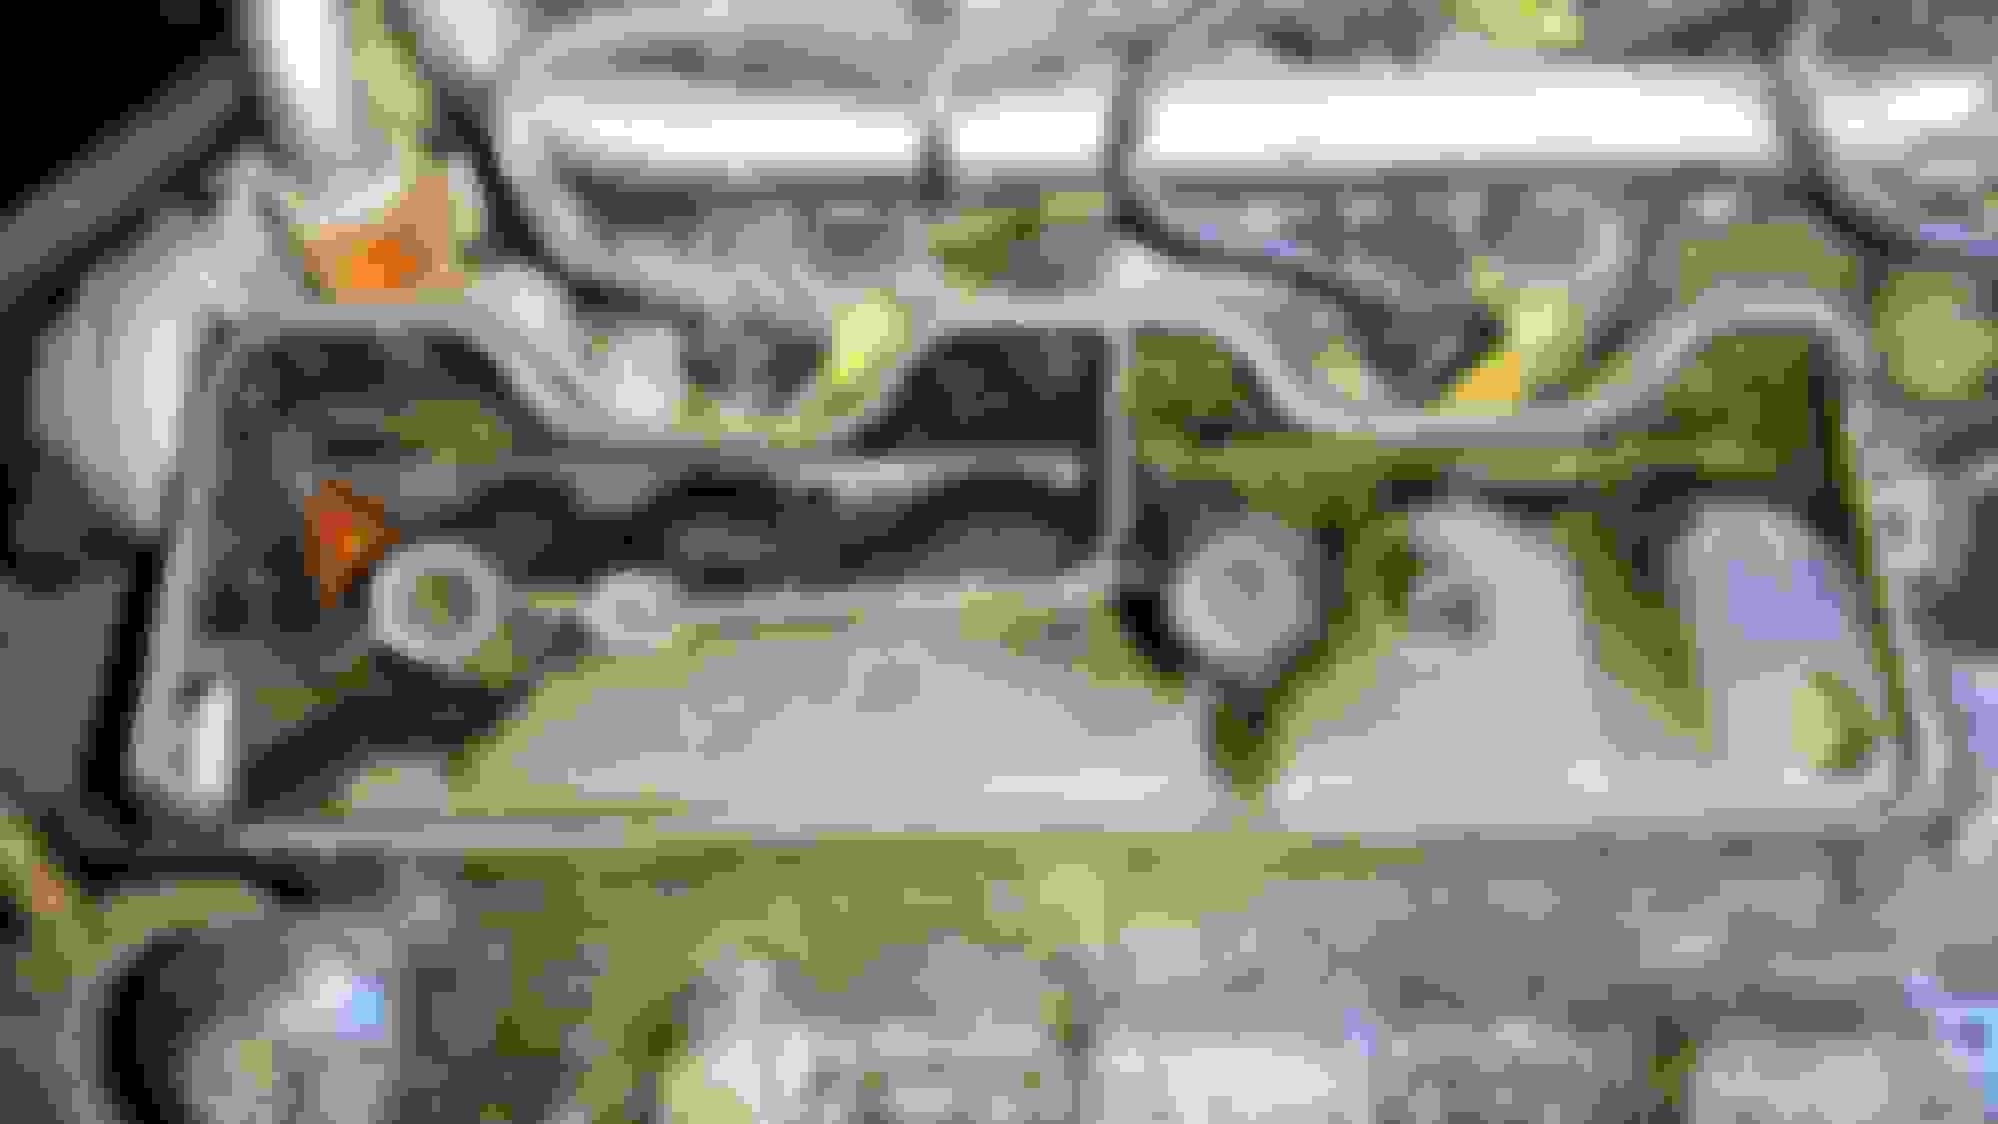
In this post you'll see my quest to replace the valve cover gaskets and breathers, the egr valve, and the associated bolts and vacuum hoses.
Airbox off, coolant tank to the side, and coil packs getting loosened.
Coil packs coming off. Note the oil residue around the leaky breather cover.
Necessary coils off. Others do not get in the way, so they are still attached.
Breather cover removed. Filthy.
Inside of the breather cover. Quite a lot of oil residue, but the hole for the EGR wasn't fully plugged,
I broke this damn thing. They are SO expensive. One of the vacuum lines attached to it was deteriorated, so it will be replaced too.
Valve cover off.
Another angle.
Used engine degreaser, brake cleaner, steel wool, scraped the crap out of the mating surfaces, and stuck both in the dish washer.
Inside of the value cover looks clean.
Before the dish washer.
Prepping for EGR removal.
I unscrewed the tranny dipstick bolt and moved the dipstick to the side, disconnected the MAF and lower TB connector, and disconnected the the back injector clip.
EGR pipe was VERY difficult to get out of the intake manifold.
New vs. Old.
Removed vacuum hoses and 3-way connector.
New vs. Old. Twisted the old pipe off of the old valve. Couldn't get it off any other way.
New vs. Old vacuum hoses. Make sure you get new hoses. Mine looked OK, but were brittle and dry.
Buttoned up.
Just need to connect the pipe and the valve. Needed a bigger wrench,
Post dish washer and ready for breather cover sealant.
EGR hole in the breather cover.
Breather cover sealed and reattached with new bolts.
I was sent an M112 valve cover, so I am waiting on a new set before I can tighten this side down and move on.
Sometime over the next few days I'll do the other side. I have to wait for a set of correct valve covers before I can make everything tight. I refuse to reuse the old valve covers despite their lack of leakage.
Hey guys, I did some more work on the car today. I wanted to get the driver's side valve cover off before nightfall. This side was MUCH harder to remove due to a lack of space. I also got an OEM set of M113 valve cover gaskets, so I can move forward with the project.
The valve cover and breather cover are currently drying in the dishwasher. I'll seal the breather tonight so it's ready to install tomorrow.
Here's the To Do List:
-Seal driver's side breather
-Install and secure both valve covers and gaskets
-Tighten EGR nut
-Replace last breather hose
-Replace coolant expansion tanks and add coolant
-Raise car on Rhino ramps to look for potential coolant leaks if new expansion tank doesn't do the trick
-Oil change
-Install final three pieces of wood trim in interior
-Wash and wax
Pics from today:
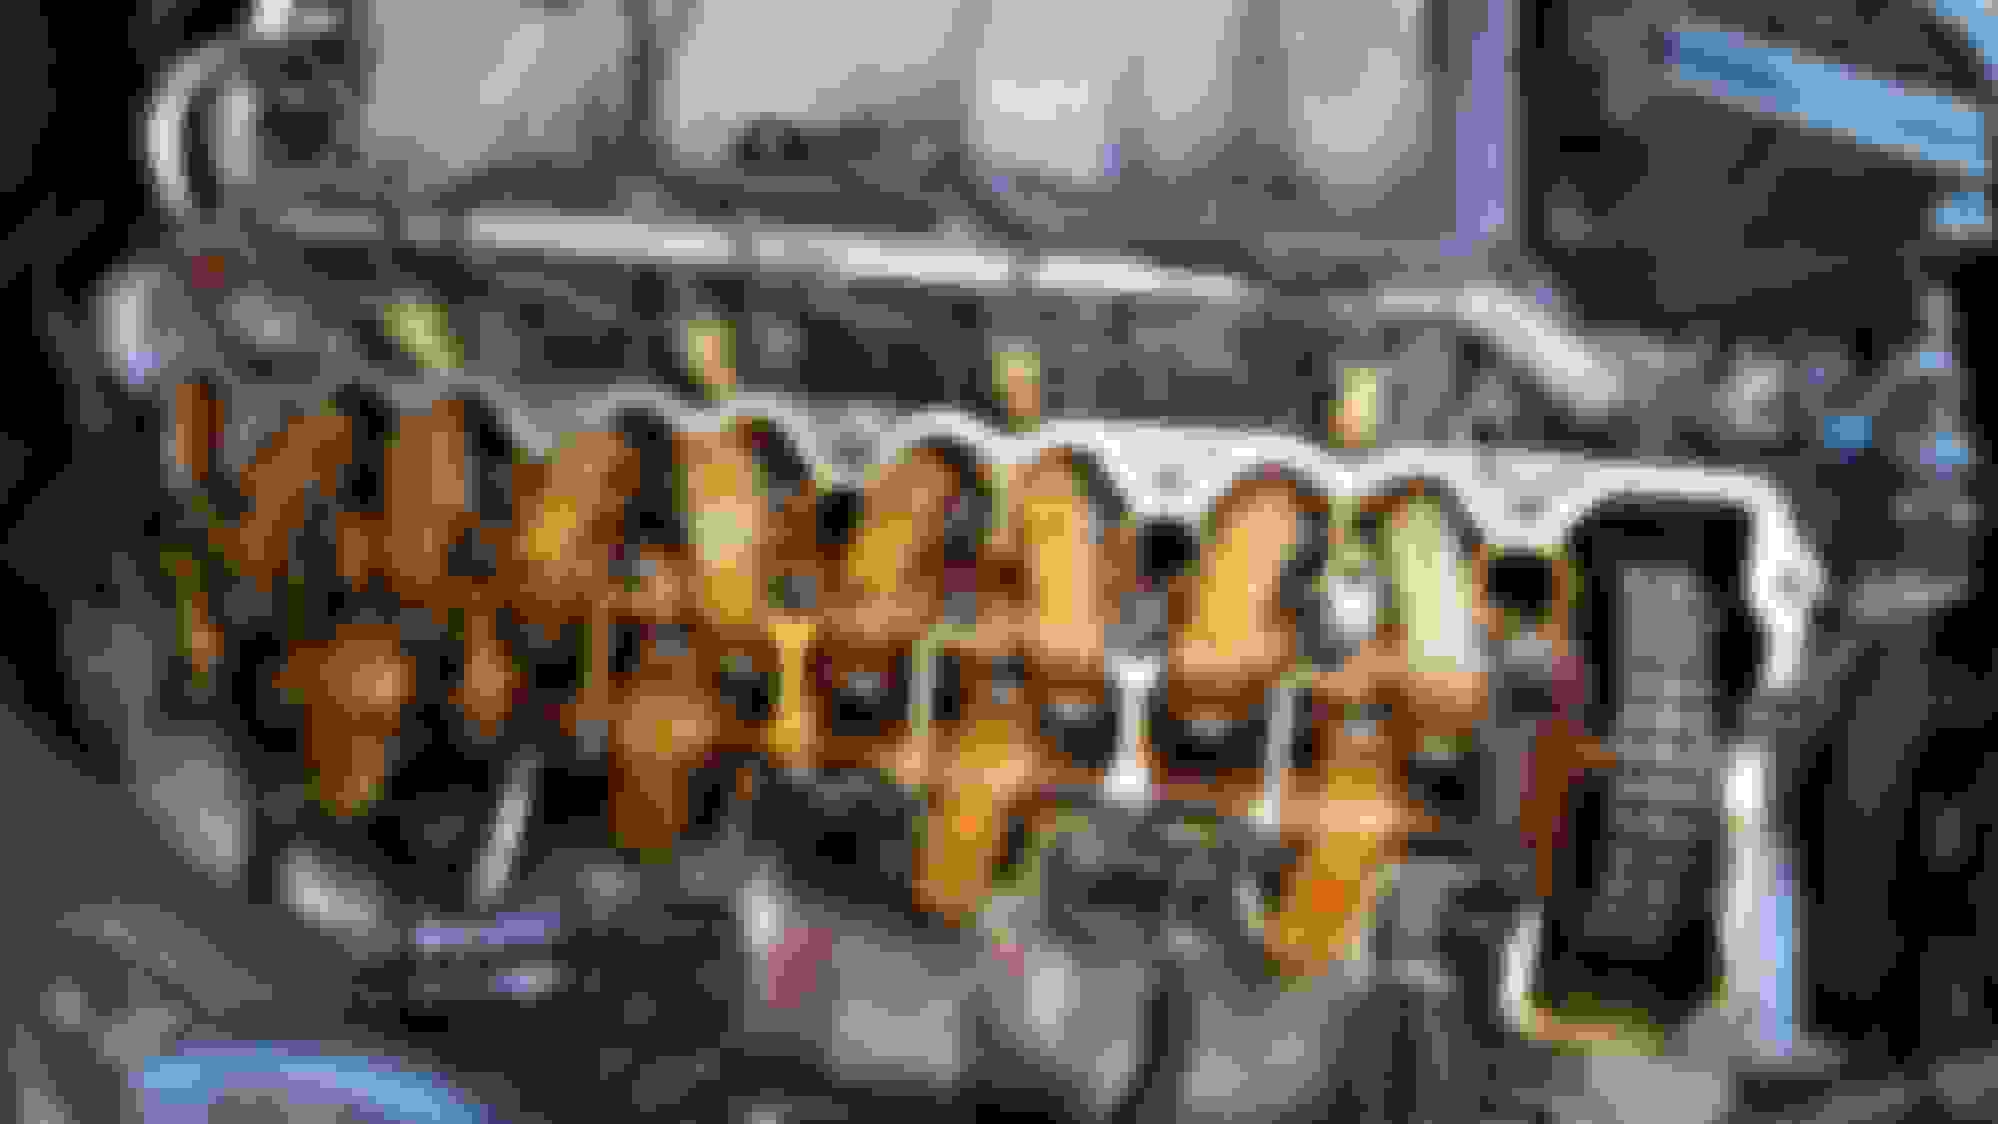
About to start removing the coil packs.
Unscrewed, but this side is WAY tighter than the other side. I had to remove almost all of the coils to have enough space to work on the valve cover screws.
I had to loosen and move the windshield washer tank towards the grille to access the coils and lower valve cover bolts. Note the leaky breather seal.
The cover finally came off.
All looks good.
This hose does not move. That was the biggest obstacle to overcome during the cover removal.
This is the final hose that needs to be replaced. It's connected to the lower intake bend right under the MAF, and goes onto a bung on the valve cover.
Valve cover before cleaning.
Breather and valve cover separated.
Removing the old gasket material.
UPDATE: Both covers are clean, out of the dishwasher, and the breather is sealed and bolted down. Tomorrow I'll install the valve cover, and we'll see if it holds, or pisses oil.
Last edited by 03basesedan; May 5, 2016 at 01:32 AM.
Alright, so the valve covers are back in place, and all went well. I did undo the fuel line, and it did leak everywhere, but I had rags handy. Now only three problems remain:
1) I can't get the broken part of the smog air pump check valve out of the block.
2) The car still has a coolant leak from the left side of the motor.
3) I must've broken something, or left something unplugged because the engine temp. sensor isn't reading anything.
Both valve covers are back on!
Right cover cleaned, glued, and bolted down.
Another angle.
The replacement smog check valve.
Coils back on.
Broken check valve seat. How am I going to get this thing out?
New expansion tank in.
Where is that top hose supposed to go?
1st startup, no oil leaks from the covers, but it's still pissing coolant.
Today I devoted some time to the interior. The whole dash is burlwood except for the top piece and the door cards, so I started the not so fun task of getting everything to match.
I purchased some door inserts, and an upper dash wood piece a while back. It's hard to find stuff that's a good match to the rest of the car, but this'll do.
Here's the old birdseye. As you can see, it's in poor condition.
Door card-1 coming off.
Replacement burlwood piece is in!
These are the clips that hold the wood grain to the door card. I recommend using a hook tool instead of trying to rip the clips off with a flat head.
Door card-2 coming off.
Before.
After.
Time to replace the upper trim. Yes, the WHOLE damn dash has to come out.
I hope I can put this all back together...
Glove box removal.
Climate control removal.
The dash is finally free.
It's off! The a pillar covers have to come off too.
New vs. Old
The burlwood is in! I'll finish reassembly tomorrow.
The top hose on the expansion tank just runs down the fender. It is only for overflow so nothing should be coming out of there unless you have problem.
Excellent work. I admire your diligence. Got a kick out of your rear sun shade photo. The homes in the background look just like the street I grew up on in Shaker.
Excellent work. I admire your diligence. Got a kick out of your rear sun shade photo. The homes in the background look just like the street I grew up on in Shaker.
Ah, yes, I live in Cleveland Heights. Shaker is a great area!
Originally Posted by IBelieve
Oh man, you are brave to wait till today to put it back together. In 2 hours I forget any sequences and mix up the screws.
I did misplace the two screws for the A/C vents ... oops
Originally Posted by insame1
The top hose on the expansion tank just runs down the fender. It is only for overflow so nothing should be coming out of there unless you have problem.
Thank you. I googled a few underhood pics last night, and they confirmed its purpose.
You really do a great job with the pictures. 2 questions. What did you do for the bezel around the shiftier, and will your new hose come with that green stuff already attached?
very nice work. you have addressed over 90% of the things that plague this car. 1 suggestion. Check your engine mounts and especially the transmission mount. The car has a habit of eating them. if driven daily expect to replace them ever other year.
will your new hose come with that green stuff already attached?
If you are running green coolant I would flush that stuff out of there right now and go with either the MB (blue) or the zerex g 05 (orange). That green stuff, at least on my old 190e, is know to eat gaskets.
If you are running green coolant I would flush that stuff out of there right now and go with either the MB (blue) or the zerex g 05 (orange). That green stuff, at least on my old 190e, is know to eat gaskets.
I think it's a mix of the orange and blue in there right now. It leaks SO much I didn't have time to reorder MB coolant from Amazon.
Originally Posted by IBelieve
You really do a great job with the pictures. 2 questions. What did you do for the bezel around the shiftier, and will your new hose come with that green stuff already attached?
I'll have to buy some coolant, hahah. The center bezel is still silver. You mean the one around the shifter? I decided this car has seen enough of my money for a little while, so, after the coolant leak and broken check valve is fixed, I'll give it an oil change, do the serpentine belt, and detail it. The other little niggles can wait.
Originally Posted by dohcfiend
very nice work. you have addressed over 90% of the things that plague this car. 1 suggestion. Check your engine mounts and especially the transmission mount. The car has a habit of eating them. if driven daily expect to replace them ever other year.
I am almost positive the engine mounts have deteriorated. That was on my list as well. It'll have to wait, but I can feel the engine come down after abrupt acceleration at lower speeds.
CAUTION my friend. Bad motor mounts can lead to other problems. I put them off and the raising motor wore through wires and caused an intermittent problem that cost lots of time and money to find. And it messed up my Mass Air Flow Sensor to boot. The other alternative is to keep your foot out of it...ya, if you're like me, that won't happen.
05 CLK55 AMG (1 of 247) Cubanitsilber designo series
Also if your motor mounts are bad your transmission mount is almost certainly dropped as well which changes the alignment of the drive shaft to the center support bearing and the flex disk. That alignment can affect the rear transmission seal as well. It's best to change all the mounts and plan to change them in the future. As Ibelieve said, it will cost you more to drive with the mounts collapsed.
I gotta say dude, you got some stones to take your dash apart and get it back together again!
I would urge you make a second evaluation. The parts can all be had for less than $100, no need for genuine MB mounts since they go so quick especially if you like pressing the accelerator and any mechanic can install all 3 of them for around $100. Use the same mechanic and def lock in a lower rate; those engine mounts are ****ing awful on maintenance......between those and the fully electronic trunk with the battery in it sometimes makes me want to drag Hans out the AMG factory and line him up against the wall.
I would really like to see some poly or solid mounts, ugh!
If nothing else replace the trans mount. It can be bought for around $20 and installed for around $50ish.
I would hate to see you make all this progress just to have to re-do some of the work you have already done or incur additional expenses.
funny story when I first bought mine i noticed a small dent in the hood but it was poking out and not in. I was like "wtf happened here; someone shut the hood with a tool on top of the airbox maybe?". Also thought it was odd the original owner said he replaced the engine mounts until mine finally went bad and i hit the accelerator while under the hood and seen the engine jump; "I was like ooohhhhhh, that's how that dent got there." LOL.
Last edited by dohcfiend; May 12, 2016 at 05:25 AM.
Well, if the install for the motor mounts/tranny mount isn't too bad, I would certainly consider doing it myself. I do have a weird little dent in my hood as well Do you guys have links to the poly mounts?
I don't mind doing all of this stuff, but I may be selling the car within a month, so we'll see what happens. I may have to leave a couple of items for the new owner to have fun with...
Here are the issues that need to be addressed ASAP:
+Coolant temp gauge is not not showing a reading
---> The fans still function when they should, and are not on high all the time
---> May be the sensor, cheap part, will throw it in when I do the serpentine belt, bought one from the dealer earlier today
+Serpentine belt is cracked, have replacement ready to go
+Broken smog check valve needs to be fixed by either removing the broken piece from the block and installing the replacement I sourced, or it needs to be glued back together with gasket maker/sealant (I planned on using Permatex Right Stuff)
+Lower radiator/coolant hose needs to be replaced, I ordered the replacement with expedited shipping, but AZAutohaus is still showing the order as 'Processing' - frustrating
---> Went to the MB dealer today and got 3 jugs of MB coolant
+Yes, my trunk no longer pops, maybe the last thing I want to deal with
+My seatbelts are slow to retract, planned on using furniture cleaner on the belts to see if it makes a difference
Then, I suppose I can work on the motor mounts, etc.
Ive done the mounts on a 208 and its not that hard. If you have a lift it pretty easy. if you end up keeping the car get the newer e55 mounts. same price and they last a bit longer.
Mercedes SLR McLaren 722 S Is Extremely Rare Example Modified by McLaren
Slideshow: A one-of-one U.S.-spec Mercedes-Benz SLR McLaren Roadster became even rarer after a factory-backed transformation at McLaren's headquarters.
Mercedes Teases Updated EQS With Steer-By-Wire and a Yoke
Slideshow: The 2027 update adds a fully digital steering system, revised styling, and potential charging upgrades as the company looks to revive interest in the luxury EV.
Slideshow: From problematic air suspensions to early dual-clutch transmission issues, these specific models and years stand out as the least dependable modern Mercedes vehicles.


 ,
, 


 Do you guys have links to the poly mounts?


