When you click on links to various merchants on this site and make a purchase, this can result in this site earning a commission. Affiliate programs and affiliations include, but are not limited to, the eBay Partner Network.
Known to MB as Body Hardware, Quarter Panel, Interior Trim, Side Cover
Here’s another method for repairing the two hinged covers (flaps) on the rear deck that cover the hole through which the top supports extend.
THE ISSUE is that the tiny plastic hinges are not robust enough for the application.
ANOTHER SOLUTION is to replace the plastic hinge barrels with brass barrels. You need to be handy enough to be able to cut, file, and epoxy them as well as remove and replace the deck panels.
MATERIALS NEEDED
Two brass hinges for each side. See pictures for recommended hinges available from places like Rockler or Woodcraft.
Epoxy. West Marine sells an epoxy brand G/FLEX, available I both liquid and gel forms. Use the gel so seepage is not an issue. This epoxy is tenacious, BUT it remains a little flexible which is needed for use on these thin plastic panels so it won’t crack off.
NB: The panel, if cracked or broken, can also be repaired with this epoxy using light fiberglass cloth for strength. Wet surface first, then cloth, then coat top and soak in.
The plastic end pin for the flap, if broken, may also be repaired using a short length of 1/16” diameter brass rod or tube, available at model stores, or even Ace hardware.
Do one side at a time to use the other side as a reference when assembling.
PROCEDURE Here’s a step-by-step procedure. The second goes much faster once familiar with the job.
1. Top down.
2. Open trunk.
3. Raise the load assist for access to rear mounting screw.
4. Remove screw but don’t drop it. Store in a container.
5. Lower the load assist.
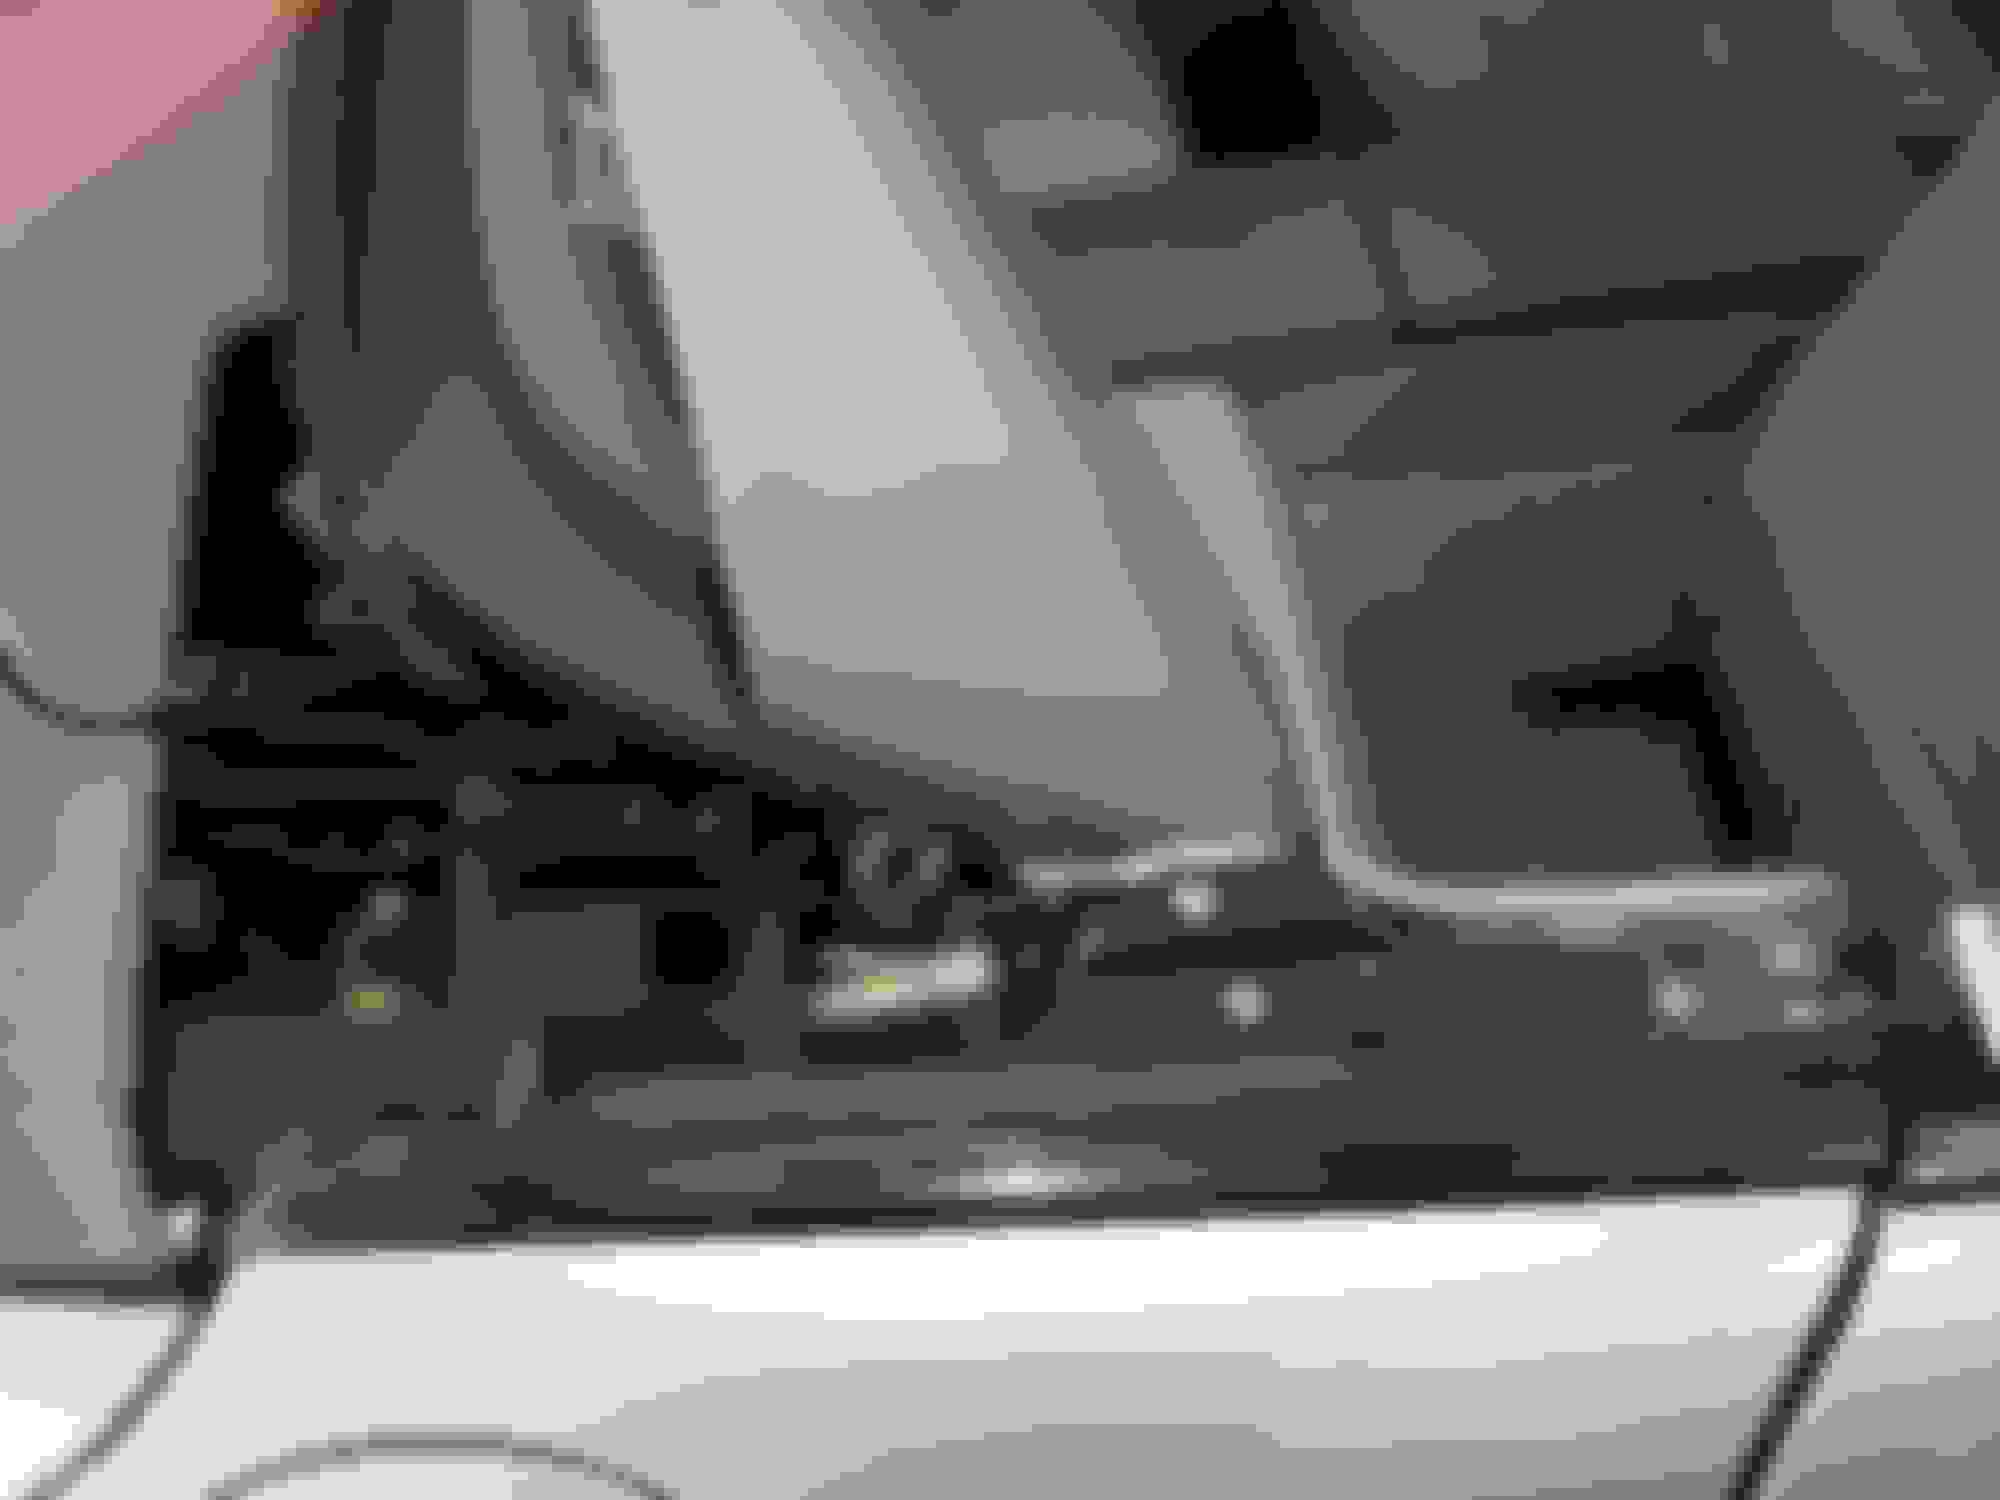
6. Loosen hex head screw under panel, access from rear or through flap opening. Use 5/16” deep socket or wrench. One turn only, if tight, none if loose. It is in a captured nut, but can fall into the mechanism.
7. Remove four screws and front cap. Store. Long screws are the upper screws.
8. Locate the two white plastic fasteners underneath and carefully pry them up to release panel. Bending the panel will break it.
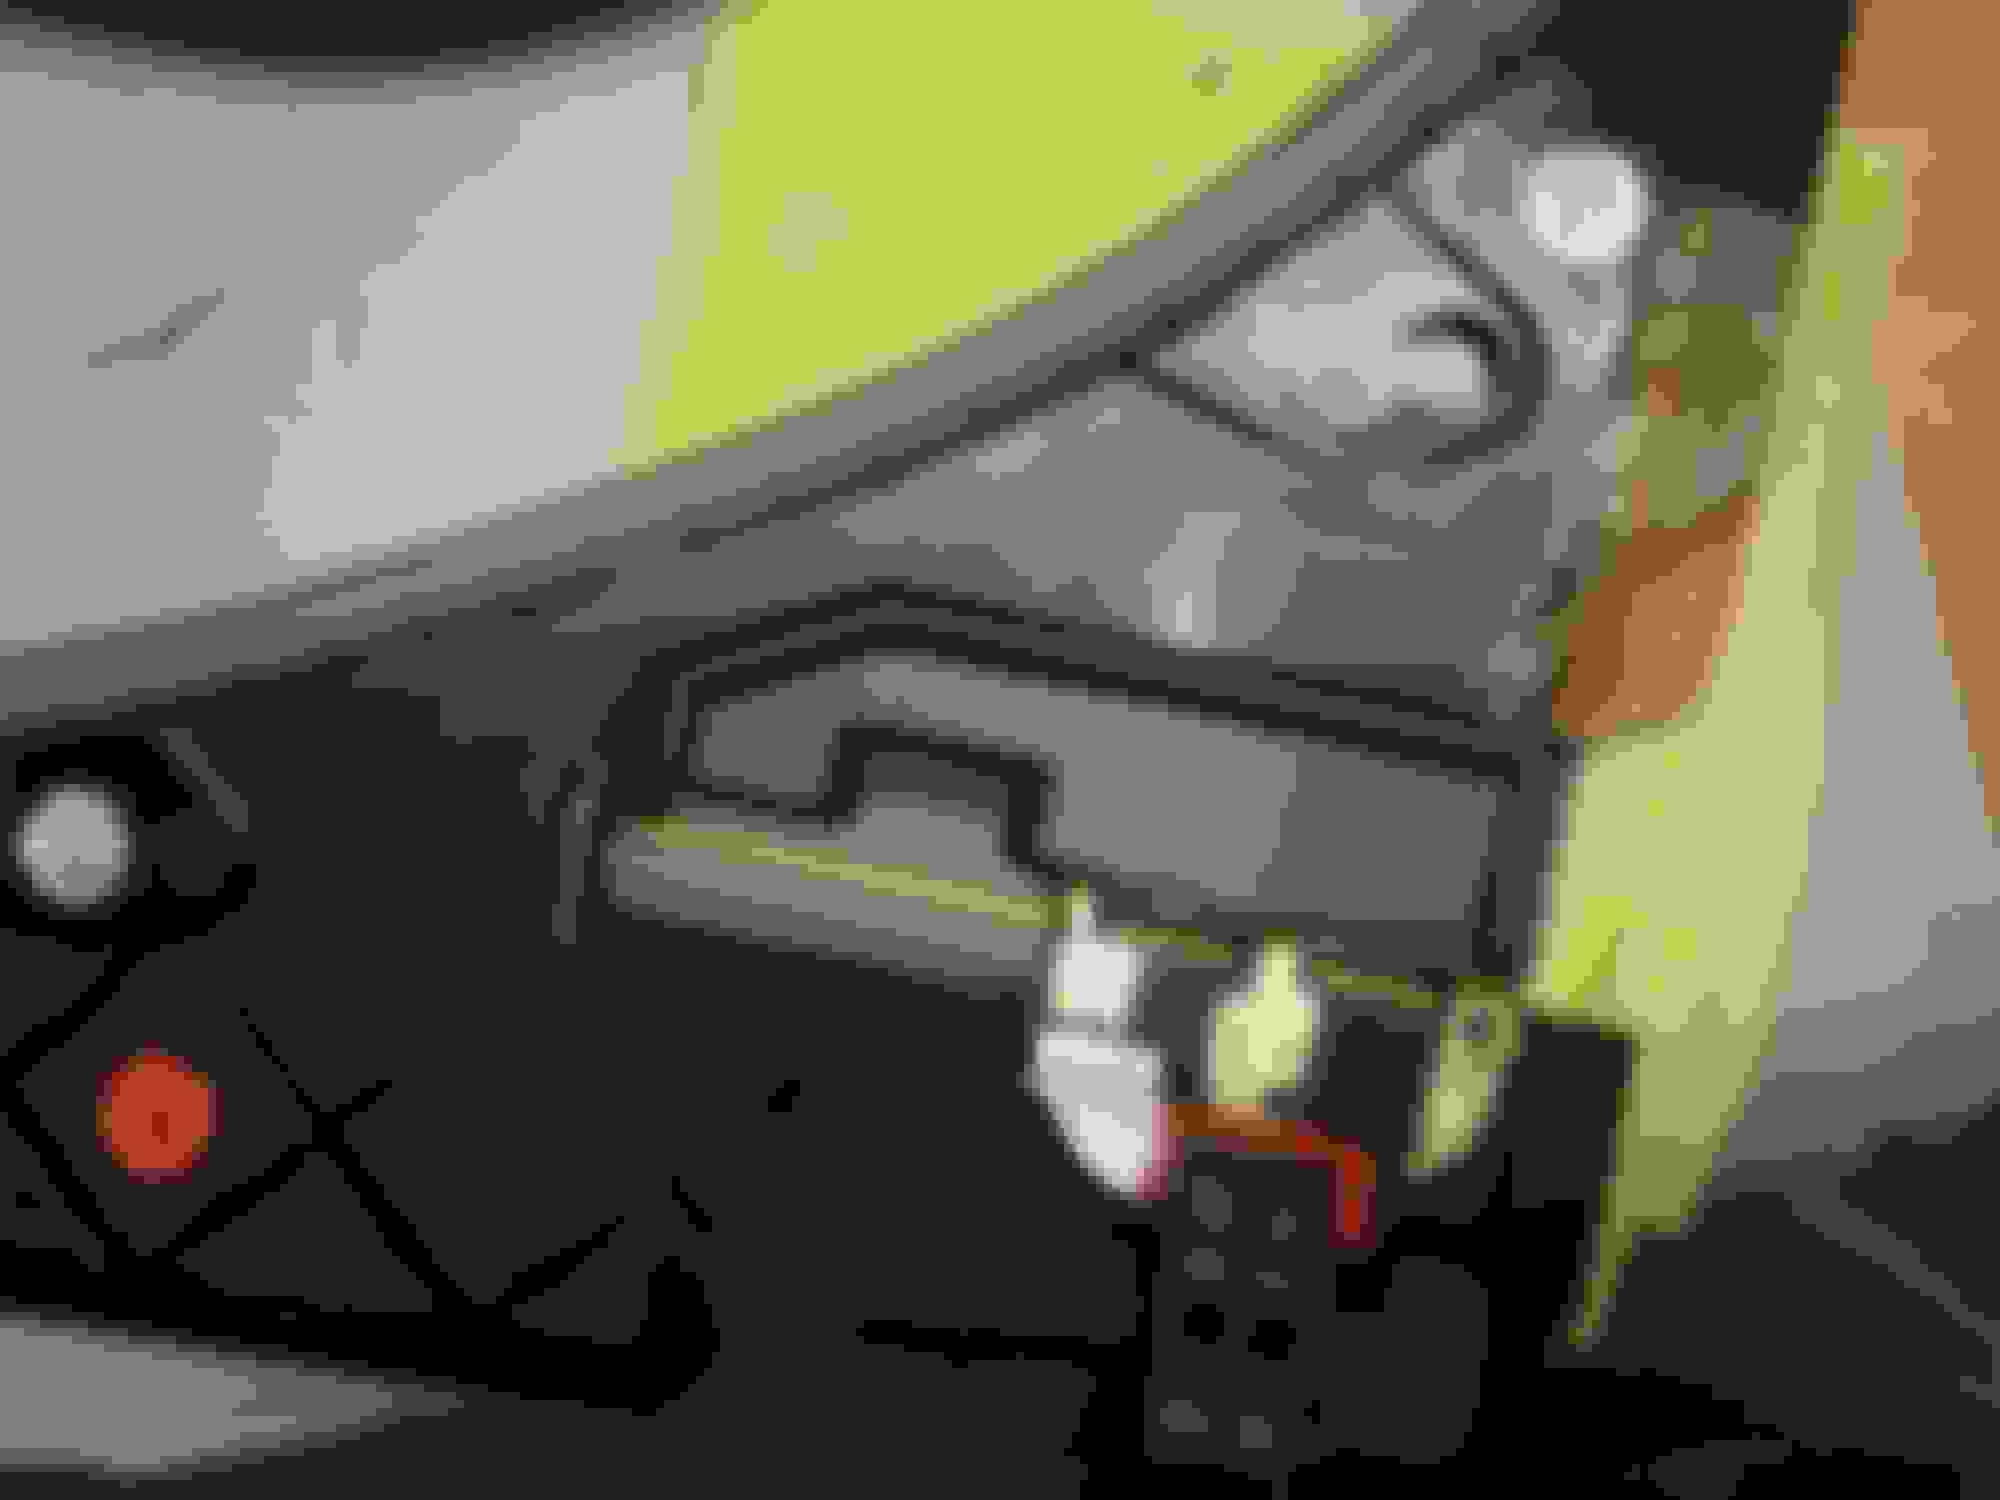
9. Cut off the three hinges and the ribs above the plastic panel for an epoxy surface. Remove about 1/16” of the remaining hinge extensions, round edge for brass hinge bend.
10. Flip panel upside down. Plan where hinges are located and surface for maximum bonding area.
11. Cut and fit hinges from purchases brass hinges. Bend on a vice to about 45 degrees. You may have to straighten and bend again as you fit them. With this brass you can do that at least once.
12. Check hinge barrels are not too long to bind, aligned with original location, and swing allows 90 degrees without being blocked. This is critical to get it right. Use a small clamp on the open end to assist alignment.
13. When satisfied the hinges are correct, sand off the lacquer and roughen the brass surface, as well as roughen the plastic areas on the panel where bonding will occur.
14. Note the sliding bracket. Protect it from being fouled by epoxy by sliding a small piece of paper with waxed paper over it into the space between the panel and the sliding piece.
15. Assemble the three brass hinges on the hinge pin and the flap, arranging the spring to operate correctly. If you get it wrong, it is a lot harder afterward.
16. Epoxy three hinges, one at a time, starting with the open end, and lightly clamping the open end hinge, being careful not to epoxy the clamp. Clamp the sprung hinge also to keep it in contact until the epoxy hardens. Assur no epoxy gets into working parts. Leave to cure for 10 hours.
17. After hardening, remove clamps and apply more epoxy on the edges and where missed due to clamps. Leave to cure 8 hours.
18. Test the flap operation. May need to trim/file, sand any binding areas.
19. Reinstall the panel, aligning it with the slotted clamp underneath and the two white pins. Best done by extending the screw as much as is feasible without risking it dropping out. Make sure it fits correctly by comparing to the other side.
20. Insert rear torx screw loosely.
21. Attach front cap and four screws (2 long on top, 2 short lower down).
21. Then tighten the rear torx screw.
22. Check operation, looking for anything binding or blocking travel.
(How do I make the pictures smaller?) Locate two mounting pin holes and hex head machine screw Parts bought and how to cut Note: sliding bracket masking from epoxy, epoxy/fiberglas repair to panel, repaired hinge pin.
Last edited by rrueckwald; Nov 7, 2021 at 06:36 PM.
Rrueckwald, very skillful solution..! Kudos to that! I found this thread while trying to find a solution for the rear folding deck on my car.
Well my friend, when I purchased my car, that little lid was missing, so I took a very easy approach to solve that. Glued some bristles used in many door thresholds...! Works fine for me! If one day I find that little door in a junkyard I will do your technique!
Mercedes SLR McLaren 722 S Is Extremely Rare Example Modified by McLaren
Slideshow: A one-of-one U.S.-spec Mercedes-Benz SLR McLaren Roadster became even rarer after a factory-backed transformation at McLaren's headquarters.