SL55/63/65/R230 AMG: DUDMD - SL65 AMG V12T - Single Turbo Conversion Build

 01-30-2017, 10:19 PM
#27
Member
Thread Starter
Test fit the billet oil drain on the drain, seems to fit perfectly. I used the same one on my other projects as well.
Dropped the engine back in, and holy crap. It is so much easier to connect everything back together without the turbos/intercoolers/abc hoses and extra lines. It is now probably the easiest mercedes to change engine mounts on. I can easily undo all 3 bolts on top of motor mounts straight from the top.
Power steering hoses to rack can now be installed and secured all the way from the top, too.
Here's a few pics from today's progress.
Up next is to finish all the transmission bits with installation and start fabricating the exhaust to the turbo.
Billet CNC T4 oil drain to -10an adapter.
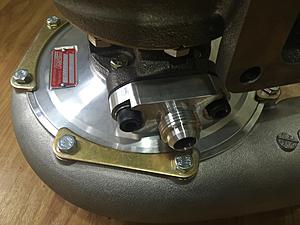
Steel 1/8" NPT to -4AN fitting, used steel so that it doesn't easily break when installing hose. Hard to reach area, so better safe than sorry.
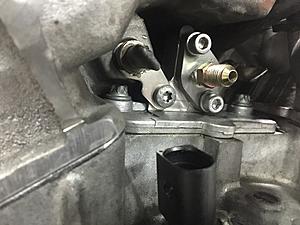
Drivers side engine bay shot. Power steering rack connections easy to get to, motor mount bolts are a joke now.
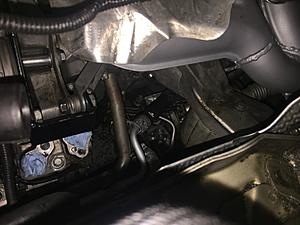
Passenger side engine bay shot.


 02-17-2017, 07:24 AM
#30
Senior Member
How is it going?
I'm really curious, how much air can be forced healthy through your motor with your Turbo-Setup!
What are your plans with upgrading the transmission?
Best of Luck!
I'm really curious, how much air can be forced healthy through your motor with your Turbo-Setup!
What are your plans with upgrading the transmission?
Best of Luck!
02-17-2017, 01:34 PM
#32
Member
Thread Starter
For the moment, I'll be running just mild boost to get the setup and all the bugs worked out at first.
For the transmission only change at the moment will be a deep aluminum pan with cooling fans that add 2-3qts of extra ATF. If it blows up at medium power level on pump gas, I'll replace it with another and send this one out to get upgraded to handle 1K RWHP.
02-19-2017, 07:10 AM
#33
Member
Thread Starter
Here's a few updates for you guys. Will be putting in some more work into it next week as well. Goal is to have it all done in about a month from now.
Passenger side exhaust pipe from the header down.

Drivers side exhaust pipe from header down.
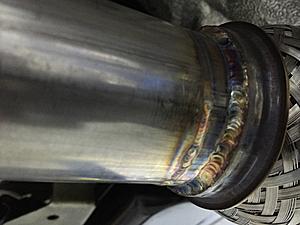
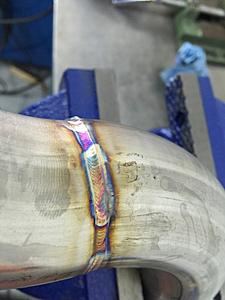
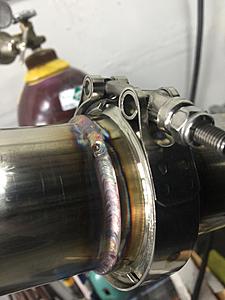
One of the better welds, I don't weld much with the TIG as I'm not really a fabricator much.
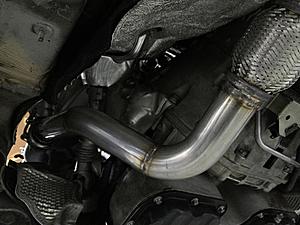
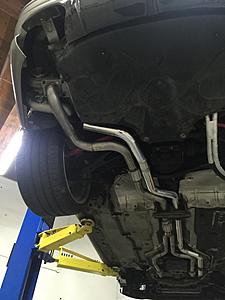
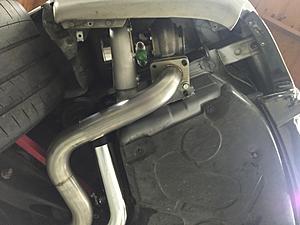
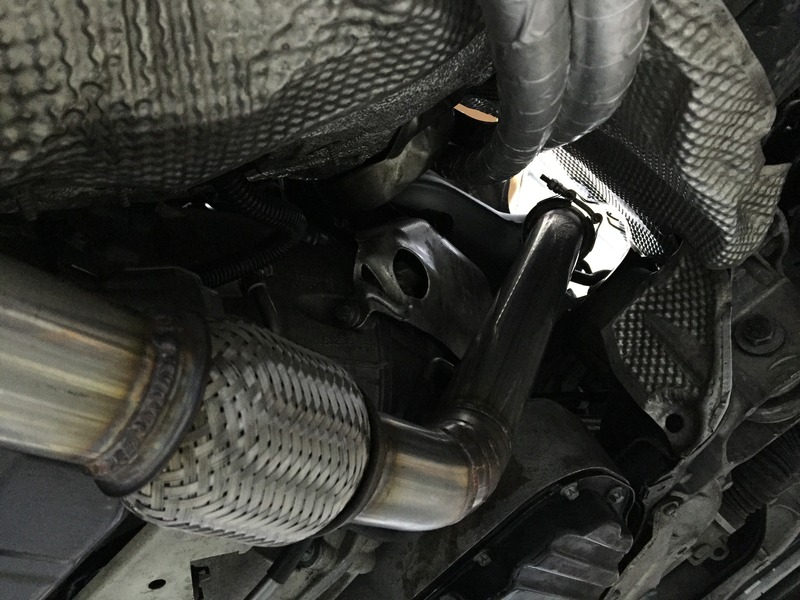
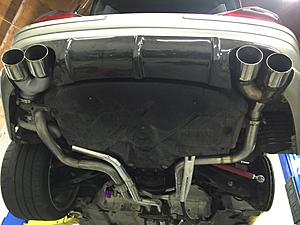
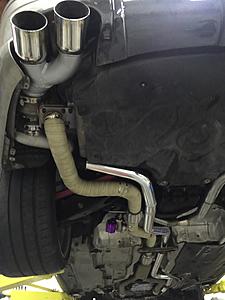
Bottom shot of the exhaust to the turbo, and charge pipe coming back to the engine bay.
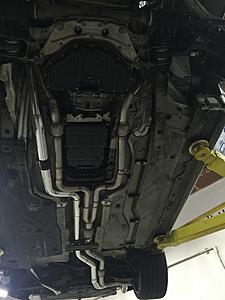
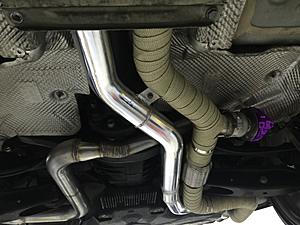
Another underside shot, still need to install wastegate and run the pipe over to pass side bumper exit for the dump tube.
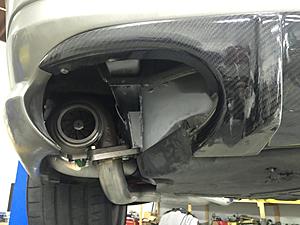
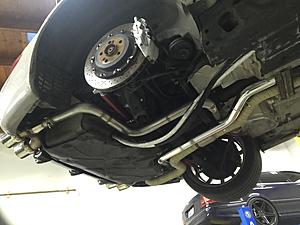
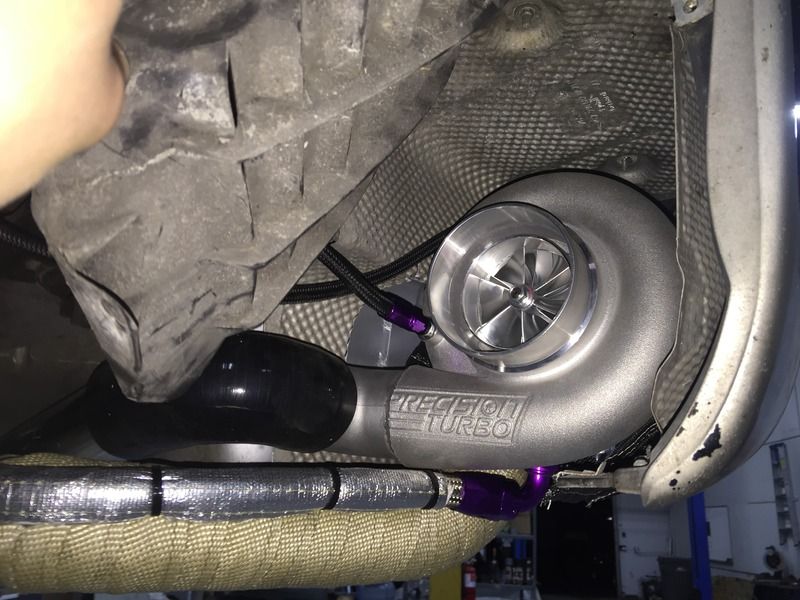
Underside shot of the turbo placement/install.
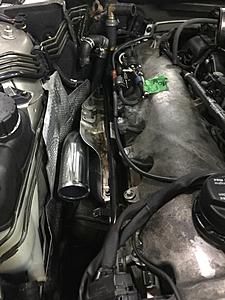
Charge pipe up into the engine bay, now time to spec out an intercooler and place an order for one.
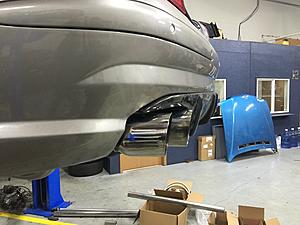
Rear end shot of the turbo placement before building the "downpipe"
Exhaust tips installed, aka shortest downpipe ever.
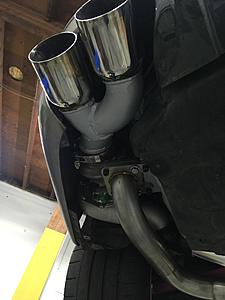
Turbine wheel can be seen through the rear of the tip.
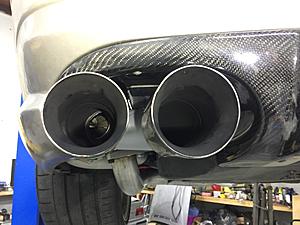
Tips are placed exactly as they were before on my previous setup.
Passenger side exhaust pipe from the header down.
Drivers side exhaust pipe from header down.


One of the better welds, I don't weld much with the TIG as I'm not really a fabricator much.

Bottom shot of the exhaust to the turbo, and charge pipe coming back to the engine bay.

Another underside shot, still need to install wastegate and run the pipe over to pass side bumper exit for the dump tube.

Underside shot of the turbo placement/install.

Charge pipe up into the engine bay, now time to spec out an intercooler and place an order for one.

Rear end shot of the turbo placement before building the "downpipe"

Exhaust tips installed, aka shortest downpipe ever.

Turbine wheel can be seen through the rear of the tip.

Tips are placed exactly as they were before on my previous setup.
 02-21-2017, 07:20 AM
#36
Hey one thing brother. I don't know if you thought about this or not, but that charge pipe is going to get SUPER heat soaked by the exhaust. You're going to end up having to get it coated/wrapped or both. It's literally sitting on the exhaust system.
02-21-2017, 11:06 AM
#37
MBWorld Fanatic!

Join Date: Aug 2003
Location: In my garage
Posts: 8,424
Received 1,003 Likes
on
810 Posts
E55, GLS450, GL63, GLE350
Cap'n obvious, I bet he has that covered. Just kidding with you. I believe he said that the exhaust would be ceramic coated and I'd imagine it will also be wrapped at that point too.
02-21-2017, 01:32 PM
#39
Member
Thread Starter
Intercooler pipe will be heat wrapped only where it's really close to the pass side header in the engine bay, it will then go into a large air to water intercooler.
Right now I'm trying to finish up all the fabrication first, before making final brackets and running oil lines.
Heat will not be an issue.
02-21-2017, 01:34 PM
#40
Member
Thread Starter
A turbo blanket alone would be good enough, but I will reinstall the factory muffler heatshield back into that spot as well, so bumper heat or anything else plastic wont come close to melting.
02-21-2017, 11:39 PM
#41
Senior Member

I love seeing your attention to detail here.
Best
02-27-2017, 02:53 AM
#42
Member
Thread Starter
A little bit more progress. Fabrication is pretty much all done, just need to get the intercooler and install it. Otherwise just simple oil feed/drain/pump install, boost solenoid install/relocate and finish the engine install back in the car.
Here's a few more pictures:
Here's a few more pictures:


 03-04-2017, 06:07 AM
#45
Member
Thread Starter
More updates for you guys. Another step closer.
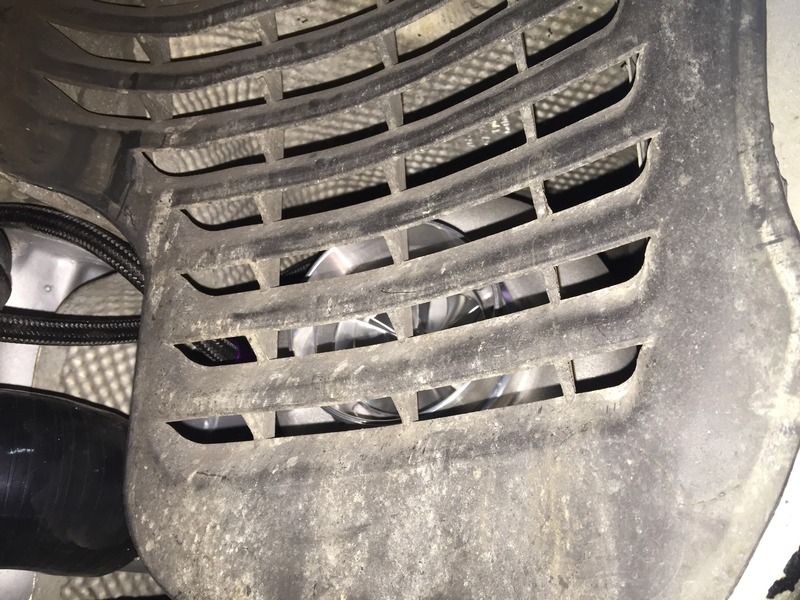
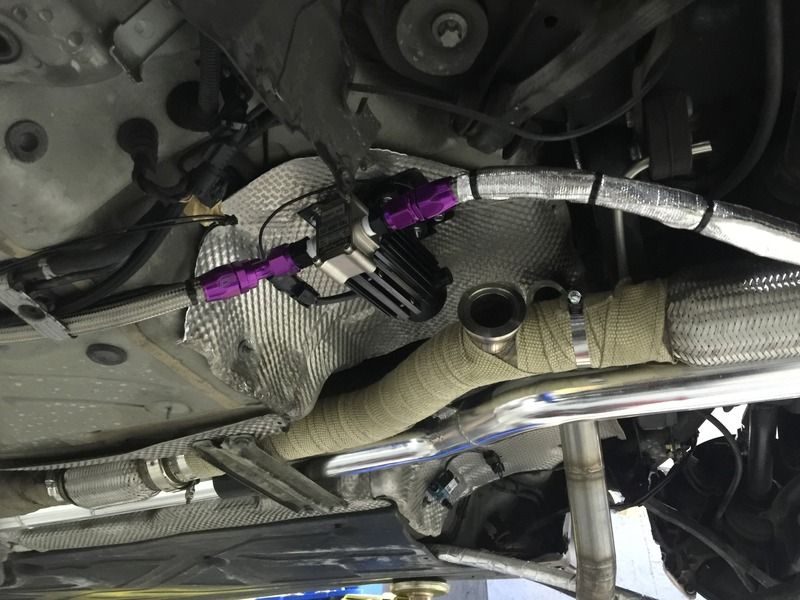
Turbo lurking behind the wheel well cover. The vent holes will be covered up with a sheet of stainless steel later to prevent debris from getting to the turbo.
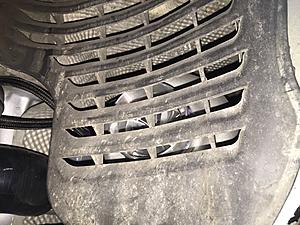
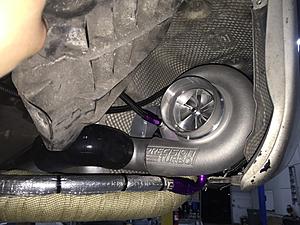
Pull back wheel well cover and the turbo is exposed.
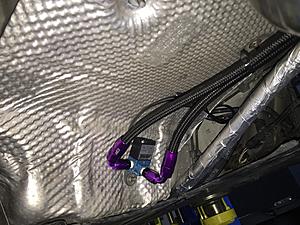
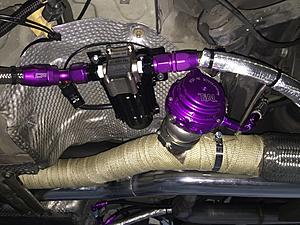
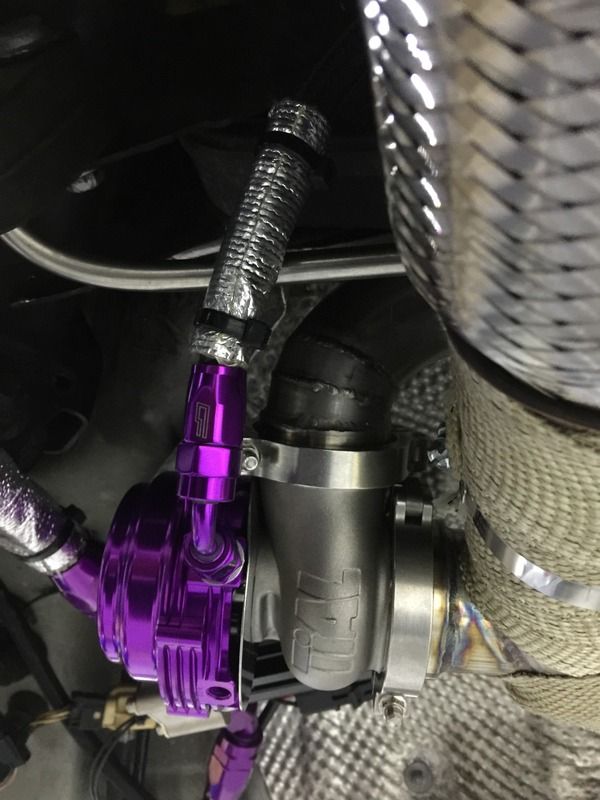
Waste-gate fittings and boost lines attached. A short section of boost line protected against any heat that may come off from the exhaust.

Boost solenoid mounted and lines routed/installed.
Further view away from boost solenoid.
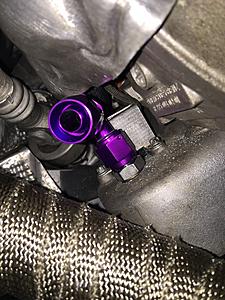
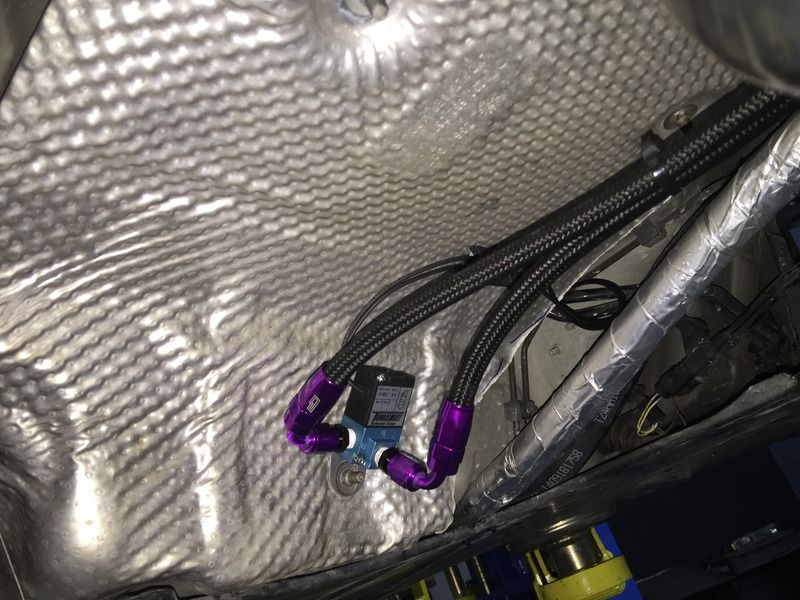
Turbowerx scavenge pump installed, wired up, and all purple is color matched to Tials purple wastegate/bov.
Another shot of scavenge pump setup.
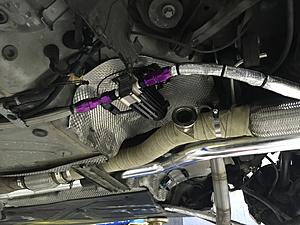
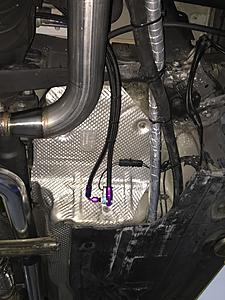
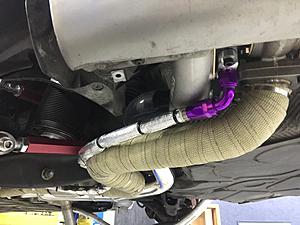
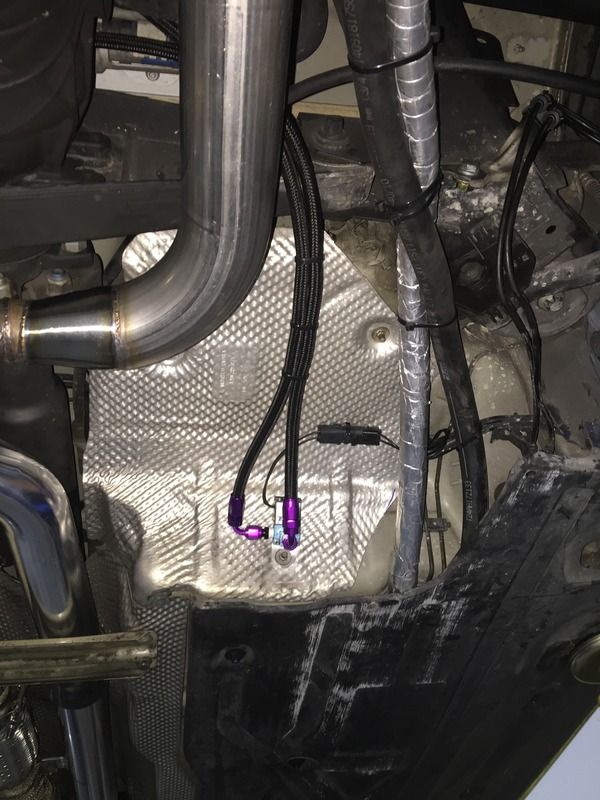
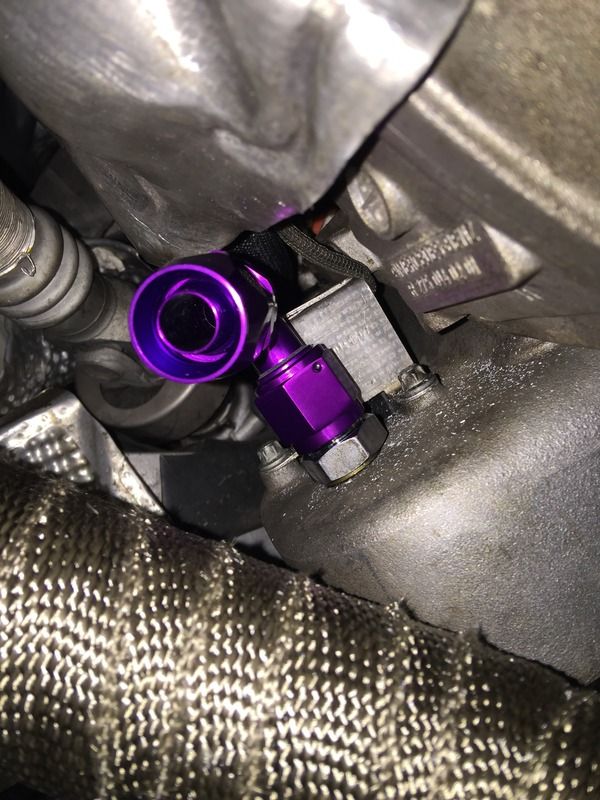
Turbo drain flange installed, drain hose made and insulated from heat as I had to mount it to the exhaust pipe. The 90 degree fitting wouldn't clear the compressor housing if facing the front of the car. So i had my machinist buddy waterjet me a 1/2" spacer between oil drain flange and turbo housing. New clearance is perfect, barely clears the housing but doesn't touch.
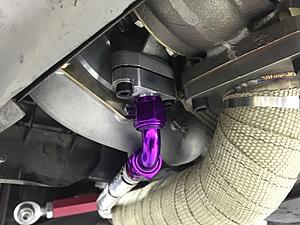
Another shot of oil drain hose.
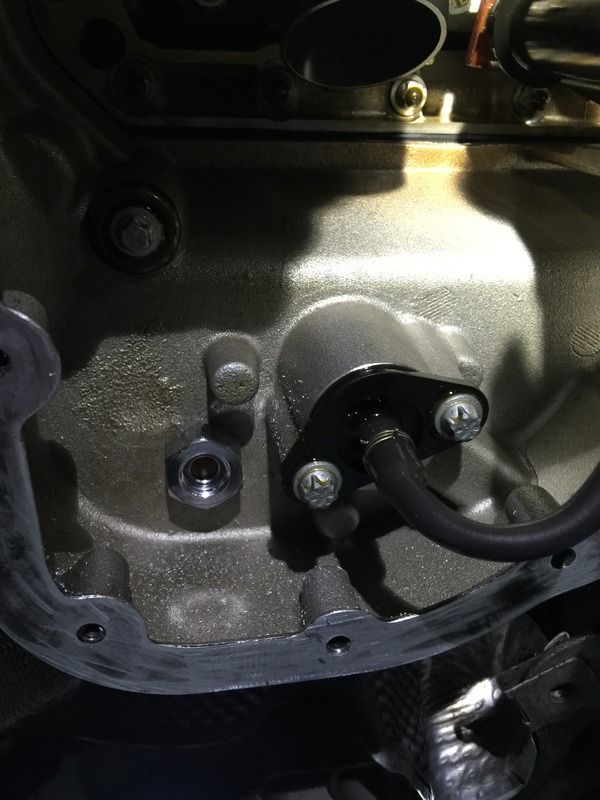
Removed lower oil pan and drilled a hole for the oil return fitting. Bottom view.

Top view of the oil return hose attaching to oil pan.
As a bonus, here's a youtube video of the first start up, just a few seconds. Still haven't filled it with coolant but everything so far worked good.
Turbo lurking behind the wheel well cover. The vent holes will be covered up with a sheet of stainless steel later to prevent debris from getting to the turbo.

Pull back wheel well cover and the turbo is exposed.

Waste-gate fittings and boost lines attached. A short section of boost line protected against any heat that may come off from the exhaust.

Boost solenoid mounted and lines routed/installed.

Further view away from boost solenoid.

Turbowerx scavenge pump installed, wired up, and all purple is color matched to Tials purple wastegate/bov.

Another shot of scavenge pump setup.

Turbo drain flange installed, drain hose made and insulated from heat as I had to mount it to the exhaust pipe. The 90 degree fitting wouldn't clear the compressor housing if facing the front of the car. So i had my machinist buddy waterjet me a 1/2" spacer between oil drain flange and turbo housing. New clearance is perfect, barely clears the housing but doesn't touch.

Another shot of oil drain hose.

Removed lower oil pan and drilled a hole for the oil return fitting. Bottom view.

Top view of the oil return hose attaching to oil pan.

As a bonus, here's a youtube video of the first start up, just a few seconds. Still haven't filled it with coolant but everything so far worked good.
Last edited by DUDMD; 03-04-2017 at 06:11 AM.
The following users liked this post:
euphoriaDSM (03-04-2017)
 03-04-2017, 01:37 PM
#48
Super Member

More updates for you guys. Another step closer.
Turbo lurking behind the wheel well cover. The vent holes will be covered up with a sheet of stainless steel later to prevent debris from getting to the turbo.
Pull back wheel well cover and the turbo is exposed.
Waste-gate fittings and boost lines attached. A short section of boost line protected against any heat that may come off from the exhaust.
Boost solenoid mounted and lines routed/installed.
Further view away from boost solenoid.
Turbowerx scavenge pump installed, wired up, and all purple is color matched to Tials purple wastegate/bov.

Another shot of scavenge pump setup.
Turbo drain flange installed, drain hose made and insulated from heat as I had to mount it to the exhaust pipe. The 90 degree fitting wouldn't clear the compressor housing if facing the front of the car. So i had my machinist buddy waterjet me a 1/2" spacer between oil drain flange and turbo housing. New clearance is perfect, barely clears the housing but doesn't touch.

Another shot of oil drain hose.

Removed lower oil pan and drilled a hole for the oil return fitting. Bottom view.
Top view of the oil return hose attaching to oil pan.
As a bonus, here's a youtube video of the first start up, just a few seconds. Still haven't filled it with coolant but everything so far worked good.
https://www.youtube.com/watch?v=L_LMcFHRSvI
Turbo lurking behind the wheel well cover. The vent holes will be covered up with a sheet of stainless steel later to prevent debris from getting to the turbo.
Pull back wheel well cover and the turbo is exposed.
Waste-gate fittings and boost lines attached. A short section of boost line protected against any heat that may come off from the exhaust.
Boost solenoid mounted and lines routed/installed.
Further view away from boost solenoid.
Turbowerx scavenge pump installed, wired up, and all purple is color matched to Tials purple wastegate/bov.
Another shot of scavenge pump setup.
Turbo drain flange installed, drain hose made and insulated from heat as I had to mount it to the exhaust pipe. The 90 degree fitting wouldn't clear the compressor housing if facing the front of the car. So i had my machinist buddy waterjet me a 1/2" spacer between oil drain flange and turbo housing. New clearance is perfect, barely clears the housing but doesn't touch.
Another shot of oil drain hose.
Removed lower oil pan and drilled a hole for the oil return fitting. Bottom view.
Top view of the oil return hose attaching to oil pan.
As a bonus, here's a youtube video of the first start up, just a few seconds. Still haven't filled it with coolant but everything so far worked good.
https://www.youtube.com/watch?v=L_LMcFHRSvI
Are you going to use the turbo without the air filter ?
03-04-2017, 06:37 PM
#50
Member
Thread Starter
Turboguard mesh screen is on the way for the turbo inlet, as well as sheet metal to cover most openings around the turbo.


