When you click on links to various merchants on this site and make a purchase, this can result in this site earning a commission. Affiliate programs and affiliations include, but are not limited to, the eBay Partner Network.
The SL55 AMG – A Wild Purchase and an Even Wilder Journey
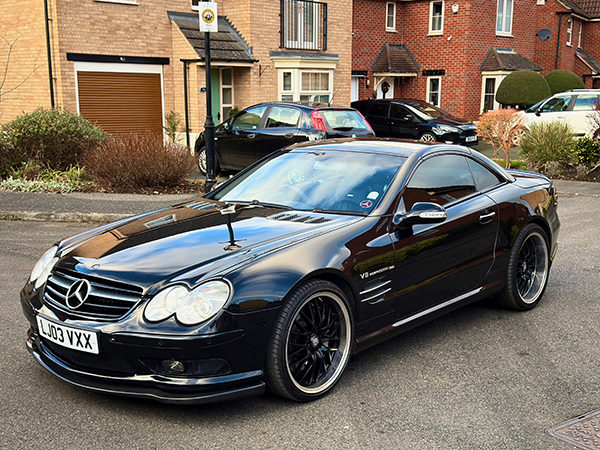
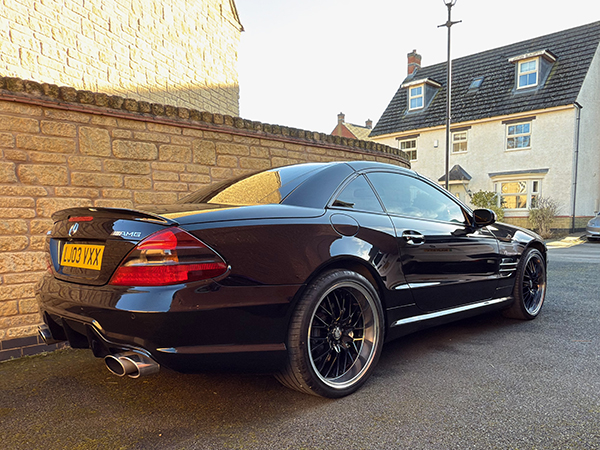
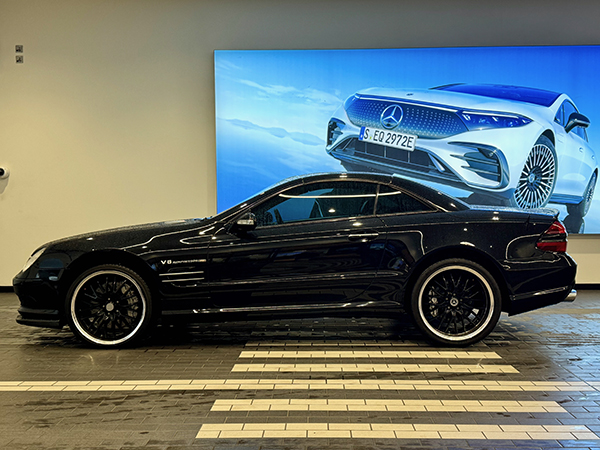
In July 2024, out of nowhere, Liz, my wife, excitedly pointed out a car on Autotrader: a 2003 Mercedes SL55 AMG R230 with a few mods. It had 65,000 miles and five “careful” owners, though that last part seemed optimistic.
.
Current Mods:
Front Carbon Splitter
SL63 Rear diffuser
SL63 Exhast Tips
Tuned by MSL Performance
77mm Supercharger Pulley
Wrapped belt kit
Gearbox has been mapped to suit
Kleemann Exhaust Heders and Sports Cats
Upgraded Pulleys
.
I’ve spent a decade researching SL55s, and I always said if we ever bought one, it should ideally be a 2007+ model with more power, fewer issues, and a more refined ABC suspension system. But there was another way: buy an older one and restore it ourselves, which, in theory, should cost less. *In theory*.
Excitement took over, and we went to see it. The seller was friendly and respectful; on paper, it was Ł15K, about right for what it was. I took it for a spin. It was loud, blowing somewhere in the exhaust, and felt loose, needing a few exterior touch-ups. I usually get an AA inspection, but the car looked fine; it was a mistake, in hindsight. The owner, looking half-scared, admitted he’d never pushed the car or tested the brakes like that before, a red flag I should have clocked. The car had been breathed on by MSL Performance in Birmingham by a previous owner.
We haggled it down to Ł13.5K, thought we’d gotten a great deal, and felt a little sorry for him. .
The First Drive
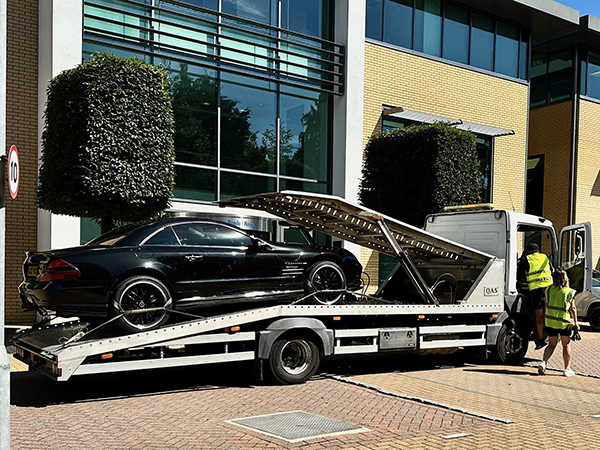
The 150-mile trip home went smoothly enough, aside from being so loud that I had to wear noise-cancelling headphones. The first stop is HRSS, Anton’s garage, a trusted friend and race mechanic with a penchant for racing high-performance machines.
On the way there, at about 50 mph and at a steady speed, there was a loud bang, and suddenly, the car lost power. Any throttle input was met with more violent banging from the rear. It felt like I’d just run over an exhaust that had fallen off another car.
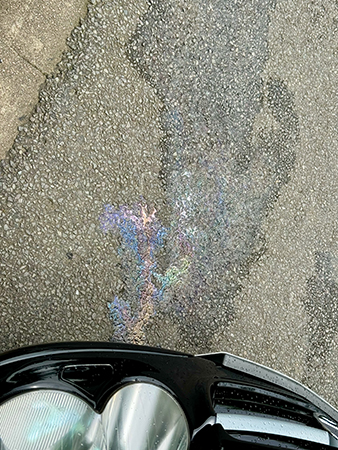
AA arrived, and it was clear that the rear differential had exploded (the ring and pinion gears had sheared), and oil was dripping everywhere. Instead of Anton’s, the car was trailered to Prestige Allparts in Oldham for a replacement rear diff.
.
The Second Breakdown
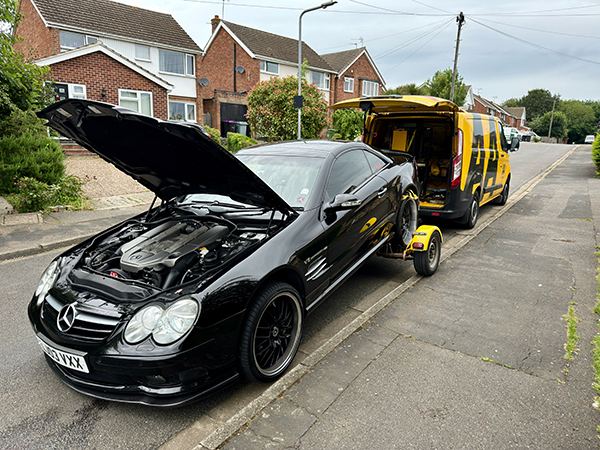
A week later, I was finally set to take the SL to Birds Automotive to have a Quaife Limited Slip Differential (LSD) fitted. Fate had other plans.
Halfway there, the dashboard lit up like a Christmas tree; the power kept cutting out, and the car randomly died while driving through Beaconsfield. If I left it alone for a minute, it would restart, only to cut out again moments later. I limped it to my office in Chalfont St Peter, where it was promptly trailered to Birds.
.
The Diagnosis
The throttle actuator had stuck, and the car was misfiring badly. Even worse, the throttle went wide open during test drives and wouldn’t close. 600bhp at full throttle with no control is not a fun time.
The fix: a new S/I Throttle Actuator from Germany, more diagnostics, and a growing sense that this car had lived a very hard life.
The next stop was the Mercedes-Benz of Heathrow, as the car was misfiring on cylinders 3, 6 and 8 and due for an essential service. Their estimate? A staggering Ł8,000, with Ł4,327 of that attributed to seized brake bleed nipples, which, according to them, required a full set of new callipers. The rest of the bill covered coil leads and spark plugs, but at that price, I quickly decided this wasn’t the place to get it all done; just the essentials.
We brought the SL55 to MB Nottingham, who was very professional and highly communicative. At this point there were around five or so locations where the engine and suspension system were leaking from. Between them and HRSS (Anton’s Garage), we managed to get her back on her feet and happily purring again.
At this point of the story, I need to introduce you to Mo Wali; some of you may recognise him on Facebook as Dr AMG and on here as DOCTOR_AMG But that happier chapter of the story will keep for another day!
Despite all of this, we still love the car. We weren’t naive, we knew what we were getting into, and our luck with second-hand cars hadn’t been great, so we were prepared.
We’re guessing that the car has been tracked or drag-raced at some point, as it really shouldn’t be having these many issues in so little miles. But our goal remains the same: give it the TLC it deserves and bring it back to showroom condition or as close as possible, whilst maintaining it in a condition that allows us to enjoy her regularly and go for runs like the NC500, across the Alps or even be lucky enough to join Mic on one of his amazing “Drive and Dine” tours.
I hope to keep adding to this post, as there is much more to this story. Let me list the jobs below that have already been done and those in the queue. .
Jobs Done
Removal of Front Splitter
Obtain and Install Bonnet Sensor/Switch
Gas Strut Centre Console Lid
Gear Selector Guide (Park Release Lever) - HRSS
Replace Coil Leads and Sparkplugs - HRSS
Replace Rear Differential - Prestige Allparts
New Consumer Battery
Remove Tacky Daylight Running LEDs
Weld Exhaust - HRSS
Fit Battery Monitors to Front and Back Batteries
Initial Diagnostics and Investigation - Mercedes Benz of Heathrow
Transmission Oil and Filter Change - MB Nottingham
Renew ABC Fluid and Bleed System Through Star - MB Nottingham
Remove and Refit Engine following Replacing ABC Hydraulic Lines - MB Nottingham
Remove and Replace Leaking Oil Filter Housing - MB Nottingham
Remove Both Cam Covers and Reseal with Breather Hoses - MB Nottingham
Replace Leaking ABC Pump - MB Nottingham
Renew Coolant, Bleed System - MB Nottingham
Recharge AirCon - Check Function and Efficiency - MB Nottingham
Congratulations, a fantastic one of a kind, car. I too have a 2003 SL55 AMG, which even has a pano roof, very nice on nice days... and after purchase I did some refurbishing too, not bad really. ABC needed accumulators, motor mounts at 20 years old, brake discs and pads, really all those parts can be considered consumables. I waited a little too long while driving knowing those accumulators needed replacement, and waiting caused the main ABC high pressure hose to blow out. Never wait when you need accumulators, just replace them. Got that hose replaced, and all perfect again. Previous owner had fitted a new alternator, also a consumable part that could be given an expected lifespan of 10-15 years I would think. But, he had used a (cheap junk) Duralast alternator from Autozone. Weird when a genuine Bosch alternator doesn't cost that much, maybe he took it to a shop where they did this to make themselves a bigger profit. That alternator failed by suddenly outputting 30 Volts, melted the Battery control module and the 100-amp fuse under passenger floorboard. So, that was a learning experience. While in the shop to correct this, luckily I have a shop with very knowledgeable guys who knew what to check while the belts were off the engine. Turned out the water pump was on its last legs and the other pulleys at the front of the engine were well worn, too. Shop guys said when replacing a water pump it's best to also get a new thermostat, so it's all new. So, we did that too. So now, all those parts are new and of course, Genuine Mercedes/Bosch parts. After all that, the engine would occasionally want to idle way too high, like 4000RPM, which is un-driveable. Replaced throttle actuator (gas pedal, it's electronic) and throttle body, and never a problem since. Trunk lid struts cost around $25 and wouldn't hold the lid up, that's a ten minute job to replace those. With the parts replaced I have close to $10,000 more into the car that I'd planned, but the car runs fantastic, there is not one leak anywhere, every drive results in big smiles. Never buy cheap parts for these cars!! I could feel very confident driving the car across the USA and back five times, before I'd expect much in repairs needed. It's like, all the consumable parts that typically you expect to wear out on a car after 20-22 years, have been replaced with new, and the car couldn't be happier. There are some "advisors" on Youtube who say don't buy a car that has had very many new parts put on it, but I disagree. Obviously, time has been reset now with all the new parts on the car, it is going to be 7-10 years before those will wear out again. If I were looking to buy an SL55 today and came across one without all the servicing mine has, and came across mine too, for a little more money, I would feel much more confident buying the one with all the new stuff. The cheaper one, will likely be needing some of these parts soon. Supercharged engine has no high-dollar coilpacks or turbo coolant lines like the V12s but they do have the belts and pulleys that will need attention by the time you reach 85-90k miles... , look closely at the belts and see how they are tracking. The idler pulley is a special dual idler pulley, and so is the big one, a.k.a. the crank pulley, those both cost over $700 each, from Mercedes. I really love the SL55, the 2003 is the same year and model that Mario Andretti drove on a track at 208 MPH, there was a video on Youtube but it was removed due to copyright issues, it was either Motor Trend or Motorweek. One of the most incredible and fantastic cars ever made!! The ABC is actually really great, and even my Maserati with its Skyhook suspension, feels sloppy compared to the SL55.
Congratulations, a fantastic one of a kind, car. I too have a 2003 SL55 AMG, which even has a pano roof, very nice on nice days... and after purchase I did some refurbishing too, not bad really. ABC needed accumulators, motor mounts at 20 years old, brake discs and pads, really all those parts can be considered consumables. I waited a little too long while driving knowing those accumulators needed replacement, and waiting caused the main ABC high pressure hose to blow out. Never wait when you need accumulators, just replace them. Got that hose replaced, and all perfect again. Previous owner had fitted a new alternator, also a consumable part that could be given an expected lifespan of 10-15 years I would think. But, he had used a (cheap junk) Duralast alternator from Autozone. Weird when a genuine Bosch alternator doesn't cost that much, maybe he took it to a shop where they did this to make themselves a bigger profit. That alternator failed by suddenly outputting 30 Volts, melted the Battery control module and the 100-amp fuse under passenger floorboard. So, that was a learning experience. While in the shop to correct this, luckily I have a shop with very knowledgeable guys who knew what to check while the belts were off the engine. Turned out the water pump was on its last legs and the other pulleys at the front of the engine were well worn, too. Shop guys said when replacing a water pump it's best to also get a new thermostat, so it's all new. So, we did that too. So now, all those parts are new and of course, Genuine Mercedes/Bosch parts. After all that, the engine would occasionally want to idle way too high, like 4000RPM, which is un-driveable. Replaced throttle actuator (gas pedal, it's electronic) and throttle body, and never a problem since. Trunk lid struts cost around $25 and wouldn't hold the lid up, that's a ten minute job to replace those. With the parts replaced I have close to $10,000 more into the car that I'd planned, but the car runs fantastic, there is not one leak anywhere, every drive results in big smiles. Never buy cheap parts for these cars!! I could feel very confident driving the car across the USA and back five times, before I'd expect much in repairs needed. It's like, all the consumable parts that typically you expect to wear out on a car after 20-22 years, have been replaced with new, and the car couldn't be happier. There are some "advisors" on Youtube who say don't buy a car that has had very many new parts put on it, but I disagree. Obviously, time has been reset now with all the new parts on the car, it is going to be 7-10 years before those will wear out again. If I were looking to buy an SL55 today and came across one without all the servicing mine has, and came across mine too, for a little more money, I would feel much more confident buying the one with all the new stuff. The cheaper one, will likely be needing some of these parts soon. Supercharged engine has no high-dollar coilpacks or turbo coolant lines like the V12s but they do have the belts and pulleys that will need attention by the time you reach 85-90k miles... , look closely at the belts and see how they are tracking. The idler pulley is a special dual idler pulley, and so is the big one, a.k.a. the crank pulley, those both cost over $700 each, from Mercedes. I really love the SL55, the 2003 is the same year and model that Mario Andretti drove on a track at 208 MPH, there was a video on Youtube but it was removed due to copyright issues, it was either Motor Trend or Motorweek. One of the most incredible and fantastic cars ever made!! The ABC is actually really great, and even my Maserati with its Skyhook suspension, feels sloppy compared to the SL55.
Wow, I feel you. It's a hard lesson, but I assume the car is a keeper?
I do recall that video, and you can still find it on Youtube; I just watched it again, great video:
Unfortunately, that video is blocked in the USA because of some copyright garbage. If you had a way to download it and place it somewhere that I could be able to download it I'd be very grateful. Or put it on a USB stick and mail it to me. LoL
Mercedes SLR McLaren 722 S Is Extremely Rare Example Modified by McLaren
Slideshow: A one-of-one U.S.-spec Mercedes-Benz SLR McLaren Roadster became even rarer after a factory-backed transformation at McLaren's headquarters.