
04 E55 Bi Xenon II

Thread Starter
MBWorld Fanatic!
Joined: Oct 2006
Posts: 3,642
Likes: 13
From: Caribbean/Florida/Colorado
E-ZGO 53hp., 1999 E 430 sport, 2004 E 55, 2008 Tahoe LTZ on 24"s
04 E55 Bi Xenon II
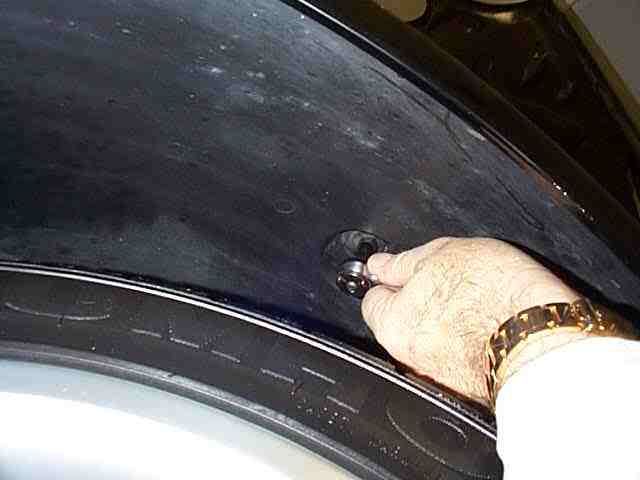
And 4 more screws two in each wheel well
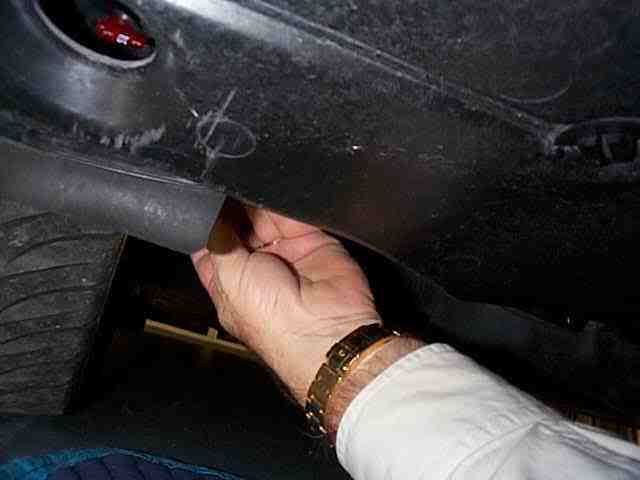
Now a little coaxing will necessary to get the pan out. I have taped up to avoid any paint damage.
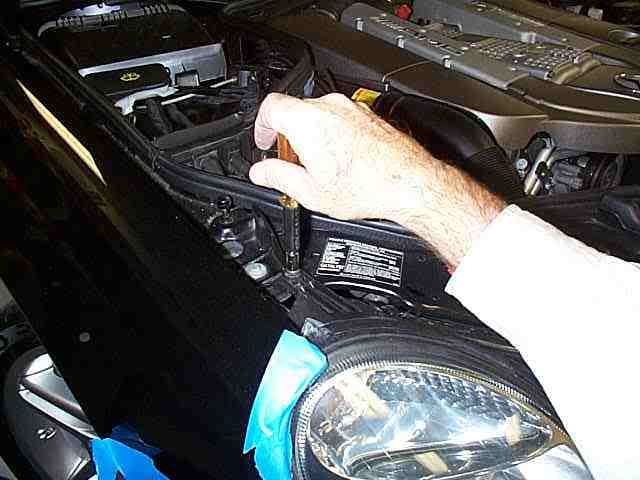
Now back at the lower grill opening at the top remove two 10mm bolts
Then the two on top, but leave one or two to keep bumper from falling
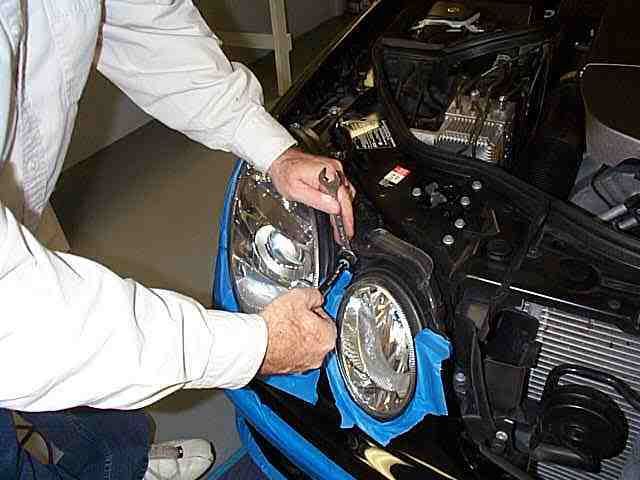
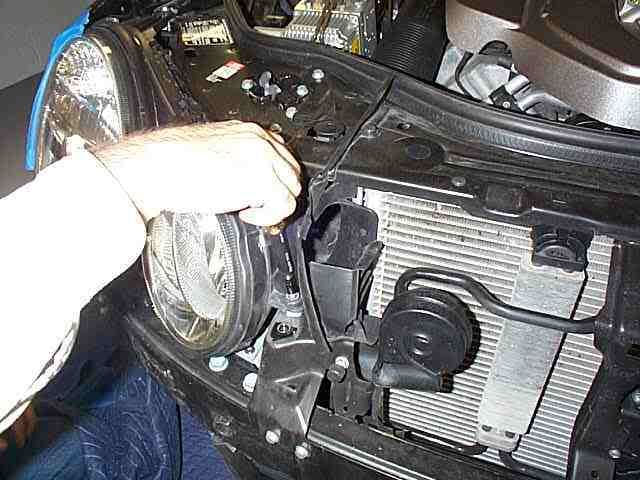
Now the 8mm between the lights, use a 13mm wrench to hold mounting nut.
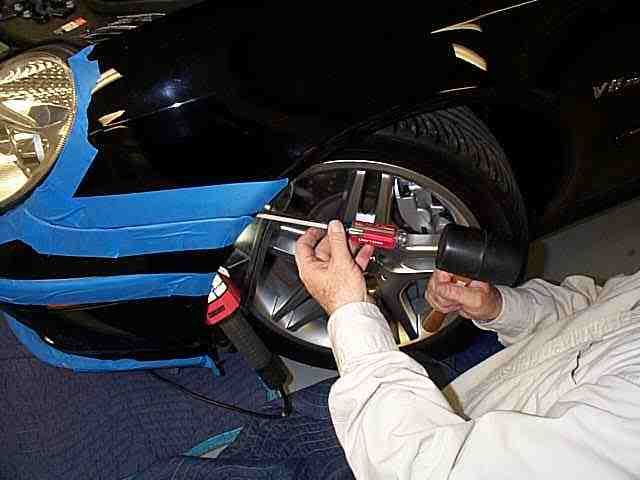
Back to the wheel well remove the 10mm plastic nut (not far from the first push lock)
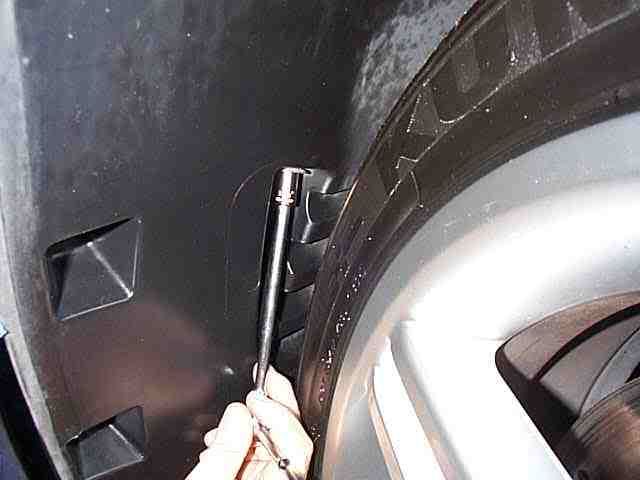
Next just loosen the 10mm plastic nut at the top of wheel well
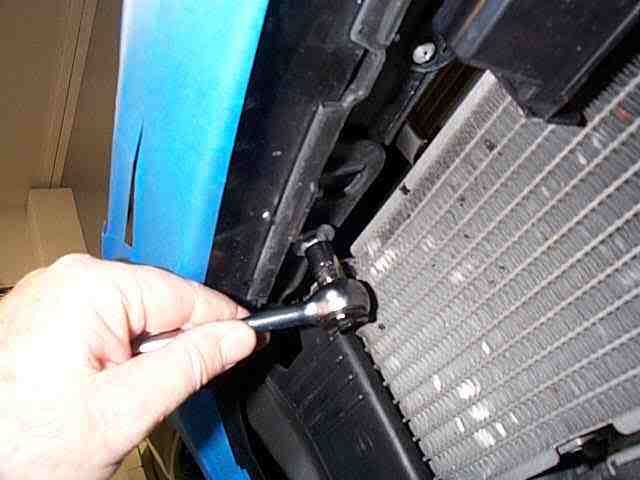
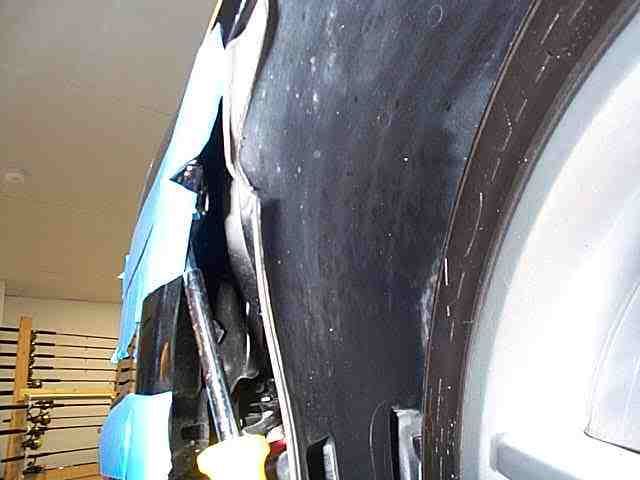
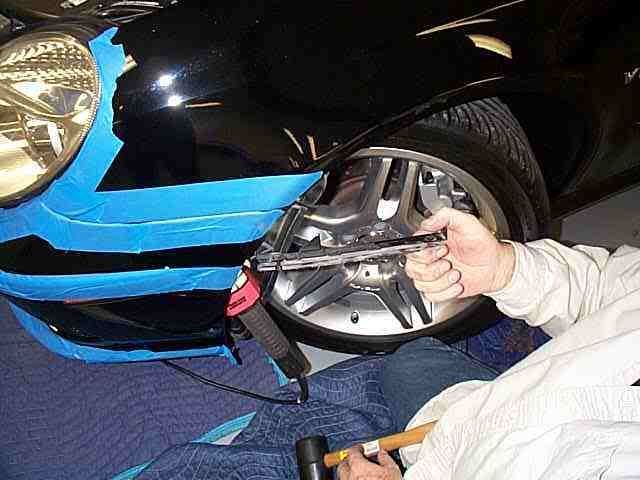
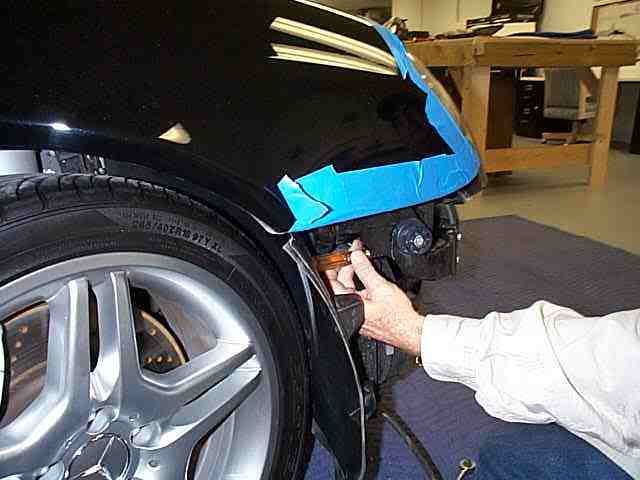
Now pull the inerfender panel out to gain access to the fender to bumper clamp and use #20 torx to remove screw that holds clamp in place.
Gently tap the clamp bracket forward and to the center of the car, it will unhook in a forward motion by hand
You may have to work the clamp back and forth to get it to release.
At this point you may need a hand cause the bumper is almost ready to come off, time to disconnect the fog lights, air temp sensor, side marker lights

Remove the other fender to bumper clamp and the two remaining 10mm bolts
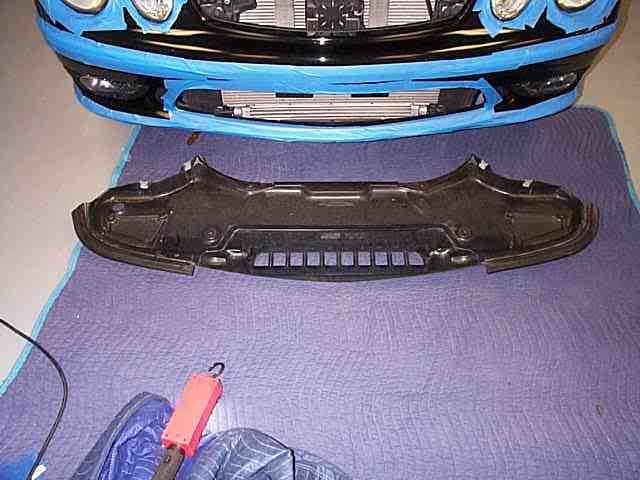
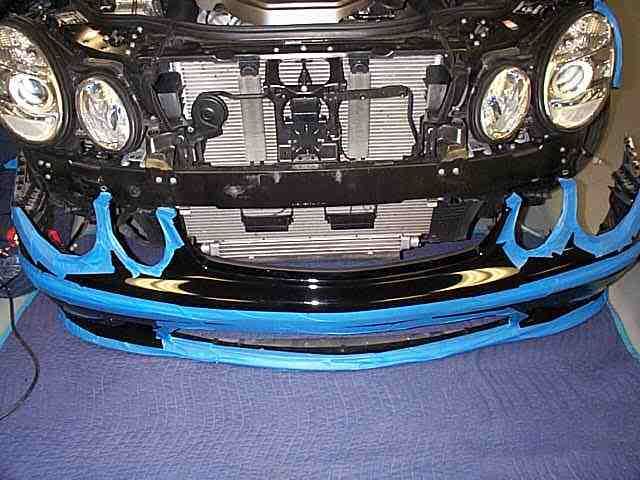
and with a little rear ward pressure the last bumper hook at the very front of fender will unhook and the bumper is off.
Break time
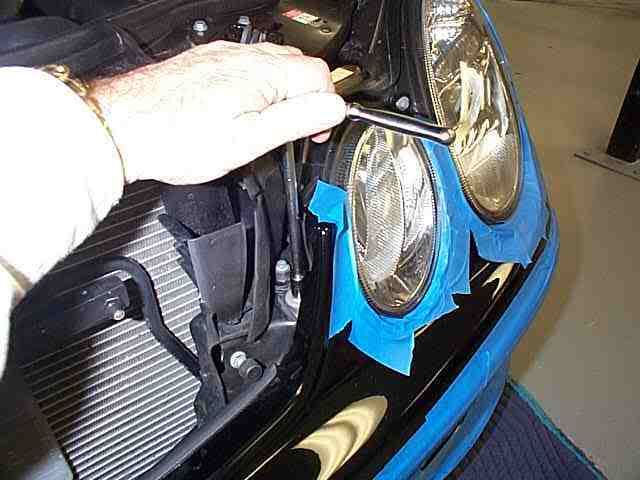
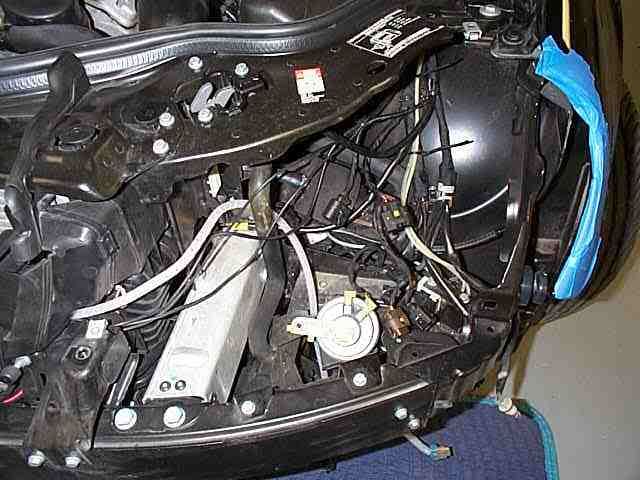
The easy part 8mm nut driver remove the old lamps
Try to not move the clip nuts from their position
The lower bolt is a pain
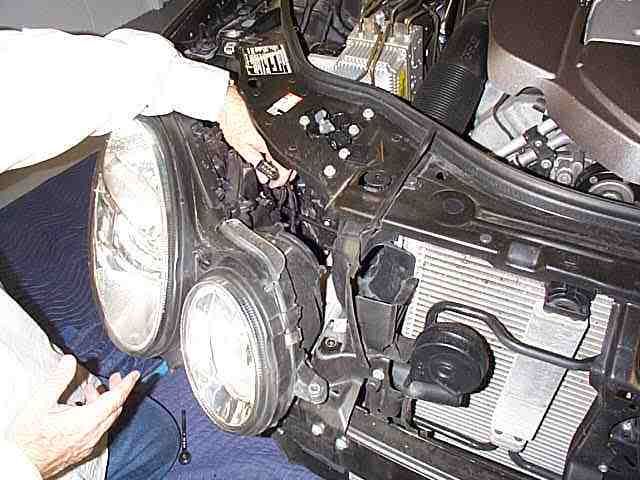
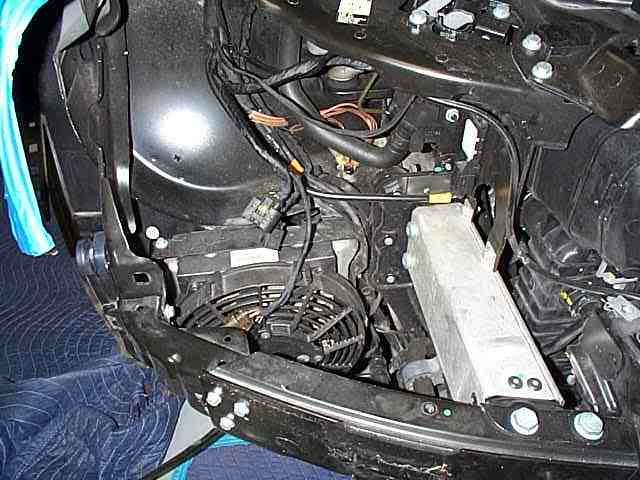
disconnect the 4 wires to the headlamp and remove it
Little clean up and tywraps
and the other side too
Now a little coaxing will necessary to get the pan out. I have taped up to avoid any paint damage.
Now back at the lower grill opening at the top remove two 10mm bolts
Then the two on top, but leave one or two to keep bumper from falling
Now the 8mm between the lights, use a 13mm wrench to hold mounting nut.
Back to the wheel well remove the 10mm plastic nut (not far from the first push lock)
Next just loosen the 10mm plastic nut at the top of wheel well
Now pull the inerfender panel out to gain access to the fender to bumper clamp and use #20 torx to remove screw that holds clamp in place.
Gently tap the clamp bracket forward and to the center of the car, it will unhook in a forward motion by hand
You may have to work the clamp back and forth to get it to release.
At this point you may need a hand cause the bumper is almost ready to come off, time to disconnect the fog lights, air temp sensor, side marker lights
Remove the other fender to bumper clamp and the two remaining 10mm bolts
and with a little rear ward pressure the last bumper hook at the very front of fender will unhook and the bumper is off.
Break time
The easy part 8mm nut driver remove the old lamps
Try to not move the clip nuts from their position
The lower bolt is a pain
disconnect the 4 wires to the headlamp and remove it
Little clean up and tywraps
and the other side too
Last edited by Yacht Master; Feb 16, 2008 at 09:36 AM.


