
X-Pipe/Resonator Delete Pics
 08-23-2013, 09:34 AM
#26
Senior Member
Join Date: Feb 2011
Location: South, FL
Posts: 312
Likes: 0
Received 8 Likes
on
8 Posts
2002 E55 AMG Obsidian Black with Charcoal
ddb: did your eBay headers arrive? How do they look? Any chance that you took measurements? Flange thickness, each of the 4 ports, and the collector size?
They look very similar to the AMS headers.
I'm thinking about getting them. They are still on sale for 3 more days $449.99
They look very similar to the AMS headers.
I'm thinking about getting them. They are still on sale for 3 more days $449.99
Last edited by cudaized; 08-23-2013 at 10:06 AM.
 08-23-2013, 09:50 AM
#27
Super Member
It's hard to believe you can get a set of headers for under $500😳
08-23-2013, 08:01 PM
#28
Senior Member
Thread Starter
cudaized,
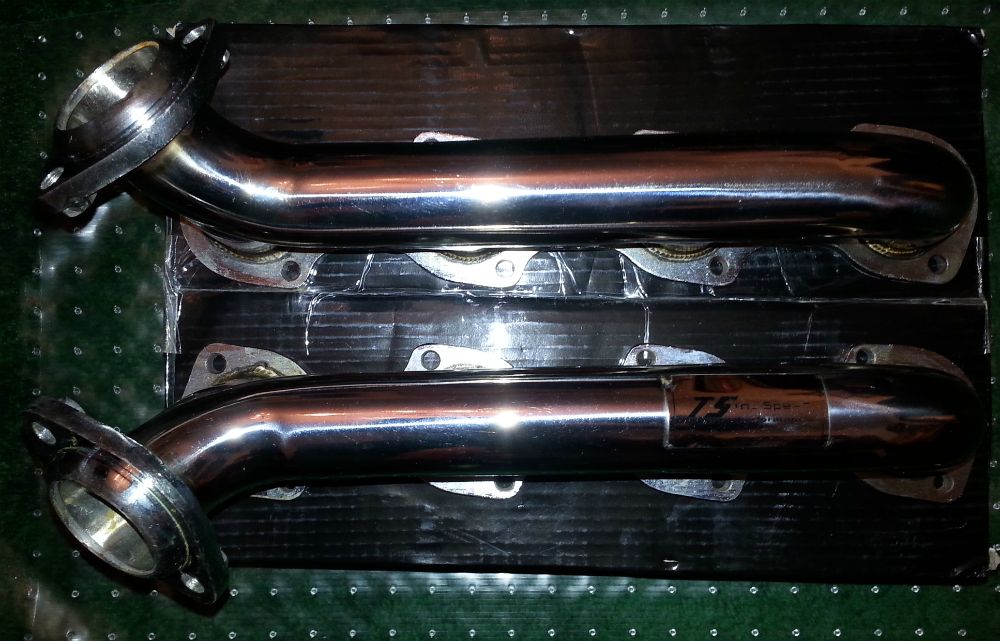
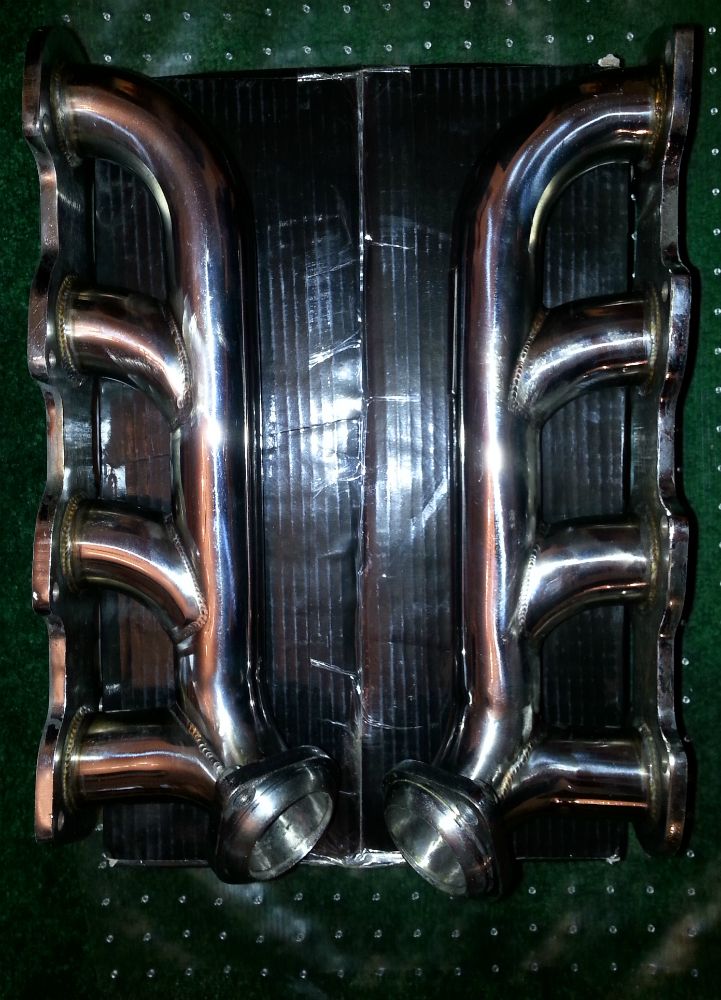
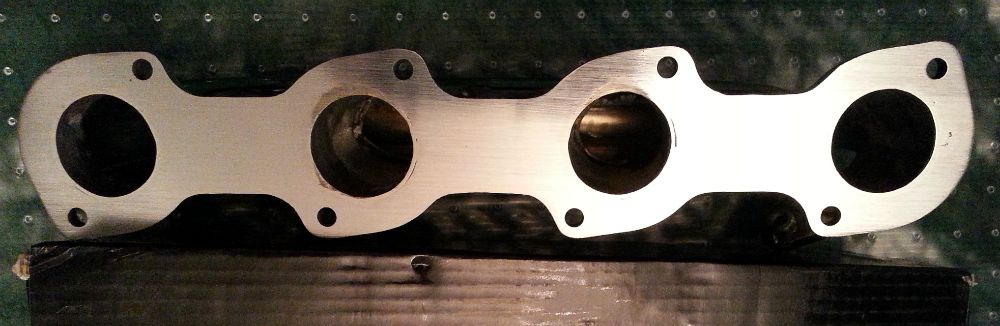
Yes, they arrived Wednesday and I immediately took them to a machine shop to have the flanges checked, and corrected if needed. I watched the owner place a straight edge on the flanges and both had low spots in the center. He said it wasn't that bad and asked how thick the gaskets were. I left the gaskets at home so I didn't have a good answer. I asked if he could level them out and he said yes. I asked how he would do it and he said because it wasn't bad he would just use a belt sander. I picked them up today and they are now nice and level. He said it was tough to do the job. I asked why and he said because stainless steel is tough to work with in this manner.
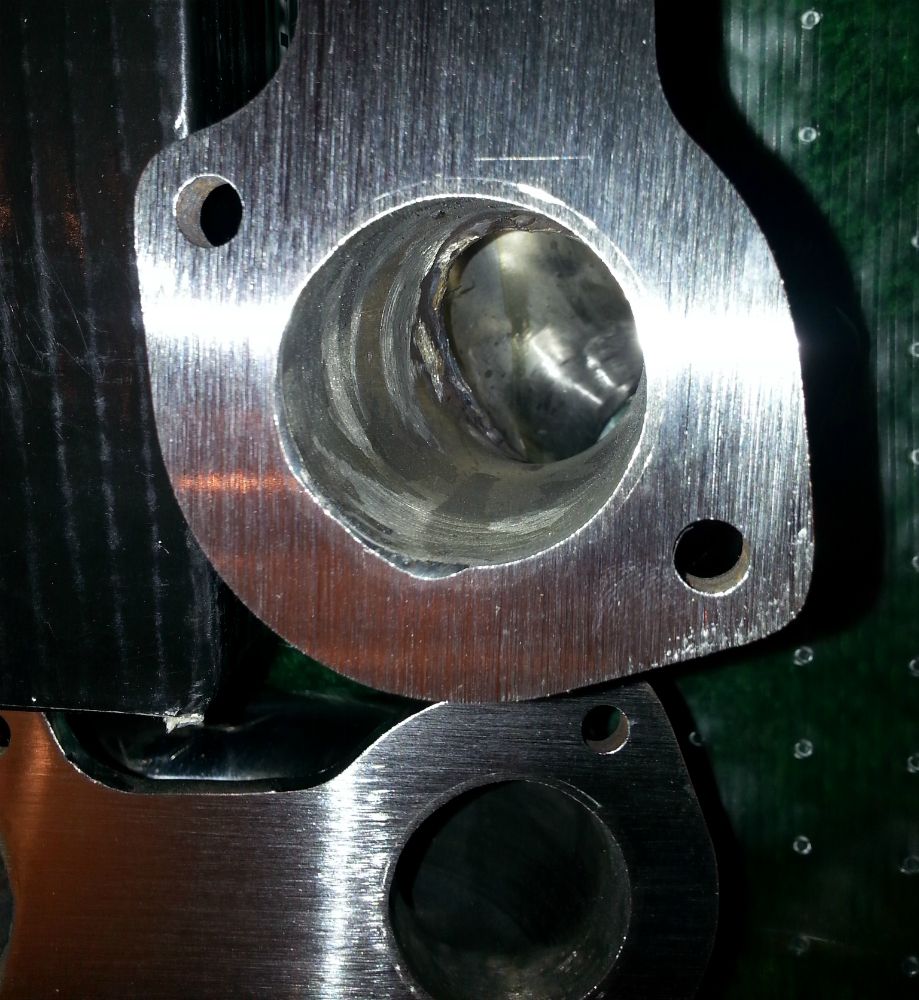
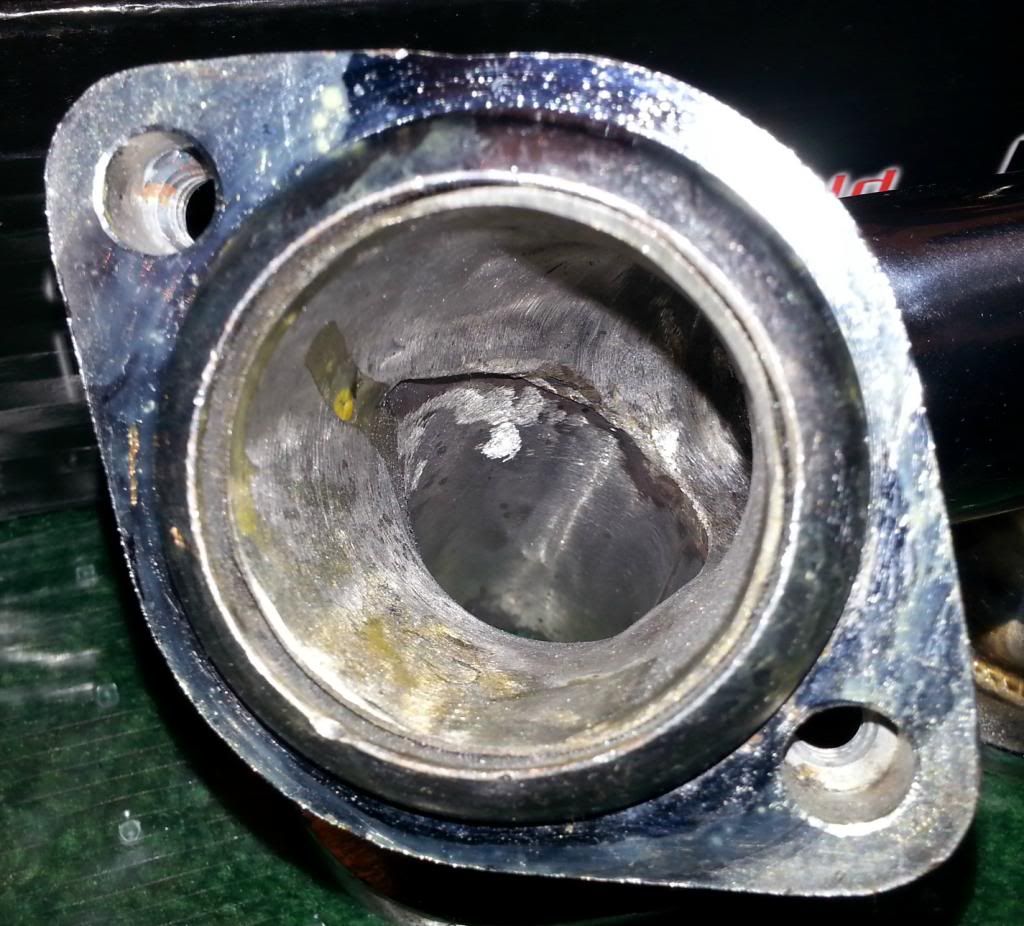
In general they look adequate in my opinion (I'm no expert). The welds look fine to me. One of the ports on one header looks like a small piece of metal is missing just inside the opening, and none look perfectly circular. But I think they will be fine. Inside the collector looks rough to me. But maybe this is normal.
I didn't check any of the dimensions. Since you have a set on order (I saw your post in the other thread) I won't attempt to do so since I don't have the proper micrometers. Sounds like you have the necessary stuff so I look forward to your reviews once they arrive. It will be interesting to see what you find on the flanges as far as level and what it will take on the CNC to fix them.
The thing is, these are the only set that I can find as far as short tube headers at this price point. I would love to have a beautiful set of the Renntech headers but at $3,500 that is a bit much.
I'm dropping mine off on Monday to have them ceramic coated. Unfortunately the guy said they were running behind 7-10 days. So it will be a while before I can get them installed. I had a look this afternoon and the passenger side looks straight forward as far as installation. The driver's side looks a lot more difficult.
Looking forward to hearing your opinion once yours arrive.
ddb
Yes, they arrived Wednesday and I immediately took them to a machine shop to have the flanges checked, and corrected if needed. I watched the owner place a straight edge on the flanges and both had low spots in the center. He said it wasn't that bad and asked how thick the gaskets were. I left the gaskets at home so I didn't have a good answer. I asked if he could level them out and he said yes. I asked how he would do it and he said because it wasn't bad he would just use a belt sander. I picked them up today and they are now nice and level. He said it was tough to do the job. I asked why and he said because stainless steel is tough to work with in this manner.
In general they look adequate in my opinion (I'm no expert). The welds look fine to me. One of the ports on one header looks like a small piece of metal is missing just inside the opening, and none look perfectly circular. But I think they will be fine. Inside the collector looks rough to me. But maybe this is normal.
I didn't check any of the dimensions. Since you have a set on order (I saw your post in the other thread) I won't attempt to do so since I don't have the proper micrometers. Sounds like you have the necessary stuff so I look forward to your reviews once they arrive. It will be interesting to see what you find on the flanges as far as level and what it will take on the CNC to fix them.
The thing is, these are the only set that I can find as far as short tube headers at this price point. I would love to have a beautiful set of the Renntech headers but at $3,500 that is a bit much.
I'm dropping mine off on Monday to have them ceramic coated. Unfortunately the guy said they were running behind 7-10 days. So it will be a while before I can get them installed. I had a look this afternoon and the passenger side looks straight forward as far as installation. The driver's side looks a lot more difficult.
Looking forward to hearing your opinion once yours arrive.
ddb


Last edited by ddb; 08-24-2013 at 08:23 AM.
08-23-2013, 09:42 PM
#29
Super Member
Belt sanding is fine. That's what I had the performance shop do to mine. Yeah, I took a look at the engine bay and it looks pretty much straight forward in the installation. The passenger side should be easier compare to the driver's side. Still, all in all, it is not too bad. Would like to see pictures once you guys have them put in.
08-24-2013, 03:39 AM
#30
Newbie

Join Date: Feb 2012
Posts: 11
Likes: 0
Received 0 Likes
on
0 Posts
w210 e55 amg
Prepare for that x pipe to get rusty as heck....I've had magnaflow tru-x (basicly same as urs)for past couple years and it looks 20 years old and sounnds different.I'm not sure if it wuz t304 but it had a goldish brass color when it wuz new ...I need a new x pipe for when I install my kleemann headers ....I'll finally have complete custom exhaust to eisenmann tipps.....and dont want the magnaflow ruin it..
This is best thing I found I wish there wuz a pic of it from above to c how much space between the pipes
This is best thing I found I wish there wuz a pic of it from above to c how much space between the pipes
Last edited by DOUBLE-LINCOLN; 08-24-2013 at 03:49 AM.
08-24-2013, 08:31 AM
#31
Senior Member
Thread Starter
Do you drive in a lot of snow/salt?
08-26-2013, 08:37 PM
#33
MBWorld Fanatic!

Join Date: Jan 2010
Location: Richmond, CA
Posts: 3,249
Received 255 Likes
on
233 Posts
2001 E320 Wagon, 2006 LBZ Silverado, 2007 E63 (sold), 2001 E55 (sold)
I said **** it and bought a set of the Ebay headers. Now to order the **** to do the x-pipe mod/resonator delete and 2nd cat delete.
08-26-2013, 08:47 PM
#34
Senior Member
Thread Starter
Fantastic - you're going to love this mod! I dropped my headers off to be ceramic coated today. I hope to get them back by the middle of next week. I can't wait to bolt them on!
08-27-2013, 03:30 PM
#35
Super Member

Prepare for that x pipe to get rusty as heck....I've had magnaflow tru-x (basicly same as urs)for past couple years and it looks 20 years old and sounnds different.I'm not sure if it wuz t304 but it had a goldish brass color when it wuz new ...I need a new x pipe for when I install my kleemann headers ....I'll finally have complete custom exhaust to eisenmann tipps.....and dont want the magnaflow ruin it..
This is best thing I found I wish there wuz a pic of it from above to c how much space between the pipes
This is best thing I found I wish there wuz a pic of it from above to c how much space between the pipes
DDB - you can always grind the insides of the headers for better flow, just use an air powered die grinder, I bet it won't take more than 20 min total.
08-27-2013, 07:27 PM
#36

Take care, Magnaflow has 2 X pipe models, the first model posted in the thread and not has the best design. the second one is the 20" lenght. They comes with stight tube cross and perfect design, i install it in my car 3 yrs ago with kleemann headers + resonator deleat without any rust and no problems, no broken welds and fits perfect in the second cats place.

Fabio Daniel
Fabio Daniel
08-28-2013, 01:00 AM
#38
Super Member
 08-28-2013, 01:05 AM
#39
Super Member
 08-28-2013, 11:11 AM
#40
Super Member
No, just the portions that stick out inside the headers where the primaries meet the downtube in the back. That's just excess material. It's impossible to reach the welds back there anyways given the angle. You do not need to touch the welds right at the opening ports obviously
08-28-2013, 07:16 PM
#42
Senior Member
Thread Starter
08-31-2013, 01:29 PM
#43
Senior Member
Thread Starter
Top Speed Header Pictures After Ceramic Coating
I was excited today when the guy called from the ceramic coating company and asked me if I wanted to pick up my headers today. Otherwise it would have been Tuesday since Monday is a holiday.
They look good, although my motivation wasn't for appearance sake. Since they are stainless steel they will probably hold up well without a coating. The real benefit in my opinion is the thermal properties provided by the coating. Under hood temperatures are reduced by 10-30% when compared to the same un-coated header. This is great for every component under the hood. Also, thermal efficiency is improved (inside the headers are coated as well). This increases scavenging and makes more power. I've seen some estimates on how much but I won't quote them without more research.
I've also read that a coated header will sound different from the same non-coated header. I won't really know the difference since I've never heard a non-coated header in person. I will see if I can make some nice sound clips once they are in and have run a bit.
The coating cost me $255.13 ($239.00 + $16.13 tax). I had to pay tax since they were done in my home state of NC. I didn't however have to pay for shipping since I was able to drop them off and pick them up.
I'm looking forward to putting them on. I hope to do so tomorrow and/or Monday.
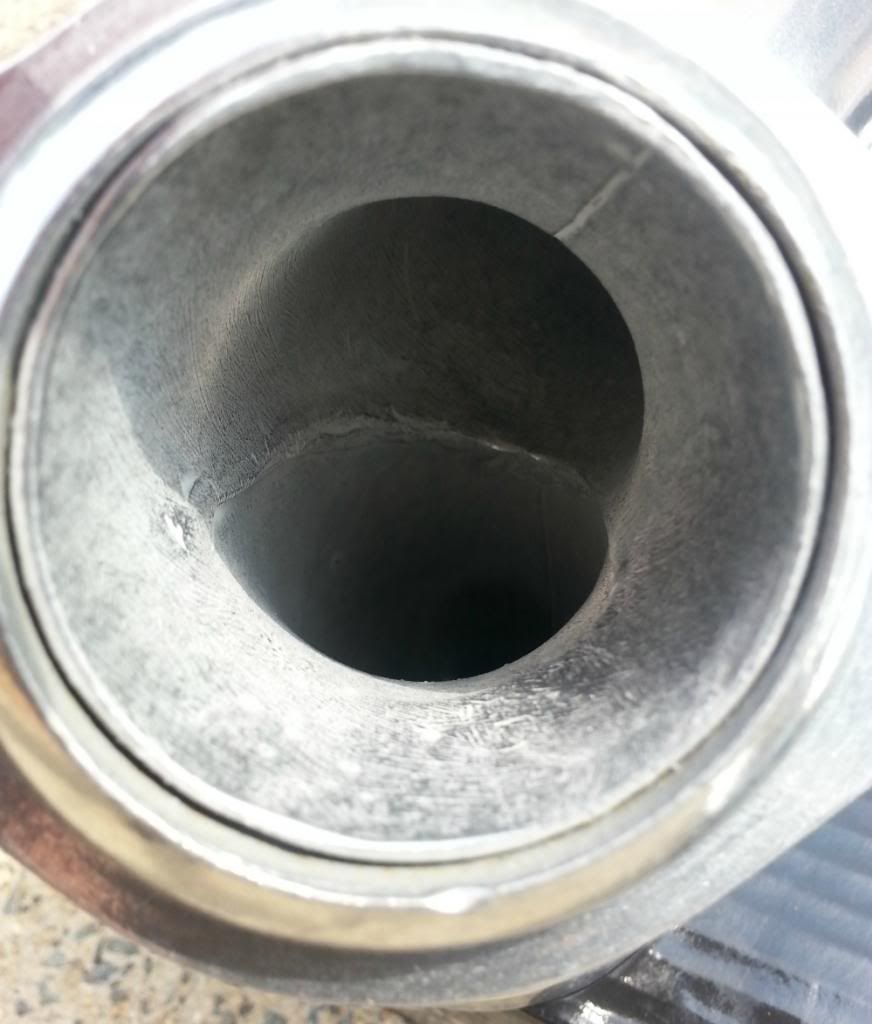
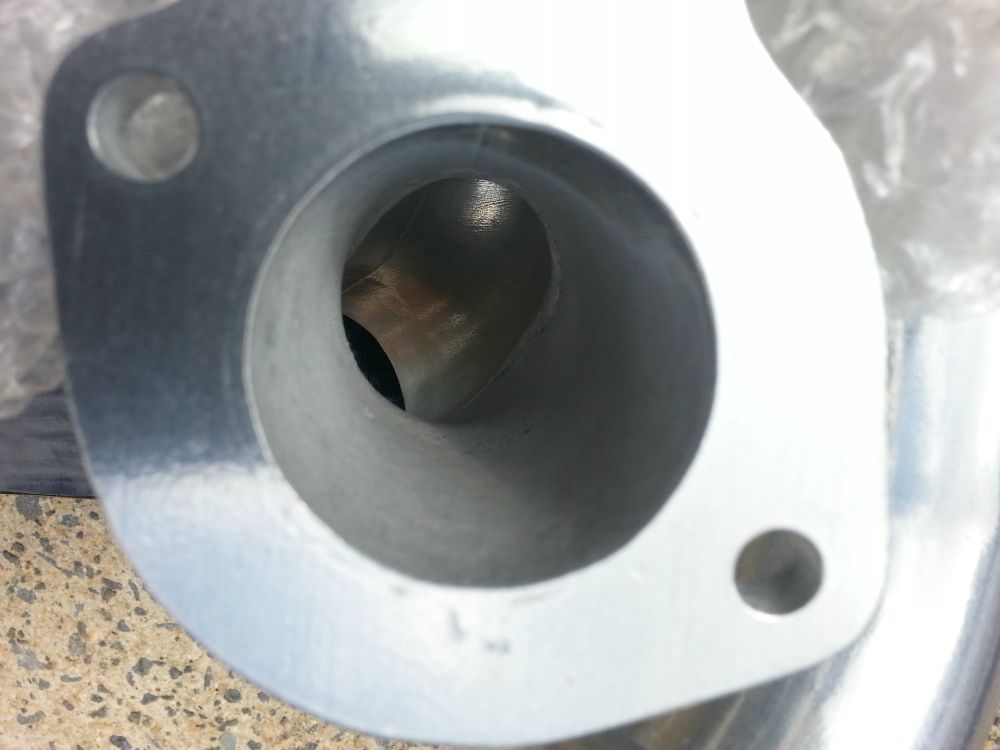
Some pics:
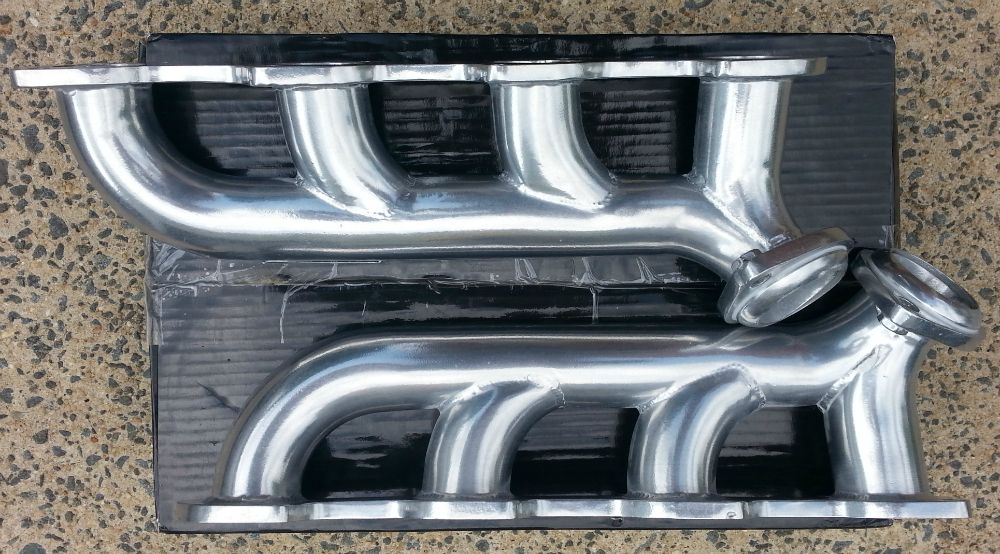

Collector Before:
Collector After:
Port Before:
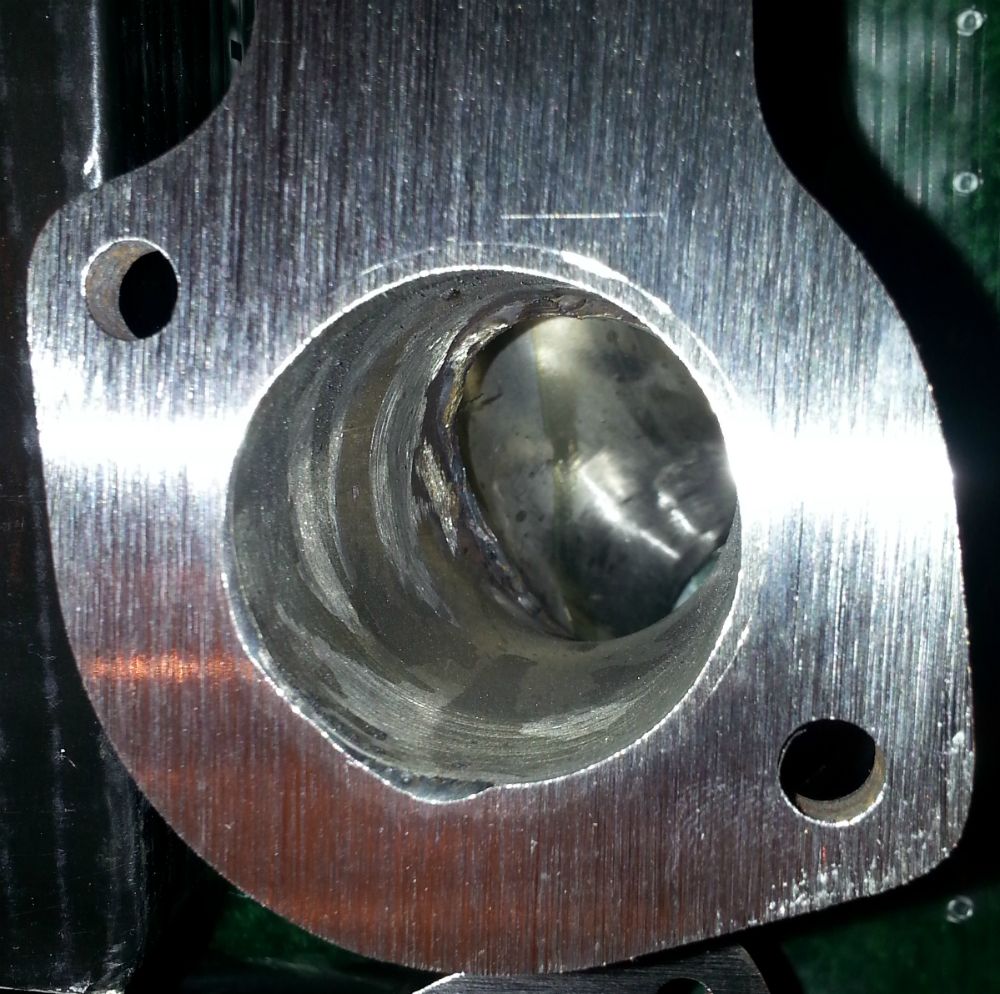
Port After:
They look good, although my motivation wasn't for appearance sake. Since they are stainless steel they will probably hold up well without a coating. The real benefit in my opinion is the thermal properties provided by the coating. Under hood temperatures are reduced by 10-30% when compared to the same un-coated header. This is great for every component under the hood. Also, thermal efficiency is improved (inside the headers are coated as well). This increases scavenging and makes more power. I've seen some estimates on how much but I won't quote them without more research.
I've also read that a coated header will sound different from the same non-coated header. I won't really know the difference since I've never heard a non-coated header in person. I will see if I can make some nice sound clips once they are in and have run a bit.
The coating cost me $255.13 ($239.00 + $16.13 tax). I had to pay tax since they were done in my home state of NC. I didn't however have to pay for shipping since I was able to drop them off and pick them up.
I'm looking forward to putting them on. I hope to do so tomorrow and/or Monday.
Some pics:


Collector Before:
Collector After:

Port Before:

Port After:
 08-31-2013, 02:21 PM
#44
Super Member
Looks nice. Actually the coated price would still be less then what I paid for my AMS headers. The stainless steel sound would be less prominent I getter as the coating would absorb some of the noise. I bet it would work better then non coated ones because the inside look very smooth.
Last edited by snooozie; 08-31-2013 at 05:22 PM.
09-01-2013, 07:14 AM
#46
Senior Member
Thread Starter
Looks nice. Actually the coated price would still be less then what I paid for my AMS headers. The stainless steel sound would be less prominent I getter as the coating would absorb some of the noise. I bet it would work better then non coated ones because the inside look very smooth.
From what I've read it will take some days for the ECU to totally adapt to the changes. So I will be patient. Some also say the sound changes over time.
This is fun stuff!
09-01-2013, 07:20 AM
#47
Senior Member
Thread Starter
Thanks, cudaized! Hope you have an easy install as well.
I think I'm going to reseal that valve cover airbox (maybe both) before tackling the headers. I will let it vulcanize for 24 hours before I start her up. So if I get the headers in today it will be tomorrow before I turn the key.
Looking forward to hearing your impressions after you are finished.
I think I'm going to reseal that valve cover airbox (maybe both) before tackling the headers. I will let it vulcanize for 24 hours before I start her up. So if I get the headers in today it will be tomorrow before I turn the key.
Looking forward to hearing your impressions after you are finished.
09-01-2013, 06:00 PM
#48
Senior Member
Join Date: Feb 2011
Location: South, FL
Posts: 312
Likes: 0
Received 8 Likes
on
8 Posts
2002 E55 AMG Obsidian Black with Charcoal
Me too! I will post my installation process with pictures. I will also post my new dyno run with just the header installation (in my other thread).
* Teaser* : I ordered the AFE Pro Dry S Filters. I will do the new dyno runs with the headers only change and record the increase hp/torque numbers. After that, I will swap the air filters for the last run. Just to see what, (if any) the new filters will increase the hp.
Anyone venture a guess as to what the increase in hp/torque will be with just the header change? 5, 10, 15, 20, 25 hp/ft. lbs increase?
09-01-2013, 06:37 PM
#49
Senior Member
Thread Starter
Well, I did spend some time on the car today, but I didn't make as much progress as I hoped.
I started with valve cover breather box. The more I looked around the box and the valve cover the more cleaning I needed to do. Then I removed the coil packs to clean them and to clean behind them. I then discovered I didn't have the correct RTV. So I did a little more cleaning and abandoned the reseal project temporarily. Just picked up a fresh tube of RTV so I will finish cleaning and reseal tomorrow.
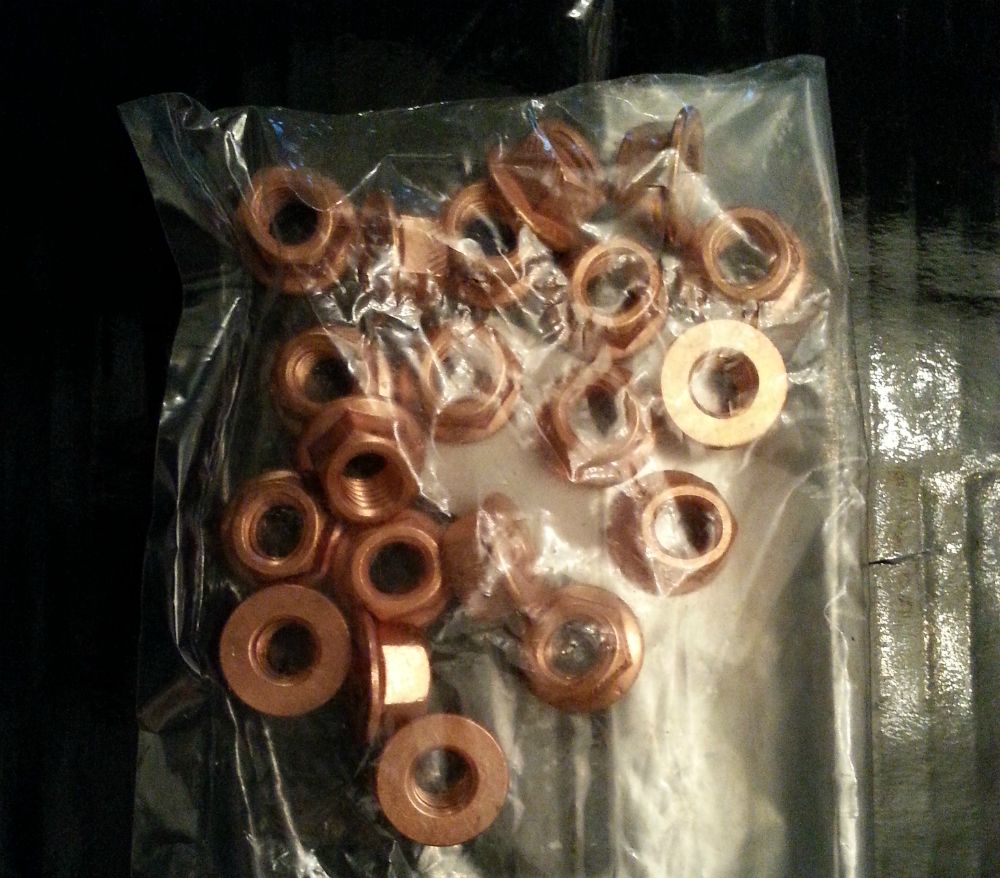
I did loosen all of the copper nuts because I was curious to see if they would be problematic. Thankfully they were not. I will jack the car up tomorrow to remove the two down tube bolts. I hope they are as easy as the manifold nuts.
I will decide tomorrow if I'm going to reseal the driver side breather box/oil fill cap. It isn't leaking, yet. It does look like it will need attention sooner rather than later so I probably will go ahead and do it so I won't have to worry about for a long time.
Looking forward to your post header dyno run and air filter test!
I started with valve cover breather box. The more I looked around the box and the valve cover the more cleaning I needed to do. Then I removed the coil packs to clean them and to clean behind them. I then discovered I didn't have the correct RTV. So I did a little more cleaning and abandoned the reseal project temporarily. Just picked up a fresh tube of RTV so I will finish cleaning and reseal tomorrow.
I did loosen all of the copper nuts because I was curious to see if they would be problematic. Thankfully they were not. I will jack the car up tomorrow to remove the two down tube bolts. I hope they are as easy as the manifold nuts.
I will decide tomorrow if I'm going to reseal the driver side breather box/oil fill cap. It isn't leaking, yet. It does look like it will need attention sooner rather than later so I probably will go ahead and do it so I won't have to worry about for a long time.
Looking forward to your post header dyno run and air filter test!
09-01-2013, 08:02 PM
#50
Super Member


