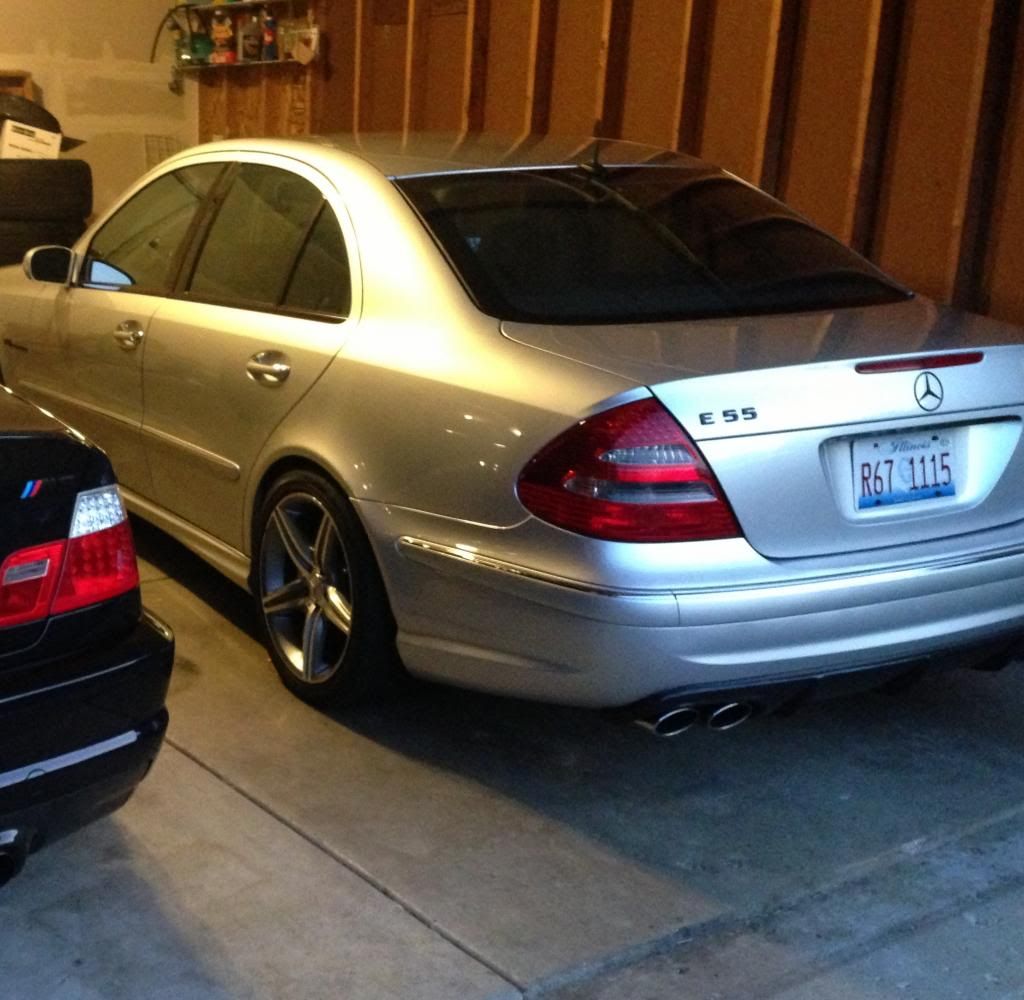
W211 AMG Discuss the W211 AMG's such as the E55 and the E63
Sponsored by:
Sponsored by:

Gary@Suvneer Diffuser Install (pics) FLUSH 56k no no

Thread Tools
 
Search this Thread
 
Rate Thread
 
Old 01-26-2014, 03:41 PM
  #1  
Super Member
Thread Starter
 
Redw20855amg's Avatar
 
Join Date: Apr 2012
Posts: 840
Likes: 0
Received 0 Likes on 0 Posts
Blown 208 55 amg, 211 55 amg
Gary@Suvneer Diffuser Install (pics) FLUSH 56k no no

No cutting required just remove the factory diffuser and the rest is history...My pictures should tell the story of "how to" any questions feel free to ask
Attached Thumbnails Gary@Suvneer Diffuser Install (pics) FLUSH 56k no no-img_0559.jpg   Gary@Suvneer Diffuser Install (pics) FLUSH 56k no no-img_0560.jpg   Gary@Suvneer Diffuser Install (pics) FLUSH 56k no no-img_0561.jpg   Gary@Suvneer Diffuser Install (pics) FLUSH 56k no no-img_0562.jpg   Gary@Suvneer Diffuser Install (pics) FLUSH 56k no no-img_0563.jpg  

Gary@Suvneer Diffuser Install (pics) FLUSH 56k no no-img_0564.jpg  

Last edited by Redw20855amg; 01-26-2014 at 03:53 PM.
Old 01-26-2014, 03:43 PM
  #2  
Super Member
Thread Starter
 
Redw20855amg's Avatar
 
Join Date: Apr 2012
Posts: 840
Likes: 0
Received 0 Likes on 0 Posts
Blown 208 55 amg, 211 55 amg
more pics
Attached Thumbnails Gary@Suvneer Diffuser Install (pics) FLUSH 56k no no-img_0565.jpg   Gary@Suvneer Diffuser Install (pics) FLUSH 56k no no-img_0566.jpg   Gary@Suvneer Diffuser Install (pics) FLUSH 56k no no-img_0567.jpg   Gary@Suvneer Diffuser Install (pics) FLUSH 56k no no-img_0568.jpg   Gary@Suvneer Diffuser Install (pics) FLUSH 56k no no-img_0569.jpg  

Gary@Suvneer Diffuser Install (pics) FLUSH 56k no no-img_0570.jpg  
Old 01-26-2014, 03:45 PM
  #3  
Super Member
Thread Starter
 
Redw20855amg's Avatar
 
Join Date: Apr 2012
Posts: 840
Likes: 0
Received 0 Likes on 0 Posts
Blown 208 55 amg, 211 55 amg
and some more
Attached Thumbnails Gary@Suvneer Diffuser Install (pics) FLUSH 56k no no-img_0571.jpg   Gary@Suvneer Diffuser Install (pics) FLUSH 56k no no-img_0572.jpg   Gary@Suvneer Diffuser Install (pics) FLUSH 56k no no-img_0573.jpg   Gary@Suvneer Diffuser Install (pics) FLUSH 56k no no-img_0574.jpg   Gary@Suvneer Diffuser Install (pics) FLUSH 56k no no-img_0576.jpg  

Gary@Suvneer Diffuser Install (pics) FLUSH 56k no no-img_0577.jpg  
Old 01-26-2014, 03:59 PM
  #4  
MBWorld Fanatic!
 
berti_00's Avatar
 
Join Date: May 2007
Location: Clearwater Beach, Florida
Posts: 6,377
Received 116 Likes on 74 Posts
2016 Cls63s AMG
what are you adding on the top silicone??? looks like a solid job and flush for sure. ohh and did you have to remove the exhaust or no?
Old 01-26-2014, 06:09 PM
  #5  
Super Member
Thread Starter
 
Redw20855amg's Avatar
 
Join Date: Apr 2012
Posts: 840
Likes: 0
Received 0 Likes on 0 Posts
Blown 208 55 amg, 211 55 amg
No Exhaust removal, I was just pulling back diffuser and adding epoxy
Old 01-26-2014, 07:39 PM
  #6  
Member
 
Natibeastcat's Avatar
 
Join Date: Oct 2013
Posts: 214
Likes: 0
Received 2 Likes on 1 Post
E90M3, E55 AMG
I thought it screwed in on top of all the factory bumper? Do you remove something first?

looks good!
Old 01-27-2014, 09:13 AM
  #7  
MBWorld Fanatic!
 
Manuyc's Avatar
 
Join Date: Dec 2011
Location: tampa florida
Posts: 1,610
Received 6 Likes on 6 Posts
06 e55,81SC Targa,08 CLK63 BLK,91 E34 M5
nice job man, and in the winter time DIY
Old 01-27-2014, 04:58 PM
  #8  
Super Member
Thread Starter
 
Redw20855amg's Avatar
 
Join Date: Apr 2012
Posts: 840
Likes: 0
Received 0 Likes on 0 Posts
Blown 208 55 amg, 211 55 amg
Couldn't stand starring at parts in the living room any longer
Old 01-27-2014, 05:29 PM
  #9  
Former Vendor of MBWorld
 
Suvneer's Avatar
 
Join Date: Sep 2009
Location: Los Angeles, CA
Posts: 4,277
Received 25 Likes on 22 Posts
.
Great pictures!!
Old 01-27-2014, 05:58 PM
  #10  
Senior Member
 
3BNick's Avatar
 
Join Date: Nov 2012
Location: Houston, TX
Posts: 381
Likes: 0
Received 0 Likes on 0 Posts
2006 E55
Lol at "56K no no". Does that even exist?
Old 01-28-2014, 11:24 PM
  #11  
Member
 
MACH-E55's Avatar
 
Join Date: Feb 2013
Location: Barrington, IL
Posts: 166
Likes: 0
Received 1 Like on 1 Post
06 e55 amg
I want!!!!
Old 01-28-2014, 11:25 PM
  #12  
Junior Member
 
copo30's Avatar
 
Join Date: Feb 2012
Posts: 60
Likes: 0
Received 0 Likes on 0 Posts
03 amg
Awesome write up and pics.
Old 01-29-2014, 12:21 AM
  #13  
Super Member
 
vcci's Avatar
 
Join Date: Sep 2011
Location: SoCal
Posts: 687
Likes: 0
Received 10 Likes on 9 Posts
2014 E63s
i'm getting ready to install mine on my e63. do i need to remove the original diffuser in order to install the new one?
Old 03-07-2014, 03:53 PM
  #14  
Senior Member
 
ALEN35's Avatar
 
Join Date: Feb 2013
Location: salt lake city, utah
Posts: 288
Likes: 0
Received 0 Likes on 0 Posts
2007 sl65 amg
I am getting mine soon, Is this only DIY for this diffuser?
Old 03-07-2014, 04:38 PM
  #15  
Super Member
 
biggking's Avatar
 
Join Date: Apr 2012
Location: Northern California
Posts: 887
Received 2 Likes on 2 Posts
2004 E55 AMG; 1991 Previa
Someone told me that the factory diffuser is glued on. Is that why you had the heat gun?
Old 03-07-2014, 05:21 PM
  #16  
Super Member
Thread Starter
 
Redw20855amg's Avatar
 
Join Date: Apr 2012
Posts: 840
Likes: 0
Received 0 Likes on 0 Posts
Blown 208 55 amg, 211 55 amg
Yes, the Factory is double side taped on excessively
Old 03-07-2014, 05:59 PM
  #17  
Member
 
tolentino71's Avatar
 
Join Date: Jun 2013
Posts: 150
Received 1 Like on 1 Post
W211 E55
Looks awesome! Great job bro...
Old 03-07-2014, 07:26 PM
  #18  
Senior Member
 
try m3's Avatar
 
Join Date: Apr 2012
Location: Chicago
Posts: 336
Received 100 Likes on 47 Posts
M3, E55, cls63
Damn I didn't know you were supposed to take the stock diffuser off lol. I just put mine over but it's pretty flush.

Old 03-11-2014, 07:38 PM
  #19  
Junior Member
 
__pg's Avatar
 
Join Date: Jun 2013
Posts: 20
Likes: 0
Received 1 Like on 1 Post
06 W211 / Evo 9
Maybe you can help me out? I tried installing mine and it didn't fit well at all. Maybe I'm missing something? After deciding not to remove the bumper I went after it. I used self taping screws from the inside. I did not remove the "factory diffuser" and the sides were way off. I guess I don't understand how you attached the sides? Are you using the backing attachments with the screws here? With the inside section (the space between the exhausts, the bulk of the diffuser) are you coming from the inside of the bumper? Surprisingly a smallish drill fits inside the bumper, ha. I'd love some tips here. Guess I need to remove the factory diffuser?

Here are some pics:


Old 03-11-2014, 08:28 PM
  #20  
Senior Member
 
try m3's Avatar
 
Join Date: Apr 2012
Location: Chicago
Posts: 336
Received 100 Likes on 47 Posts
M3, E55, cls63
I didn't use any screws at all my Dad brought some super heavy duty silicon and we used that to attach it. The diffuser bends slightly so we just applied pressure to both side for a couple of minutes then taped it down and let it sit for a few hours. I drive 70miles a day mostly highway and I do 150+ at least once a week and it's still on lol.
Old 03-11-2014, 10:58 PM
  #21  
Super Member
Thread Starter
 
Redw20855amg's Avatar
 
Join Date: Apr 2012
Posts: 840
Likes: 0
Received 0 Likes on 0 Posts
Blown 208 55 amg, 211 55 amg
The screw goes through the corner of diffuser into the corner of the bumper i used a "nut" on the inside of the bumper to pull it tight. Masking tape helps pull everything into place. I ended up using liquid nails instead of epoxy taped into place tightly and let dry overnight. I have been through the automated carwash and is as of day 1 still intact! If you still cant figure it out pm me ill give you my phone number :cheers
Old 03-12-2014, 10:59 AM
  #22  
Junior Member
 
__pg's Avatar
 
Join Date: Jun 2013
Posts: 20
Likes: 0
Received 1 Like on 1 Post
06 W211 / Evo 9
Awesome thanks! So did you remove anything before applying the diffuser?
Old 03-12-2014, 11:23 AM
  #23  
Super Member
Thread Starter
 
Redw20855amg's Avatar
 
Join Date: Apr 2012
Posts: 840
Likes: 0
Received 0 Likes on 0 Posts
Blown 208 55 amg, 211 55 amg
I removed the factory diffuser, It came off in many pieces. I used a heat gun to warm it up
Old 03-12-2014, 12:15 PM
  #24  
Junior Member
 
__pg's Avatar
 
Join Date: Jun 2013
Posts: 20
Likes: 0
Received 1 Like on 1 Post
06 W211 / Evo 9
Ok cool, I'll give that a shot. Thanks for the info!
Old 03-12-2014, 03:16 PM
  #25  
Senior Member
 
ALEN35's Avatar
 
Join Date: Feb 2013
Location: salt lake city, utah
Posts: 288
Likes: 0
Received 0 Likes on 0 Posts
2007 sl65 amg
Silicon?

Originally Posted by try m3
I didn't use any screws at all my Dad brought some super heavy duty silicon and we used that to attach it. The diffuser bends slightly so we just applied pressure to both side for a couple of minutes then taped it down and let it sit for a few hours. I drive 70miles a day mostly highway and I do 150+ at least once a week and it's still on lol.


Can u find out which silicon you have used?


You have already rated this thread Rating: Thread Rating: 0 votes,  average.

Quick Reply: Gary@Suvneer Diffuser Install (pics) FLUSH 56k no no


All times are GMT -4. The time now is 04:29 PM.