
4000lb Sideways

 05-31-2017, 06:59 PM
#126
Super Member
Thread Starter
Time to work on mounting this guy! Bought a spool of brake line, ordered various fittings and adapters. 3/16 bend tool in the mail. This is about to get interesting.
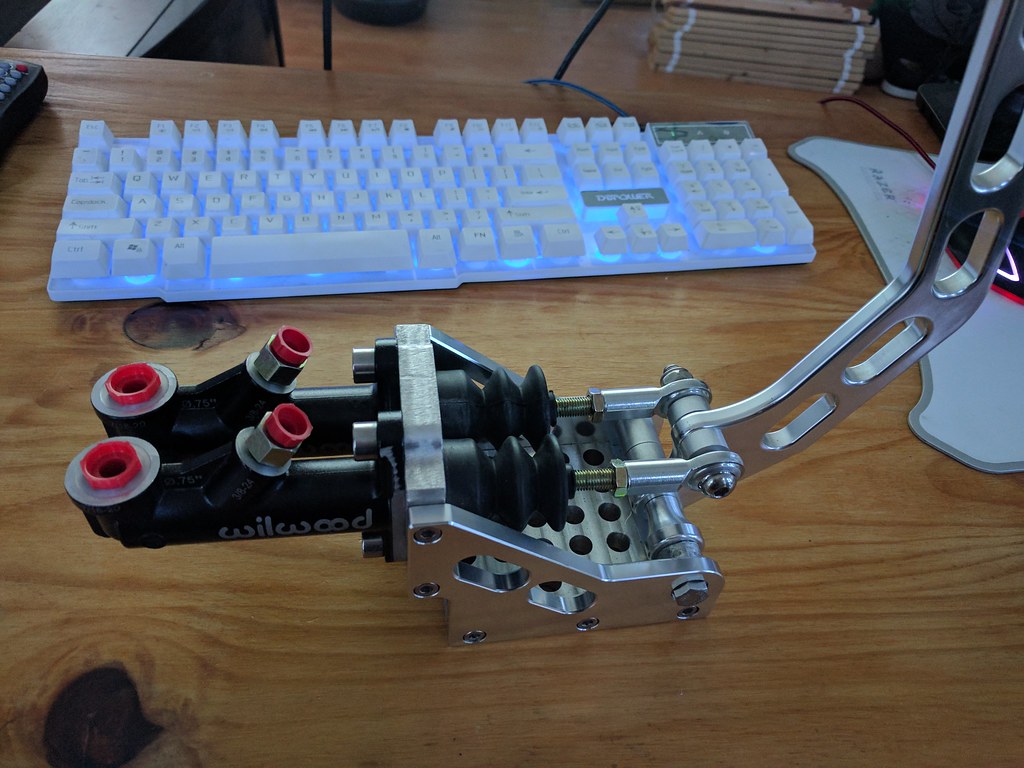
A little note: the Wilwoods use a 7/16-20 inlet which is extremely rare and strange. Why, I do not know. ASD use these MCs, which is why I went with them and luckily offer an adapter. However, both the adapter and the MC side appear to be convex, expecting a flare, so this should be interesting. Quasi-jank if you ask me.
A little note: the Wilwoods use a 7/16-20 inlet which is extremely rare and strange. Why, I do not know. ASD use these MCs, which is why I went with them and luckily offer an adapter. However, both the adapter and the MC side appear to be convex, expecting a flare, so this should be interesting. Quasi-jank if you ask me.
Last edited by jumph4x; 05-31-2017 at 07:02 PM.
 06-03-2017, 02:14 PM
#127
Super Member
Thread Starter
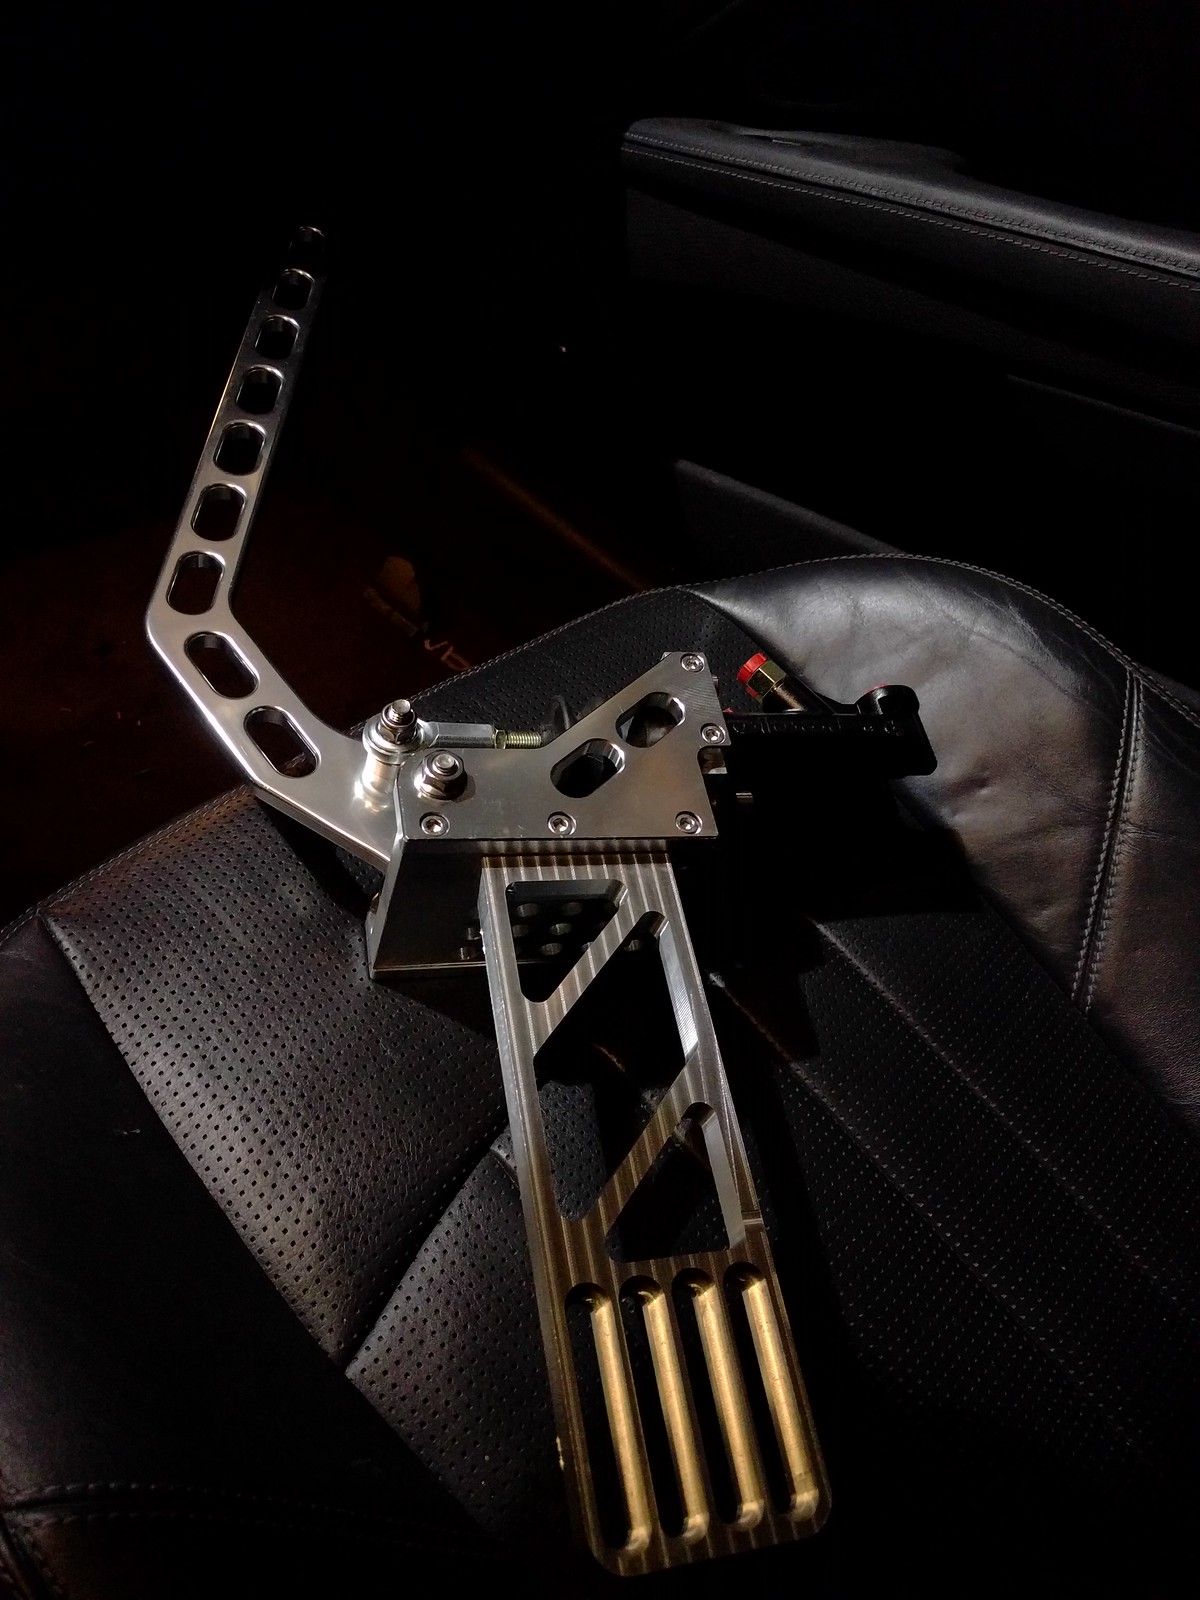
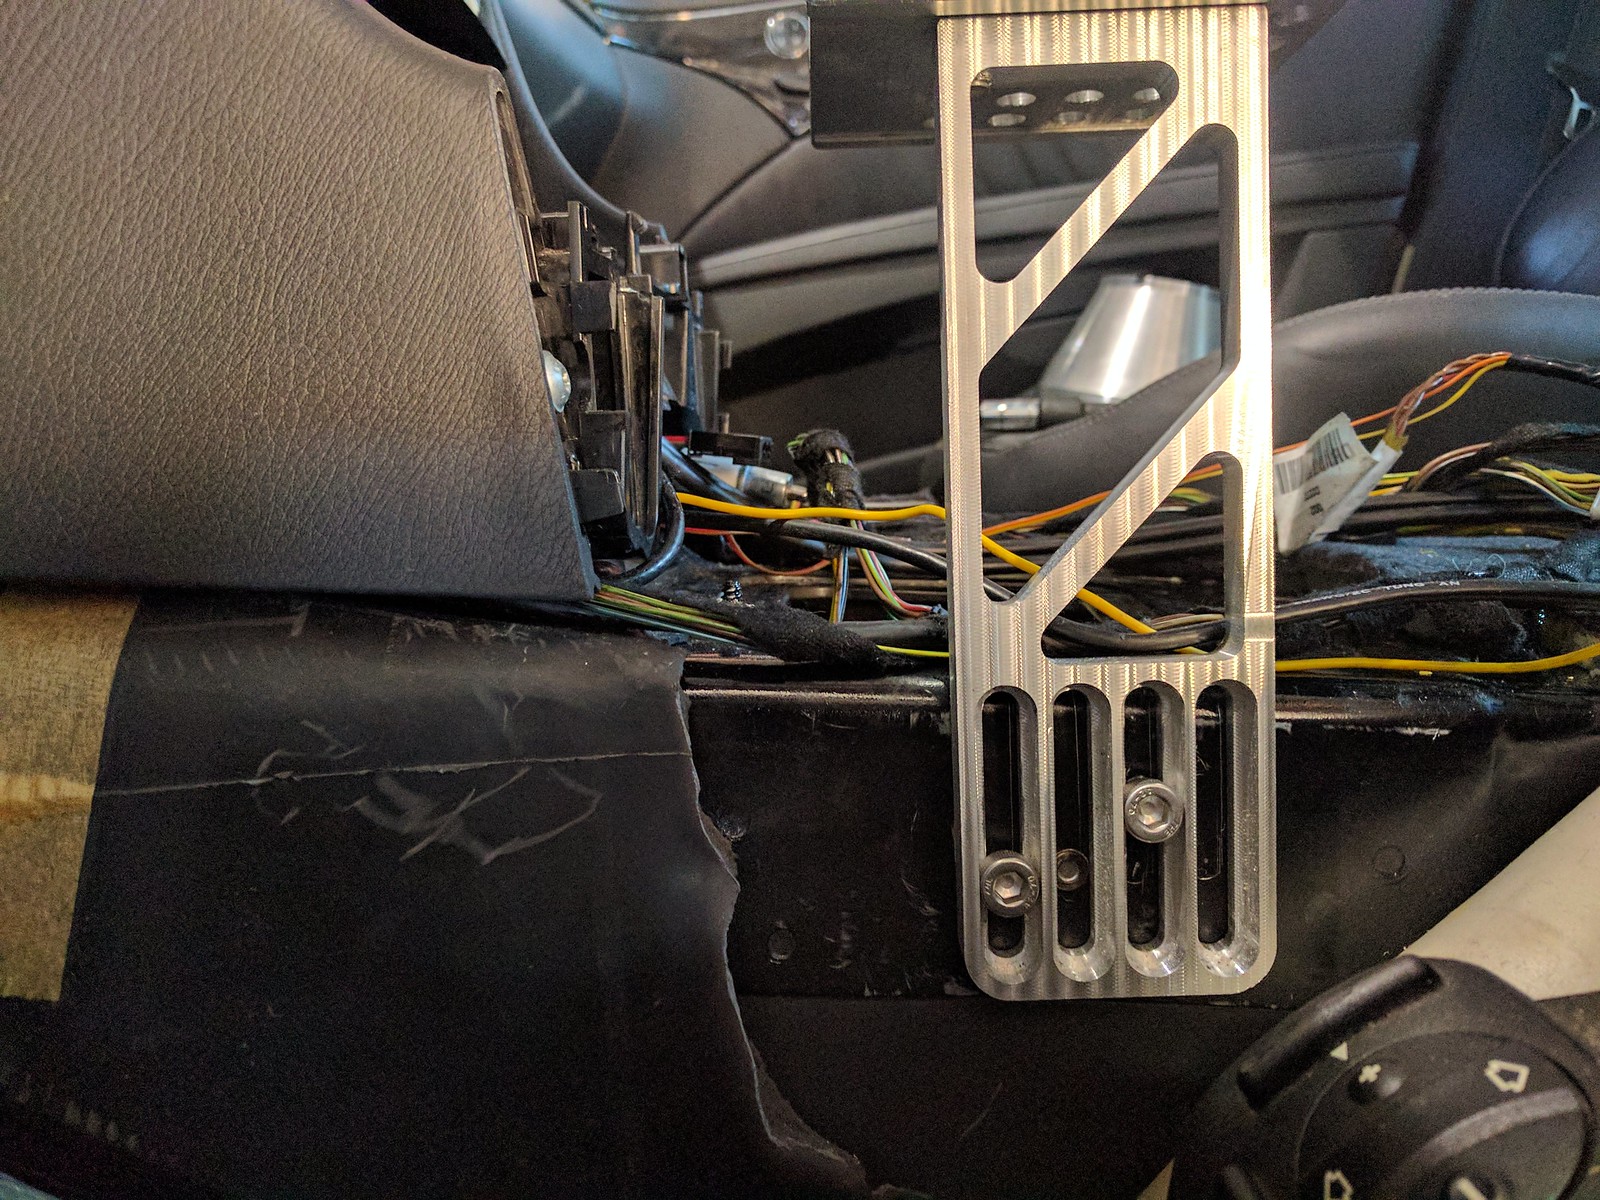
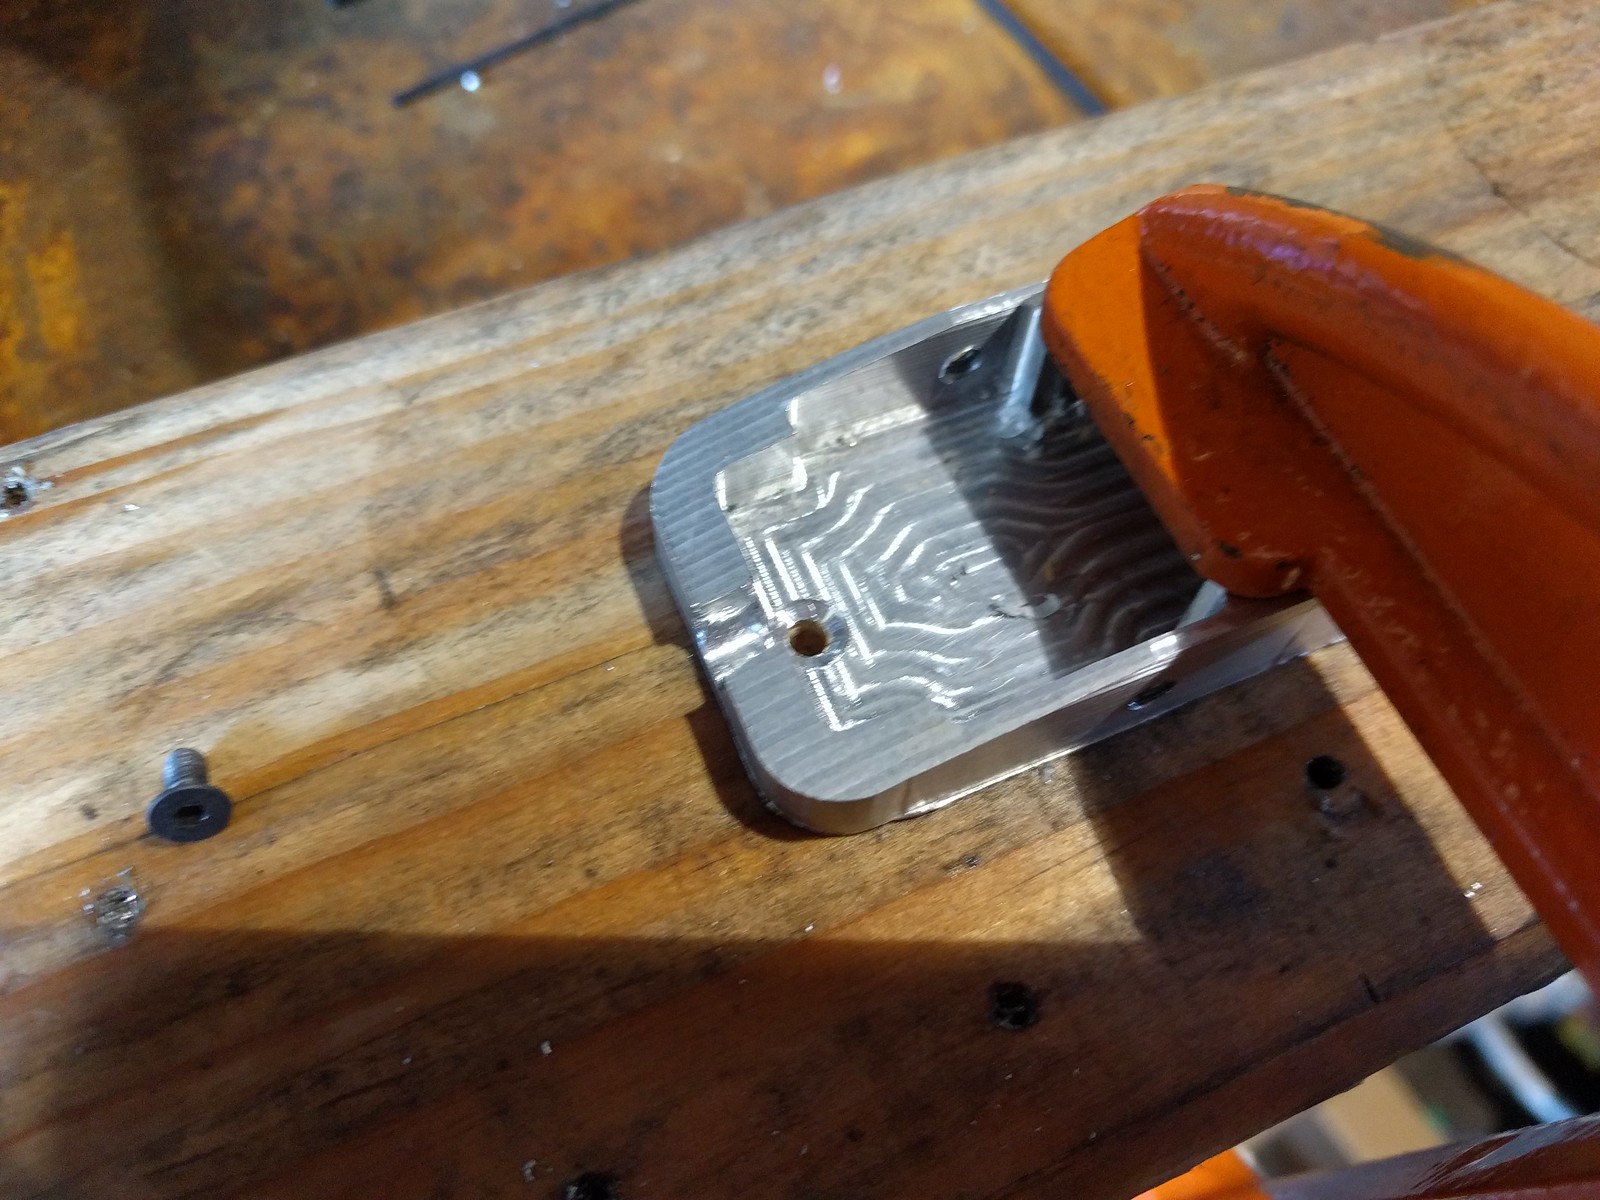
The tube bending tool, unions and fittings are here. Made the vertical mounting bracket for the hydro brake, this is the nicest piece so far, albeit not without mistakes.
Version 1 is pretty skinny, might have to end up reinforcing additionally later or redesigning the bracket. Time will tell.

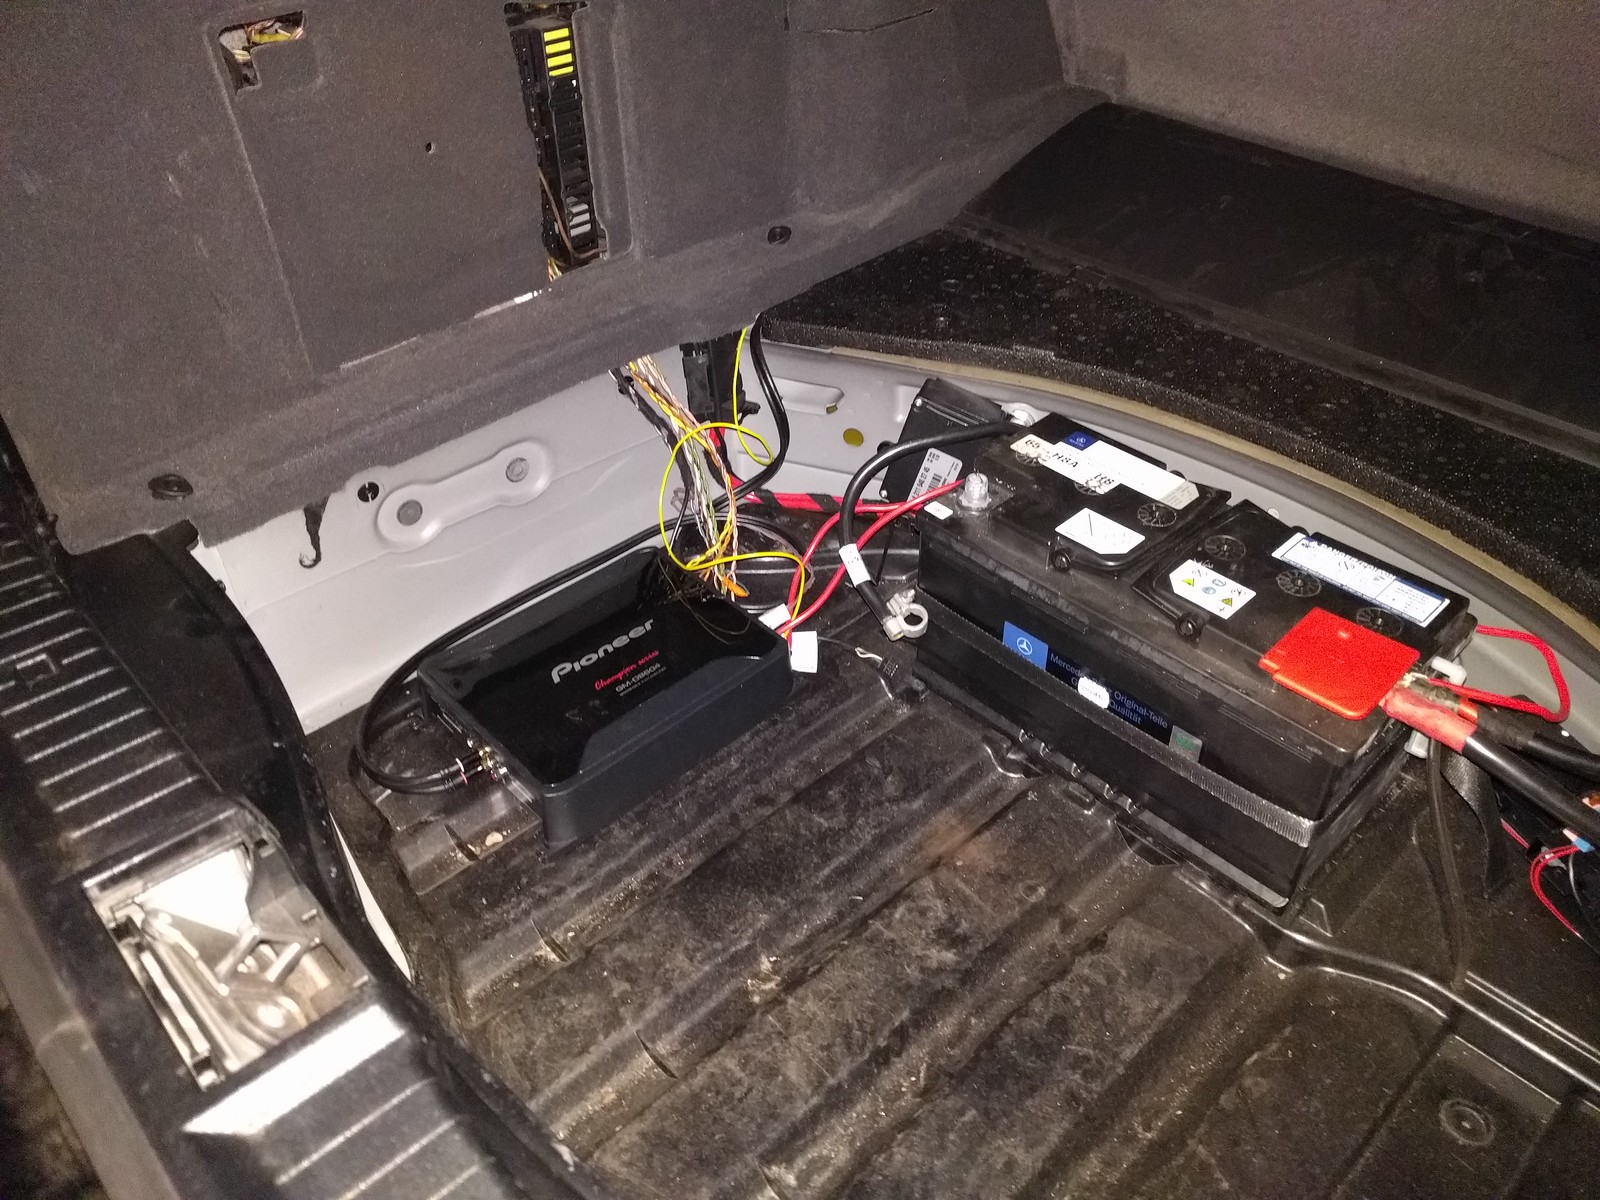
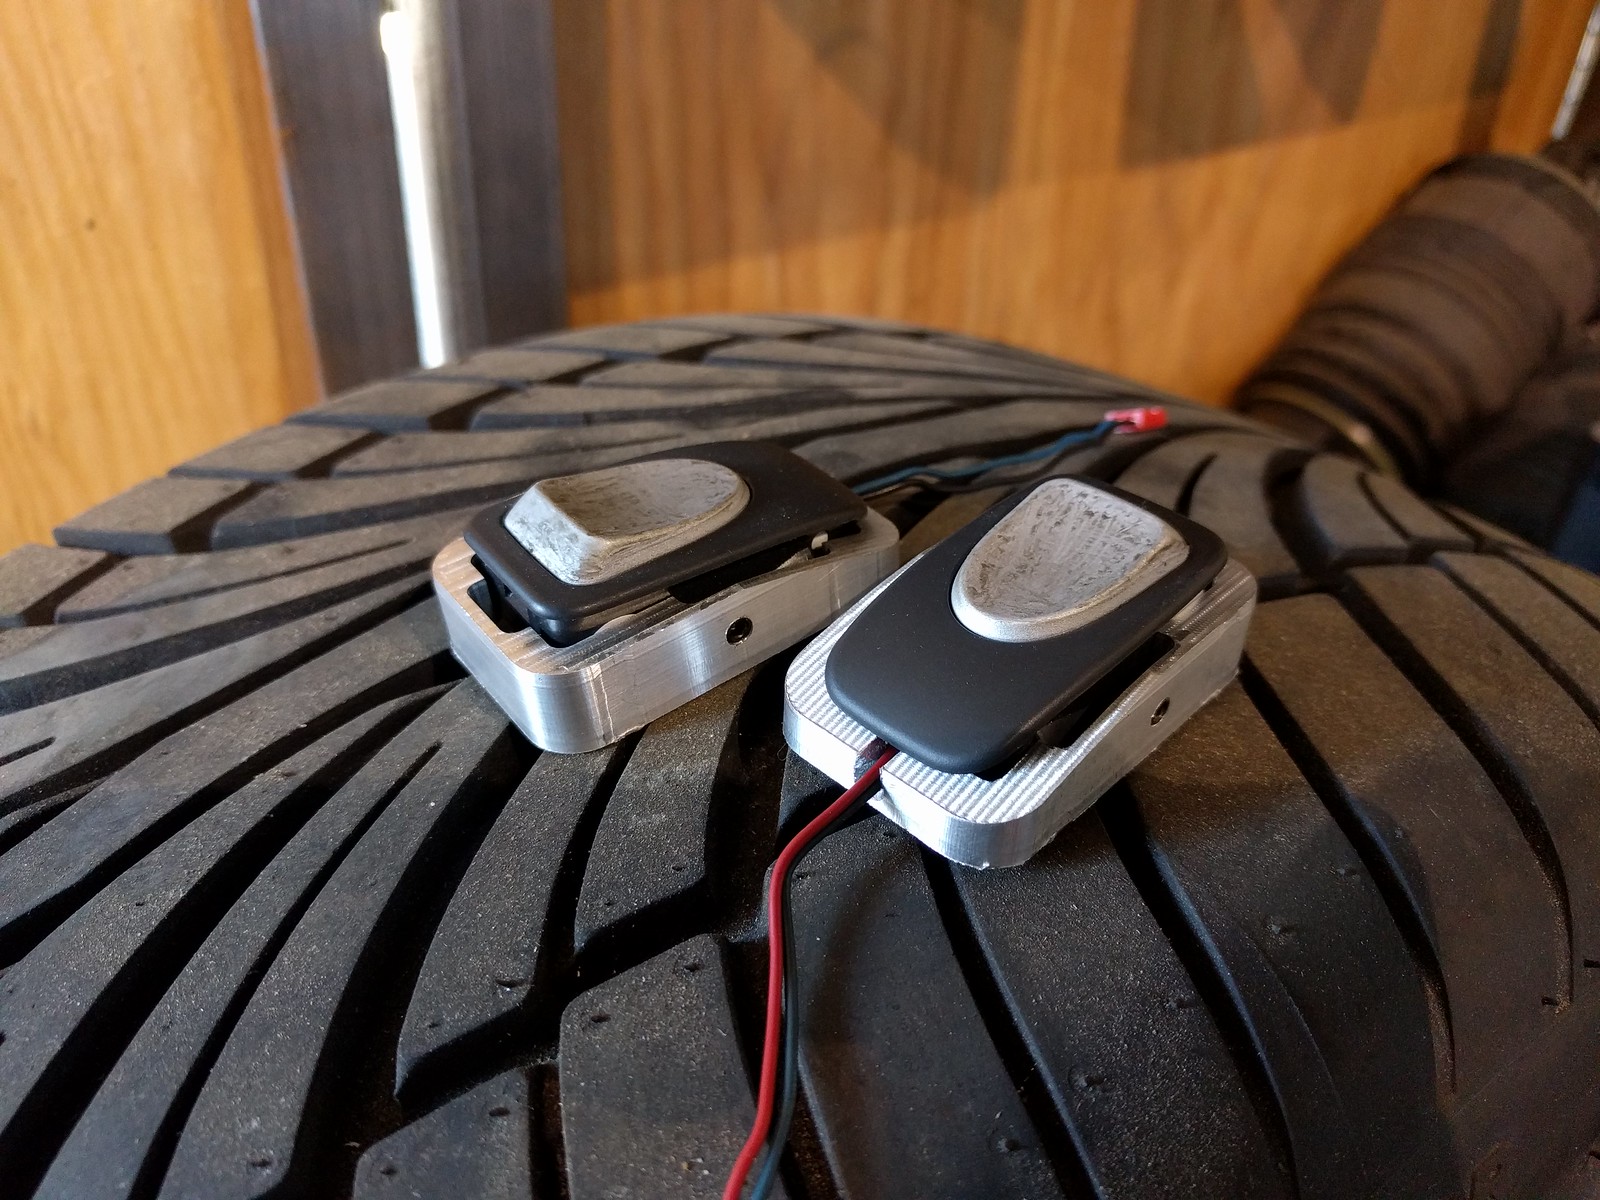
Made rear rebound adjuster access cuts in the trunk liner, prewired the headunit, ran the remote-ON to the trunk, prewired the amp. Tested speaker connector, figured out what's what:
Green LF,
Pink LR,
Brown RR,
Black RF
Meaning
Teal C
Version 1 is pretty skinny, might have to end up reinforcing additionally later or redesigning the bracket. Time will tell.
Made rear rebound adjuster access cuts in the trunk liner, prewired the headunit, ran the remote-ON to the trunk, prewired the amp. Tested speaker connector, figured out what's what:
Green LF,
Pink LR,
Brown RR,
Black RF
Meaning
Teal C
Last edited by jumph4x; 06-03-2017 at 02:16 PM.
06-06-2017, 03:13 AM
#128
Super Member
Thread Starter
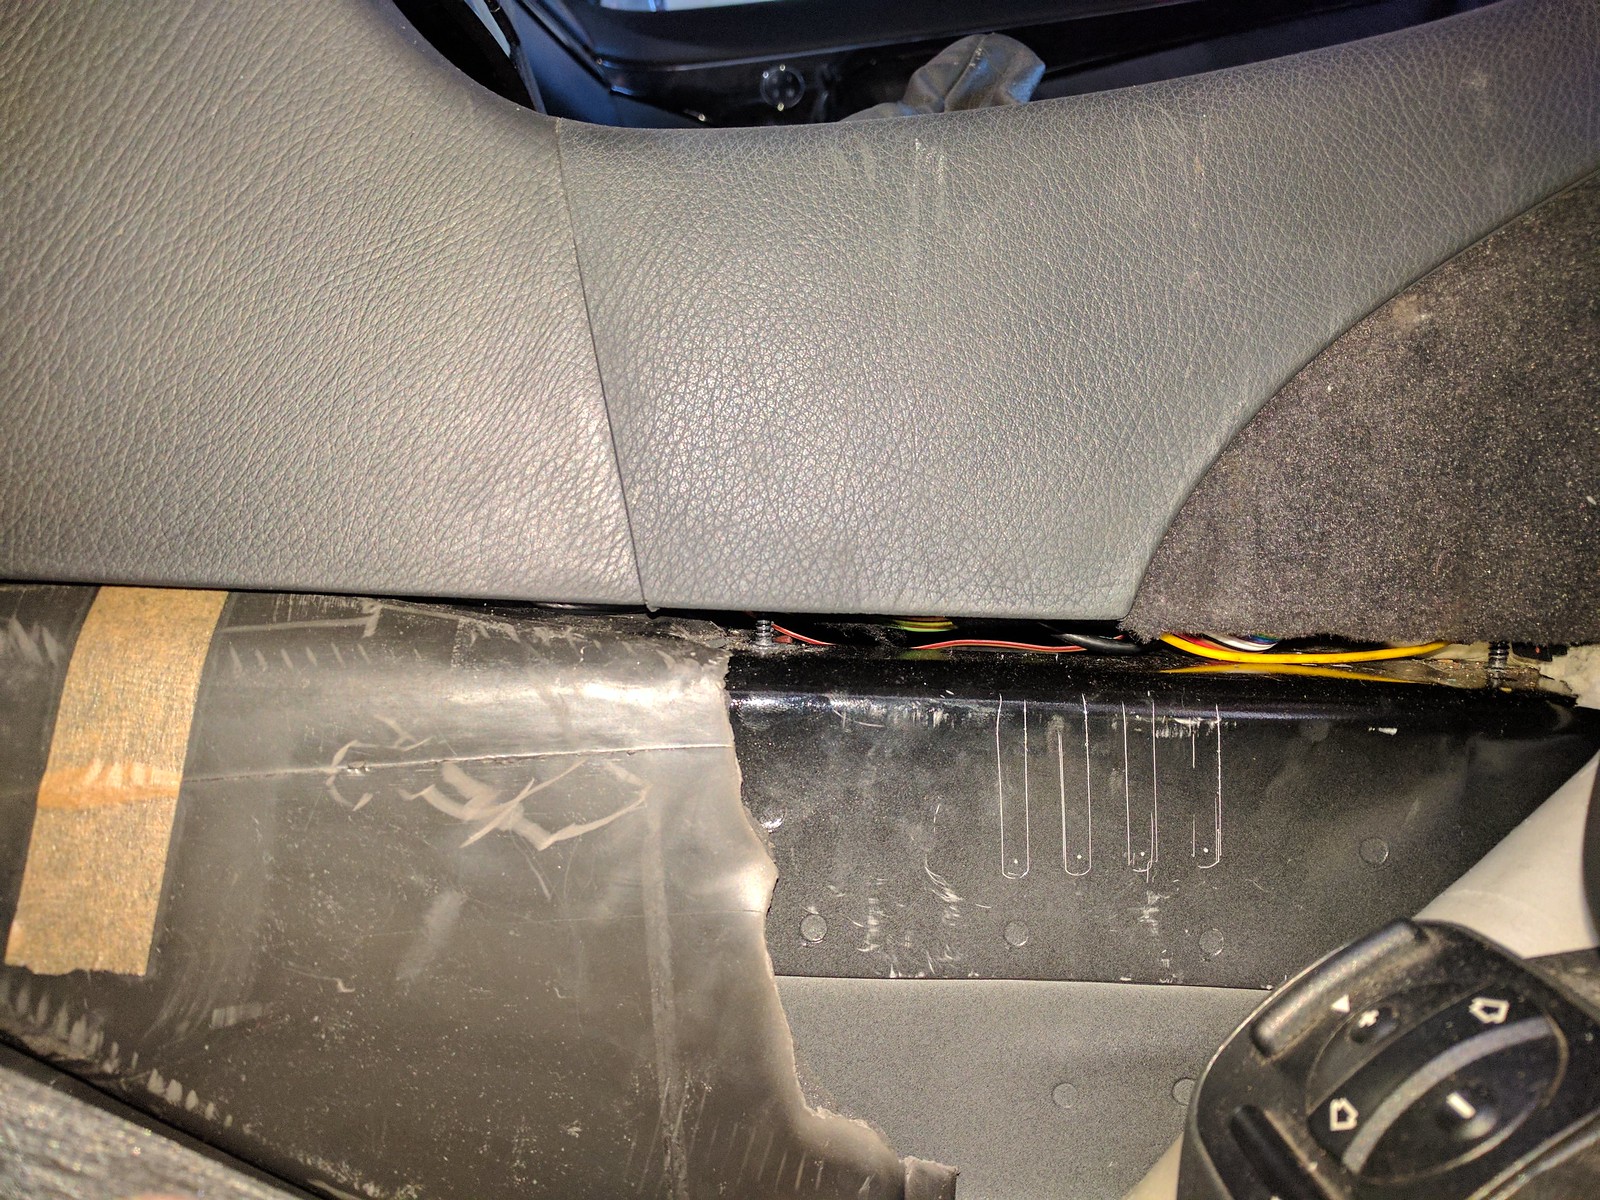
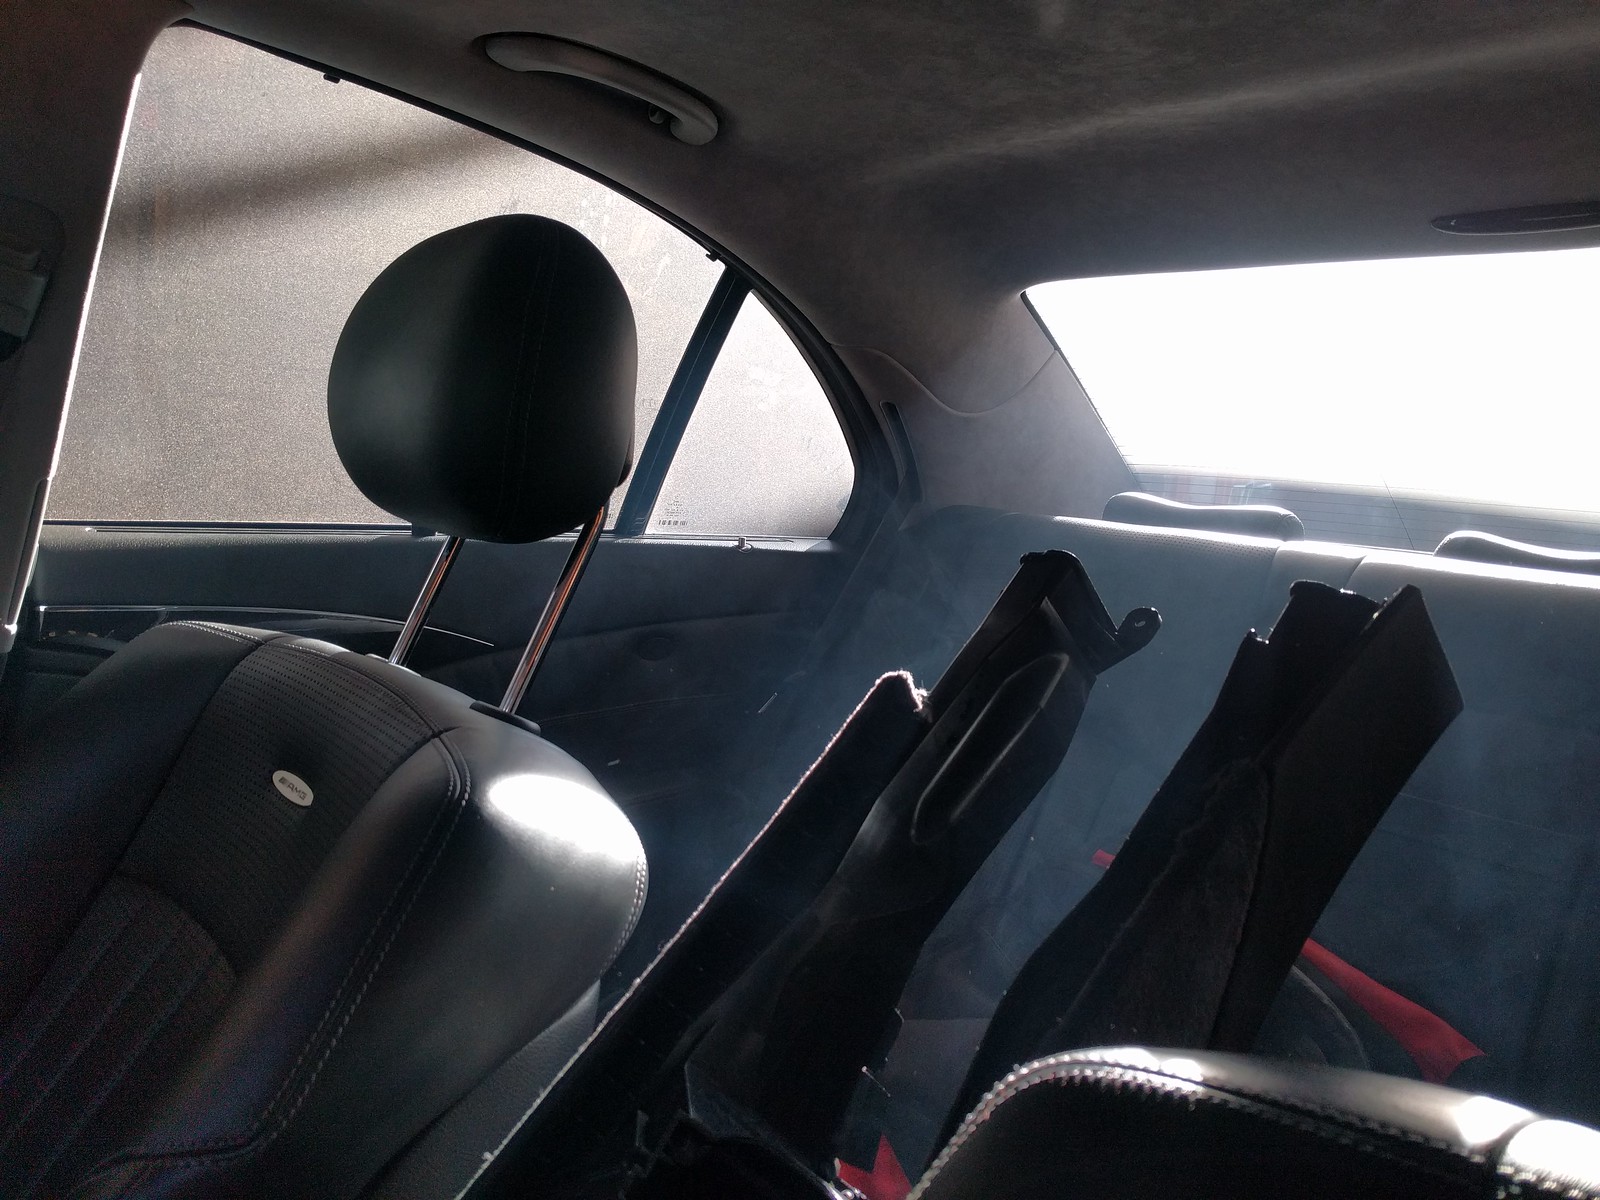
Wired and wrapped up installing the headunit, the amplifier and the trunk bits. Also cut access holes for suspension adjustments in the liner, can sort of see one in the corner here:
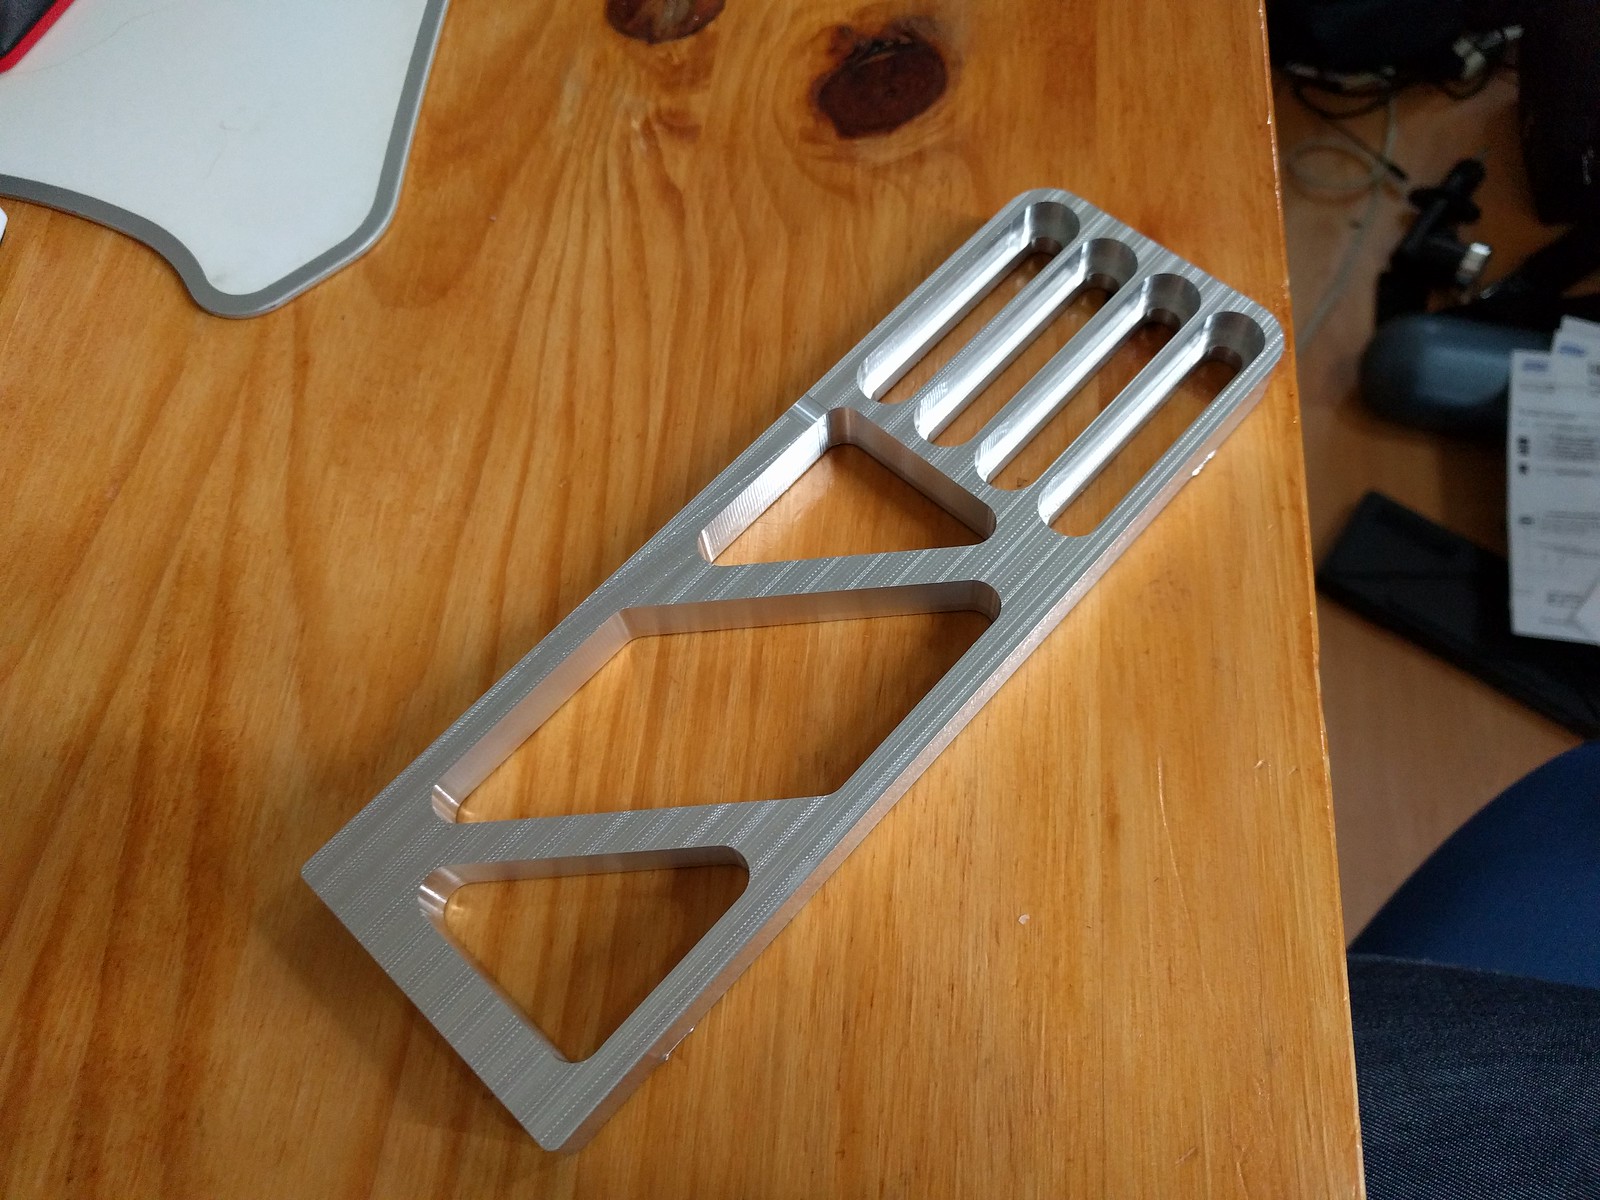
Tapped the holes into the vertical plate, which was the last bit of machining for the brake project. This will also give you some idea of the scale:
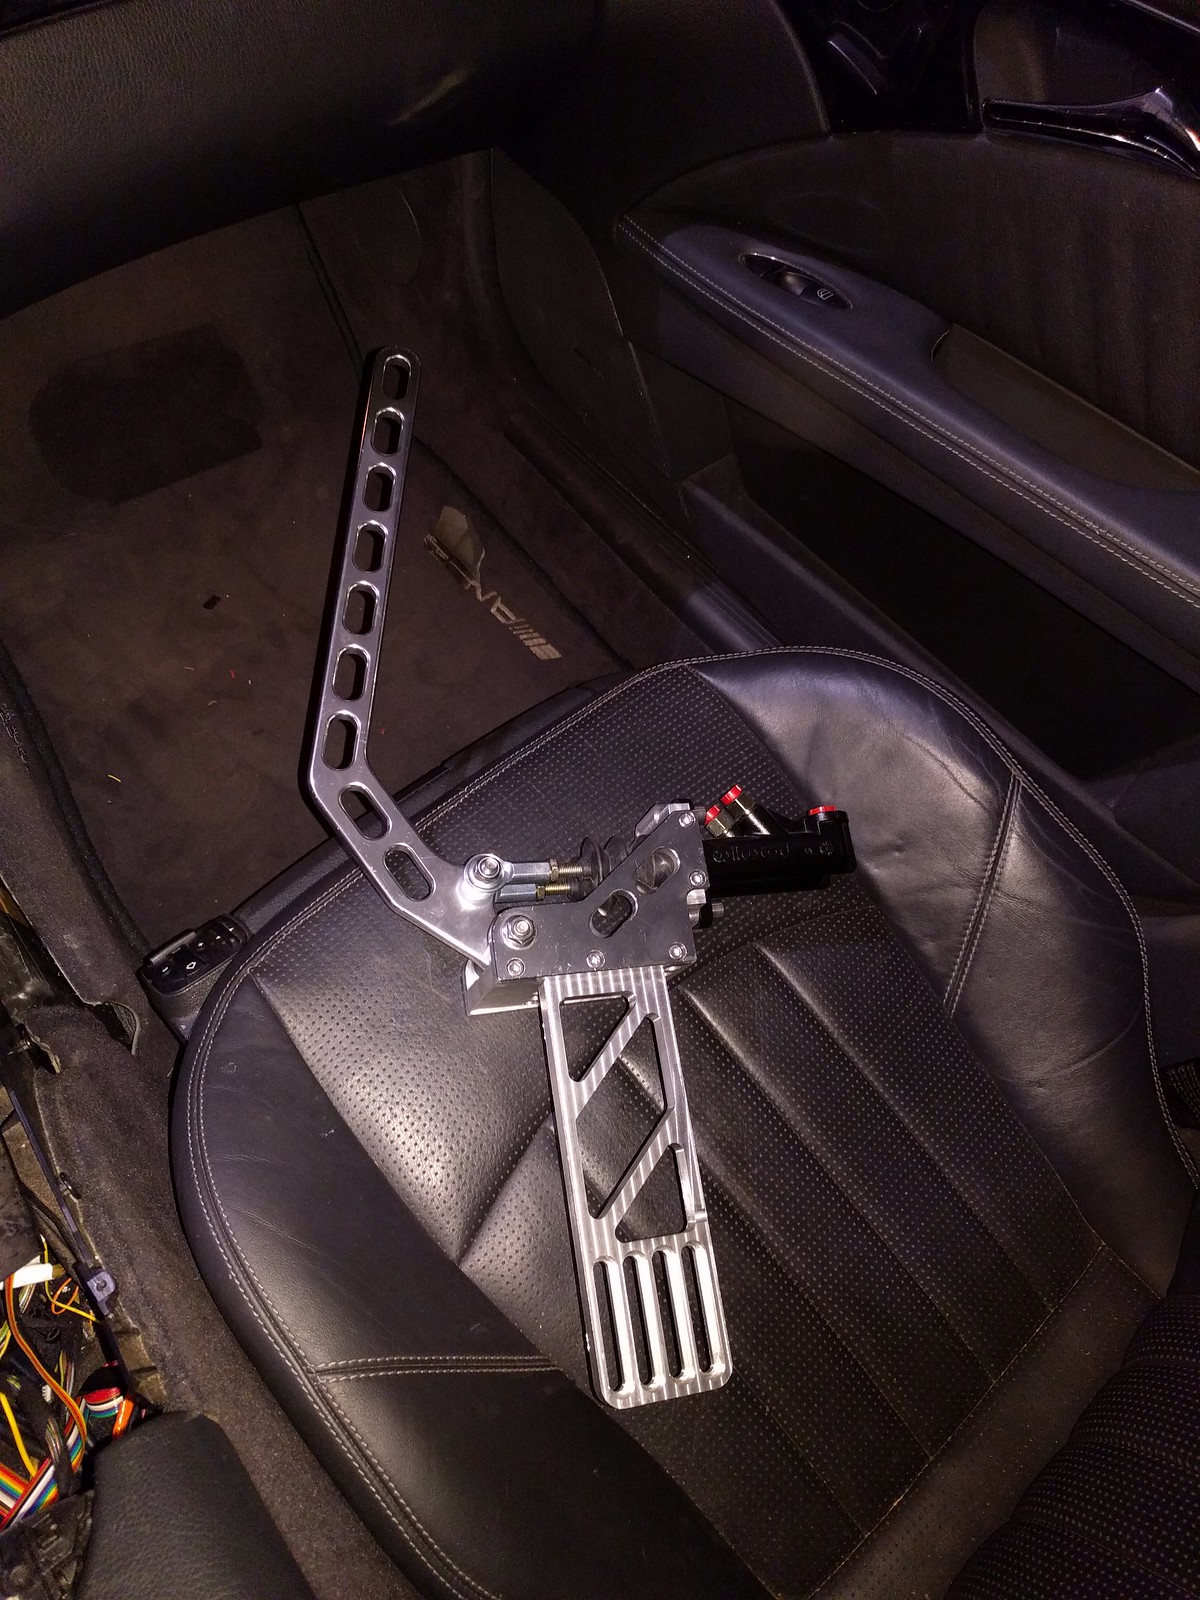
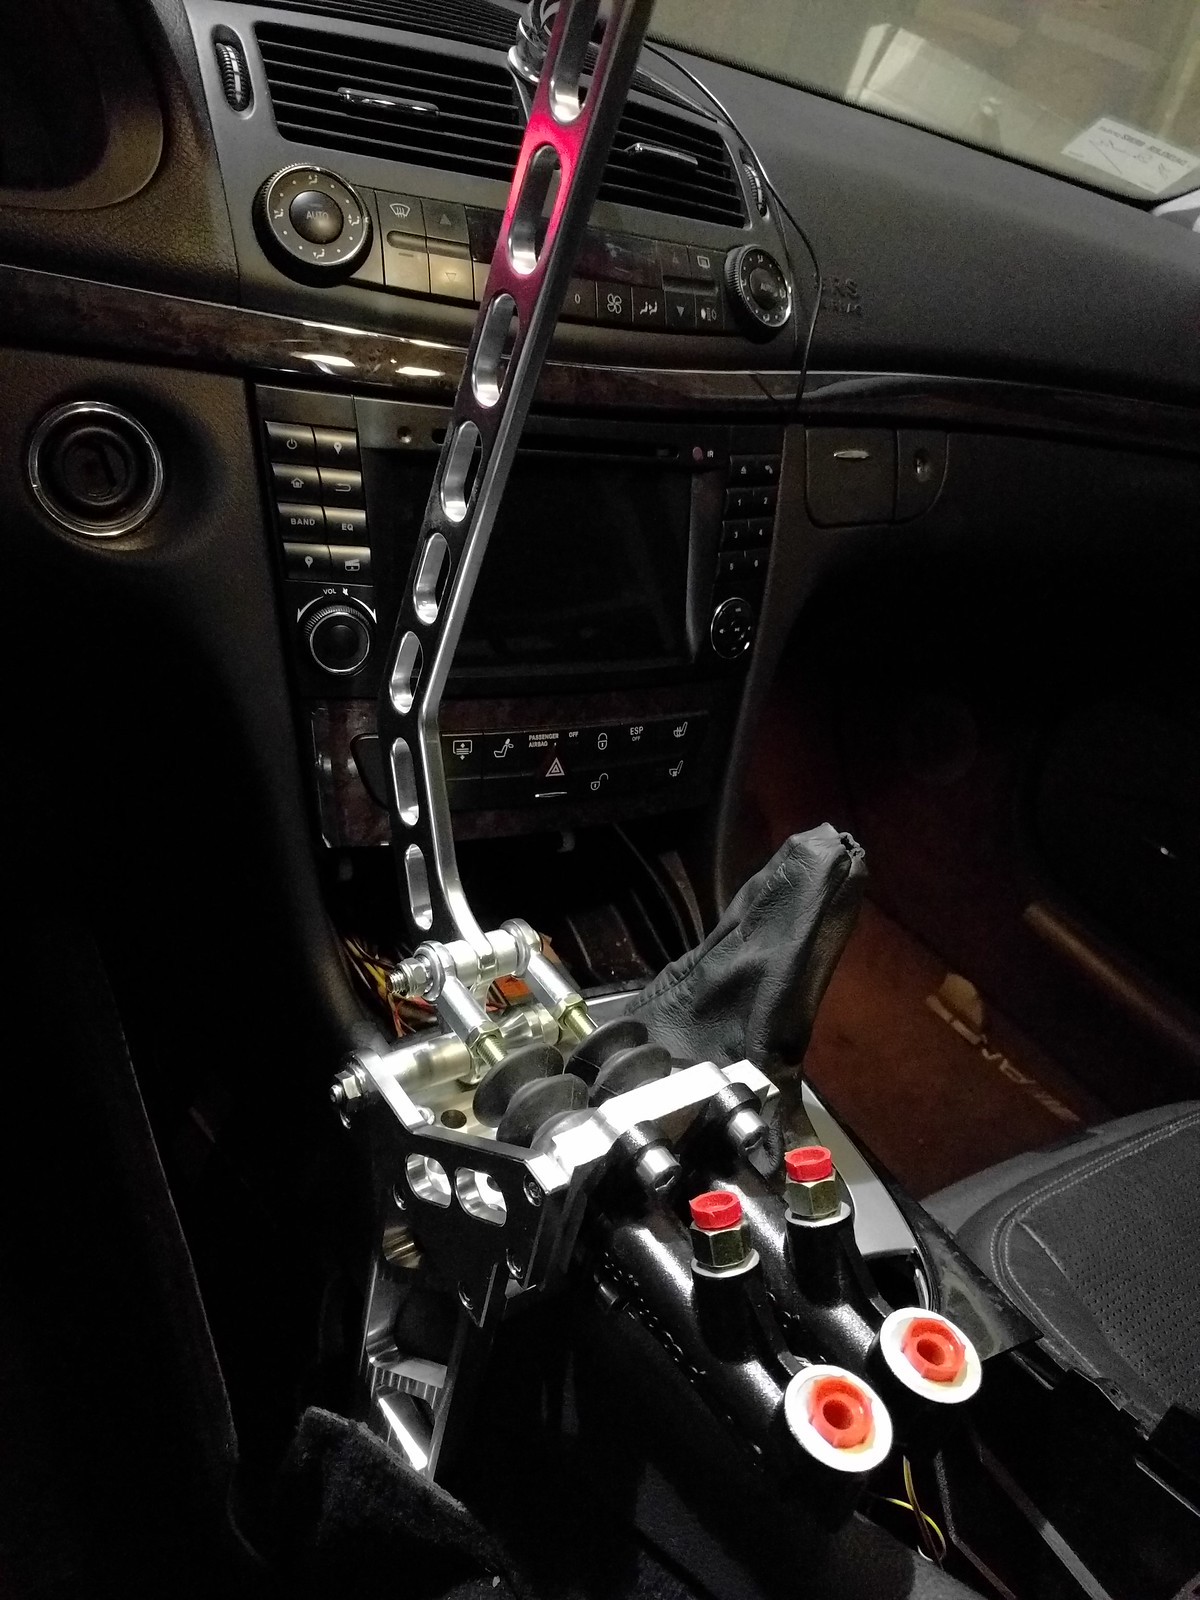
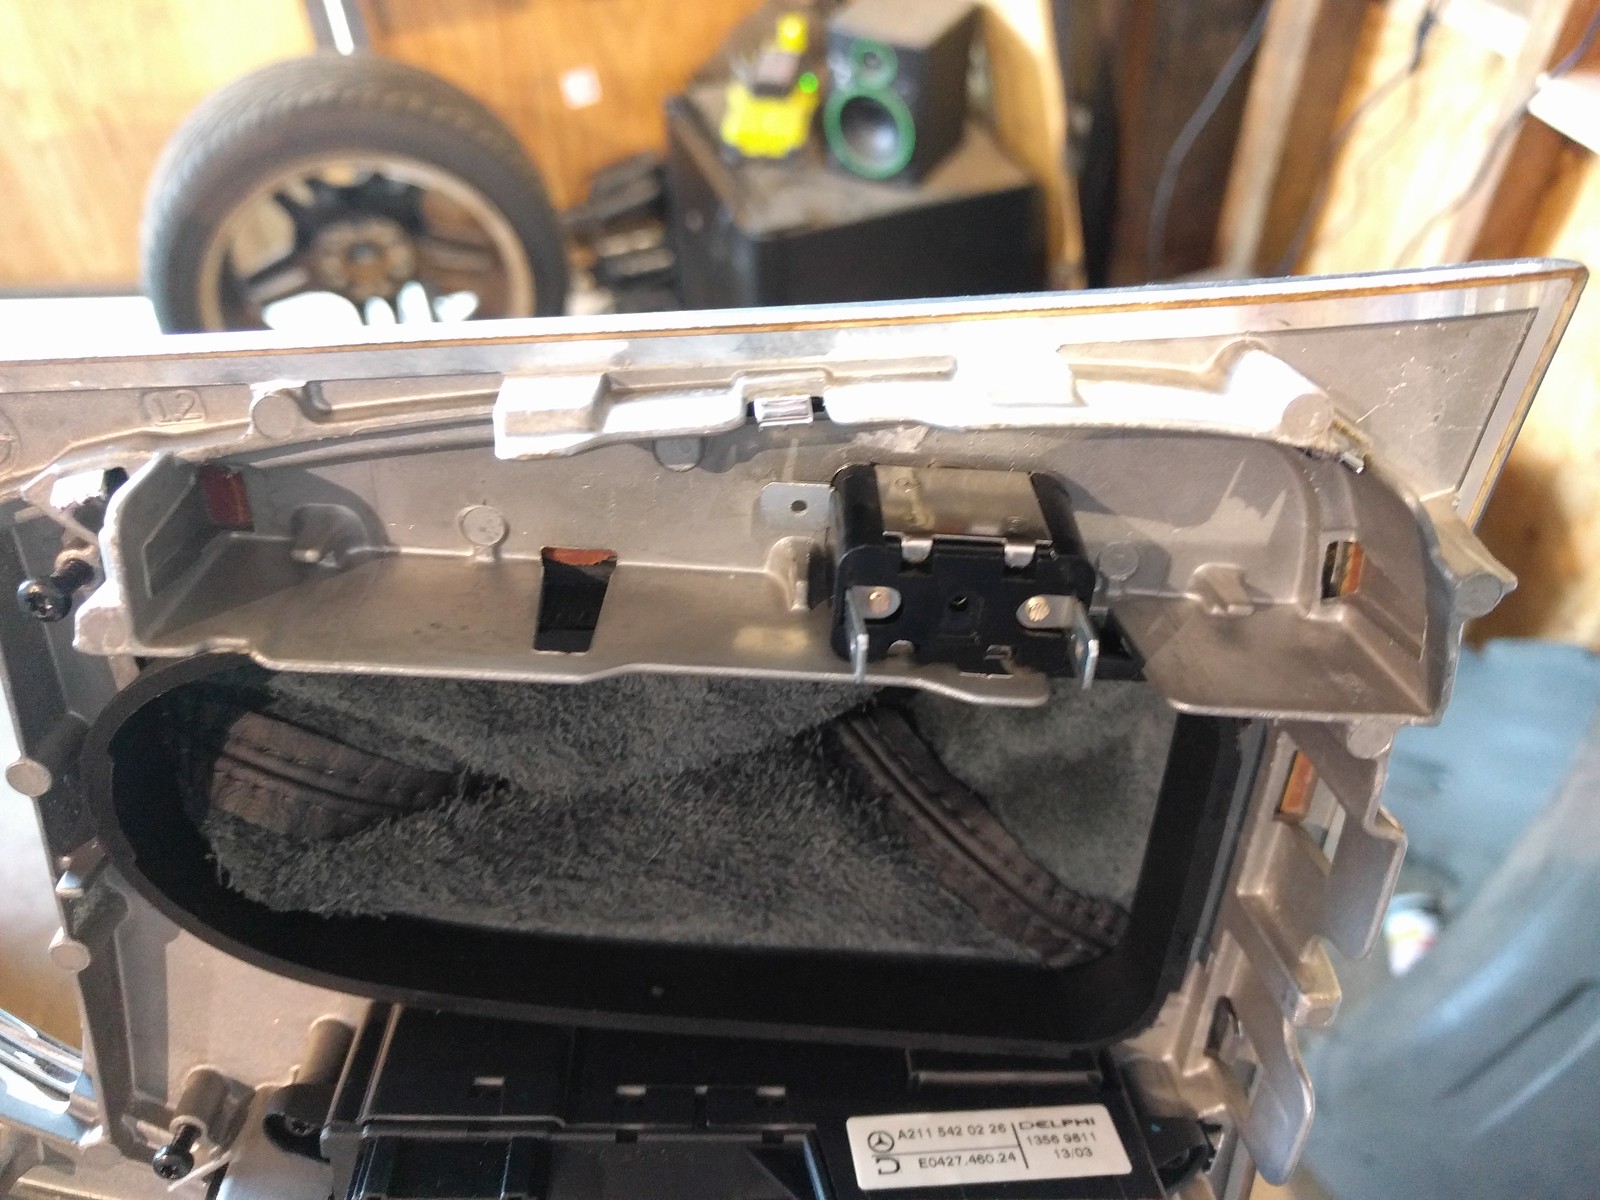
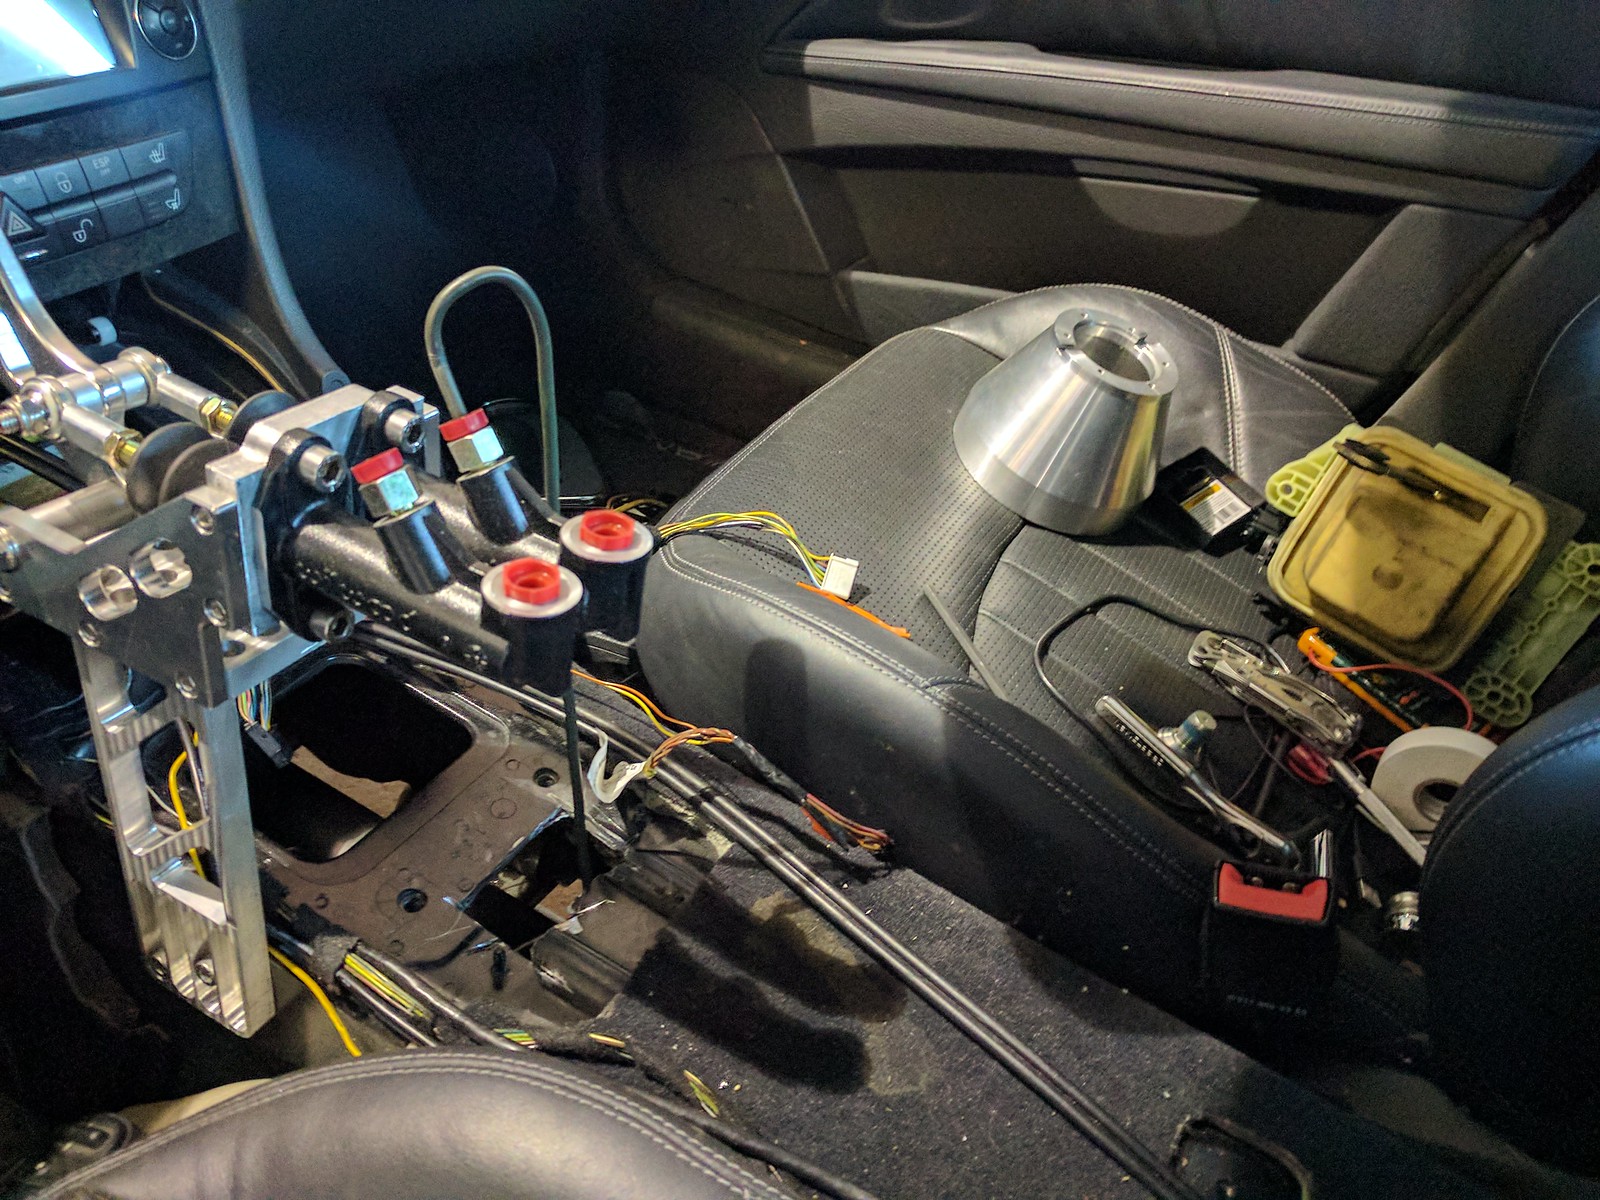
And with all this, was able to do some test fitting and plan where to drill, what to expect ergonomically and all that. Conveniently, since the Airmatic buttons are no longer needed, that module is taken out and the brake line will go through there.
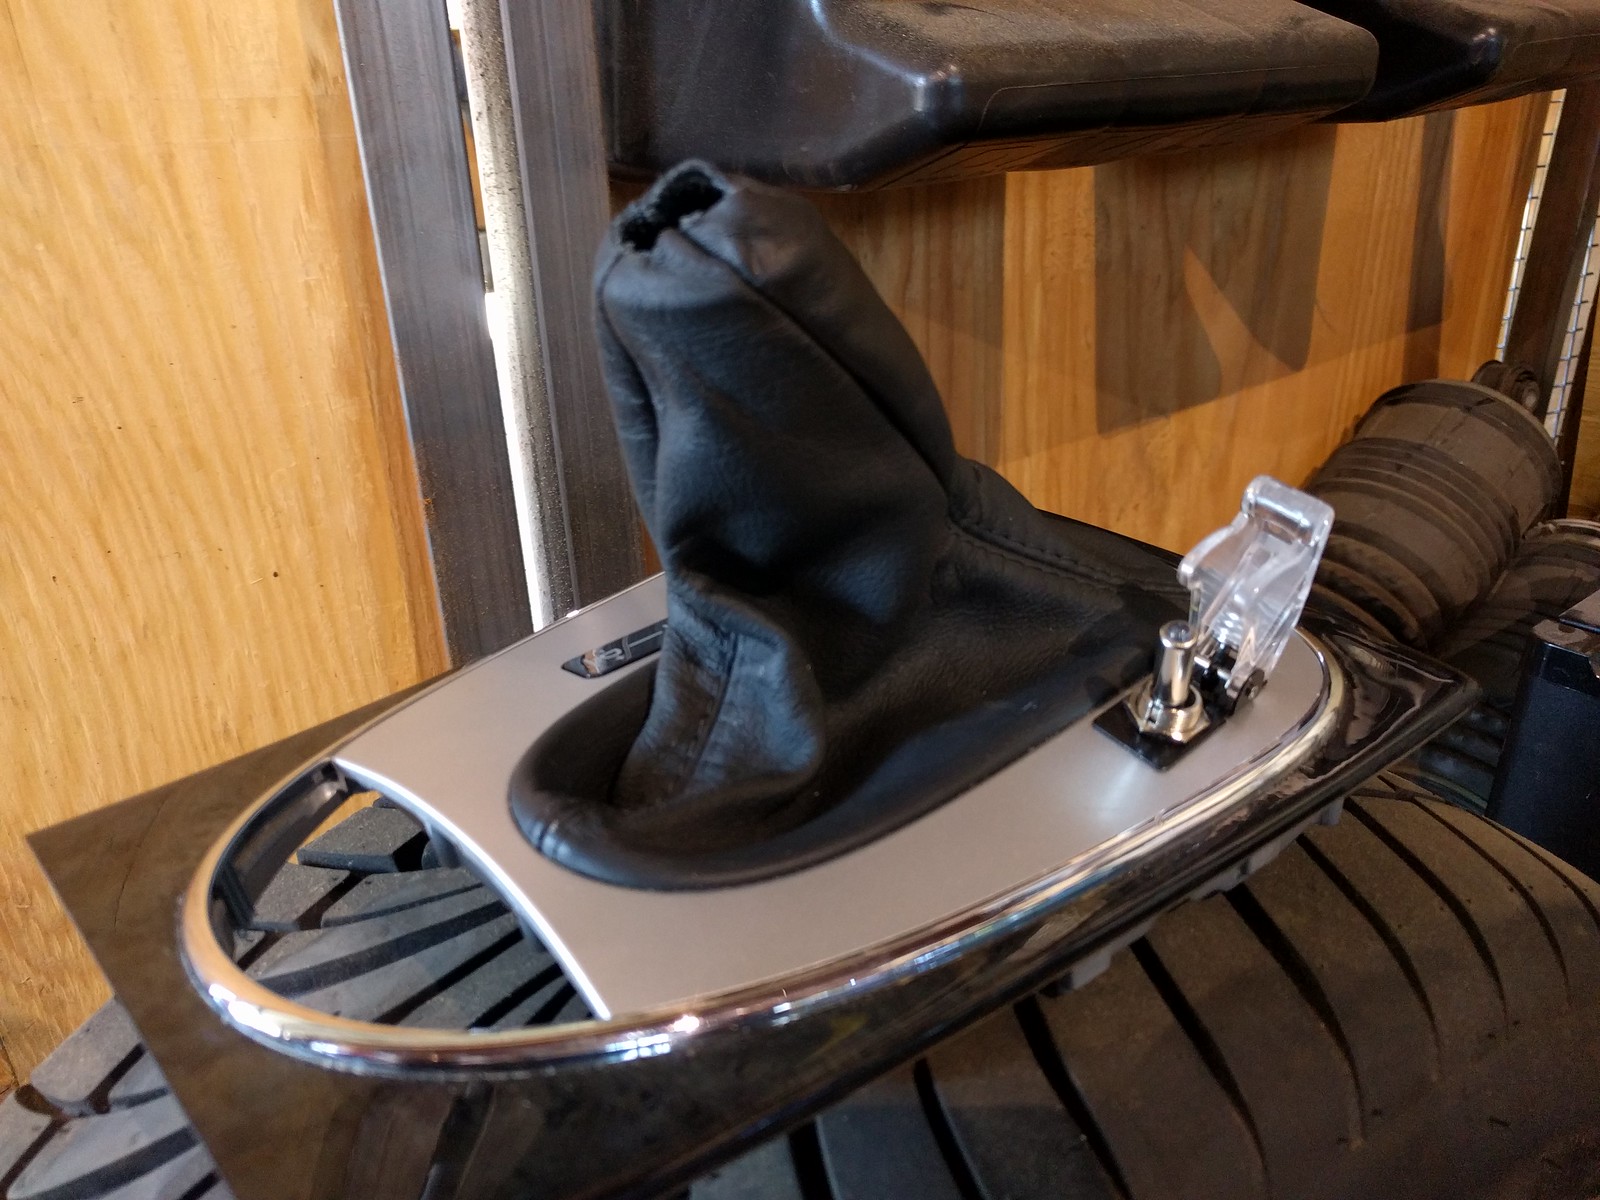
The opening in the tunnel for the brake lines will have to be drilled immediately beneath the shifter assembly (not shown), there is about 1-1.5" of room before you're really imposing on the cupholder and we wouldn't want to have to give that up. That wouldn't be very dapper, now would it?
Can't wait to share with you guys what James has been cooking up. Stay tuned.
Tapped the holes into the vertical plate, which was the last bit of machining for the brake project. This will also give you some idea of the scale:
And with all this, was able to do some test fitting and plan where to drill, what to expect ergonomically and all that. Conveniently, since the Airmatic buttons are no longer needed, that module is taken out and the brake line will go through there.
The opening in the tunnel for the brake lines will have to be drilled immediately beneath the shifter assembly (not shown), there is about 1-1.5" of room before you're really imposing on the cupholder and we wouldn't want to have to give that up. That wouldn't be very dapper, now would it?
Can't wait to share with you guys what James has been cooking up. Stay tuned.
06-06-2017, 04:28 AM
#131
MBWorld Fanatic!

Cool thread but goodluck with that guardroller on these cars. You'll do the front fine as long as your weary of not going overboard and cracking the alloy fenders. The rear will be doable if you cut the inner lip out or take to it with a BFH before hand.
These things arent silvias made of recycled tin cans. Those rear fenders are pretty solid. I have the exact same roller. So I know its doable but its not easy.
 06-06-2017, 02:06 PM
#133
Super Member
Thread Starter
Cool thread but goodluck with that guardroller on these cars. You'll do the front fine as long as your weary of not going overboard and cracking the alloy fenders. The rear will be doable if you cut the inner lip out or take to it with a BFH before hand.
These things arent silvias made of recycled tin cans. Those rear fenders are pretty solid. I have the exact same roller. So I know its doable but its not easy.
These things arent silvias made of recycled tin cans. Those rear fenders are pretty solid. I have the exact same roller. So I know its doable but its not easy.
 06-07-2017, 03:33 PM
#135
Super Member
Thread Starter
Looks like ASD fitting adapters will arrive next Wednesday.
Expect fun updates between now and end of next week.
EDIT: Double checked my amp's specs and it would appear it is stable down to 1ohm/channel, but to maintain comparable driver volumes I ended up wiring in the rear parcel speakers in series with the door circuits.
Front doors = 2ohm each,
rear doors = 2 ohm each,
parcel speakers - 2 ohm each.
So I'm giving up some power and runner two channels at 2+2+2=6ohms. The other two each drive a coil on the subwoofer.
All of this with just a single $180 amp and it sounds great. Between this and the Android headunit, it is a very cost effective sound upgrade.
Alternatively I could've run the three circuits in parallel to each other for a total of 1.5ohms per channel, but in my case the amp is powerful enough to where it really does not make a difference.
Last edited by jumph4x; 06-08-2017 at 02:05 AM.

 . Didn't know it could look that pretty.
 06-12-2017, 10:50 PM
#142
Super Member
Thread Starter
Just got back from the shop. It's getting so close, I'm getting butterflies in my stomach! I've got a helmet in the mail and will be running the car ins Sonoma Drift on the 28th of June!
Marking off the mounting point for the hydro rear assembly:
Drilling the mounting holes:
Marking off roughly where to cut for the brake line routing:

Grinding in the interior and the lighting made for an epic scene:
Prototype bend and how it approaches the master cylinders:
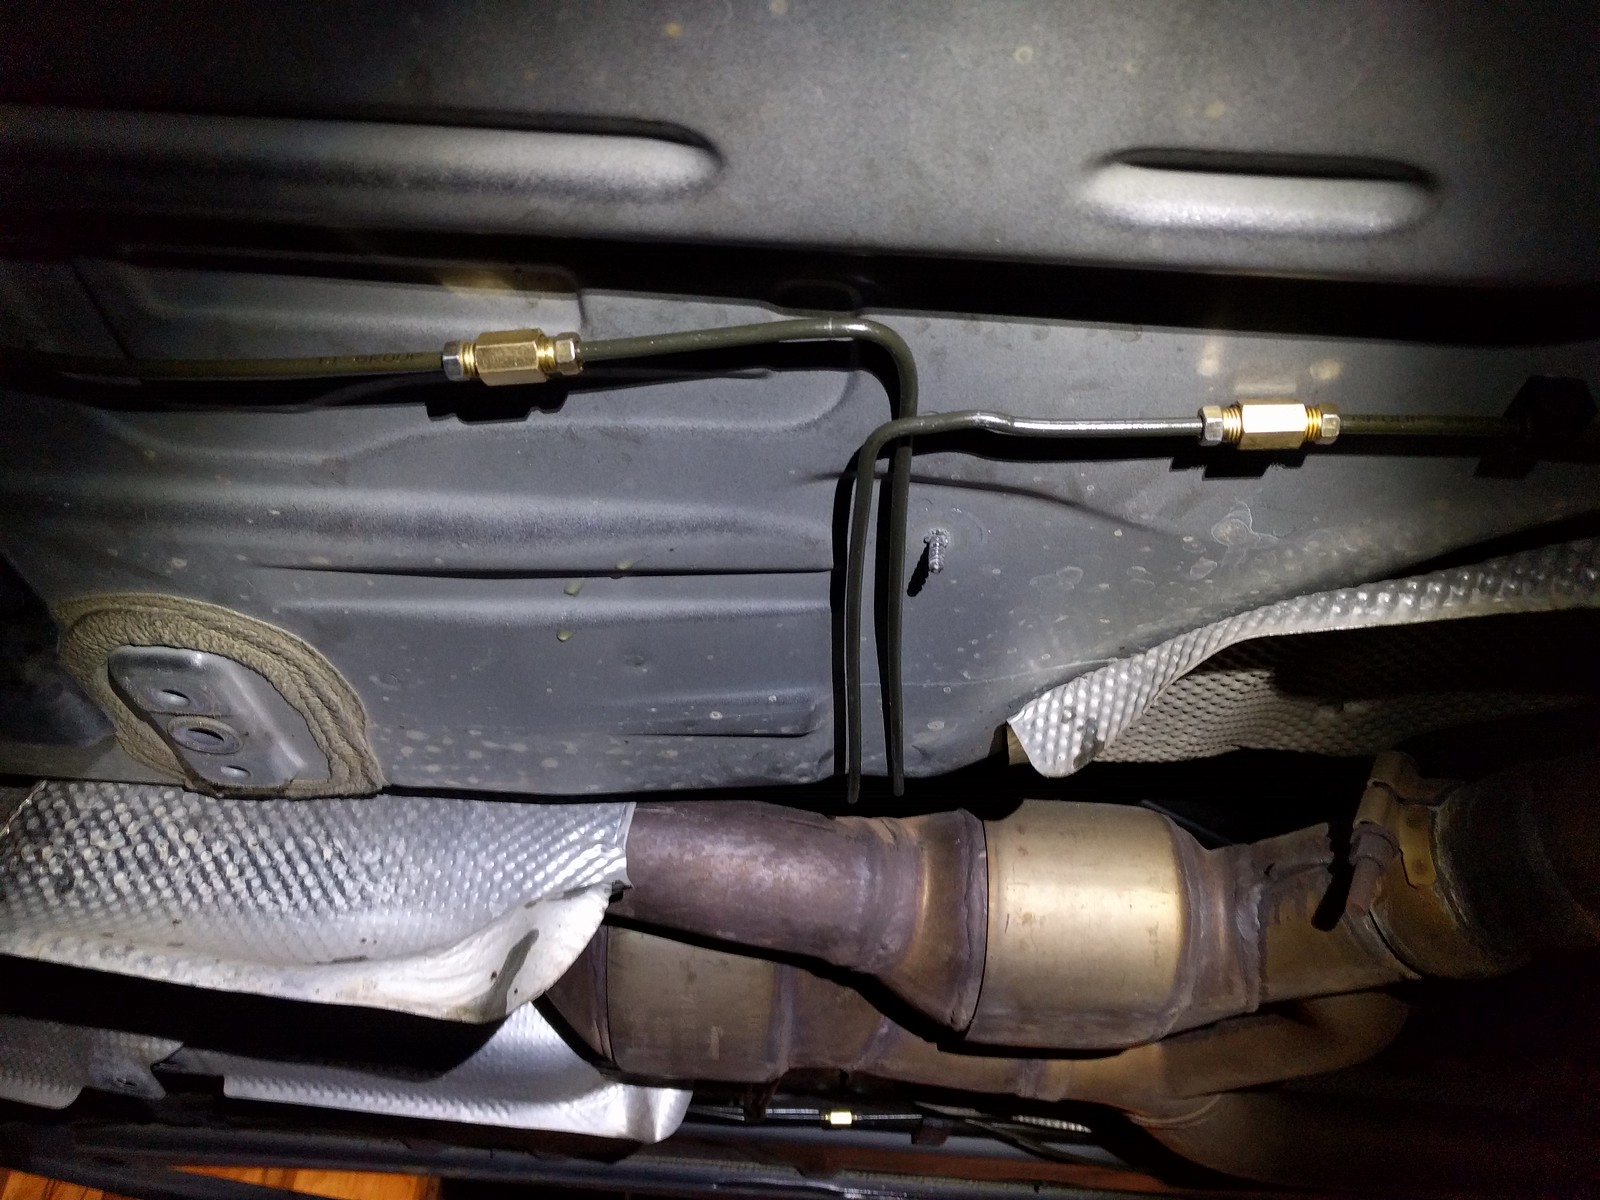
The line path, basically meant to come down from the MC and follow the cross-section contour of the driveshaft tunnel (routed under the heatshield) and eventually under the floor:

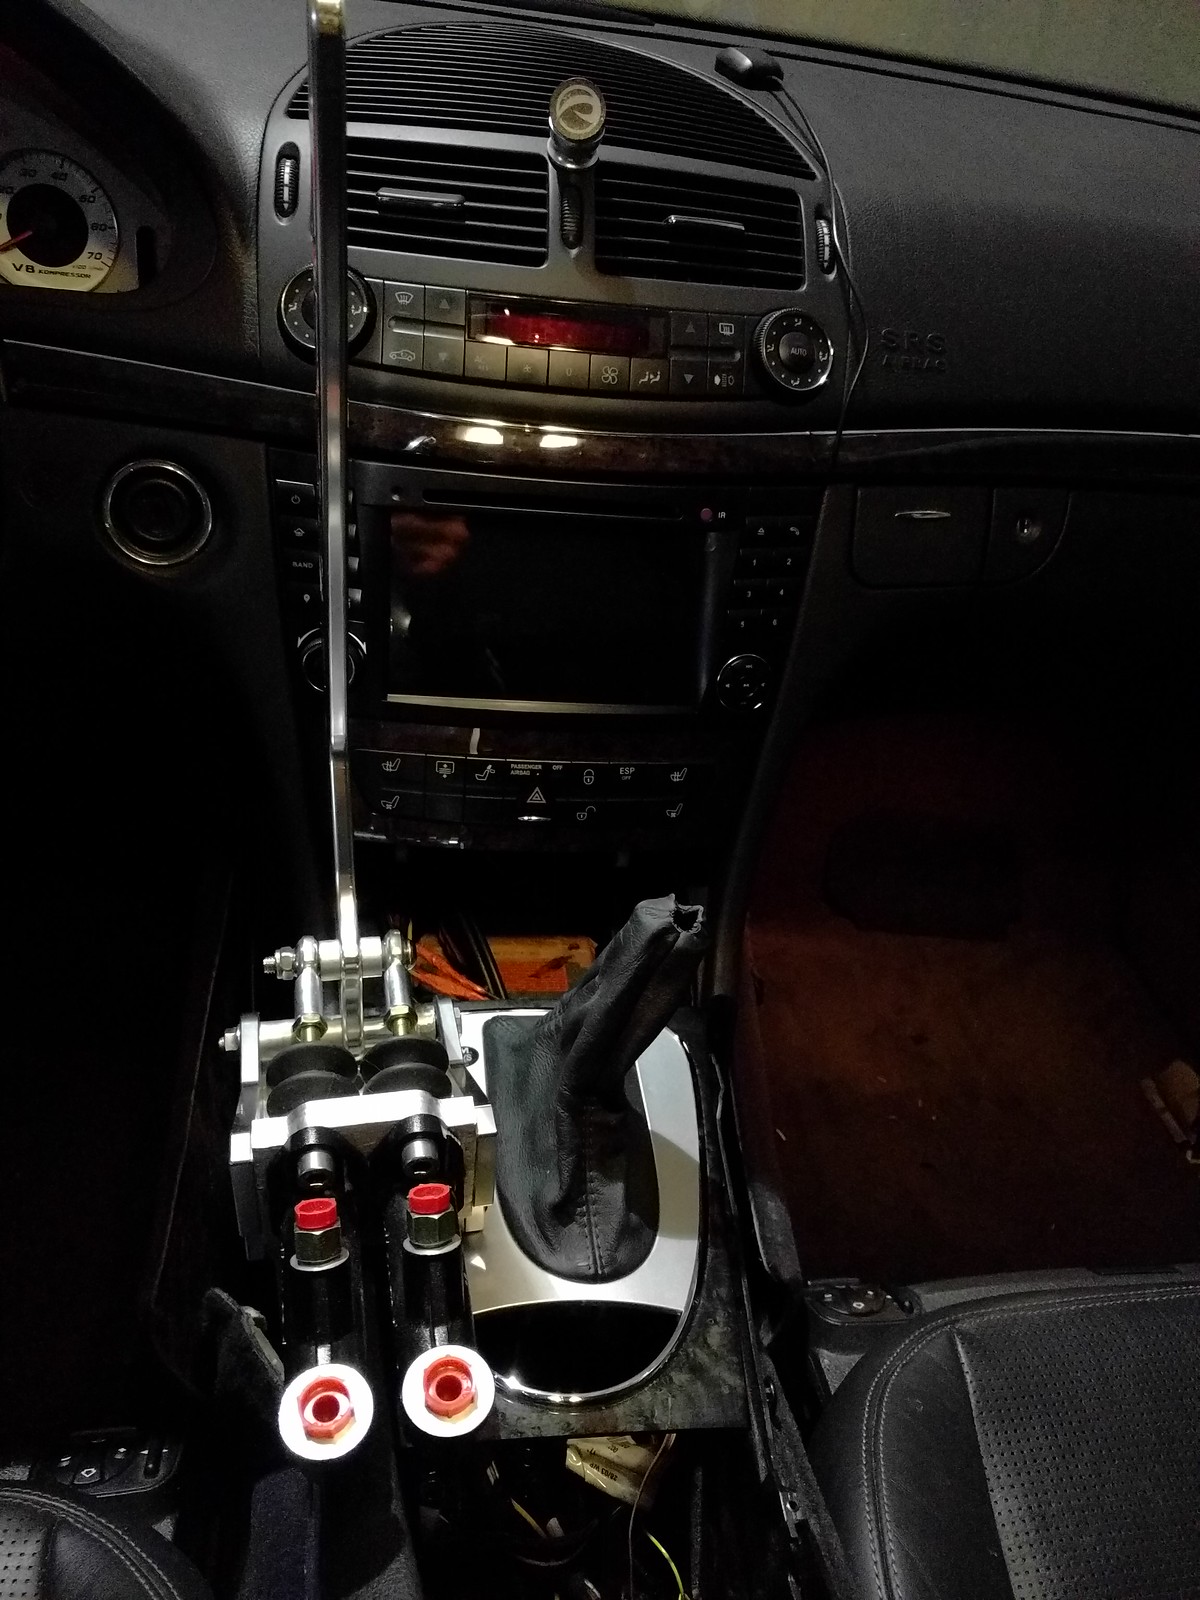
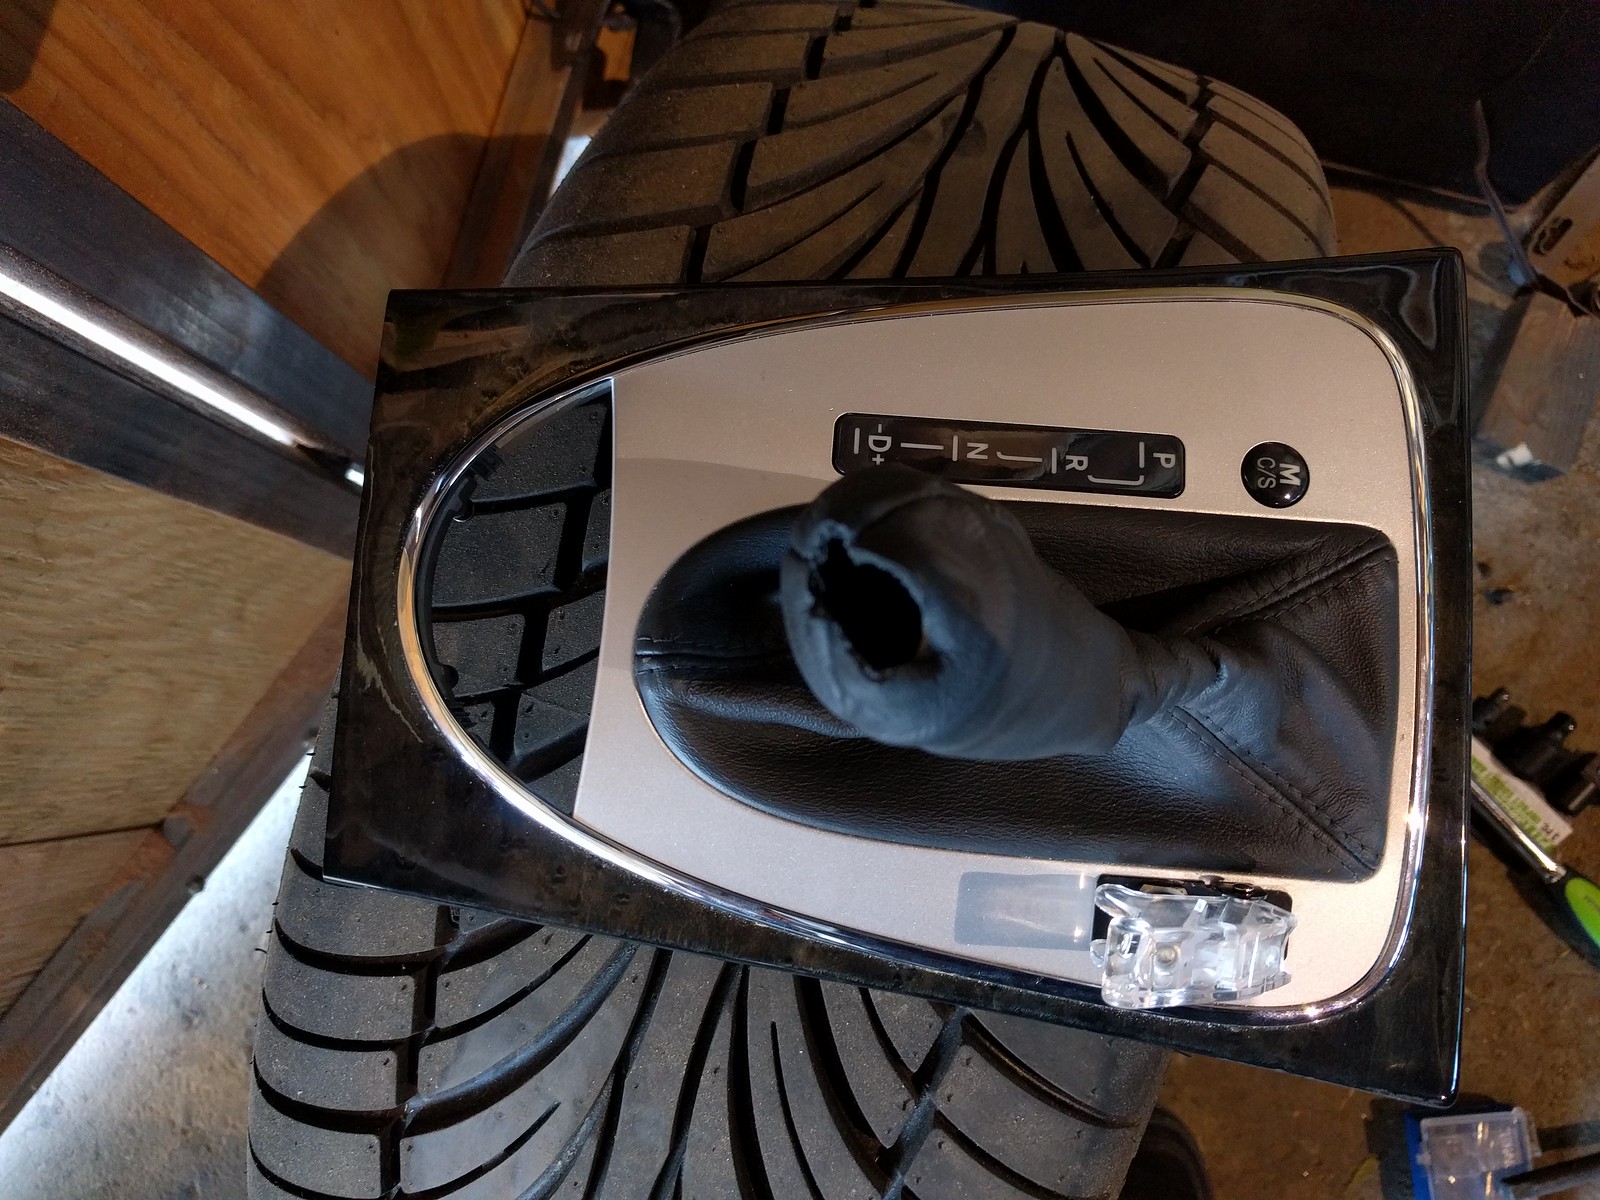
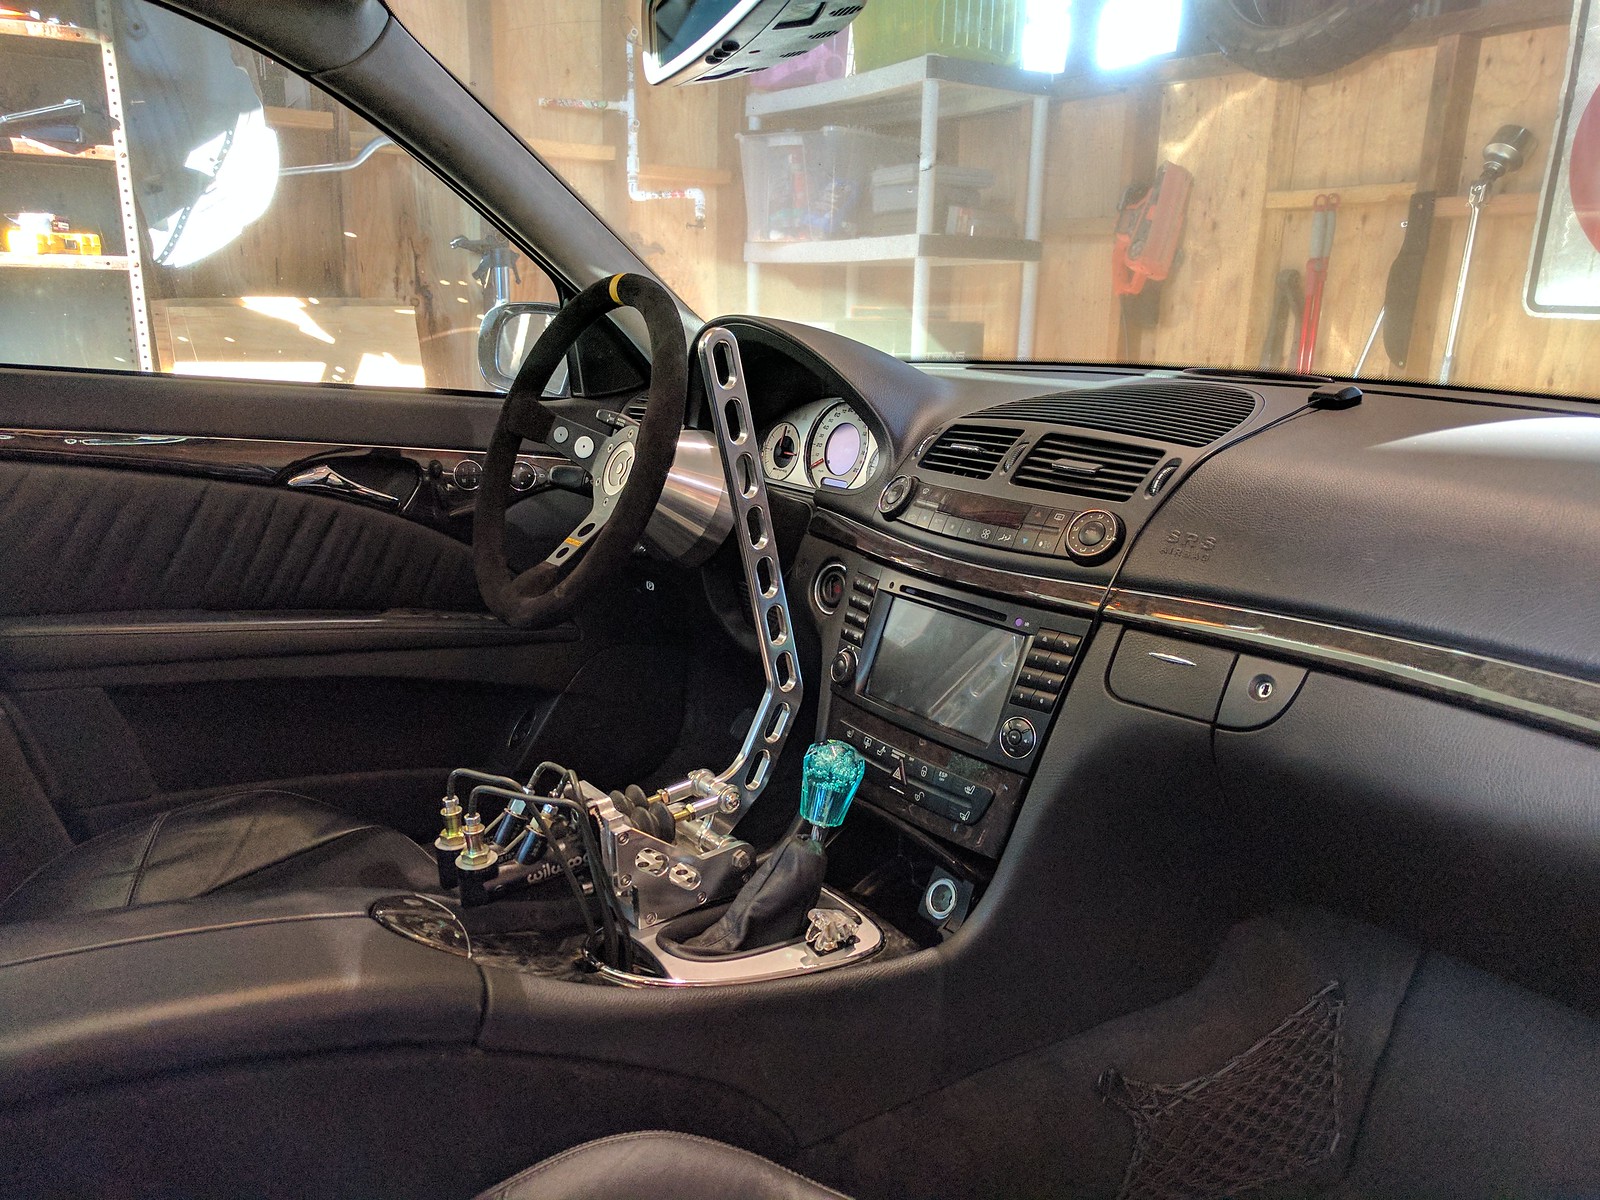
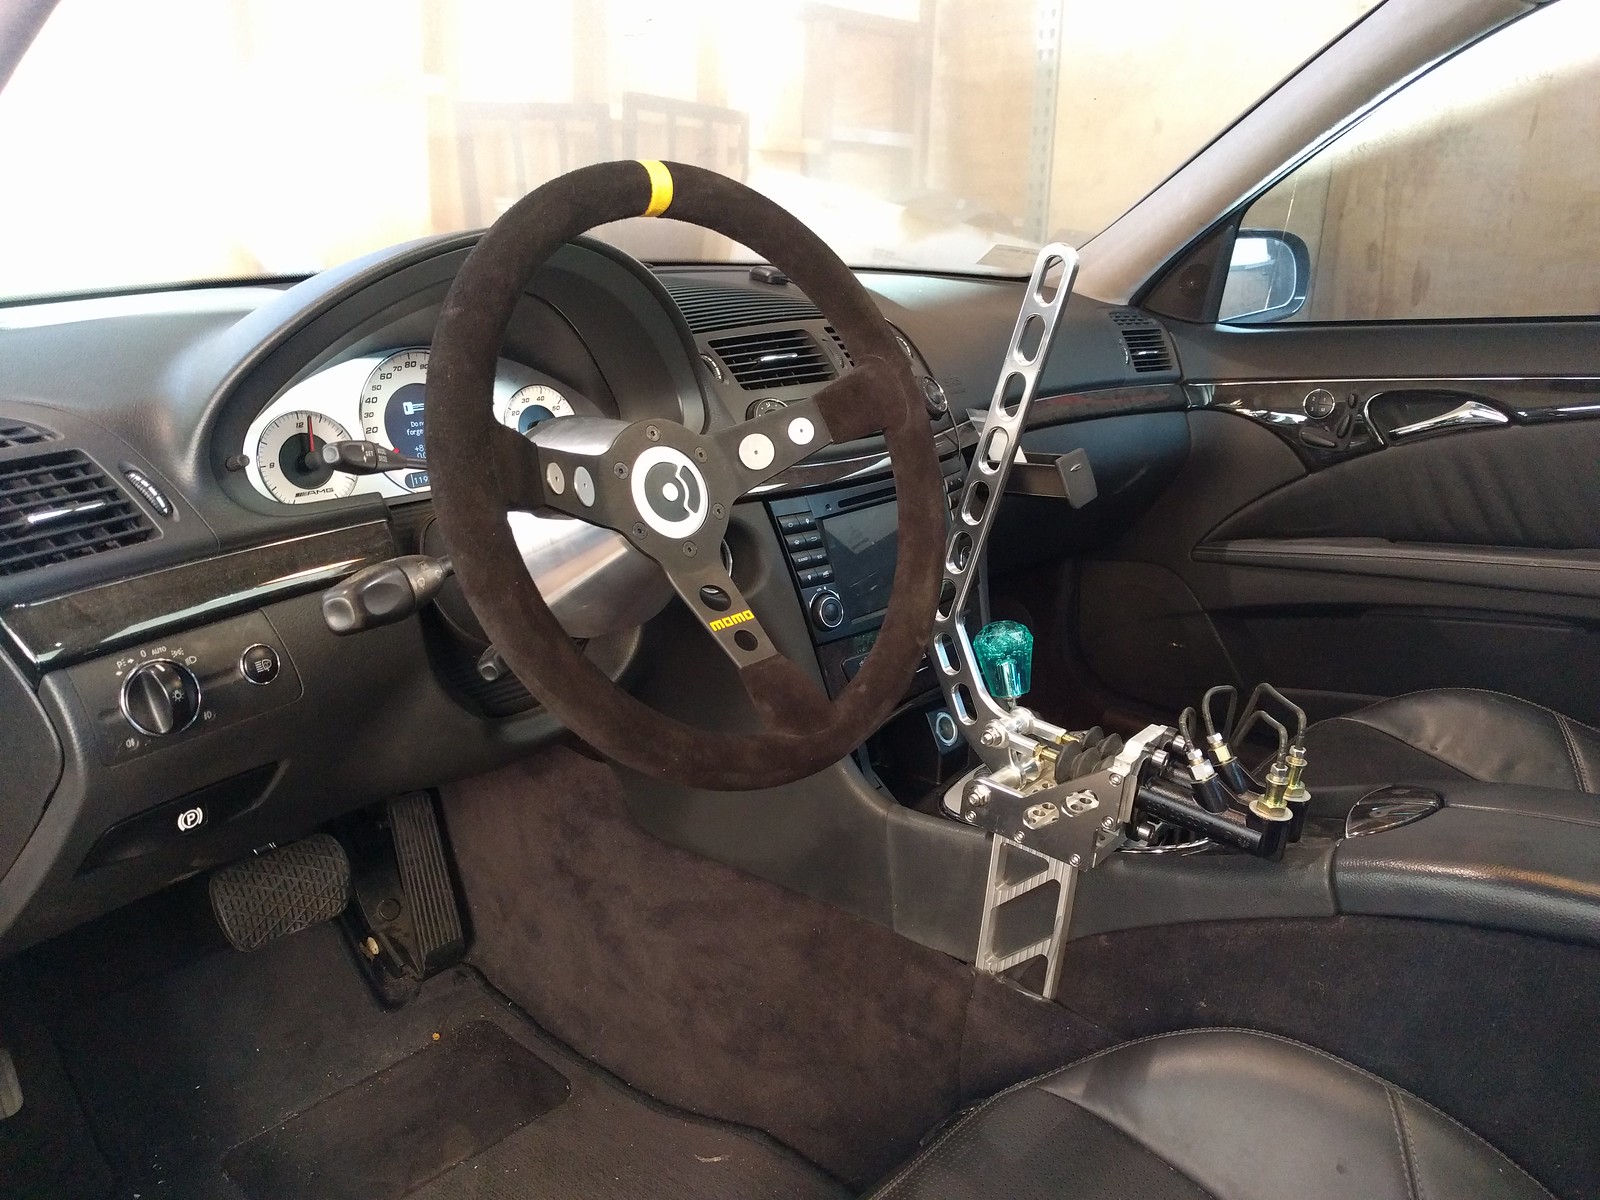
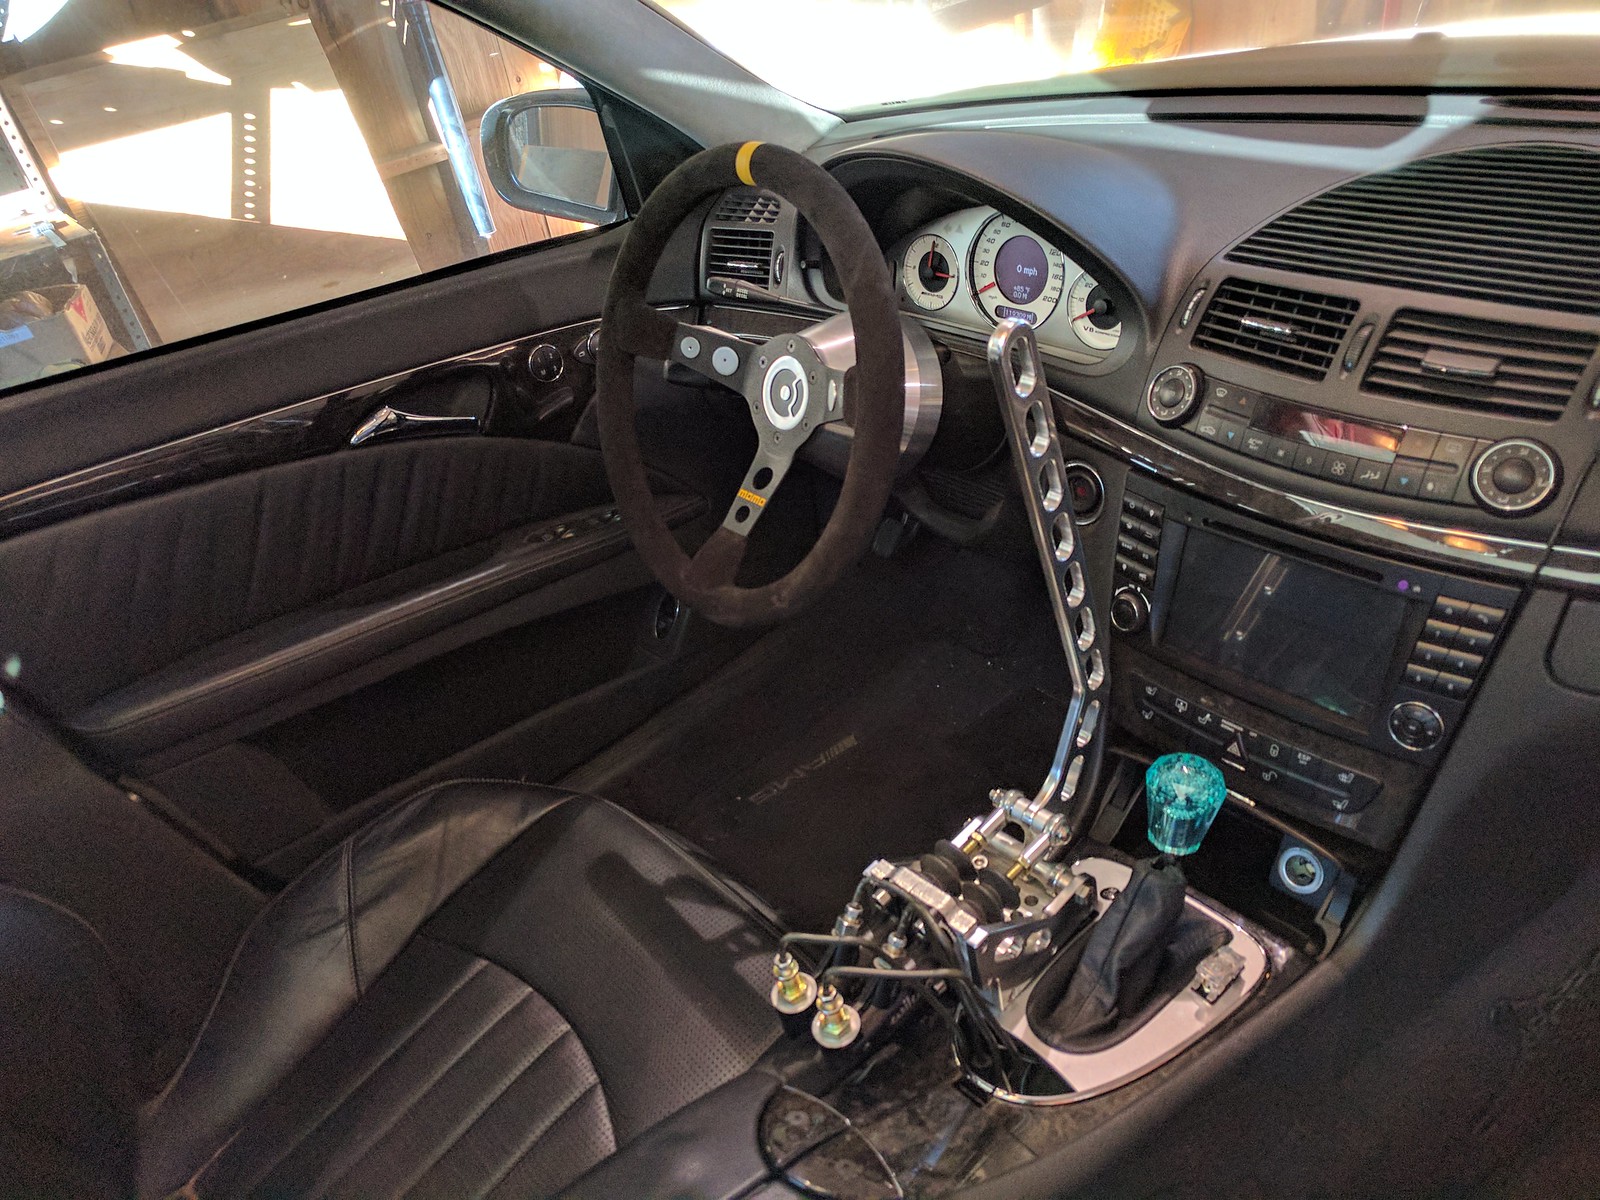
Here is what this will look like with the center console back in place:
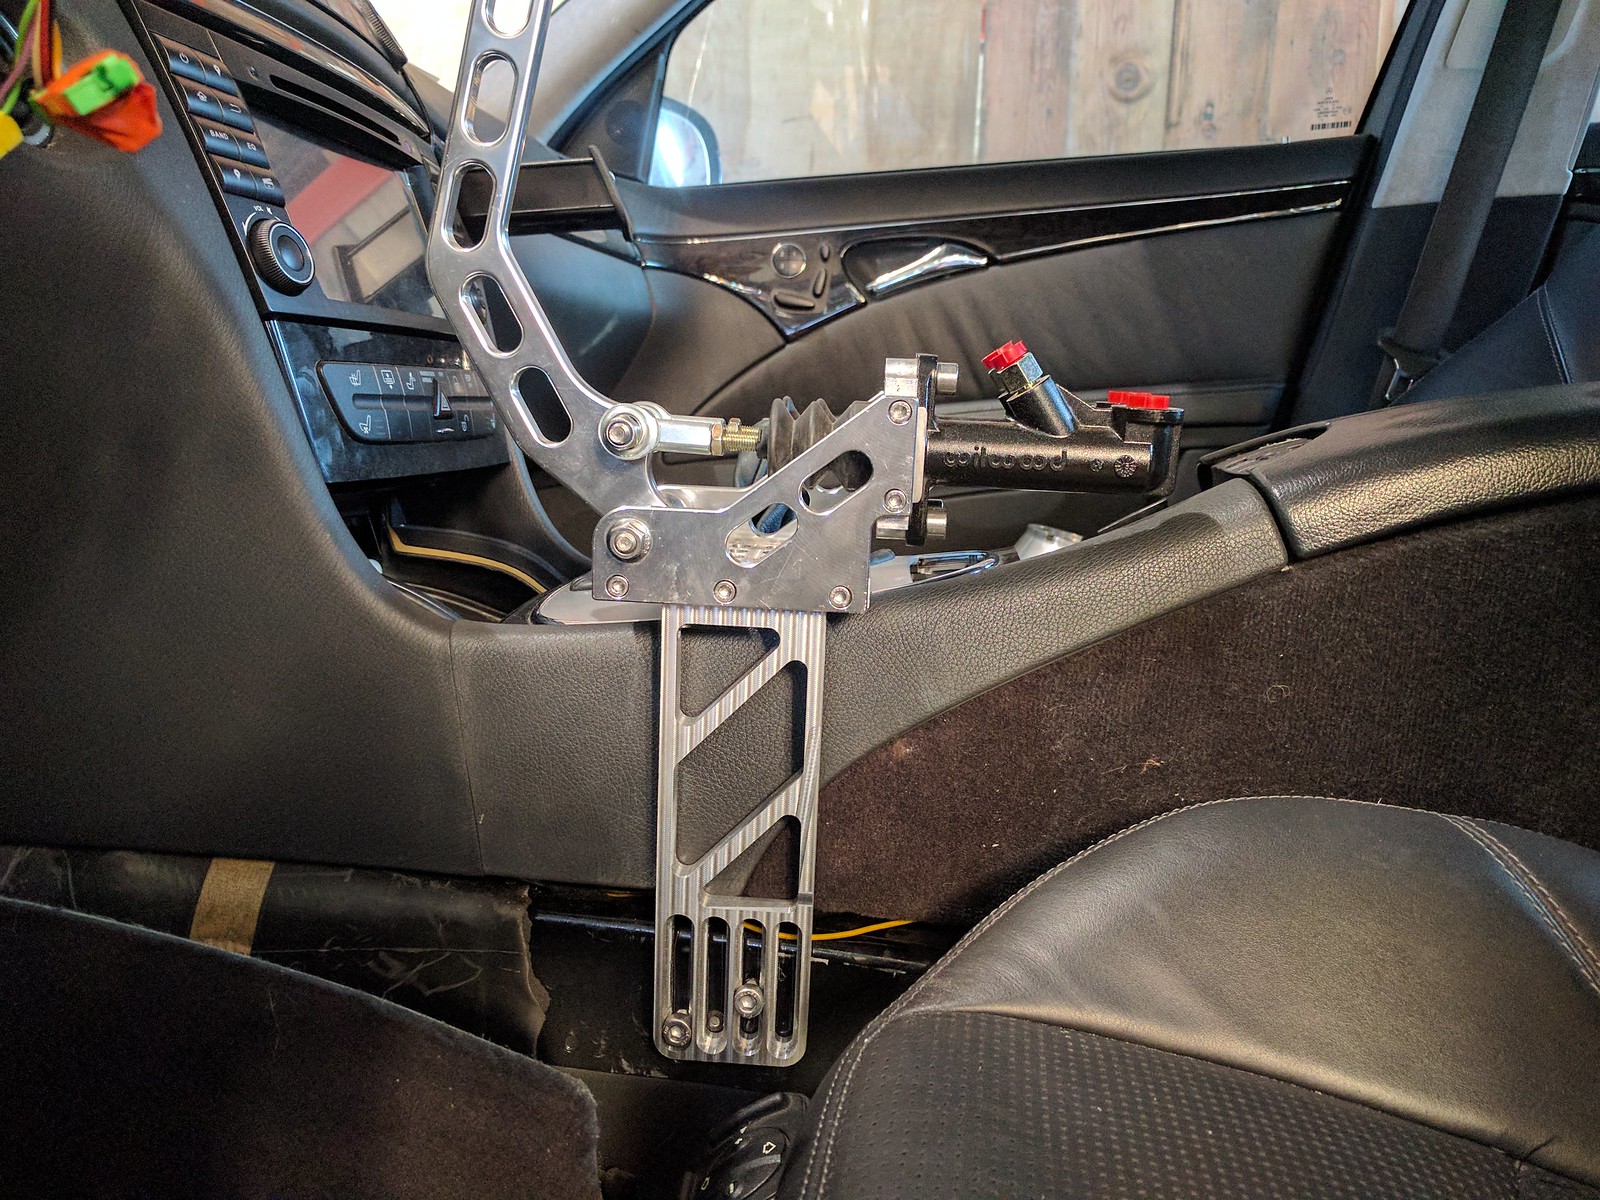
Looks like the original plan of keeping even the cupholder will work out!
Marking off the mounting point for the hydro rear assembly:
Drilling the mounting holes:
Marking off roughly where to cut for the brake line routing:
Grinding in the interior and the lighting made for an epic scene:
Prototype bend and how it approaches the master cylinders:
The line path, basically meant to come down from the MC and follow the cross-section contour of the driveshaft tunnel (routed under the heatshield) and eventually under the floor:
Here is what this will look like with the center console back in place:
Looks like the original plan of keeping even the cupholder will work out!
06-12-2017, 10:58 PM
#143
Super Member
Thread Starter
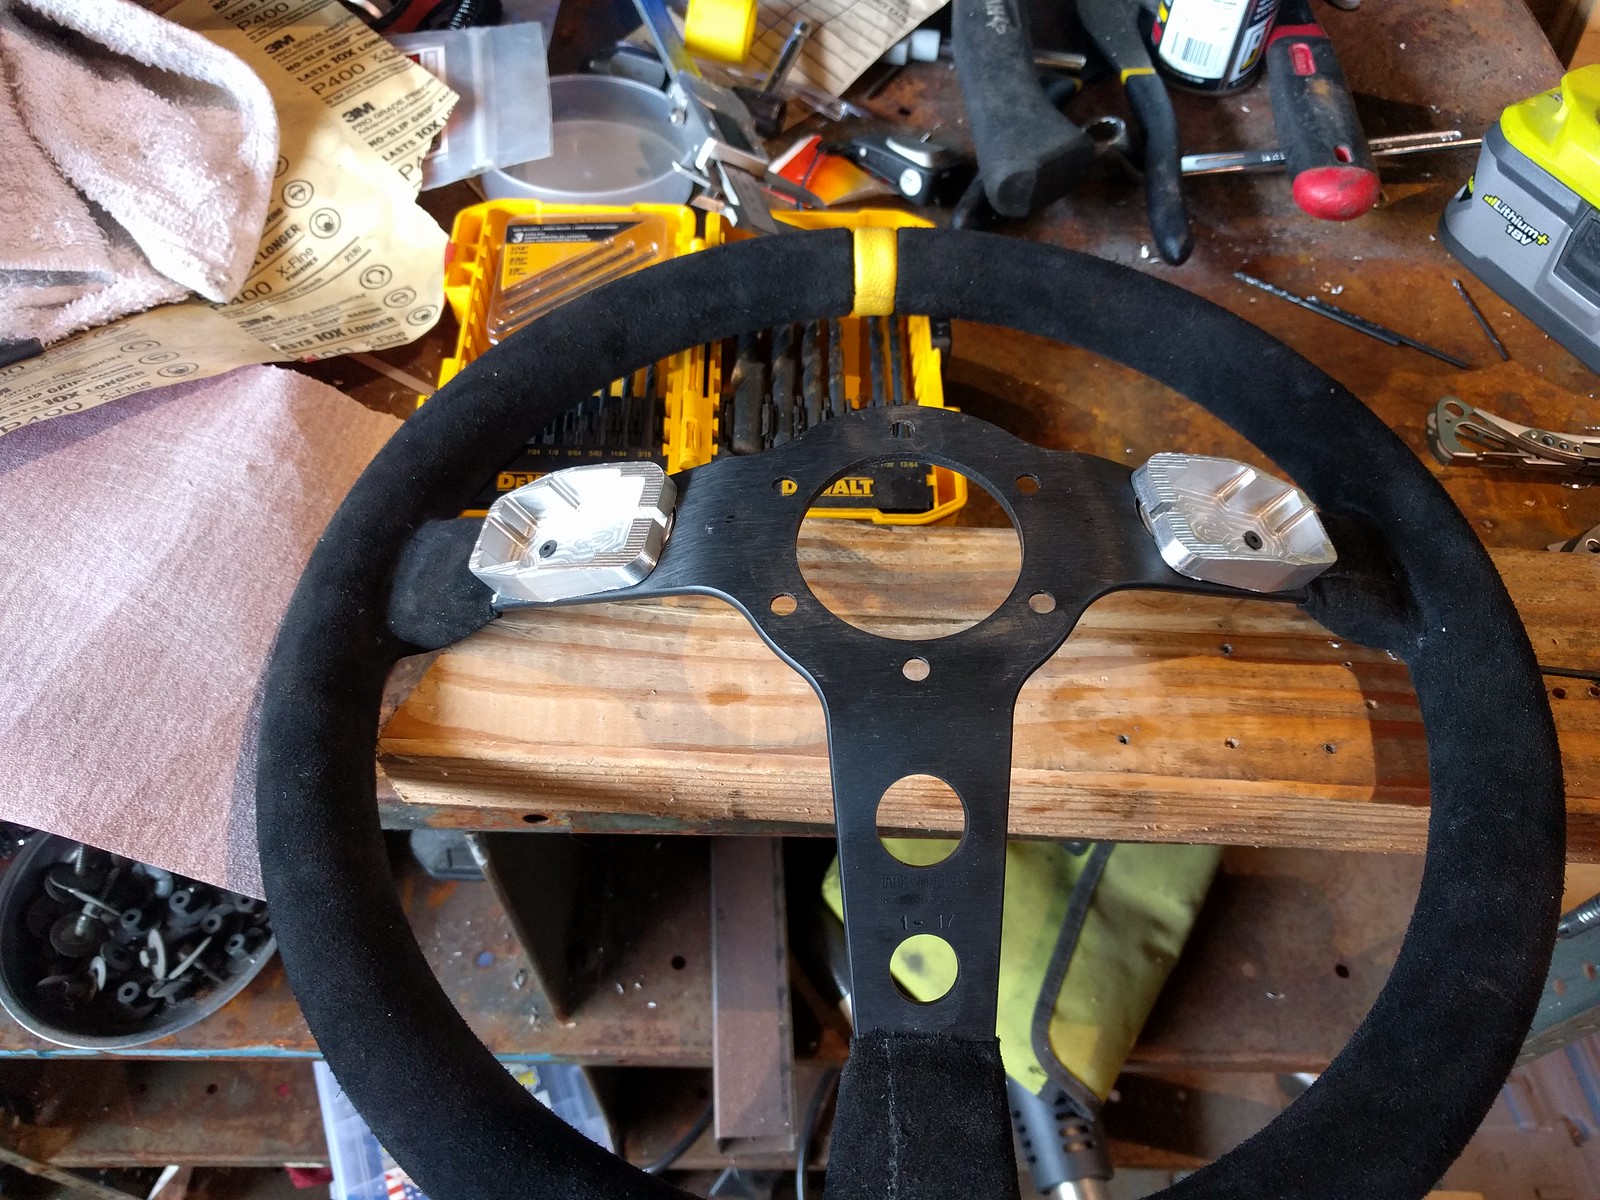
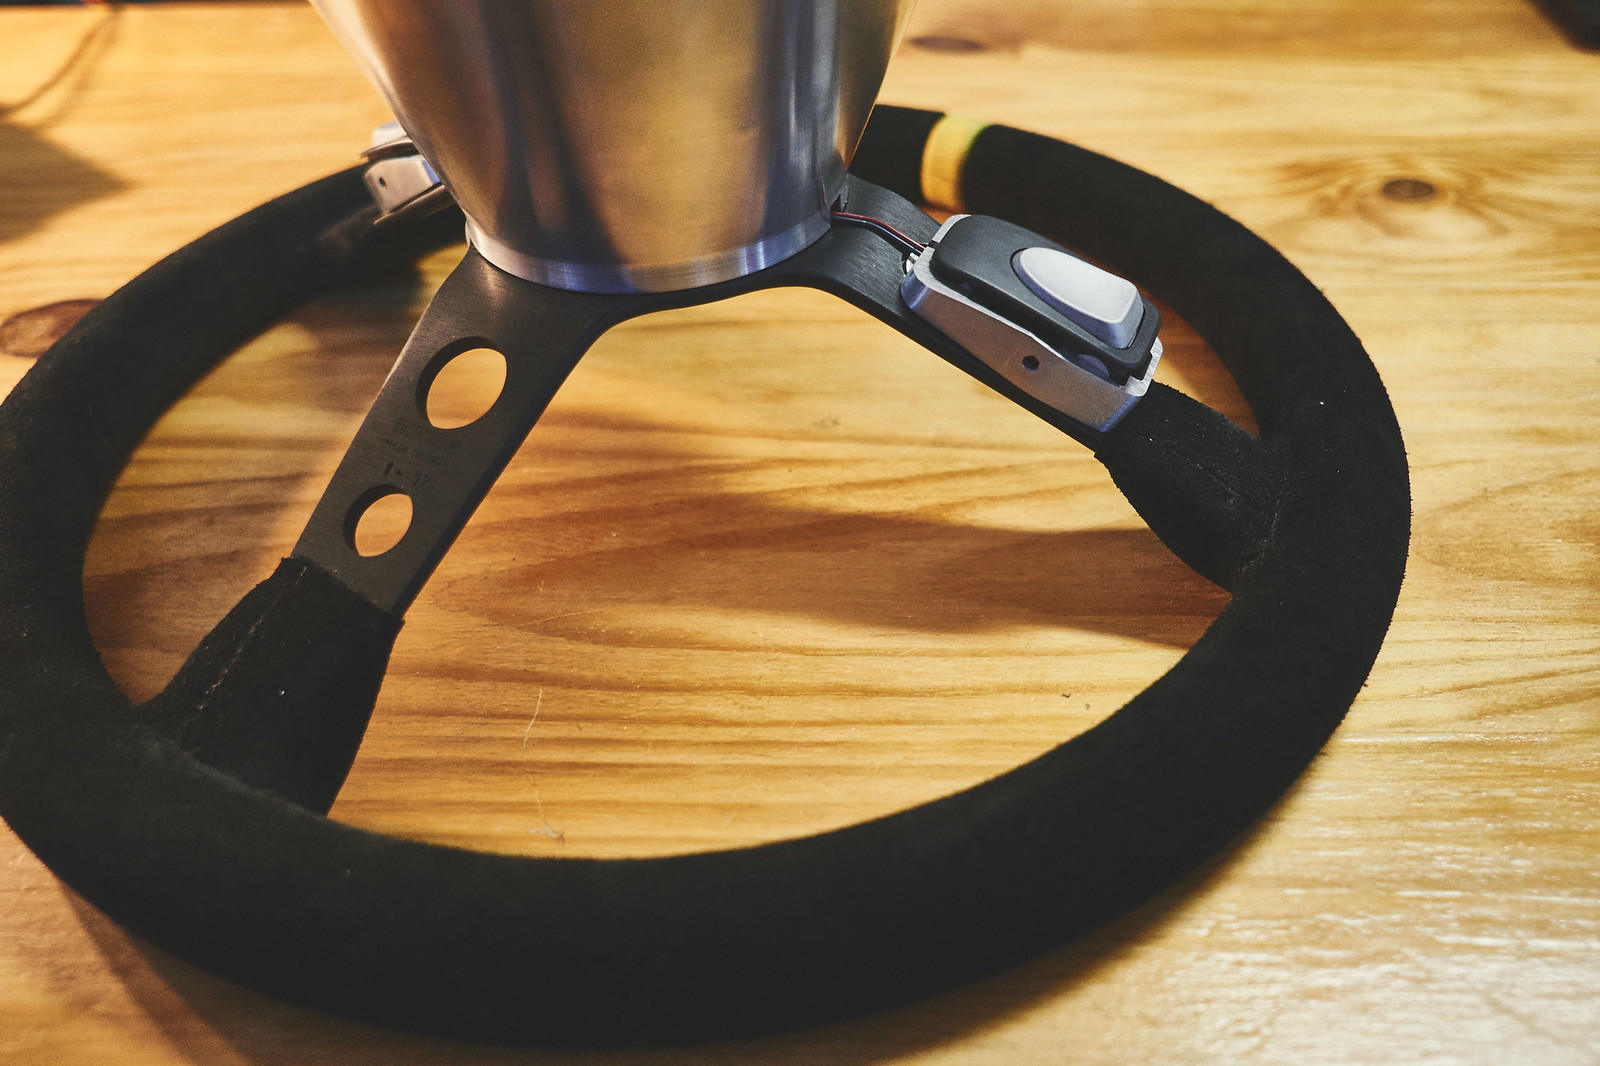
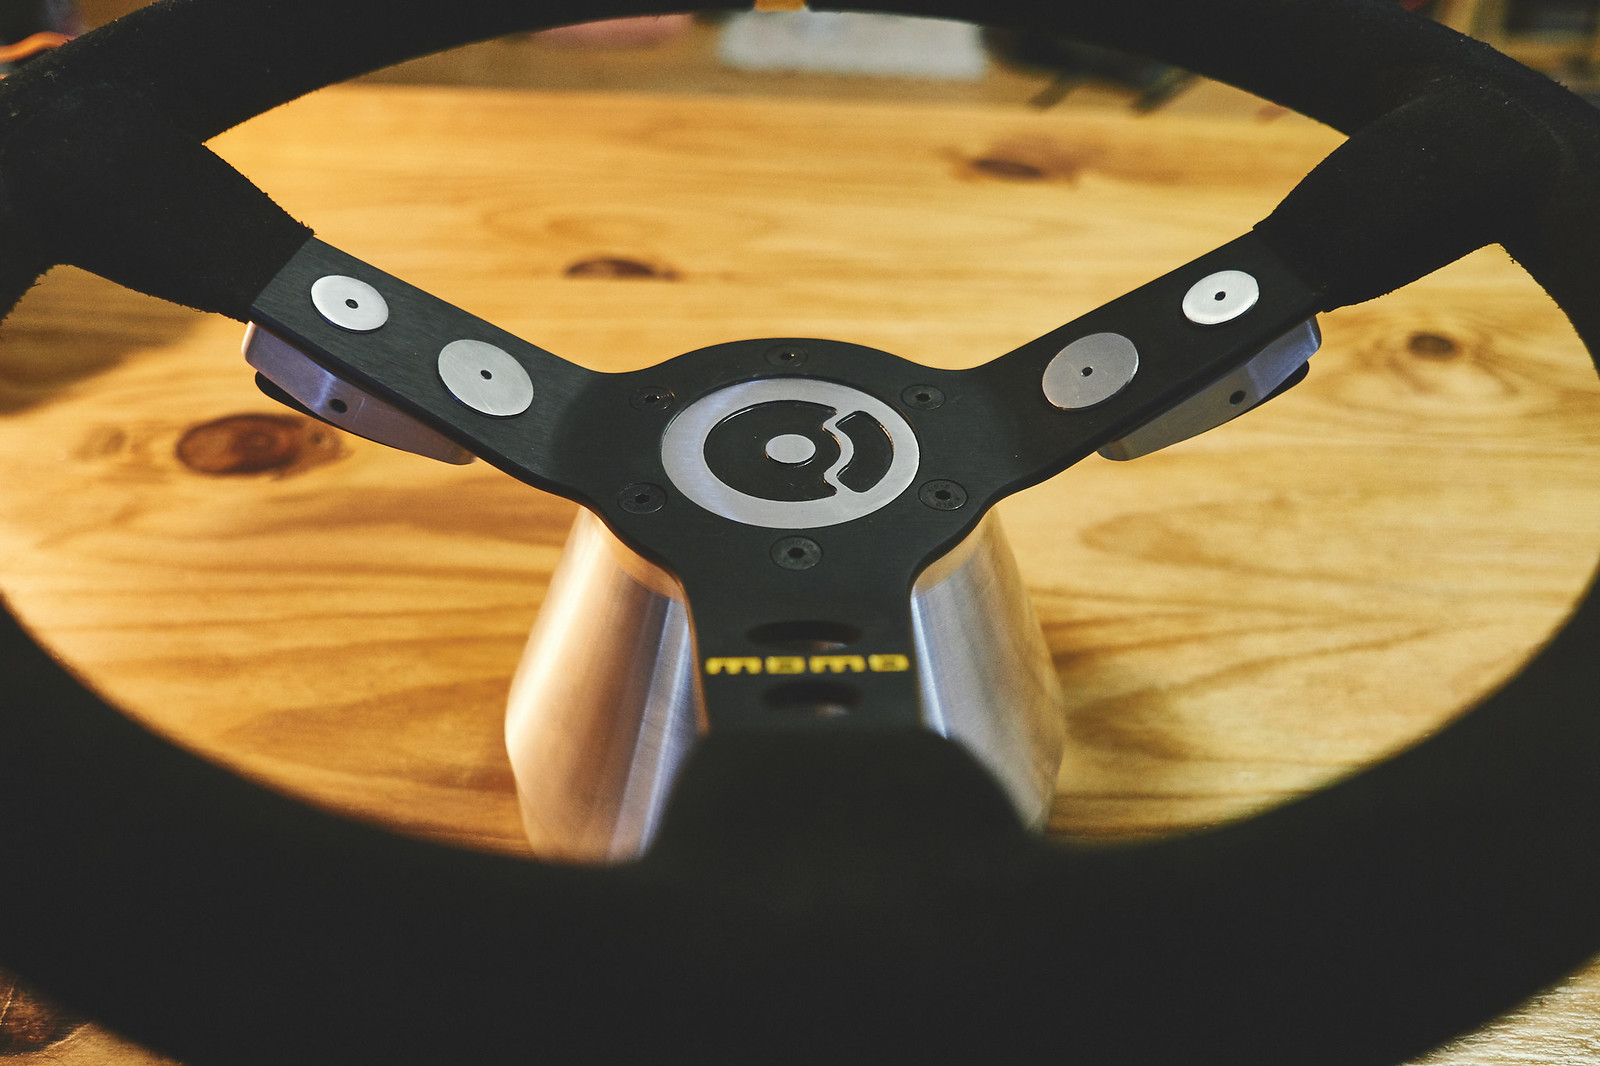
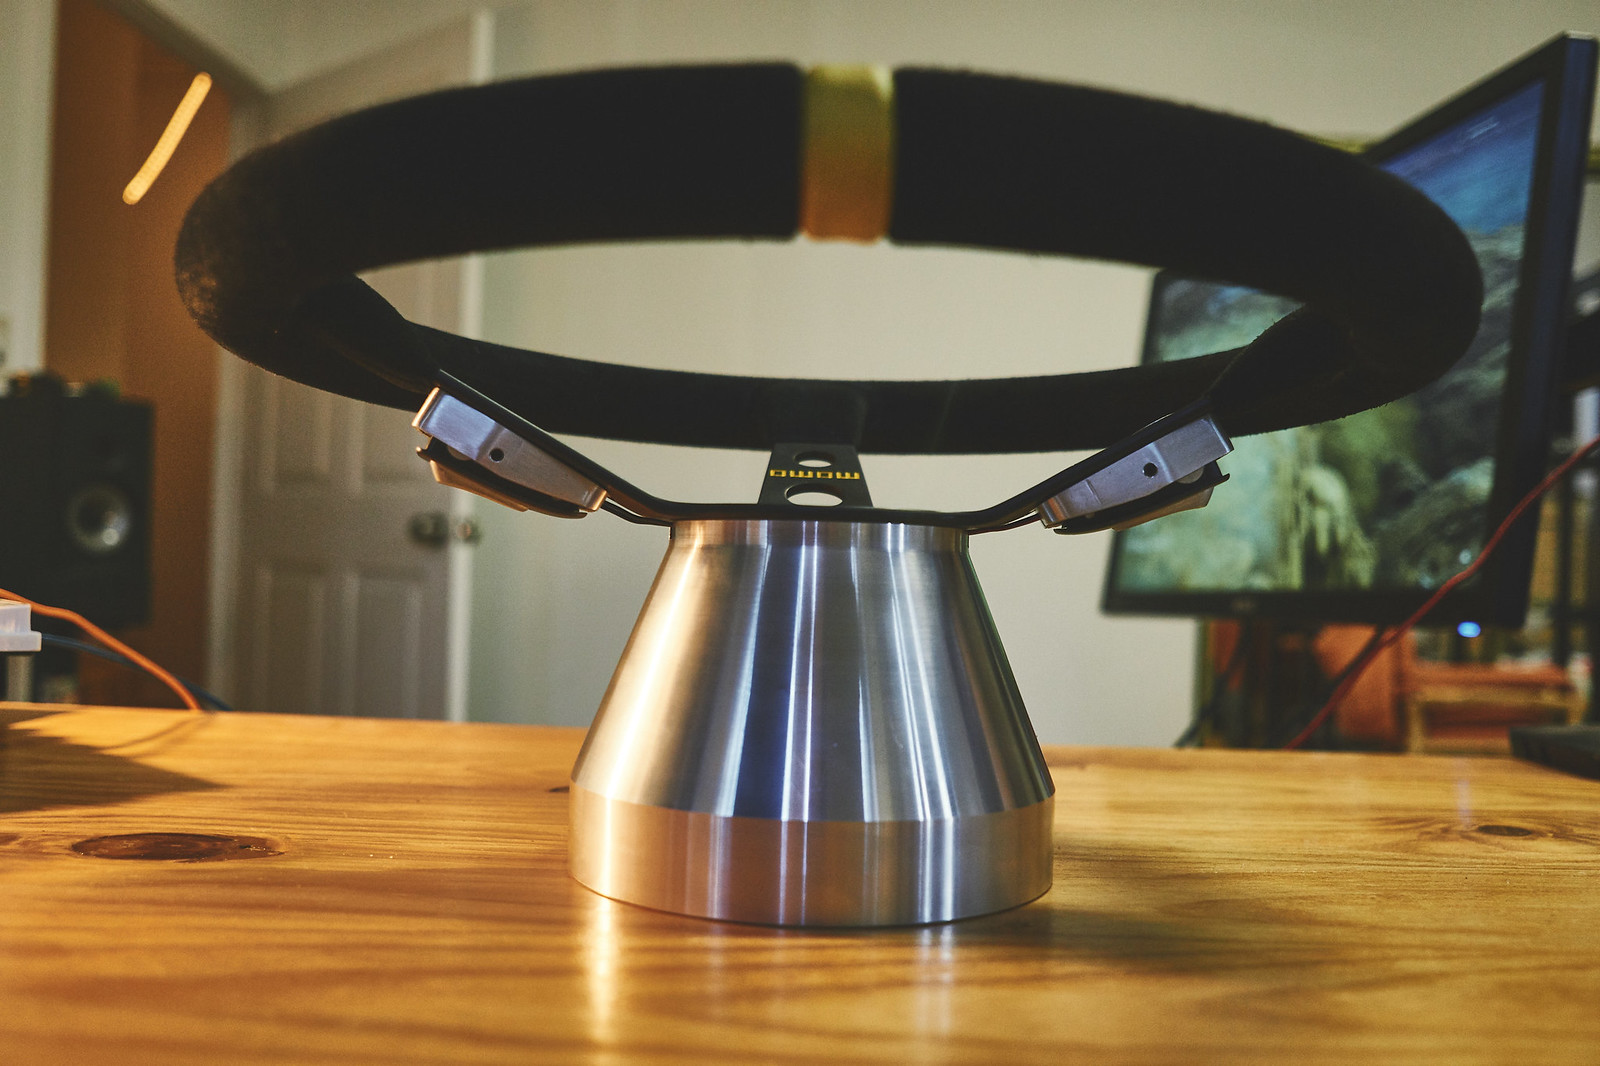
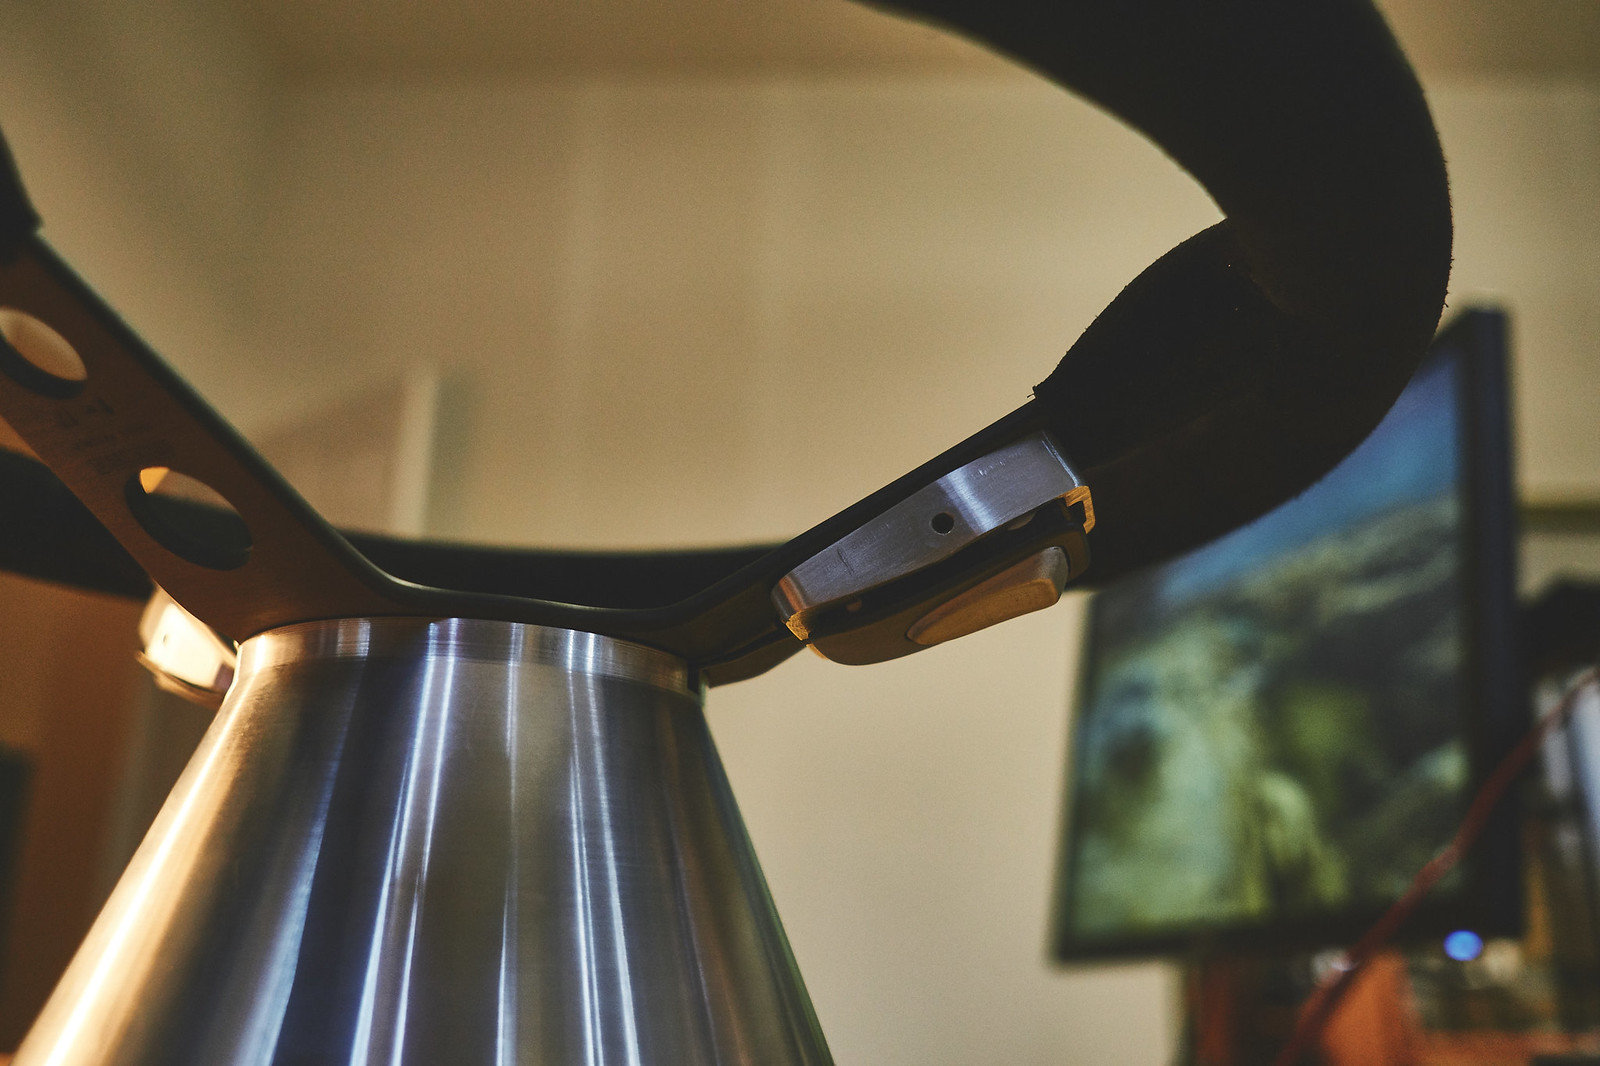
Now for the steering wheel shop pictures.
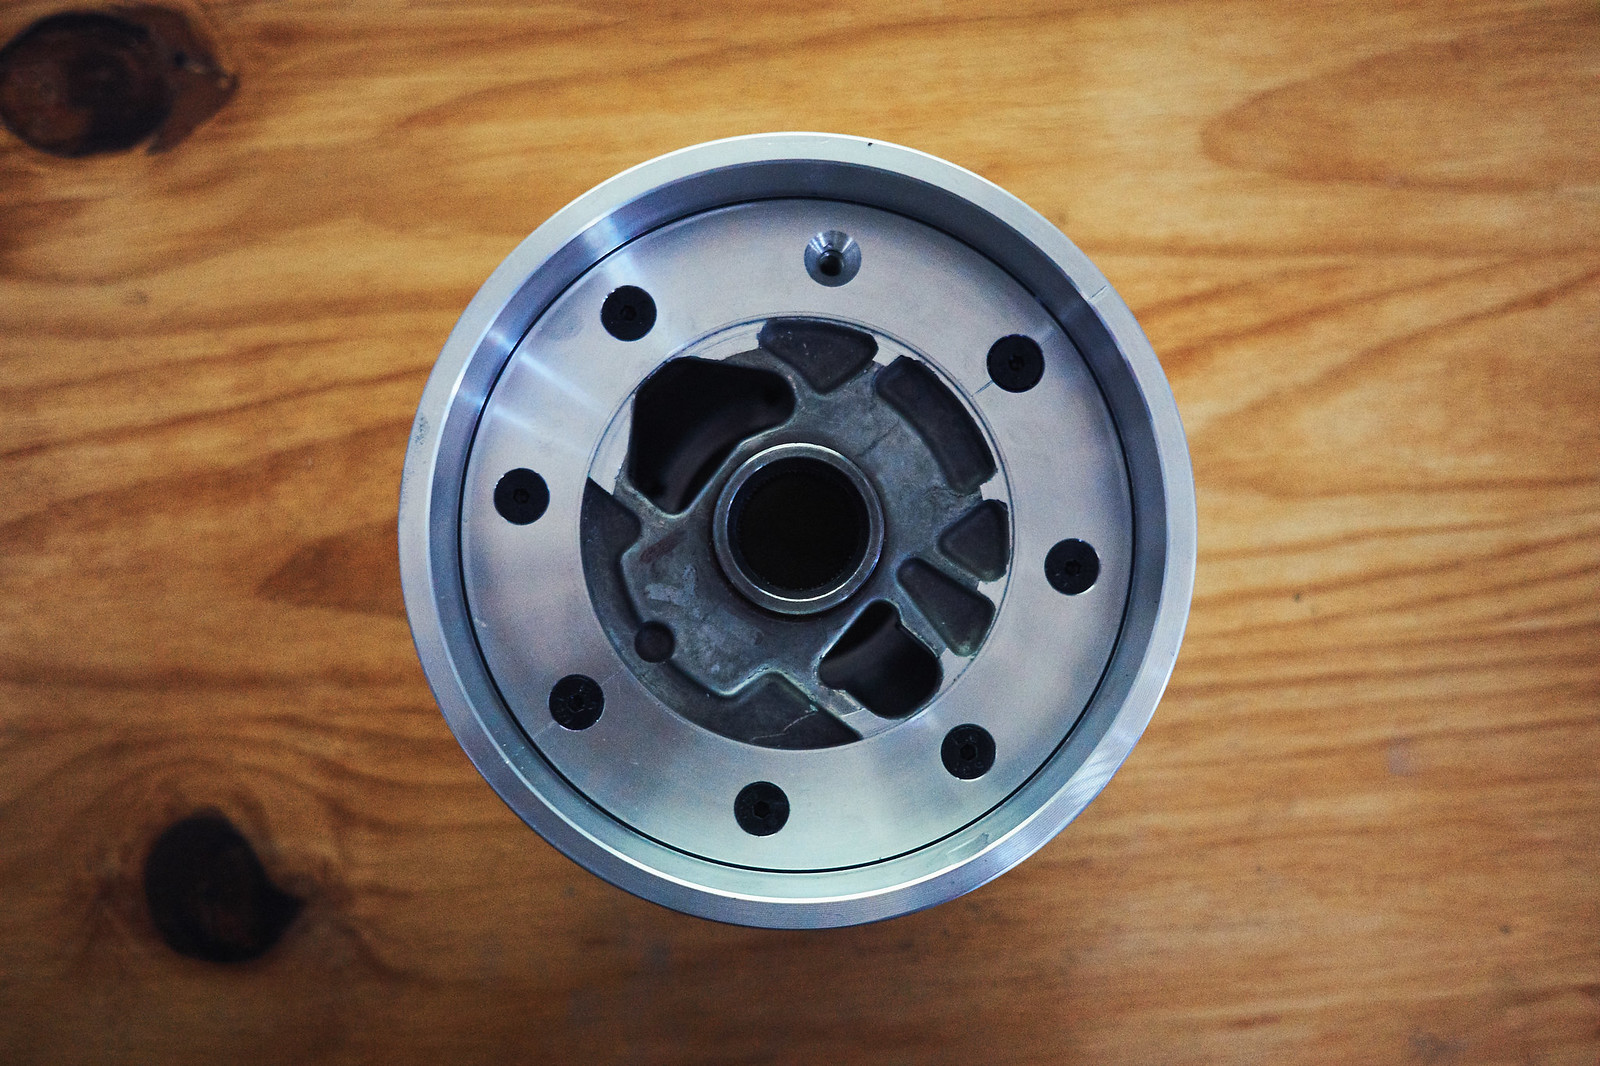
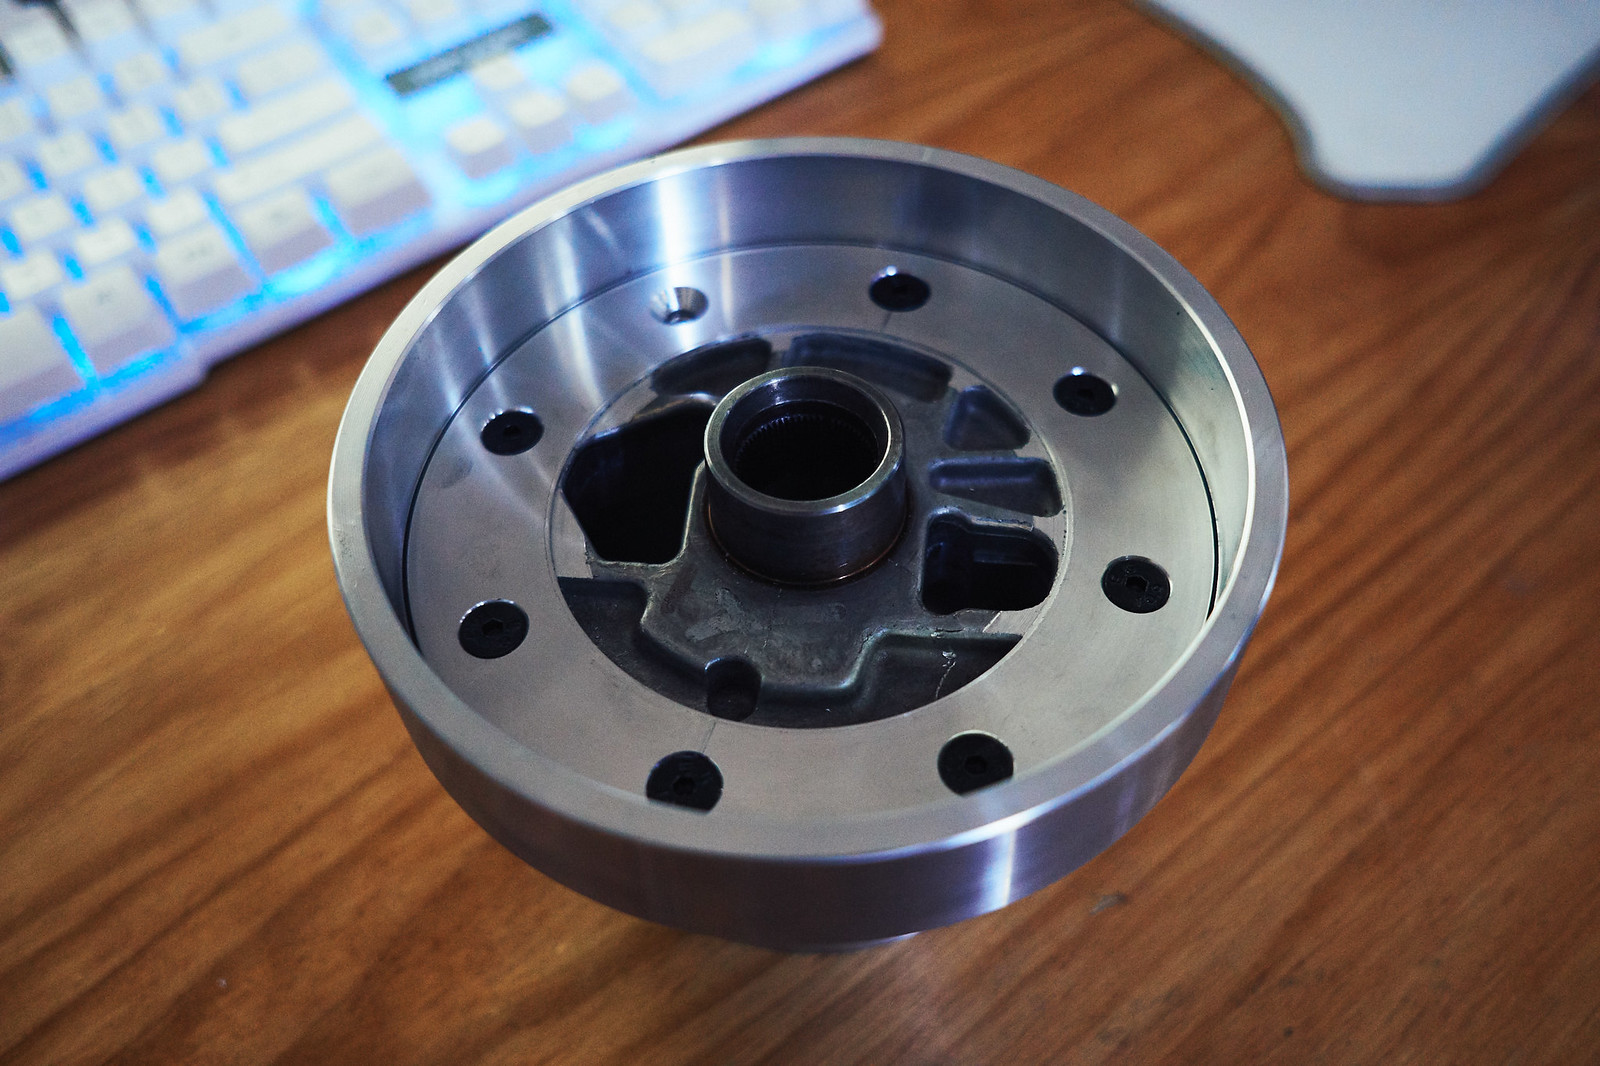
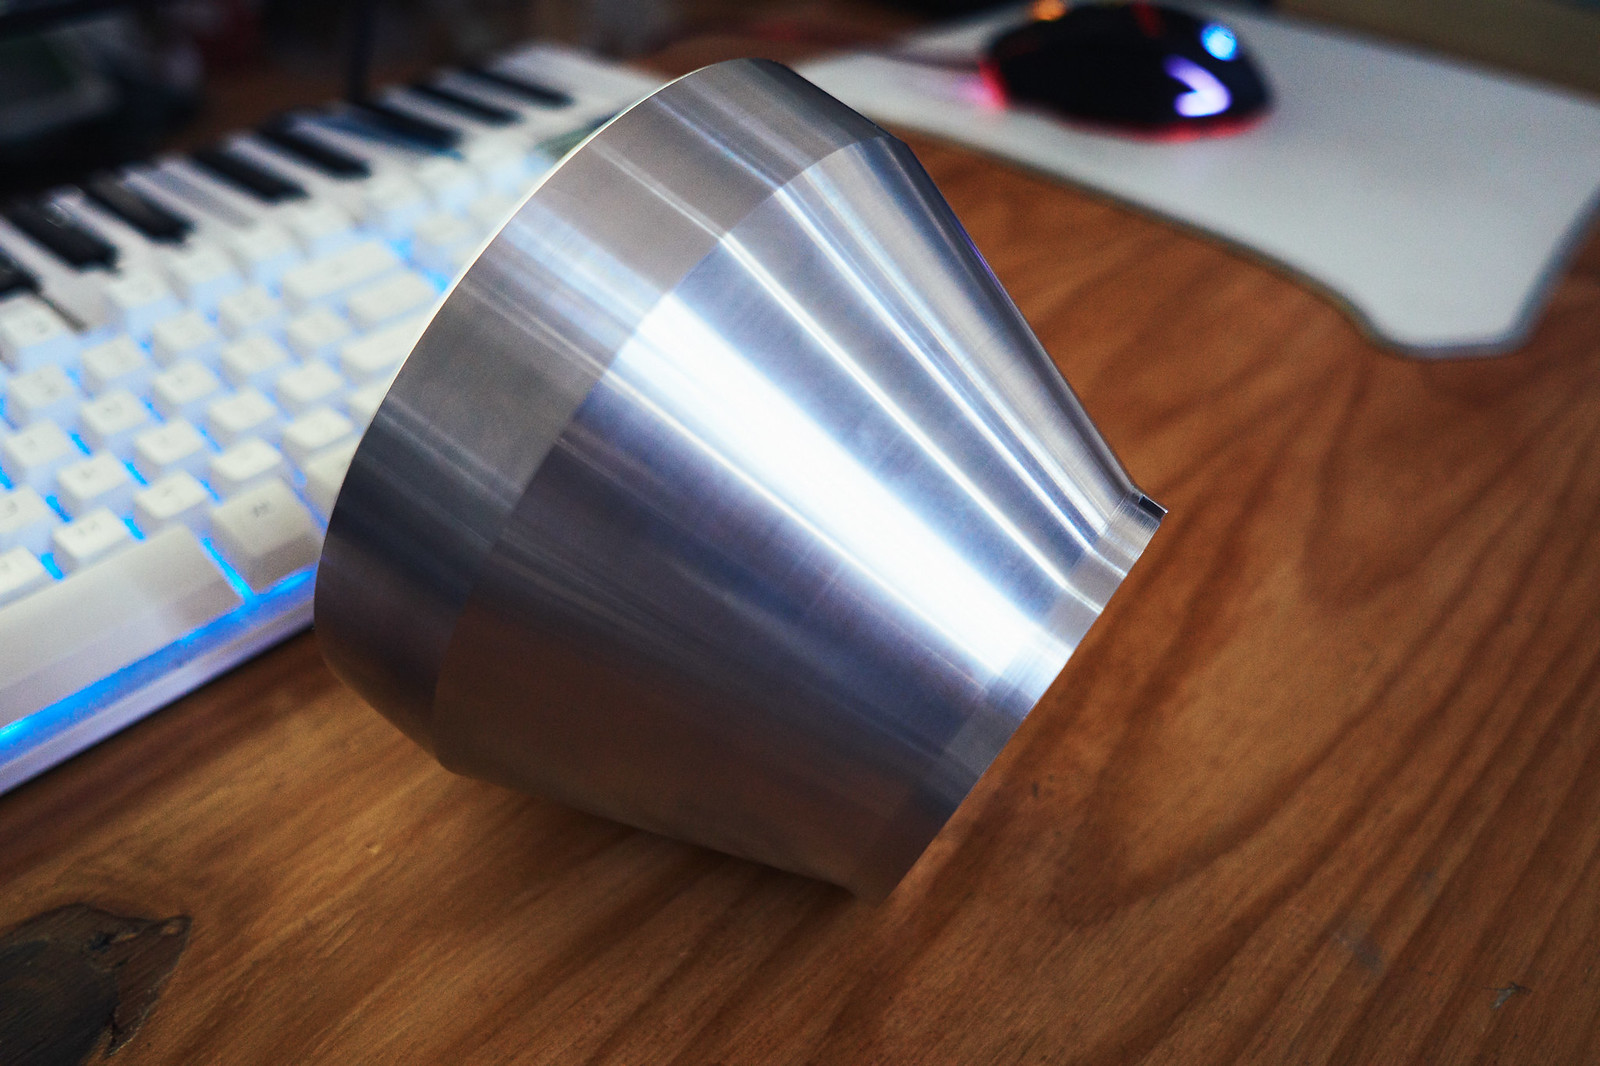
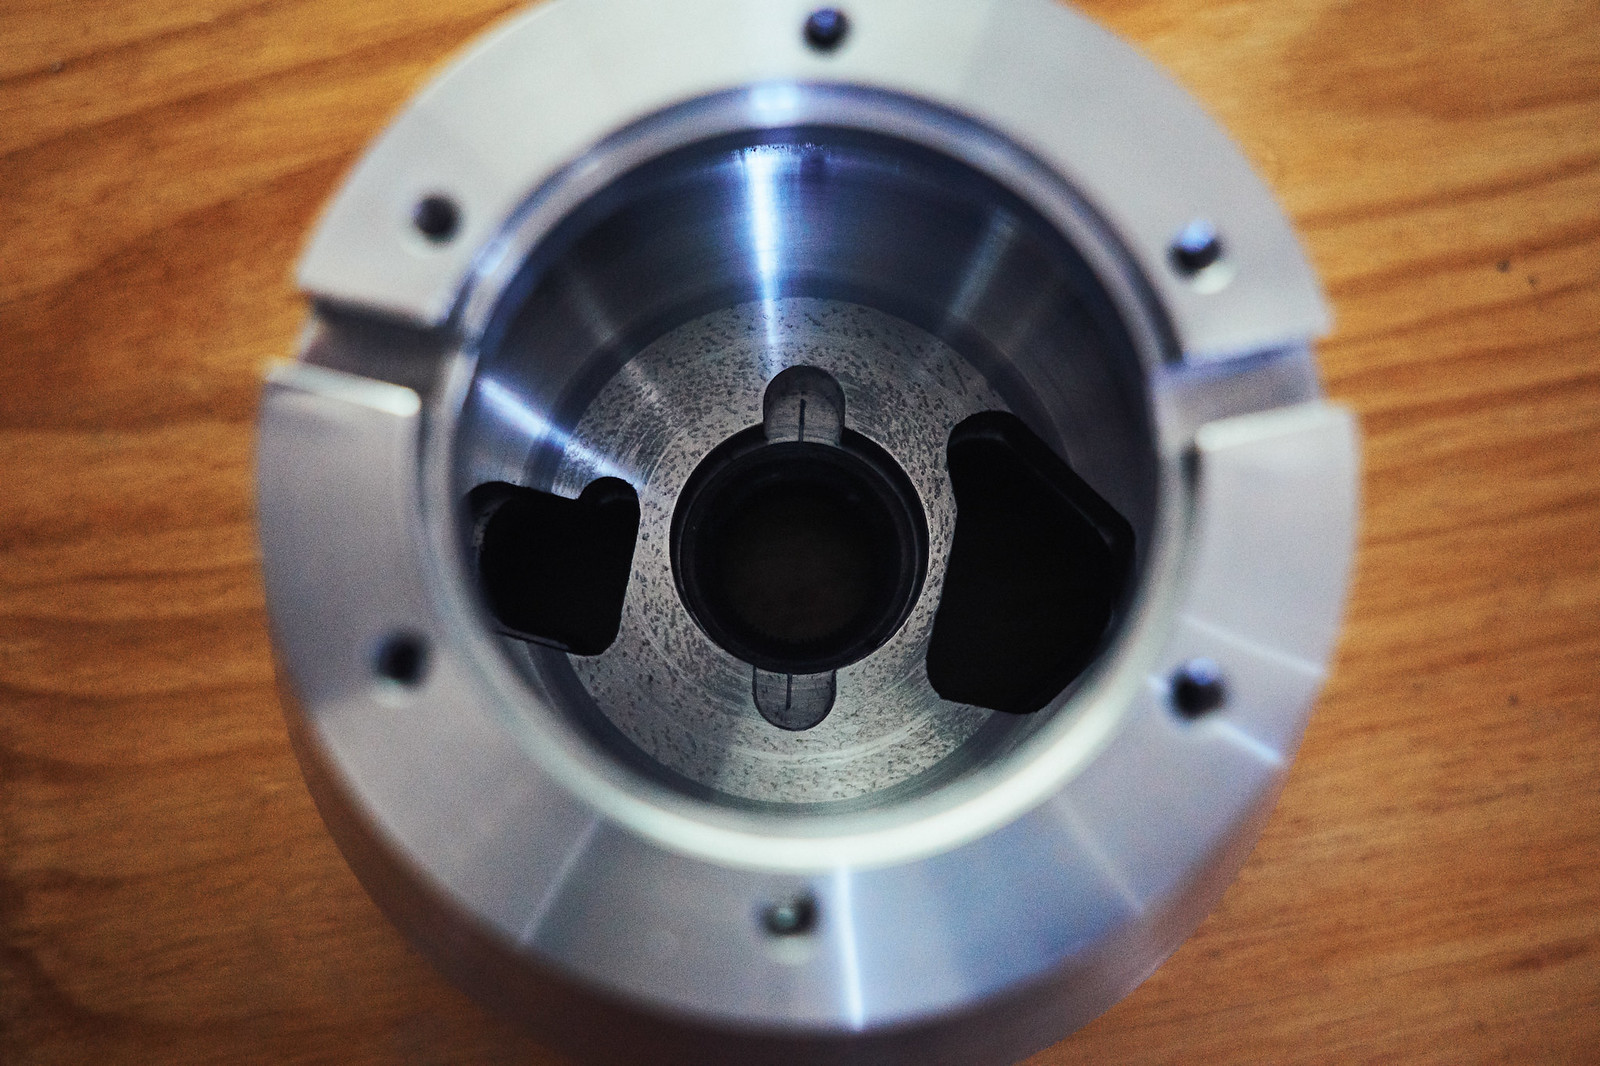
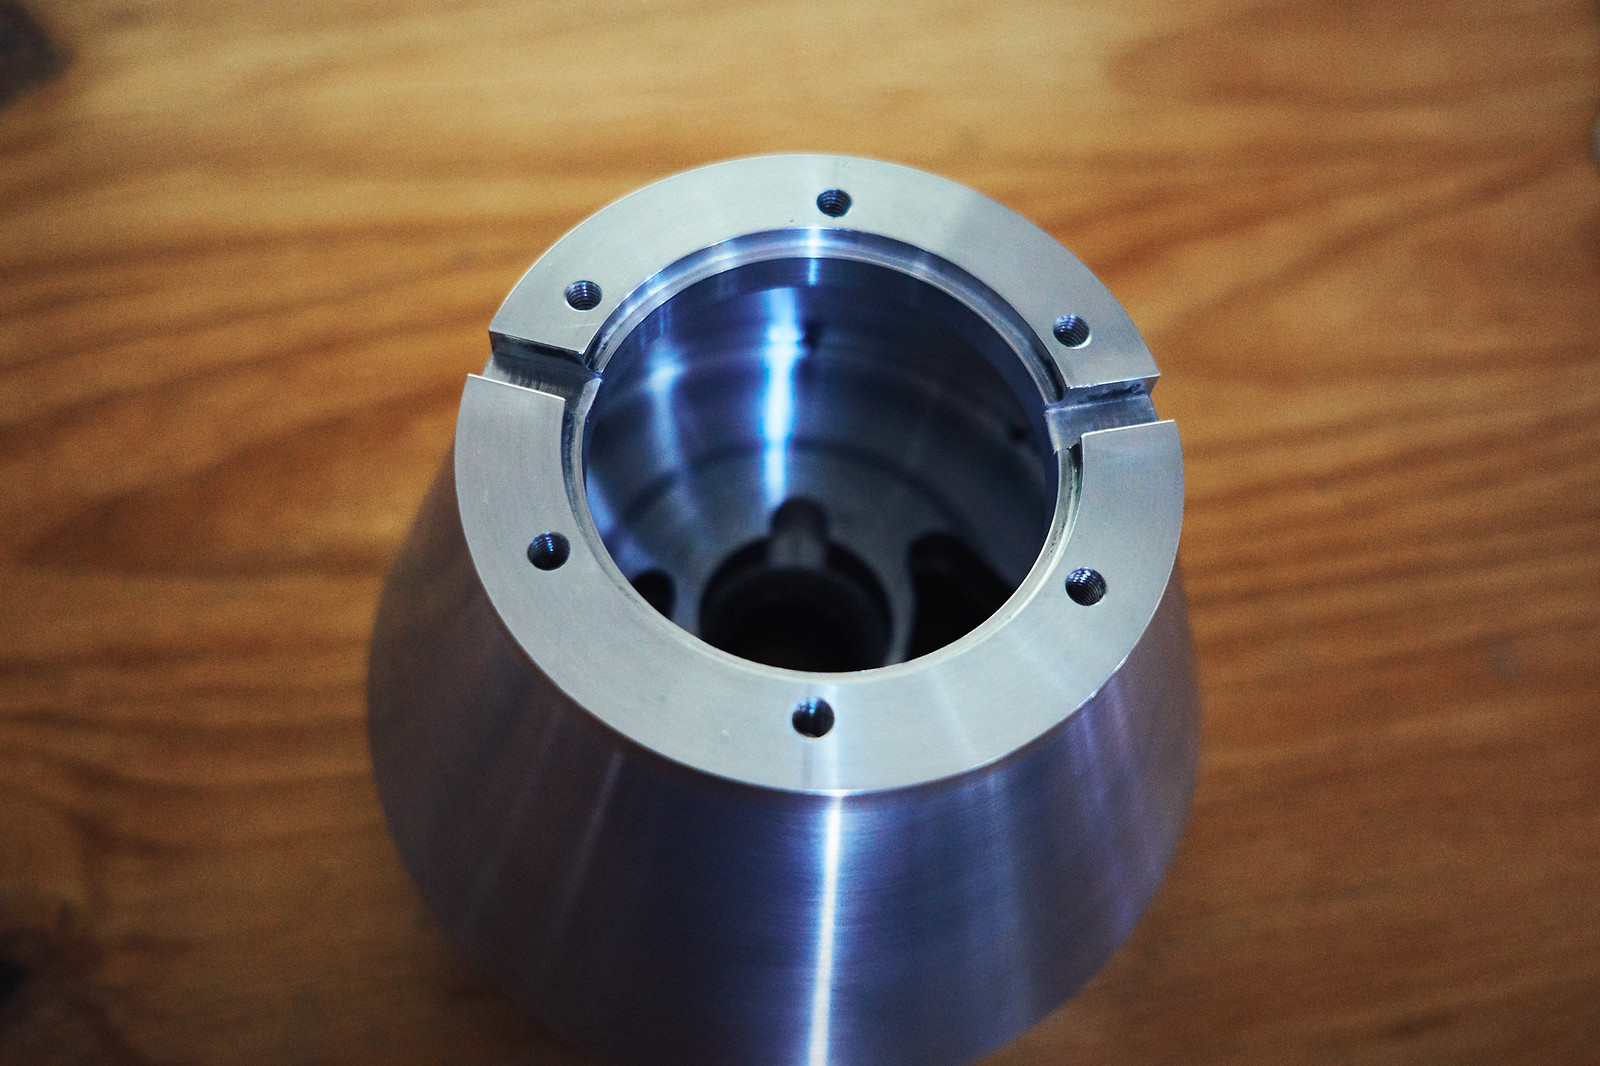
Made extra plugs this time around because I screwed up tapping and marking off the last batch. CNC machined, then hand drilled, tapped, countersunk and finally 400 grit polished:
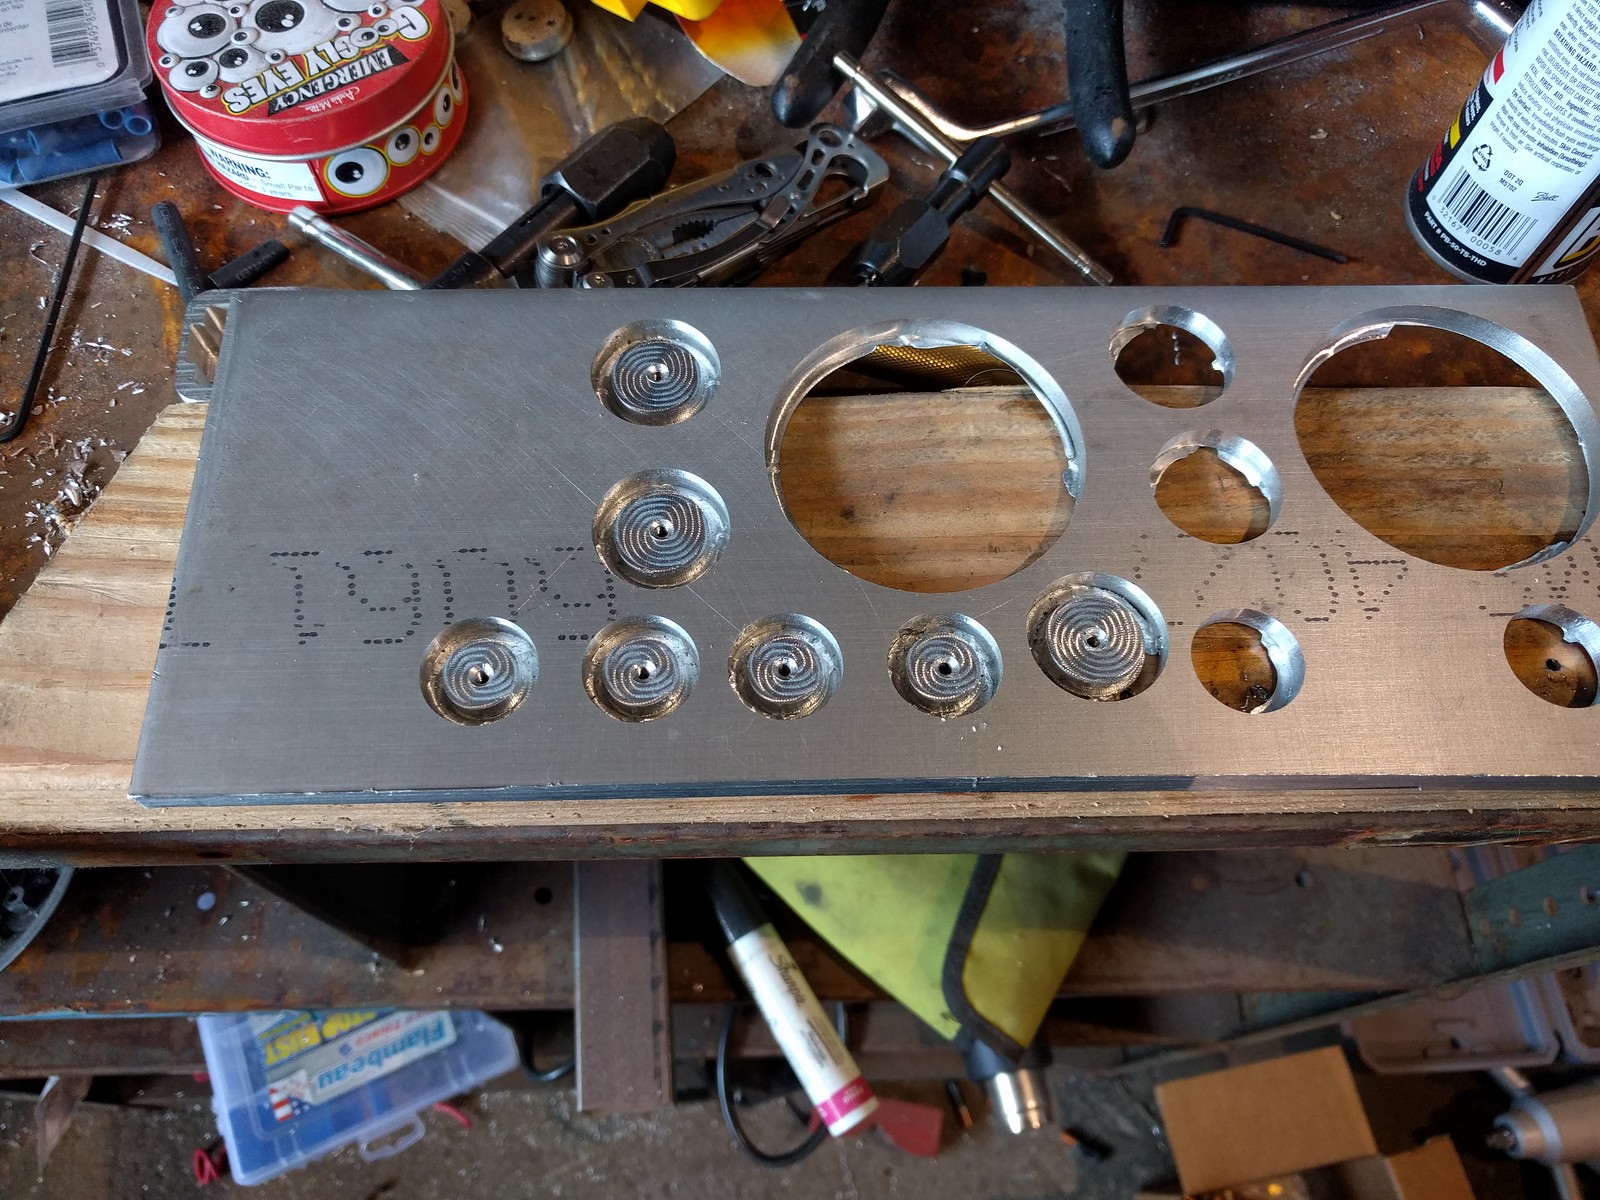
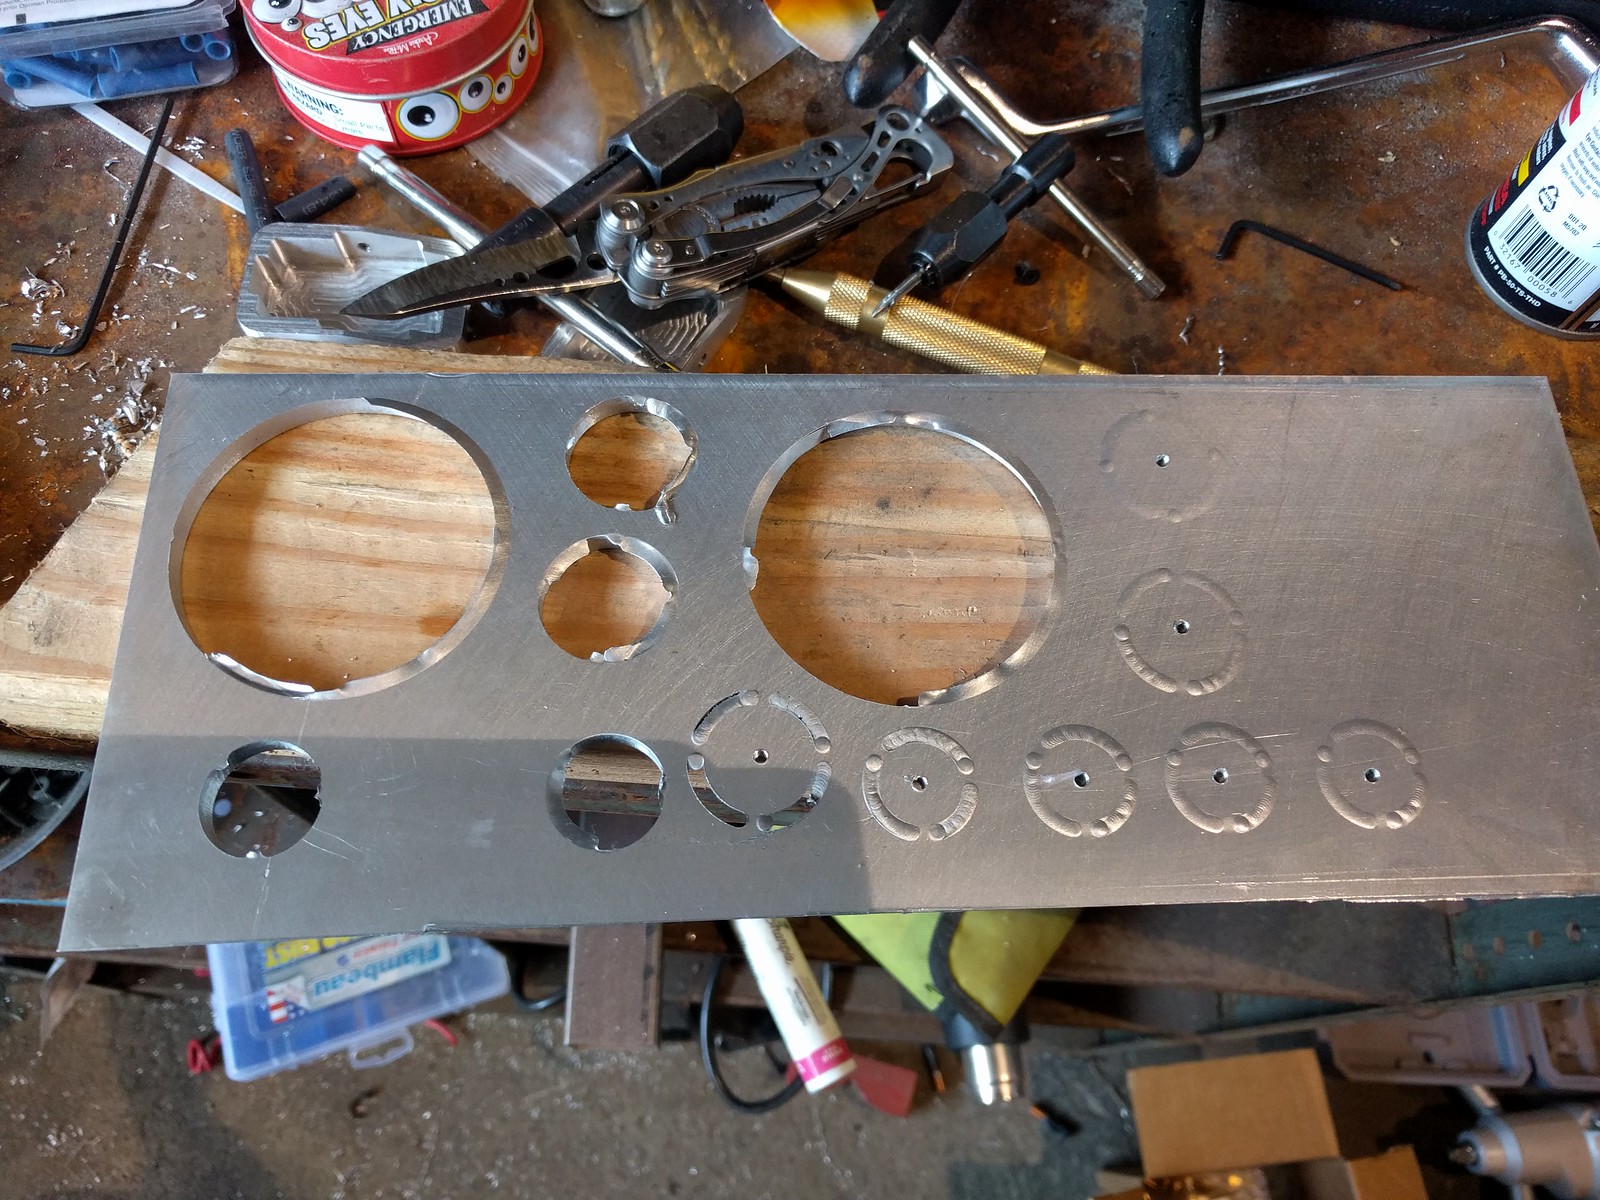
Drilling and countersinking of the mounting holes in the button seats:
Notice that they now have a taper profile to hide completely behind the Prototipo spokes:
Made extra plugs this time around because I screwed up tapping and marking off the last batch. CNC machined, then hand drilled, tapped, countersunk and finally 400 grit polished:
Drilling and countersinking of the mounting holes in the button seats:
Notice that they now have a taper profile to hide completely behind the Prototipo spokes:
06-12-2017, 11:06 PM
#144
Super Member
Thread Starter
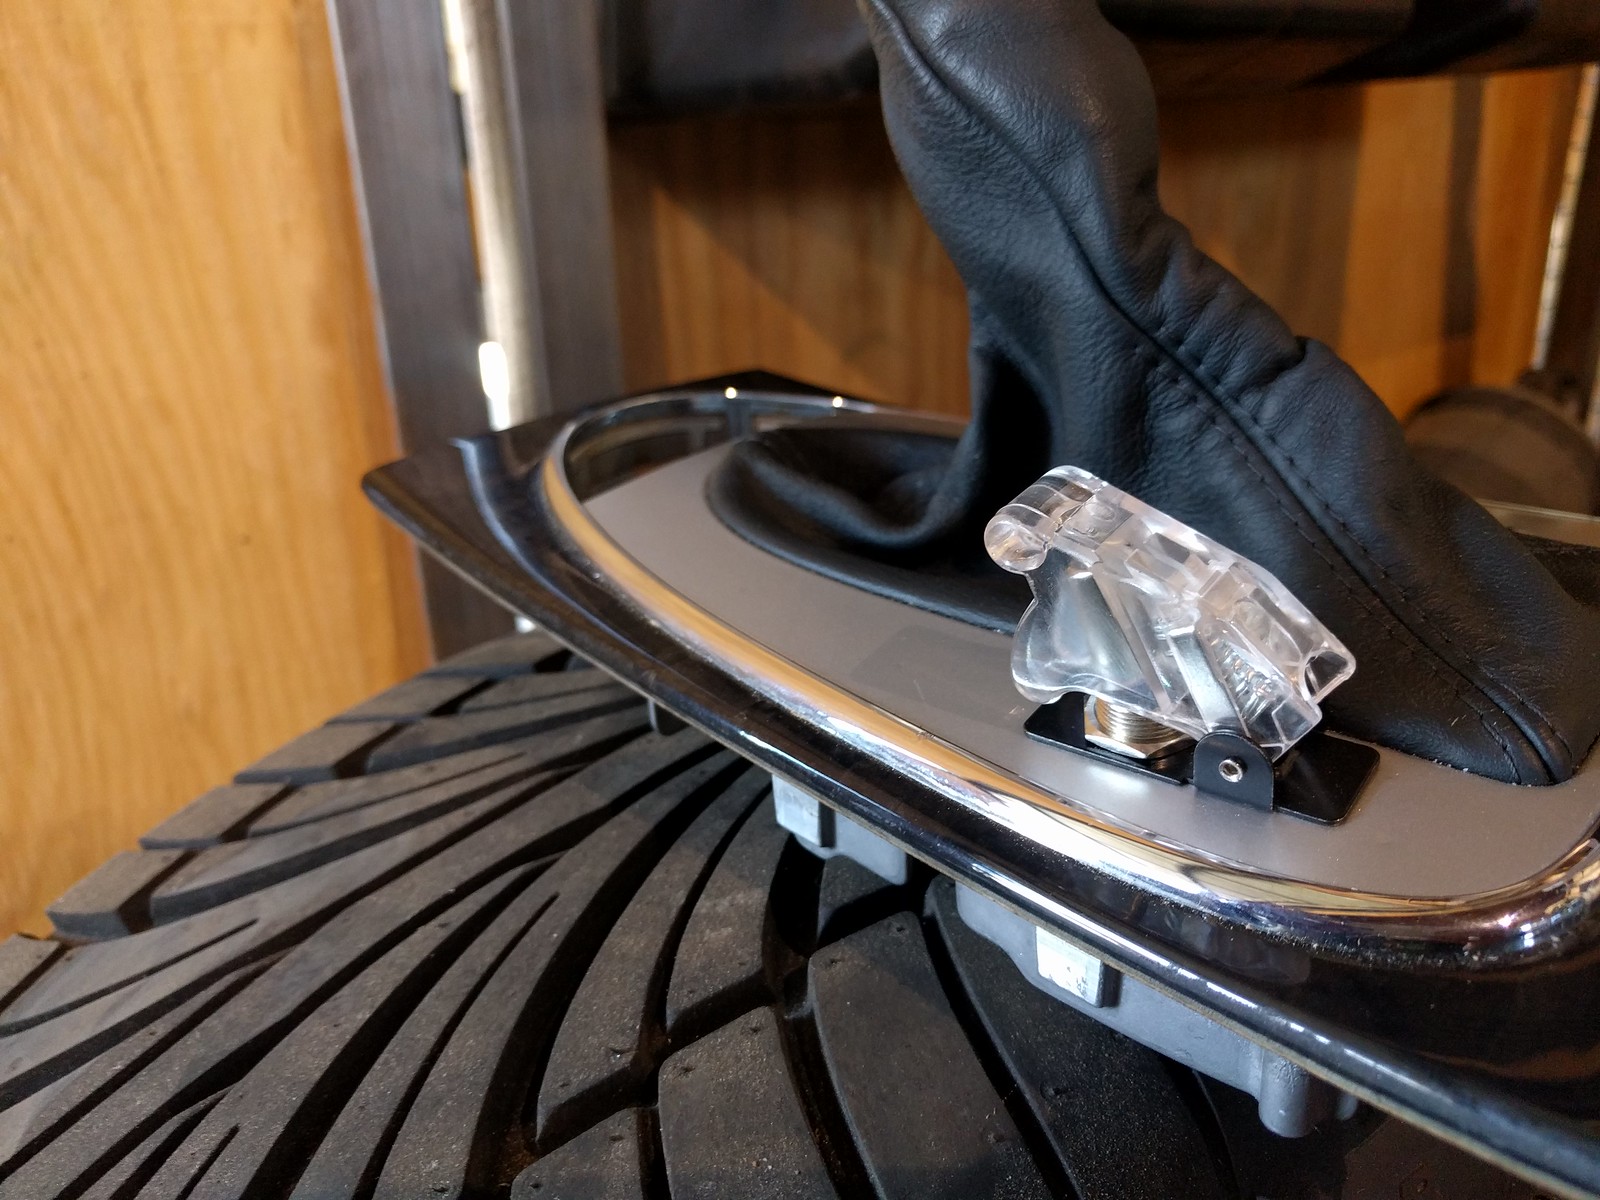
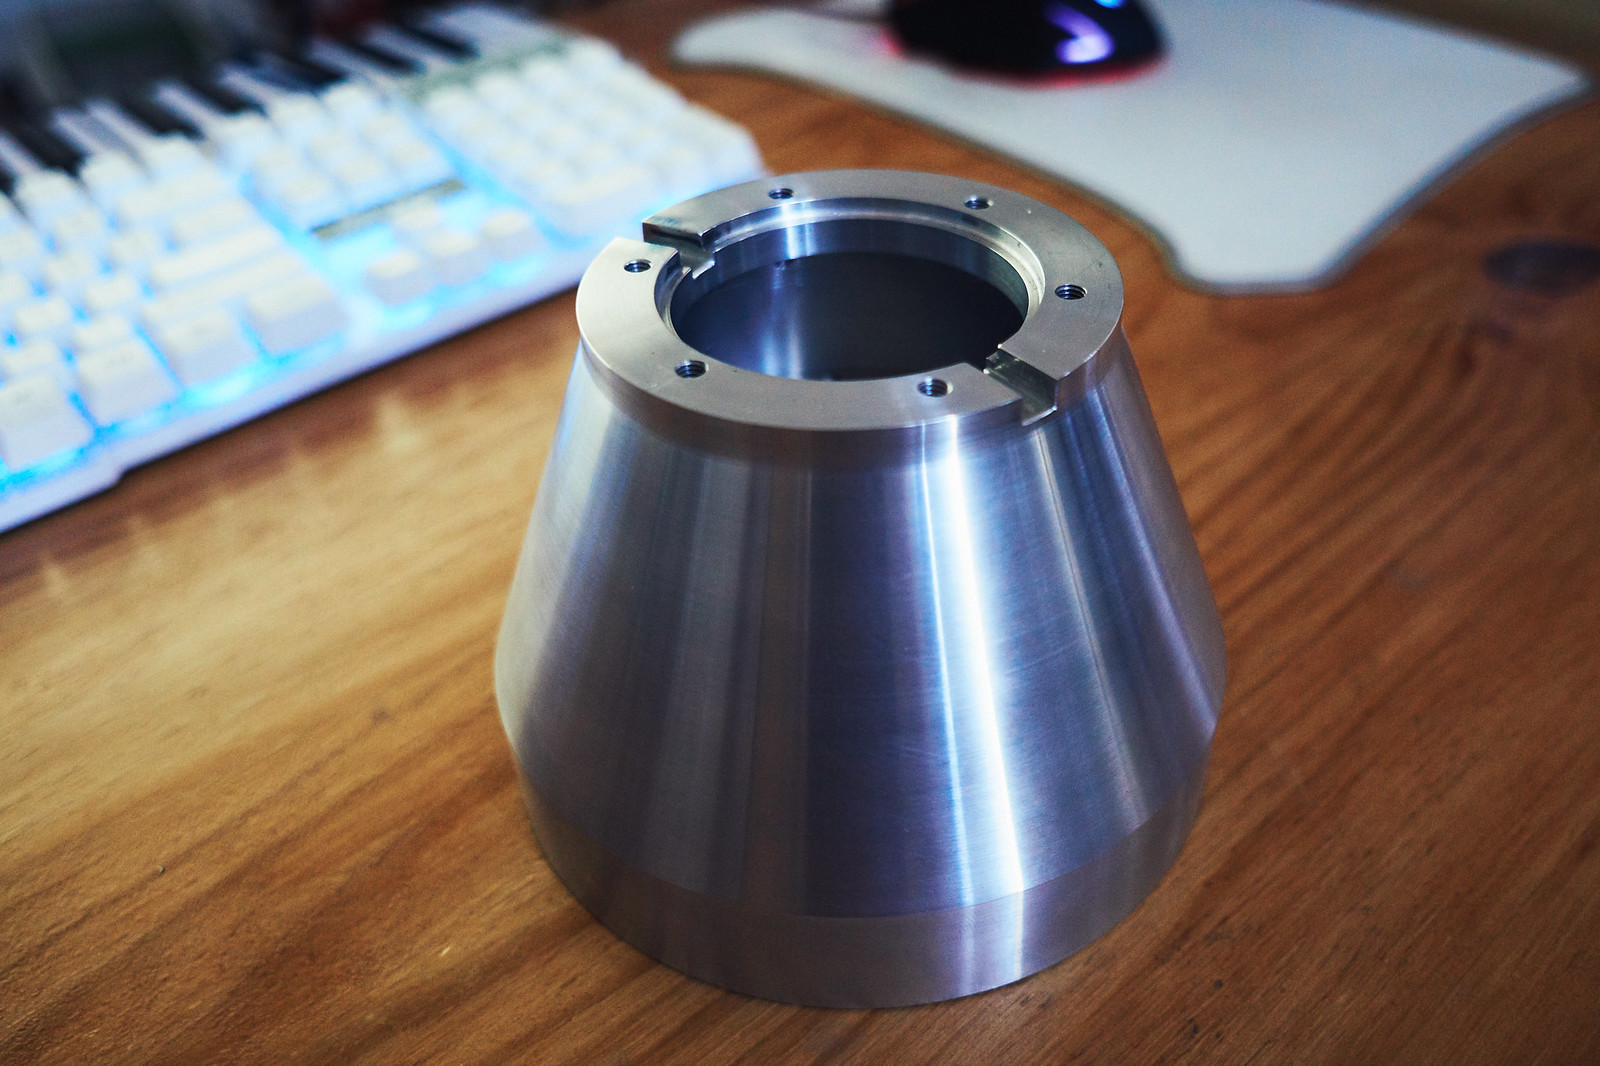
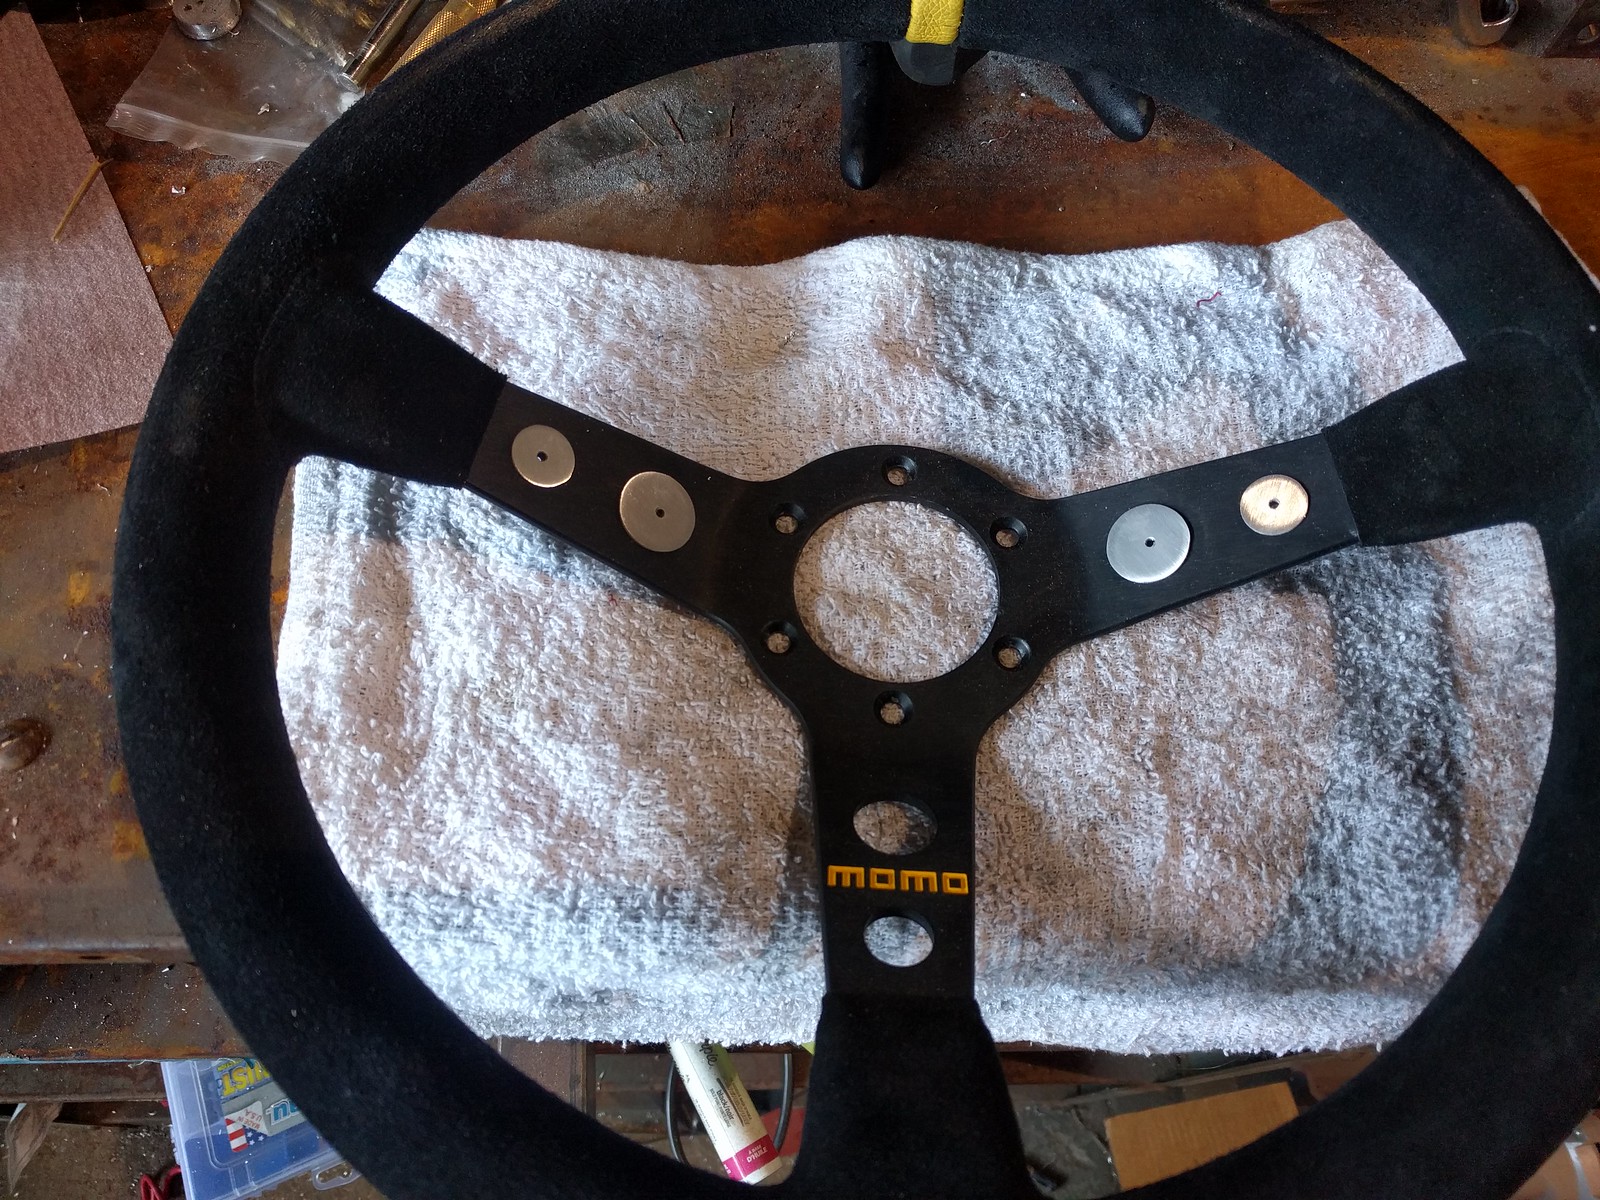
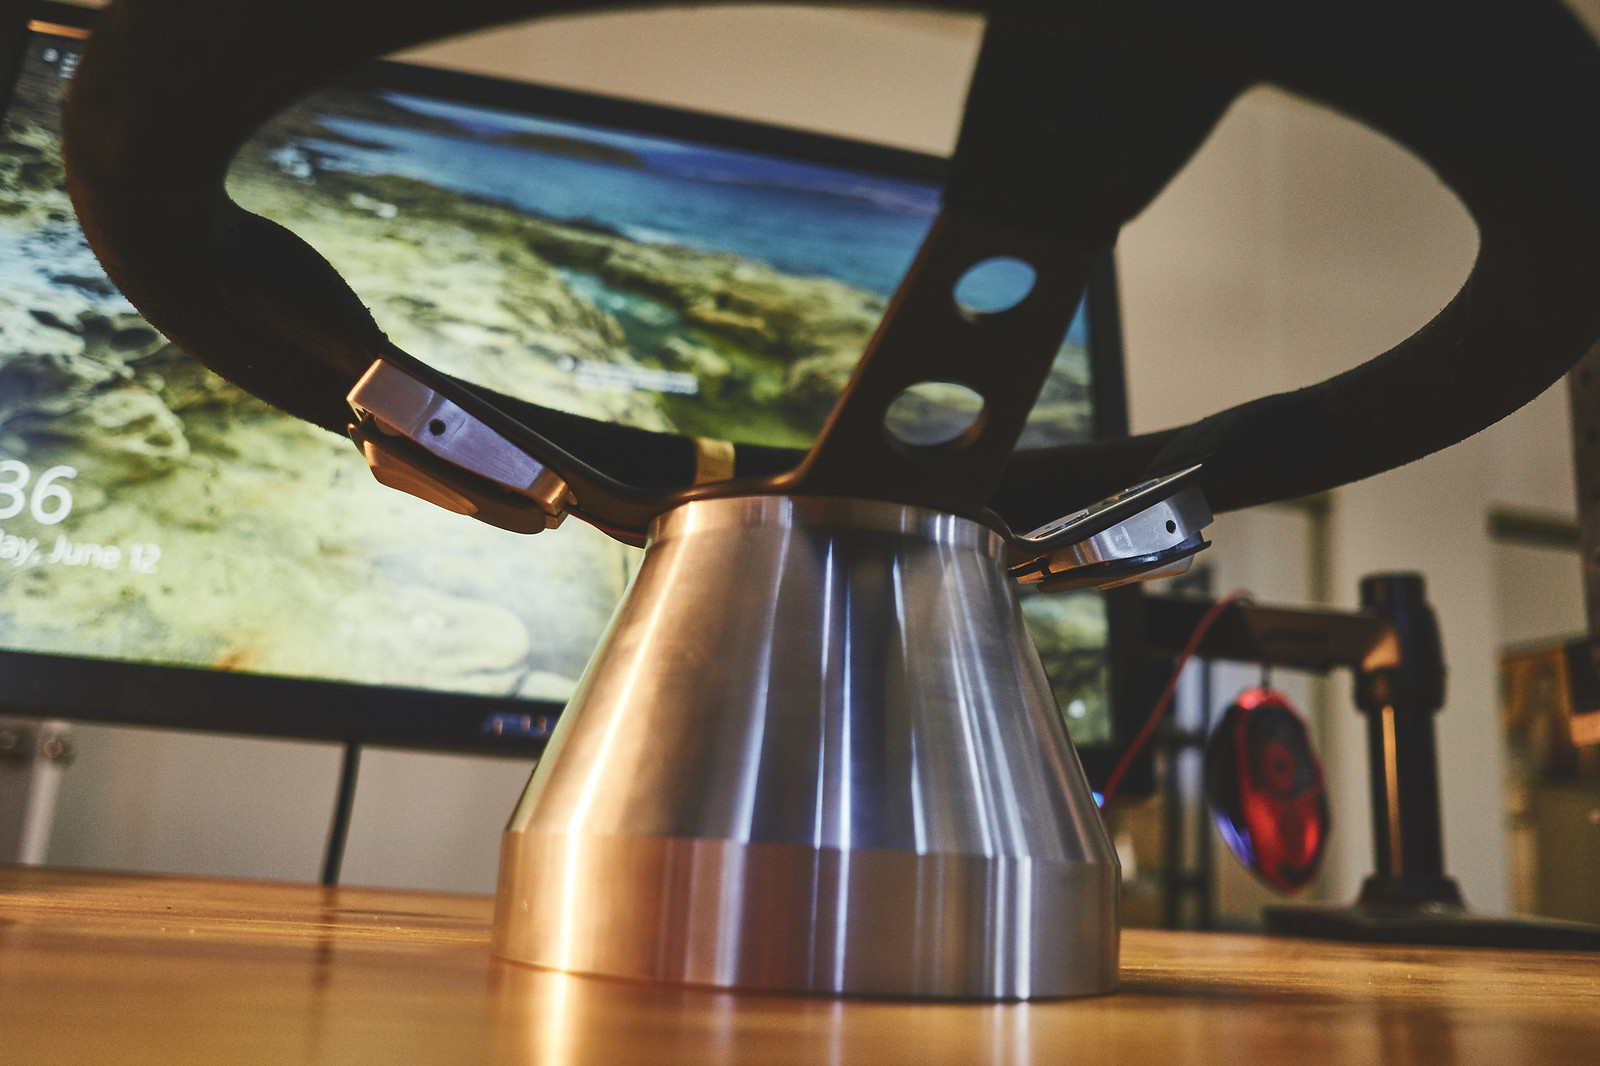
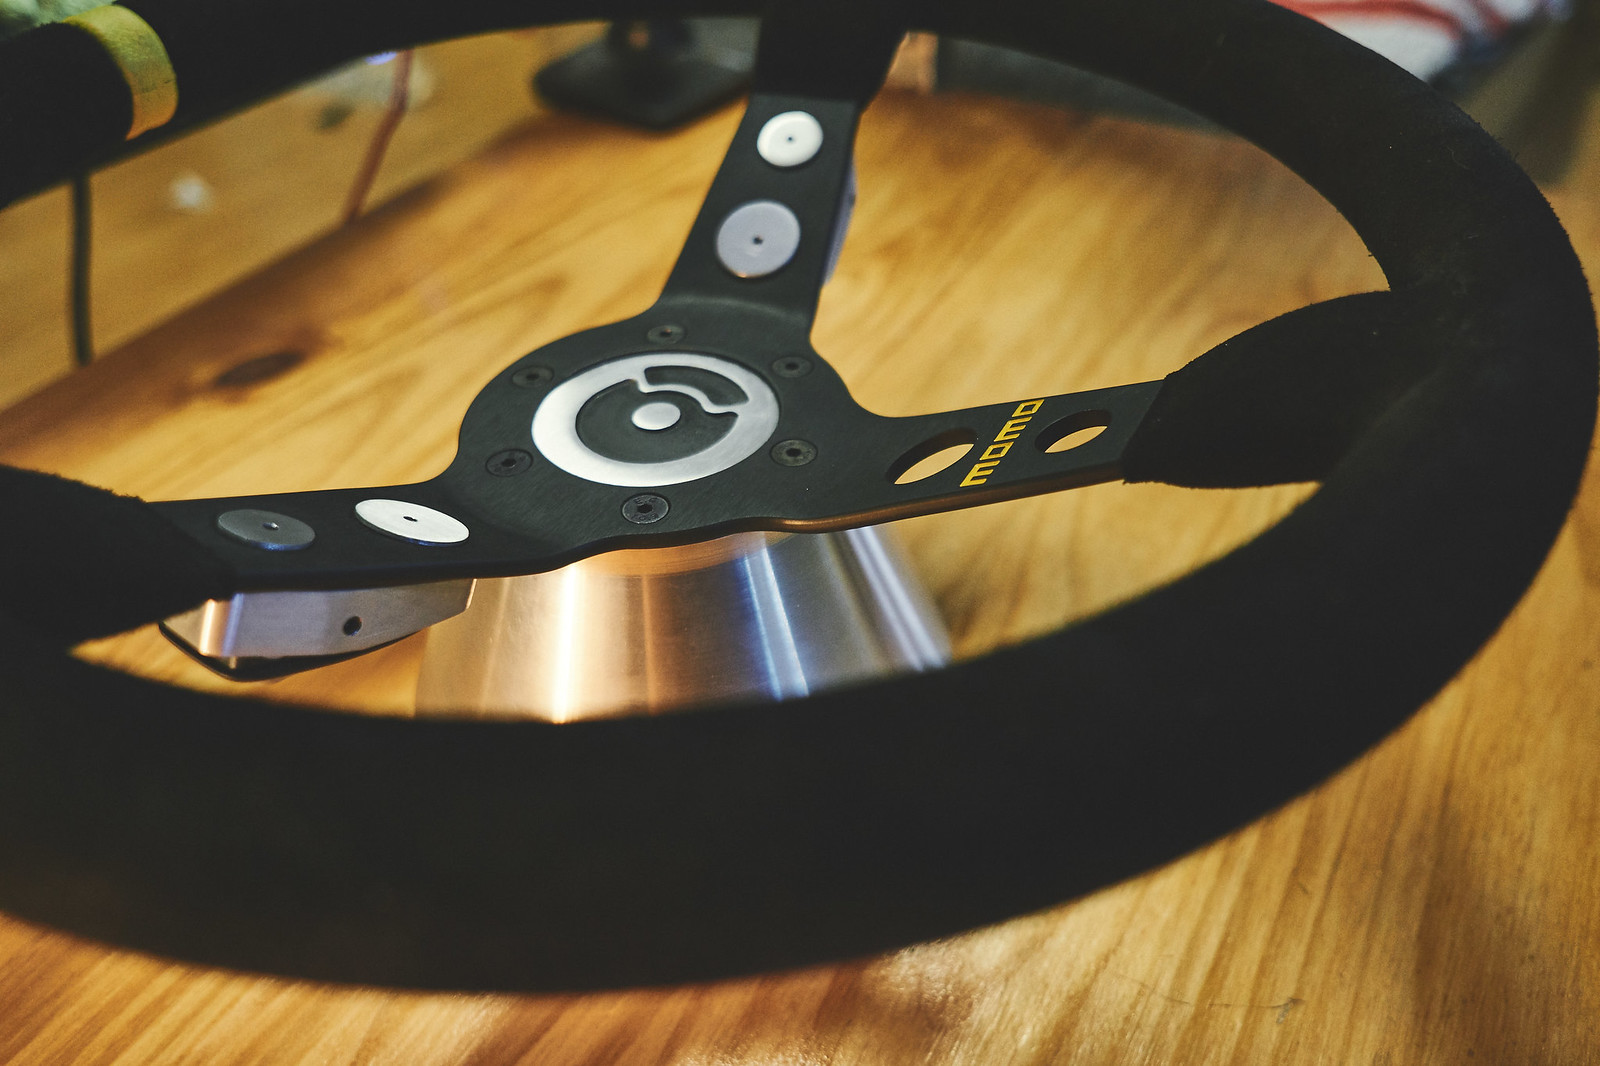
And now, finally, the result I'm so proud of, the complete custom steering wheel & hub assembly. That's the FCP Euro logo in the center, love my East coast family!

 06-17-2017, 10:52 PM
#148
Super Member
Thread Starter
Mama mia! Loving it. Button it all up (not without mistakes and re-dos, of course), bathed in brake fluid for a couple of days so I can finally deliver these preliminary photos of what we're working with here:
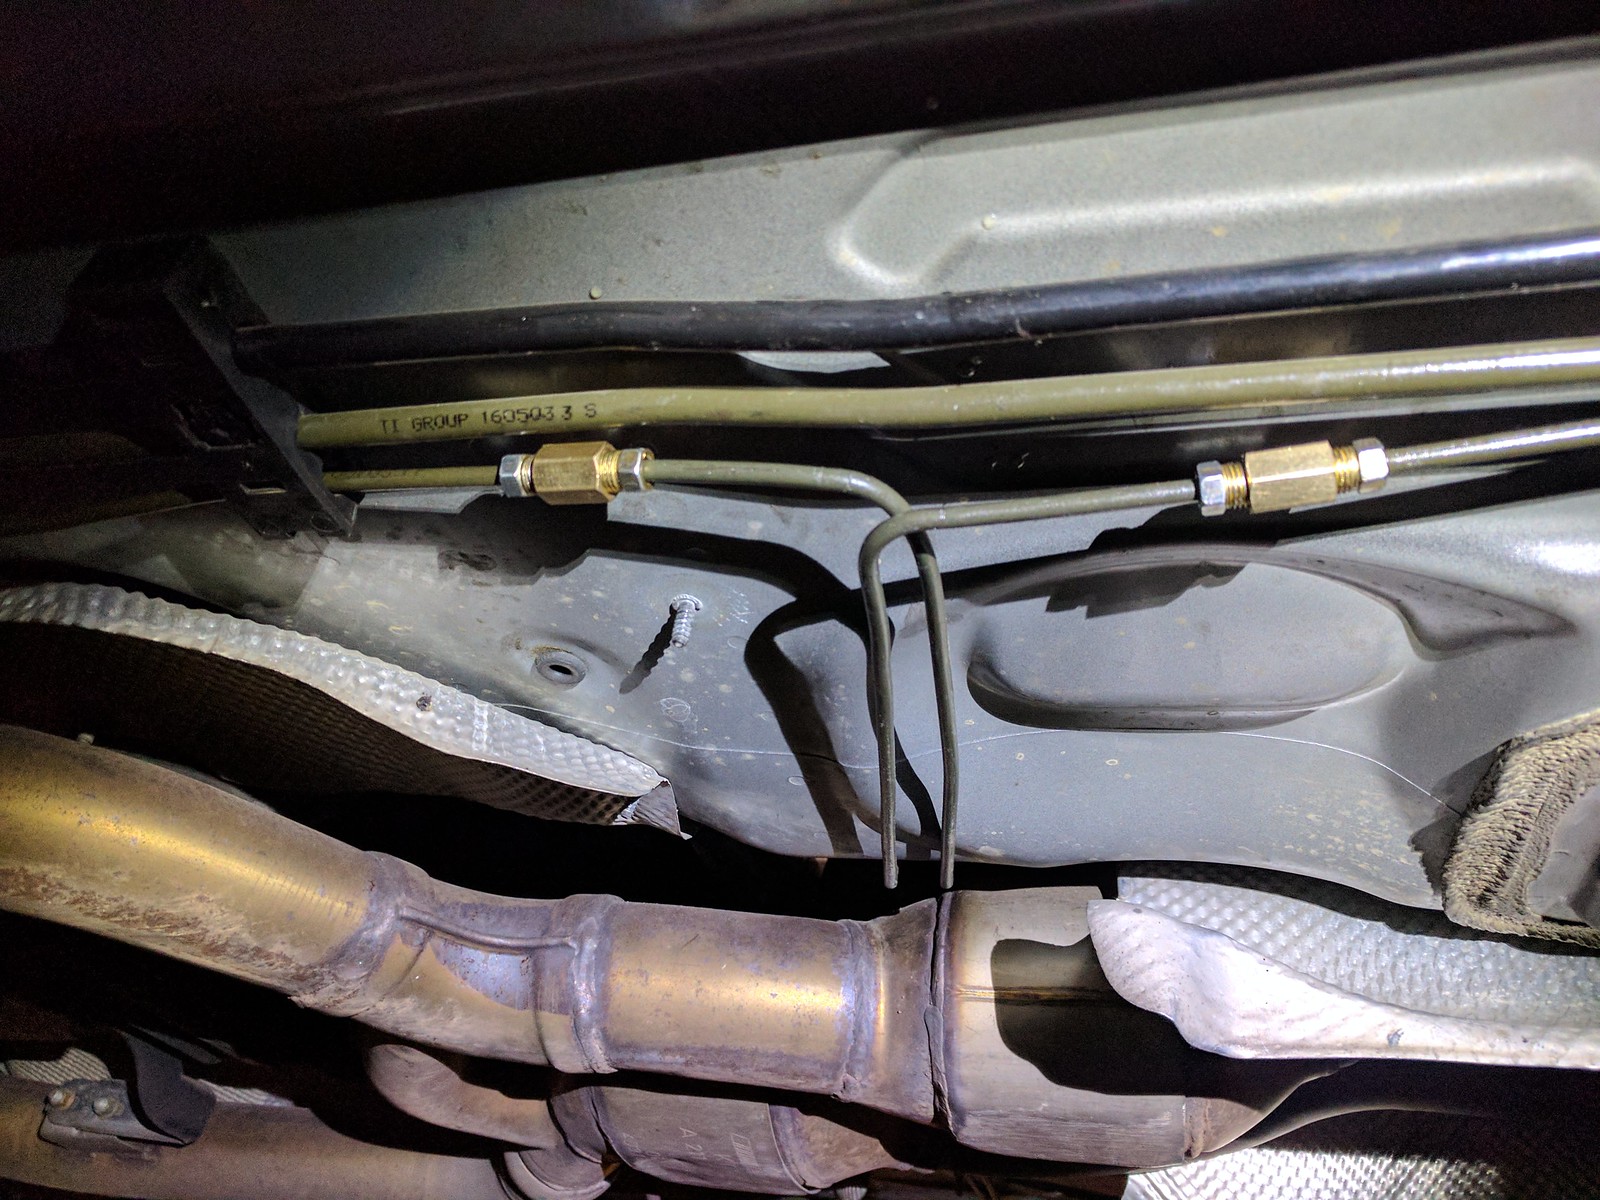
Brake lines before I put the rubber fuel line hose as buffer around 'em. They routed nicely behind the factory heatshield.
Voila!

Photoshoot soon! Stay tuned folks.
Brake lines before I put the rubber fuel line hose as buffer around 'em. They routed nicely behind the factory heatshield.
Voila!
Photoshoot soon! Stay tuned folks.
06-17-2017, 11:09 PM
#149
MBWorld Fanatic!
Get an SLS amg intercooler pump. (Pierburg CWA100)
I can do 6-7 or so laps on the stock intercooler system without noticeable heatsoak with just this pump.
I think you'd need atleast a bigger heat exchanger or additional ones and that pump to keep yours in check as your obviously going to be hammering on it.
I can do 6-7 or so laps on the stock intercooler system without noticeable heatsoak with just this pump.
I think you'd need atleast a bigger heat exchanger or additional ones and that pump to keep yours in check as your obviously going to be hammering on it.
06-18-2017, 12:30 PM
#150
Super Member
Thread Starter
Get an SLS amg intercooler pump. (Pierburg CWA100)
I can do 6-7 or so laps on the stock intercooler system without noticeable heatsoak with just this pump.
I think you'd need atleast a bigger heat exchanger or additional ones and that pump to keep yours in check as your obviously going to be hammering on it.
I can do 6-7 or so laps on the stock intercooler system without noticeable heatsoak with just this pump.
I think you'd need atleast a bigger heat exchanger or additional ones and that pump to keep yours in check as your obviously going to be hammering on it.


