When you click on links to various merchants on this site and make a purchase, this can result in this site earning a commission. Affiliate programs and affiliations include, but are not limited to, the eBay Partner Network.
As always jack the car up with the E-brake on. Use jack stands.
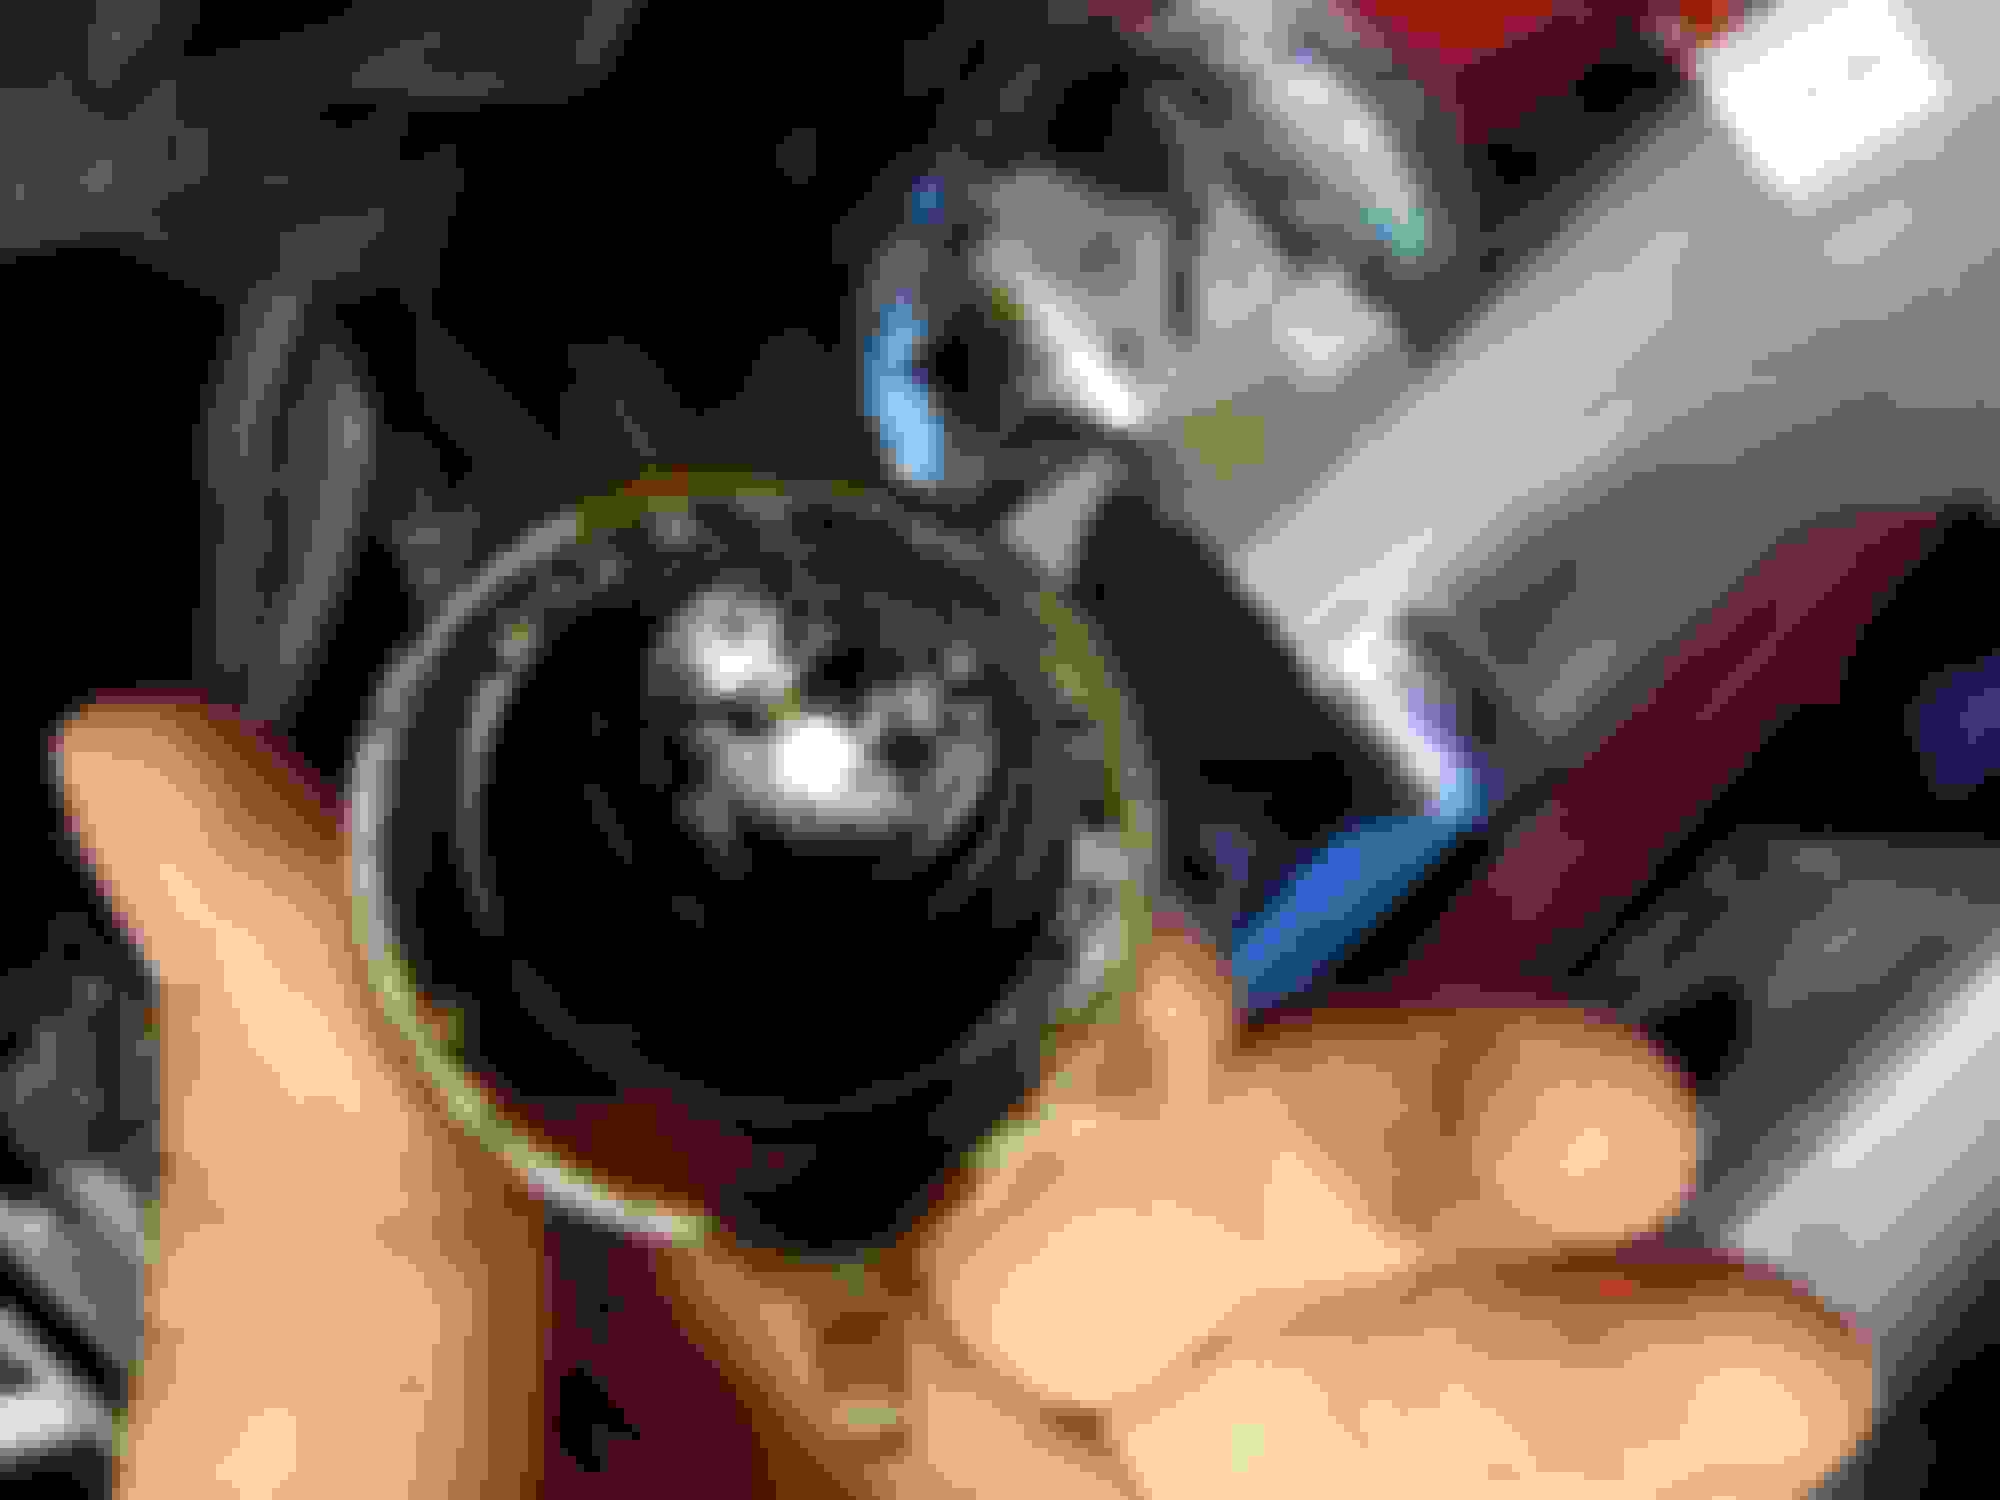
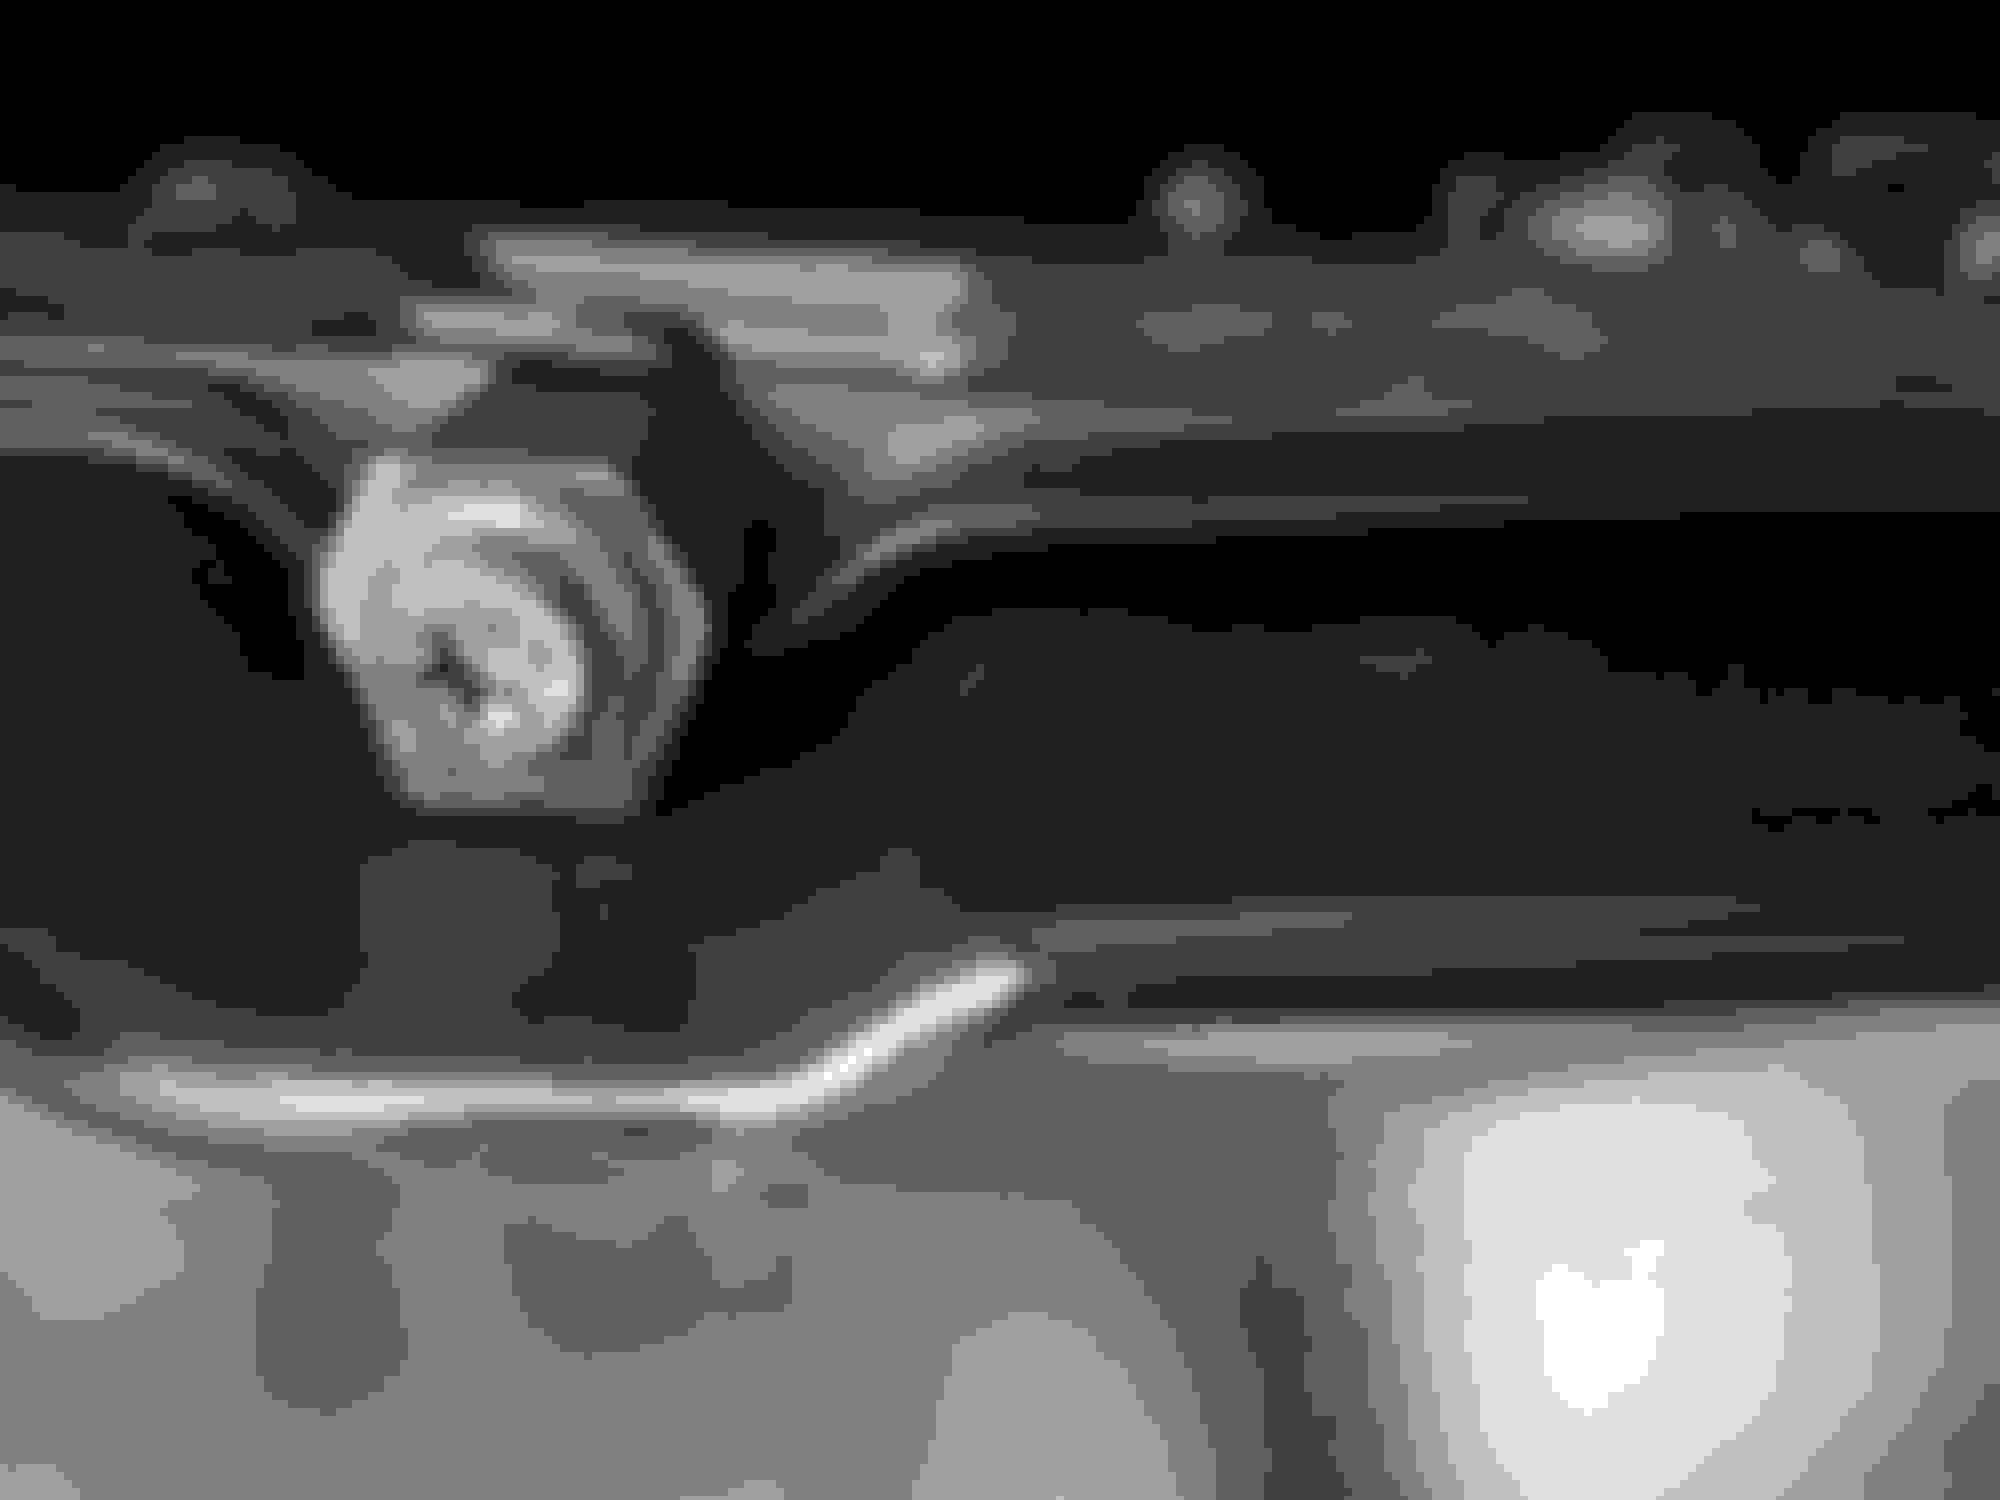
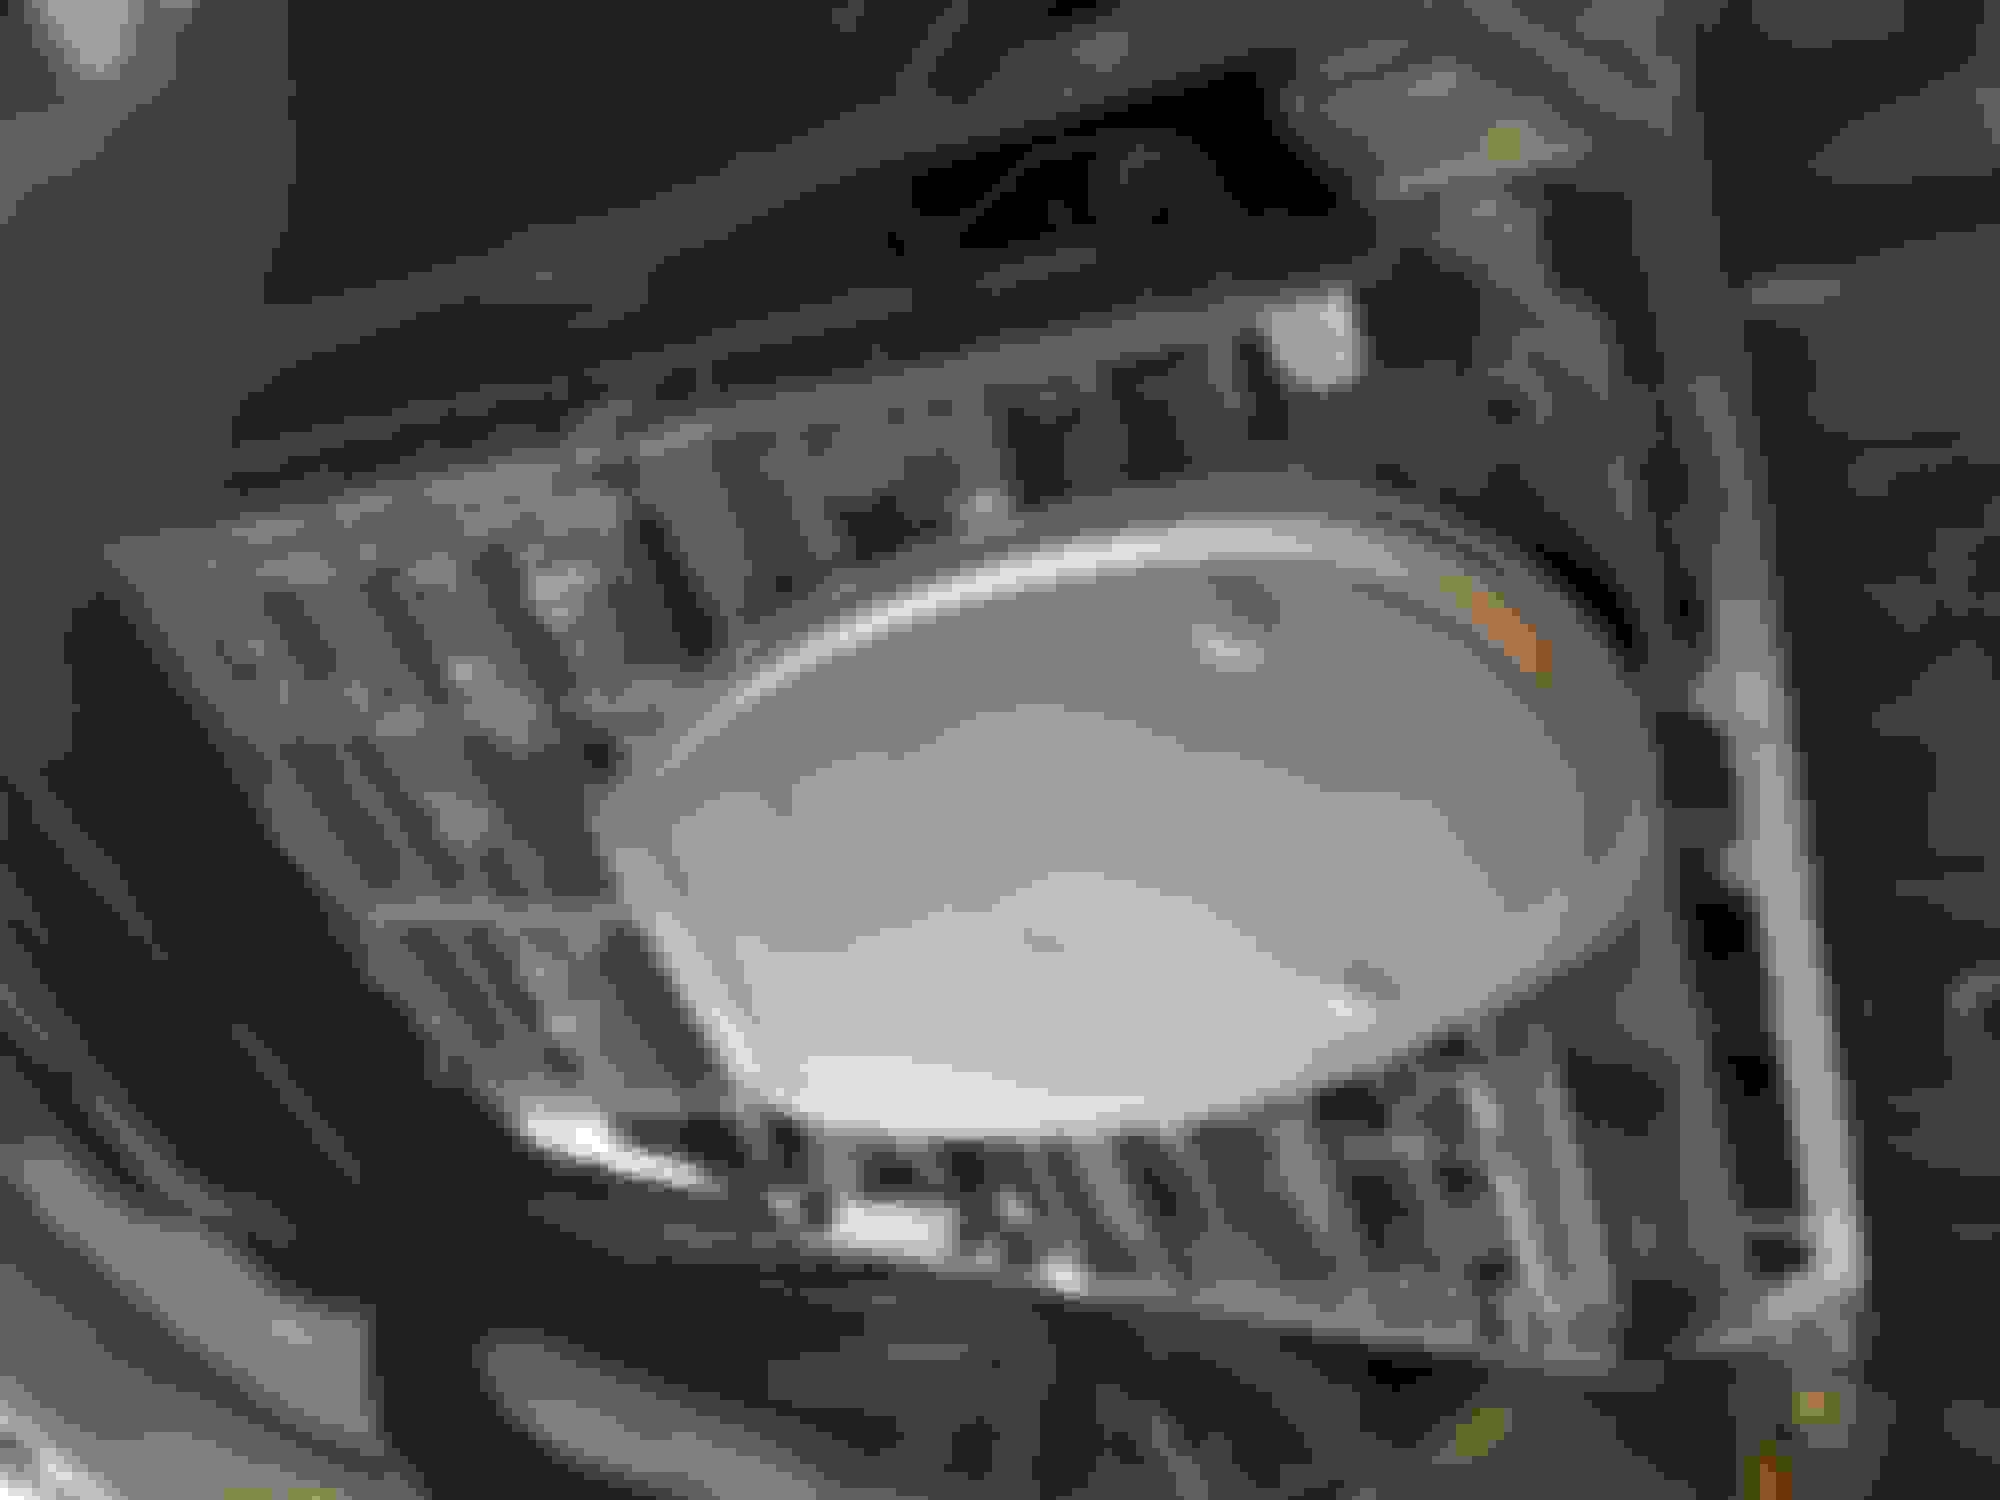
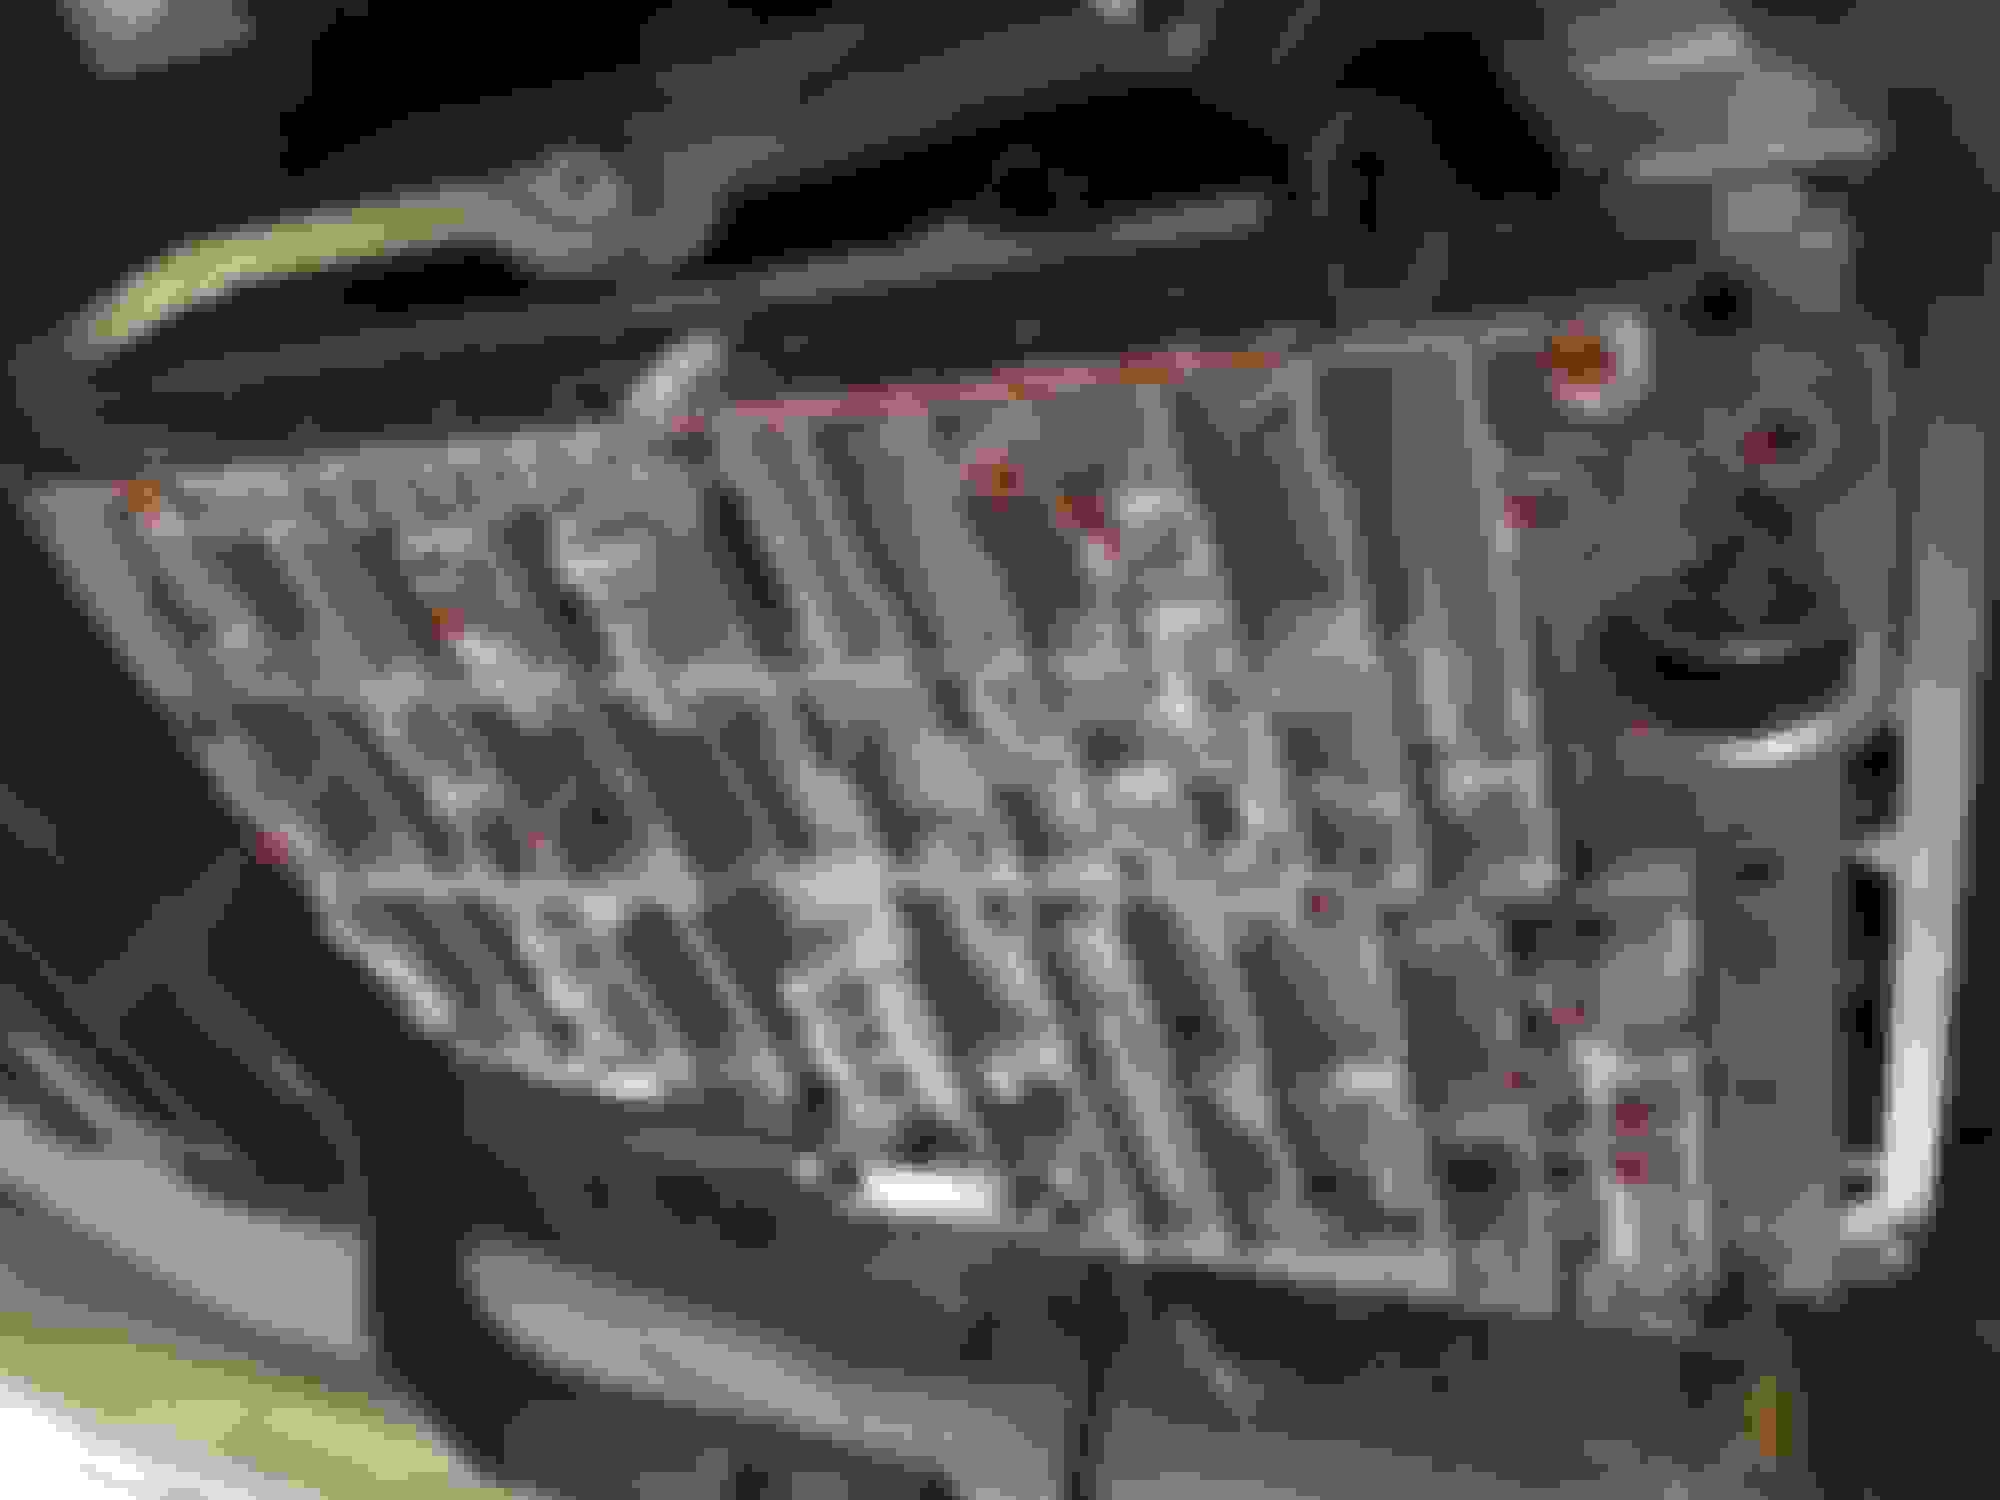
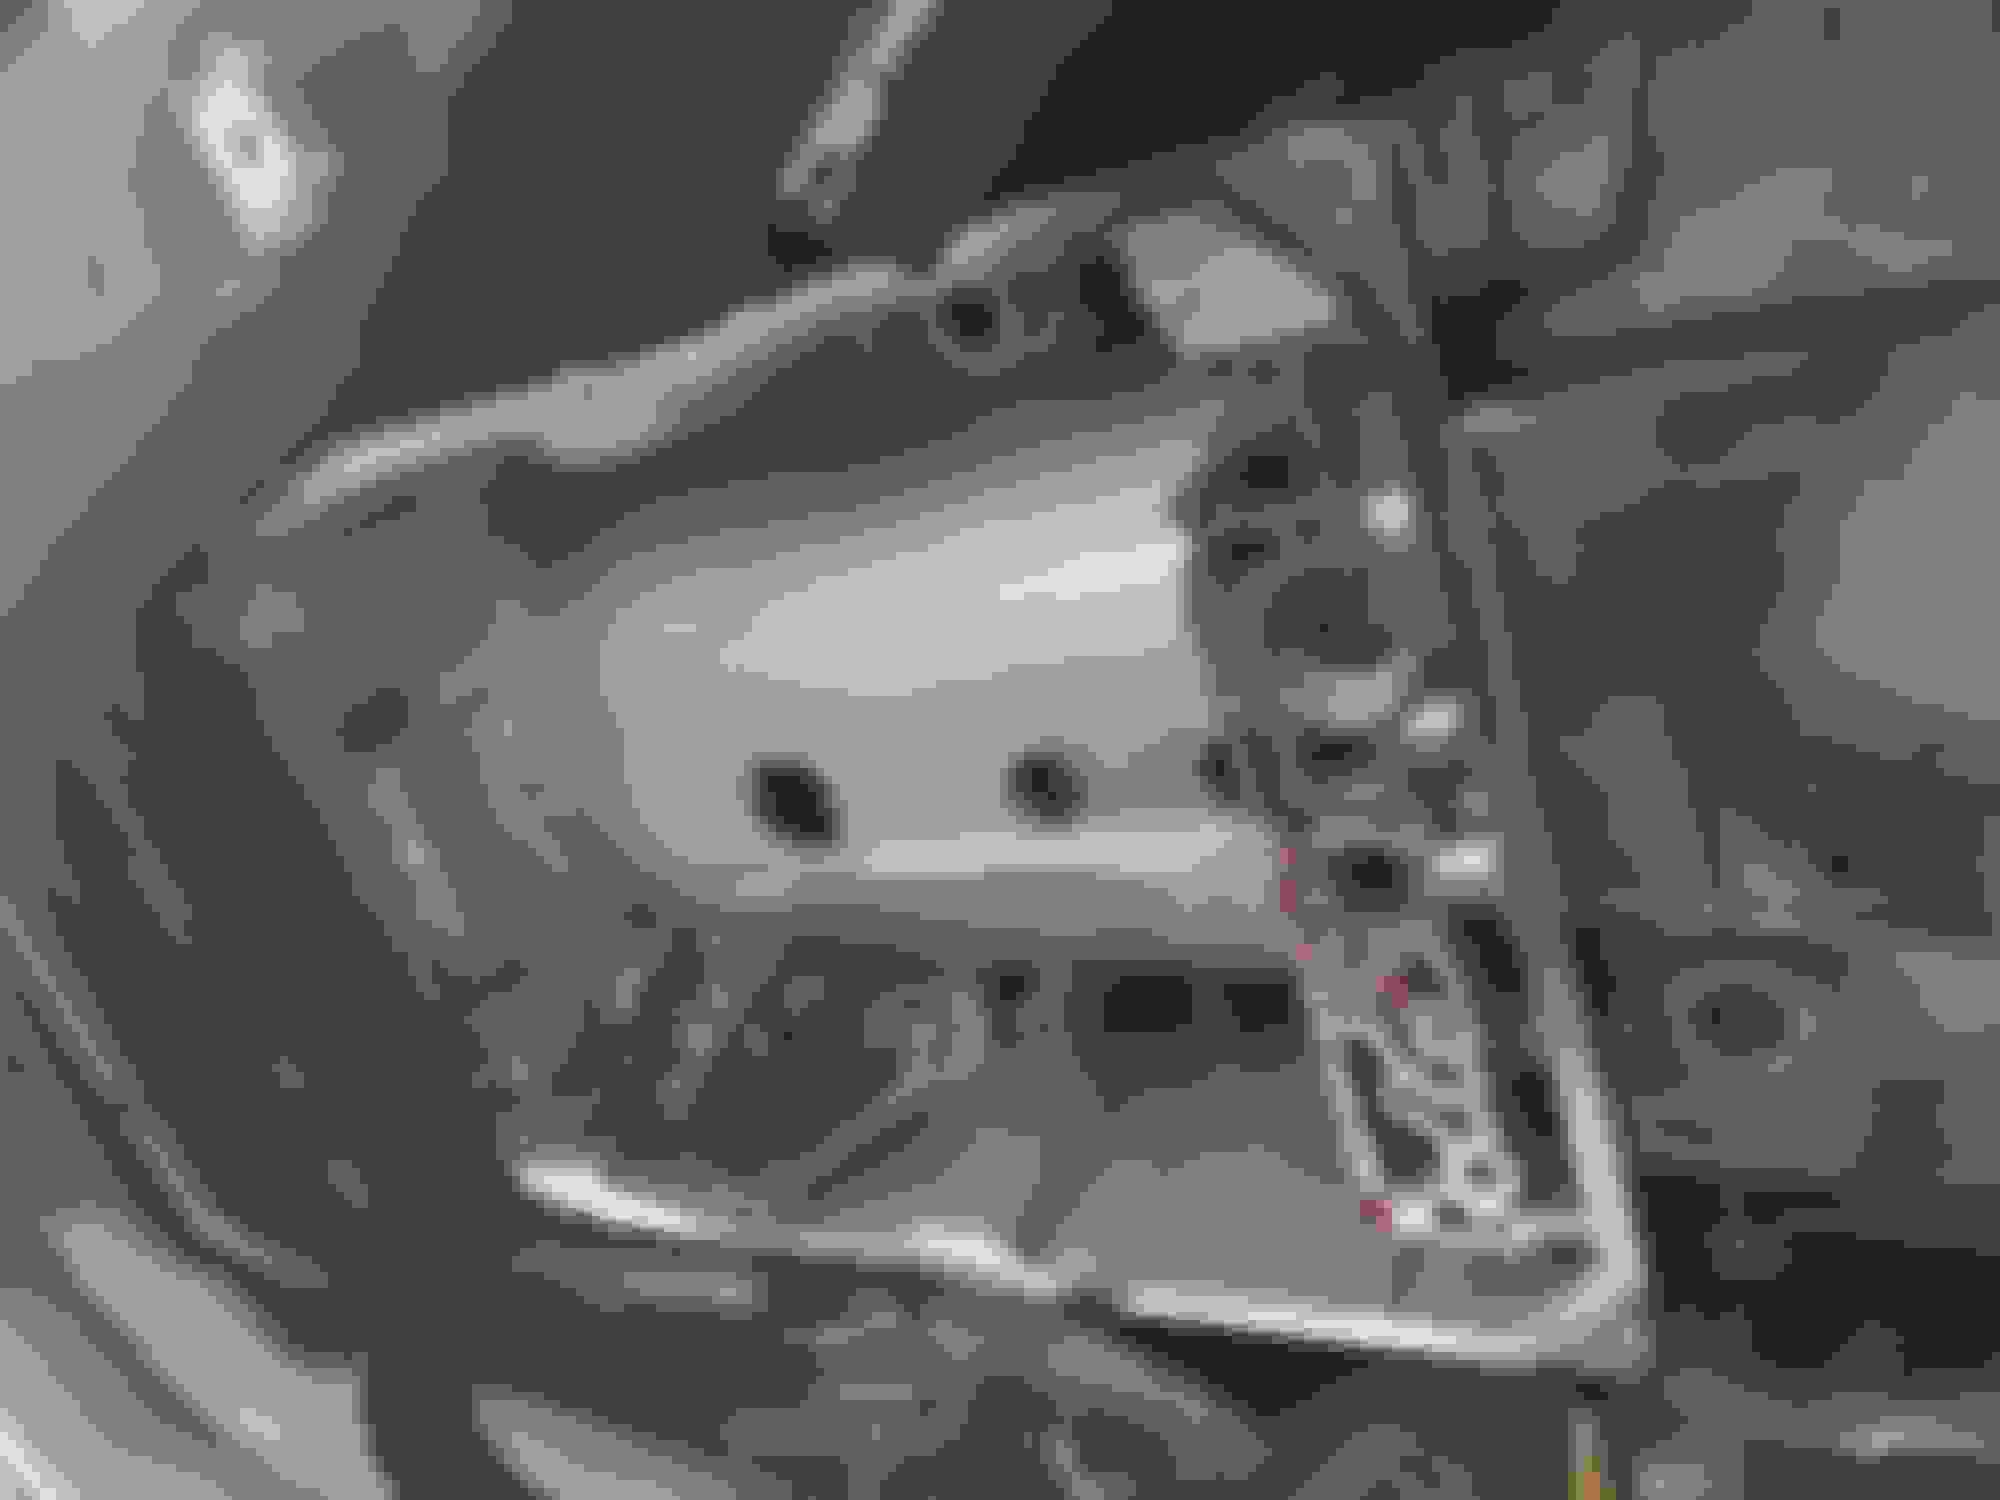
Use an 8mm socket to remove the rear most underpanel to expose the transmission pan. Tools to do the job. 7mm 8mm sockets a T30 male torx bit and a 5mm allen key. 8mm socket to remove the screws on the under body plastic panel. Exposed transmission drain pain. Use a 5mm allen key to remove the drain from the pan. the front passenger side will have a heat shield that covers the TCM plug that connects to the transmission from the TCM. Remove it with a T30 torx bit. T30 torx bit removing the heat shield. A picture showing the yellow cap piece during the reinstall. Once the transmission is drained of fluid and the heat shield has been removed you need to remove the plug from the transmission. It requires you to twist the yellow cap to the left and the pull the black connector out of the transmission. Once the plug is removed you will need an extension and a 7mm socket to remove the inner connector out of the transmission it takes a few turns to loosen the screw about 10ish if I remember correctly. Once the screw is loosened you can pull out the inner cap from the transmission. When reinstalling it just remember how you removed it as the plug has 3 groves that have to align to reinstall it correctly. Also use some transmission fluid to lube up the gaskets before reinstallation to stop leaks. Once you remove the connector you can then drop the pan by removing the 6 T 30 torx bolts surrounding the pan. Remember where they go as the passenger front bolt will need to hold the heat shield again. When you get down to the last two bolts loosen them both up half way and then using your other hand support the weight of the pan while removing it. be prepared with paper towels and a catch pan as transmission fluid will come out as well. try not to tip the pan as it will have fluid in it. how I kept track of where the bolts go on the pan. Once the pan is removed clean up the magnet and the bottom of the pan. Also leave the old gasket on it as it makes a nice clean work space to put the valve body once it is out of the car. magnet cleaned. When reinstalling the drain plug don't forget to buy a new crush washer. remove the old filter from the valve body once you drop the pan. now that you have your valve body exposed there are 10 bolts that need to be removed using a T30 torx bit. remember now is the time to be very clean with your work. you will remove 6 bolts from the front as pictured and you can see the 4 bolts at the back that need to be removed in this picture as well. you do NOT need to remove the bolts holding the black clip on the bottom of this picture. Now that you have all but two bolts removed you will need to once again support the weight of the valve body while you remove it from the car. there will be transmission fluid falling from the valve body as you remove the bolts. be prepared to catch it as it falls with a pan or paper towels. Once the valve body is removed this is what the transmission will look like. on the bottom of the picture is the shift linkage (I believe that is what it is called) and it attaches to a float piece in the valve body you must make sure to push the float piece back into the valve body before reinstall or it won't line up correctly and you won't be able to fit it back into position inside the transmission. you will need to pull off the yellow cover pieces to reach the solenoids. You can clean up the valve body and the solenoids by wiping the grime off with paper towels at this point. you can see some of it in the picture below. Here is the conductor plate on top of the valve body. remember to be clean while performing this swap. you must remove the 3 clips holding the 6 solenoids to the valve body/conductor plate with a T30 torx bit. Remember to keep track of which solenoid goes where on the conductor plate. This is how I kept track of them. Once the solenoids are removed you can pull off the old conductor plate (It just clips onto the valve body no bolts holding it on at this point.)
To reinstall just do everything in reverse order. Remember to change your pan gasket with a new one and to use a bit of transmission fluid on the gasket to get a good seal. the torque setting for the valve body bolts is 72 inch pounds. remember you are working with aluminum so you won't need to strain yourself putting the bolts back in. Once the valve body is back in put the new filter in and align it with the grove in the valve body and push it in. Don't forget to clean around where the pan gasket surface attaches to the transmission to prevent leaking.
You will need to use star to reprogram the conductor plate to the VIN or the car will not shift into gear. go to drive and then ETC to get to the electronic transmission control unit. Click on new start up sequence and transfer the codes to the new unit. and follow the prompts
And now don't forget to refill the transmission with transmission fluid using the dip stick tool and reinsert the red lock pin into the fill tube cap when finished. to get the correct level you must fill to the lower line on the tool then drive stop and go traffic for 20-30 minutes to warm up the transmission to 80C and place the car into neutral with the e-brake on and correct the level of transmission fluid on a level surface.
Last edited by gjunon; Sep 7, 2018 at 07:14 PM.
Reason: clarification
Damn i wish i saw this before i paid someone to do this for me. I was terrified to do it and paid someone else to do it and i ended up needinng a full trans rebuild after the guy didnt seal it well and was slowly leaking over a period of months. Great DIY!!
Mercedes SLR McLaren 722 S Is Extremely Rare Example Modified by McLaren
Slideshow: A one-of-one U.S.-spec Mercedes-Benz SLR McLaren Roadster became even rarer after a factory-backed transformation at McLaren's headquarters.