When you click on links to various merchants on this site and make a purchase, this can result in this site earning a commission. Affiliate programs and affiliations include, but are not limited to, the eBay Partner Network.
The water pump was a little trickier as I had to move a factory oil line somewhat in order to get it to fit. The upgraded pump came with its own bracket that would not fit with the factory oil line, and even after I moved the line, it wouldn�t fit. Finally I figured out that I also had to remove not only the bracket that holds the factory water pump, but also there�s another bracket that holds the bracket� that holds the factory water pump (a bracket for a bracket), which was not an obvious fix right off the bat. Being as I�m sure this mod has been done a thousand times, it would have been very helpful to have some instructions... In any case, with the bracket�and the bracket for the bracket�removed, I was able to get the pump to mount albeit very tightly to the oil cooler line.
With some more helpful advice from mertd93, and some instructional vids from youtube, I took the front bumper cover off and went to work.
Did you have any issue installing two bumper screws under the crash bar with the new HE? Also, inner bumper brackets jamming against new HE?
I had to clipped off parts of the bumper brackets and had to lower the HE by less than an inch or more to get them screws in. Maybe later I�ll try bending them HE brackets/bars to an �L� shape to push HE inward to clear opening for those two screws.
Cooling, and monitoring via torque already? Off to a good start Did you bleed the system to get all the air out after install? That is a CWA pump, and since you got it from a vendor in a kit I'm assuming it's the CWA100 (superflo) from VRP. On factory clutched I would closer to 10-15 above ambient cruising with that set up.
Did you have any issue installing two bumper screws under the crash bar with the new HE? Also, inner bumper brackets jamming against new HE?
I had to clipped off parts of the bumper brackets and had to lower the HE by less than an inch or more to get them screws in. Maybe later I�ll try bending them HE brackets/bars to an �L� shape to push HE inward to clear opening for those two screws.
I'm not quite sure which two bumper screws you're referring to...the HE is held in place by only the four screws that I highlighted below. The two vertical brackets on the HE sort of just wedge under those two black tabs that extend down over the bumper. That alone holds it in place to be able to mark for the mounting holes.
I was able to press it up fairly flush with the bumper.
Cooling, and monitoring via torque already? Off to a good start Did you bleed the system to get all the air out after install?
Yes I did bleed back into the reservoir, but there really were very little bubbles at all...
Originally Posted by drothgeb
That is a CWA pump, and since you got it from a vendor in a kit I'm assuming it's the CWA100 (superflo) from VRP. On factory clutched I would closer to 10-15 above ambient cruising with that set up.
You know...right after install, it was right around 14 degrees above ambient, and was fairly consistent there for a while and recovery times that seemed very acceptable to me...but recently it seems to have settled around 20-25 above ambient for some reason...and the recovery time has seemed to decrease a bit since right after install when it was very quick...it has definitely been a source of consternation for me as I was quite pleased with the initial temp relative to ambient as well as recovery times...I even tried to re-bleed it.
In other words, it seems as if the initial overall performance suddenly dropped off a tad for some reason.
Yes I did bleed back into the reservoir, but there really were very little bubbles at all...
You know...right after install, it was right around 14 degrees above ambient, and was fairly consistent there for a while and recovery times that seemed very acceptable to me...but recently it seems to have settled around 20-25 above ambient for some reason...and the recovery time has seemed to decrease a bit since right after install when it was very quick...it has definitely been a source of consternation for me as I was quite pleased with the initial temp relative to ambient as well as recovery times...I even tried to re-bleed it.
In other words, it seems as if the initial overall performance suddenly dropped off a tad for some reason.
The superflo and upgraded HE is the same one i have I also hardwired mine to run at all times when car is on and see between 12 to 18 degrees above ambient. Higher if the cars not moving but i will be installing a custom single pass more efficient core bigger tank eith 3/4 inlet an outlet intercooler as soon as its ready and then a custom 6.5 gallon trunk tank with a ewp modified pump. Should keep everything cool and recovery will be great.
The superflo and upgraded HE is the same one i have I also hardwired mine to run at all times when car is on and see between 12 to 18 degrees above ambient. Higher if the cars not moving but i will be installing a custom single pass more efficient core bigger tank eith 3/4 inlet an outlet intercooler as soon as its ready and then a custom 6.5 gallon trunk tank with a ewp modified pump. Should keep everything cool and recovery will be great.
Ok, good to know then, based on that it sounds like perhaps it's operating in the right range...thank you!
and then a custom 6.5 gallon trunk tank with a ewp modified pump. Should keep everything cool and recovery will be great.
Perfect Segway into my next purchase...great minds think alike...
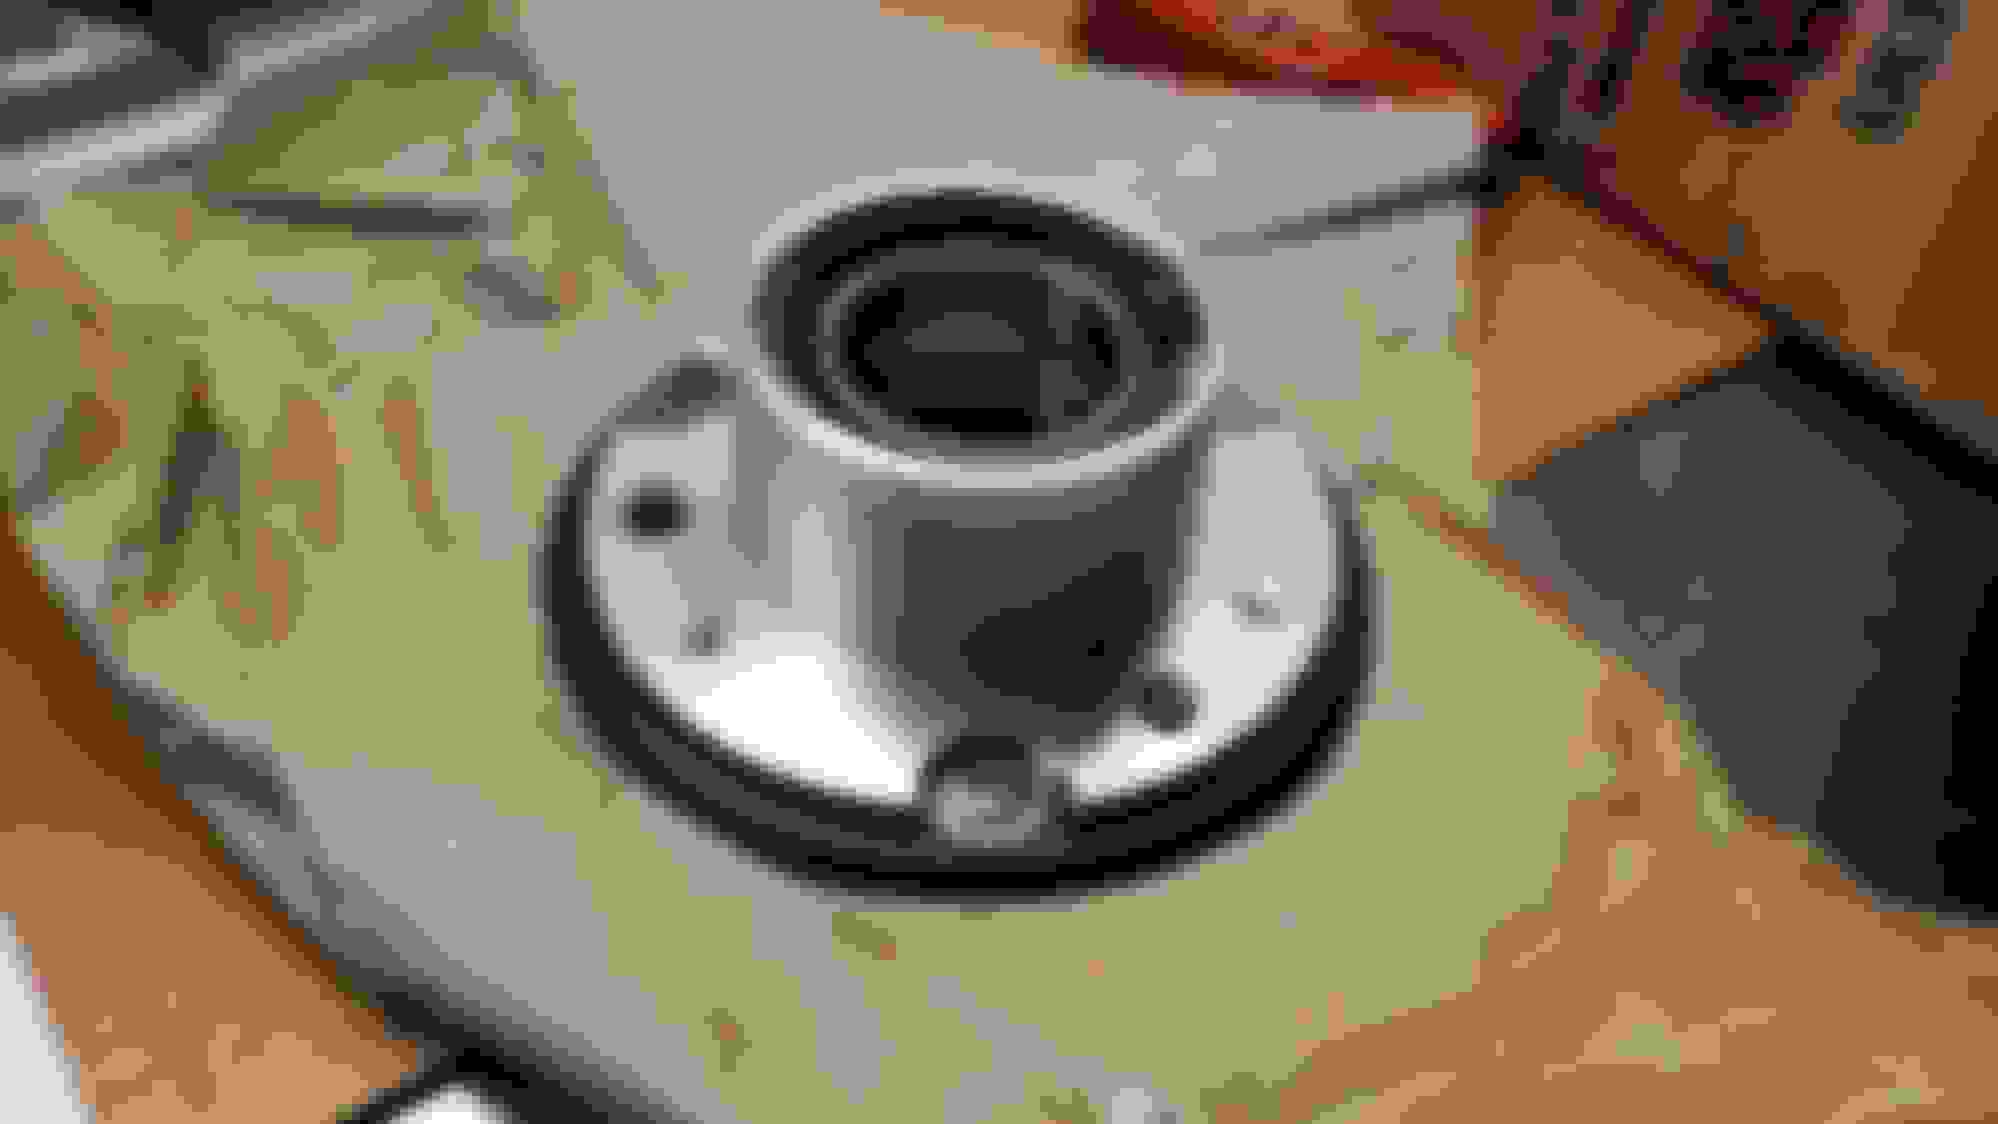
So I ordered this beauty in anticipation of taking my cooling mods to the next level...beautiful piece and quality workmanship.
Initial assessment of install indicates that it will be more challenging than it initially seems.
First impression is...drill a couple holes run a couple hoses and...voila!
However this particular tank isn't specifically designed for the E55...it's designed more for a car with a true circular spare tire well. As such, the brackets don't really work as is.
The brackets will have to be modified (nothing like modifying your modifications)...then, once exited from the trunk, the path of the lines is not a simple as one might think either...
I first thought under the plastic undercarriage panels, but there's no room under them, they run flush to the body...we have some other ideas that we will have to tinker with...
I'm not quite sure which two bumper screws you're referring to...the HE is held in place by only the four screws that I highlighted below. The two vertical brackets on the HE sort of just wedge under those two black tabs that extend down over the bumper. That alone holds it in place to be able to mark for the mounting holes.
I was able to press it up fairly flush with the bumper.
Definitely two screws to hold bumper to crash bar (yellow sticker is on) the screw holes are between the black bracket on each ends. Just an awareness and get your take on how you negotiate HE install with bumper. No worries, cheer!
More pre-purchase research on here made me aware of the importance of modifying the water to air intercooler system. I know this has been posted ad nausea on this site�but here was my experience:
I purchased a kit that came with an upgraded HE, water pump, and split cooling kit. I have to admit I was disappointed the minute I noticed that it came with no instructions at all, just a box with parts. I emailed the vendor and he said they did not provide instructions�huh? Only after I inquired did he email some instructions, which were a hodge-podge of pdfs, pictures that had been drawn on by hand, and written instructions that had been modified by hand �I found that very odd. Like...so there obviously were instructions...but they are only provided after request?
I also discovered after inspection that it didn�t have all of the necessary hardware to complete the install, when I emailed the vendor to ask, I was told I had to provide my own hardware for the reservoir and water pump�I also found this odd that, 1.) for the price I was paying they could not include a few more fasteners to make the kit complete and save me the time and trip to Home Depot to put together the right pieces, and 2.) If this was the case why it would not be mentioned up front (�batteries not included�).
The HE, for its part, was a very nice piece, and an obvious serious upgrade from factory.
Well, at least you know what vendor to avoid for future mod purchases
After much deliberation, and research regarding which SC pulley to go with, I decided on UPD.
I pm�d Shardul with a couple of questions which he promptly responded to�he was very helpful.
I ordered a 77mm SC pulley, as well as a Belt Wrap Kit. I received both items within just a couple of days. The items were well packed and the craziest part is that both items came with their own instructions!
The pulley and the BWK both were very high quality pieces and definitely passed the eyeball test. (apologies for the lack of pics of the BWK)
One of my closest friends, Doug, is the owner of a boutique performance shop named FabShop Miami, where he is a one man show. FabShop is known for producing some of the fastest Nissan GTRs in Miami, however Doug is an automotive artist that can work on basically anything. We�ve been friends for 30 years and so I have the privilege to be able to use his facility and tools, as well as benefitting from his expertise.
I decided to do the pulley and wrap kit at his shop�and I�m glad I did. He has exponentially more tools than I do and there were some bolts and fittings that would have been challenging but became easy with the right tools that I do not have.
Removal of the factory pulley was a bit of a struggle at first as the SC pulley bolt was very tight and the tool to hold the pulley in place to be able to remove the bolt (no idea the actual name for it) was slipping on the SC balancer (I believe it�s a balancer?)�
The balancer is very smooth so we wrapped it in duct tape to try and give the tool a little more grip. A little struggling and finesse and the bolt finally came loose�
The UPD pulley instructions said to remove all shims and check the gap before adding any shims, indicating that the gap needed to be within .3mm - .6mm. We checked the factory gap before removing the OEM pulley and it was at .5mm�when we pulled the OEM pulley off there was one factory shim in there.
Per the instructions, we removed that shim and placed the UPD pulley on and checked the gap�unfortunately the gap was .8mm and even bolted on at factory torque spec�the gap would not get any smaller�once you put it on, its on and while you can always make the gap larger with shims, there�s nothing you can do to make the gap smaller other than machining either the pulley, or the balancer.
Obviously this caused some concern�any time you are out of spec it causes concern�
Options at this point were limited: send it back and wait for the new one to come back (I hate waiting), send it off to be machined (I hate waiting), or try it as is and hope for the best�
We decided to try option 3...I figured that the worst thing that could happen is that clutch wouldn�t engage and it would not go into boost, and then I would then just have to go with option 1 or 2 anyway.
We just took the edge off so to speak and rounded the bottom out a bit…the result was much more acceptable clearance from the belt.
Other than that the BWK was a pretty straightforward install…did I mention that it came with instructions? (As well as all necessary hardware for install)
So all the goodies installed, and just one more item to finish it off�a Scatter Shield�
�did I mention the Scatter Shield came with instructions? (Like�4 page color instructions no less, as well as nicely packaged fittings and even an allen wrench)
So everything buttoned up, and I went for a test drive (a very delicate test drive since I had not yet gotten the tune for the pulley). I just wanted to see if it would go into boost�
And to my delight�it did.
So now an easy drive home to park it and send the ECM off for tune.
Is it possible you have that bracket upside down? That clearance can't be the way it was designed.
Extra pulley gap will only affect the springs. They have to flex more to engage.
For a more secure scatter shield, you can drill a small hole down through the tabs and pin. Then drop a cotter pin through.
Is it possible you have that bracket upside down? That clearance can't be the way it was designed.
hmmmm...not sure what you mean about the gap, but I'm pretty sure it only goes one way, otherwise you wouldn't be able to tighten the screw...plus the lettering would be upside down.
Originally Posted by StarvingArtist
Extra pulley gap will only affect the springs. They have to flex more to engage.
Ah I see, so then is being outside the range (by .2mm) ok?
Originally Posted by StarvingArtist
For a more secure scatter shield, you can drill a small hole down through the tabs and pin. Then drop a cotter pin through.
Good tip, as I have had to adjust the tab side on occasion.
I meant the bracket of your belt wrap kit. All the motors should presumably be the same, so if the bracket is almost rubbing the belts, something is wrong. I haven't got a BRK to look at, but it can't be designed that way. Hopefully someone who has the kit will chime in.
Extra clearance on the pulley is not ideal. That's why I suggested securing your shield. It's not much, but the more the springs have to flex, the shorter their life.
I meant the bracket of your belt wrap kit. All the motors should presumably be the same, so if the bracket is almost rubbing the belts, something is wrong. I haven't got a BRK to look at, but it can't be designed that way. Hopefully someone who has the kit will chime in.
Ah ok I see what you mean...i initially thought the same thing, but unfortunately, the bracket also only goes on one way, it has specific size holes on each end that fit onto preexisting corresponding sized pieces of the motor.
Have you pinned your scatter Shield? I'd love to see your method if you dont mind, I think it's a great idea, but it seems like drilling through that prong would be a little challenging no?


 05-01-2019, 12:58 AM


 Did you bleed the system to get all the air out after install? That is a CWA pump, and since you got it from a vendor in a kit I'm assuming it's the CWA100 (superflo) from VRP. On factory clutched I would closer to 10-15 above ambient cruising with that set up.