E55 Bosch Alternator Rebuild DIY
#1
Member
Thread Starter
E55 Bosch Alternator Rebuild DIY
W211 E55 Mercedes Bosch 180 amp Alternator Rebuild DIY
0131548502, 0121548902 non-clutched, Bosch type IR/IF
Tools for the job:
Gear/Bearing Puller, 2 Jaw (I used a Sunex 3905)
Impact Screwdriver to remove the 4 front bearing retainer screws
Phillips/Crosshead screwdriver
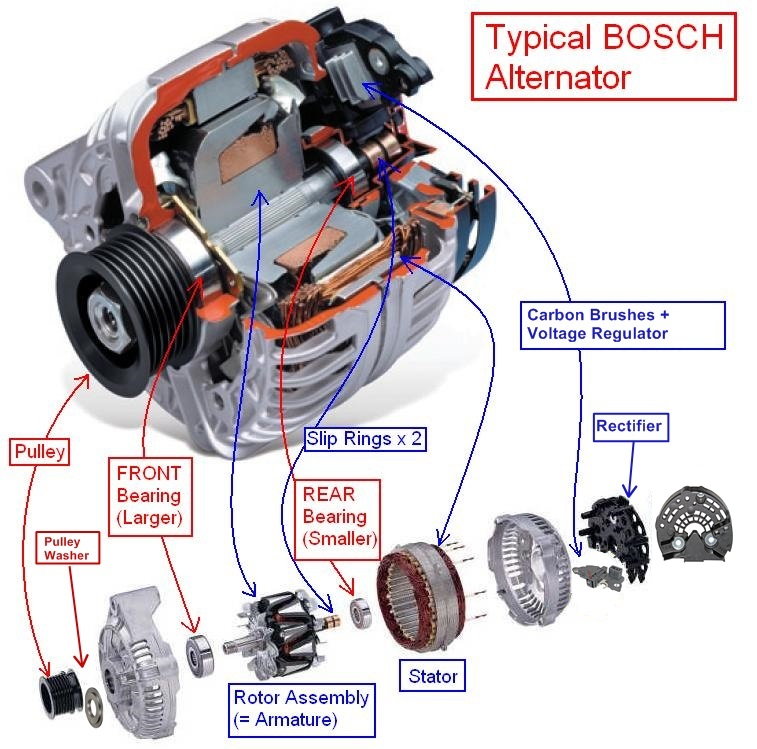
4mm ¼”drive socket to help bearing puller remove rear smaller bearing
5/16” or 8mm deep socket to remove the 4 60mm long case bolts
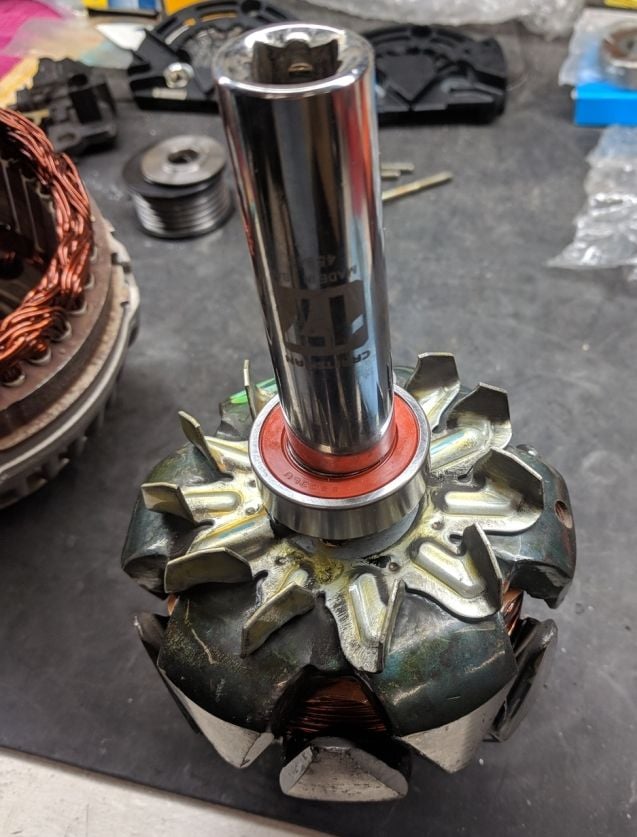
17mm deep socket to tap on rear smaller bearing
¾” or 19mm deep socket to tap out the front larger bearing from housing
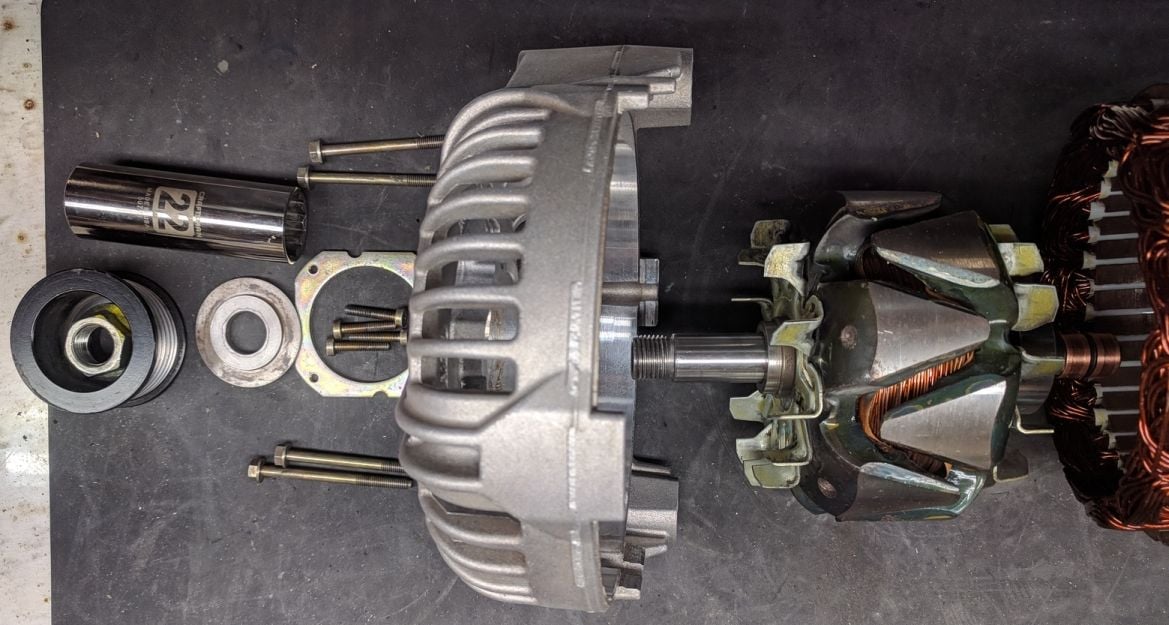
22mm ½” drive deep socket to turn the pulley nut
Impact Gun, ½” drive
Bench Vise or blocks
Thick gardening/utility gloves
Sandpaper 400-800 grit or similar emery cloth to lightly clean bearing races/shaft
Nylon brush/5gal bucket or similar
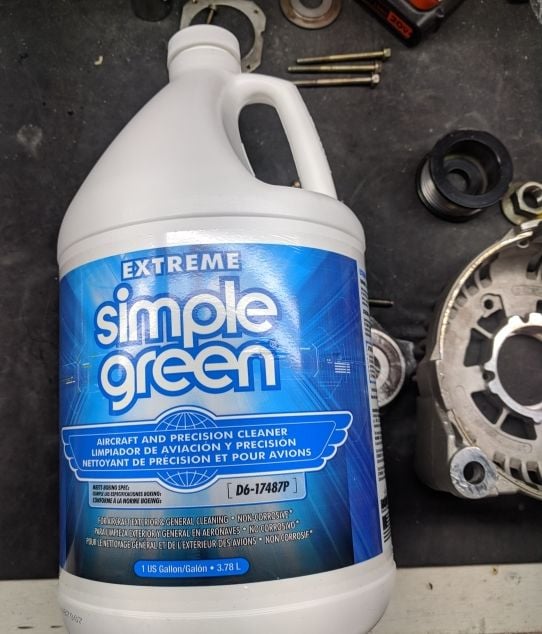
Simply Green Extreme Aircraft Cleaner, 1-2cups in 3gals hot water
Parts List:
Replace each rebuild:
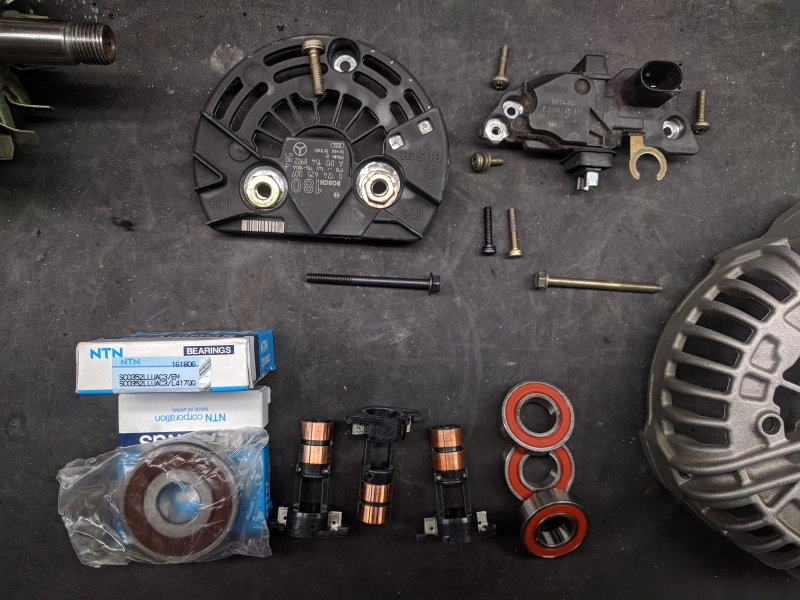
Voltage regulator/Brushes x1 MB part 0031546506 $59.04 lifetime warranty or $54.45 wholesale.
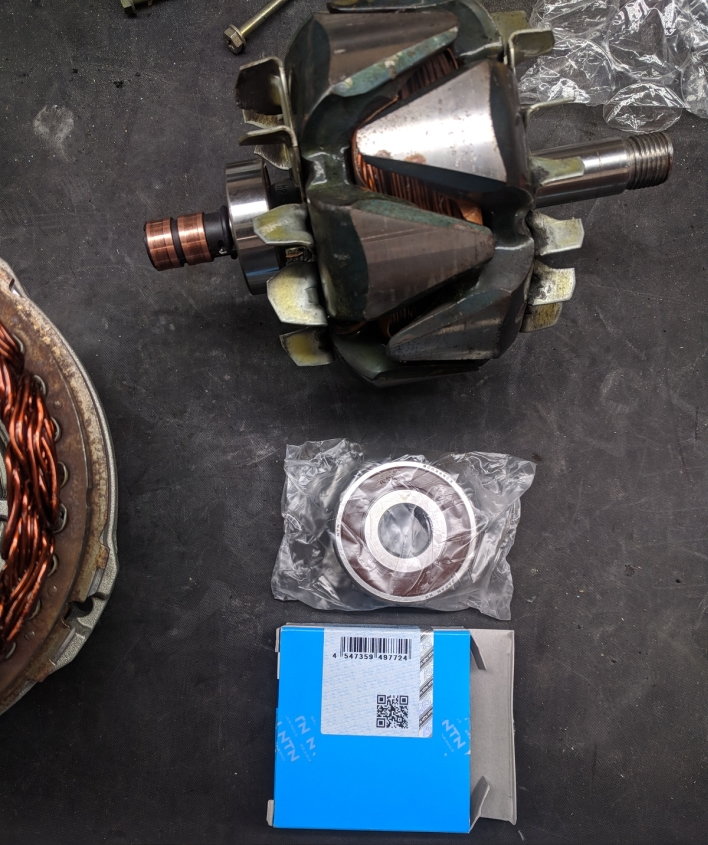
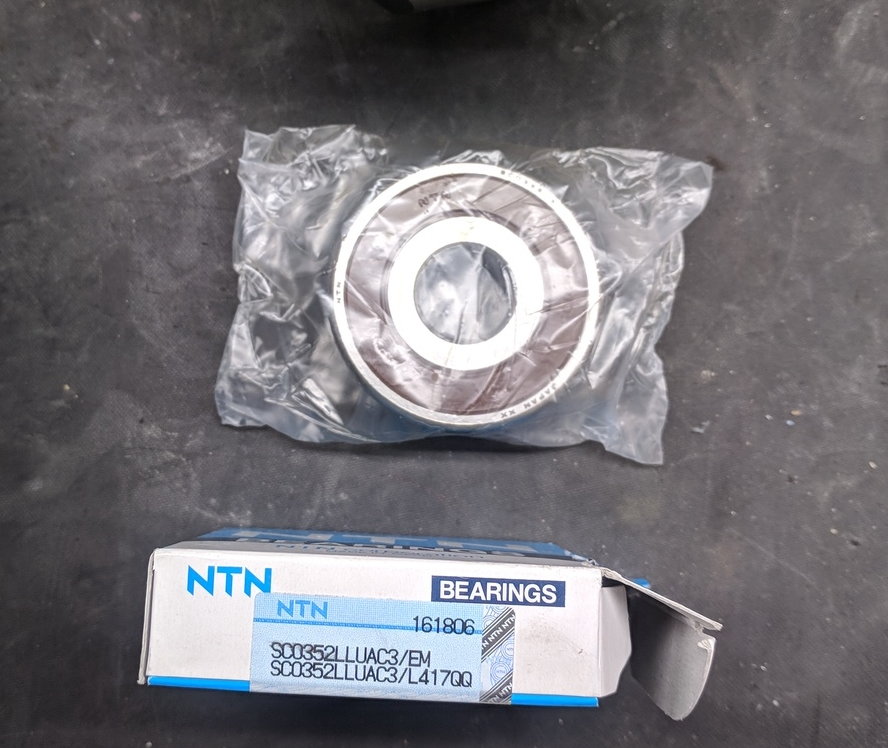
Bearing 17mmX52mmX17mm $12.99 x1 (Request NTN or other high quality Japanese, original was NTN)
Bearing 17mmX35mmX10mm $8.50 x1 (Request NTN or other high quality Japanese, original was NTN)
Replace if bad, loose, or stripped:
Grounding Screw M4-0.7x13mm w/ washers x1 $3.99
Bearing Retainer Screws M4-0.7x22mm x4 $ Voltage Regulator Screws M4-0.7x18mm x2, Local hardware store
Case Thru Bolts M5-0.8x60mm flange head (50in/lbs) x4 $19.00
Slip Ring 52mm, 7.1mm ID, 16.1mm OD $9.80
Bearing Tolerance Ring 35mm ID, 38mm OD, 50.2mm W x1 $6.99
Bosch Front Bearing Retainer $7.36
Pulley Spacer 17mm ID, 39mm OD, 5mm x1 $7.50
Pulley 1121550215 $22.13
Rectifier, 6 Diodes, 00M133249 or 00M133276 x1 $29.99, more difficult process requiring decrimping/high temp silver soldering terminals.
Cautions:
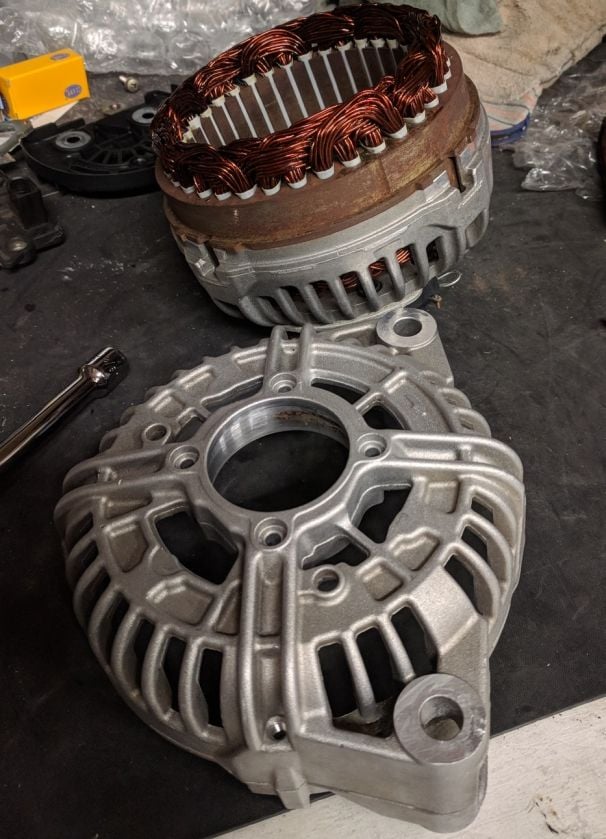
Be very careful not to scratch the dark red varnish from the exposed stator windings when housings are disassembled.
Steps:
1) Watch the first video below twice and read my notes below.
2) Watch the second video if you need to replace your slip ring unit. It has a few other helpful tips on the overall rebuild as well.
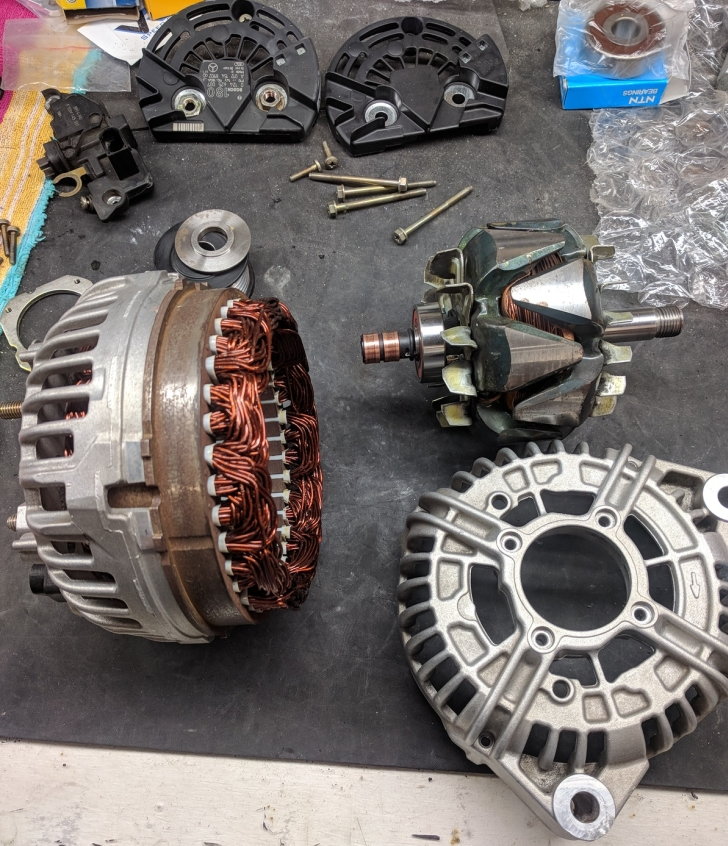
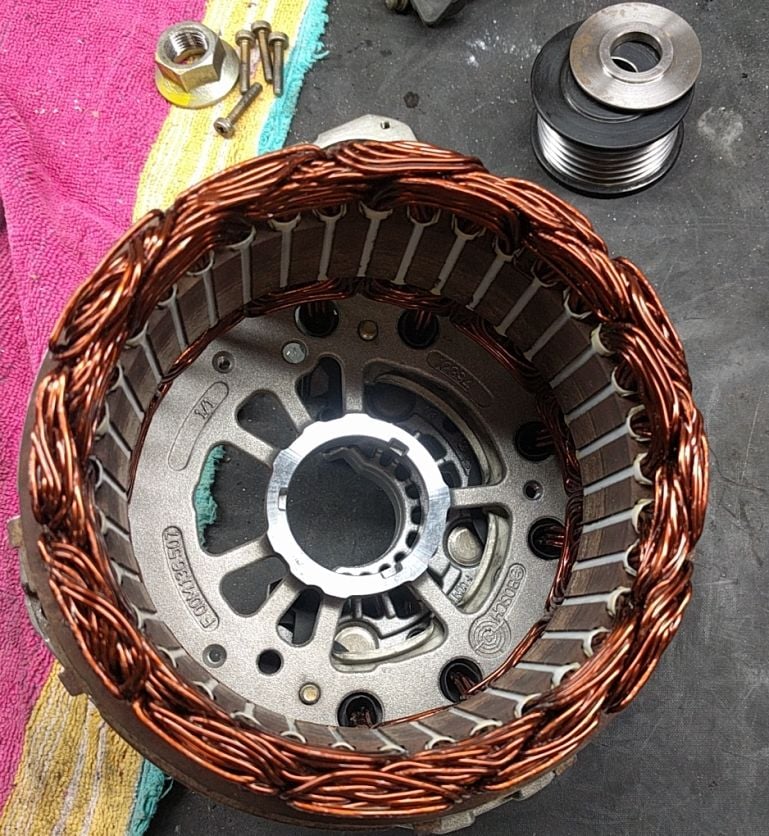
3) Review photos below in the next post.
4) Before disassembly mark the two separate housings in relation to each other.
5) Begin disassembly according to first video.
6) When apart without bearings installed, clean both housings with a nylon brush in a 5gal bucket or similar container with a solution of all-purpose cleaner and hot water. I used Simply Green Extreme Aircraft Cleaner and mixed about 2 cups to about 3 gals of very hot water. This cleaner is safe for the stator windings. I let the two case housings soak for about 15-20 mins and then started to brush the grease off including the attached stator windings and magnets inside. They came out surprisingly very clean afterwards. Thoroughly rinse with water. Repeat if necessary. I also cleaned/wire brushed the bolts, screws, retaining plate, and pulley/washer.
7) Begin assembly according to first video.
Videos (if these get taken down for some reason PM me and I’ll upload them to another YouTube account and fix the links):
– Very similar to our alternators with some minor differences.
3:35 – The W211 E55 alternators usually don’t come with a separate washer. It instead uses a flange nut.
5:10 – I had to use an impact screwdriver to loosen these 4 front bearing retainer screws.
6:21 – I put the large bearing in the freezer for about an hour and then heated the housing to 280F for 20 mins. Wearing thick gloves the bearing almost dropped right in. Lightly tap in with a wood handle if need be.
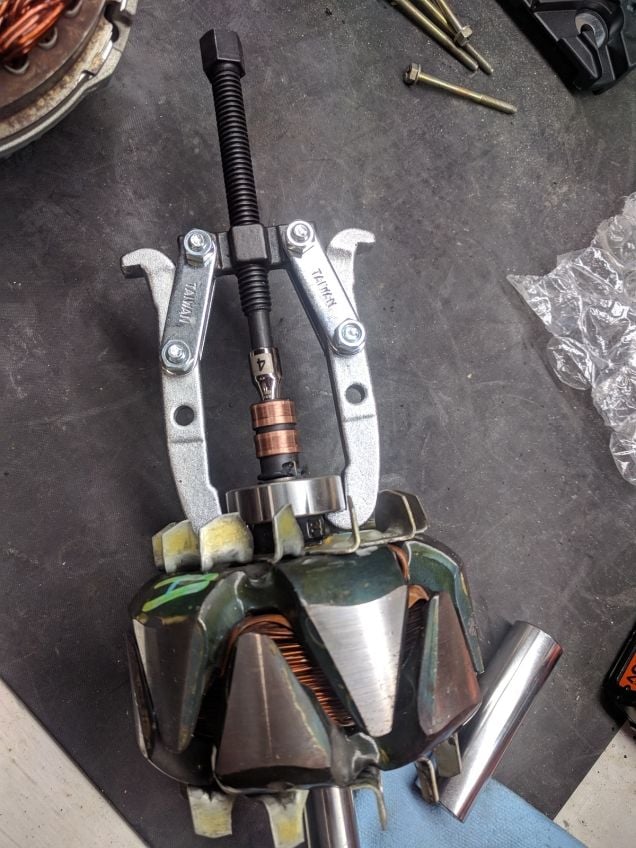
6:40 – I sprayed the small rear bearing with Kroil, let set for a while, and then used the bearing puller and 4mm socket to remove. The 4mm socket is to make sure the puller shaft only pushes against the steel shaft on the inside top of the black plastic slip ring housing and doesn’t crack it. Go slowly and make sure you are centered. If you crack the slip ring housing then see the second video below as you will need to replace it. You shouldn’t have to use a Dremel to cut in and remove either bearing. Skip to 9:16 on the video.
9:35 – I used blue Loctite on the 4 front bearing retainer screws hand tightened (see photos below).
9:57 – 17mm deep socket to tap on rear small bearing over the slip ring.
12:56 – Mine used a flange nut and won’t have the separate washer. I used a 22mm deep socket and ½” drive impact gun to tighten nut. I use about 115psi on the air regulator to loosen and tighten this nut.
12:31 – My tolerance ring was loose so I used a new one that installed tight. Use a deep socket to tap around the tolerance ring base if need be. FYI: The rear smaller bearing OD will press into the ID on this tolerance ring.
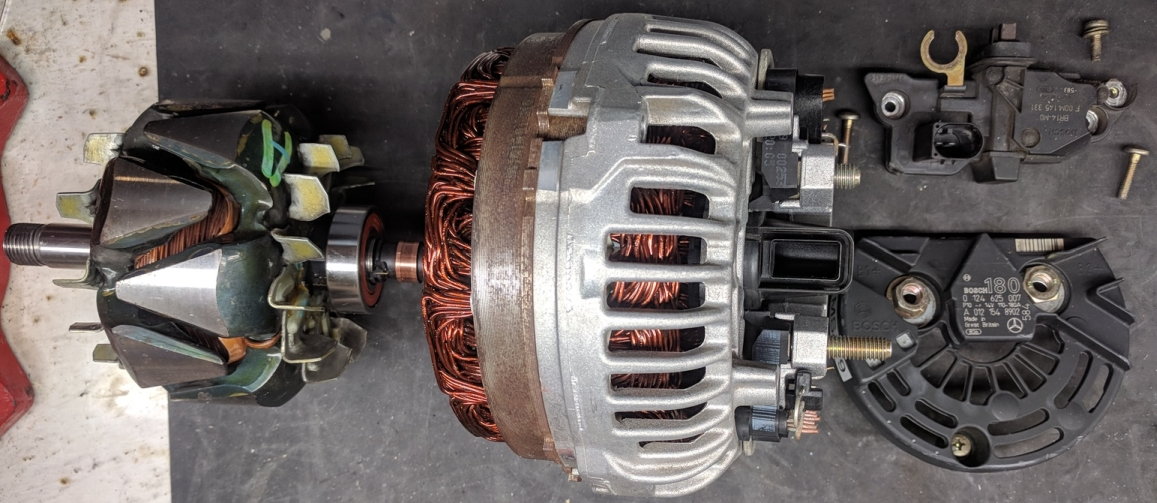
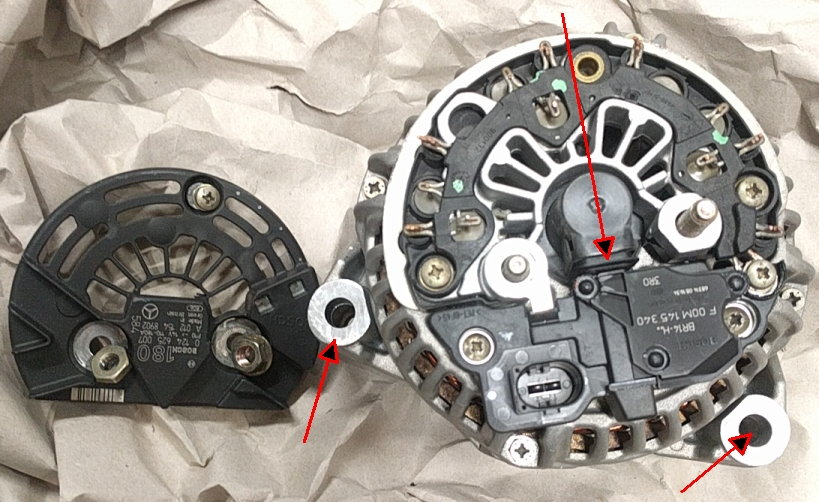
13:43 – See photo below for front-rear housing orientation on the E55 but check your orientation prior to disassembly as some M113k configurations may be different. The tolerance ring opening (brushes go into) faces out between the smaller distances of the two alternator-engine mounting holes.
14:45 – I tightened the 4 M5-0.8x60mm case through bolts to 50lbs/in in a cross pattern. You’ll know if you don’t tighten these in the correct pattern completely as the pulley will bind in certain spots when hand spinning. You can always try to lighten, loosen, and then re-tighten to see if that helps.
14:49 – It will hand spin with some resistance but it will be consistent and not bind in some spots.
15:32 – I applied some dielectric grease on the grounding screw/loop terminal and the large “C” terminal on the voltage regulator.
– This isn’t need most of the time. It’s only if the slip ring is damaged during disassembly or the alternator has very high mileage and the copper slip rings are very deeply grooved.
3:44 – Start of slip ring removal and replacement.
For a DIY on removing and installing the alternator from the car:
DIY W211 E55 Alternator Removal by HeissRod
0131548502, 0121548902 non-clutched, Bosch type IR/IF
Tools for the job:
Gear/Bearing Puller, 2 Jaw (I used a Sunex 3905)
Impact Screwdriver to remove the 4 front bearing retainer screws
Phillips/Crosshead screwdriver
4mm ¼”drive socket to help bearing puller remove rear smaller bearing
5/16” or 8mm deep socket to remove the 4 60mm long case bolts
17mm deep socket to tap on rear smaller bearing
¾” or 19mm deep socket to tap out the front larger bearing from housing
22mm ½” drive deep socket to turn the pulley nut
Impact Gun, ½” drive
Bench Vise or blocks
Thick gardening/utility gloves
Sandpaper 400-800 grit or similar emery cloth to lightly clean bearing races/shaft
Nylon brush/5gal bucket or similar
Simply Green Extreme Aircraft Cleaner, 1-2cups in 3gals hot water
Parts List:
Replace each rebuild:
Voltage regulator/Brushes x1 MB part 0031546506 $59.04 lifetime warranty or $54.45 wholesale.
Bearing 17mmX52mmX17mm $12.99 x1 (Request NTN or other high quality Japanese, original was NTN)
Bearing 17mmX35mmX10mm $8.50 x1 (Request NTN or other high quality Japanese, original was NTN)
Replace if bad, loose, or stripped:
Grounding Screw M4-0.7x13mm w/ washers x1 $3.99
Bearing Retainer Screws M4-0.7x22mm x4 $ Voltage Regulator Screws M4-0.7x18mm x2, Local hardware store
Case Thru Bolts M5-0.8x60mm flange head (50in/lbs) x4 $19.00
Slip Ring 52mm, 7.1mm ID, 16.1mm OD $9.80
Bearing Tolerance Ring 35mm ID, 38mm OD, 50.2mm W x1 $6.99
Bosch Front Bearing Retainer $7.36
Pulley Spacer 17mm ID, 39mm OD, 5mm x1 $7.50
Pulley 1121550215 $22.13
Rectifier, 6 Diodes, 00M133249 or 00M133276 x1 $29.99, more difficult process requiring decrimping/high temp silver soldering terminals.
Cautions:
Be very careful not to scratch the dark red varnish from the exposed stator windings when housings are disassembled.
Steps:
1) Watch the first video below twice and read my notes below.
2) Watch the second video if you need to replace your slip ring unit. It has a few other helpful tips on the overall rebuild as well.
3) Review photos below in the next post.
4) Before disassembly mark the two separate housings in relation to each other.
5) Begin disassembly according to first video.
6) When apart without bearings installed, clean both housings with a nylon brush in a 5gal bucket or similar container with a solution of all-purpose cleaner and hot water. I used Simply Green Extreme Aircraft Cleaner and mixed about 2 cups to about 3 gals of very hot water. This cleaner is safe for the stator windings. I let the two case housings soak for about 15-20 mins and then started to brush the grease off including the attached stator windings and magnets inside. They came out surprisingly very clean afterwards. Thoroughly rinse with water. Repeat if necessary. I also cleaned/wire brushed the bolts, screws, retaining plate, and pulley/washer.
7) Begin assembly according to first video.
Videos (if these get taken down for some reason PM me and I’ll upload them to another YouTube account and fix the links):
3:35 – The W211 E55 alternators usually don’t come with a separate washer. It instead uses a flange nut.
5:10 – I had to use an impact screwdriver to loosen these 4 front bearing retainer screws.
6:21 – I put the large bearing in the freezer for about an hour and then heated the housing to 280F for 20 mins. Wearing thick gloves the bearing almost dropped right in. Lightly tap in with a wood handle if need be.
6:40 – I sprayed the small rear bearing with Kroil, let set for a while, and then used the bearing puller and 4mm socket to remove. The 4mm socket is to make sure the puller shaft only pushes against the steel shaft on the inside top of the black plastic slip ring housing and doesn’t crack it. Go slowly and make sure you are centered. If you crack the slip ring housing then see the second video below as you will need to replace it. You shouldn’t have to use a Dremel to cut in and remove either bearing. Skip to 9:16 on the video.
9:35 – I used blue Loctite on the 4 front bearing retainer screws hand tightened (see photos below).
9:57 – 17mm deep socket to tap on rear small bearing over the slip ring.
12:56 – Mine used a flange nut and won’t have the separate washer. I used a 22mm deep socket and ½” drive impact gun to tighten nut. I use about 115psi on the air regulator to loosen and tighten this nut.
12:31 – My tolerance ring was loose so I used a new one that installed tight. Use a deep socket to tap around the tolerance ring base if need be. FYI: The rear smaller bearing OD will press into the ID on this tolerance ring.
13:43 – See photo below for front-rear housing orientation on the E55 but check your orientation prior to disassembly as some M113k configurations may be different. The tolerance ring opening (brushes go into) faces out between the smaller distances of the two alternator-engine mounting holes.
14:45 – I tightened the 4 M5-0.8x60mm case through bolts to 50lbs/in in a cross pattern. You’ll know if you don’t tighten these in the correct pattern completely as the pulley will bind in certain spots when hand spinning. You can always try to lighten, loosen, and then re-tighten to see if that helps.
14:49 – It will hand spin with some resistance but it will be consistent and not bind in some spots.
15:32 – I applied some dielectric grease on the grounding screw/loop terminal and the large “C” terminal on the voltage regulator.
3:44 – Start of slip ring removal and replacement.
For a DIY on removing and installing the alternator from the car:
DIY W211 E55 Alternator Removal by HeissRod
Last edited by mbmg; 07-01-2019 at 06:23 PM. Reason: formatting
The following 2 users liked this post by mbmg:
bbirdwell (07-02-2019),
eFifty5AMG (07-02-2019)
#4
Member
Thread Starter
Thanks. I read that some people were having issues with rebuilt alternators. This is another option to make sure it's rebuilt with quality parts.
#5
Super Member
iTrader: (1)
I bought one from rockauto. A new bosch 180 amp. They had reman option , but i decided on the new one instead. Dont want to deal with reman unit, probably dont last long. There priced pretty cheap compare to others.
There is no core to return on the new unit so it was worth it for me.
There is no core to return on the new unit so it was worth it for me.
Trending Topics
#8
Funny you post this 3 days ago and today my alternator poos the bed.
So did you need any items 4-9 on your list?
I know usually the regulator is the most common failure, but could it be anything else? I just hate to have my car all torn apart to find this didnt fix the issue because the main rotor was shorted or something else was bad.
So did you need any items 4-9 on your list?
I know usually the regulator is the most common failure, but could it be anything else? I just hate to have my car all torn apart to find this didnt fix the issue because the main rotor was shorted or something else was bad.
#9
Member
Thread Starter
I changed out the bearing retainer screws because I didn’t want to use phillips head screws again. I also changed out my bearing tolerance ring (rear bearing cover) because my original was loose. These were in addition to changing out the first three items on my list above.
As far as any other part you’ll need to disassemble your alternator and see if your rectifier is melting. It may be too close to a heat source like your headers. It’s rare that a stator goes bad but if it did I’d just pick up a used alternator and rebuild that one.
As far as any other part you’ll need to disassemble your alternator and see if your rectifier is melting. It may be too close to a heat source like your headers. It’s rare that a stator goes bad but if it did I’d just pick up a used alternator and rebuild that one.
#10
MBWorld Fanatic!
Funny you post this 3 days ago and today my alternator poos the bed.
So did you need any items 4-9 on your list?
I know usually the regulator is the most common failure, but could it be anything else? I just hate to have my car all torn apart to find this didnt fix the issue because the main rotor was shorted or something else was bad.
So did you need any items 4-9 on your list?
I know usually the regulator is the most common failure, but could it be anything else? I just hate to have my car all torn apart to find this didnt fix the issue because the main rotor was shorted or something else was bad.
#11
Newbie
Join Date: Apr 2020
Location: San Francisco
Posts: 1
Likes: 0
Received 1 Like
on
1 Post
2000 CLK430 Convertible
Nice job. Mercedes guys do it right.
With the COVID-19 issue, I am in the process of doing all my DIYs. Just did the differential fluid, tranny, fuel filters, brakes, etc in the CLK430 Convertible and my 2001 E55. Best cars ever.
Again nice job.
Dave
With the COVID-19 issue, I am in the process of doing all my DIYs. Just did the differential fluid, tranny, fuel filters, brakes, etc in the CLK430 Convertible and my 2001 E55. Best cars ever.
Again nice job.
Dave
The following users liked this post:
mbmg (04-06-2020)
#13
Member
Thread Starter
If you notice any of the windings are scratched or the original varnish is thin or coming off then you can spray or paint it with a red insulating varnish. You could also do it just to make it look new. MG Chemicals makes a popular red varnish for this purpose.
#14
MBWorld Fanatic!
Join Date: Jul 2012
Location: Orbiting the planet
Posts: 4,478
Received 1,488 Likes
on
986 Posts
This place is a joke.
Put a new (not reman) Bosch alternator in your car and be done with it. They're around $350. Stop screwing around with voltage regulators or half-assed rebuilds on a 15 year old car, unless you like getting stranded and paying for a tow truck.
#15
Member
Thread Starter
That's always an option to buy new. I agree not to buy a reman as they typically use cheap Chinese bearings unless you like to keep exchanging them. I know what's in my reman because I rebuilt it with quality parts. It's still running great.


