ASA ST-3 Clear Coat Lip Pitted - Stripped + Polished
 03-30-2008, 07:13 PM
#1
Super Member
Thread Starter
Join Date: May 2004
Location: Rhode Island
Posts: 911
Likes: 0
Received 1 Like
on
1 Post
Debadged 6-Speed '05 C320 Sports Coupe
ASA ST-3 Clear Coat Lip Pitted - Stripped + Polished
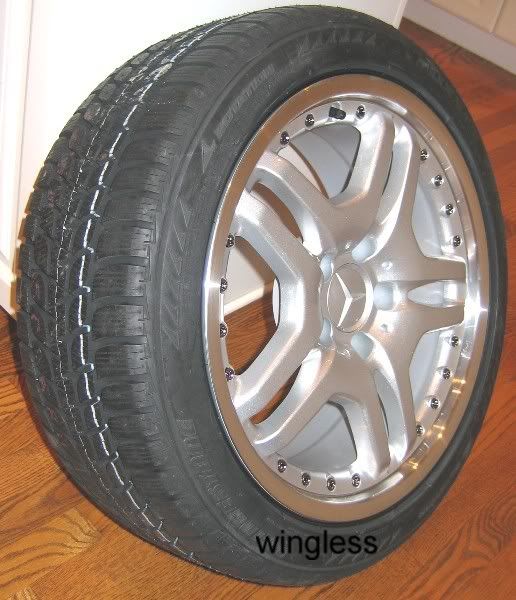
My cheap Korean ASA ST-3 MB knock-off winter wheels got all pitted on the clear-coat polished lip. I couldn't get them looking nice, so I decided to try removing the clear coat and polishing the lip. It worked pretty well. They look SO much better, they are acceptable until I burn through the Blizzak LM-23 and put my factory summer wheels / tires on.
The wheels were cleaned with acetone all over. It got the slime from 3 winters off, that would not budge with other cleaners, polishes or waxes. Note - do NOT use this chemical unless the wheels are otherwise ruined, as it is very aggressive.
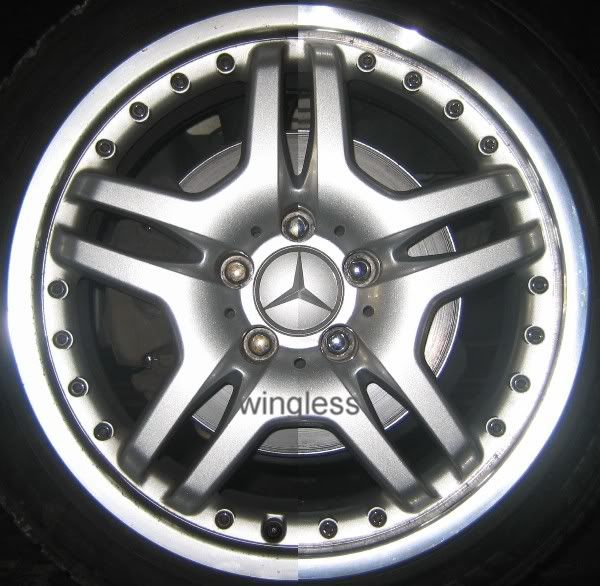
The acetone cleaned the painted front and back of the wheel very well, but the pitted lip still looked really bad. It removed everything, right down to the paint. I used acetone and an SOS pad on just the lip to remove the clear coat. I then polished the bare aluminum with metal polish, all by hand.
There are still minor lip irregularities that would require a mechanical polisher to eliminate, but I'm happy as-is.
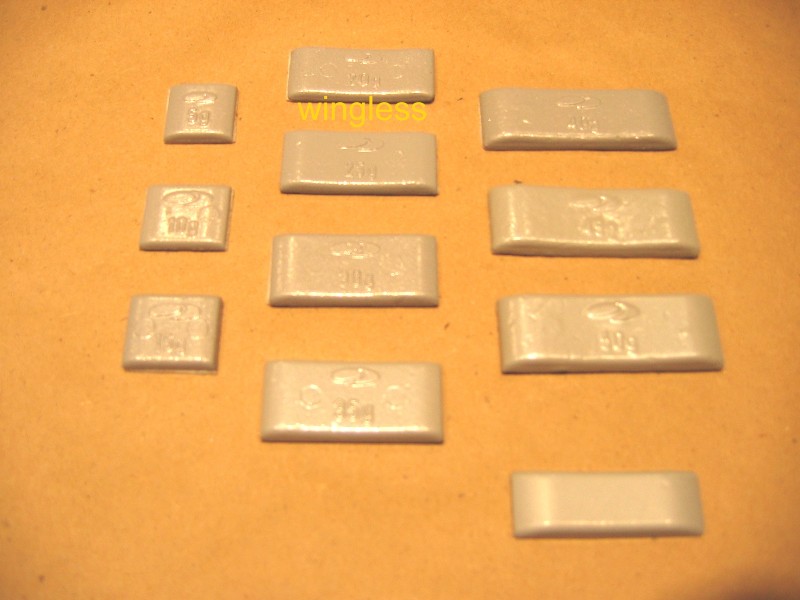
The back-side images show the plombco CCS Series aerodynamic wheel weights. These provide a much cleaner solution to wheel balancing than the standard, snap-off weight strips. These were purchased through Mohawk Rubber Sales of N.E. (800) 242-1446.
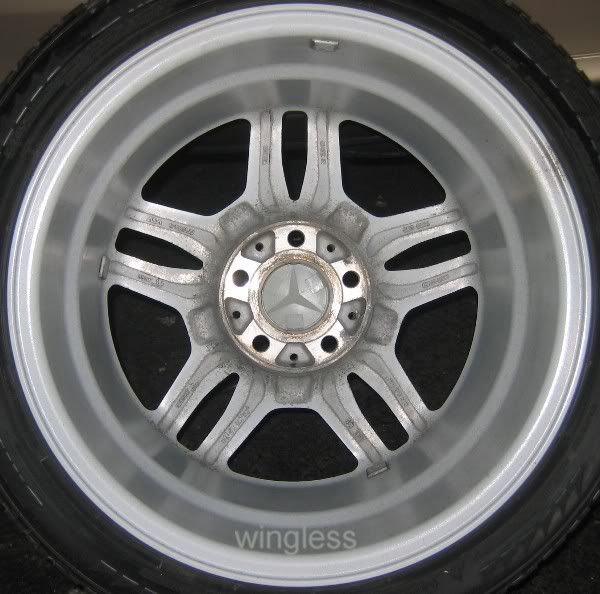
New ASA ST-3 Wheel
Combination - Left - Clean and Pitted - Right - Polished

Another Combination - Left - Clean and Pitted - Right - Polished
Cleaned and Polished Wheel Back Side � After One Winter
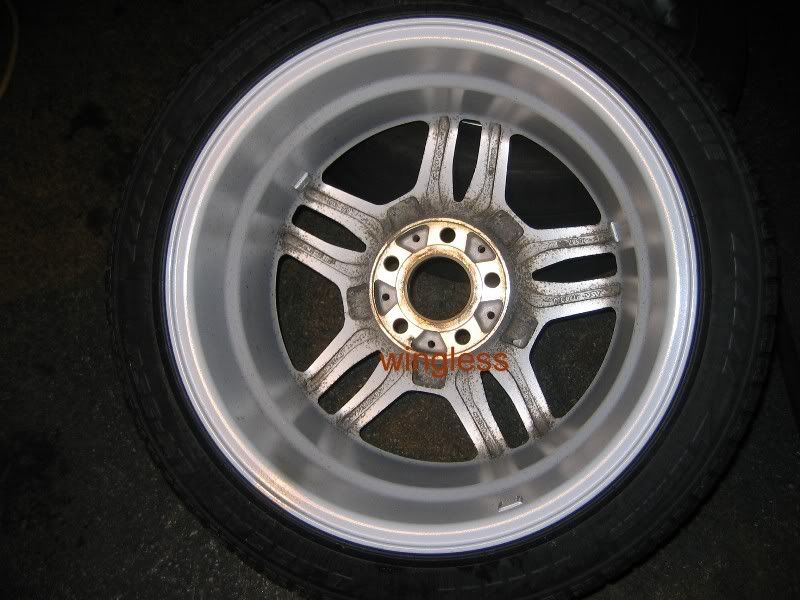
Wheel Back Side � After Three Winters � Half Cleaned w/ Acetone
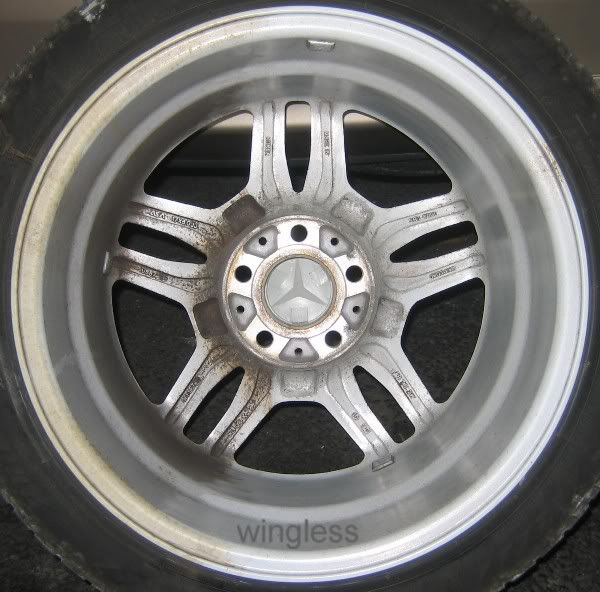
Wheel Back Side � After Three Winters � Cleaned w/ Acetone + Polished
Plombco CCS Series Wheel Weights w/ MB Factory Weight (Lower Right)
The wheels were cleaned with acetone all over. It got the slime from 3 winters off, that would not budge with other cleaners, polishes or waxes. Note - do NOT use this chemical unless the wheels are otherwise ruined, as it is very aggressive.
The acetone cleaned the painted front and back of the wheel very well, but the pitted lip still looked really bad. It removed everything, right down to the paint. I used acetone and an SOS pad on just the lip to remove the clear coat. I then polished the bare aluminum with metal polish, all by hand.
There are still minor lip irregularities that would require a mechanical polisher to eliminate, but I'm happy as-is.
The back-side images show the plombco CCS Series aerodynamic wheel weights. These provide a much cleaner solution to wheel balancing than the standard, snap-off weight strips. These were purchased through Mohawk Rubber Sales of N.E. (800) 242-1446.
New ASA ST-3 Wheel
Combination - Left - Clean and Pitted - Right - Polished
Another Combination - Left - Clean and Pitted - Right - Polished
Cleaned and Polished Wheel Back Side � After One Winter
Wheel Back Side � After Three Winters � Half Cleaned w/ Acetone
Wheel Back Side � After Three Winters � Cleaned w/ Acetone + Polished
Plombco CCS Series Wheel Weights w/ MB Factory Weight (Lower Right)
 06-15-2008, 10:03 AM
#2
Super Member
Thread Starter
Join Date: May 2004
Location: Rhode Island
Posts: 911
Likes: 0
Received 1 Like
on
1 Post
Debadged 6-Speed '05 C320 Sports Coupe
The bare aluminum is holding up well. I hit it w/ metal polish periodically, to remove water spots and stains and the shine comes right back.
06-15-2008, 08:55 PM
#3
Super Member
Thread Starter
Join Date: May 2004
Location: Rhode Island
Posts: 911
Likes: 0
Received 1 Like
on
1 Post
Debadged 6-Speed '05 C320 Sports Coupe
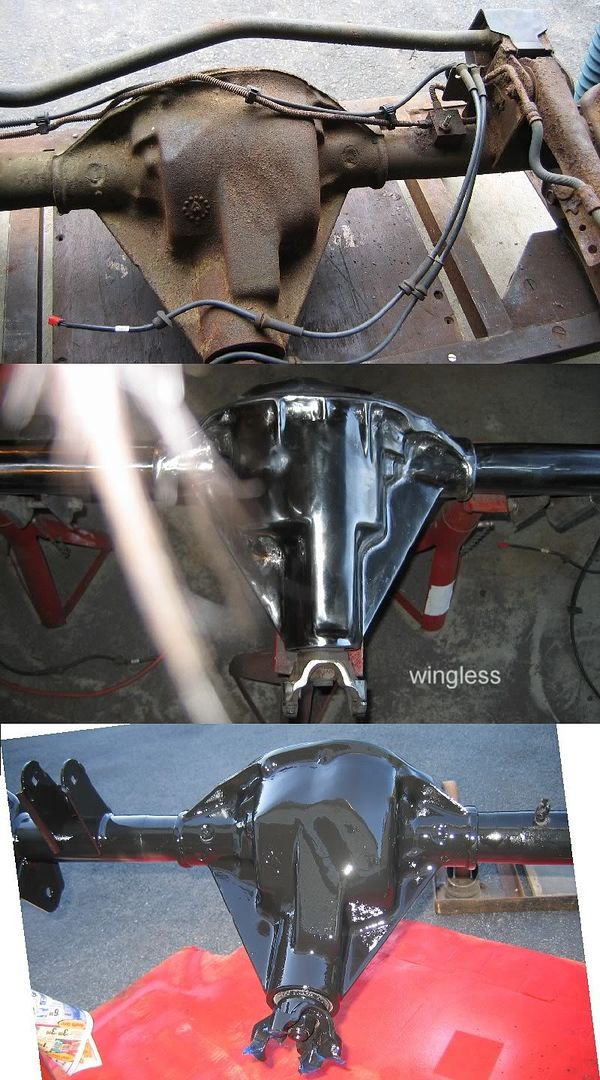
The BEST way to polish metal is w/ a right angle die grinder and woven pads, as shown in the first image of the initial polishing of a live Jeep axle.
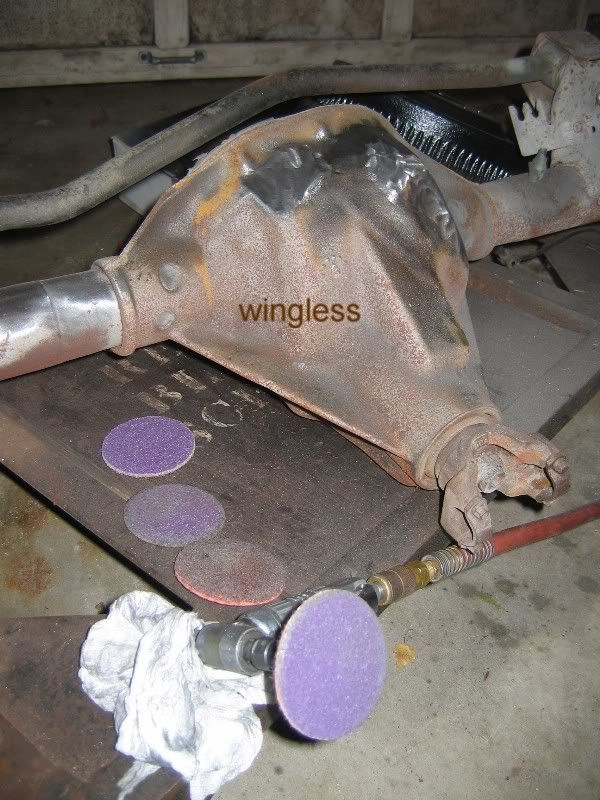
This image shows the axle almost done w/ polishing.
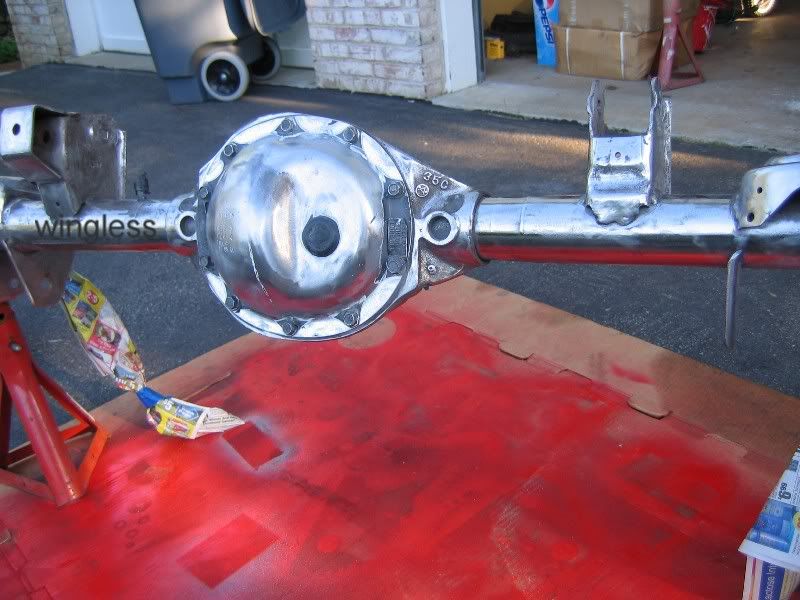
This image shows the progression the axle.
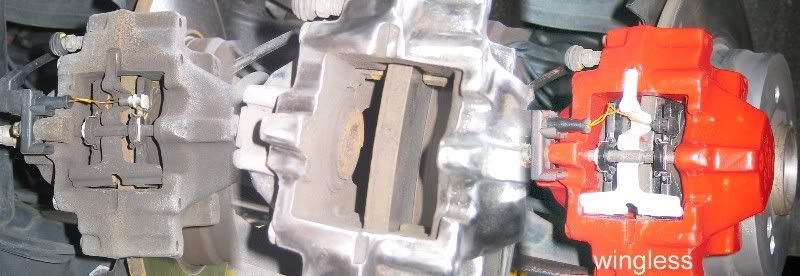
This image shows a caliper polished w/ the woven pads and the right angle die grinder.
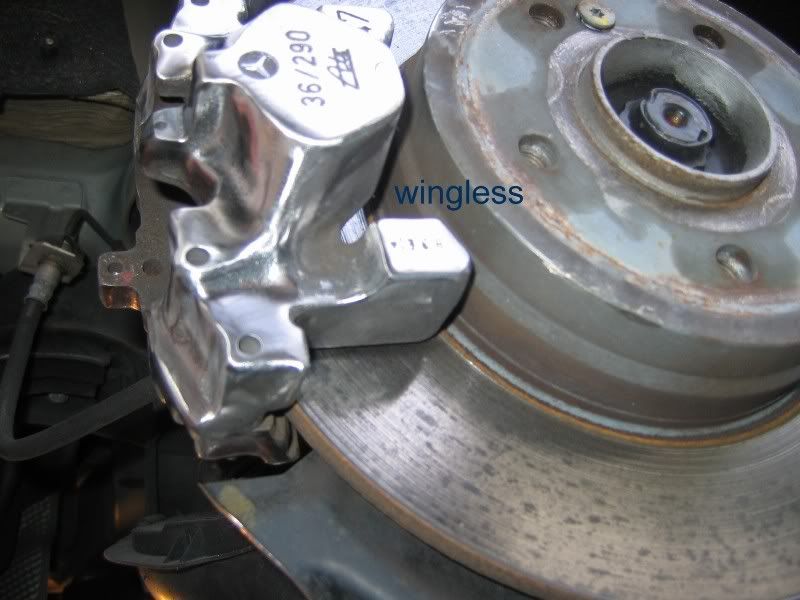
This image shows the progression of polishing the caliper.
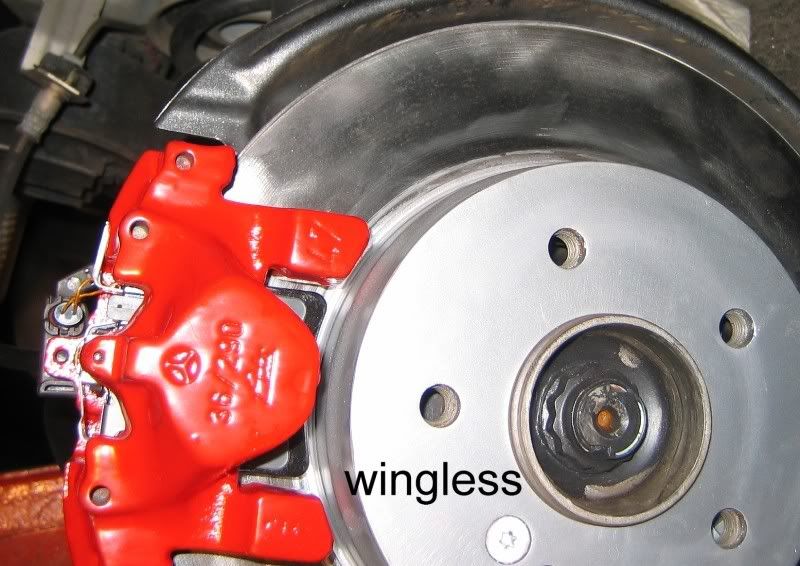
This image shows the polished caliper and rotor after painting.
This image shows the axle almost done w/ polishing.
This image shows the progression the axle.
This image shows a caliper polished w/ the woven pads and the right angle die grinder.
This image shows the progression of polishing the caliper.
This image shows the polished caliper and rotor after painting.
06-15-2008, 09:35 PM
#4
Super Member
Thread Starter
Join Date: May 2004
Location: Rhode Island
Posts: 911
Likes: 0
Received 1 Like
on
1 Post
Debadged 6-Speed '05 C320 Sports Coupe
This is a before and after image of polished bronze marine steering linkages, also done using right angle die grinder and woven pads.