Mercedes-Benz C-Class: How to Install Illuminated Star Grille Emblem
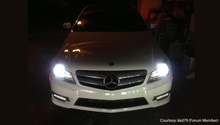
Illuminating the Mercedes-Benz star in the center of your car's grille is a fantastic way to differentiate your vehicle from others on the road. The installation process is fairly straightforward. It is also something you can do at home, which is great because it will save you hundreds of dollars.
This article applies to the Mercedes-Benz C-Class w204 (2007-2014).
Installing an illuminated version of the renowned Mercedes-Benz star in the center of your vehicle's grille is a fantastic way to upgrade the look of your car. The process is fairly easy to do, and certainly worth pursuing as opposed to taking the car to a body shop. That's because if you were to go with the latter option, you'll likely pay several hundred dollars in extra labor fees.
Materials Needed
- Illuminated Mercedes-Benz base ($400)
- Wire splicer
- Wire cap
- Electrical tape
Step 1 – Remove the factory Mercedes-Benz emblem
Turn the star counterclockwise, and pull it out. When you do this, you’ll notice two long tabs at the back of the emblem. These are simply guides; they are there to allow the factory faster assembly. Remove these tabs with your finger because they won’t be needed when you install the emblem onto the LED illuminated base.
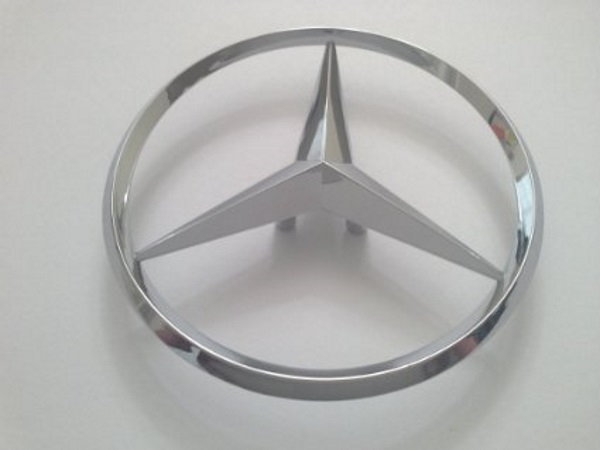
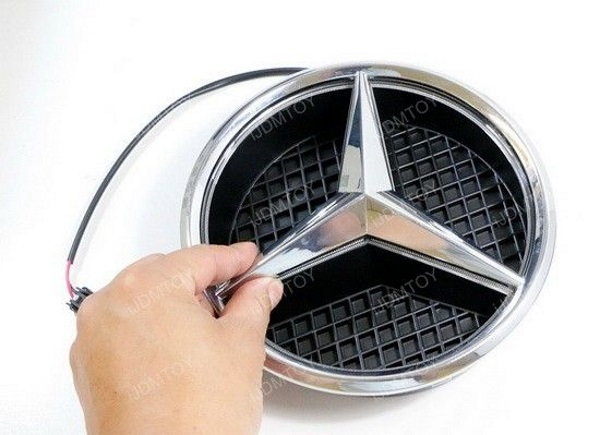
Step 2 – Clip the Mercedes-Benz emblem onto the LED illuminated base
While it might look like the star’s points are designed at an even 120 degrees apart, you’ll quickly notice that is not the case. There’s only one way to match up the star’s points, so keep rotating the emblem until it matches perfectly with the base, and you can clip it in.
Step 3 – Tap the illuminated base's wires into the parking lights or headlights
At this point, you’ll want to make sure to disconnect the car’s battery. Better safe than sorry. Once the battery has been disconnected, unplug the light to which you want to tap into. Splice the wires apart, apply the base’s wires, ground the star, and reconnect wires with a cap as well as electrical tape. If you would like to splice the parking lights, it is a gray wire.
Once completed, reconnect the car’s battery.

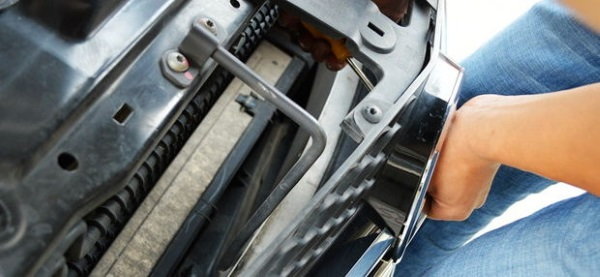
Step 4 – Install assembly back into the center of the grille
When you do this, take care to apply the assembly in an even, careful manner. That is, don’t shove it into place. It should fit snugly. Once the assembly is in place, turn it clockwise until it locks in.
Step 5 – Test the assembly
Turn your Mercedes-Benz on to make sure that not only is the assembly working, but that the light which you tapped into is working as well. Make sure to check the front of the car on occasion over the next week or so to make sure it hasn't rotated loose during driving, and that the wires are still secure.

Related Discussions
- Mercedes Benz: Illuminated Star Install Instructions W204 - MBWorld.org
- C63 AMG W204: Illuminated Star - MBWorld.org
- Illuminated Star - MBWorld.org
- C Class: Illuminated Star - MBWorld.org
- Illuminated Star: C63 One Fin Grill - MBWorld.org