Mercedes-Benz C-Class: How to Replace Front Bumper
For the Mercedes-Benz C-Class w205, few aftermarket upgrades have yet to be available. However, there's one such component from the C450 that will have your C300 or C400 gleaming with joy - the one and only diamond sports grille. So for whatever reason you want to replace the front bumper, this article will show you how to do it properly.
This article applies to the Mercedes-Benz C-Class C300/C400 w205 (2014-Present).
As delicate it is in class, style, and roaring on the track, the Mercedes-Benz C-Class looks exactly the part for an entertaining weekend. But this already intimidating look can be taken a step further. So whether you plan to install a new diamond sports grille or simply replace the front bumper on your Mercedes-Benz C-Class w205, the procedure must be done right and true. Read on to learn how.

Materials Needed
- Ratchet, extension, and metric socket set
- Trim panel removal tool
Step 1 – Remove the front bumper clips
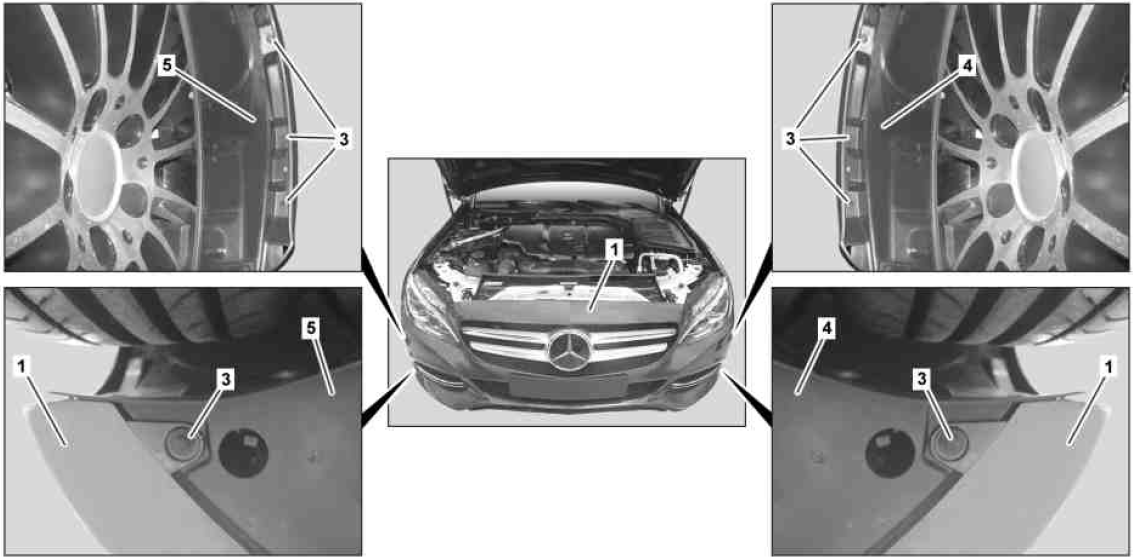
Disconnect the negative terminal (black lead) of the battery. There are four expansion rivets connecting each inner fender liner to the front bumper (#3 and #5 in Figure 1). Use a trim removal tool to unsnap the rivets, and set them aside.
Step 2 – Unbolt the side and top brackets
With a ratchet and socket, remove a bolt on each side bracket of the front engine compartment panel. Pull back on the inner fender liner of each wheel well. There is a bracket secured by two bolts on each side; remove them as well. Then, unplug the electrical connector located inside the right inner fender.
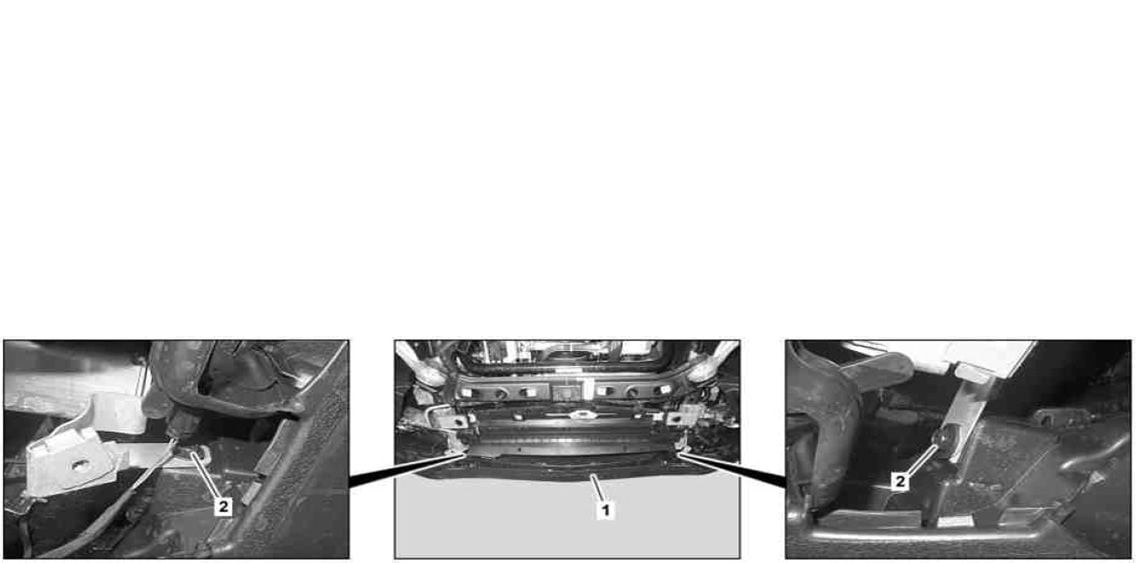
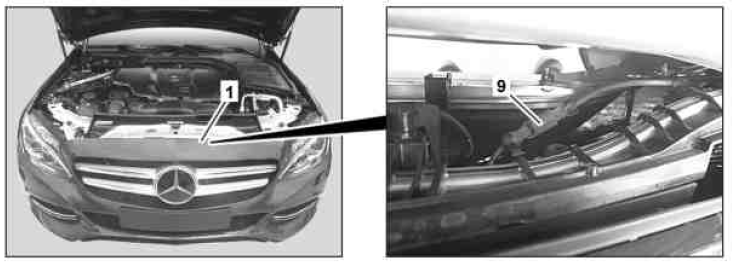
Figure 2. Front engine compartment panel. 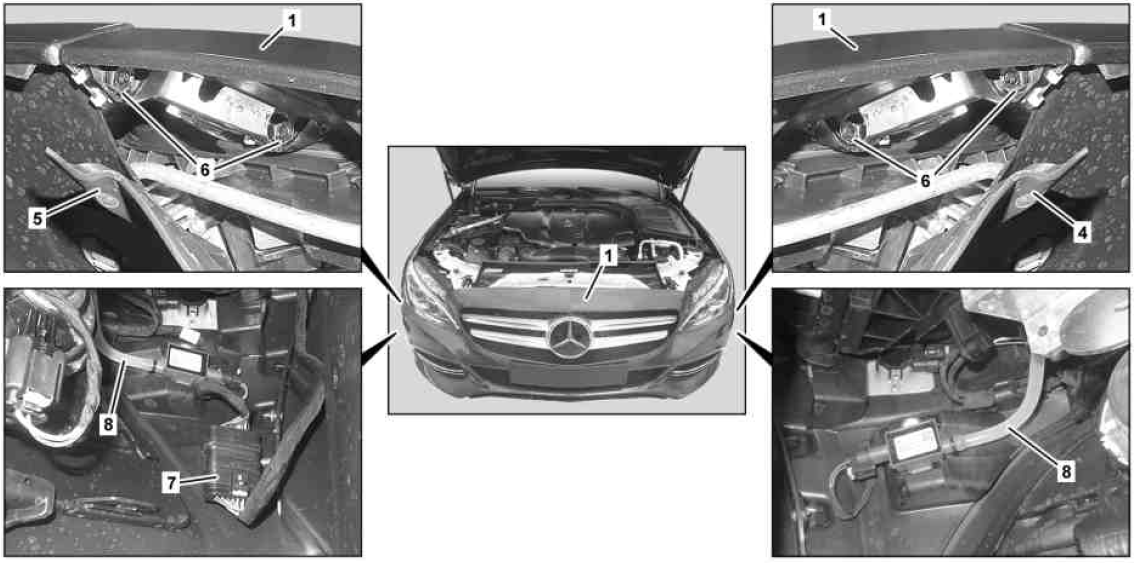
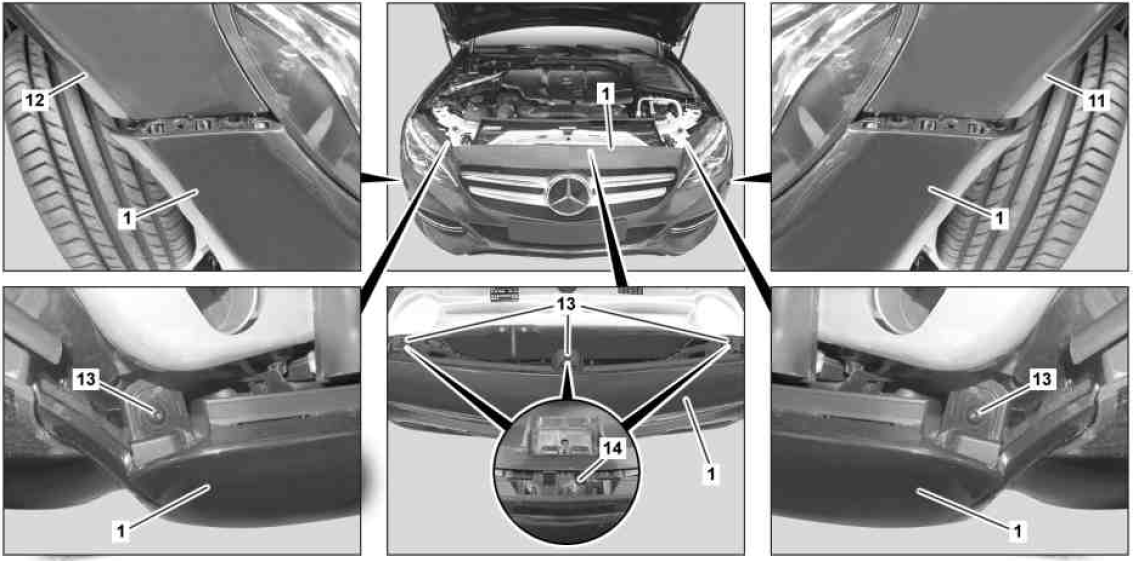
Figure 3. Wheel well bolts and electrical connector.
Step 3 – Disconnect the wire harness
Unplug one more electrical connector on the top center of the bumper.
Step 4 – Slide the front bumper out and install new bumper
Remove the two remaining bolts on top of the bumper right above the headlights. Check that all bolts and connectors are removed as well as detached before removing the bumper. Then, use the trim removal tool to unsnap three latches of the impact absorber right above the grille (#13 in Figure 5). Slide the bumper out beginning with the center and working your way to the sides. Carefully set it aside, so as not to scrape it.
Whether replacing the front bumper or installing a new grille to the stock bumper, reassemble the front end in reverse order to the steps above.
- Line up the sides and top of the front bumper.
- Slide the bumper onto the front end, and latch the top.
- Bolt the bumper's top end to the frame.
- Reconnect all wire harnesses.
- Bolt the side and top bumper brackets.
- Snap on the expansion rivets.
Related Discussions
- Remove/Install the Front Bumper - MBWorld.org
- Official C-Class Picture Thread - MBWorld.org