Mercedes-Benz E-Class and E-Class AMG: How to Replace Main and Auxiliary Batteries
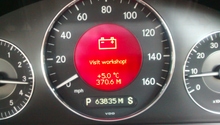
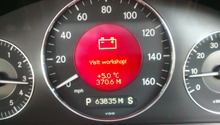
The Mercedes-Benz E-Class uses two batteries in its design. The auxiliary battery serves as a backup for the main battery. The battery control module detects if the main battery's voltage becomes low and signals the auxiliary battery to supply power.
This article applies to the Mercedes Benz E-Class and E-Class AMG (2002-2009).
The main and auxiliary batteries are Absorbed Glass Mat or AGM. These batteries use woven fiberglass mats to absorb and contain the chemical electrolyte. This makes them robust to deep cycling, vibrations, and cold temperatures. AGM batteries typically give a long service life of five to seven years and are maintenance-free. High temperatures (above 120 degrees Fahrenheit) and overcharging is known to damage the batteries. AGM batteries cost more to manufacture, resulting in higher cost over lead acid types.
It's important to use manufacturer specified batteries in your Mercedes-Benz E-Class w211, otherwise damage/errors can result. The w211's electrical system is complex, requiring high amounts of electrical power to feed its many accessories.

Materials Needed
- 10mm wrench
- 10mm socket
- 1/4" ratchet with extension
- Gloves
- Safety Glasses
Step 1 – Locate the rear battery
The rear battery is located underneath the lower interior trunk panel and spare tire carpeting cover. It's on the right side of the trunk. Place the clasp of the interior trunk panel against the trunk seal to keep it from falling.
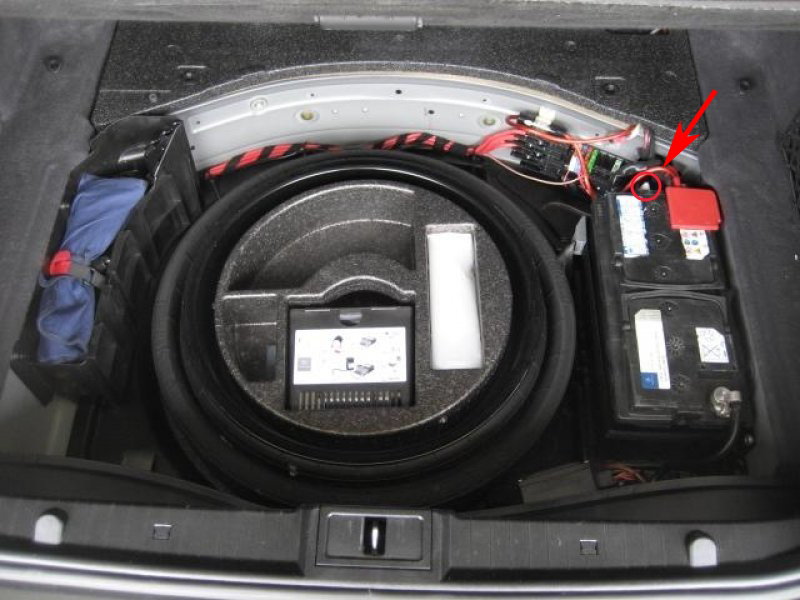
Step 2 – Disconnect the vent tube and battery cables
Disconnect the vent tube (see Figure 1) by pulling and wiggling it away from the battery. Both cables are held onto the battery by 10mm fasteners. Use a wrench to remove the negative cable first. Place the negative cable in an area where it cannot come into accidental contact with the battery or with anything metal.
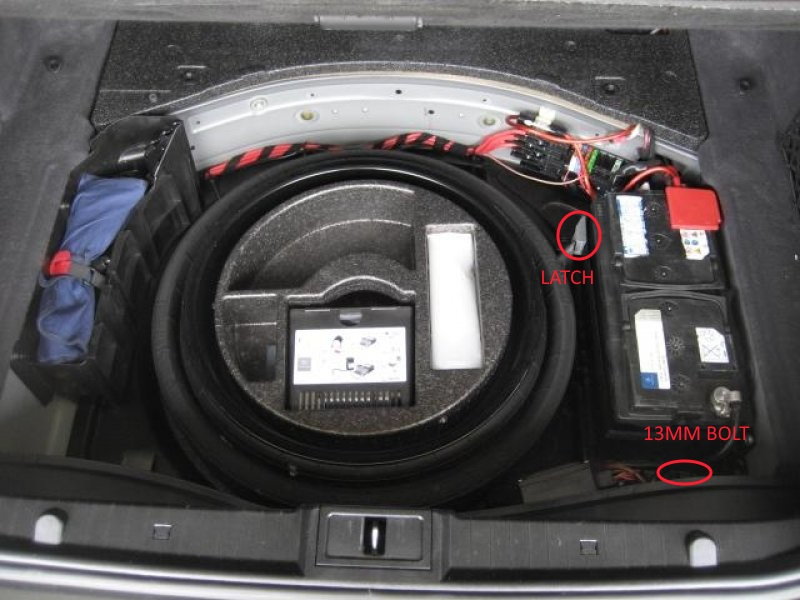
Step 3 – Replace the rear battery
To remove the rear battery, loosen the strap surrounding the battery by pulling down and pushing on the latch. Now remove the battery mounting bracket by loosening the 13mm bolt on the right side of the battery. Once removed, lift the battery out of the trunk. You can use the handles if you're sure they are in good condition and capable of supporting the battery's weight.
Installation of the new battery is in the reverse order of removal.
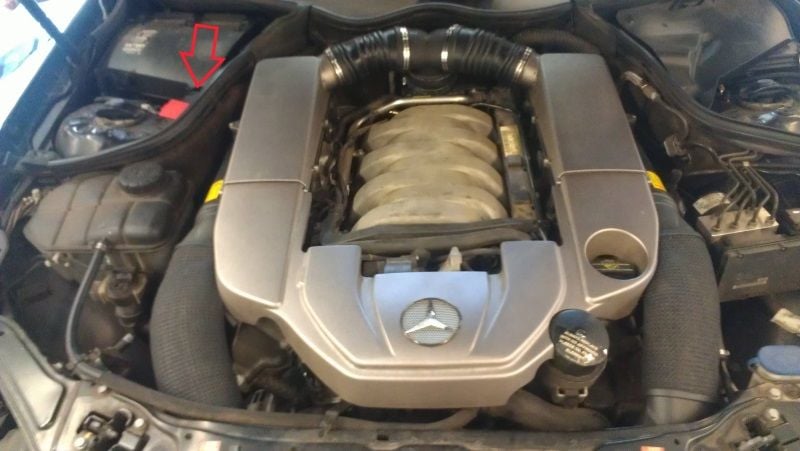
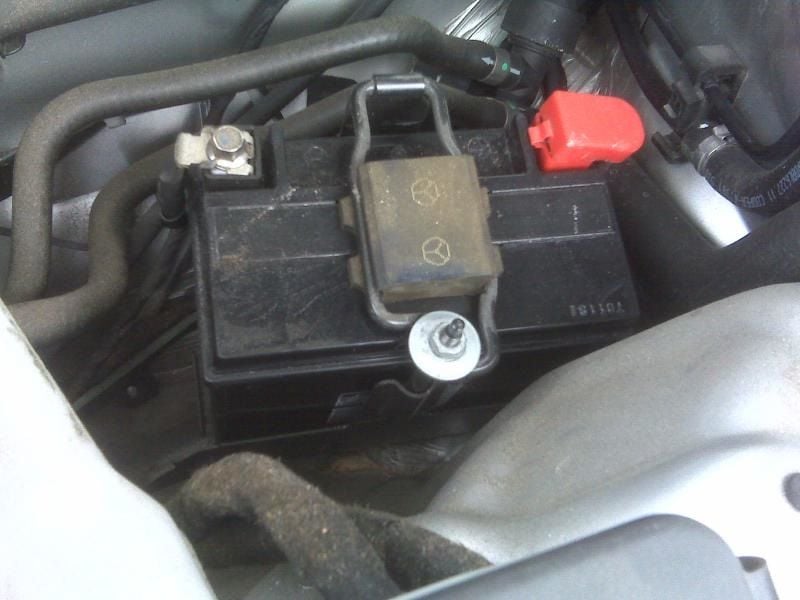
Step 4 – Locate the auxiliary battery
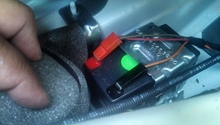
The auxiliary battery is located in the engine bay at the rear corner, on the passenger side. It is covered by a plastic panel. Remove the panel by removing the 10mm plastic nut, then lift the panel up and away from the HVAC intake.
Step 5 – Replace the auxiliary battery
Lift up on the red plastic battery terminal covers to open them. Remove the negative (black) cable first with a 10mm wrench, and then the positive one. Place the cables in an area where they cannot make accidental contact with the battery. Now remove the battery hold down by loosening the nut with a 10mm socket. Flip the hold down towards the firewall. The battery can now be removed from the engine bay.
Install the new battery in the reverse order of removal.
Related Discussions
- Aux Battery - MBWorld.org
- Aux Battery Replacement - MBWorld.org
- Main Battery: Auxiliary Battery Emergency Operation - MBWorld.org