Mercedes-Benz E-Class and E-Class AMG: How to Replace Radiator
With help from this article, you can keep your engine cool, responsive, and operating safely. The steps below will guide you on how to replace the radiator in your Mercedes-Benz E-Class or E-Class AMG.
This article applies to the Mercedes-Benz E-Class and E-Class AMG (2002-2009).
Although the radiators on Mercedes-Benz E-Class vehicles rarely need to be replaced, on occasion, due to accidents, weather or age, it becomes necessary. This task can be accomplished in your own garage. If you follow the step-by-step instructions below you will be finished in no time and save some money on labor in the process.

Materials Needed
- 8mm socket wrench / 10mm socket wrench / 14mm socket wrench
- 19mm wrench
- Phillips head screwdriver
- Radiator coolant drain pan
- New radiator
Step 1 – Loosen the ambient air sensor
Using the Phillips screwdriver, loosen the screw that holds the ambient air sensor to the license plate frame and place it safely away from the work area.

Step 2 – Remove the fender liner
Unscrew the two 8 millimeter nuts and the Phillips head screw, then simply lift the fender liner out of the car.

Step 3 – Remove the bumper
Remove the 10mm bolt that secures the bumper to the outside support of the car, then remove the large 14 millimeter nuts and washers which are holding the bumper to the front end of the car. Then, with the assistance of someone, gently pull the bumper away from the front of the car.
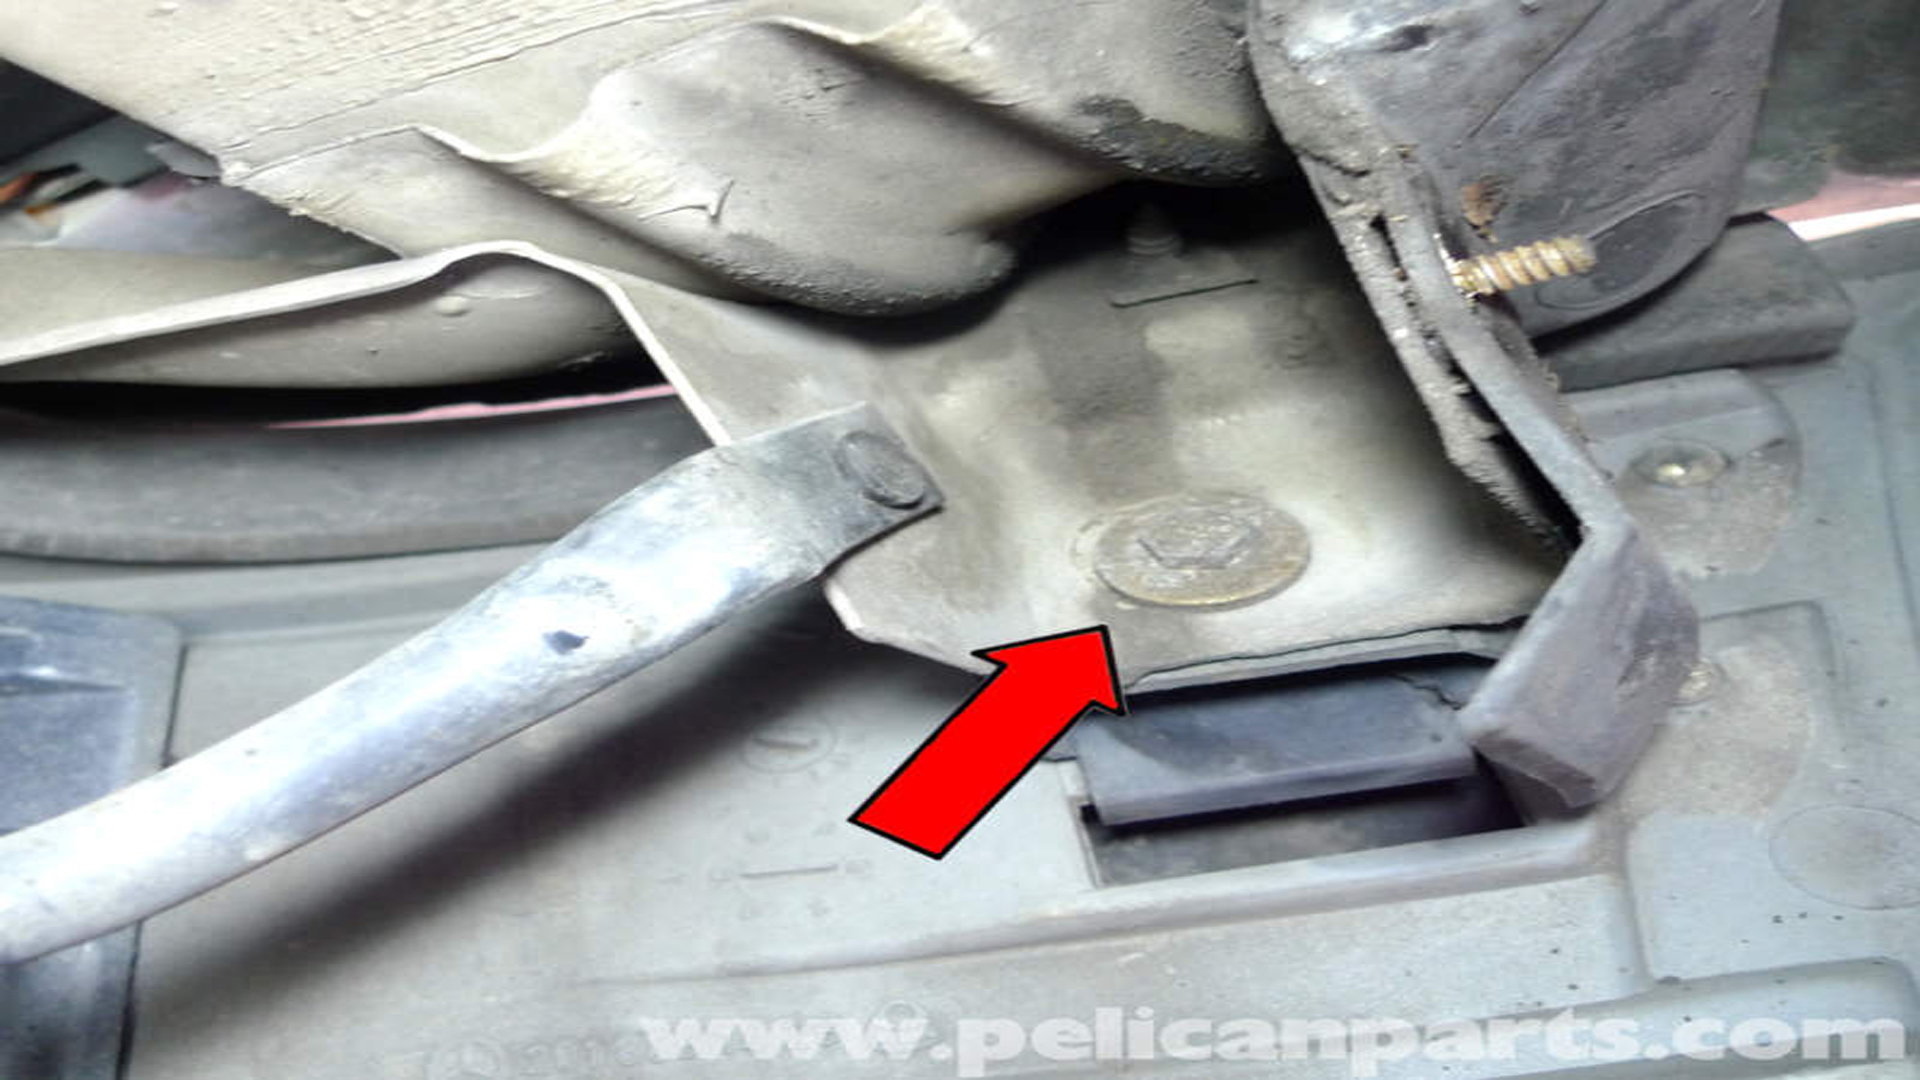
Figure 3. Remove the bolt securing the bumper to the support. 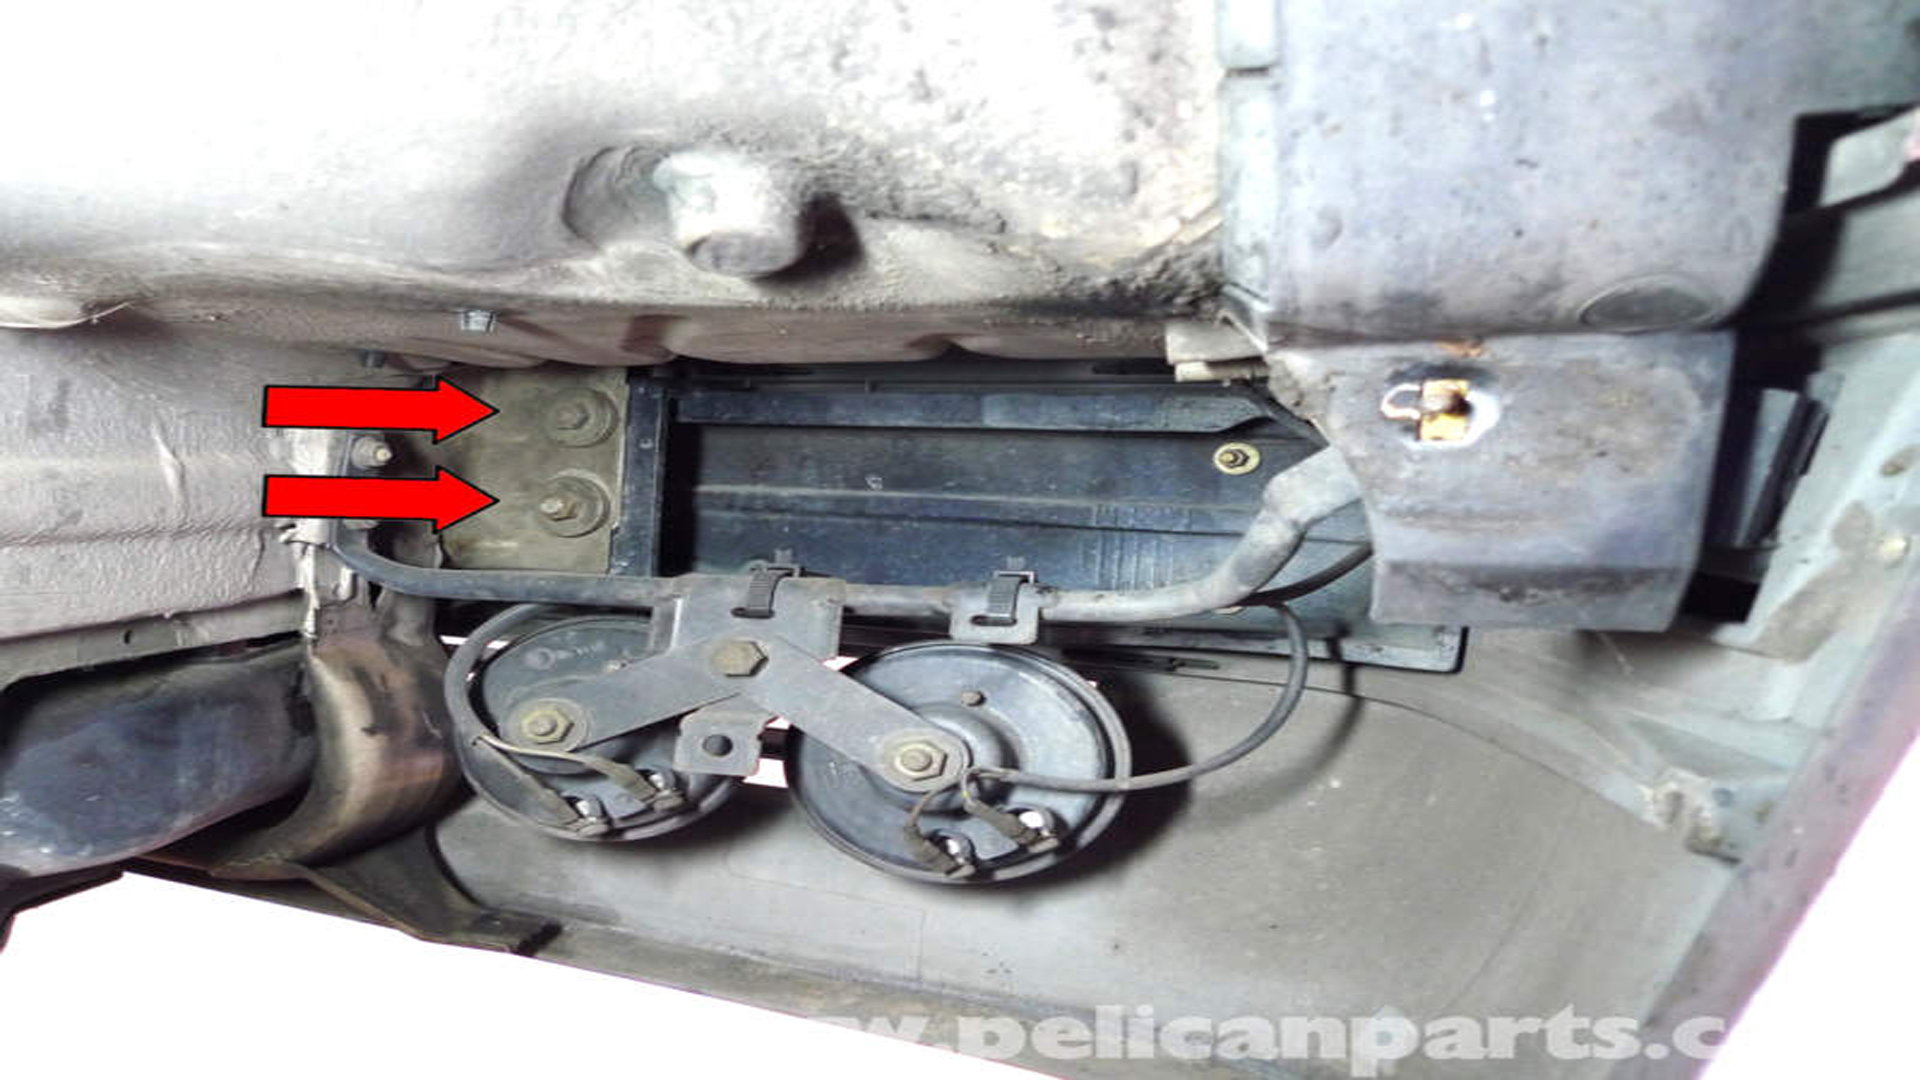
Figure 4. Remove the nuts holding the bumper to the front.
Step 4 – Remove the belly pan
Unscrew the six 8 millimeter bolts, that are attached to the belly pan. After these have been removed, lower and remove the tray from the vehicle.

Step 5 – Drain the coolant from the radiator
Locate the radiator stop plug underneath your vehicle. Place the radiator drain pan underneath the car, and loosen the radiator stop plug. In order to speed up the drainage process, remove the cap of the coolant reservoir on top of your engine to allow air flow.

Step 6 – Remove the radiator cross brace
Remove the nine 10 millimeter bolts on the cross brace that currently hold the radiator in place, then underneath the cross brace, disconnect the hood latch mechanism and set it away from the work area.
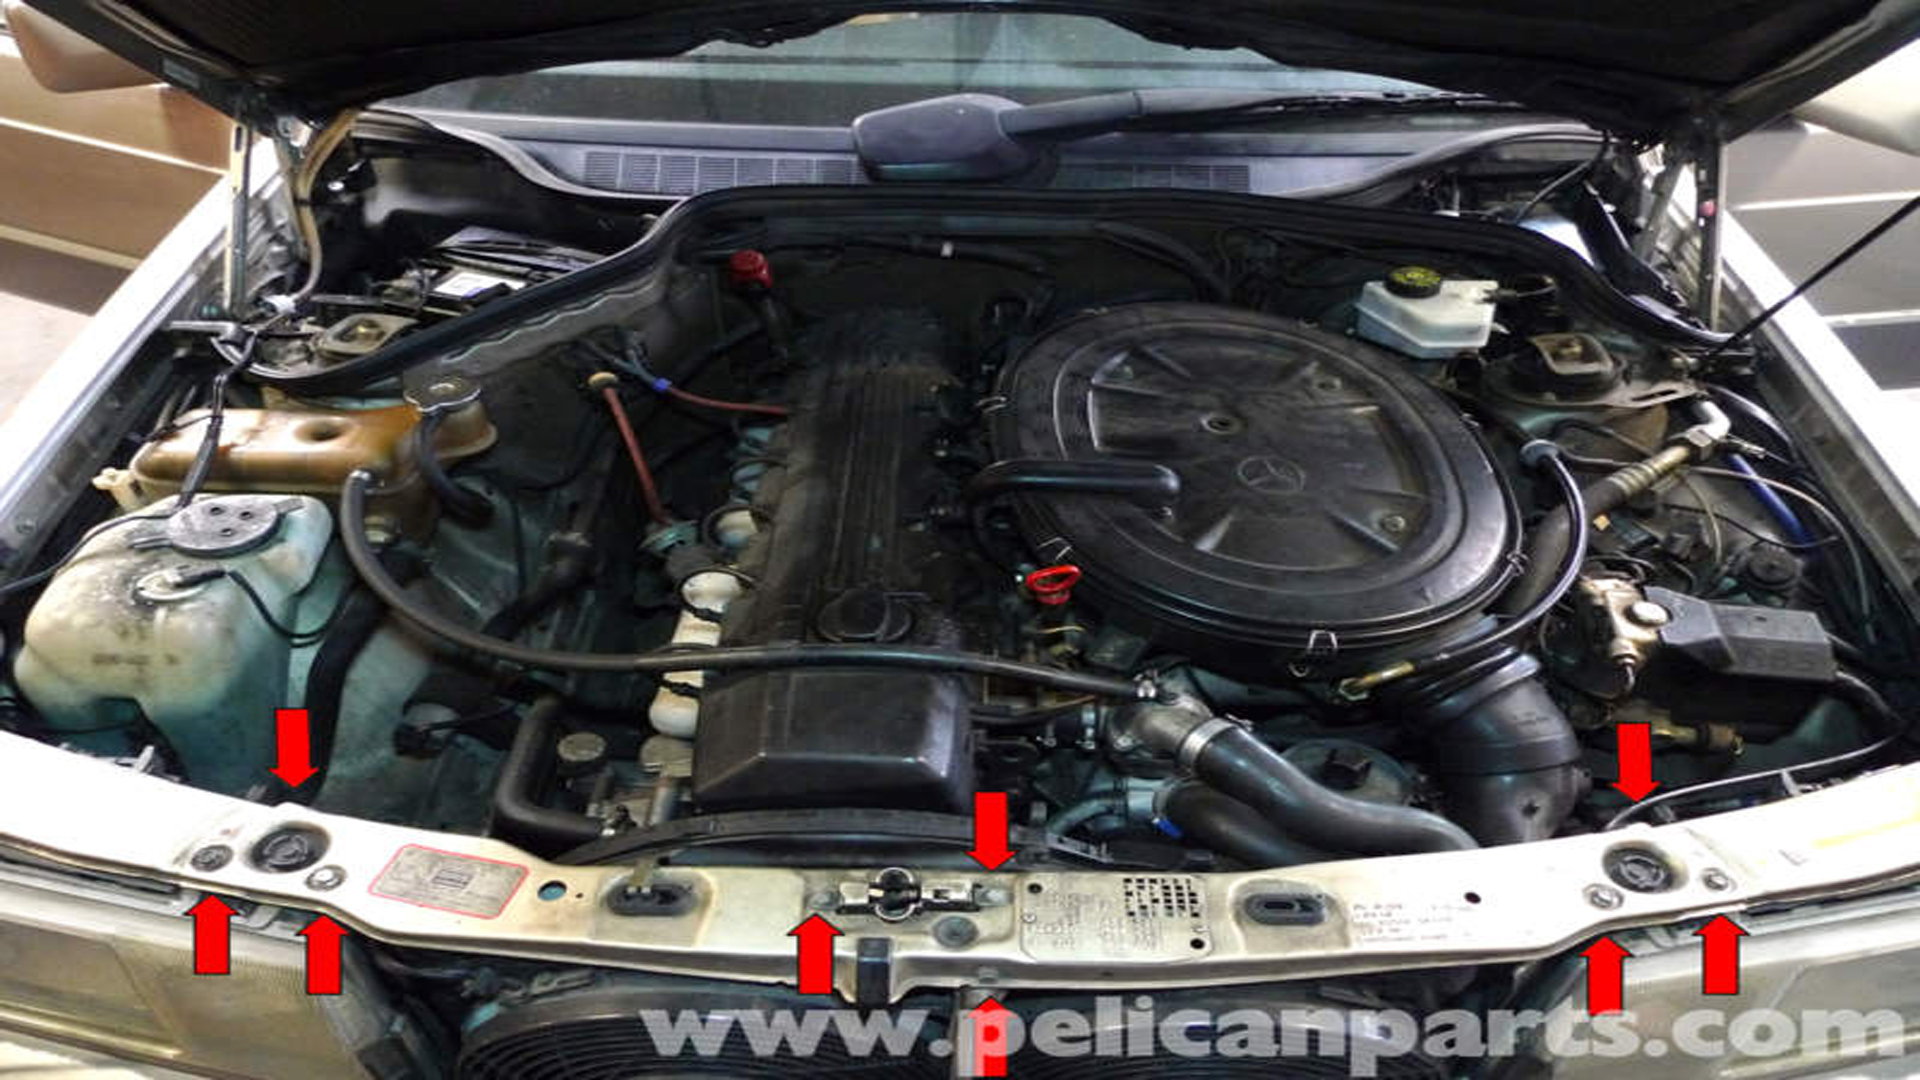
Figure 7. Remove the hood latch mechanism by simply disconnecting it and pulling it out. 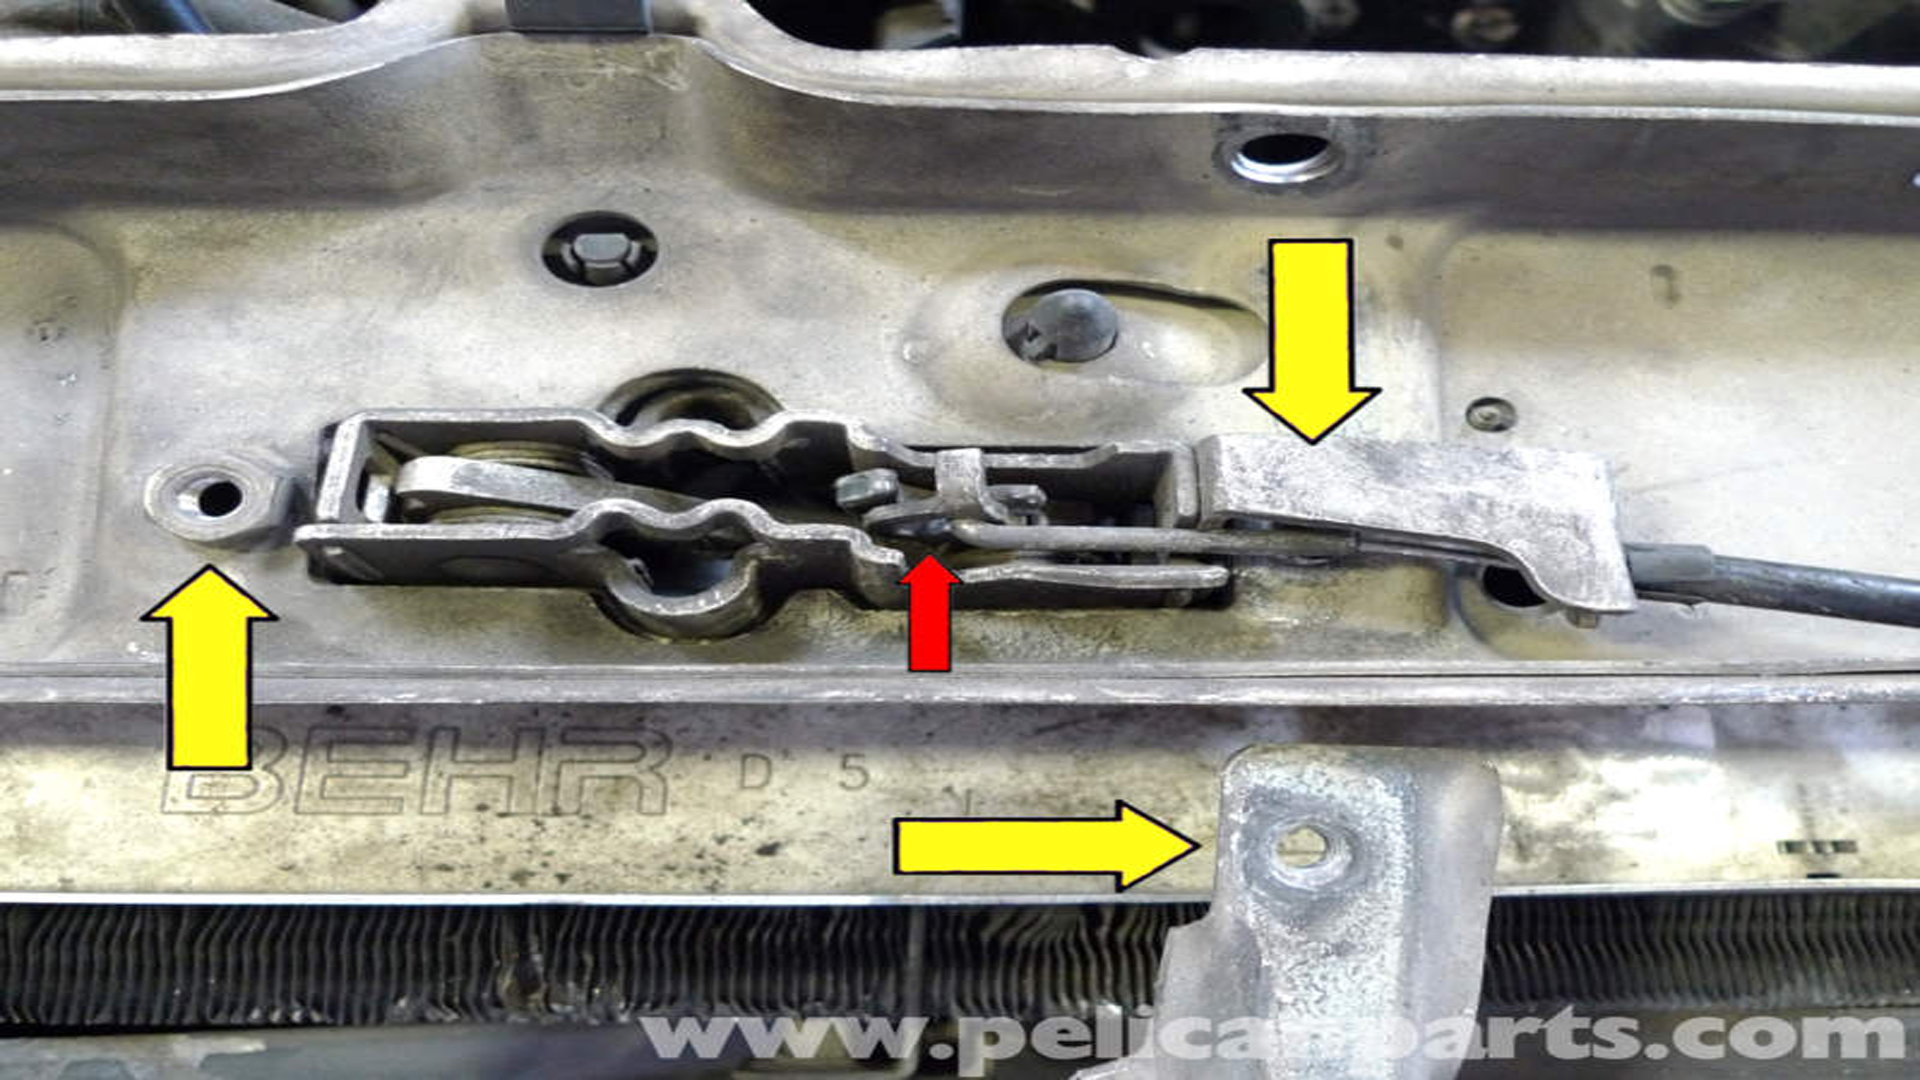
Figure 8. Remove the hood latch mechanism by simply disconnecting it and pulling it out.
Step 7 – Disconnect the automatic transmission lines from the radiator
Use the 10 millimeter wrench to loosen the transmission line from the radiator, which will be located on the passenger side. Be careful not to strip any of the melting parts, as you will reattach the lines on the new radiator. Next, unscrew the transmission line connector underneath the radiator.

Step 8 – Disconnect the a/c condenser and fans attached to the top of the radiator
Unscrew the 10 millimeter bolts that are holding down the air conditioner condenser unit and the two fans on each side of the radiator. Remove these from the radiator unit and set away from the project area.

Figure 10. Remove all attachments from the radiator. 
Figure 11. Remove attachments from the bottom of the radiator as well.
Step 9 – Remove the hoses attached to the radiator
Remove the clamps attached to the hose on the lower passenger side. Then remove the clamps on the two hoses on the upper driver side, before taking off the hoses from the radiator.

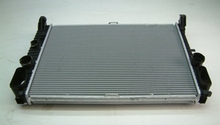
Step 10 – Remove the radiator from the vehicle
Gently grab the radiator and pull it straight up to remove from the vehicle. You may need assistance with this task to pull it straight up.

Step 11 – Insert the new radiator and reverse steps
Insert your new radiator into the vehicle and reverse the aforementioned steps for installation.
- Attach the radiator hoses back in their connections and be sure to attach the clamps as well to avoid any leaks.
- Attach the fan and AC condenser back into their connections.
- Connect the transmission lines back into the radiator.
- Install the hood latch mechanism and the top radiator bolts.
Pro Tip
Be sure to check all the hoses for cracks. This is an excellent time to replace them if need be.
Step 12 – Refill the radiator
Use the radiator fluid you drained, or purchase new fluid, and be certain that your radiator is filled. You will also want to top off your transmission fluid as well. Start your vehicle and check for leaks.
Related Discussions and Site
- Replacing Radiator - Benzworld.org
- Radiator Removal - Mbworld.org
- DIY Radiator Swap - Mbworld.org