Mercedes-Benz W204 C-Class: How to Jack Up Your Car
With your C-Class safely on jack stands, you can rotate tires, change oil, replace brake pads and much more. As your confidence grows, you may want to add a cool aftermarket suspension. Lifting is the first step to DIY auto independence. Learn how to safely lift (and then lower) your C-Class here.
This article applies to the Mercedes-Benz C-Class (2007 to 2014).
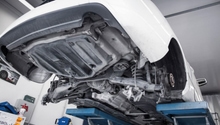
The Mercedes-Benz factory lifting points are located under the rocker panels, just behind the front wheels and forward of the rear wheels. For good security, Mercedes-Benz uses a recessed lifting pocket that cannot slip. Ordinary jack stands do not fit well and could slip. Once you accommodate the recessed, lifting point pockets, you can securely place the C-Class on jack stands and work in safety. The jack stand heads must be rectangular blocks 52 mm long, 30 mm wide and at least 28 mm high. These fit securely into the lifting pockets under the rocker panel.

Materials Needed
- 2.5 ton, low-profile, high-lift floor jack
- (1) hockey puck
- (4) heavy-duty jack stands with heads fitted to the Mercedes-Benz lift point pockets
- (4) wheel chocks
- Broom
- 2"x10" boards or auto ramps (optional)
There are a number of options for working with the Mercedes jacking point, such as specific jack stands that fit into the recess, or adapters that fit in between the void and where a normal jack stand would be placed.

Jacking the Car Up
Step 1 – Lift the front
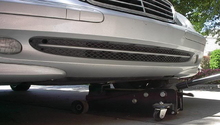
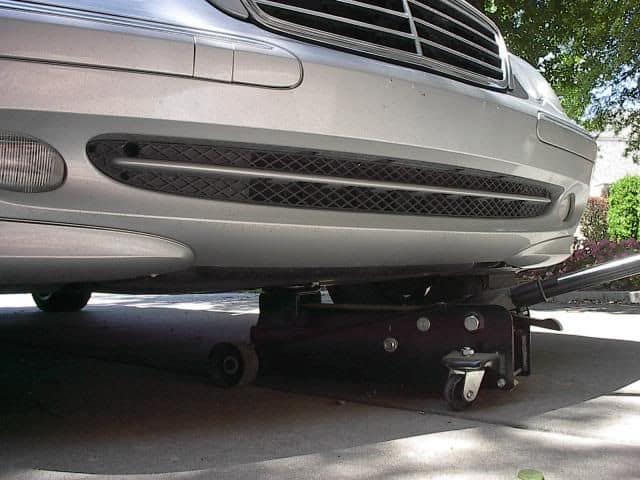
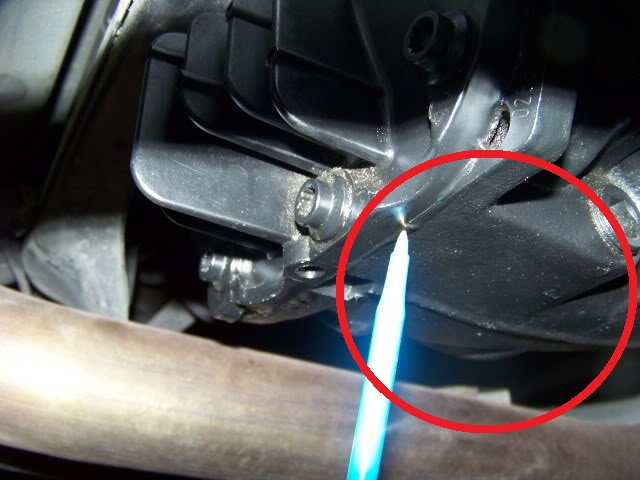
Use a smooth, level, unbroken concrete floor. Sweep it clean, because stones and grit jam the jack wheels. Set the parking brake and put chocks in front of and behind both rear wheels. Place the hockey puck in the jack saddle as a cushion, and lift at the front central jack point on the front subframe crossmember.
Note
If the jack will not fit under the front air dam, drive the front wheels up onto 2"x10" boards or auto ramps for extra height.
Warning
As the lift arm rises, it arcs up and rearward. This will cause the jack to slowly roll under the car as it lifts. Watch the jack wheels for this motion. If the car is rolling instead of the jack, then STOP and assess the situation. Engage the parking brake and check the rear wheel chocks to prevent the car from rolling.
Step 2 – Lower onto the front jack stands
Start with the front jack stands on equally low settings. Lower the jack to fit the jack stands into the front lift pockets. Ease the jack down until the car is resting securely on the front jack stands.

Pro Tip
The jack should roll slowly back towards you as it lowers and the jack stands should remain straight and erect.
Step 3 – Lift the rear
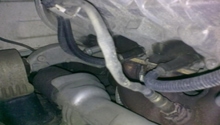
Place the jack under the rear differential and lift. As the rear rises, check that the car is pivoting on the front jack stands and they are straight and erect.
Note
This is where the Reverse Logic pivoting block adapters work well.
Pro Tip
As the car pivots, ensure that the front wheels don't touch the floor. If they do, the front jack stands need to be higher. Set the rear down, and raise the front jack stands by one or two notches.
Step 4 – Lower onto the rear jack stands
Start with the rear jack stands on a low setting, equal to the fronts. Position the rear jack stands and lower the car onto them as you did with the front. Check that the car is stable and does not rock.
Pro Tip
If you need the car to be higher, use the step procedure:
- Raise the front and adjust the front jack stands only one or two notches higher.
- Set the front on the jack stands and then do the same with the rear. This will avoid extreme angles.
Step 5 – Adjust for floor slope
Most garage floors are sloped for drainage. For transmission and differential fluid fills, the car should be level. Use a spirit level under the rocker panel and adjust front or rear jack stand height as described above to level the car. Make note of the final jack stand notch positions for future use.
Getting the Car Down
Step 1 – Lower the rear
Lift the rear slightly off the rear jack stands. If you used the step procedure to raise the car, lower it by reversing the step procedure.
- Lower the rear stands only one or two notches.
- Set the rear on the jack stands and do the same with the front. Avoid extreme angles.
- When the car is low enough, remove the rear jack stands and ease the rear down.
- Ensure the parking brake is set and the rear wheels are chocked front and back.
Step 2 – Lower the front
Lift the front slightly off the jack stands. Remove the front jack stands and ease the front down. Remember to lower the front wheels onto boards or auto ramps, if you needed them for jack clearance under the air dam.
Related Discussions and Site
- Jack Pad Adapter - ReverseLogic.us
- Jacking Points for C-Class - MBWorld.org
- Jack Stand Placement - MBWorld.org