

 06-17-2015, 07:22 PM
Last edit by: IB Advertising
See related guides and technical advice from our community experts:
- Mercedes Benz E Class AMG: How to Install Coilovers
Step by step instructions for do-it-yourself repairs

My E55 DIY Coilover install With Step by step
 11-16-2016, 11:01 AM
#127
MBWorld Fanatic!
Awesome setup. Do not mean to thread jack... So, with all this chatter about coilovers. Does anyone have a pair of good non leaking airmatic fronts for sale then? PM ME PLEASE, PAYPAL READY!
11-30-2016, 08:45 PM
#129
Member

I am having a brain fart trying to install the rear shocks on the BC racing setup. When installing the rear shocks through the body into the trunk of the car what configuration of washers/bushings/bump are you using. I don't see how the stock hourglass style rubber bushing will work. My next thought was to remove the old bushings from the old shocks and use those instead. Any help would be greatly appreciated.
These pictures I have are from a friends setup, looks like the original bushings from the old shocks?
These pictures I have are from a friends setup, looks like the original bushings from the old shocks?
01-17-2017, 02:52 PM
#130

Rear Control Arm Removal Clarification
Adding to this thread as this tech doc helped clarify removal process of the rear control arms a bit more than the DIY, tools needed etc
http://www.pelicanparts.com/techarti...eplacement.htm
http://www.pelicanparts.com/techarti...eplacement.htm
01-23-2017, 03:28 PM
#131
Super Member
Just got the RED screen of suspension death this morning. Car not slammed to ground but really low in rear. Looking at the BC coilovers but worry about squeaking? Has anyone experienced this? My car is driven through all the seasons with a fair share of road salt. Last thing I want to do is sink $1,300 into this setup & have it squeak.
 01-23-2017, 10:58 PM
#133
Super Member
02-22-2017, 12:25 PM
#134
Member

reply
No squeaking at all, but I am not impressed with the ride. Other's say their car feels the same or pretty darn close, but mine bounces all over the frigging place, no matter what the setting is on the shocks. I have emailed BC racing repeatedly asking for advice and they ignore me. It is such a crappy ride I am just going to go back to air, and I would suggest you don't waste your money.
02-22-2017, 01:14 PM
#136
MBWorld Fanatic!
The squeaking is most likely because of the perch on the spring in the rears that attach to the body. With bc you can get the oem plastic rubber mounts and that will stop it immediately. With Megan's the perch has to be sprayed down with min 4 layers of plastidip and will make them like rubber and will not squeak.
Wpdmed it seems you don't have the correct preload on the springs. They come preloaded for the vehicle that it is intended for. Either they sent them out without preloading correctly or when the installer put them in he adjusted the height and not knowing that by turning them without undoing the bottom collar I believe he set them out of preload.
Wpdmed it seems you don't have the correct preload on the springs. They come preloaded for the vehicle that it is intended for. Either they sent them out without preloading correctly or when the installer put them in he adjusted the height and not knowing that by turning them without undoing the bottom collar I believe he set them out of preload.
02-22-2017, 05:41 PM
#137
Member
Thanks
Thanks for the reply, I bought them directly from BC and they were supposedly specific to the E55. I installed them, and I am not a pro, but I grew up at my dads shop and rebuild all my own engines, so I'm fairly familiar with turning wrenches. I did install them and then use their spanner wrenches to adjust the height because the car sat on top of the tires. What is your suggestion for a fix? I can't get any advice from BC, them ignore all emails and phone calls.
02-22-2017, 05:53 PM
#138
MBWorld Fanatic!
Autoluxury is close with bc
I'll ask him to come into this thread maybe he can help you out with bc
Like I said really strange although mine are not bc they are made by the same manufacturer and are great
I'll ask him to come into this thread maybe he can help you out with bc
Like I said really strange although mine are not bc they are made by the same manufacturer and are great
02-23-2017, 11:28 AM
#139
Member
BC has a video on their web site showing how to set the pre load. I guess I will take them off and do this and see what happens. The guy on the video says he is doing "4mm of preload" and this is good for a "street or track car", don't know how it could be both. Can any one advise if 4mm is a good amount for the E55, or should it be less? Thanks!
02-23-2017, 12:13 PM
#140
Member
Thread Starter
BC has a video on their web site showing how to set the pre load. I guess I will take them off and do this and see what happens. The guy on the video says he is doing "4mm of preload" and this is good for a "street or track car", don't know how it could be both. Can any one advise if 4mm is a good amount for the E55, or should it be less? Thanks!
if you have too little preload it will bounce around
4-5mm of preload is about right.
Follow the video on BCs YouTube channel!
Also call BC and talk to them. Don't email
02-23-2017, 02:00 PM
#142
Member
Thanks again gentlemen for the responses, I will take them off today and try 4mm. Let you know what happens.
I appreciate your input.
I appreciate your input.
02-23-2017, 05:54 PM
#143
Member
BC
My buddy came by today while I was taking the coil overs off and he says I have the wrong springs. They are copper colored and have a sticker on them which reads "Swift". He says they are for racing, did BC send the wrong springs to me???
02-24-2017, 01:39 PM
#144
Member
Took the coil overs off, did the preload myself to 4 mm like suggested, and the car rides much, much better. Still waiting to hear from BC is 4mm is the correct amount for the swift springs, but like usual no one ever answers the phone or returns emails. One spring was wound extremely tight and the other was loose, no preload at all. That is the way they came out of the box, I didn't touch the nuts which control the preload, so I suggest anyone else who buys them watch the video on BC web site and check the preload yourself. The rears are a little small I think for the application, I am just going to order a set of E500 rear springs and put them in.
05-09-2017, 07:18 PM
#145
Super Member
First and foremost! Major apologies to all my friends following this. I have been dealing with weather, work, and lack of time to complete this project as quickly as I anticipated.
However this is not going to be as precise as the previous install. Its simple really, remove everything and reinstall. LOL! I know too easy right? Wrong this was hell and took loads of time. So without further adieu here we go:
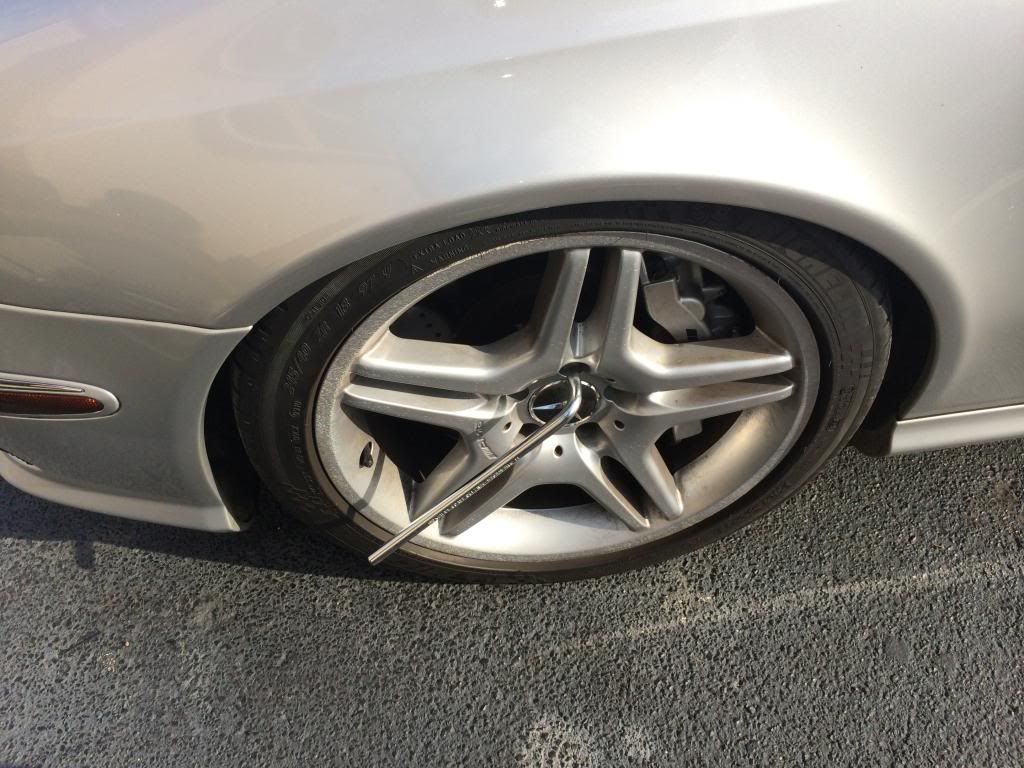
As usual break the lug nuts loose with the car on the ground. Chock the front wheels on both sides of the wheel.
Then get the rear end up in the air. The rear is a bit tricky so i suggest you use the factory jack on the jacking points in the rear and lift the car up.

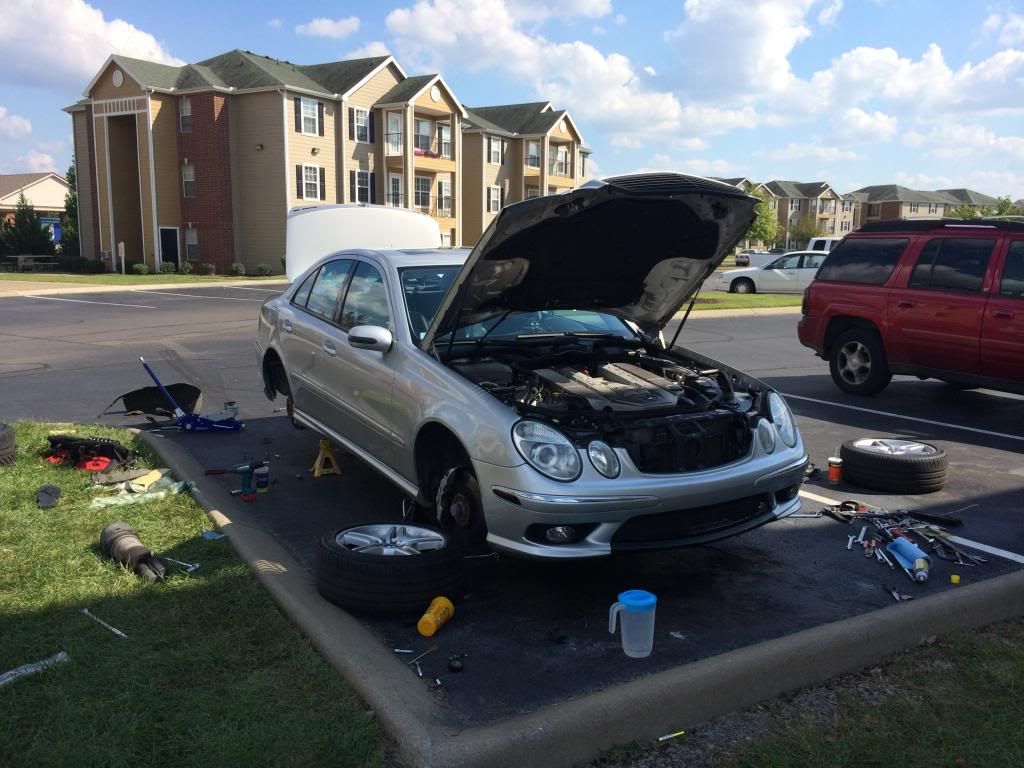
Then slide a proper jack in from behind the car and you will see two big rubber pads on each side of the car infront of the mufflers. These are also jacking points. Place a piece of 2x4 in between the jack and the rubber pads and lift one side at at time untill the rear end is up high enough for the factory jack to fall out of the standard jacking point. Then proceed to install a jack stand in the factory jacking point. Repeat on the other side as well (DO NOT RAISE THE CAR AS HIGH AS THE JACK STAND WILL GO ON THE FIRST LIFT). Make sure you raise each side up a few inches at a time and stagger the lifting process. This will guarantee that the car will not fall off the jack stands but also will be a lot safer .
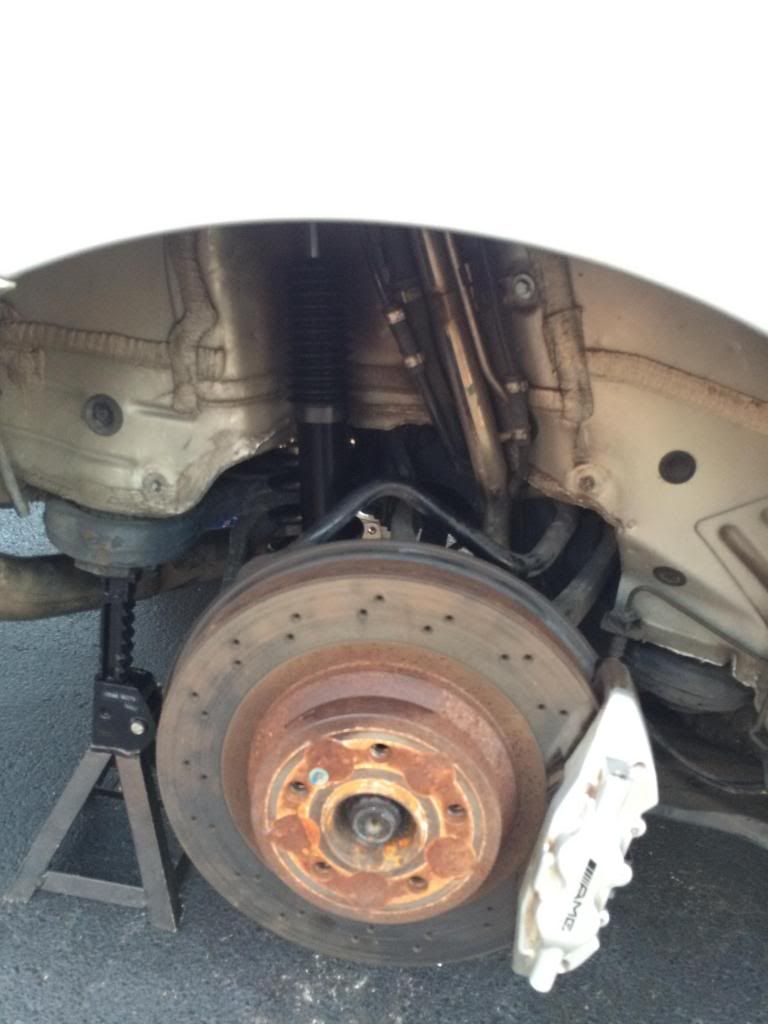
Once you have accomplished that. Remove the wheels and this is what you should be staring at:
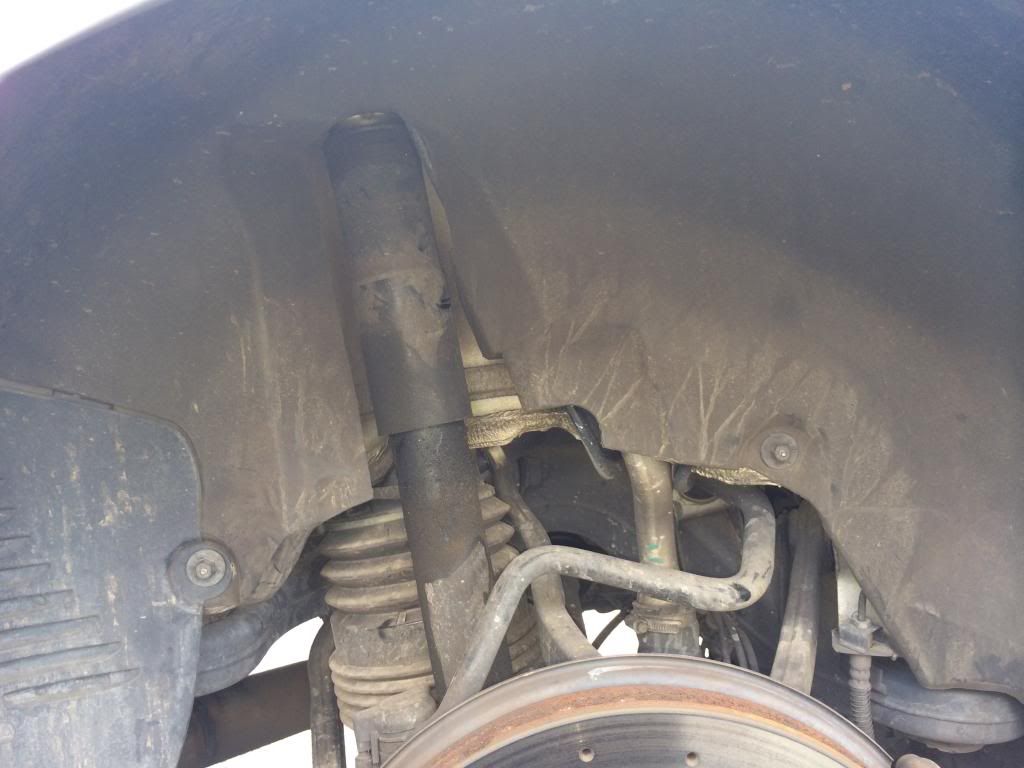
Remove all the nuts holding the inner fender liner from the car. This should allow you to see what kind of carnage you are about to come in contact with.
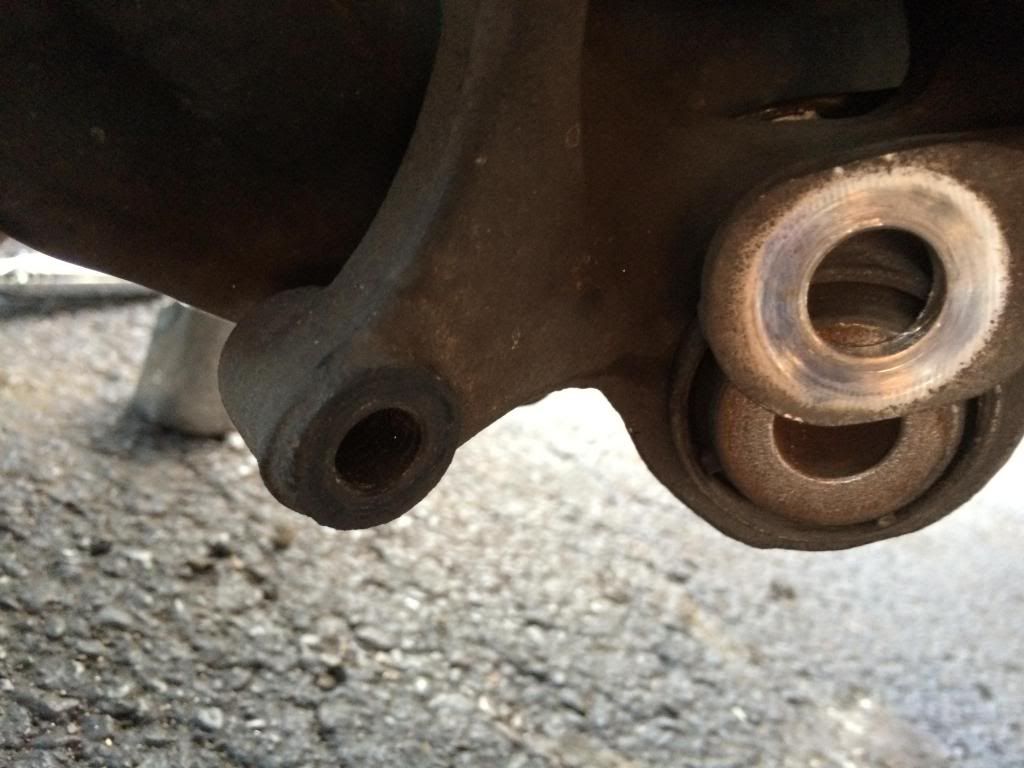
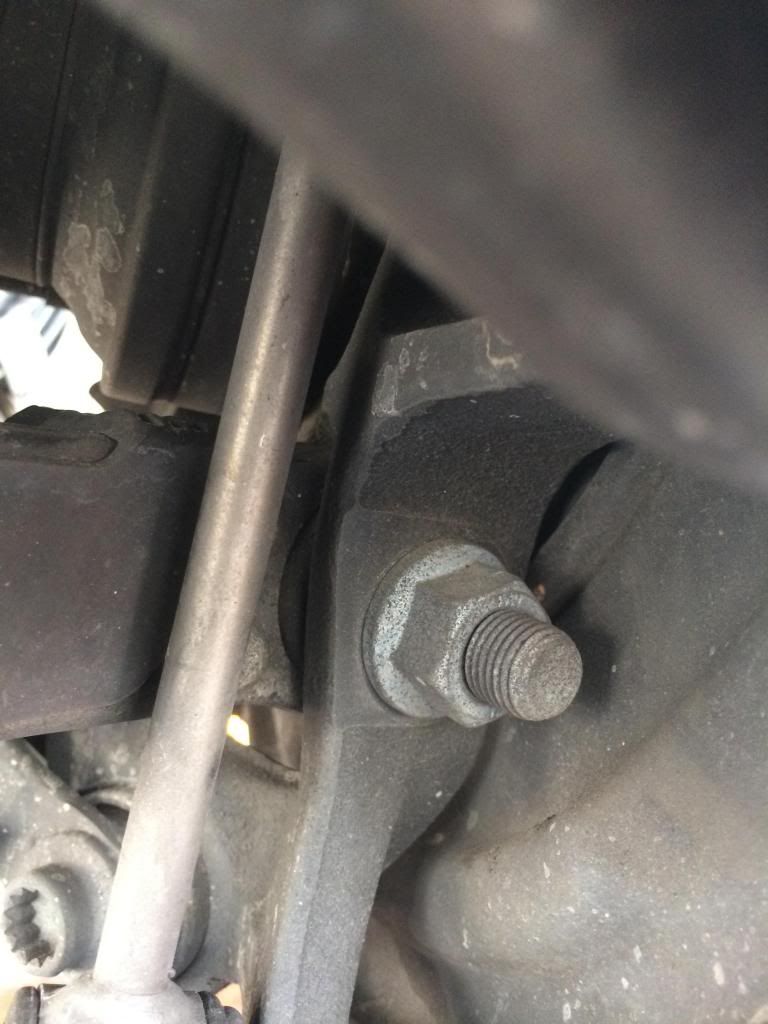
On the back back side of the rear spindle facing the rear of the car will be a connecting arm to the chassis. Disconnect this bolt from the spindle.
Remove the sway bar from the spindle and the camber arm
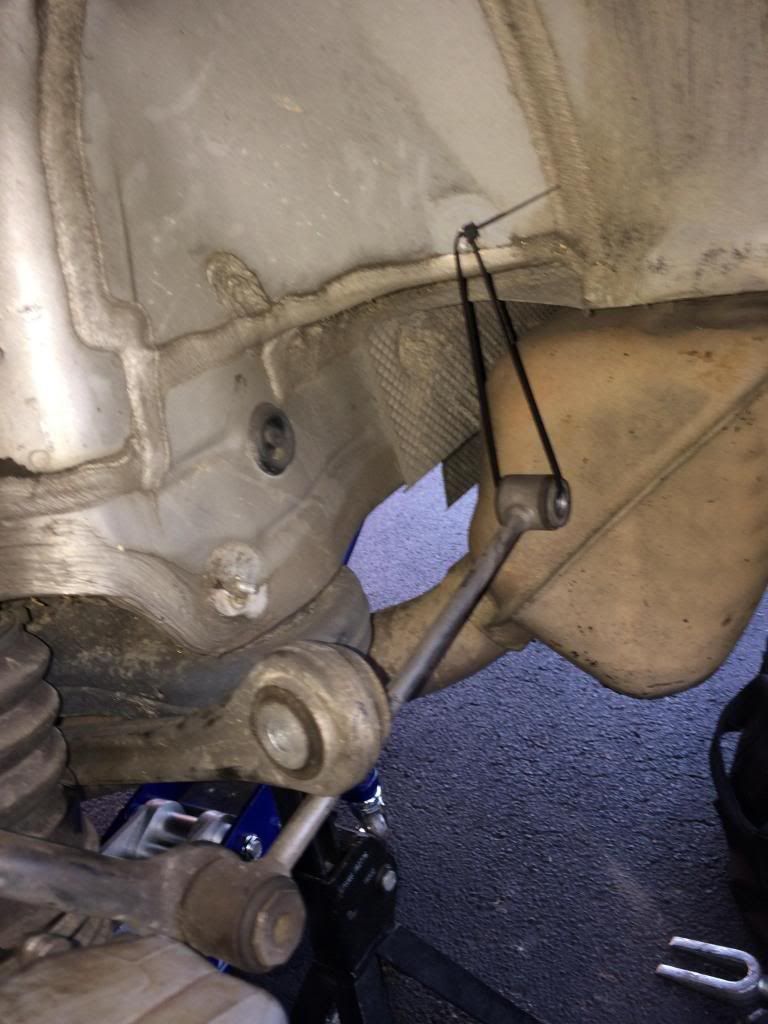
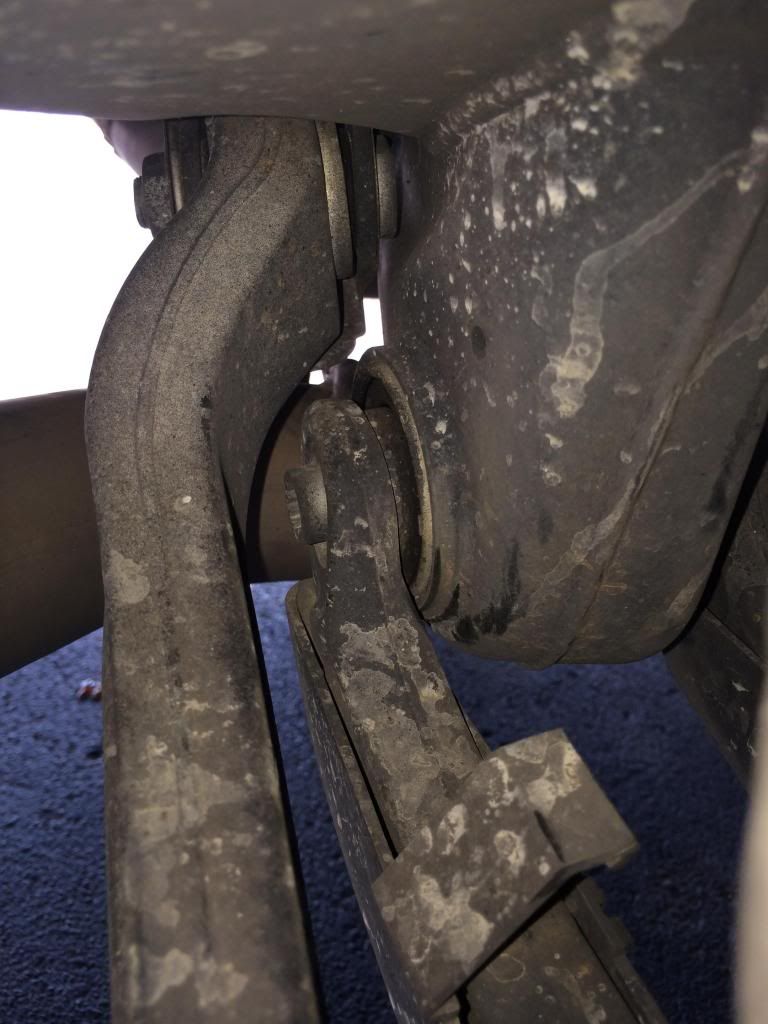
Now take a zip tire and swing the sway bar mount up and hold the rear toe arm in place with the sway bar mount and a zip tie like so:
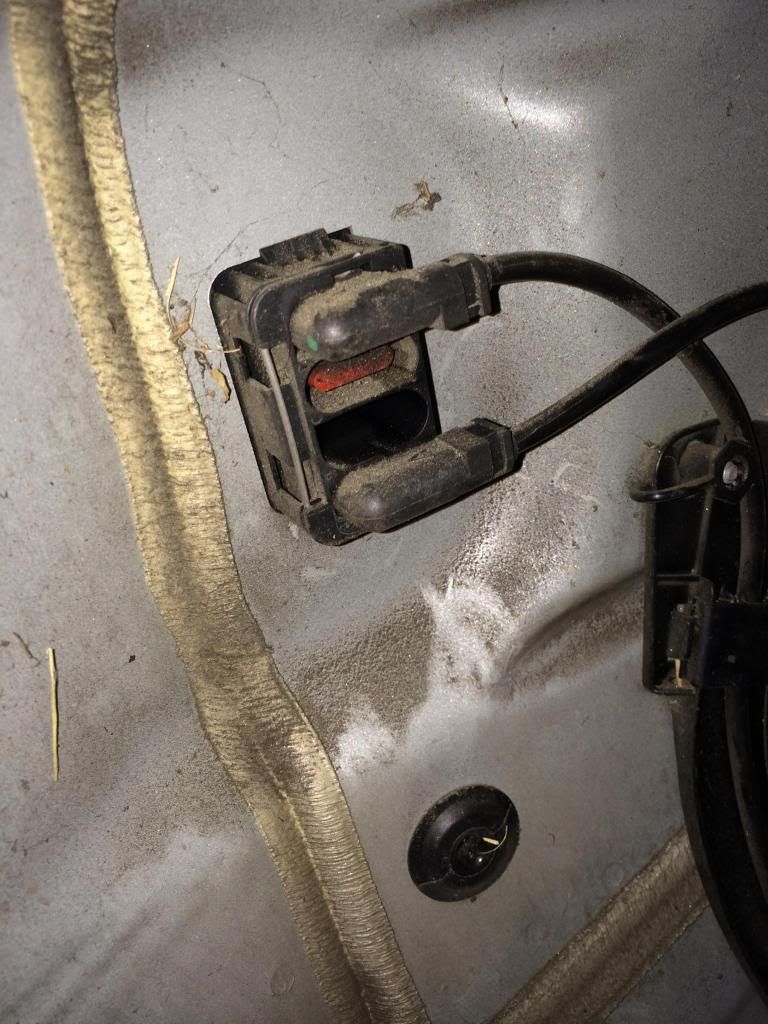
Now trace the line leaving the shock to this junction box. There will be three connections in there. You will remove the middle one. To sever the connection you will see a small metal clip at the top. Simply insert a flat head screwdriver and pry upwards. The clip will slide with ease and you will remove the clip. Then unplug the middle harness clip by pulling with a light tug. Then insert the clip back and press firmly till it clicks in place.
Lets get that pesky shock out! LOL! Remove the bolt from the control arm. Enter your trunk and remove the liner from the same side you are working on and undo the top nut. Compress the shock by hand it should come out easily.
I forgot to take a picture of this step.
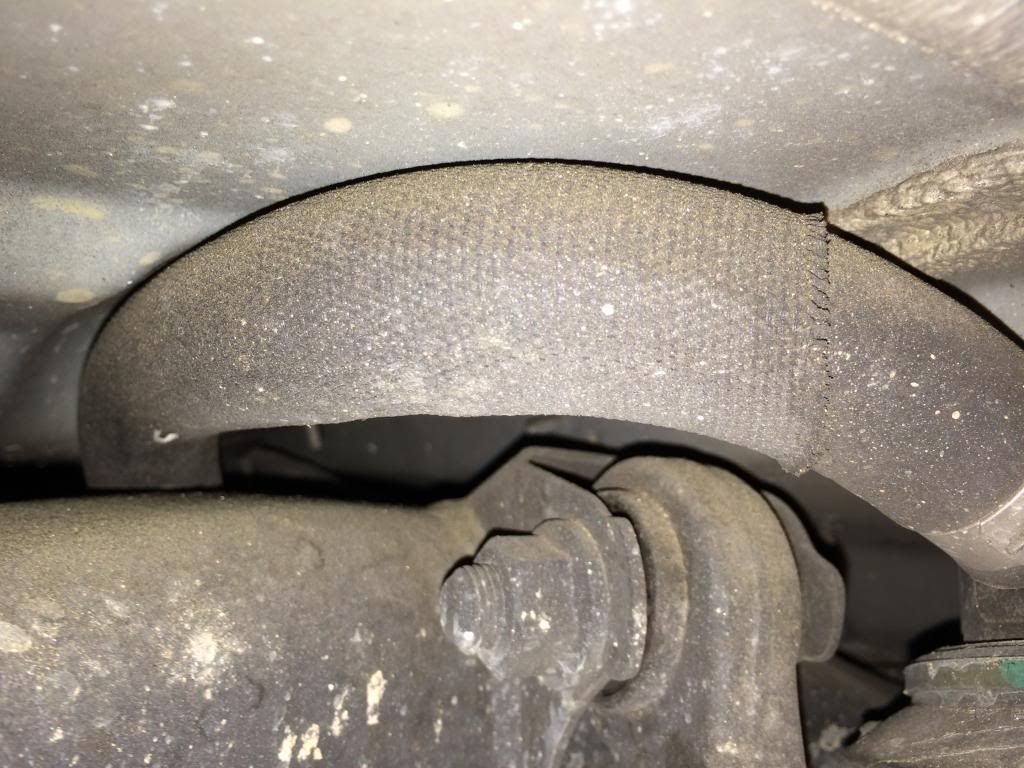
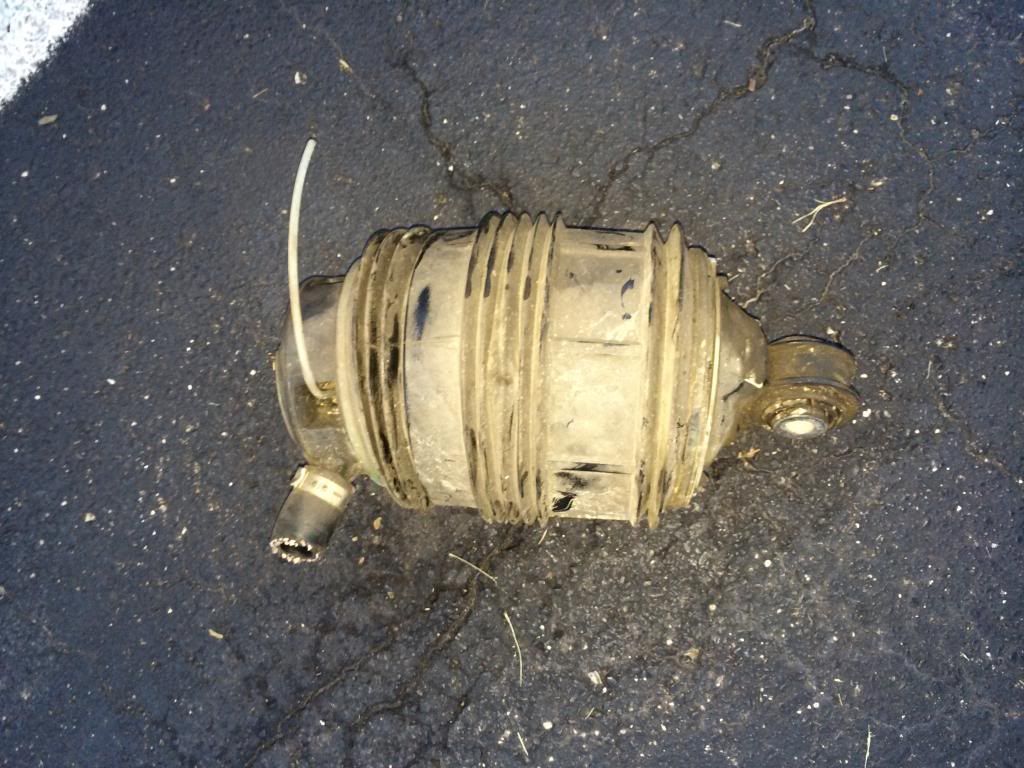
Now lets pull that annoying rear air bladder. The rear air bladder has nothing holding it up top except a centering bulge in the chassis and a dip on the bladders top side to accommodate the bulge. So the best way to remove the air bladder is to cut the main thick rubber hose leading to it. All the air will leak out of the bladder and it will compress like an accordion.
Then remove the lower bolt.
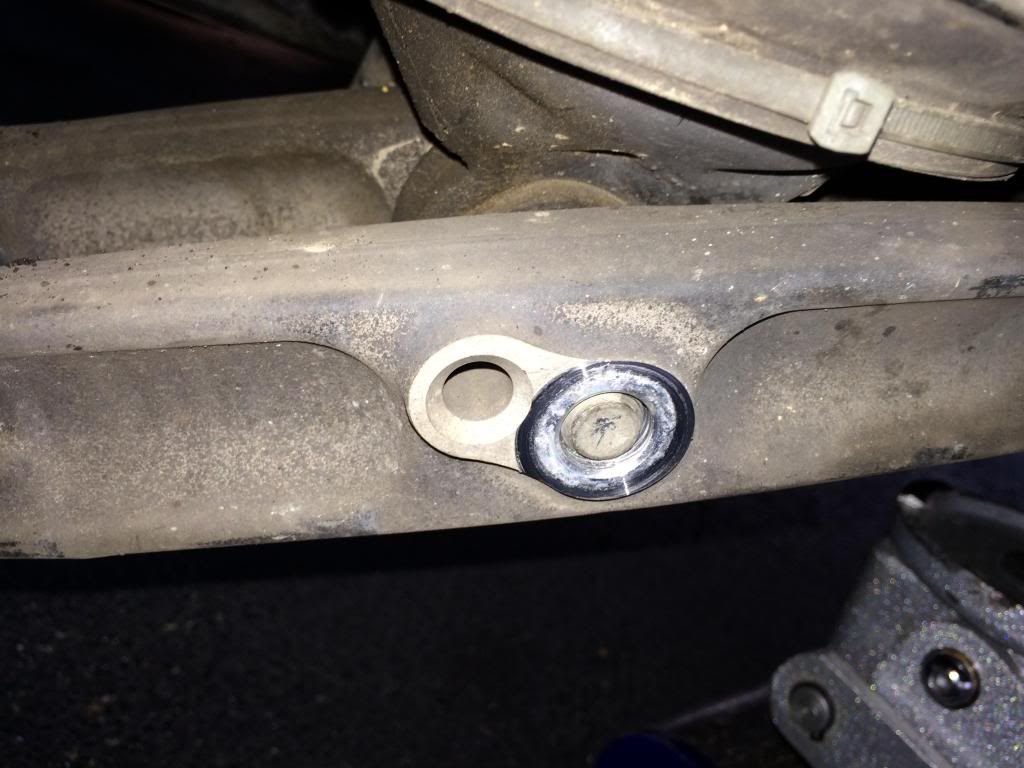
Cut the factory white air feed line:
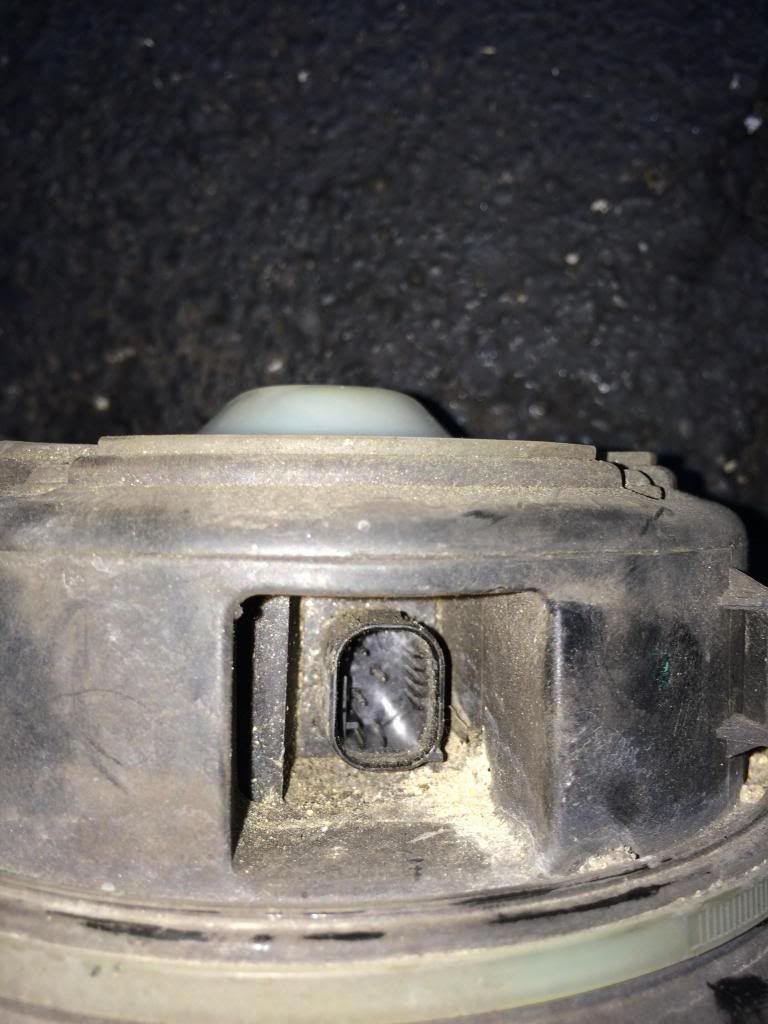
Unclip the harness:
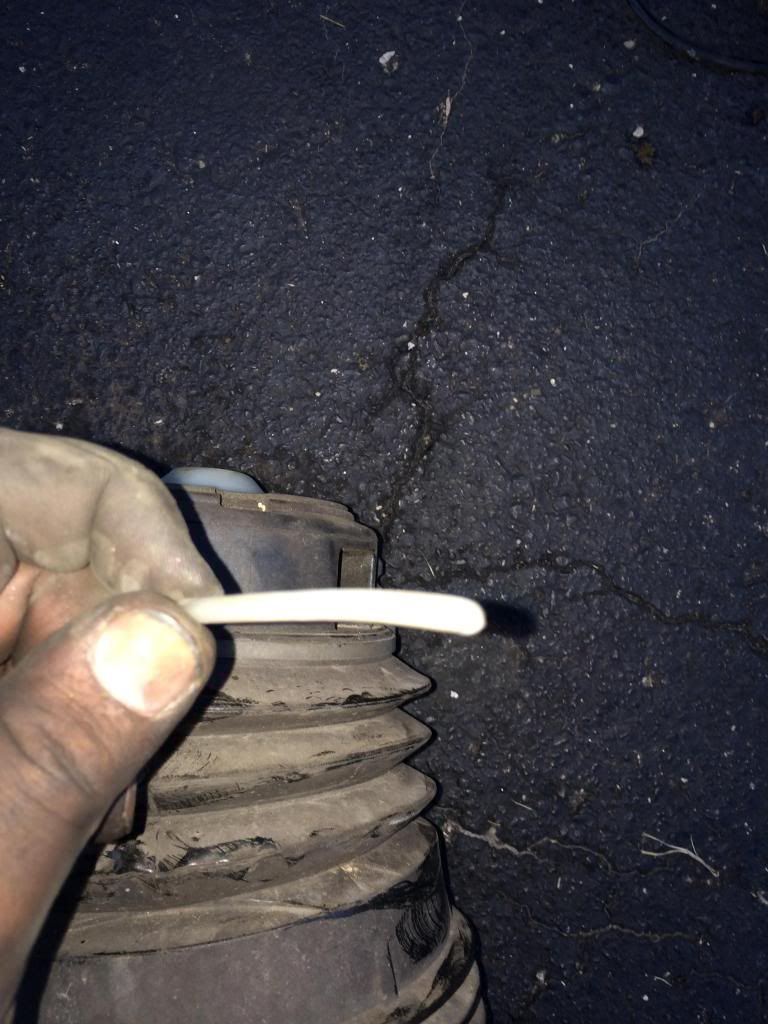
This is what should pop out.
Undo the two bolts holding the brake caliper on.
(sorry no picture)
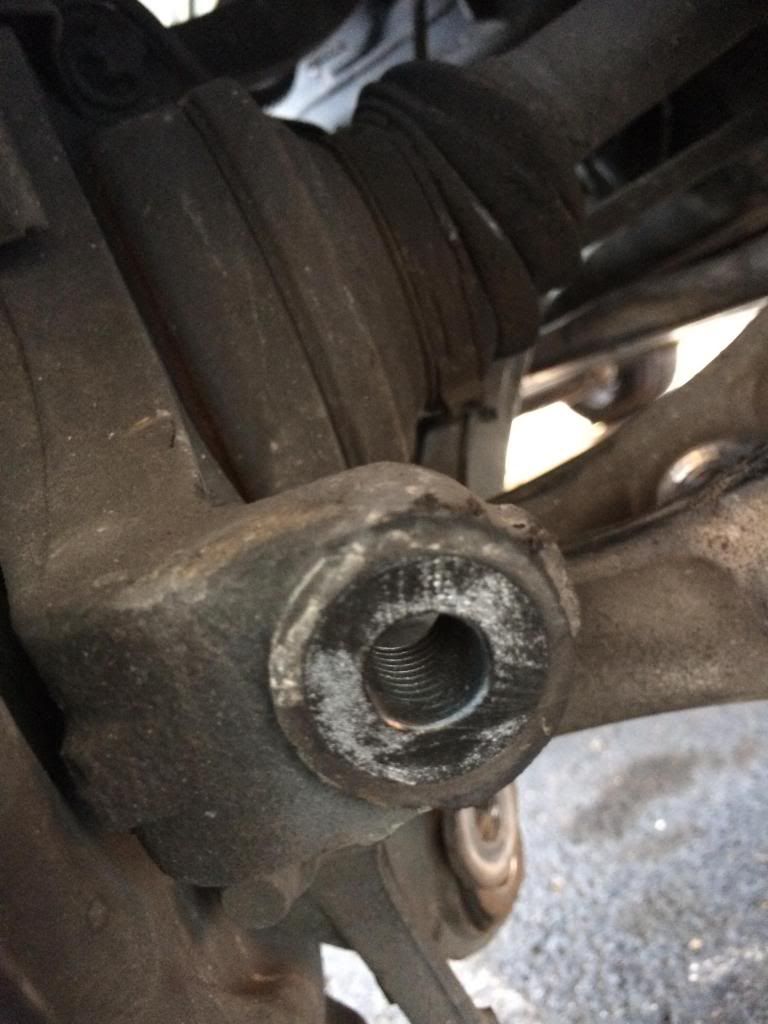
Undo this control arm bolt from the spindle.
Then undo this control arm bolt from the chassis:
Remove the control arm!
Yay! Go grab a beer/cold drink/water/smoke/or pop a squat! The hard part is over with!
Now reinstallation is the reverse of removal.
1. Insert new control arm with spring cup to spindle and bolt down
2. Seat the spring as per manufacturers instructions and insert rear control arm bolt
3. Feed top of shock through trunk hole and bolt down with proper bushings. Then connect eyelet bolt to the shock and control arm.
4. Install camber arm.
5. Install brake calipers
6. Install rear toe arm.
7. Install sway bar.
8. Install rear fender liner
9. Repeat on the other side.
TADA You are done. My phone battery died so I didn't get to take any more pictures. I feel sad now. Adjust your coilovers as per manufactures instructions!
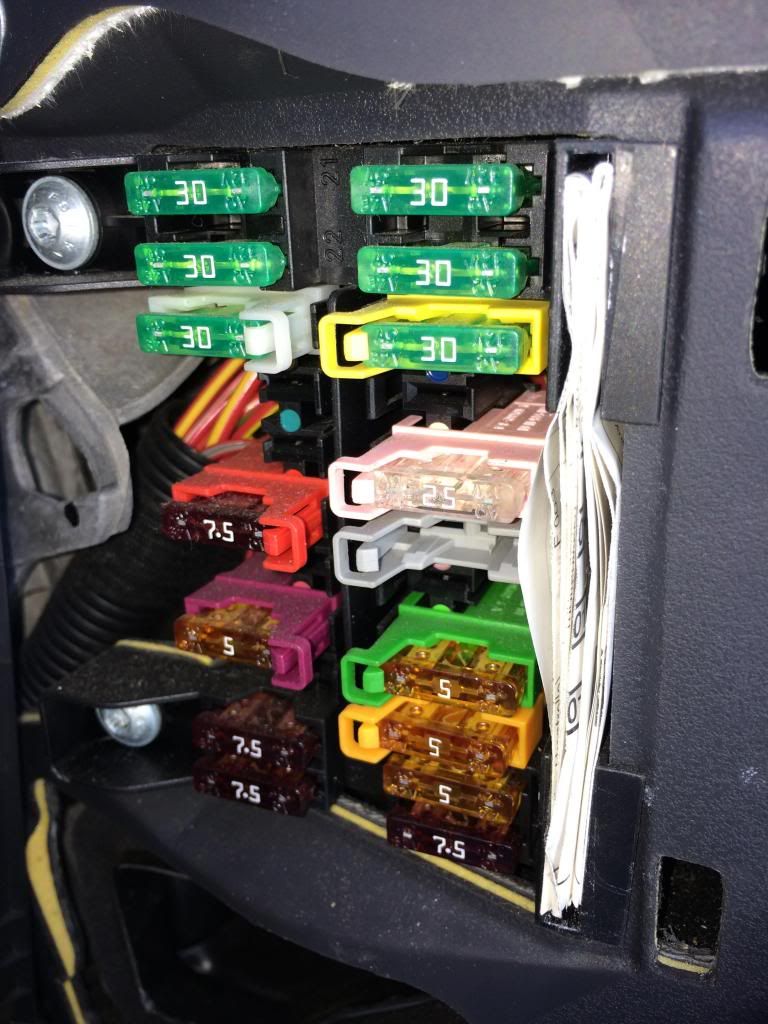
****TO DISABLE AIRMATIC AND AVOID THE WARNINGS ON THE DASH. JUST OPEN THE DRIVER SIDE DASH FUSE BOX. AND PULL FUSE F037 AND ITS DONE. NO MORE AIRMATIC WARNINGS AND NO MORE VISIT WORKSHOP WARNINGS.****
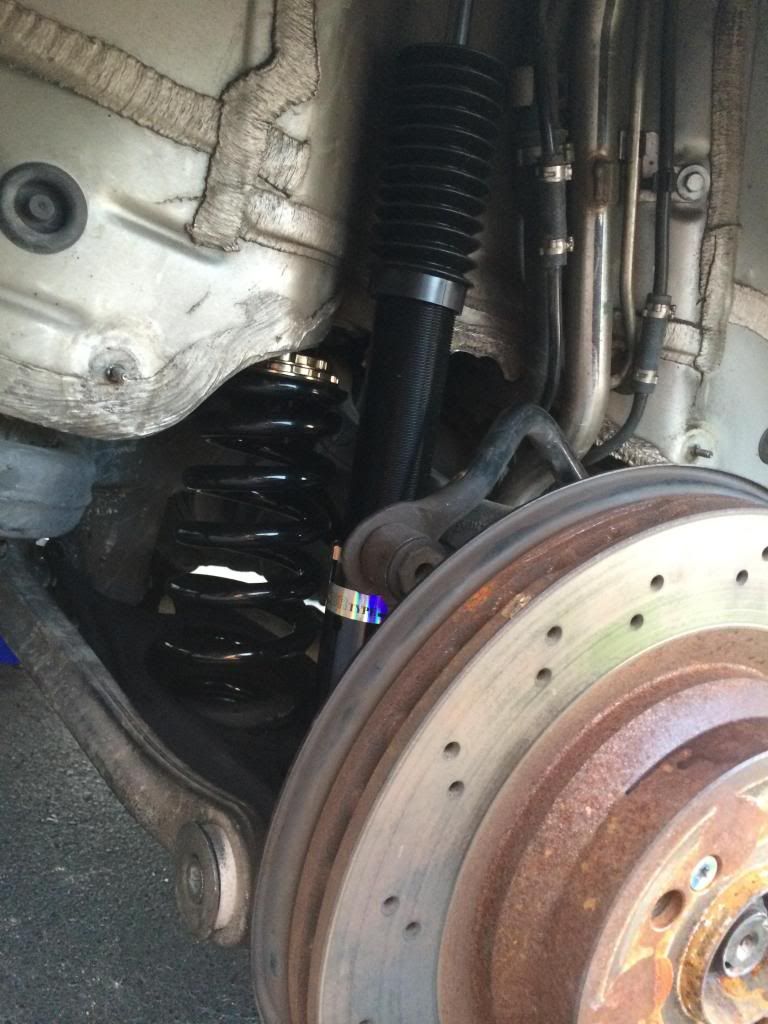
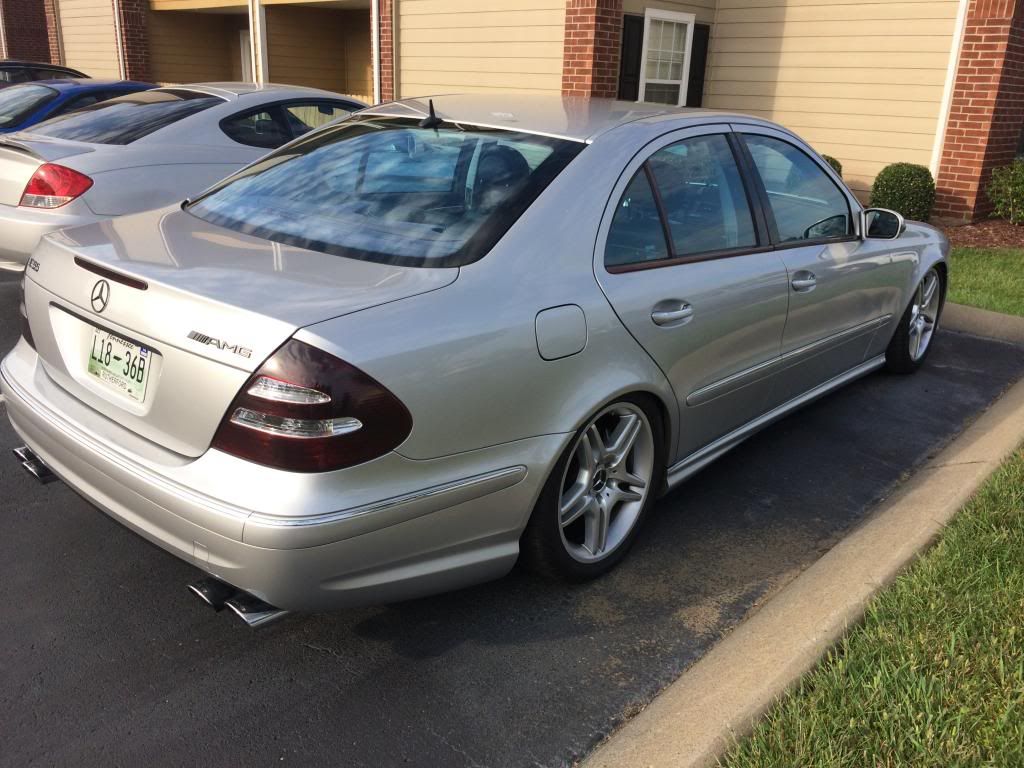
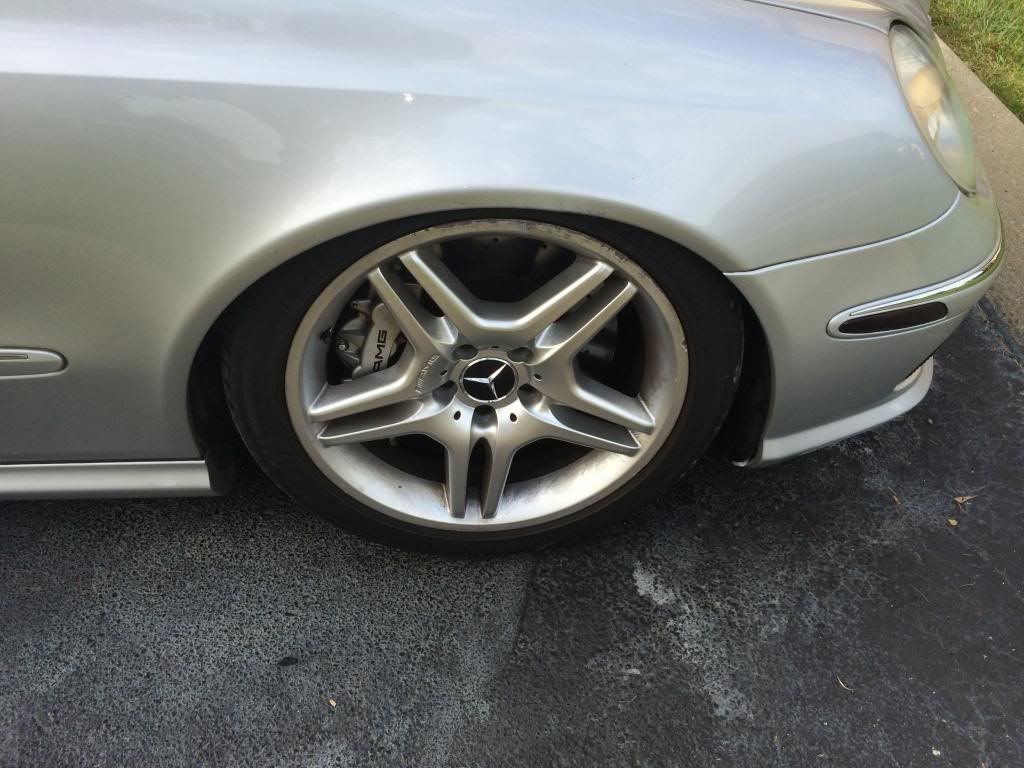
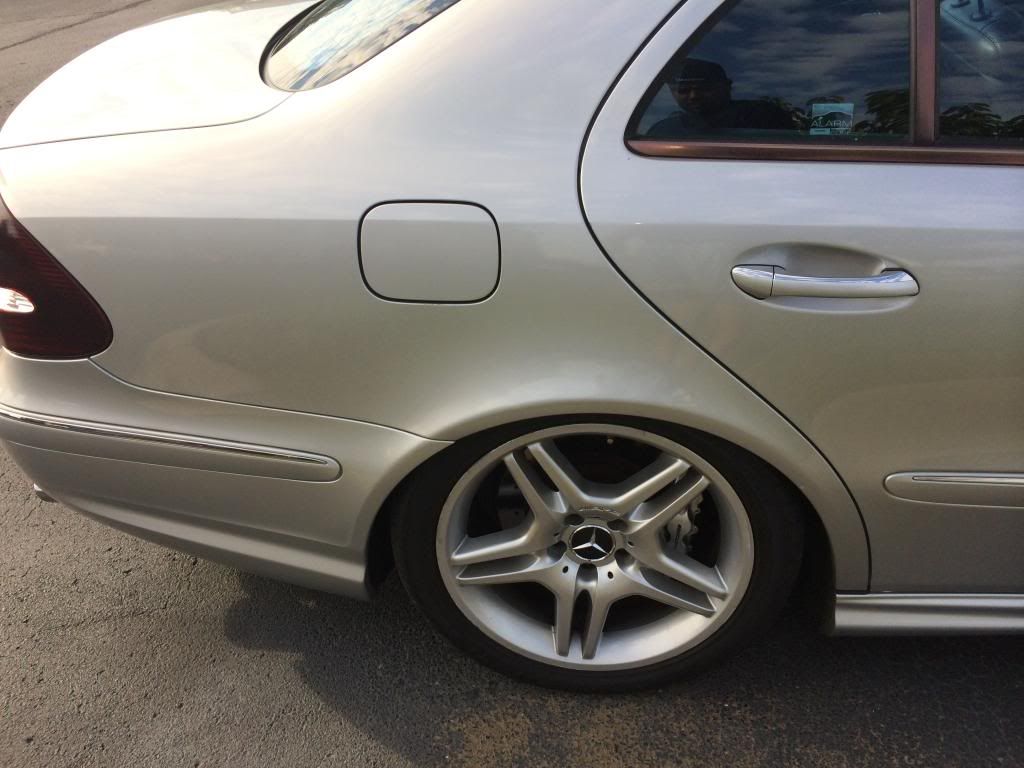
IF YOU WANT TO GO LOW YOU CAN WITH THESE:
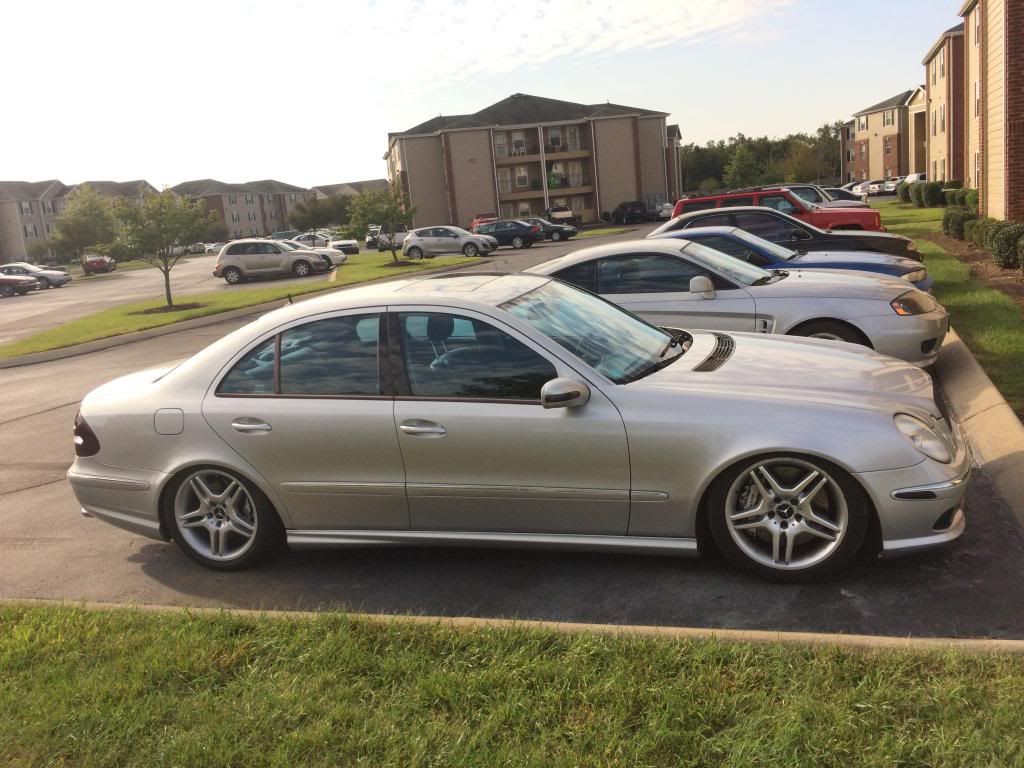
The only thing i had to purchase was the control arms to install the BC Racing MBR Type Coilovers. Nothing else.
However this is not going to be as precise as the previous install. Its simple really, remove everything and reinstall. LOL! I know too easy right? Wrong this was hell and took loads of time. So without further adieu here we go:
As usual break the lug nuts loose with the car on the ground. Chock the front wheels on both sides of the wheel.

Then get the rear end up in the air. The rear is a bit tricky so i suggest you use the factory jack on the jacking points in the rear and lift the car up.


Then slide a proper jack in from behind the car and you will see two big rubber pads on each side of the car infront of the mufflers. These are also jacking points. Place a piece of 2x4 in between the jack and the rubber pads and lift one side at at time untill the rear end is up high enough for the factory jack to fall out of the standard jacking point. Then proceed to install a jack stand in the factory jacking point. Repeat on the other side as well (DO NOT RAISE THE CAR AS HIGH AS THE JACK STAND WILL GO ON THE FIRST LIFT). Make sure you raise each side up a few inches at a time and stagger the lifting process. This will guarantee that the car will not fall off the jack stands but also will be a lot safer .
Once you have accomplished that. Remove the wheels and this is what you should be staring at:

Remove all the nuts holding the inner fender liner from the car. This should allow you to see what kind of carnage you are about to come in contact with.

On the back back side of the rear spindle facing the rear of the car will be a connecting arm to the chassis. Disconnect this bolt from the spindle.

Remove the sway bar from the spindle and the camber arm

Now take a zip tire and swing the sway bar mount up and hold the rear toe arm in place with the sway bar mount and a zip tie like so:

Now trace the line leaving the shock to this junction box. There will be three connections in there. You will remove the middle one. To sever the connection you will see a small metal clip at the top. Simply insert a flat head screwdriver and pry upwards. The clip will slide with ease and you will remove the clip. Then unplug the middle harness clip by pulling with a light tug. Then insert the clip back and press firmly till it clicks in place.

Lets get that pesky shock out! LOL! Remove the bolt from the control arm. Enter your trunk and remove the liner from the same side you are working on and undo the top nut. Compress the shock by hand it should come out easily.
I forgot to take a picture of this step.
Now lets pull that annoying rear air bladder. The rear air bladder has nothing holding it up top except a centering bulge in the chassis and a dip on the bladders top side to accommodate the bulge. So the best way to remove the air bladder is to cut the main thick rubber hose leading to it. All the air will leak out of the bladder and it will compress like an accordion.

Then remove the lower bolt.

Cut the factory white air feed line:

Unclip the harness:

This is what should pop out.

Undo the two bolts holding the brake caliper on.
(sorry no picture)
Undo this control arm bolt from the spindle.

Then undo this control arm bolt from the chassis:

Remove the control arm!
Yay! Go grab a beer/cold drink/water/smoke/or pop a squat! The hard part is over with!
Now reinstallation is the reverse of removal.
1. Insert new control arm with spring cup to spindle and bolt down
2. Seat the spring as per manufacturers instructions and insert rear control arm bolt
3. Feed top of shock through trunk hole and bolt down with proper bushings. Then connect eyelet bolt to the shock and control arm.
4. Install camber arm.
5. Install brake calipers
6. Install rear toe arm.
7. Install sway bar.
8. Install rear fender liner
9. Repeat on the other side.
TADA You are done. My phone battery died so I didn't get to take any more pictures. I feel sad now. Adjust your coilovers as per manufactures instructions!

****TO DISABLE AIRMATIC AND AVOID THE WARNINGS ON THE DASH. JUST OPEN THE DRIVER SIDE DASH FUSE BOX. AND PULL FUSE F037 AND ITS DONE. NO MORE AIRMATIC WARNINGS AND NO MORE VISIT WORKSHOP WARNINGS.****

IF YOU WANT TO GO LOW YOU CAN WITH THESE:


The only thing i had to purchase was the control arms to install the BC Racing MBR Type Coilovers. Nothing else.
The fuse remark is particularly useful.
Much love!
 05-10-2017, 11:30 PM
#147
Super Member
Having pulled the 037 fuse, does the main display complain about anything at all? Mine said 'Display Malfunction' but I also tinkered with other things, so I didn't have an opportunity to isolate it.
10-16-2017, 02:32 PM
#148
Newbie

Join Date: Oct 2010
Posts: 6
Likes: 0
Received 0 Likes
on
0 Posts
93 RX7
I just installed mine and have the same Dispaly Malfunction. I didnt mess with anything else so I would assume this is the reason.
10-16-2017, 02:35 PM
#149
Member

What I ended up doing is having a Mercedes Tech program out the codes for the air suspension. I don't know how he did it but it took him awhile to find the right branch of code to change. At that time he also disabled my Automatic Headlights as I replaced them with Depo Facelift updates.
10-16-2017, 02:39 PM
#150
Newbie
Join Date: Oct 2010
Posts: 6
Likes: 0
Received 0 Likes
on
0 Posts
93 RX7
I just finished the install on my CLS55. The rear was nothing short of an absolute pain in the *** but its doable by any average mechanic. I weighed the factory components in comparison to my BC setup and here are the results.
Front OEM Air Struts-19 lbs 13 ounces each.
BC Front Coilovers-11 lbs 13 ounces each
Rear OEM Strut-8 lbs 5 ounces each
Rear OEm Air Spring-7 lbs 4 ounces each
Rear BC Strut-3 lbs 12 ounces each
Rear BC Spring and collar-6 lbs 11 ounces each.
Factory Air Pump-9 lbs 1 ounce.
With air lines, mounting brackets etc removed you save about 37-39 lbs total for those that are interested.


