When you click on links to various merchants on this site and make a purchase, this can result in this site earning a commission. Affiliate programs and affiliations include, but are not limited to, the eBay Partner Network.
I agree with dolucasi that it's possible your car was either modified or an early production car.. My W201 is a later production 91 and it has a fuel filter. It's kind of strange that the MB engineers wouldn't include a fuel filter from the beginning given their legendary attention to detail and to over engineering. You might double check with the MB Classic Center in California to try to determine if there was no fuel filter for your 1985 or if your car was modified and find out what you'd need to do to get it back to factory spec.
1985 190E 201 pre facelift, Ford F150, BMW Z3, 79MGB LE, 1934 MG PA
Progress on My Tank
OK, so I took the tank to my local radiator shop last week. They cleaned it and put a liner in it. I picked it up today. Looks good. The picture shows the union that is a flared union, and there is absolutely no way to get an in tank strainer in there. This IS an early 201, pre face lift if you will. Vin is WDBDA24C8FF069716. So a couple of things. I could put an in line fuel filter in the line from the tank to the pump. I have a fuel filter W/5/8" inlet outlet. Is that necessary? Also, the checkvalve in the one vent line works, I know one of you guys suggested replacing it. Do you have a part number and a source? I am now going to fabricate the fuel line and I'll provide pictures of that when I get it put together. Again, the line from the tank to the pump is gravity feed. It is only pressure from the pump through the filter to the throttle body assembly,then obviously the injectors. I think I will again remove the pump/filter/accumulator assembly and bench check it with 12V to make sure the pump works. I do believe the pump relay may be bad. Also, isthere a way to check the fuel gague sending unit? Thoughts?????
Hey Randy congrats on getting your tank together! I think your �back to front� approach is a good way to tackle things
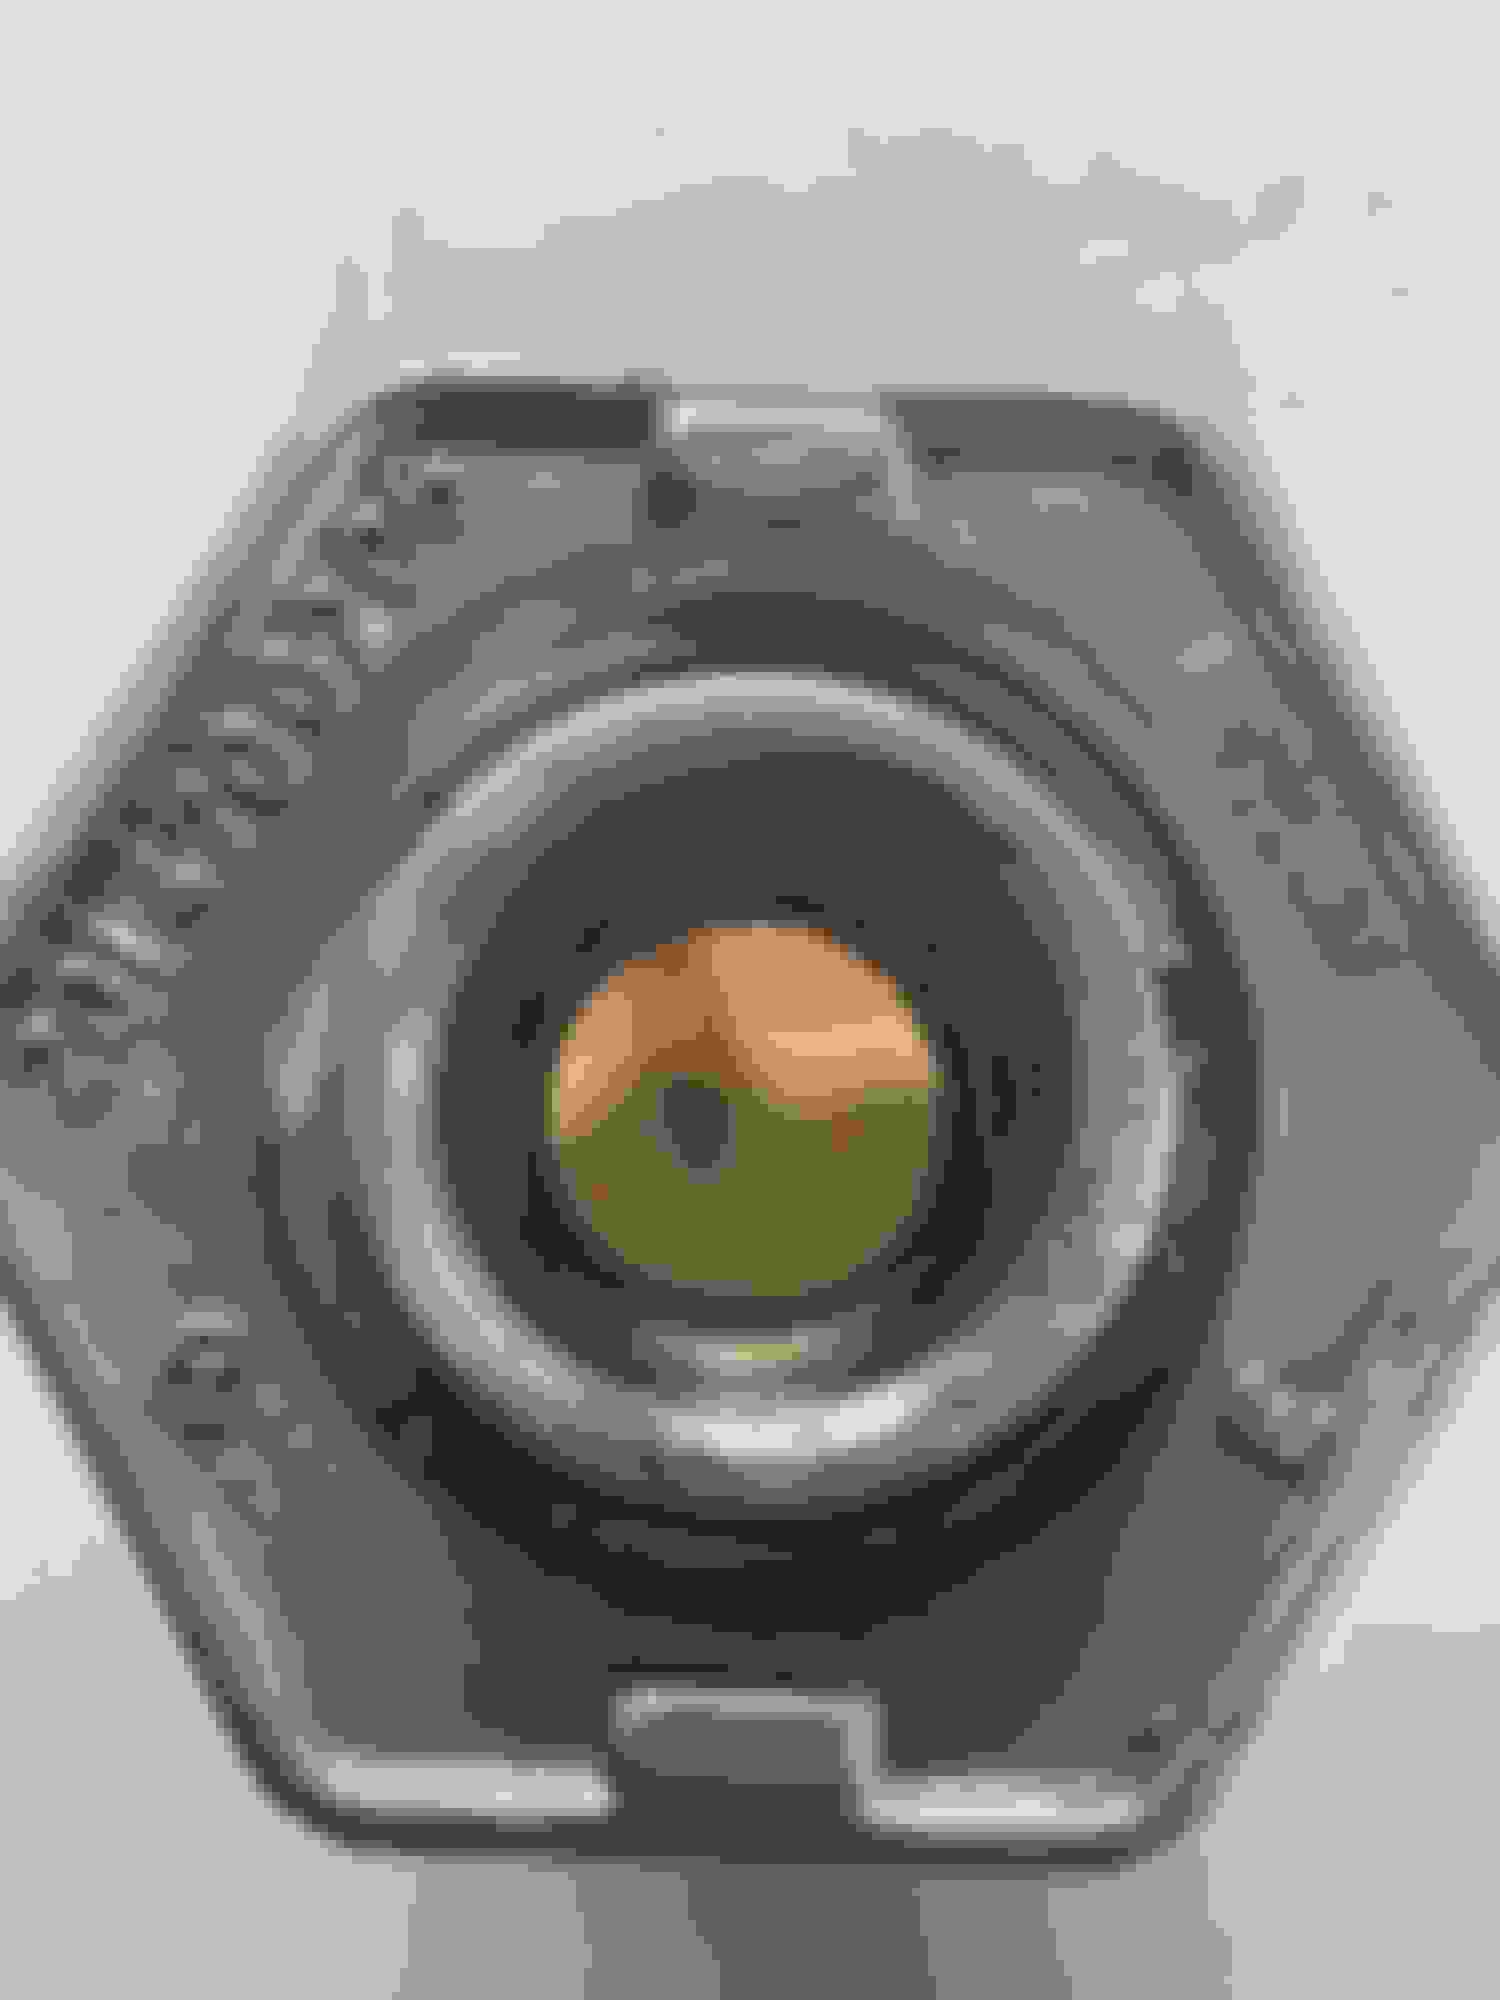
That hexagon in your picture IS the fuel strainer, it is extremely tough to get off but I believe you can use whatever you use to get the fuel sending unit out
I don�t have any part number but that fuel vent valve can get extremely brittle, mine broke so I my vote is to replace it
Last edited by BetterDaze; 08-09-2024 at 06:01 PM.
190E 2.6L 1989, 190E 2.6L 1988, BMW 535dXdrive 2014, BMW 428i 2015
Yep, as Betterdaze mentions (and he is an expert on this now) that hex is the strainer. You need a giant wrench to take it off. So do not put inline filters etc. That may even have an adverse effect on the pumps. The strainer has a very large surface area and porous as it is meant to be.
If you look at a strainer picture, you will know what we mean.
190E 2.6L 1989, 190E 2.6L 1988, BMW 535dXdrive 2014, BMW 428i 2015
This is what they look like from inside the tank. Here is a new one I put in last year against my original 34 year old. My old one looked impressively clean but discolored and I figured it had been in there long enough.
1985 190E 201 pre facelift, Ford F150, BMW Z3, 79MGB LE, 1934 MG PA
Hey guys, OK I NOW GET IT!!!!!! I have removed the strainer and ordered one from FCP Euro. Should have it by Thursday. I can return the inline filter to Amazon. So, how about the fuel gague sending unit? Any way to test that? By the way, given that the tank is out I was able to use a really large adjustable wrench to get the strainer out. I don't know how I would get it out if the tank was still in the car. Like I said while I wait for parts, I gonna remove the pump/filter/acuaator assembly and bench test it to make sure the pump works. Any other thoughts?
When you reinstall the strainer it has to be tight but if too tight you can damage the tank so be careful. The sending unit should be fine if you had an appropriate reading last time you filled it or drove. You can plug it into the car and flip it upside down to see if your fuel meter changes in the cluster. That should be like a 100 dollar part but I dont think much else goes bad if you have new filter and pumps it should work just fine.
learn from my mistake and Make sure you thoroughly tighten all the clamps once you reinstall everything and start the car, check again while the car is running. The pressure can loosen things you initially thought were tight
Last edited by BetterDaze; 08-10-2024 at 12:26 PM.
I agree that if the sending unit was working properly before you removed the gas tank then there's no reason to think that it won't work properly after everything is hooked back up. If it doesn't work properly after everything has been hooked back up then it likely needs to be replaced.
190E 2.6L 1989, 190E 2.6L 1988, BMW 535dXdrive 2014, BMW 428i 2015
Just to repeat what is already said. Both the sending unit and the strainer should never be overtightened. The O rings do the job not the metal to metal sealing.
So replace the O-rings for sure, strainer will come with an O-ring. In both cases you will need to make sure the tank surface is super clean as the strainer will be new. For the sender, you need to clean the sender surface/O-ring slot. Otherwise it will leak.
Like I mentioned before to replace this with the tank in place you purchase a super shallow 30mm(??) socket online. But this is really for other members, yours is already out.
On the sending unit, if it was not dancing do not mess with it because they are expensive and cleaning them require delicate hands. The sensor wires are super thin and require contact cleaner or carburetor cleaner (or both) and a cotton ball to clean. And you need a special slot screw to open the unit.
Also the sending unit is relaced with the tank in place, easily. So save that for after the tank is installed.
I bought my dash zebrano there last summer and they were very easy to work with and the zebrano quality was perfect, at a reasonable price.
More importantly, they claim to have the Tank to Pump fuel line (aftermarket) for under $60,
Dave, they have your exterior mirror plastic replacements,
I just broke my third brake light fixture while refurbishing my '88 5-speed over the weekend. They have that too. Will order that and report the results in a separate post.
1985 190E 201 pre facelift, Ford F150, BMW Z3, 79MGB LE, 1934 MG PA
OK, so whaat is a dash zebrano? Also, they show to have the line that goes from the filter to the fuel line, but NOT the line that goes from the strainer fitting on the tank to the fuel pump. That is the line that I am going to fabricate here in my garage in a few minutes.
Also, I took a picture of the dash, and as I recall you mentioned somewhere along the line that I should check a vacuum part under the dash. Have a look at this picture and if you would tell me if the black sylendrical part in the picture is the part that you are drawing my attention to.
190E 2.6L 1989, 190E 2.6L 1988, BMW 535dXdrive 2014, BMW 428i 2015
Performance Produce website is a bit hard to navigate.
Here is a line into the pump. I replaced mine last year just because I do not intend to go back in there anytime in the near future. This is not the line to the tank you want: https://ppembzparts.com/i-30510714-m...%7Cyear%3D1988
You are correct they only have the FD to fuel line under the hood not the one from tank to pump assembly. My bad.
Performance manufactures (overseas) and sells zebrano add on's for the dash. It is an easy way to cover cracks around the vents and looks pretty good. It is OEM quality.
I am posting mine here.
Also the pods under the dash. I had prepared this photo's many years ago, so ignore the pricing, most are not available from those outlets now.
You forgot to post a picture but here is a summary of all the vacuum pods in the dash.
190E 2.6L 1989, 190E 2.6L 1988, BMW 535dXdrive 2014, BMW 428i 2015
The best way to check the flaps is to use a mityvac air pump to apply suction on the pod actuator and make sure it does not leak and is operable.
You may have other means to apply vacuum. Like an oil extractor may also work.
That one appears to be the air mixture flap operator to mix heater core and fresh air. Are you having trouble there with the air mixture?
1985 190E 201 pre facelift, Ford F150, BMW Z3, 79MGB LE, 1934 MG PA
Tank Strainer Fitment
Well it would appear that I have hit a wall. Once again FCP Euro has sent me an incorrect part. I got the strainer, and indeed put it in the tank. Then when I went to "dry fit" things I found that the OE Fuel line that I fabricated with commercial banded fuel line hose I found that the fuel line that goes into the strainer has a flared connection rather than the tapered connection. Apparently there was a change somewhere later than my early 85 190E. Then in conversation with FCP Euro I learned that the MB part number is A201470506, and they do not stock that part. So I am in search of that part. An alternative is to clean up the OD part, it is in fair conditon, not laquerd up or anything just somewhat stained with rust stain, and put a new O ring on it and go on my way. Thoughts?
190E 2.6L 1989, 190E 2.6L 1988, BMW 535dXdrive 2014, BMW 428i 2015
So the strainer you purchased does not fit the fuel line. This is why getting your parts from the dealer helps. They would have immediately sold you the part you need or at least you would have found out what the part number is. Most likely they do not have the part either and would ask you to also replace the hose but then they do not have the hose......
First I would check if the part is available from the dealer. Then MBclassic center.
How is the original strainer you have looking? I'm guessing not great especially after the lining material you put in the tank.
The other option is to find a fuel line from a junk yard even if it is just for the connection part. You will have to remanufacture the hose again.
I can check my garage and see if I have an extra fuel Outlet fitting from years 87+. I went through this twice and should have two spares. Maybe you can just transfer the rubber so you can use the strainer they currently make, as a last resort
i would just put all fresh parts since you have it all apart, i would not use the old strainer but maybe others can say if it is truly harmful or not
definitely check the scrap yards like dolucasi recommended�I think it�s a good idea to have multiple because if that line breaks you cannot use the car at all and now have a huge hazardous mess haha
Last edited by BetterDaze; 08-15-2024 at 11:16 AM.
sorry, I thought I had included it. Oh, and how do you check that these work?
Thanks,
randy
This is the pic of the dash
I removed my glove box and plan to test with mightyvac from vacuum module to the far right.
do I just pull each line one by one to see what holds and doesn�t?
my AC does work from the center vents but simultaneously it blows full heat out the windshield and none from the side vents. I think the air mix flap is the culprit as of now, the temp dial and directional buttons don�t work at all
1985 190E 201 pre facelift, Ford F150, BMW Z3, 79MGB LE, 1934 MG PA
here are it cleaned up OK, but fabric screen is split
pictures of my strainer. I have ordered two strainers from two different sources I hope one of them will fit
190E 2.6L 1989, 190E 2.6L 1988, BMW 535dXdrive 2014, BMW 428i 2015
I'm guessing you are not near a dealer. Best to get these at the dealer if you are near. They are pretty cheap and you will know they will fit the car.
I agree with dolucasi that you should be using MB parts. They'll fit and they'll last. The MB Classic Center has much better access to W201 parts than the MB dealers have so I would suggest going there. I know this from the personal experience of needing parts for my W201 so that's why I'm suggesting them to you.

 08-01-2024, 11:26 AM