When you click on links to various merchants on this site and make a purchase, this can result in this site earning a commission. Affiliate programs and affiliations include, but are not limited to, the eBay Partner Network.
This will likely be my first and last post in W202. Insurance has written off my car and i'm off to find the next Benz to modify.
As there is a lack of information on this topic I wanted to make a post on this forum to help you out if wanted to make a custom intake as aftermarket support is scarce.
This setup is on my 1997 C280. Follow my instructions if you have the same car as I'm not sure what other modifications will be needed between engine sizes.
The benefit of this is to get 3in intake piping all the way to the manifold while keeping OE functions. This will increase performance slightly but the sound is definitely the selling point.
My setup cost $496.94 but you can definitely use cheaper parts to bring the cost down. Here is the parts list break down. All prices are in CAD.
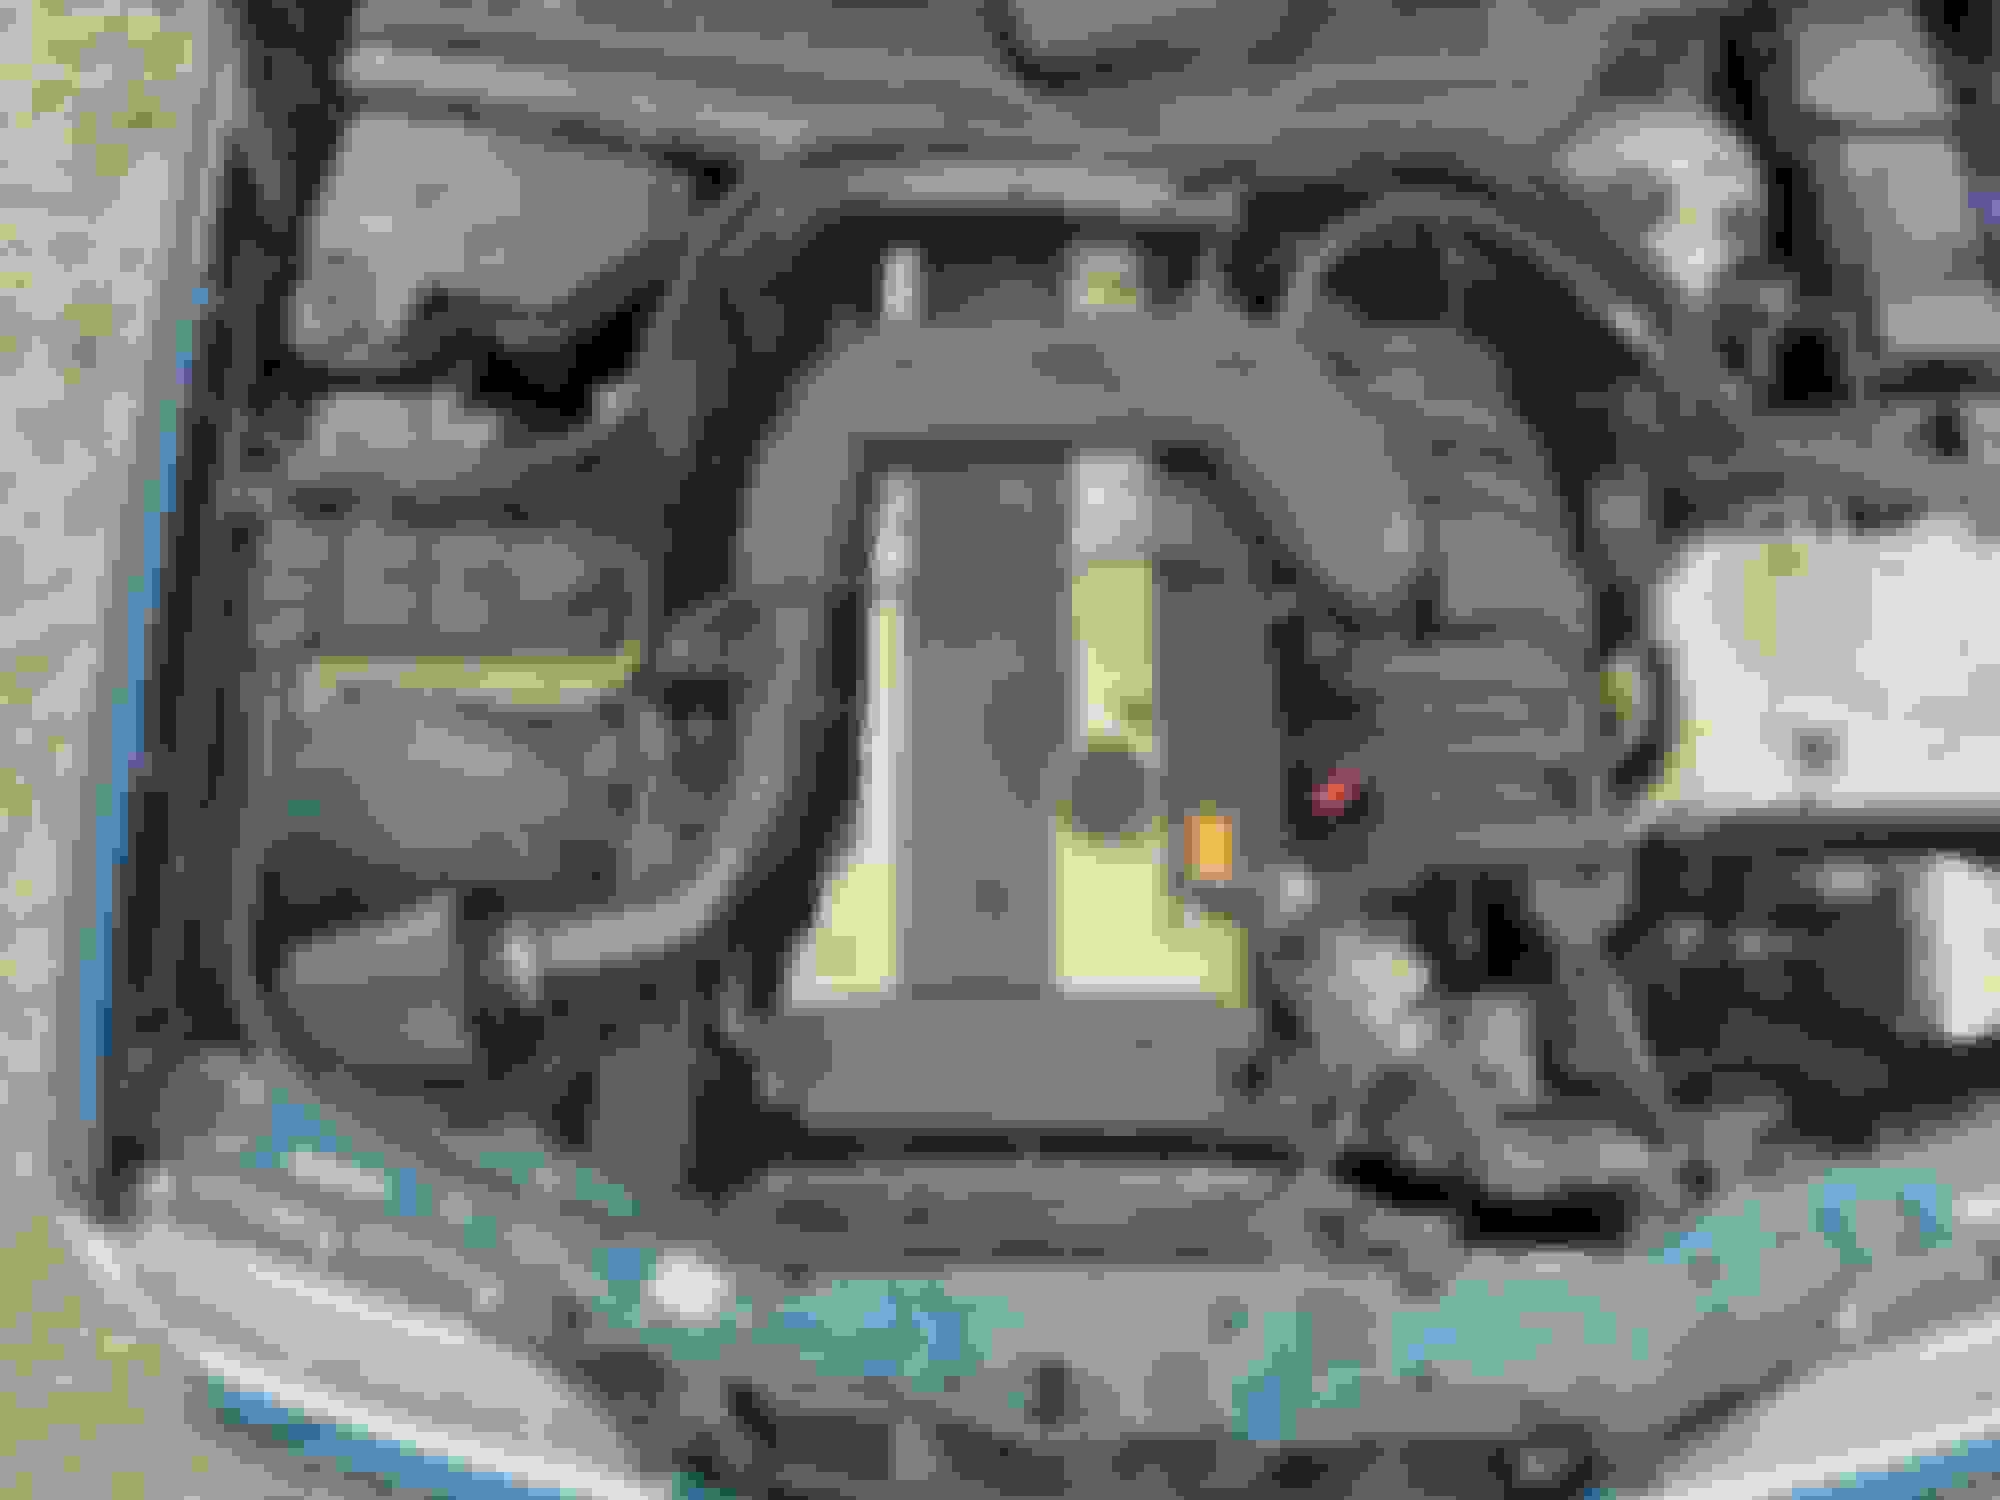
This is the finished product. I didn't get the chance to make a shroud before my vehicle got written off but that is very well documented on youtube and elsewhere.
To start you are going to remove your factory intake. All you will need is a flathead screwdriver and a 10mm. Remove the nuts from the valve cover to the intake pipe; then loosen the hose clamps around the MAF sensor and the clamp attached to the throttle body (accessible from the under the intake).
After that you can literally pull each part out. The factory air box will be tight so pull hard.
Next Step
You are going to cover the holes in the valve cover and the throttle body. Proceed to cut the two rear studs on the valve cover. I just did a quick cut on both but you can definitely make this cleaner. As you can see in the second picture the SL320 intake pipe will only fit if those rear studs are gone.
If I was to do this a second time I would remove the valve cover and make it smooth with a flappy disk.
Next Step
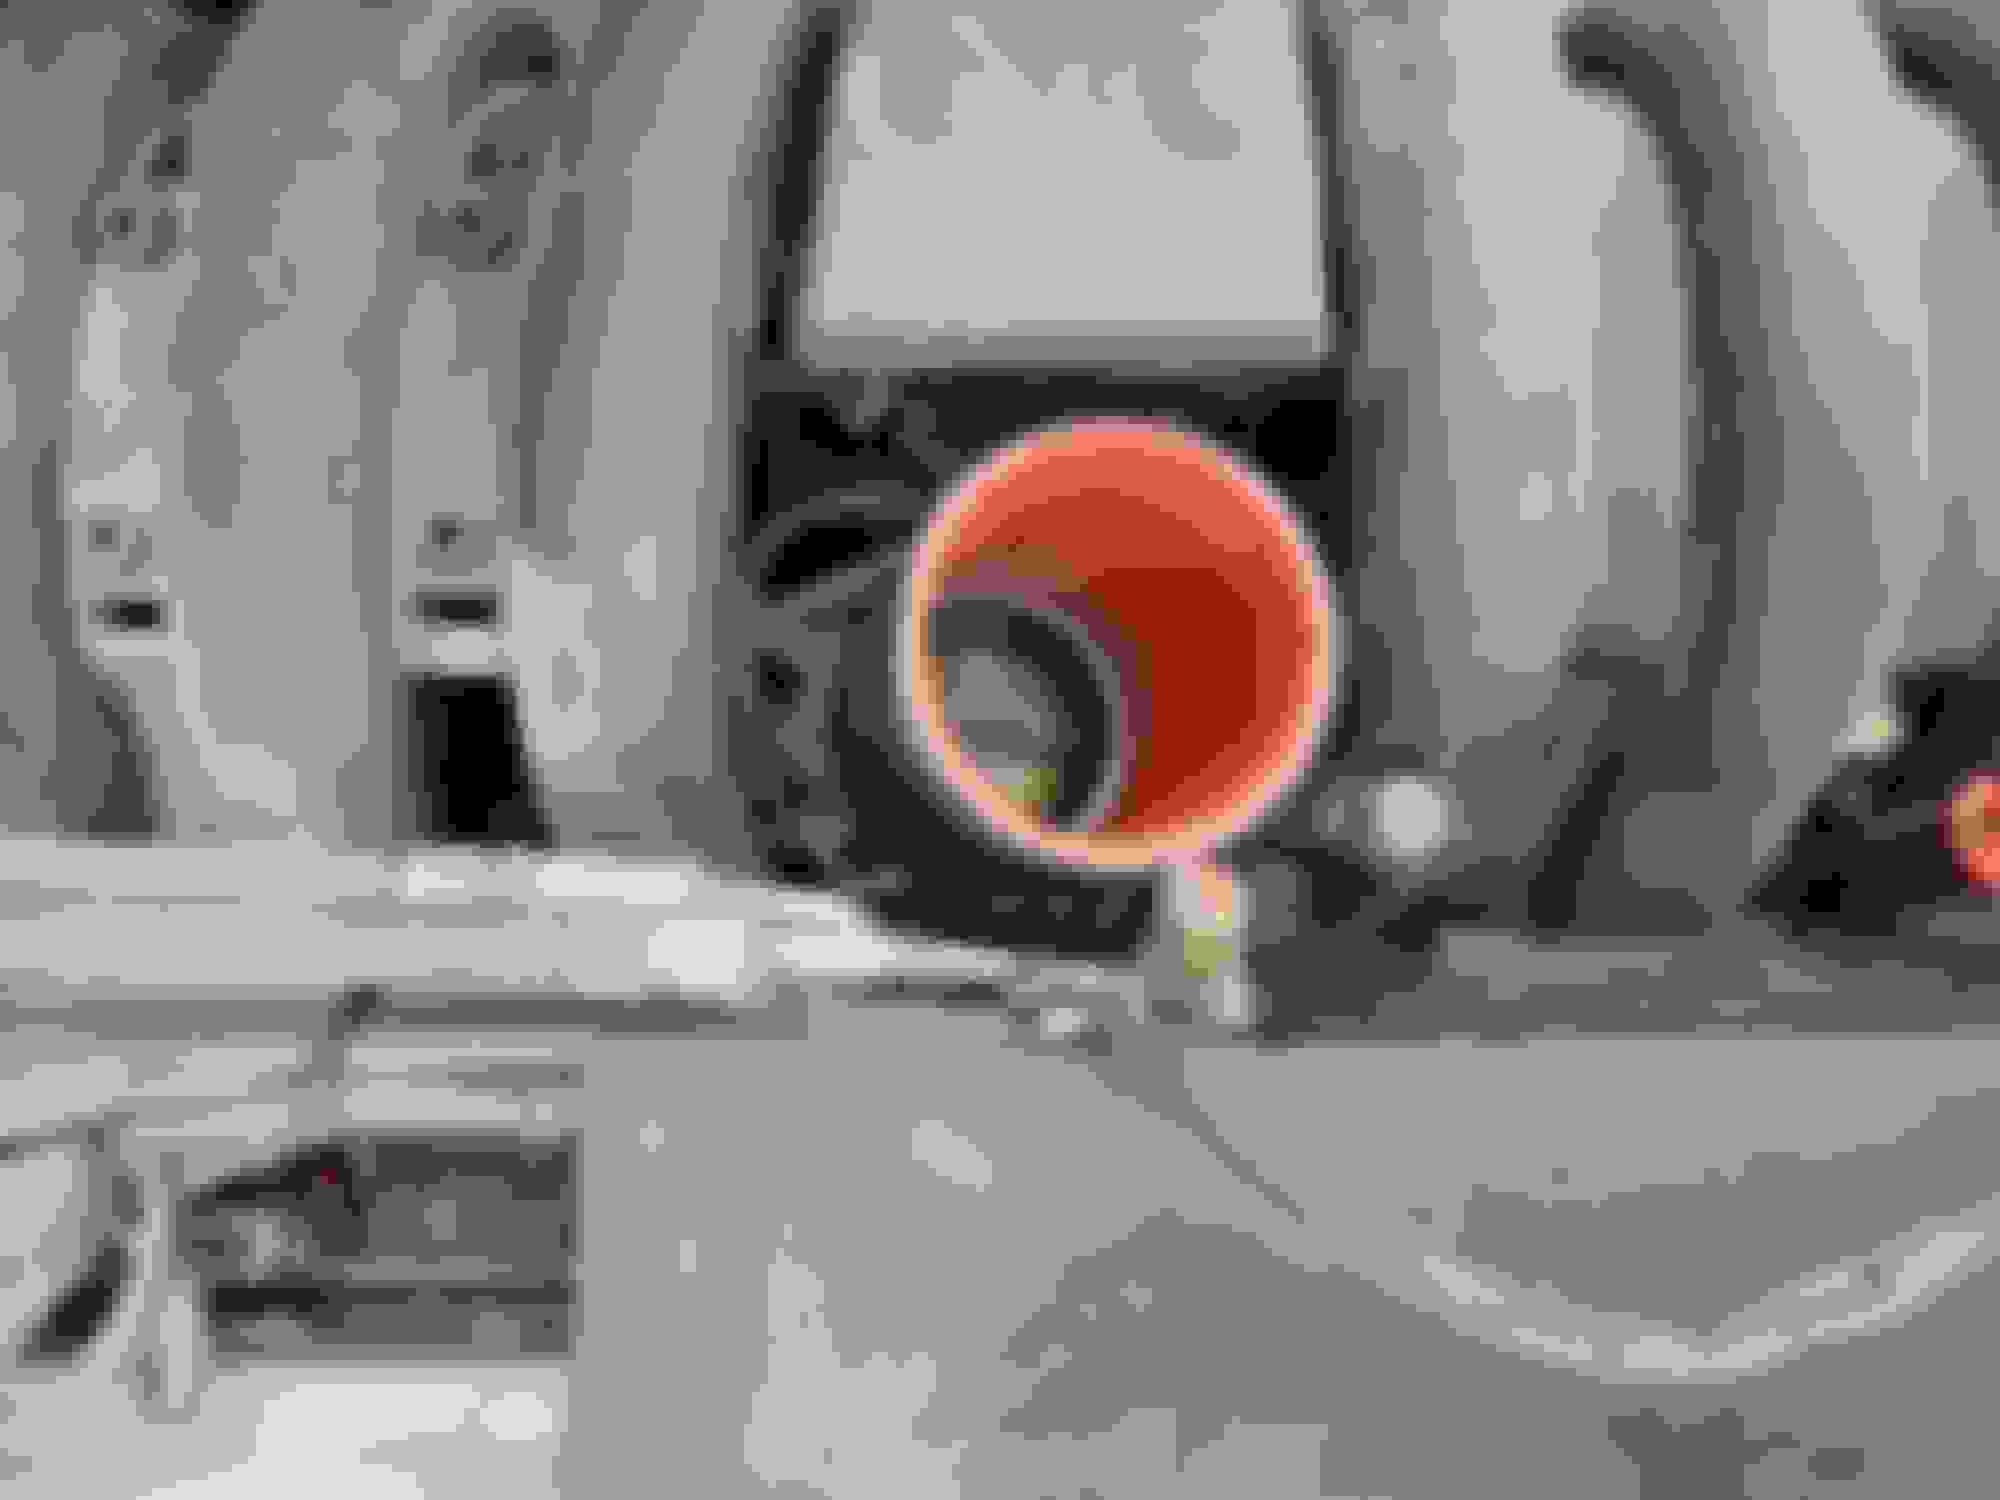
Grab your silicone offset reducer and place it on the throttle body with the coupler closest to the back right corner of the manifold just like in the picture. You may have to cut the large diameter side of the coupler on a slight angle to make it fit perfect.
**WARNING** Make sure you buy the 6in tall coupler; HPS offers two sizes a 3in and a 6in.
Make sure to hose clamp the coupler to the throttle body. It will pop off if you do not hose clamp it (don't ask me about it).
Next Step
Place your SL320 Intake Pipe into the coupler. It might take a few minutes to adjust it to fit nicely. Depending on what SL320 intake pipe you buy there may be a hole in the back of it. I 3D printed a plug for it but feel free to get creative.
**WARNING** Make sure your valve cover breather holes are sitting flush to your intake pipe
Next Step
Grab your 30 degree couplers, 45 degree carbon pipe and MAF sensor and place the first coupler on the SL320 Intake. Next connect your MAF sensor pipe (It will be a tight fit, feel free to spit on it). Make sure your MAF is pointing the correct way (with the mesh to the filter side of the intake). I did have to cut the couplers and I cut the carbon tube both about an inch. If you need to get a straight cut on your silicone elbow use a factory clamp to run your exacto knife against, this will insure your cuts don't look like my 2nd grade art projects. When all said and done it should fit perfectly behind the headlight, if it is touching anything keep adjusting and cutting until your pipes lay as nice as mine.
**WARNING** Make sure if you are cutting your pipe (especially carbon fiber) to use a mask as it is very bad to inhale
After that you are all done. Feel free to find a video on how to make a shroud to make sure your intake doesn't bounce around.
If you have any questions or concerns and or if I have misinformation please reply to the thread!
Mercedes SLR McLaren 722 S Is Extremely Rare Example Modified by McLaren
Slideshow: A one-of-one U.S.-spec Mercedes-Benz SLR McLaren Roadster became even rarer after a factory-backed transformation at McLaren's headquarters.