DIY installation of AVIC & other aftermarket HU's for W203 (Warning! lots of images!)

 07-14-2011, 01:55 PM
#1001
Member
Join Date: Mar 2009
Location: Chicago-ish
Posts: 171
Likes: 0
Received 1 Like
on
1 Post
2005 c230 S.S.
just need to clarify some stuff when you stated that you use the RCA out to a terminal strip, did you convert the rca via terminal strip to free wire and then hook it up to the factory speakers?
the RCA out from the after market radio is low level output. you need to connect the speaker wires of the new head unit to the factory speakers,
2nd you can keep the factory amp and find the input connectors to the amp and use the high level output of you radio (speaker out) to send signal to the amp.
 07-14-2011, 03:37 PM
#1002
Newbie

Join Date: Jun 2011
Posts: 3
Likes: 0
Received 0 Likes
on
0 Posts
2007 C230
if your ok with soldering thats fine. crimp caps and butt splice are faster. either way they will work. so im guessing your going to bypass the factory amp. good luck
Wow thanks for the help. I didnt even realize someone responded. So th RCA outs from the headuint are low-level, im guessing this explains why the sound is so faint. So if I run new wires from the headunit to right after the stock amp outs and splice into the signal wires going to the seperate speakers, what do you recomennd for splicing the two wires together....(I figure sodering them together would be best but its a tiny space and not much room in the trunk, is twisting them together enough like a butt-splice, or use a terminal strip although I think a terminal strip would have some losses in sound) Thanks again very much appreciated.
07-14-2011, 07:17 PM
#1003
Member
Join Date: Mar 2009
Location: Chicago-ish
Posts: 171
Likes: 0
Received 1 Like
on
1 Post
2005 c230 S.S.
Yea i'm gonna bypass it for now and see if thats enough to drive the speakers. I'll probably need to get an amp later to power the stock sub or all the speakers. Dont know much about amps so im doing my research little by little but im tired of the whispering sound at full volume lol
07-14-2011, 10:32 PM
#1004
Newbie
Join Date: Jun 2011
Posts: 3
Likes: 0
Received 0 Likes
on
0 Posts
2007 C230
just an idea for you.. my stereo system consist of the following as far as speakers and amps, subs..
2 pairs: DLS 6" component set
2 12" Dynaudio
1 diamond audio D1000.1 sub amp
1 diamond audio D600.4 channel amp
got everything in EBAY all new and i saved a ton of money vs buying from the shop.. will be doing the install myself.
2 pairs: DLS 6" component set
2 12" Dynaudio
1 diamond audio D1000.1 sub amp
1 diamond audio D600.4 channel amp
got everything in EBAY all new and i saved a ton of money vs buying from the shop.. will be doing the install myself.
Yea i'm gonna bypass it for now and see if thats enough to drive the speakers. I'll probably need to get an amp later to power the stock sub or all the speakers. Dont know much about amps so im doing my research little by little but im tired of the whispering sound at full volume lol
07-25-2011, 06:11 PM
#1005
Former Vendor of MBWorld

Join Date: Mar 2011
Location: Atlanta
Posts: 1,199
Likes: 0
Received 6 Likes
on
4 Posts
05 CL65 AMG, 07 Ferrari F430, 03 Range Rover HSE
For those that are interested, we are carrying the Connects2 CT27AA25 antenna adapter, in stock, here in North America. They are not on our site yet, but they are $18.95
07-26-2011, 12:12 PM
#1006
Member

Join Date: Apr 2005
Posts: 123
Likes: 0
Received 0 Likes
on
0 Posts
Just got my Pioneer DVD player installed (no navi) and didn't feel like installing the rear view camera that I got with it since I got my tints fixed last week ...
Anyway... it's been about 7 years since I last installed a sound system, and that was on easy 'Japanese' cars...
Having to run my own accessory +12v wire had me chasing my tail for about 40 minutes. I realize now that it's mentioned somewhere here in this thread, but I must admit I must have glanced over that part and had actually had to figure it out myself....
After that I had 0 sound coming from the speakers (though the Deck was working perfectly and so was the steering wheel controller which I was really happy about)...
Spent about 3 hours chasing the 'is it possible that I do have an amp somewhere in here and that the ECU/Dashboard (which now says 'waiting for audio since the Deck isn't communicating back to it) ... hasn't turned on the amp so I'm getting no sound?"
After gutting the trunk ... and fining no amp and then actually removing one of the door liners and continuity verifying that the wiring in my dash was in fact going DIRECTLY to the speaker ... after all that mess
Took a 10 minute break and read 90% of the pioneer manual
"For first operation of the DVD player, press the rest button"
I know it's been 7 years... but back then, the reset button was for low end / bottom of the line / generic CD players that would hang often... not for pioneers to get sound out on a first test.
So once that was sorted .... I got sound ... I was happy... only then did I start stuffing everything back in the Dash.
If not for those few hickups I could have probably been done in 2 hours.... actual work time... instead I spend 9:00am to 6:00 pm on this install ...
Oh I had to make a run to the hardware store too to pickup a thinner and taller T-20 just for the dash vents screws ... and even then, the one I got (and the only one they had that was not a separate 1/4" bit changer) was barely long enough just to get the first 1/4 turn of looseness,,, then the bulkiness of the tool (that holds about 10 different sized Torx arms in one swiss army knife style package) would hit the vent and wouldn't be able to reach the screw...
A small flat head screw driver (now that the first 1/4 turn was loosened) came in handy to solve that hurdle.
So yeah... all in all... I continue to hate Benz and Torx... stupid.... it's a great car and I love driving it... but I absolutely HATE working on these cars... they're just retarded...
As far as the head unit goes... compared to the factory Audio-20 ... quality is through the roof, bass is much cleaner and clearer ... highs are nicer, the sound definition is greater... same speakers, new head unit ...
I'm 100% satisfied with the Sound quality and the Metra Steering wheel adaptor (worked like a charm on the first try exactly as described).
Cons:
I bought the head unit from Amazon (US) and had it shipped to Saudi (Middle east)
My radio doesn't work now since it stops on odd numbers like 100.1, 100.3, 100.9 FM and our stations are 100.0, 100.2 , 100.4 ...
So I went from a Damaged CD player and a working radio to now a working CD/DVD/MP3/Ipod and no Radio ...
Does anyone know how to reflash the firmware on a Pioneer for a different region?
Will report more later... and pics of course...
07-27-2011, 10:06 AM
#1007
Member
Join Date: Apr 2005
Posts: 123
Likes: 0
Received 0 Likes
on
0 Posts
Update:
DVD doesn't play with it permanently grounded... needs to see a switched ground.
Going to do the relay to ground mod mentioned on other audio forums, except with a transistor instead of a relay... much smaller
Basically run the Green wire (parking) to the collector, Run the Remote turn on (Blue/white) to the Base, Run the Emitter to Ground/black
After the unit turns on, it powers the base of the transistor and shorts the collector to emitter .... 10 times smaller than wiring up a full automotive relay just to give a pulsed signal...
Also ordered one of these :
http://cgi.ebay.co.uk/ws/eBayISAPI.d...#ht_800wt_1058
To fix the FM problem...
All in, this is still cheaper than a local install ... just dreading having to take everything apart once again ...
Cheers
-Haitham
07-27-2011, 02:02 PM
#1008
Member
Join Date: Apr 2005
Posts: 123
Likes: 0
Received 0 Likes
on
0 Posts
07-27-2011, 06:31 PM
#1009
Senior Member

Join Date: Feb 2011
Location: LA/San Fernando Valley
Posts: 321
Likes: 0
Received 0 Likes
on
0 Posts
2003 C230K Sedan
i have a bose system in my car (03 c230) and my amp went dead. im having no luck finding one so im thinking about getting an aftermarket amp, headunit and possibly sub but keeping the stock speakers. can someone point me in the right direction?
 01-11-2012, 06:40 PM
#1012
Newbie

Join Date: Jan 2012
Posts: 8
Likes: 0
Received 0 Likes
on
0 Posts
2005 C230 Kompressor Coupe
I've read carefully through this and other threads and still don't see a clear answer on illumination. While it's easy to tap the ashtray, shifter or other nearby lights for basic illumination, and that works fine for illuminating controls, that doesn't address the need for a navigation screen to dim or reverse video in low light - i.e. when the headlights are on, especially since daytime running lights also light the dash, and that would mean you'd have your nav screen in 100% night mode if you connected to dash illumination.
Pioneer, JVC and other HU's depend on the illumination signal being connected to the low beams (headlights) to switch the map to night mode. In other brands (notably Japanese autos) there is a usable signal at the head unit connector, usually an orange/white wire, but Mercedes seems to have this on the CAN bus. Clearly you can pick this up at the headlight itself, but surely there is a better place, such as at the headlight switch.
There is a 14-pin connector on the headlamp/mirror-adjust switch. does anyone have a pinout on that? I have the Haynes manual and it lists the wires, but not what they're for. Everything goes through the SAM so you can't match to the headlight wire color. The connector is built so that you can't probe the wires with it installed, and uninstalled you don't have the light switch to do control. Or do I have to pick up the headlight output from the SAM anyway? Help, please.
01-19-2012, 05:32 PM
#1013
Newbie
Join Date: Jan 2012
Posts: 8
Likes: 0
Received 0 Likes
on
0 Posts
2005 C230 Kompressor Coupe
Answering my own question, it appears the definitive place to get the front headlamp signal in order to properly control map illumination on aftermarket nav units is on the output of the front SAM. There is a YEL wire for one side, YEL/BLK for the other.
03-01-2012, 11:33 PM
#1014

Mu beautiful C230 '07 got totaled before I could install my pioneer stereo so now I have all the cables and harnesses sitting in my closet.
If anyone is interested, this is what I have:
Pioneer CA-R-PI.133 Steering wheel control interface
Scosche MZ2347B Dash install kit
Scosche VW03B wiring harness
Scosche VWA-4B Euro antenna adapter
I'll sell everything for $100. The Pioneer steering wheel cable by itself was about that much.
PM me for more info.
02-19-2013, 11:45 AM
#1015
Super Member
Just wanted to share some pics and a few notes from my stereo install this weekend:
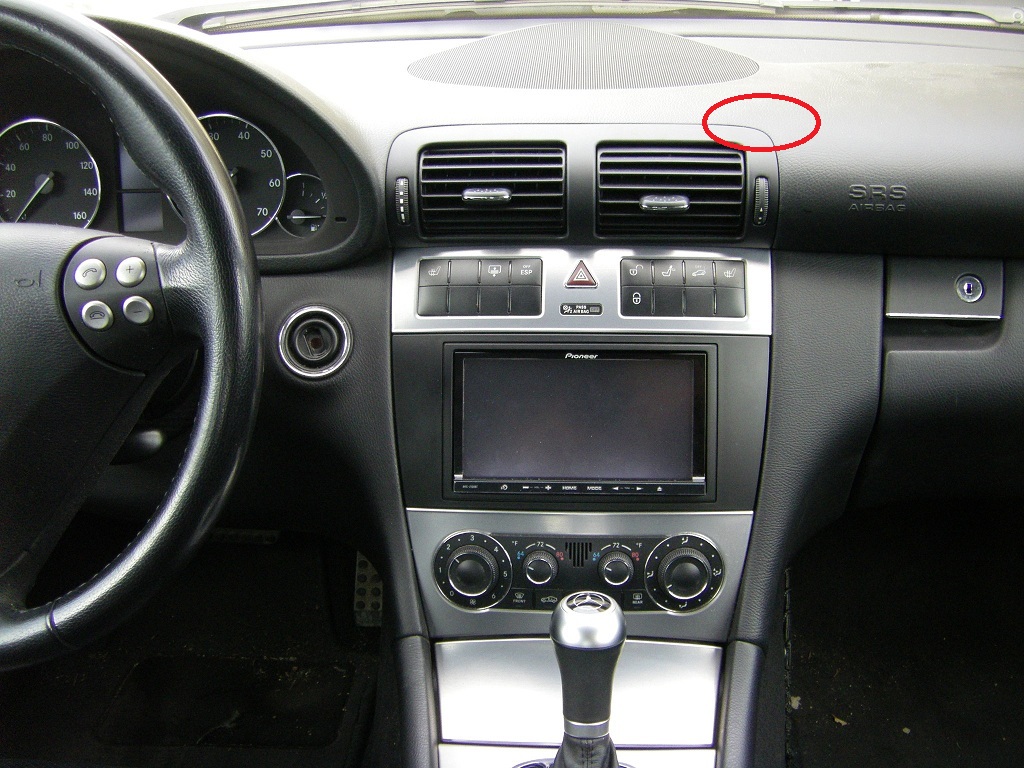
GPS antenna is located under red circle:
Mic not noticeable unless you are looking for it:
Mic closeup:
CD changer cable is wrapped back into cavity ... I taped it to the USB cable going back into the center console cavity. Look at all that space!
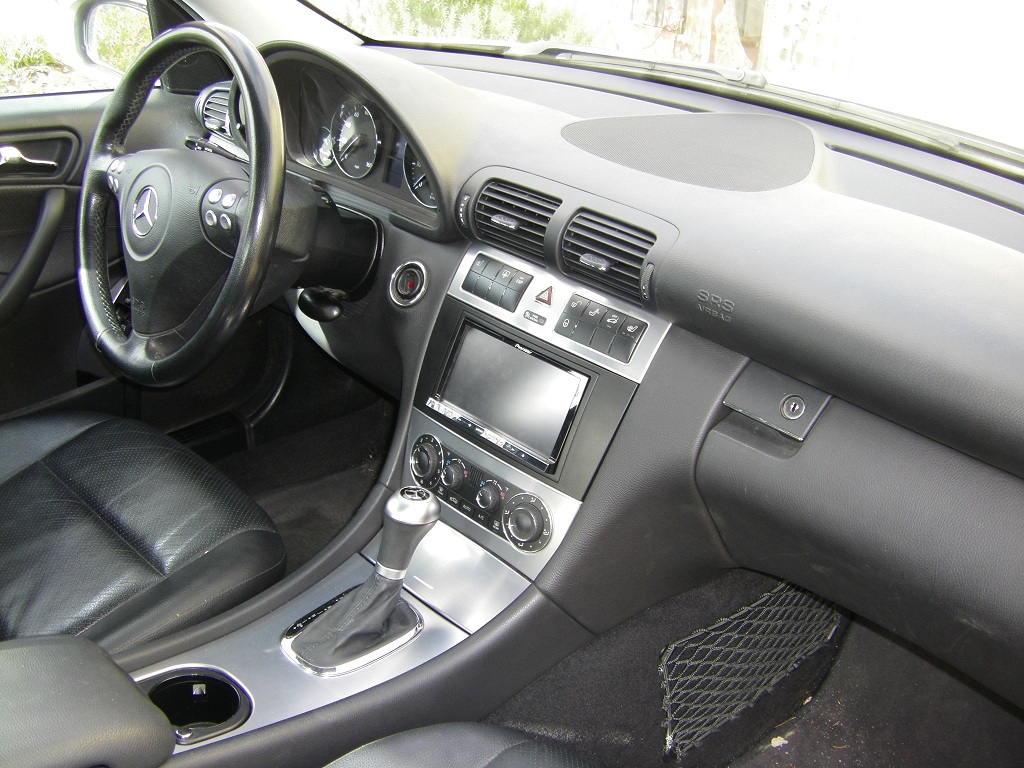
- Pioneer AVIC z130BT, Scosche faceplate, wiring harness and antenna adapter, Metra Axxess ASWC steering wheel control adapter
- I bought a refurb z130BT. Chose the z130BT over the z140BH because it has voice commands for the nav unit, and because it was about $100 cheaper. I don't need android app capability ... nav, phone and HD radio are the features I want most.
- Dash removal: buy a T15 screwdriver if you don't have one. I also have a T15 socket and used the ratchet to loosen some of the screws. The top vent is a bit tricky to remove ... the top catches look like a series of barbs and need to be pulled down about 1/4" in order to clear the underside of the dash.
- The faceplate fit very well -- no modification needed. It came with round head and flat head screws to attach the side panel. I had to use the flat head screws for side clearance in the cavity of the dash.
- Faceplate rear support: The stock radio had rear side tabs which fit in a channel to support the rear of the radio. I could not fit these onto the new unit, but the new unit is significantly lighter in the rear than the stock unit. Right now the rear is "floating", but also pinched a bit against the wiring in the rear, so far it's not going anywhere. I still have to replace the antenna converter (see below) and when I do I will try to fit a filler block under the rear of the radio to support it from the cavity bottom. Since the faceplate is custom to this specific car and only 3 years of production, they really should build these support tabs into the side panels of the faceplate kit.
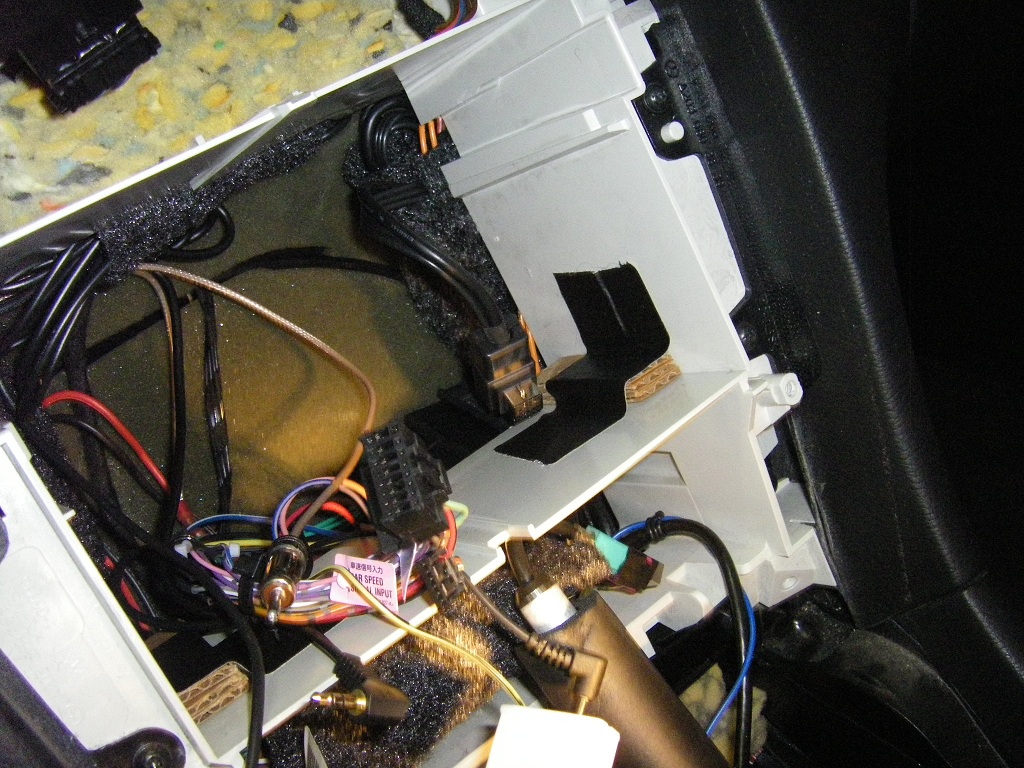
- Wiring harness: The wiring harness adapter matched well. There is NO switched 12V on the car's harness, so connect the RED wire on your radio harness to the YELLOW/BRN? wire of the cigarette lighter for switched power. To do this I unwrapped the cigarette wiring harness wrap several inches back from the lighter assembly, stripped about 3/4" of insulation off the yellow wire about halfway back, wrapped my tap wire around it, soldered the joint and wrapped with electrical tape. I snaked the power wire under some foam and up into the console cavity. I used a push connector to join it to the radio wiring harness, in case I need to remove the harness again in the future.
- USB cable: I pulled the CD changer from the glove compartment, freed up a huge amount of much welcomed space, and snaked the USB cable in through the hole in the left side where the CD wires came through (pic). The CD changer wiring actually came out through what looks like a HVAC vent, and I couldn't figure out how to pull it out, so instead I bent it back around the outside of that vent where I snaked the USB cable in. So the USB cable comes in through the hole but not through that little duct. I folded the excess cable and tucked on the right side of the radio cavity in the back. That cable is really thick! It could be a lot thinner and shorter.
- Antenna converter: My car has dual antenna cables. The adapter that came with the kit handles only one cable. I found only a couple of places selling the dual cable converter and will swap it out soon. For now my FM reception is pretty poor.
- ASWC: worked great, once I figured out how to do it. It took a couple of tries to set up the initial auto-programming ... once that was done I had working volume controls, no seek buttons, and phone buttons that did something screwy to the radio. So I tried manual programming ... didn't work. The trick here was that, since my Pioneer was able to auto-detect , the manual programming DOES NOT work. Instead I had to do the remapping sequence, which was simple and painless, and I now have seek up/down, phone on/off, and volume up/down all working on my steering wheel
 NOTE: Have the display category set to Audio on your dash when you are programming the seek up/down buttons, so your seek buttons send in the correct signal for the ASWC to recognize. My Audio dash display still shows '-----' for the audio track, I don't know if that can be fixed or not.
- GPS: I tucked the GPS in a small cavity area to the right of the top vent unit, just under the dash (red circle in pic). There is about an inch of foam under the top of the dash -- I had to cut a slit in it with a kitchen knife in order to get the metal antenna backing plate to sit flat and not be pinched. Once I had this in place the antenna fit nicely.
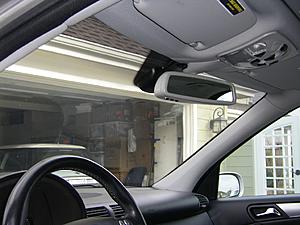
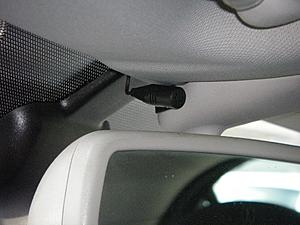
- Mic: After failing to find a place to snake the mic cord from the steering column over to the radio cavity (the dash parts are all very tightly fit) I decide to mount the mic on the rear view mirror mount, left side (pic). Fit the wire under the lip of the headliner, down the door side of the A pillar cover, into the black flexible weatherstip door moulding, and across the underside of the dash just inside the underside cover (3 T15 screws). So far no complaints about voice quality from people I have spoken to, so I'm satisfied with this location for now.
- Wiring: Packing the excess wiring into the radio cavity was a real challenge. Between the extra boxes and long wires there is a lot to tuck away. When wiring up the harness I removed all wiring from the RCA harness except for the mute wire which I moved into the bypass slot. Traffic tuner tucked into left side of cavity. GPS wire on top behind the switch panel. USB cable on the right side. ASWC and antenna adapter down below and into the back of the heater control cavity. And the original radio harness on the right side of the cavity bottom just under the rear of the radio. The ASWC and antenna adapter are in a location behind the heater controls where I can get to them without having to remove the radio.
GPS antenna is located under red circle:
Mic not noticeable unless you are looking for it:
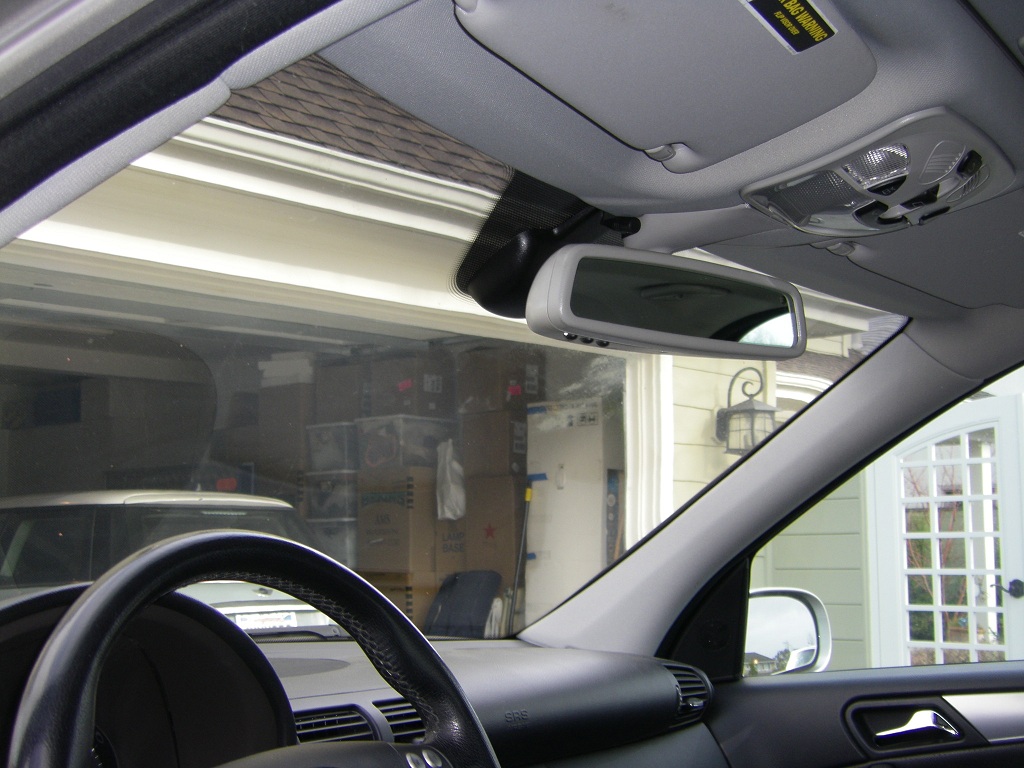
Mic closeup:

CD changer cable is wrapped back into cavity ... I taped it to the USB cable going back into the center console cavity. Look at all that space!

Last edited by jkowtko; 02-19-2013 at 10:55 PM.
02-27-2013, 03:37 AM
#1016
Super Member
Ahhh ... night maps! and radio stations!
I finished the wiring on my stereo tonight.
For the antenna connection:
* The car has two antenna cables, with Black and Yellow connectors. Black is for normal RF (FM/AM radio) reception, and yellow is called ZF, intermediate frequency, which I am guessing is the wide band that the Audio 20 used.
* I connected my VWA4B adapter to only the BLACK antenna cable.
* I connected the radio's "remote amp/antenna turn-on" wire to the blue/white wire on the VW03B harness, which leads into the black wire on the car side of the harness. Evidently these cars have antenna amps in them and you need to send the 12v wakeup signal to the amp in order for it to operate.
* Even though the antenna adapter is an amplifier type, I left it's power lead disconnected, so it is acting as a passive converter. Metra makes the 40-EU10 without amplifier as well ... but the one I got in the kit works fine.
* I now have regained my normal FM reception plus a number of HD stations
For the night maps:
* I tapped into the illumination ring lead on the cigarette lighter, and connected it to the orange/white lead on my radio harness. I left the Metra orange lead unconnected. So far (it's night time) the night maps work well ... much easier on the eyes than the day maps.
Here's how I tapped into the wiring harness -- the yellow-black wire serves as the 12v switched for powering the radio, and the blue-gray wire servers as the trigger for the illumination dimmer.
Since the Scosche DIN mount does not have rear supports I fashioned floor supports on either side of the cavity using pieces of cardboard and some gaff tape. The radio now rests firmly on these slides and relieves strain from the faceplate tabs.

I checked rear clearance of the radio. The radio measures 5.5" from the mounting tabs to the very back of the radio where the fan exhaust is located. The cavity is close to 6.5" to the back foam. So with the z130BT I have just under an inch of space, probably less, for cords and ventilation. All of my cord bundles were tucked around the sides, top and bottom of the cavity.
Lastly, since I had the dash apart I took a quick photo of the GPS antenna. I get pretty good GPS reception from here:
I finished the wiring on my stereo tonight.
For the antenna connection:
* The car has two antenna cables, with Black and Yellow connectors. Black is for normal RF (FM/AM radio) reception, and yellow is called ZF, intermediate frequency, which I am guessing is the wide band that the Audio 20 used.
* I connected my VWA4B adapter to only the BLACK antenna cable.
* I connected the radio's "remote amp/antenna turn-on" wire to the blue/white wire on the VW03B harness, which leads into the black wire on the car side of the harness. Evidently these cars have antenna amps in them and you need to send the 12v wakeup signal to the amp in order for it to operate.
* Even though the antenna adapter is an amplifier type, I left it's power lead disconnected, so it is acting as a passive converter. Metra makes the 40-EU10 without amplifier as well ... but the one I got in the kit works fine.
* I now have regained my normal FM reception plus a number of HD stations
For the night maps:
* I tapped into the illumination ring lead on the cigarette lighter, and connected it to the orange/white lead on my radio harness. I left the Metra orange lead unconnected. So far (it's night time) the night maps work well ... much easier on the eyes than the day maps.
Here's how I tapped into the wiring harness -- the yellow-black wire serves as the 12v switched for powering the radio, and the blue-gray wire servers as the trigger for the illumination dimmer.

Since the Scosche DIN mount does not have rear supports I fashioned floor supports on either side of the cavity using pieces of cardboard and some gaff tape. The radio now rests firmly on these slides and relieves strain from the faceplate tabs.
I checked rear clearance of the radio. The radio measures 5.5" from the mounting tabs to the very back of the radio where the fan exhaust is located. The cavity is close to 6.5" to the back foam. So with the z130BT I have just under an inch of space, probably less, for cords and ventilation. All of my cord bundles were tucked around the sides, top and bottom of the cavity.
Lastly, since I had the dash apart I took a quick photo of the GPS antenna. I get pretty good GPS reception from here:

Last edited by jkowtko; 02-27-2013 at 03:55 AM.
03-05-2013, 12:35 PM
#1017
Super Member
Air vent catches
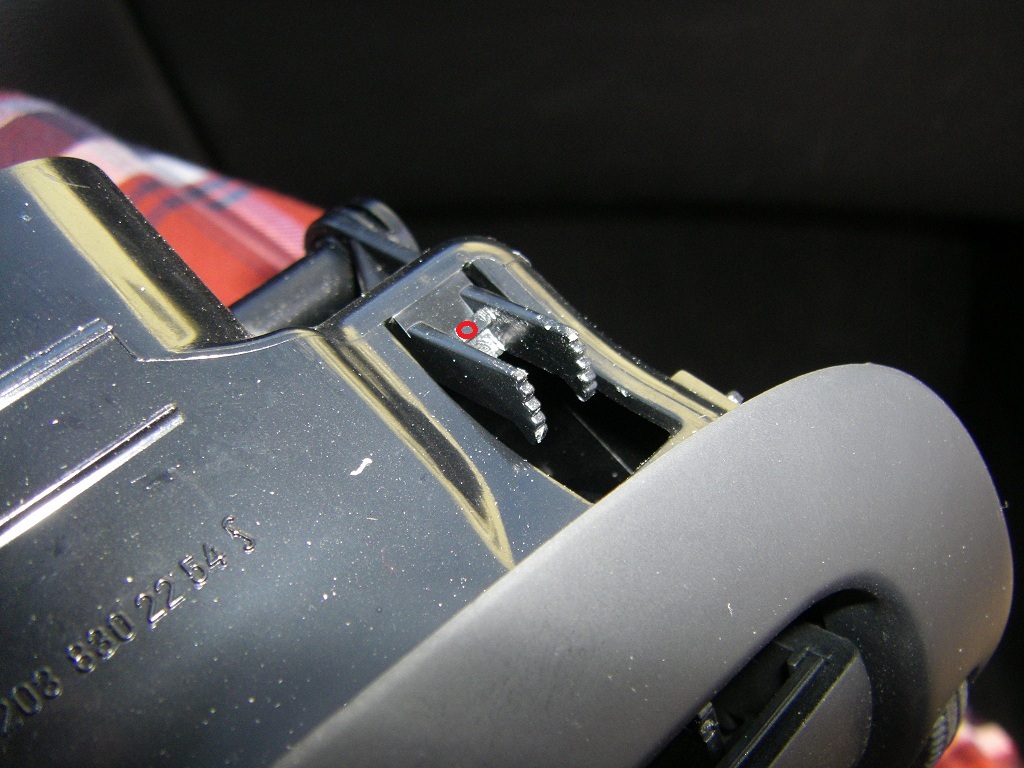
Fyi, I haven't seen any photos explicitly showing the release catches in the air vent, so here they are:

To remove the air vent, after unscrewing the bottom T15 torx screws you have to push down these catches that are located on the top of the air vent (one each side) enough to clear the barbs past the dash enclosure. You have to do this from the inside of the front of the air vent though.
To clear the barbs requires two steps:
1) with a small flathead screwdriver, push down on the flat part of the catch in between the two toothed barbs. I've indicated this with a small red circle in each photo. Pushing in this area you can move the catch down so that maybe half of the barb teeth are exposed. It's not much, but it will allow you to move the airvent just a millimeter or so out, enough that it keeps the catch held in a partial down position when you remove the screwdriver. Do this one side at a time. Do it gently so you don't keep pushing the other side back in.
2) Now that the barbs are more exposed, use the flathead screwdriver to pull the catch all the way down by grabbing onto the barb teeth. This will allow you to move the catch down enough to clear it from the dash opening and pull the air vent out maybe a half inch, one side at a time.
Once you have both sides out a half inch you can wiggle the air vent completely out.
 10-19-2013, 01:28 PM
#1018
Newbie

Join Date: Jun 2012
Posts: 7
Likes: 0
Received 0 Likes
on
0 Posts
w203
radio reception
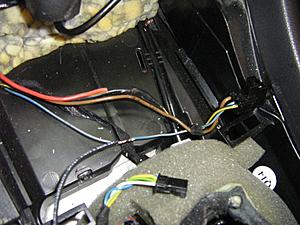
hello
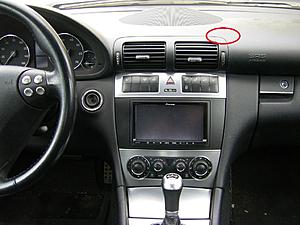
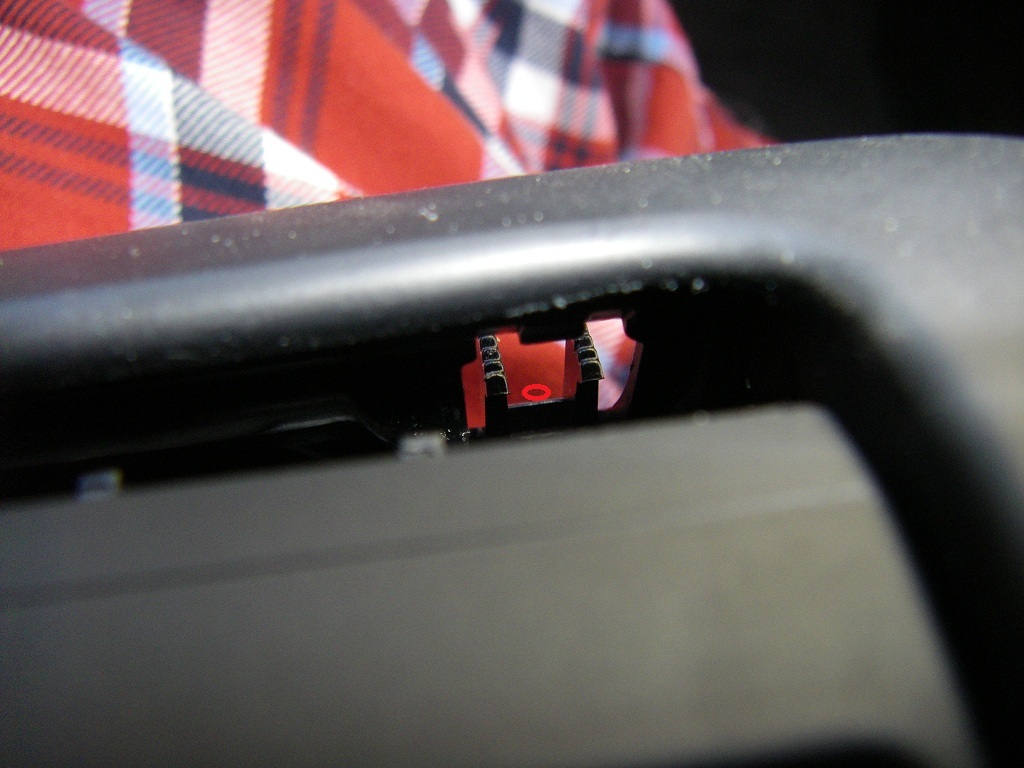
can anyone point me where the black wire should be found in this picture in order to have good radio reception ?
i know i need to power the radio antenna amplifier but need some advice
thx
can anyone point me where the black wire should be found in this picture in order to have good radio reception ?
i know i need to power the radio antenna amplifier but need some advice
thx
10-19-2013, 02:16 PM
#1019
Super Member
I'm not sure I understand the question. The antenna amplifier is powered through the 12v accessory power wire on the wiring harness that the radio plugs into. Just make sure you connect your radio's 12v accessory power-on wire to that wire on the car's harness.
10-19-2013, 07:54 PM
#1021
Super Member
Your year of car will make a difference. If you have 2005 or later with the facelifted dash and Audio 20 radio, your wiring diagram should be what's referenced in the attached images. If you have a pre-facelift radio there should be two separate 8-pin plugs ... I don't have the diagram for that but I'm pretty sure it's posted somewhere on the forums.
I would also suggest you buy a wiring harness adapter, which will label all of the wires on the harness, including the antenna/accessory remote turnon wire.
I would also suggest you buy a wiring harness adapter, which will label all of the wires on the harness, including the antenna/accessory remote turnon wire.
10-20-2013, 10:42 AM
#1023
Super Member
Hmmm ... I don't know why but I can't find the ground or constant 12 v on that diagram. I used the scosche VW03B harness, which has a legend on the package. Pin 13 is probably right but I hope you are using an adapter and not cutting into the wires directly.
04-09-2016, 09:49 PM
#1024
Newbie

Join Date: Mar 2016
Posts: 6
Likes: 0
Received 0 Likes
on
0 Posts
W203 c240 4matic
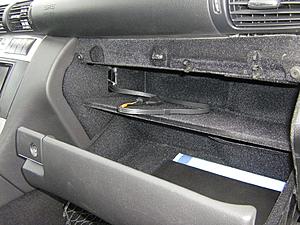
Hallo, Ich habe eine Frage. On my Car the HU I guess is the basic one with tapedeck and the non functional telephone and cd buttons. In the mini shelf underneath there is an ipod cord (prolly put by one of the previous owners). Since the car did not come with a cd changer, can I put an OE in? and as far as aftermarket, I tried looking for the Pioneer unit mentioned with the 6 cd and ipod and gps and whathveyou but couldn't find it. Can I swap in an OE model from a better equipped car?
04-10-2016, 10:10 AM
#1025
Super Member
I don't know about your car specifically ... mine had an orange colored fiber cable for the MOST system, and another two-wire power cable, that connected it to the head unit. Both cables came out of a hole in the left wall of the upper cubby in the glove compartment. If you still have those cables tucked away in there you should be able to connect up a cd player.


