sb.legacy's W203

 06-24-2010, 01:10 AM
#28
Super Member

 08-22-2010, 04:12 PM
#29
Super Member
Thread Starter
Join Date: Jun 2010
Location: Los Angeles
Posts: 754
Likes: 0
Received 2 Likes
on
2 Posts
'13 F10 535i / '05 W211 E55
Will be updating soon.. haven't gotten the chance as of late.
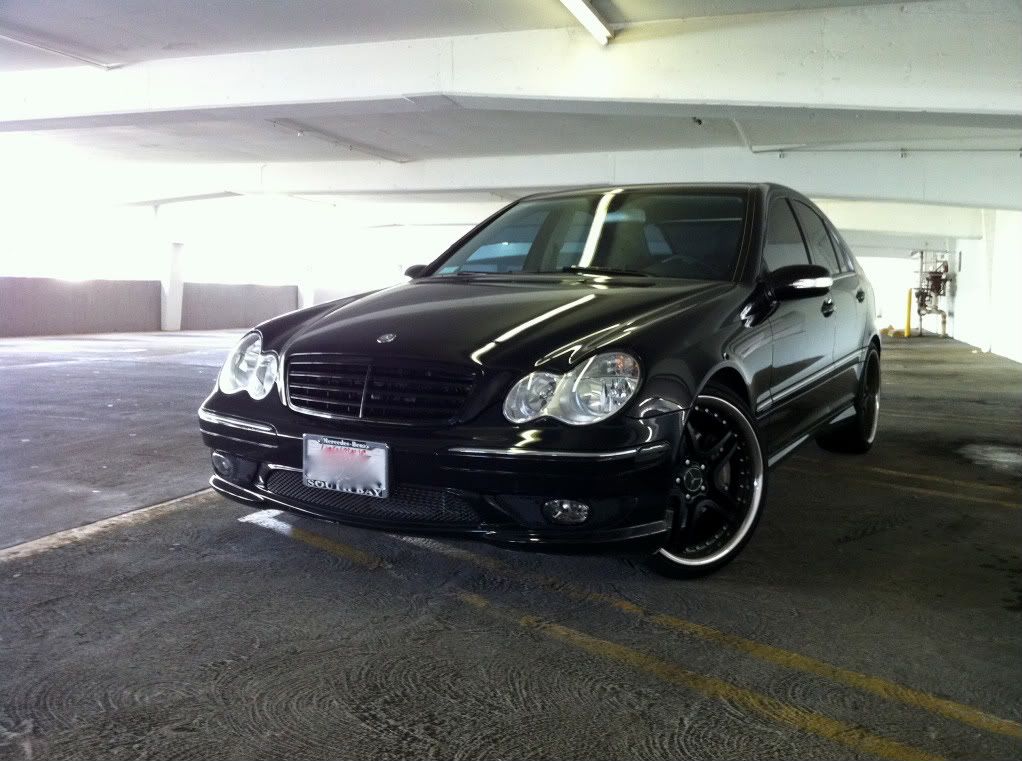
Swapped out the OEM hood star with the W204 flat hood emblem and am having the grill painted gloss black to match the car. Should have pics up in a few days once it's complete.
Swapped out the OEM hood star with the W204 flat hood emblem and am having the grill painted gloss black to match the car. Should have pics up in a few days once it's complete.
08-25-2010, 05:39 PM
#30
Super Member
Thread Starter
Join Date: Jun 2010
Location: Los Angeles
Posts: 754
Likes: 0
Received 2 Likes
on
2 Posts
'13 F10 535i / '05 W211 E55
Got the grill back today. The guys at HMS did a great job with it.

Ill try and get more close-ups of the front. Let me know what you guys think.
Ill try and get more close-ups of the front. Let me know what you guys think.

 08-26-2010, 03:33 PM
#37
Super Member
Thread Starter
Join Date: Jun 2010
Location: Los Angeles
Posts: 754
Likes: 0
Received 2 Likes
on
2 Posts
'13 F10 535i / '05 W211 E55

Yeah I do.. I was trying to sell them for quite some time, but I'm just gonna hold on to them for now.

 08-26-2010, 05:48 PM
#41
Senior Member
Know what I'd love to see on a black W203 with black wheels and smoked lights? ~35% tint over the chrome strip and polished lip. I think it would be subtle yet awesome. It would make the trim look like my sunglasses lenses. Just a thought. Never seen it, but the picture in my mind is pretty cool and it wouldn't work on a silver car.
08-28-2010, 09:30 PM
#42
Super Member
Thread Starter
Join Date: Jun 2010
Location: Los Angeles
Posts: 754
Likes: 0
Received 2 Likes
on
2 Posts
'13 F10 535i / '05 W211 E55
Replaced the engine air filters today. Did the cabin air filter about a week earlier as well. Thought I'd take some pictures and describe the procedure to anyone interested in doing it themselves and would rather save the 80-100$ the dealer would charge(labor) doing it. Bought the OEM air filters(two) from the dealer for 64$ and took it home today and decided to get it installed.
2007 C230 Sport Sedan Engine 2.5L V6: Same procedure for many C Class W203s
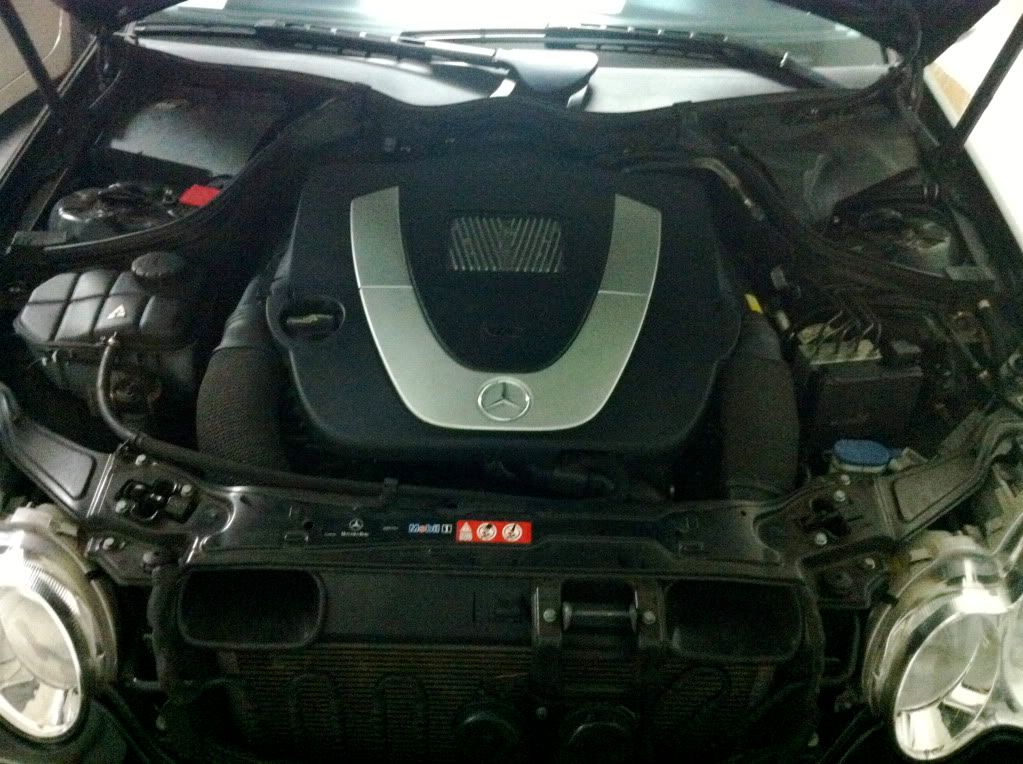
Remove the lower engine cover housing which will expose the air tubes that will need to be disconnected from the upper engine housing(where the air filters are located). Labeled by the yellow arrows in the picture below.
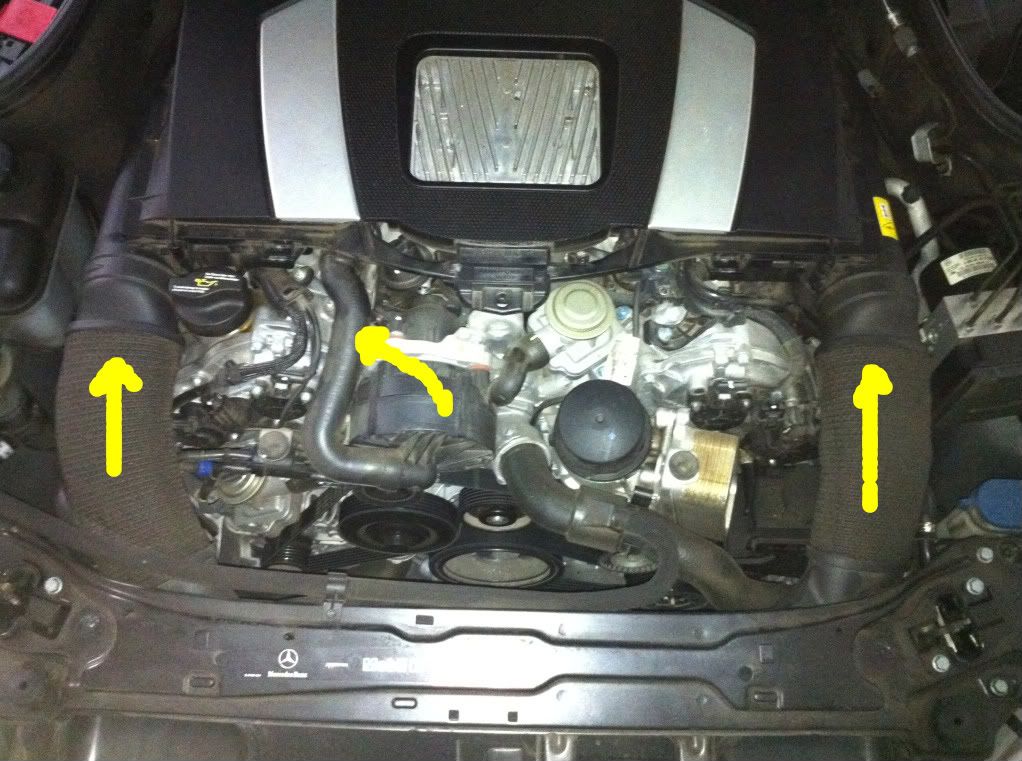
Gently disconnect each of the three air tubes; Once you've done so, gently but firmly remove the upper engine housing
Note: The upper engine housing has four brackets undernearth(securing it to the engine itself)

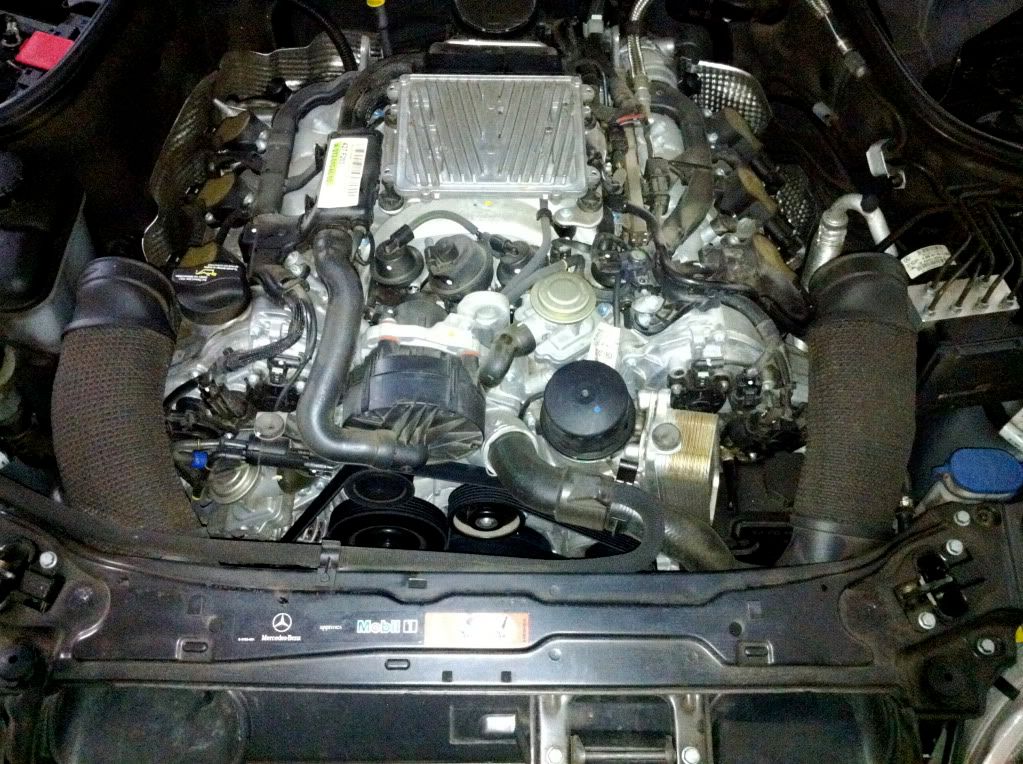
Once lifted this is what your engine bay should look like:
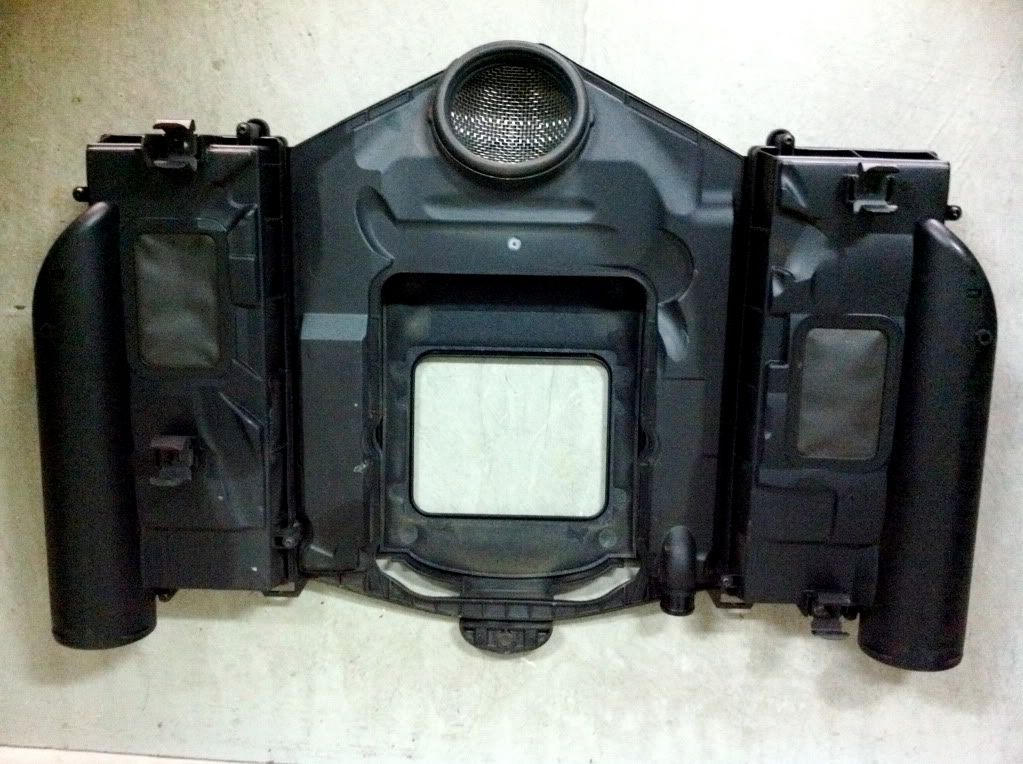
Now, the upper engine cover where your air filters are located(turned on the rear):
Each side will have four individual screws(labeled by the yellow arrow) which will need to be unscrewed in order to open up the rectangular air filter housing(labeled by the red arrow)
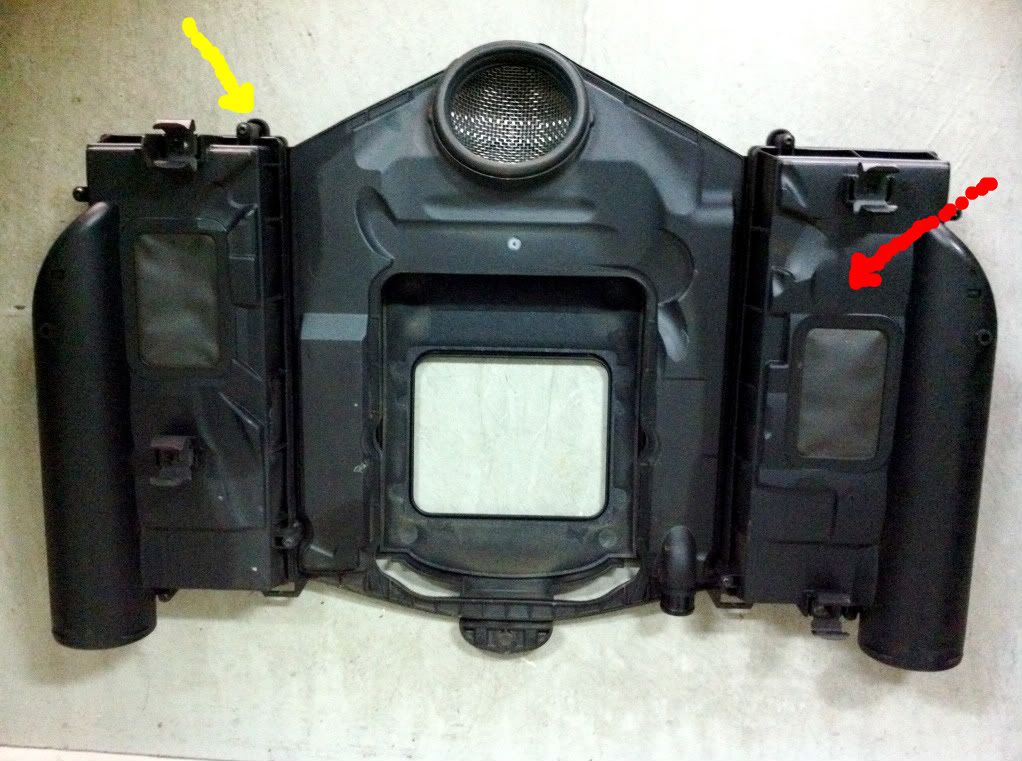
Once out, clean out the housing, replace the air filter, and put everything back together
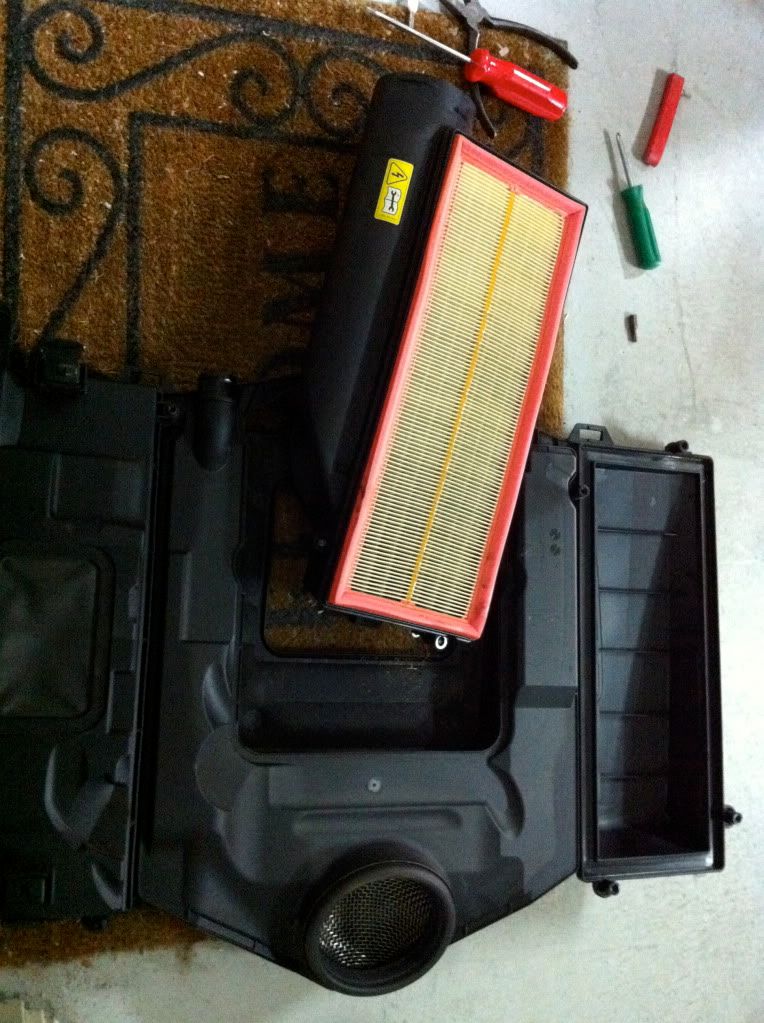
Hopefully this helps anyone who wants to take on this relatively simple DIY.
2007 C230 Sport Sedan Engine 2.5L V6: Same procedure for many C Class W203s
Remove the lower engine cover housing which will expose the air tubes that will need to be disconnected from the upper engine housing(where the air filters are located). Labeled by the yellow arrows in the picture below.
Gently disconnect each of the three air tubes; Once you've done so, gently but firmly remove the upper engine housing
Note: The upper engine housing has four brackets undernearth(securing it to the engine itself)
Once lifted this is what your engine bay should look like:
Now, the upper engine cover where your air filters are located(turned on the rear):
Each side will have four individual screws(labeled by the yellow arrow) which will need to be unscrewed in order to open up the rectangular air filter housing(labeled by the red arrow)
Once out, clean out the housing, replace the air filter, and put everything back together
Hopefully this helps anyone who wants to take on this relatively simple DIY.
Last edited by draz.amg; 08-28-2010 at 10:36 PM.

 09-20-2010, 04:48 PM
#46
Super Member
Thread Starter
Join Date: Jun 2010
Location: Los Angeles
Posts: 754
Likes: 0
Received 2 Likes
on
2 Posts
'13 F10 535i / '05 W211 E55
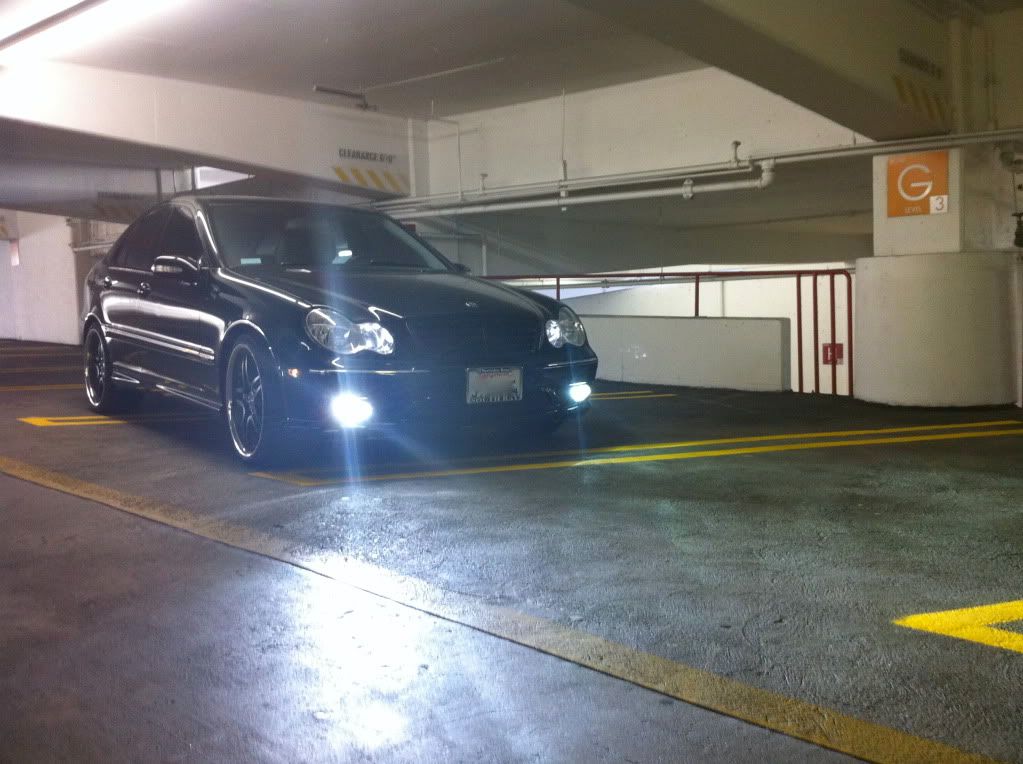
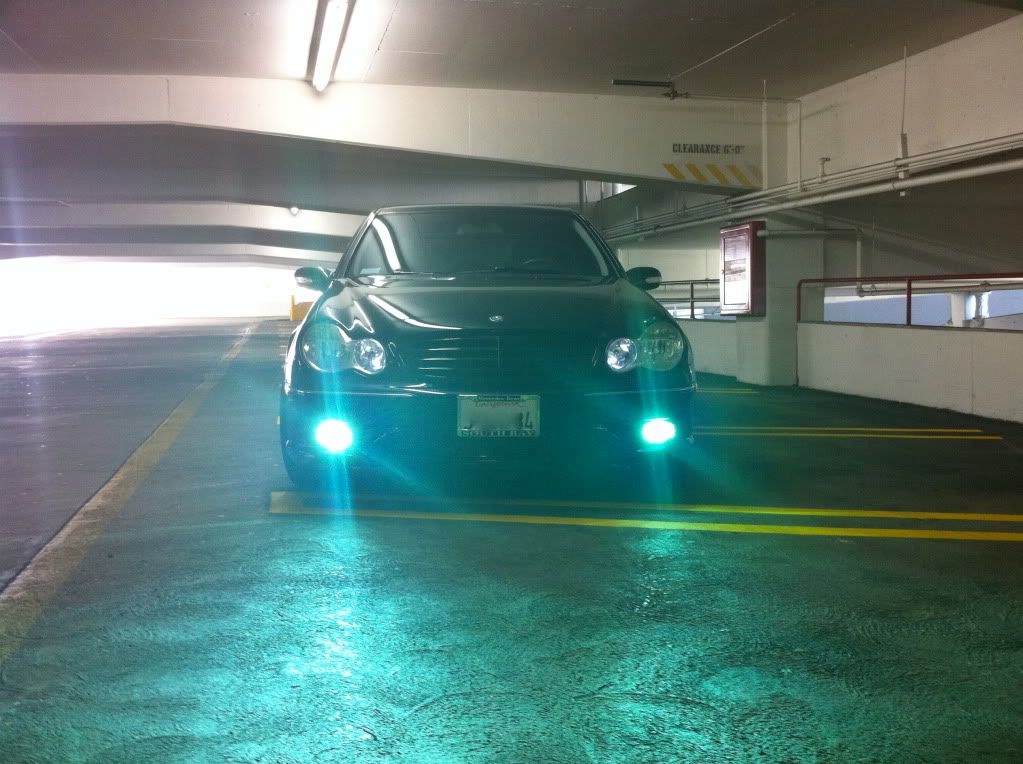
Dropped by Hyevon today and had my lows/fogs/city lights done.
I'll try and get better pictures during the night. I'll be taking out the resonator next and replacing it with a custom X pipe.
I'll try and get better pictures during the night. I'll be taking out the resonator next and replacing it with a custom X pipe.
10-17-2010, 05:44 PM
#47
Super Member
Thread Starter
Join Date: Jun 2010
Location: Los Angeles
Posts: 754
Likes: 0
Received 2 Likes
on
2 Posts
'13 F10 535i / '05 W211 E55
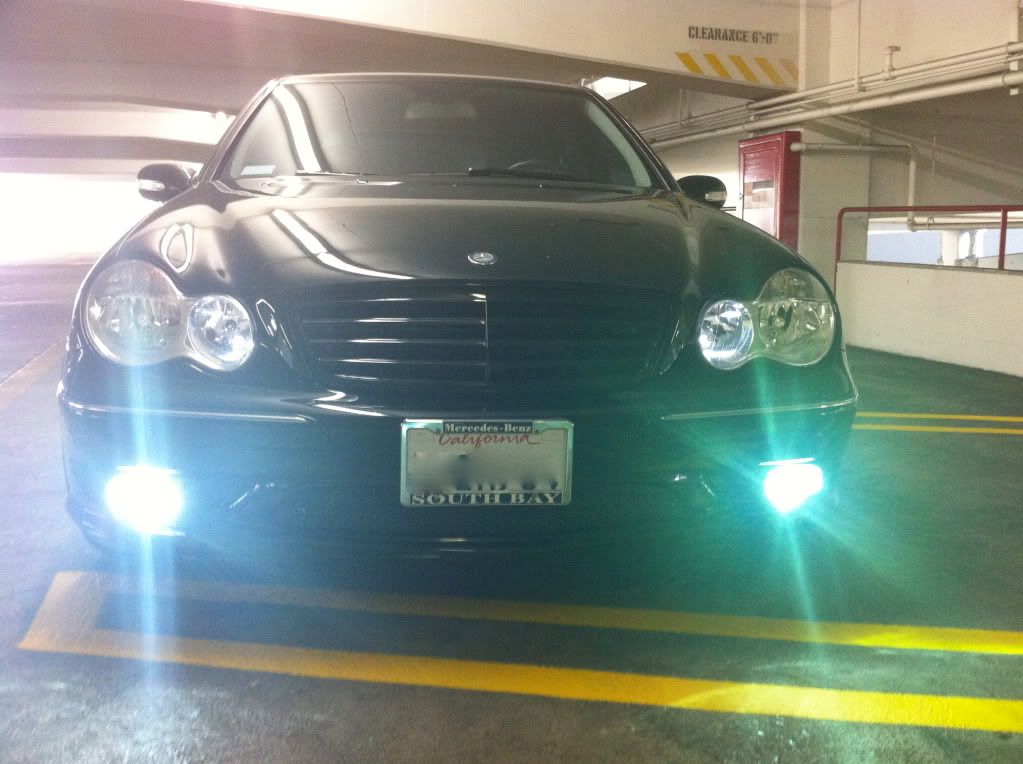
Few updates:
Light beam pattern wasn't great at all with the HIDs and stock halogens so I decide to upgrade to DEPOs and went ahead and got impact strips as well. Let me know what you guys think.
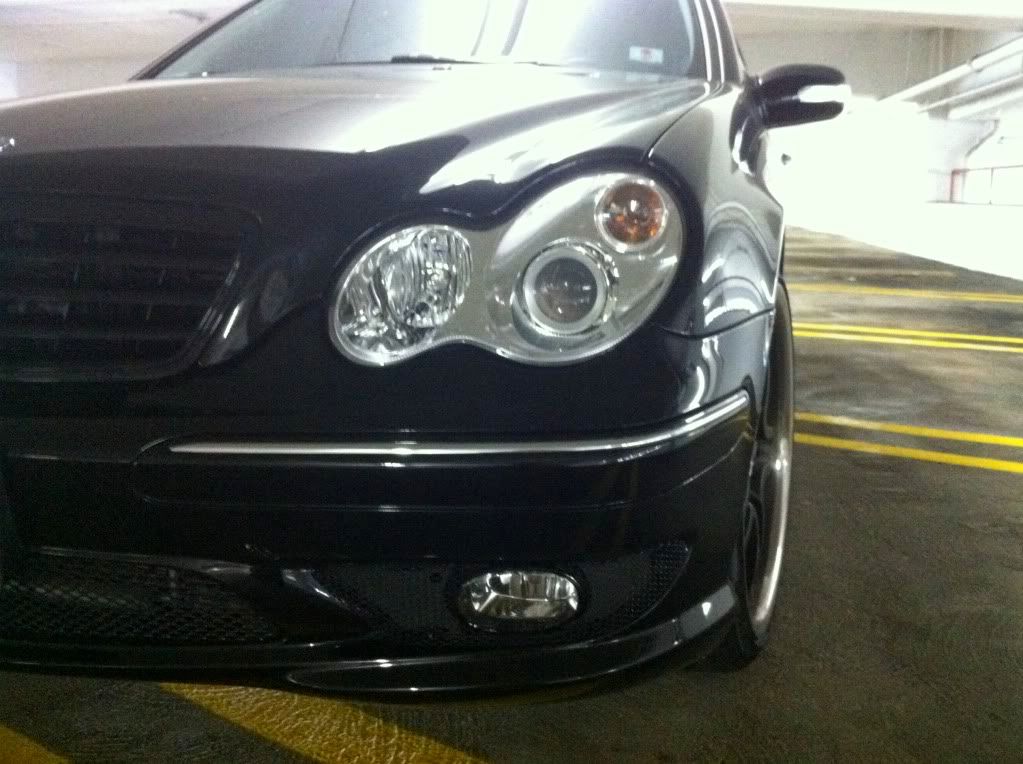
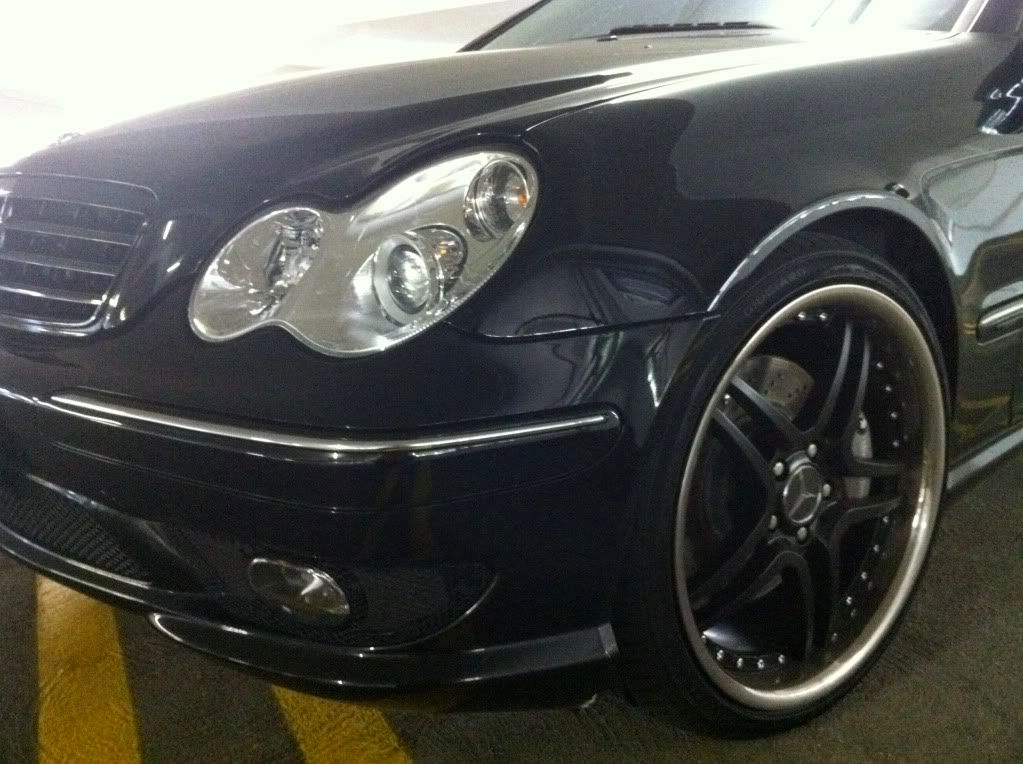
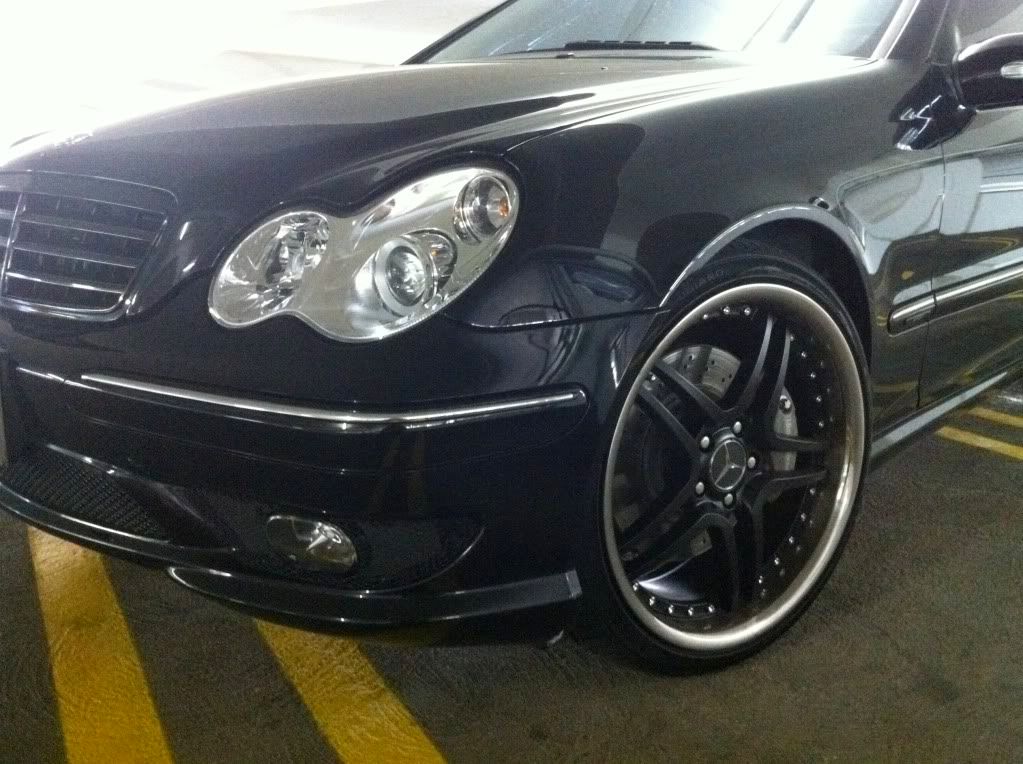
Light beam pattern wasn't great at all with the HIDs and stock halogens so I decide to upgrade to DEPOs and went ahead and got impact strips as well. Let me know what you guys think.


