


 Jun 9, 2015, 04:03 PM
Last edit by: IB Advertising
See related guides and technical advice from our community experts:
Browse all: Interior Guides
- Mercedes-Benz C-Class: How to Install Compustar Remote Start
Step by step instructions for do-it-yourself repairs
Browse all: Interior Guides

DIY : MB204 Compustar Remote Start Install

Thread Starter
Junior Member
Joined: Jul 2013
Posts: 55
Likes: 1
07 Acura Tsx, 2009 C300 L
DIY : MB204 Compustar Remote Start Install
Whats up guys this is (youssefabe) from the forums, wanted to change my username.
As i promised here is a DIY on how to install the FT-MB204-DC Remote start module.
First i want to thank the user "myinternetsucks" for posting some things that definetally helped out with the installation.
Now while the manual has some pictures, I took some more to elibarate on the install and give you a hands on experience.
Bare with me as this is my first DIY
Installation Time : 30 Minutes
Level Of Difficulty 1-10 (5)
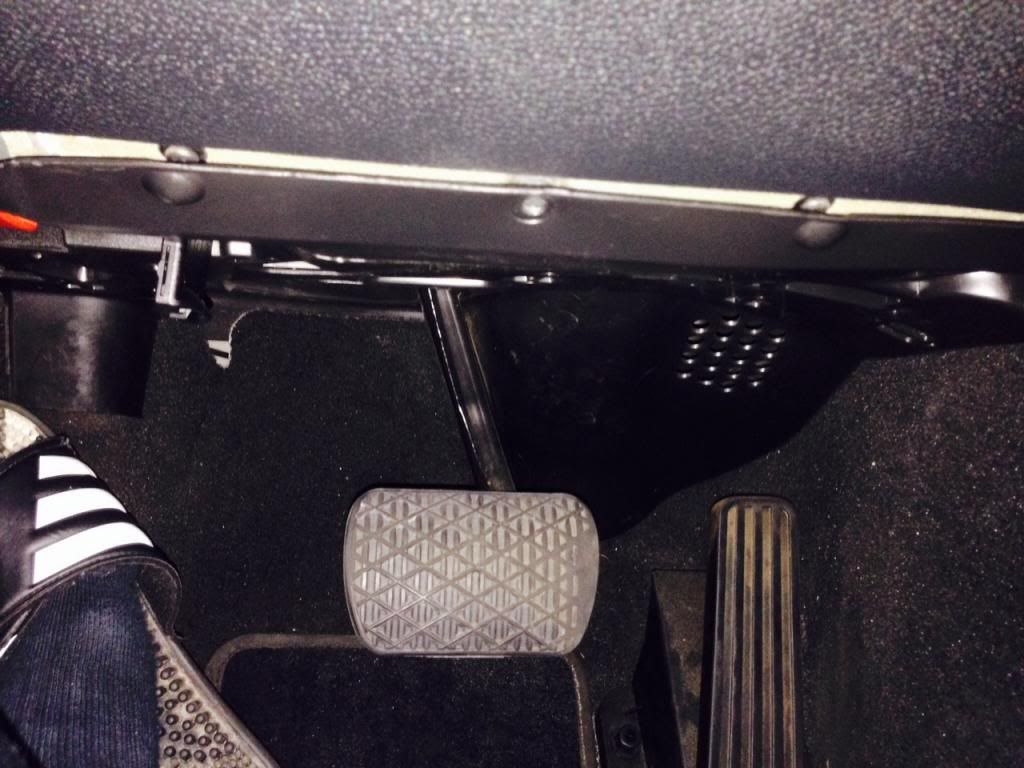
#1 On the bottom footwell under the dash you need to remove 3 t-20 screws. You can just leave it unscrewed for now, you will utilize this at the LAST step.
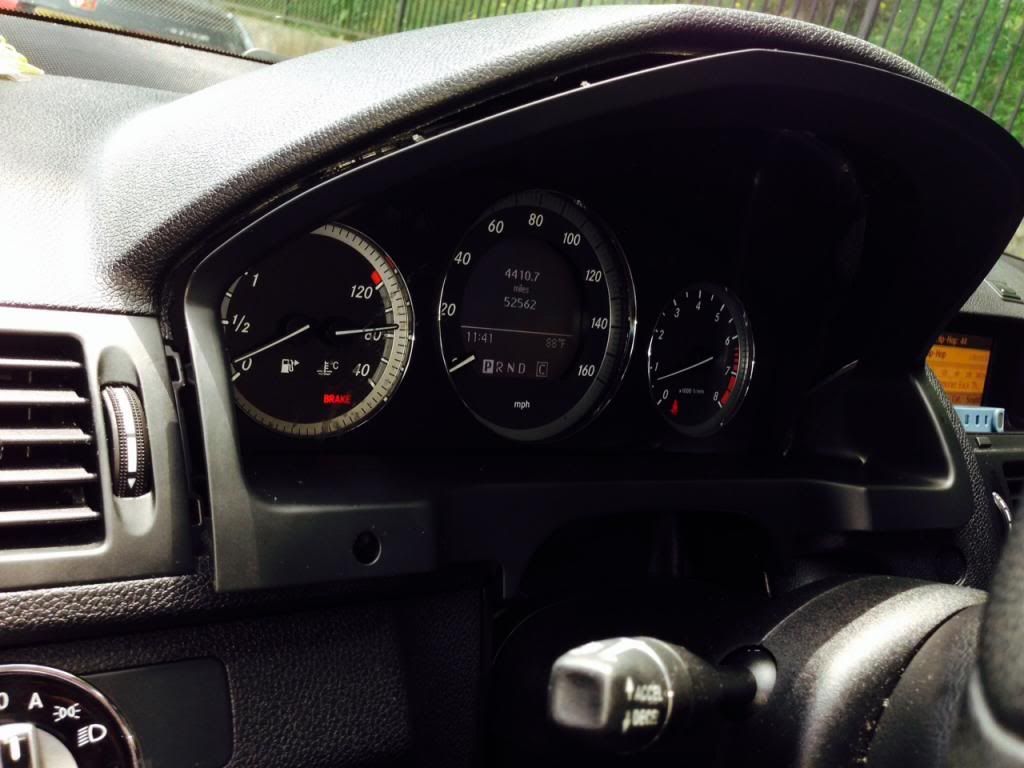
#2 using your interior trim removal tool, from the top working your way to the sides you want to pry the bezel from your cluster. and pull OUTWARDS
#3 set the streering wheel at the maximum out, as well as on the full down position.
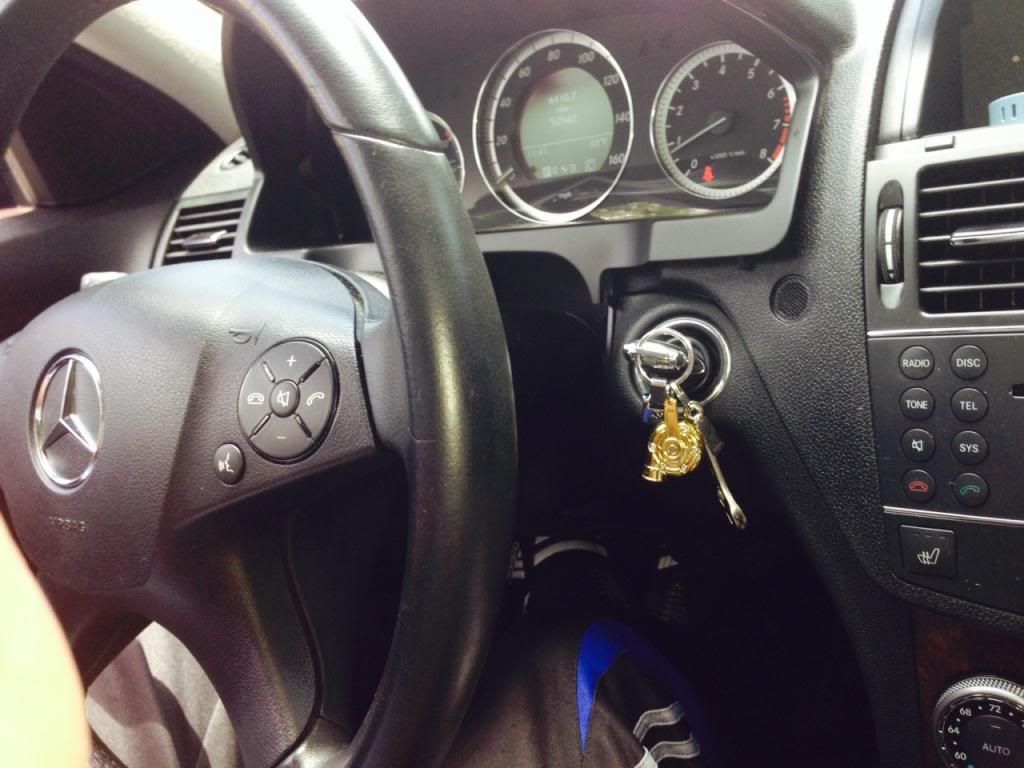
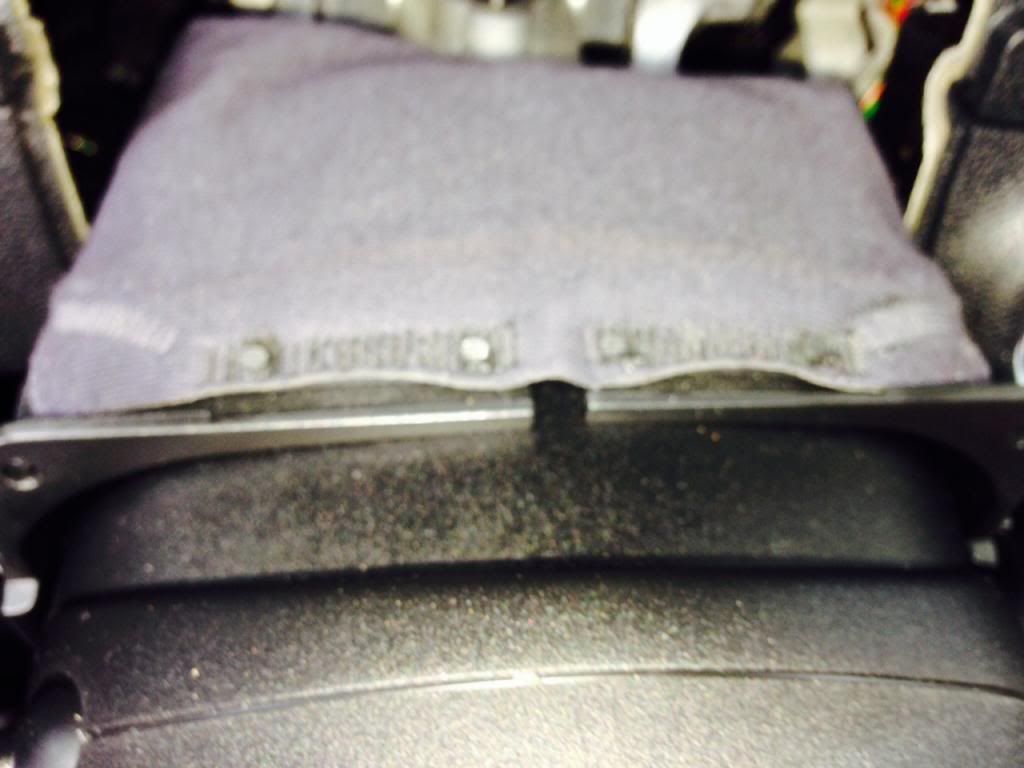
#4 Remove the steering wheel boot, push the two tabs in
wards and then down.
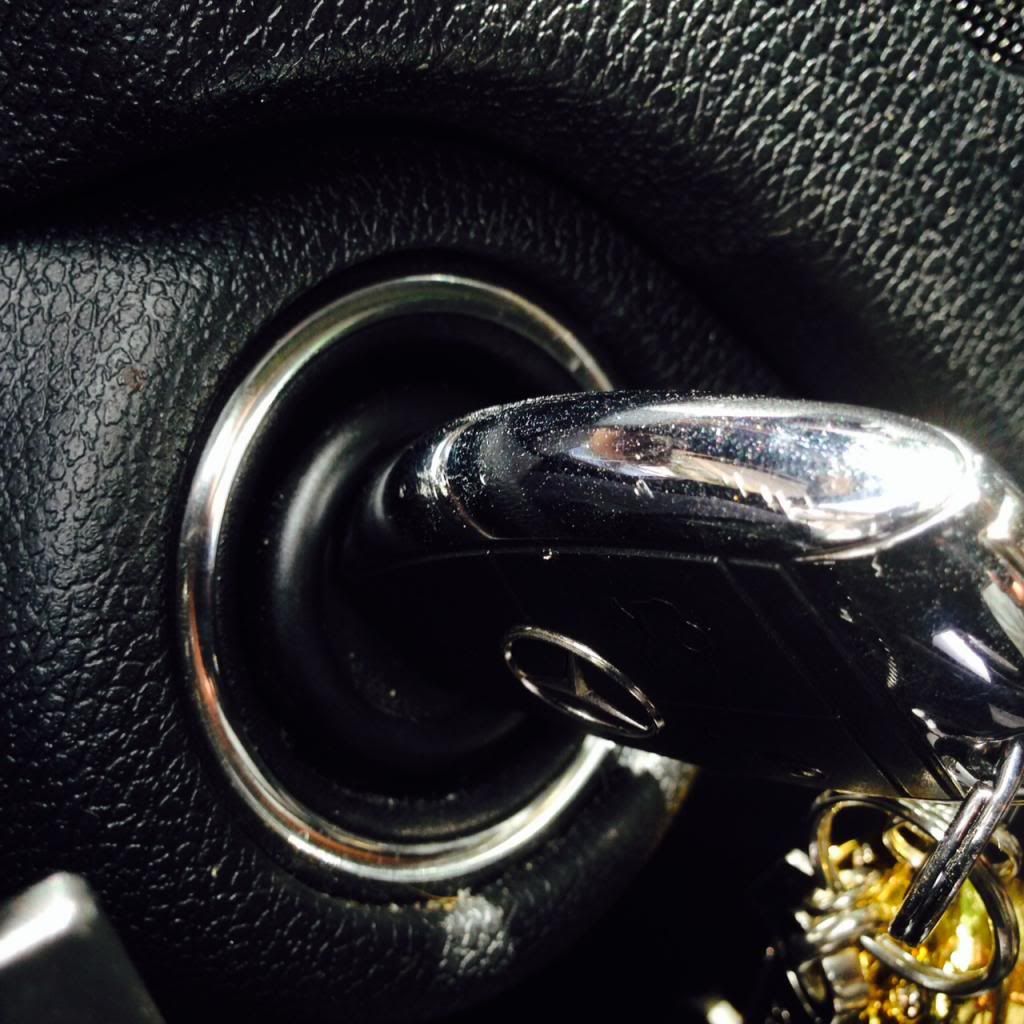
#5 pull the boot all the way towards you so reveal the EIS wiring.
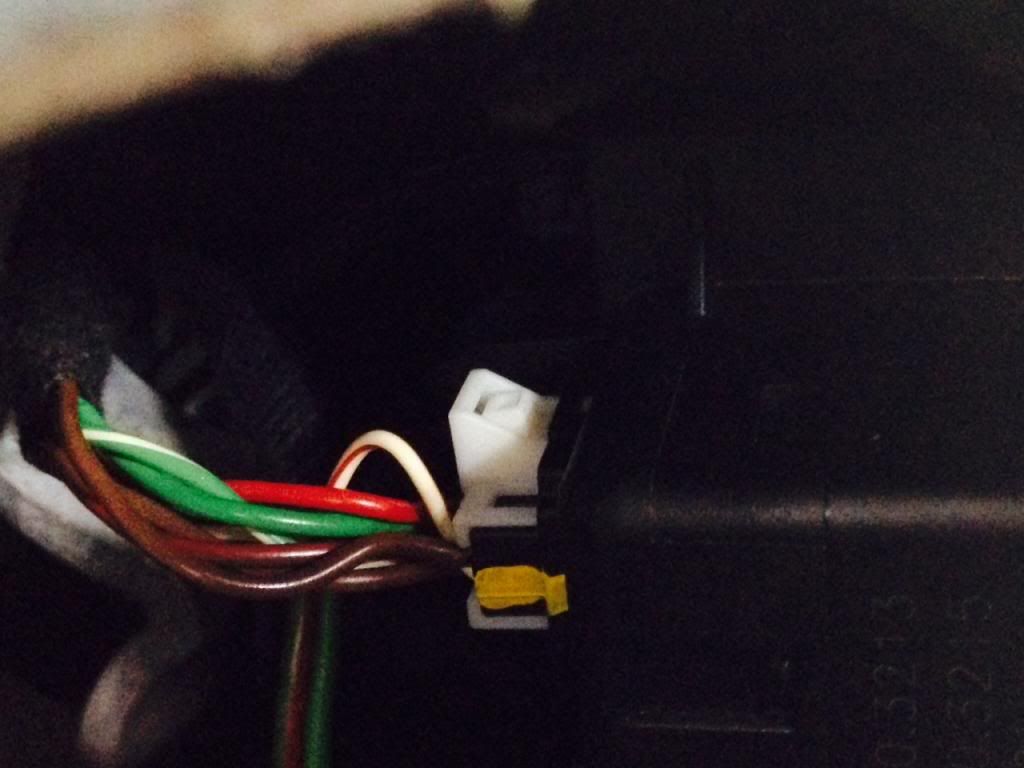
#6 unplug the harness connected into the EIS
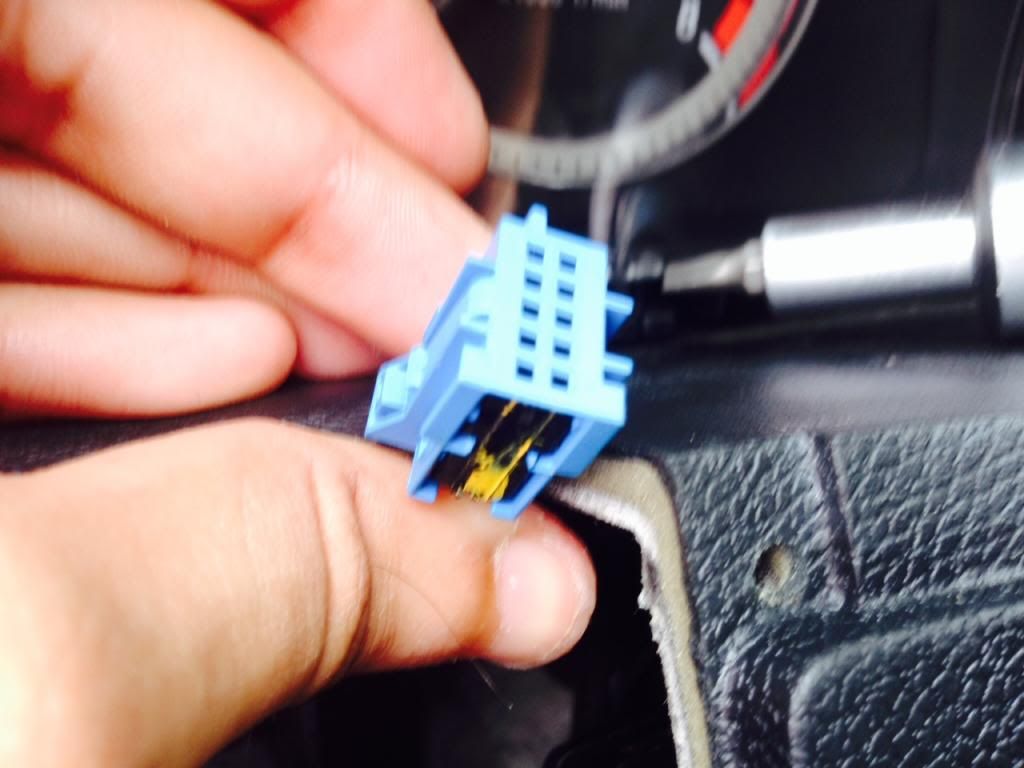
#7 take off the white shroud from the plug, what i did is stick a small screwdriver in between the white and black parts of the harness to loosen it up and pull the black part out while holding the white. (or you can use the EIS removal tool, and picks that are from harbor freight)
#8 Install the white shroud onto the black harness on your compustar unit. Arrow on the black harness facing inwards to the shroud

#9 install the blue shroud that came with the compustar unit on the EIS harness. Arrow on the black harness facing inwards to the shroud
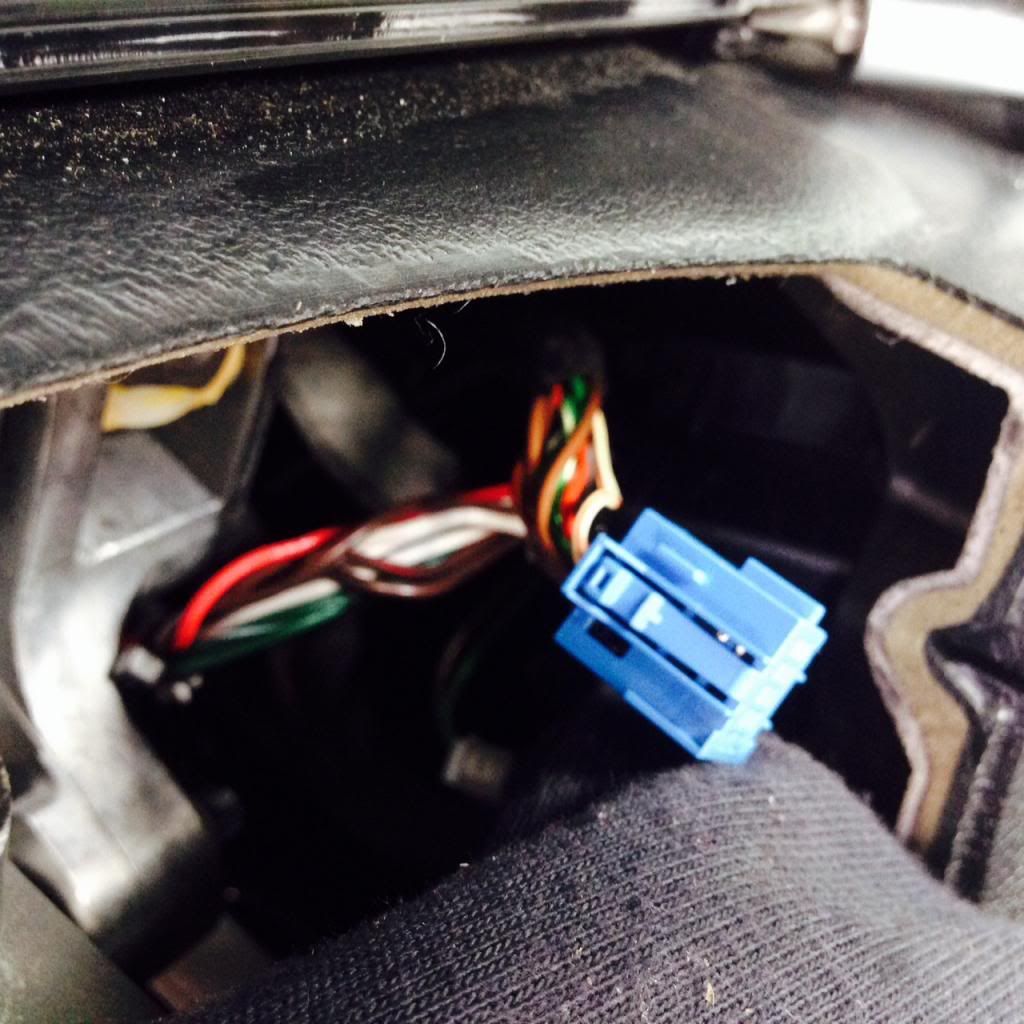
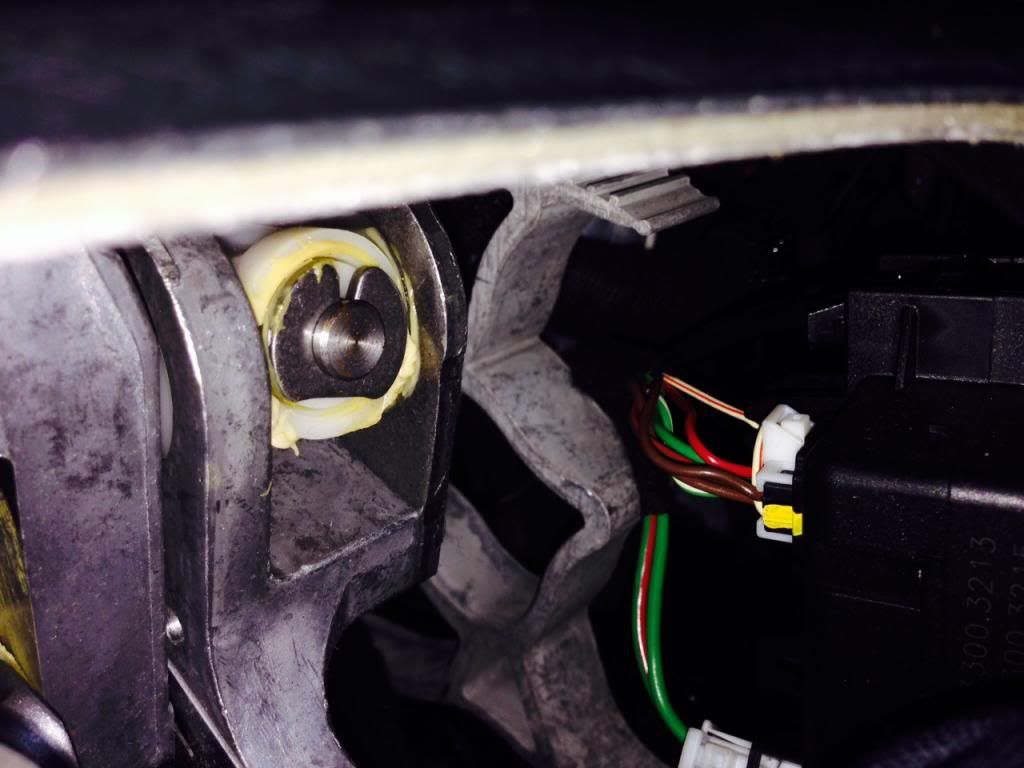
#10 Snake the wires from the bottom of the dash and pull up, you should only be pulling the white & blue sensor at this time. I used the bigger portion of the harness to snake everything down to make it easier.
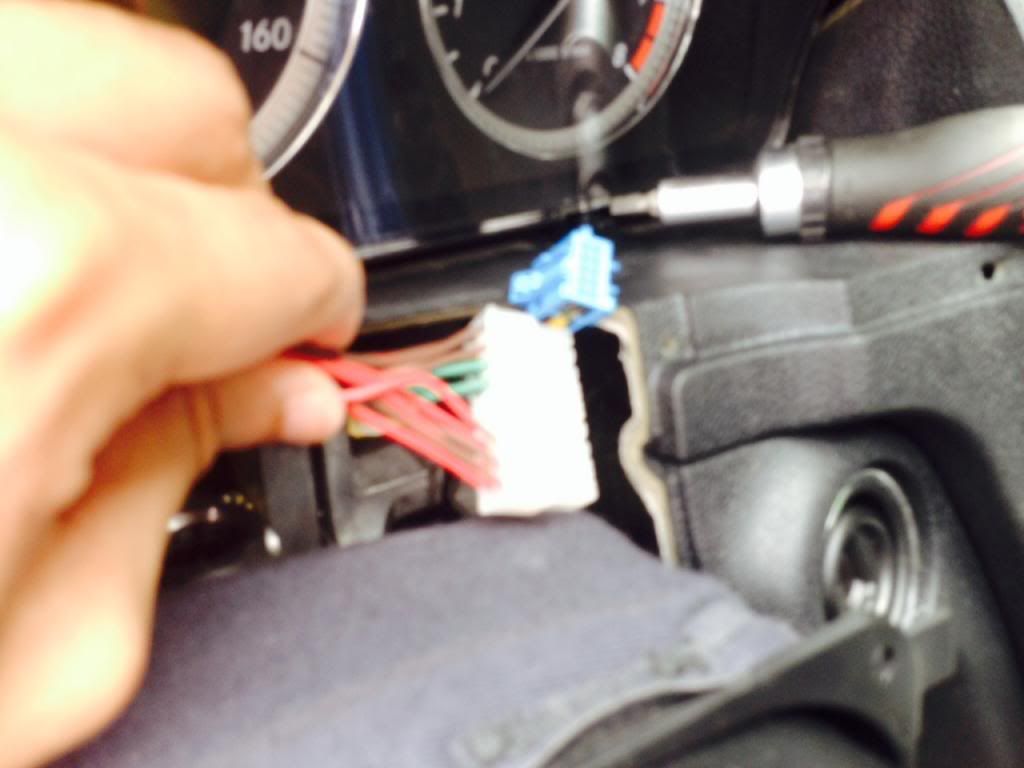
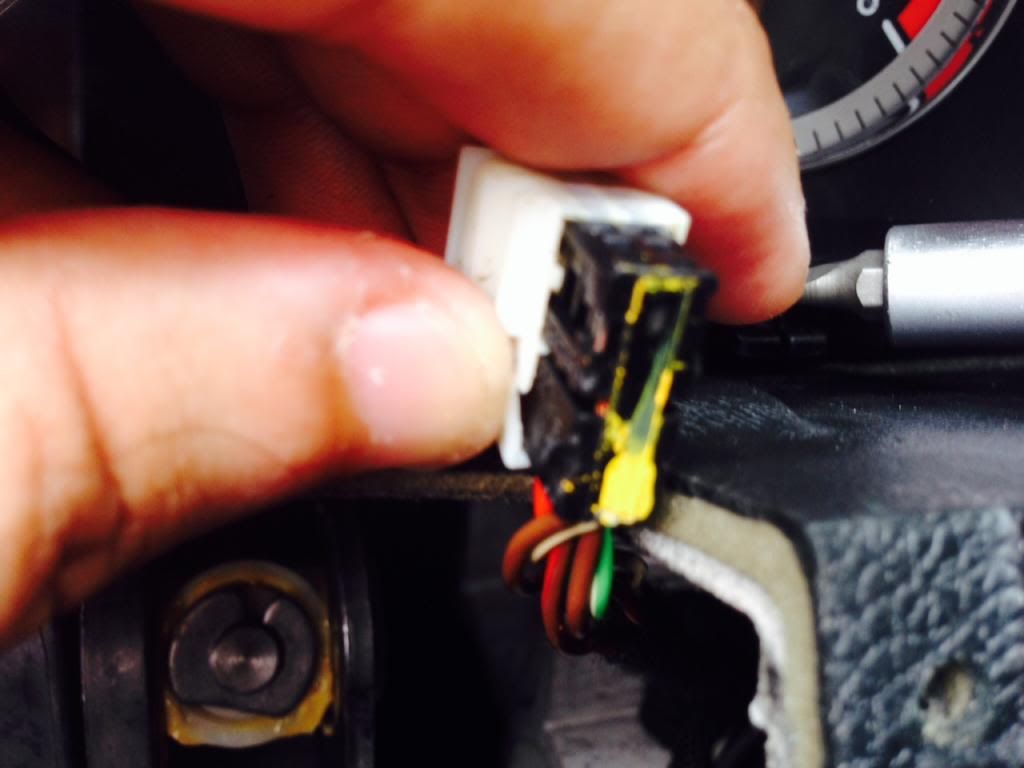
#11 Connect the white harness into the EIS
#12 Connect the two blue harness together until you hear a click.
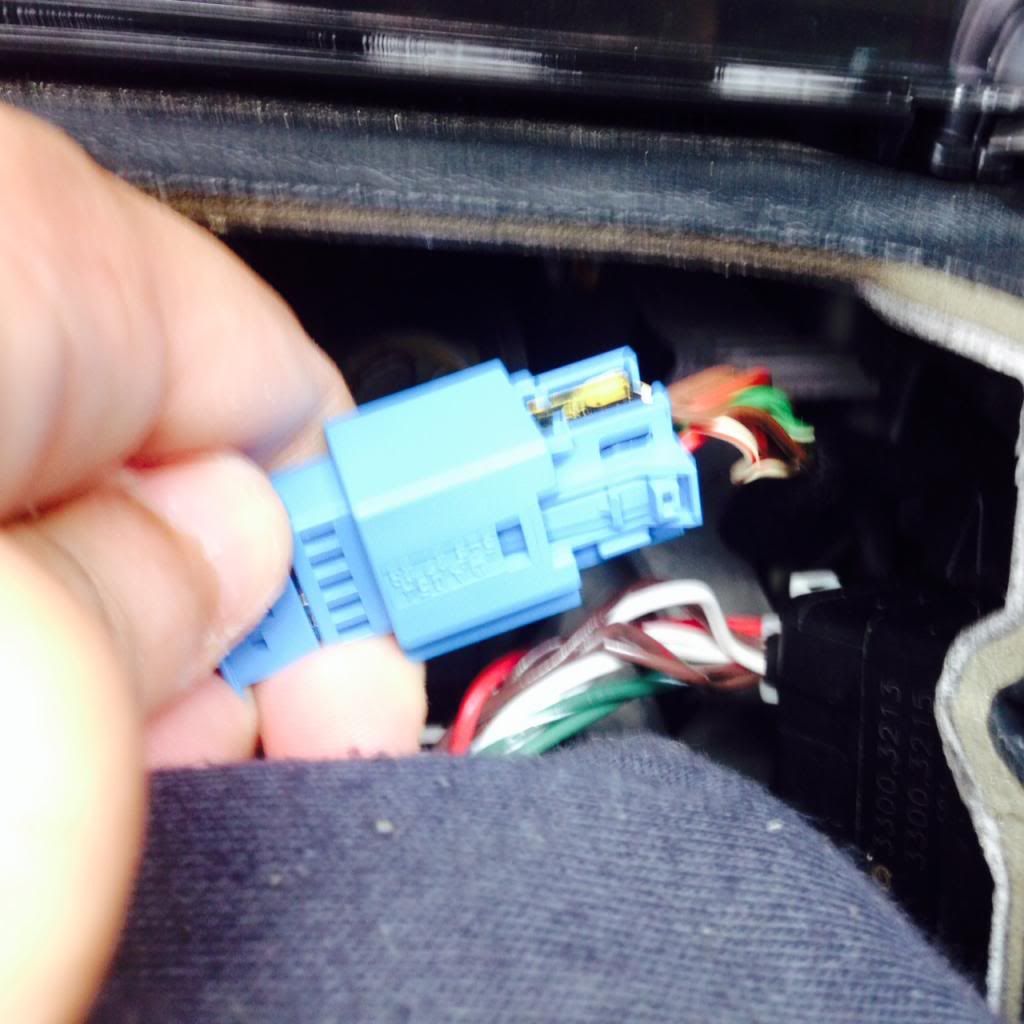
#13 Start your car - verify everything was plugged in correctly.
#14 Put back your top steering wheel boot cover.
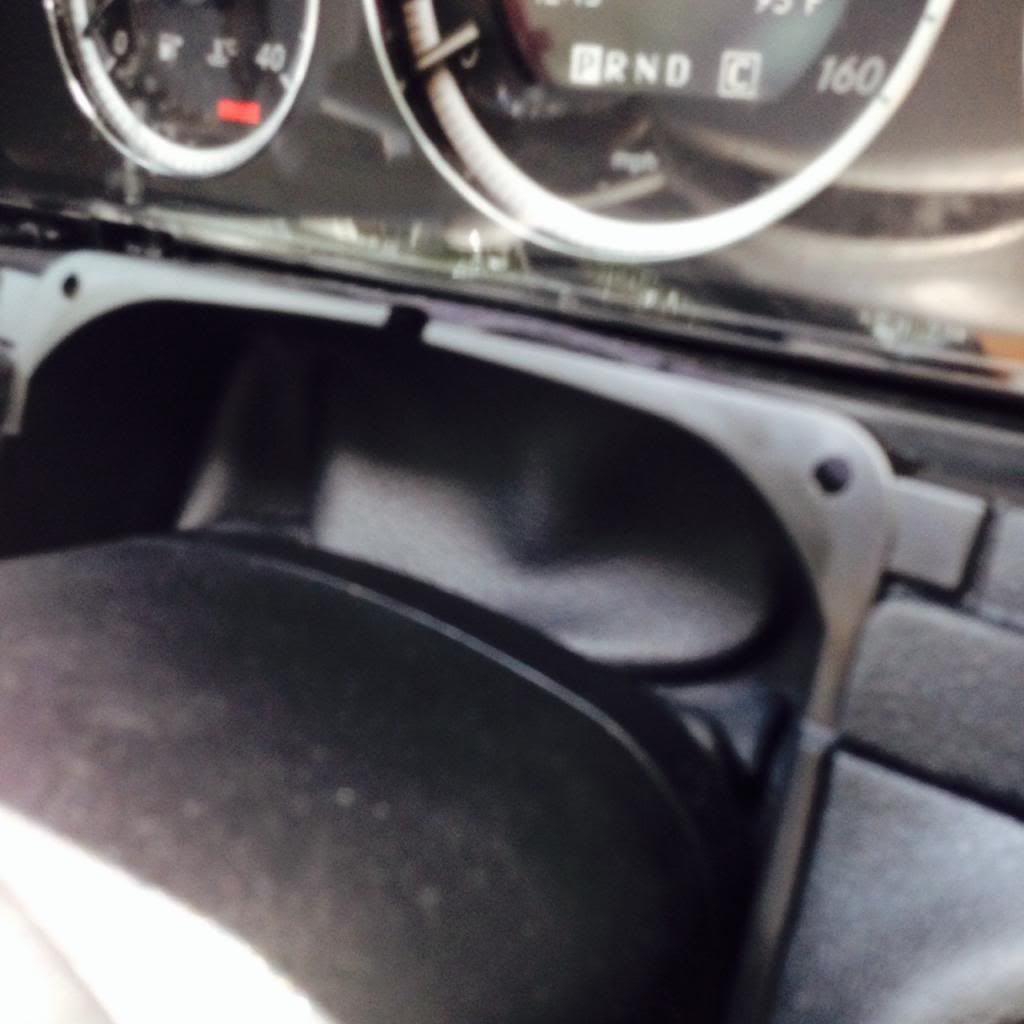
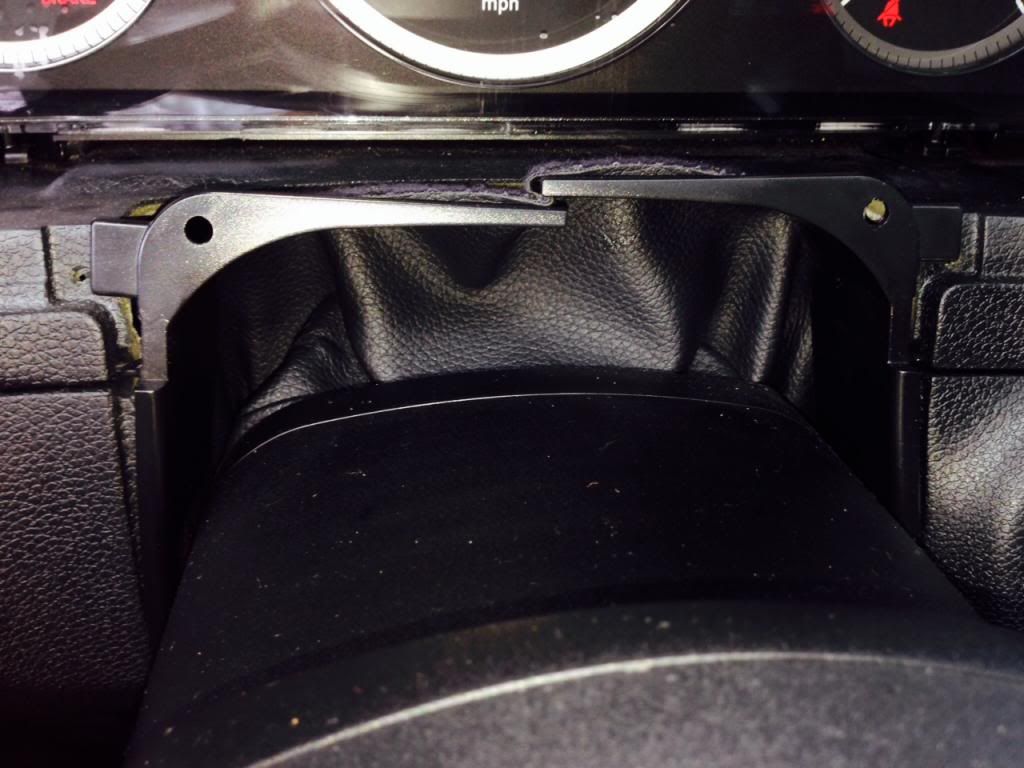
#15 Put back in your cluster dash trim. there is a black tab on the right hand side that should be put in first. then snap in.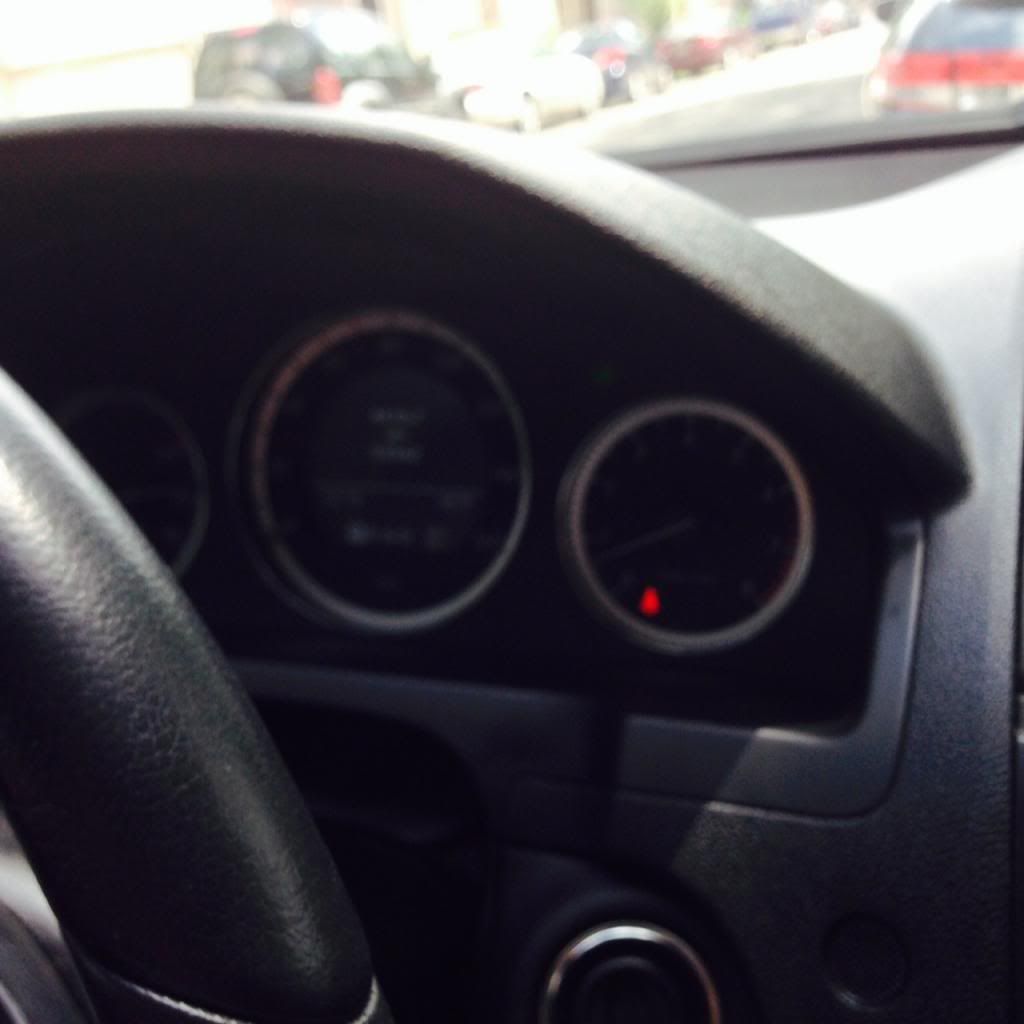
#16 connect the white harness into the compustar brain unit on the bottom of the dash.
#17 Programming time. Turn your key into the on position (1click) 5 times within 7 Seconds, After that you want to remove your key and press the lock button once. You will see your hazards flash. Step outside of your car, lock the door and press panic button ONCE, your car should now start.
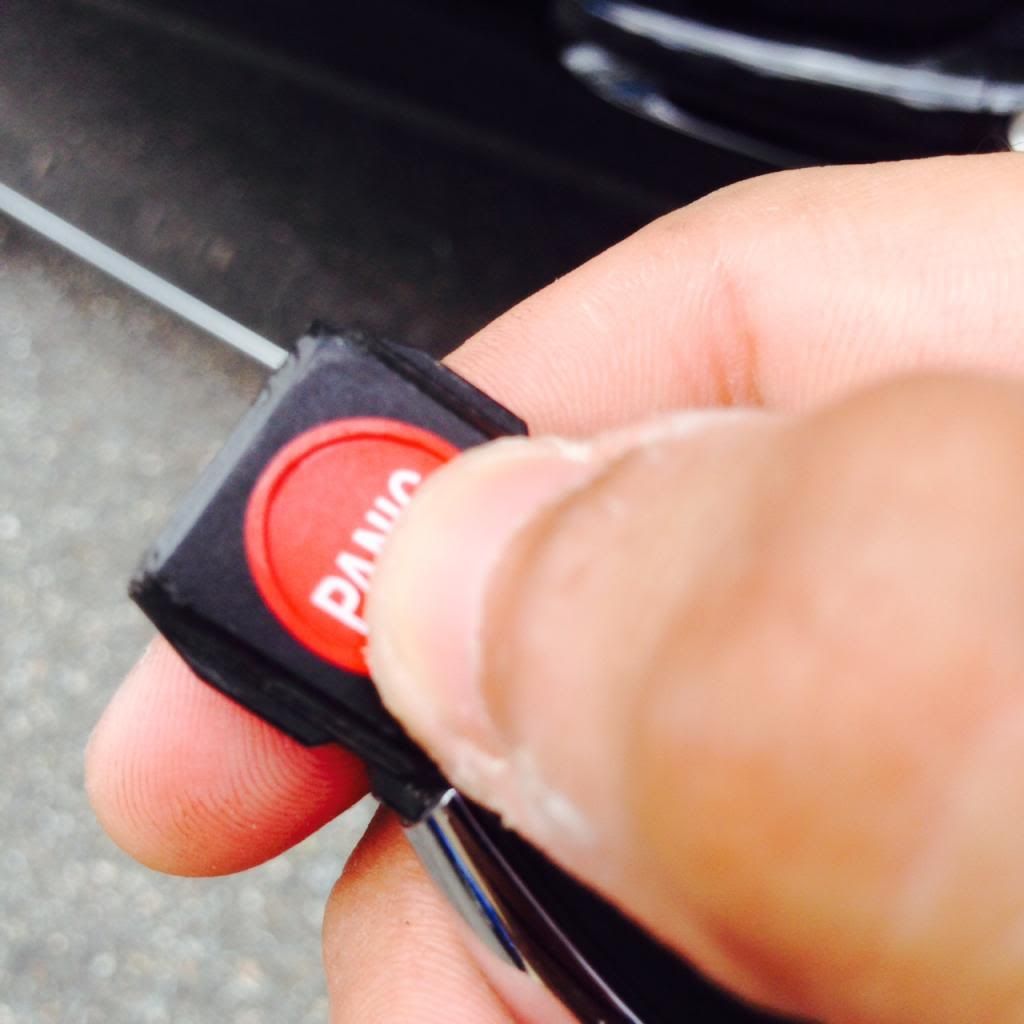
#18 My car didn't start? check your valet switch - flip it the other way and now step back outside your car, lock the door and press panic once. Vrrooom!
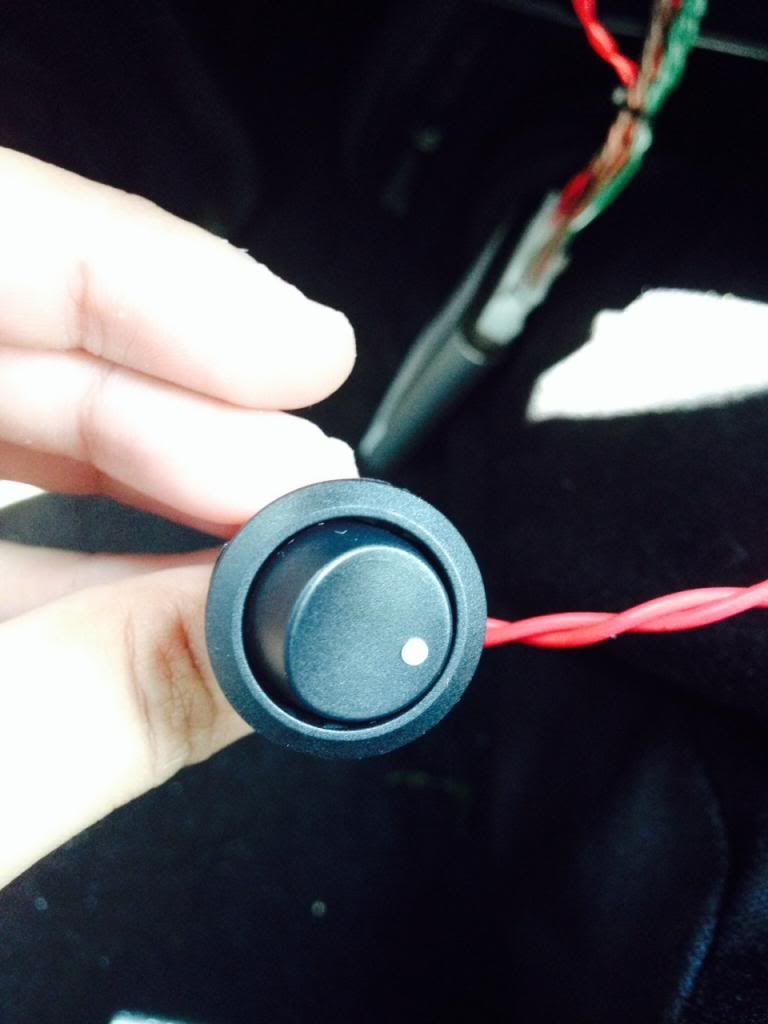
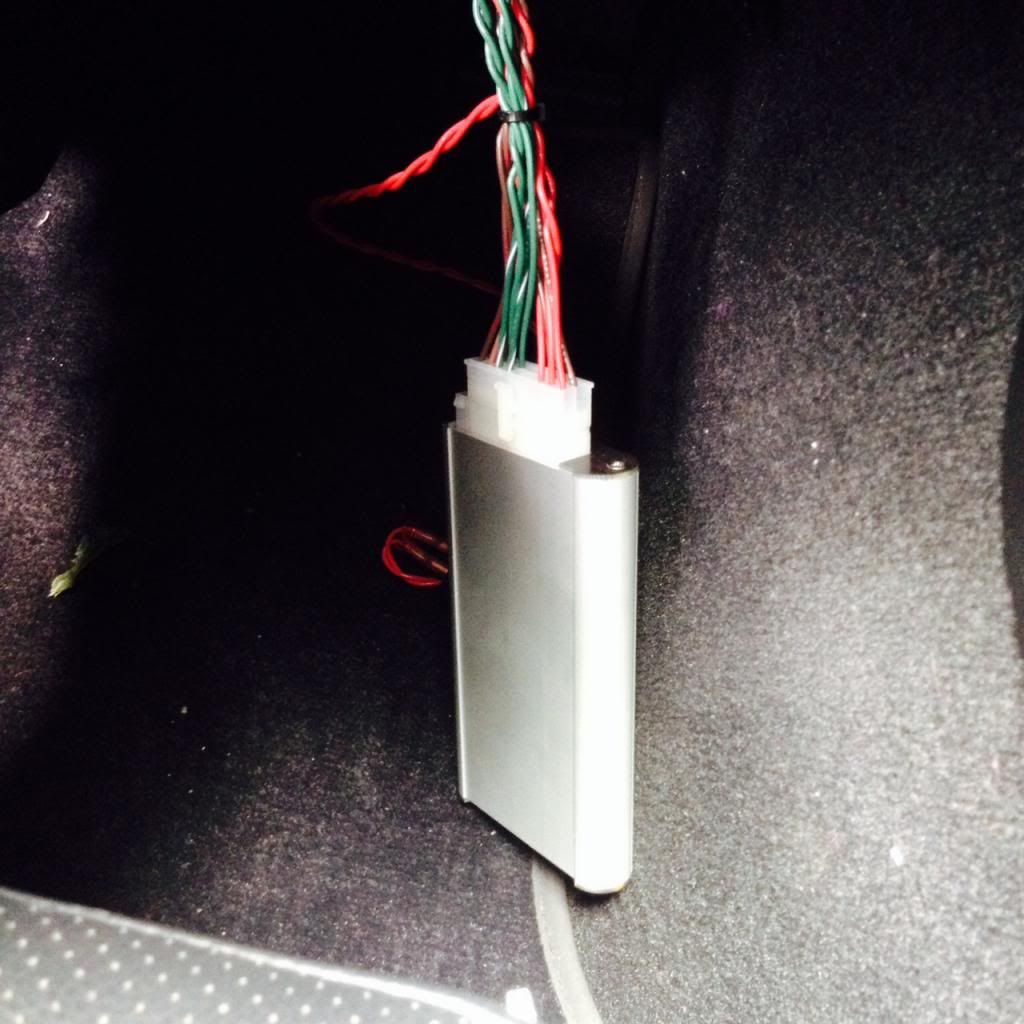
#19 I didnt mount my valet switch because i won't use it, i zip tied the harness together tightly, and tucked it into the center console carpet with some doubble sided tape.
#20 Install the 3 screws back into the under dash
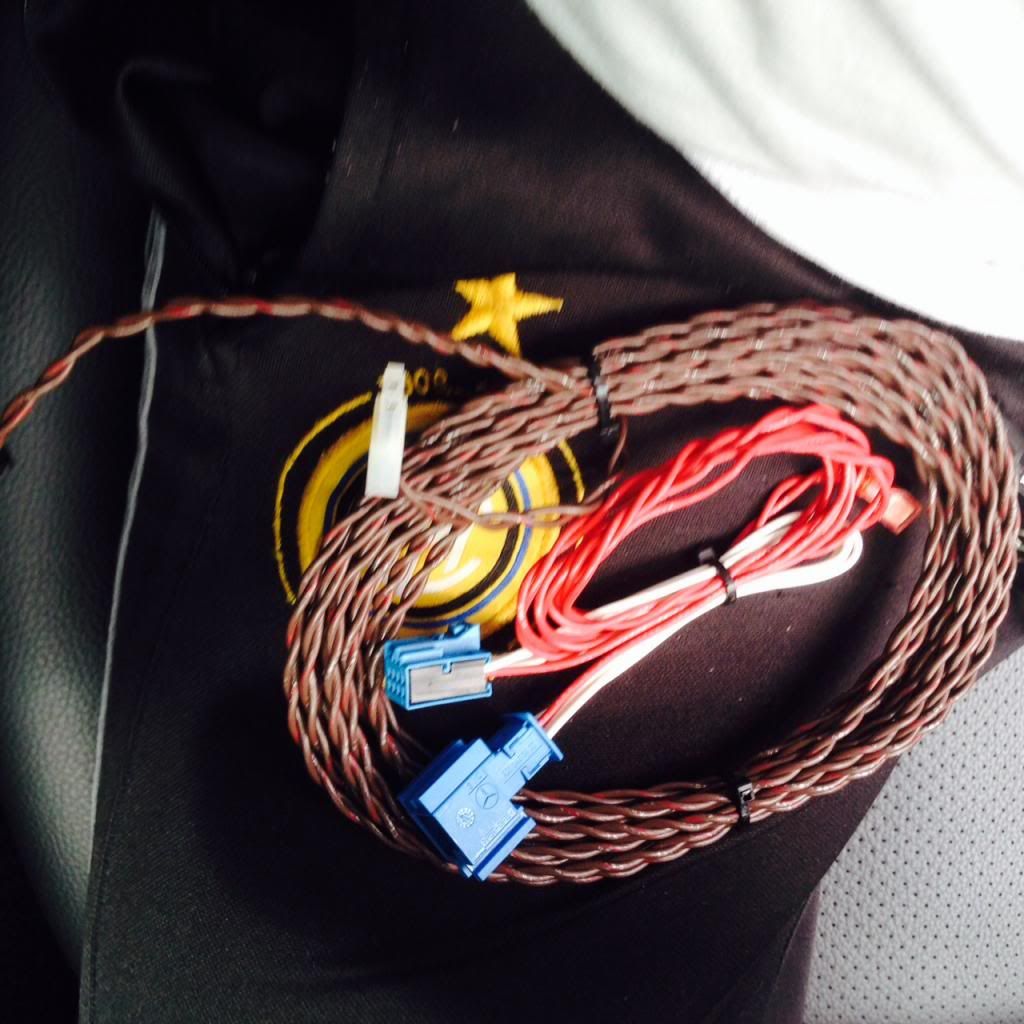
#21 Box up the unused harness, and store for resell later.
#22 Last test before i go inside and drink some beer!
Hope this has helped you guys, I know compustar had directions but wanted to provide my first hand experience to the forum. If you have any questions feel free to ask. You assume everything you do at your own risk.
As i promised here is a DIY on how to install the FT-MB204-DC Remote start module.
First i want to thank the user "myinternetsucks" for posting some things that definetally helped out with the installation.
If you have the right tools. I bought these sets from Harbor Freight. $2 for the first link and $7 for the second link.
http://www.harborfreight.com/4-piece...set-66836.html
http://www.harborfreight.com/5-piece...set-67021.html
Here is the installation guide for the "Brains" of the unit. (This will get you the remote start off the Panic Button from your factory keys and gives you an extra accelerometer (motion/bump sensor) within the unit.)
Firstech Mercedes DC MB204
Install Guide Here:
http://www.compustar.com/dealersuppo...stallation.pdf
Bare with me as this is my first DIY
Installation Time : 30 Minutes
Level Of Difficulty 1-10 (5)
#1 On the bottom footwell under the dash you need to remove 3 t-20 screws. You can just leave it unscrewed for now, you will utilize this at the LAST step.

#2 using your interior trim removal tool, from the top working your way to the sides you want to pry the bezel from your cluster. and pull OUTWARDS

#3 set the streering wheel at the maximum out, as well as on the full down position.

#4 Remove the steering wheel boot, push the two tabs in
wards and then down.

#5 pull the boot all the way towards you so reveal the EIS wiring.


#6 unplug the harness connected into the EIS

#7 take off the white shroud from the plug, what i did is stick a small screwdriver in between the white and black parts of the harness to loosen it up and pull the black part out while holding the white. (or you can use the EIS removal tool, and picks that are from harbor freight)

#8 Install the white shroud onto the black harness on your compustar unit. Arrow on the black harness facing inwards to the shroud

#9 install the blue shroud that came with the compustar unit on the EIS harness. Arrow on the black harness facing inwards to the shroud


#10 Snake the wires from the bottom of the dash and pull up, you should only be pulling the white & blue sensor at this time. I used the bigger portion of the harness to snake everything down to make it easier.

#11 Connect the white harness into the EIS
#12 Connect the two blue harness together until you hear a click.

#13 Start your car - verify everything was plugged in correctly.

#14 Put back your top steering wheel boot cover.

#15 Put back in your cluster dash trim. there is a black tab on the right hand side that should be put in first. then snap in.

#16 connect the white harness into the compustar brain unit on the bottom of the dash.

#17 Programming time. Turn your key into the on position (1click) 5 times within 7 Seconds, After that you want to remove your key and press the lock button once. You will see your hazards flash. Step outside of your car, lock the door and press panic button ONCE, your car should now start.

#18 My car didn't start? check your valet switch - flip it the other way and now step back outside your car, lock the door and press panic once. Vrrooom!

#19 I didnt mount my valet switch because i won't use it, i zip tied the harness together tightly, and tucked it into the center console carpet with some doubble sided tape.
#20 Install the 3 screws back into the under dash
#21 Box up the unused harness, and store for resell later.

#22 Last test before i go inside and drink some beer!
Hope this has helped you guys, I know compustar had directions but wanted to provide my first hand experience to the forum. If you have any questions feel free to ask. You assume everything you do at your own risk.

Registered User
Joined: Jun 2013
Posts: 499
Likes: 1
From: nowhere
2010 C300, 2013 C63 AMG
THANK YOU SO MUCH!!!!!!!!! I've been looking to order a CompuStar remote starter, but I had no clue how to install it, and didn't want to pay for pro installation. I will probably order and install my own soon. This will be a huge help!! A++++!
Super Member
Joined: Apr 2008
Posts: 518
Likes: 0
From: Fresno, Central California
Merc C300 sport, arctic white, P1, MM/Navi, iPod kit, 20% Tint, C63 Grill, X-Pipe, HID DDM Kit
Awesome write up man and thanks for the props! Good job, I found the hardest part was getting the new harness back into the EIS. It would've helped to have child size hands to get back in there.
Trending Topics

Member
Joined: Apr 2013
Posts: 118
Likes: 0
07 tsx, 09 c300
you gave me the courage to do this lol. and yes the eis was the hardest part than understanding what a shroud was also lol but after i got in at a wierd angle my hand grabbed the whole thing
MB World Stories
The Best of Mercedes & AMG

New Mercedes-AMG SUVs Arrive With NEW V8 Engine: 12 Things You Need to Know
Verdad Gallardo
8 Oddball Mercedes Ideas That Actually Made it to Production
Verdad Gallardo
Dubai Tuner Gives the Mercedes G-Class An Entirely New Look
Verdad Gallardo
Six Gift Ideas Your AMG Loving Dad or Grad Will Cherish

7 Craziest Things AMG Gas Ever Built
Verdad Gallardo
New Electric Mercedes-AMG GT 4-Door Coupe Unveiled: 10 Things You Need to Know
Verdad Gallardo
6 Mercedes Models That Did NOT Age Well (But Are Somehow Still Cool)
Verdad Gallardo
Manual Mercedes? 6 Times Sindelfingen Let Drivers Have All The Fun
Verdad Gallardo
Mercedes SLR McLaren 722 S Is Extremely Rare Example Modified by McLaren
Verdad Gallardo
Member
Joined: Apr 2013
Posts: 118
Likes: 0
07 tsx, 09 c300
go for it! if you need help just pm me & yes ot of shops wanted over 400$ to install and it dosent take that long

Junior Member
Joined: Apr 2013
Posts: 56
Likes: 1
2010 C300


Thread Starter
Junior Member
Joined: Jul 2013
Posts: 55
Likes: 1
07 Acura Tsx, 2009 C300 L

MBWorld Fanatic!
Joined: Apr 2013
Posts: 1,130
Likes: 101
From: Belgium
W205
maybe a stupid question but is that only to start the engine or can you actually compare it with keyless go? i mean do you still have to put the key in the lock to drive the car (for the steering lock for example)
Senior Member
Joined: Jan 2013
Posts: 344
Likes: 2
From: Berkley, MI
'09 C350
Good question. I'm guessing it would have to be to unlock the steering wheel and prevent the car from turning off when you press the brake pedal. Otherwise anyone can get in the car and drive away.


Member
Joined: Jun 2013
Posts: 80
Likes: 0
From: Cleveland, OH
2008 C300


Newbie
Joined: Aug 2013
Posts: 10
Likes: 0
2013 C250 Sport (US)
MBWorld Fanatic!


Joined: Nov 2003
Posts: 2,416
Likes: 498
From: Earth
2015 C300 4Matic Sport
for about $95. Should be plug & play with the unit.

I can't find the compatible remote kit model numbers. Anyone? :/
Last edited by benzdude; Nov 20, 2013 at 05:31 PM.
MBWorld Fanatic!
Joined: Nov 2003
Posts: 2,416
Likes: 498
From: Earth
2015 C300 4Matic Sport


