When you click on links to various merchants on this site and make a purchase, this can result in this site earning a commission. Affiliate programs and affiliations include, but are not limited to, the eBay Partner Network.
I believe this is my first time posting a thread on MBWorld. I frequent FB quite often for advice but it seems as if the W205 community is mainly on the forums. FB is rather annoying and limited anyway. After countless searching without anyone giving clear advice on how to add a subwoofer to the existing Burmester system, I decided to dive in and do it myself, taking a few photos along the way.
I had a 12inch Addictive Audio �Shake� subwoofer in a ported box from my BMW I just sold and wanted to utilize it in the C-Class I just bought. Of course after hearing how horrible the bass on the Burmester system was, I NEEDED to add some bass.
*Getting Bass Signal*
So I started by removing the trunk liner (passenger side)
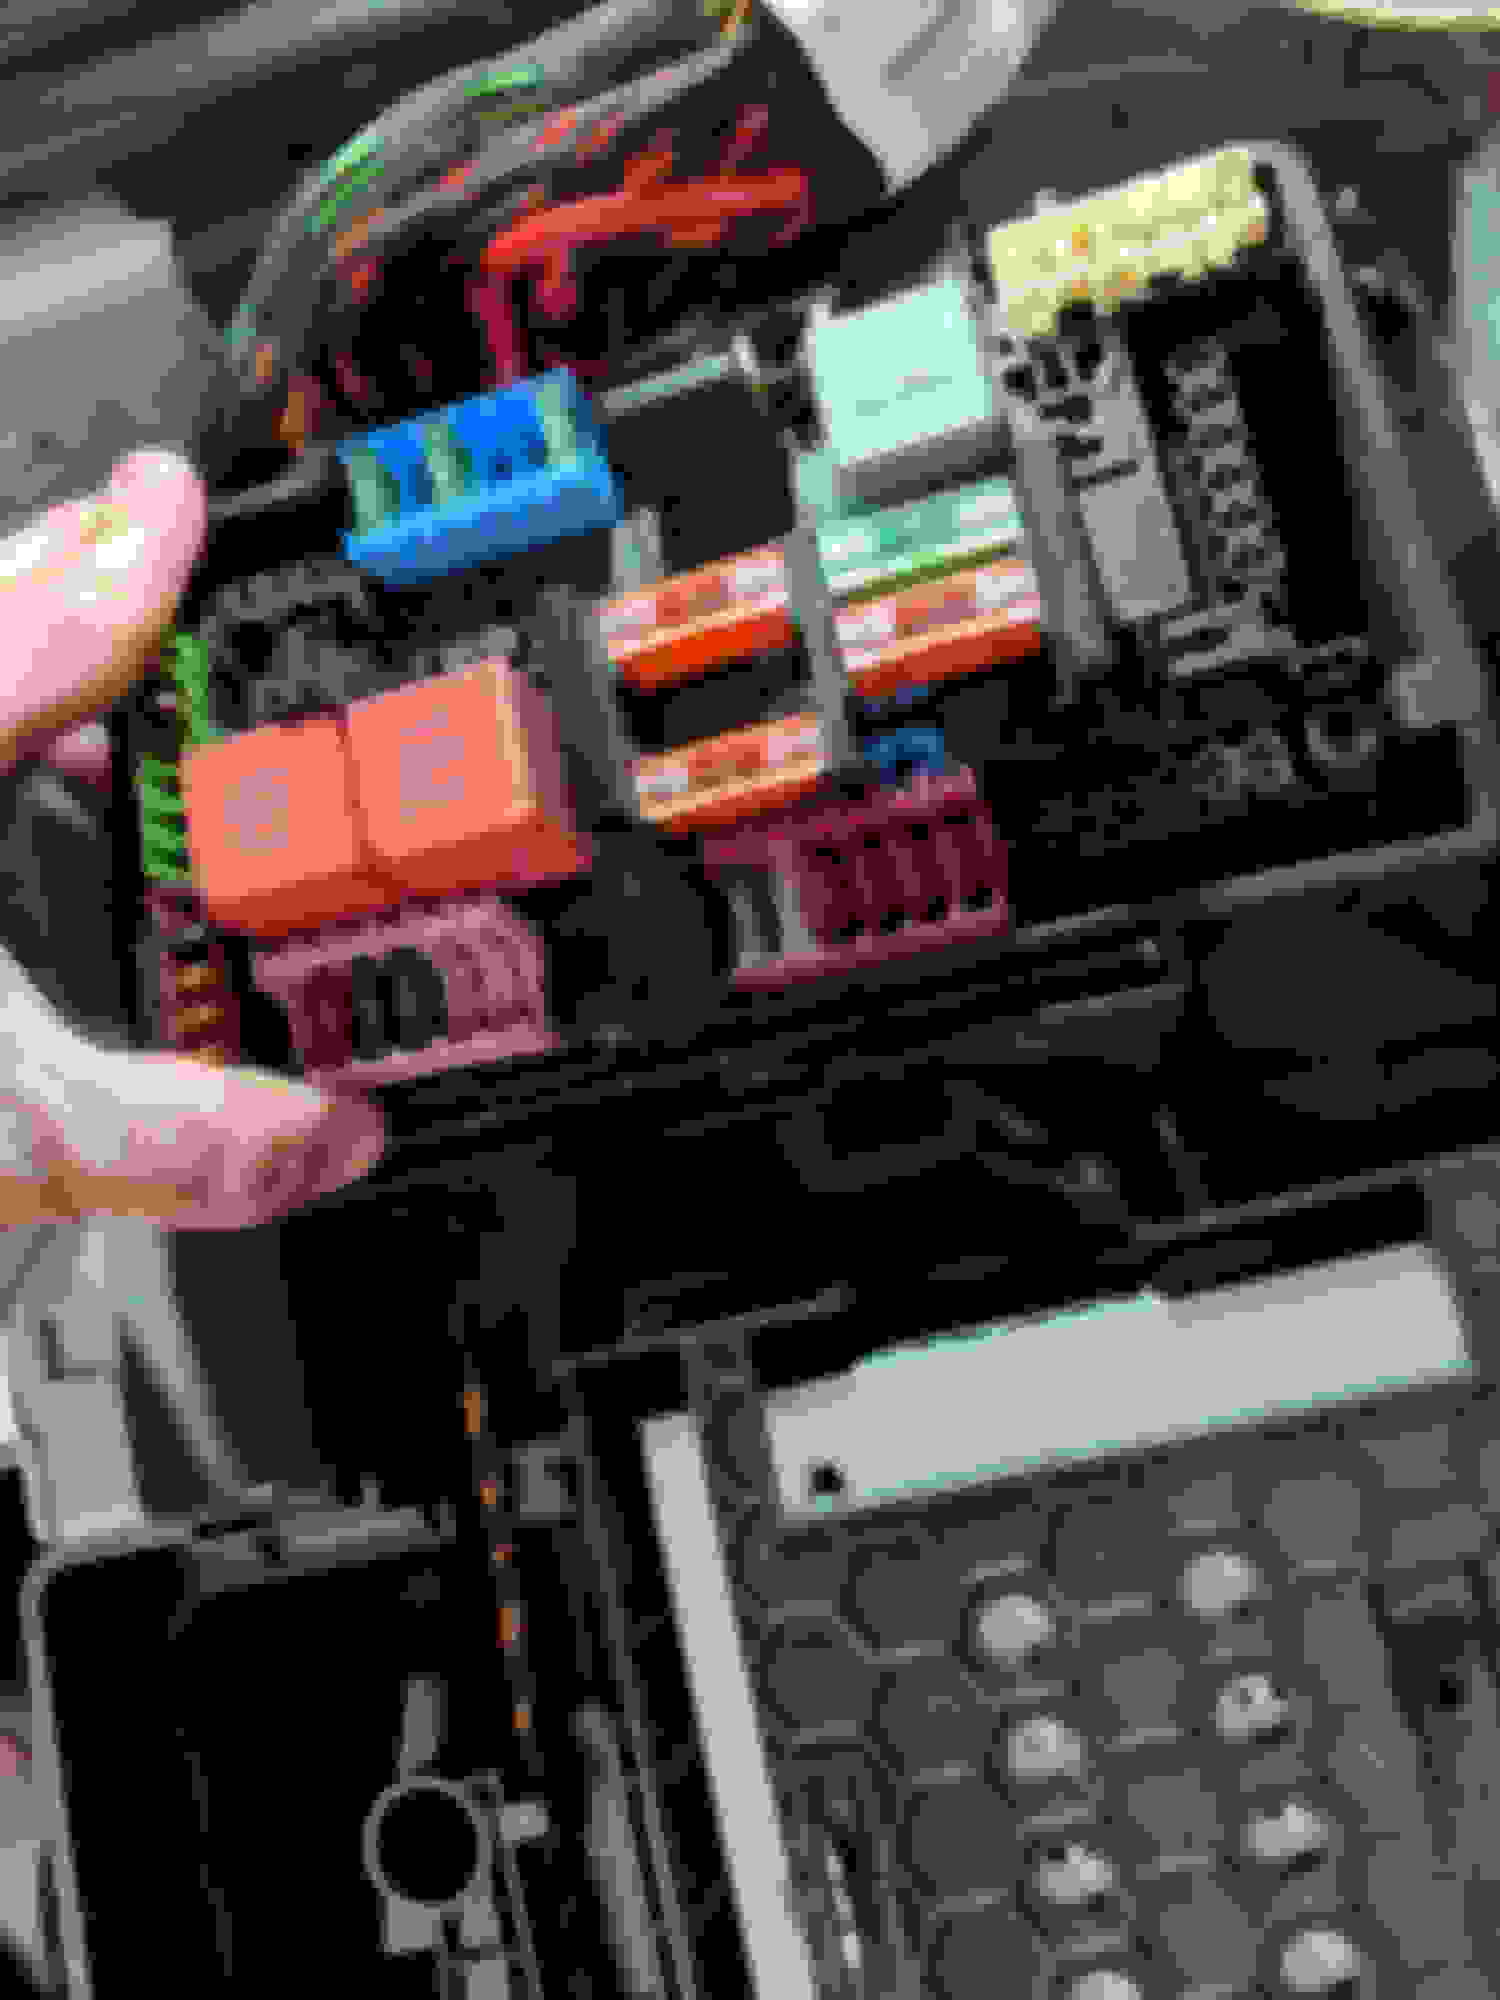
Then I accessed the factory Burmester amp which is located on the reverse side of a metal mount. You must remove the mount in order to access the amp.
I unplugged the amplifier then removed the sheathing of the wire loom to expose the wires.
On the wire loom you must tap into the Pink, Pink/Black and Violet, Violet/Black. Those are the speaker wires for the factory bass speakers.
I then installed a Line-out converter ($25). This will convert the speaker signal to RCA, which will connect to most amplifiers.
After this is complete, you now have the bass signal for the aftermarket amp for your subwoofer.
*Getting Amp Power* (If you are running a high powered system, you must run a wire directly from the battery to avoid damaging the electrical system)
Keep in mind that I have a 300w amp powering a 300w subwoofer (150w rms). I only needed 10 gauge wire.
I accessed the fuse box in the trunk under the mat. Remove the fuse box by pushing down on the tab located between the fuse box and �unknown� unit. While pushing down on this tab, you have to slide the whole fuse box assembly toward the rear of the car and it will come out.
Undo the two T20 screws on the bottom to access the power terminals
Undo the nuts and attach your amp power cable (don�t forget to use an inline fuse).
I used one of the grounding studs behind the liner for my ground.
I also tapped into one of the AUX power fuses to control the amp�s remote function (this will turn the amp on and off with the vehicle key)
Install everything back and enjoy the improved bass. Amp is behind the bracket Wire loom to amp Line out converter installed Fuse box for amp power T20 screws on bottom Bottom cover removed from fuse box fed wires through carpet finished install
I have my amp�s gain set pretty low. I adjust the bass using the factory sound menu. It works pretty well.
I saw you listed which color wires in the car are needed, but which wires go to which from the SNI35? It�s hard to tell on the picture. Thanks.
Great thread. I'm saving this for when I chose to decide how to upgrade my sound. My previous C350 with the HK package had better bass output that my BM package in my c63. I've deciding if I want to replace the two subs in the footwells with upgraded 8" versions from Focal or Eton, or just put a stealthbox in the trunk with a 10" sub/amp combo.
One topic I saw over and over in this thread is the power wire for the amp. I agree, best to run a dedicated line to the battery so you don't steal amperage from other key components. Fortunately, the coupes have their main battery in the trunk, so that's a simple process for me.
Mercedes SLR McLaren 722 S Is Extremely Rare Example Modified by McLaren
Slideshow: A one-of-one U.S.-spec Mercedes-Benz SLR McLaren Roadster became even rarer after a factory-backed transformation at McLaren's headquarters.