When you click on links to various merchants on this site and make a purchase, this can result in this site earning a commission. Affiliate programs and affiliations include, but are not limited to, the eBay Partner Network.
This is a chronicle of my project to update/upgrade my base (avantgarde) C300 body styling to the facelift C63-style body styling. I'm ordering the parts online and doing it myself in my spare time in a home garage.
Before anyone says “It’s not a C63!”... no s**t, lol… I don’t live in an ego-driven fantasy world by thinking in ANY WAY I'm making an AMG C63 or even pretending like I have one. I'm not. It's not my reason. Badge engineering makes me cringe and it’s not what this is about. If you’re into putting Lamborghini badges on a Toyota Camry, go for it. I’ll have no part in that, thank you.
So, with that bullsquat out of the way… in my opinion, the C63-style front and rear styling works better (cleaner lines) with the W205 body style, especially when lowered. I like the styling much better, I want the look on my car, so here I am changing things.
If you've been thinking of doing similar work on your car, the best advice I can give anyone is to buy a W205 Workshop Manual online. I paid around $20 for a downloadable PDF. If you take your time and don't attack things like a drunken Viking, you can do this! It's all in the W205 Workshop Manual and it will demystify the processes, fasteners, tools and methods. I’ve been wanting to do this for some time, but what held me back from doing it earlier was the general fear of the unknown. Would it fit correctly? Would I have to buy a zillion tiny unknown parts? Would it be so expensive that I’d be eating Ramen noodles for a year? Would I totally f-up my car? Answers: #1-Yes, #2-No, #3-No, #4-No.
Since most of the required information is out there (in the W205 Workshop Manual), this is just a high-level overview of my experience as opposed to an in-depth how-to.
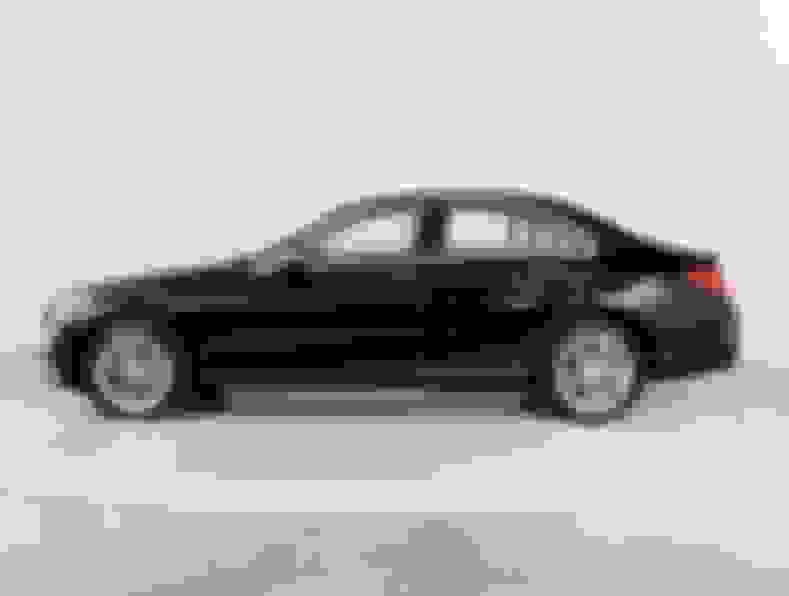
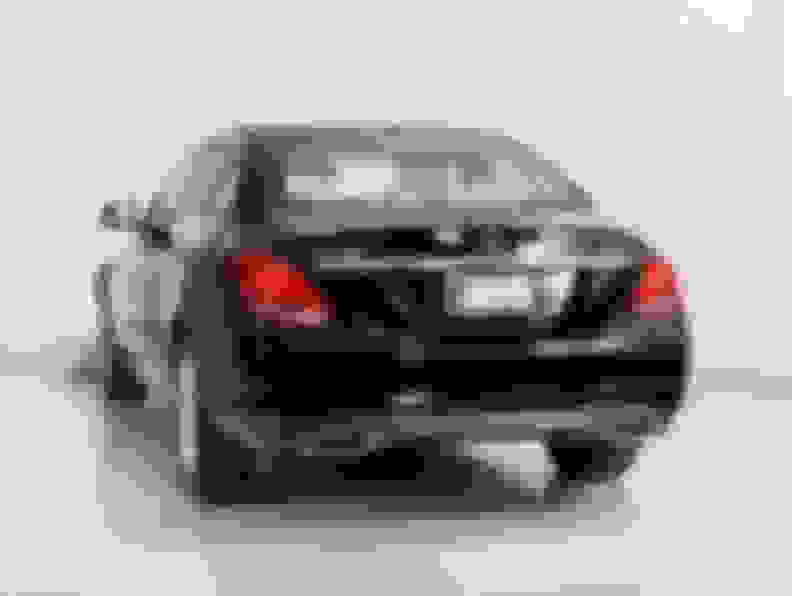
A Quick History - Pics of the car at the dealer just before I bought it, a 2015 C300 4MATIC purchased in 2018 w/25K miles:
I've done stuff since, as I can never leave my cars stock (it's a sickness!), however the only "body styling" related changes at this point are a diamond front grill, a black/chrome hood emblem and a rear spoiler. So, here we are recently, before any planned body part changes:
What's to be done is replacing these body components:
Rear Bumper
Rear Diffuser w/Exhaust Tips
Rocker Panel Covers ("Side Skirts")
Front Bumper
I'm not doing this all at once, I'm doing it as I have the extra free time from the rest of my life to do the work myself. Because of my time constraints, it may be weeks or even months between updates but I will post up when I make the changes. My hope is that in the end, this will serve as a decent example for others wanting to do the same.
Last edited by Keith66; 10-11-2021 at 10:06 AM.
Reason: Slight grammar correction.
I'm starting at the back and working my way forward. I snagged a great deal on Ebay for a new aftermarket, (painted Black #040) AMG-line Sport Rear Bumper Cover for $350 shipped. Woot:
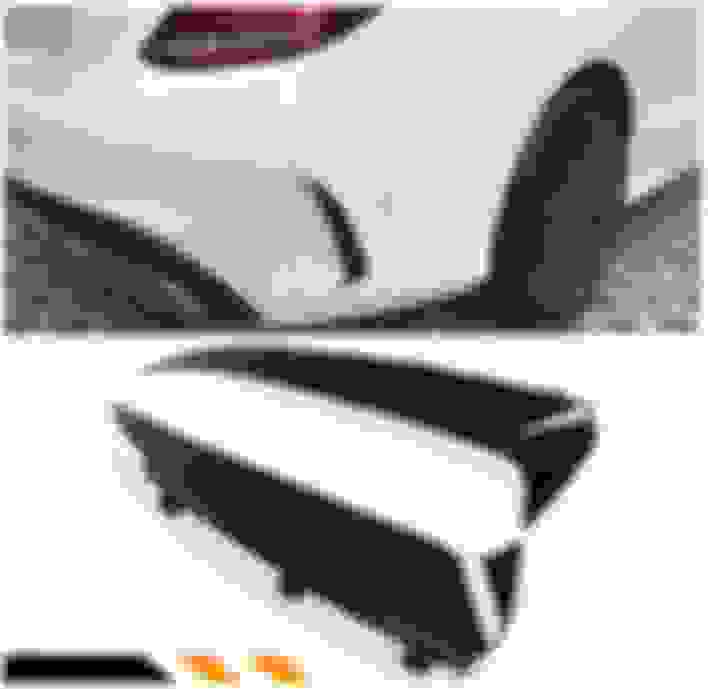
Ordered an aftermarket facelift (2019+) C63 Gloss Black Rear Diffuser w/chrome tips $485 shipped:
Ordered a pair of Gloss Black Rear Bumper Vent "Canards"/Winglets (snap-in) $45 shipped:
A reminder of what I�m starting with:
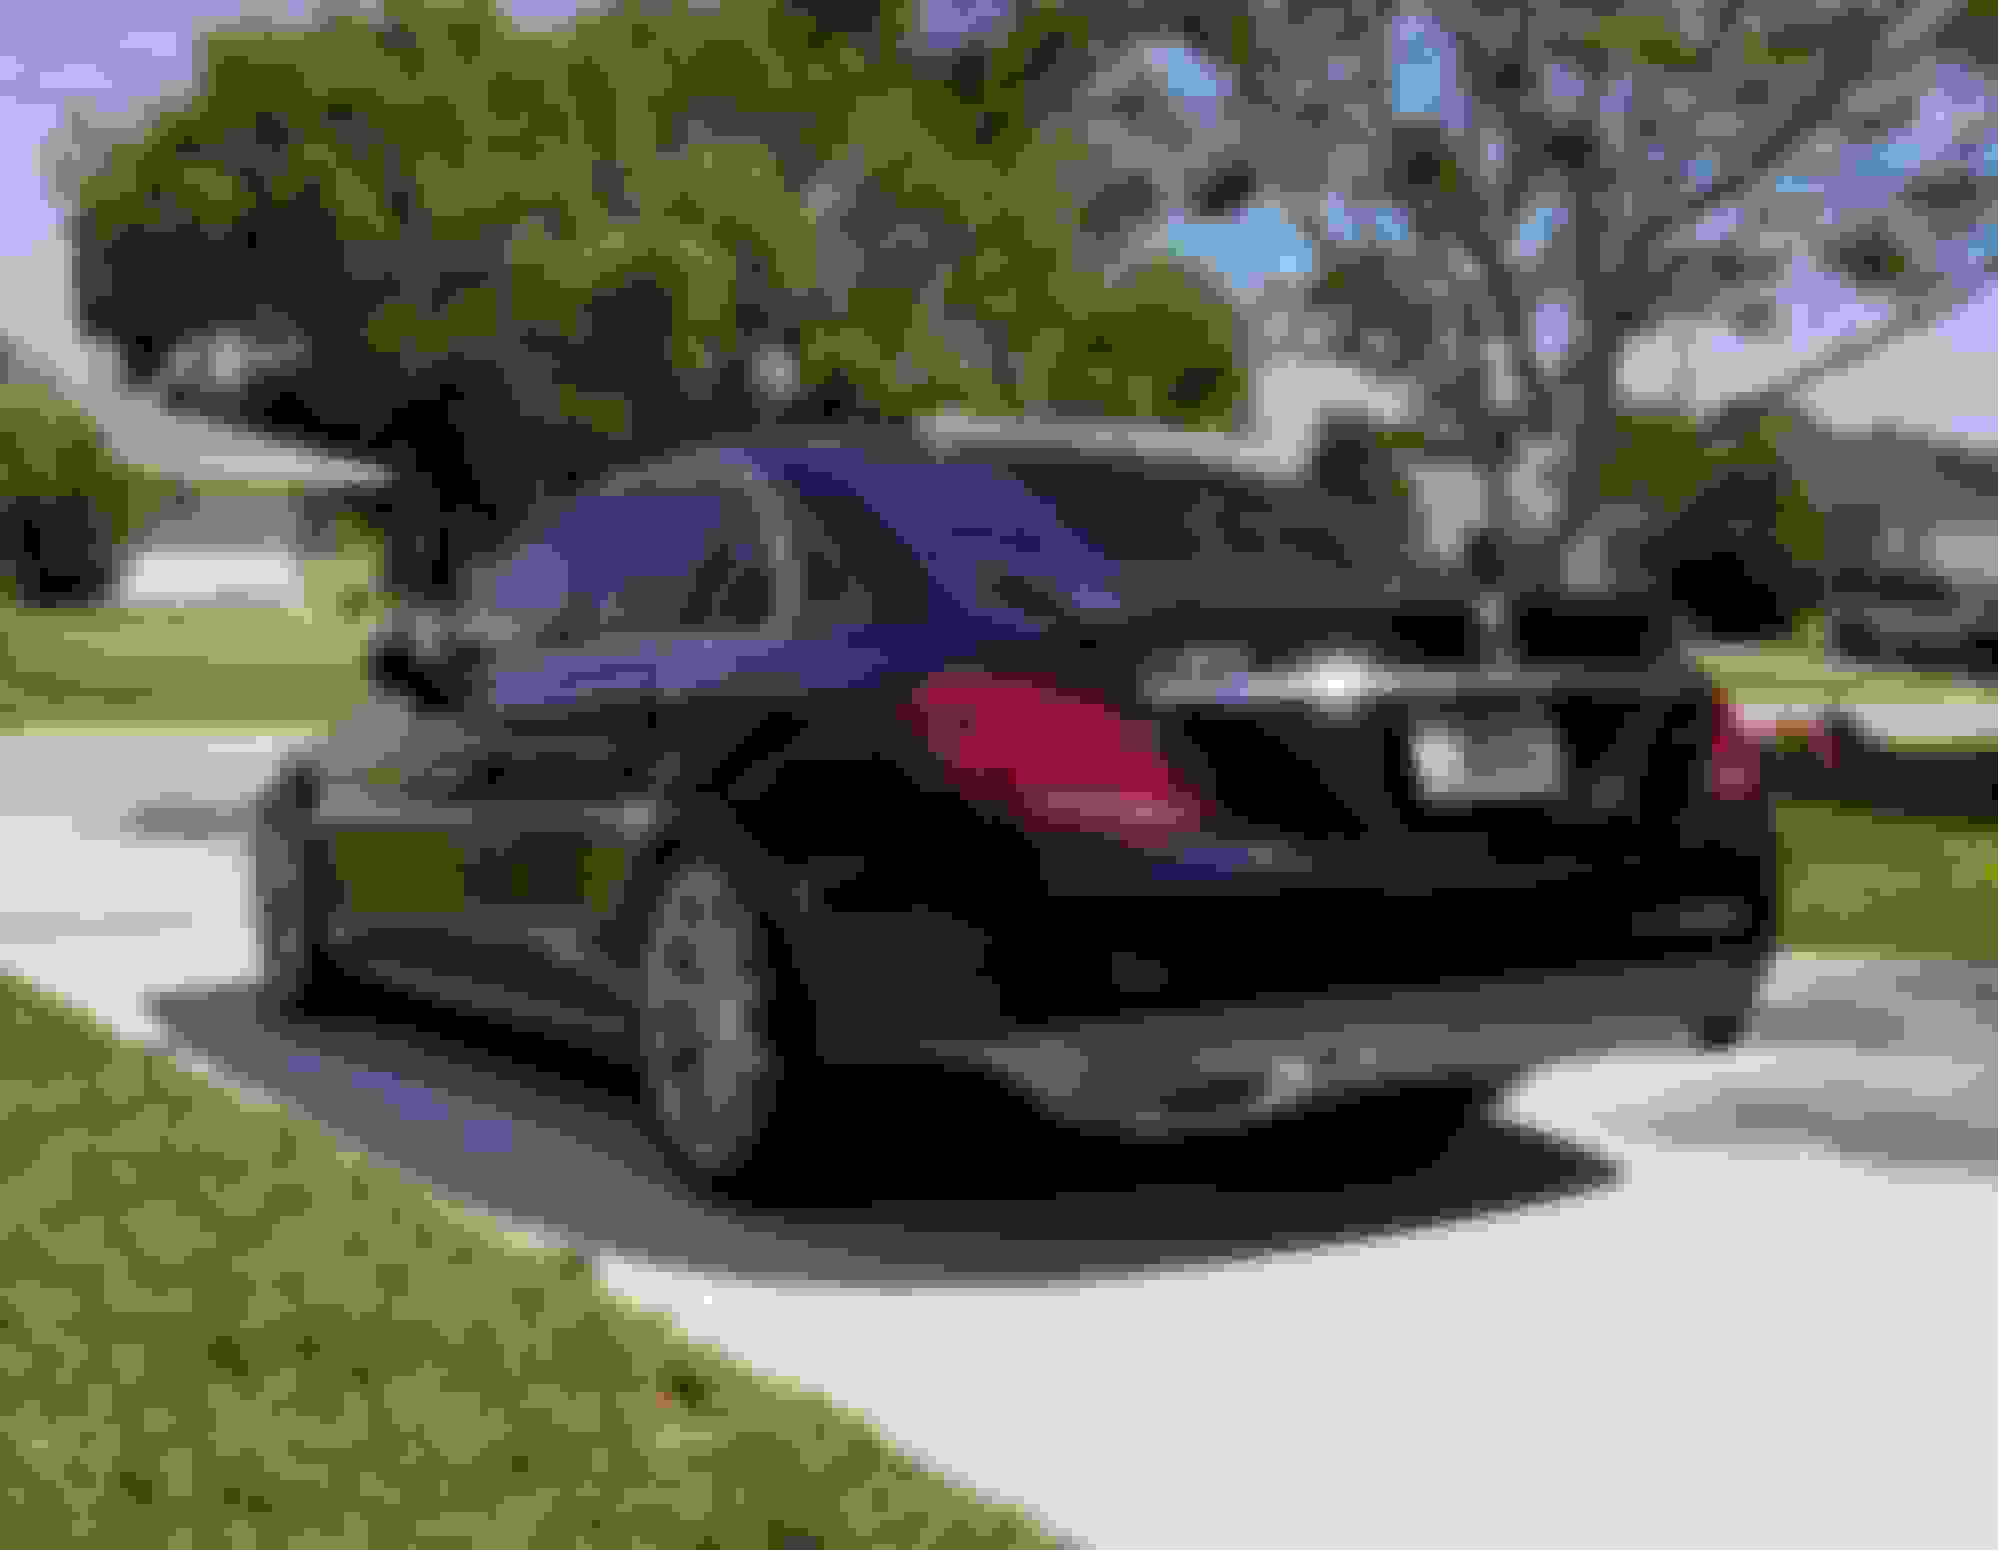
Bumper is off! That was quick: :p
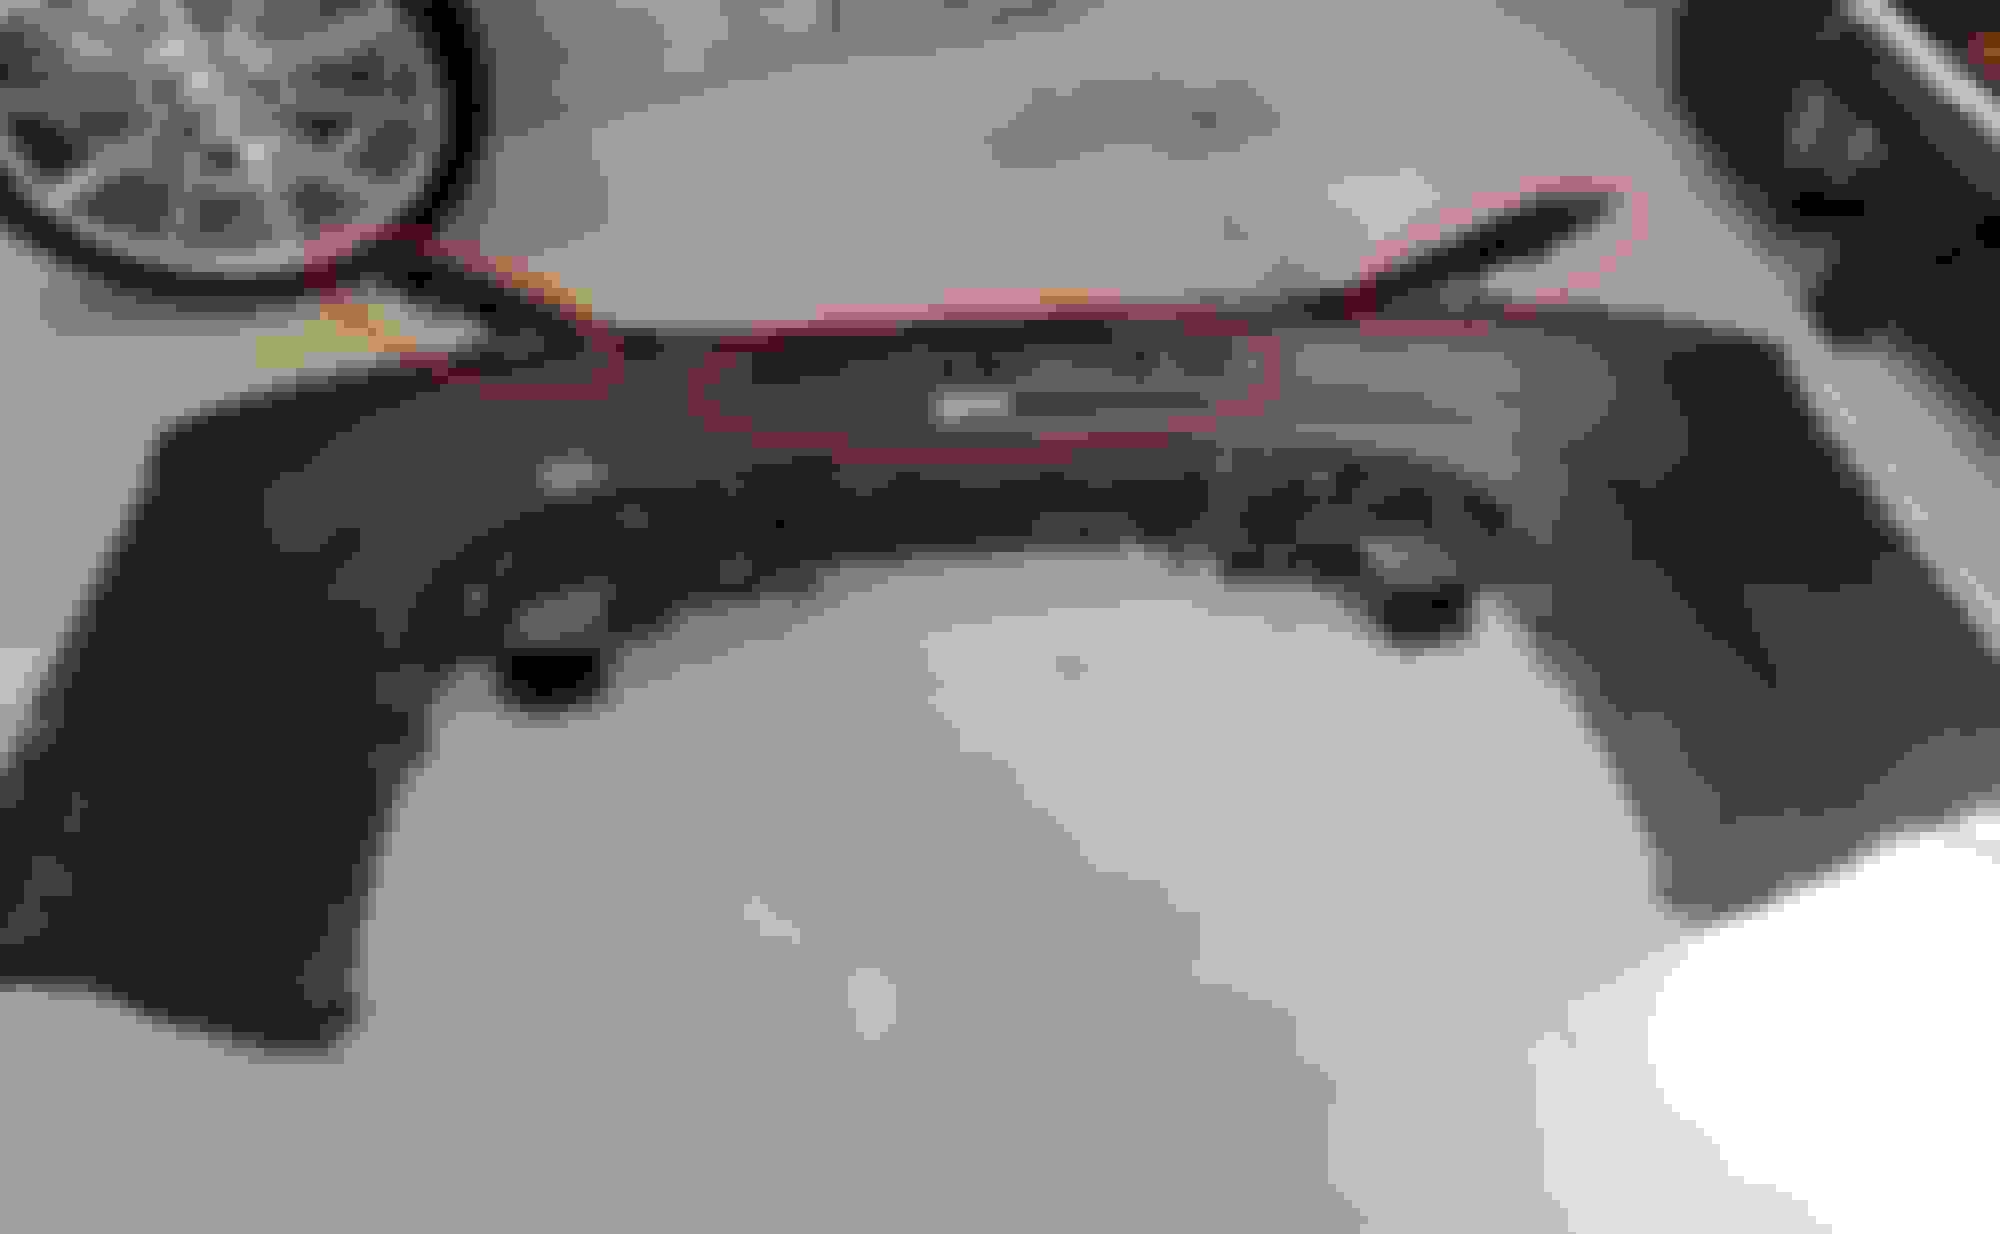
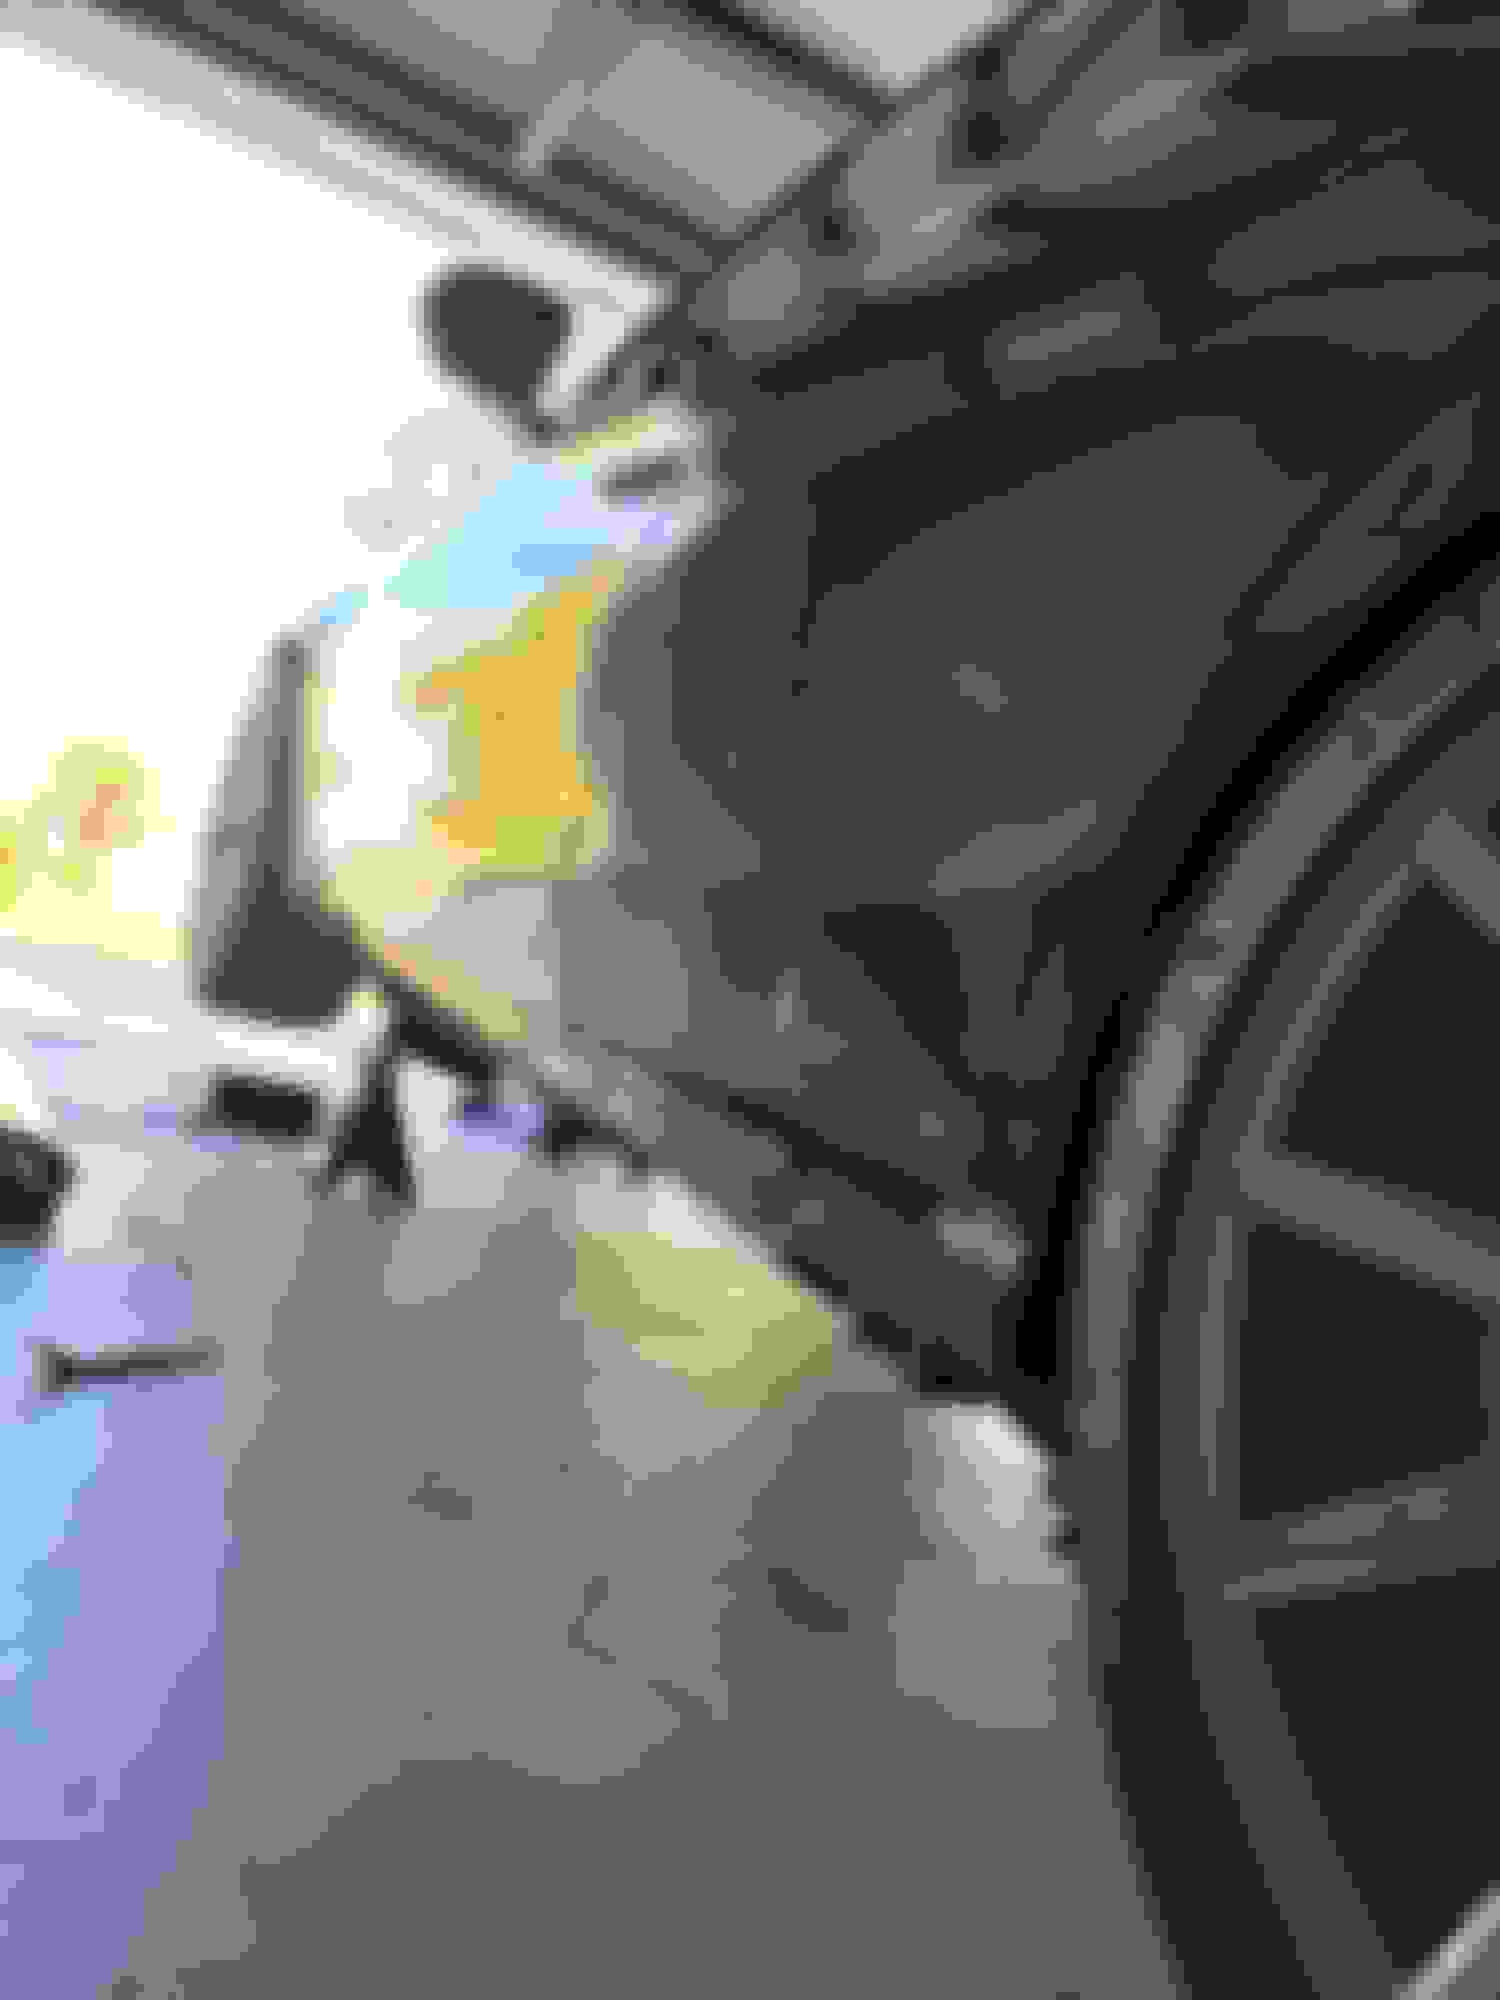
The original bumper and diffuser comes off as one piece. The plastic inserts with the studs (circled in red) will need to be transferred to the new bumper (snaps/clips-in):
One of the small things that has bugged me about this car is how you can clearly see the mufflers behind the fake exhaust tips. To try to blend the mufflers more into the shadows, I painted the muffler ends with high-temperature black stove paint:
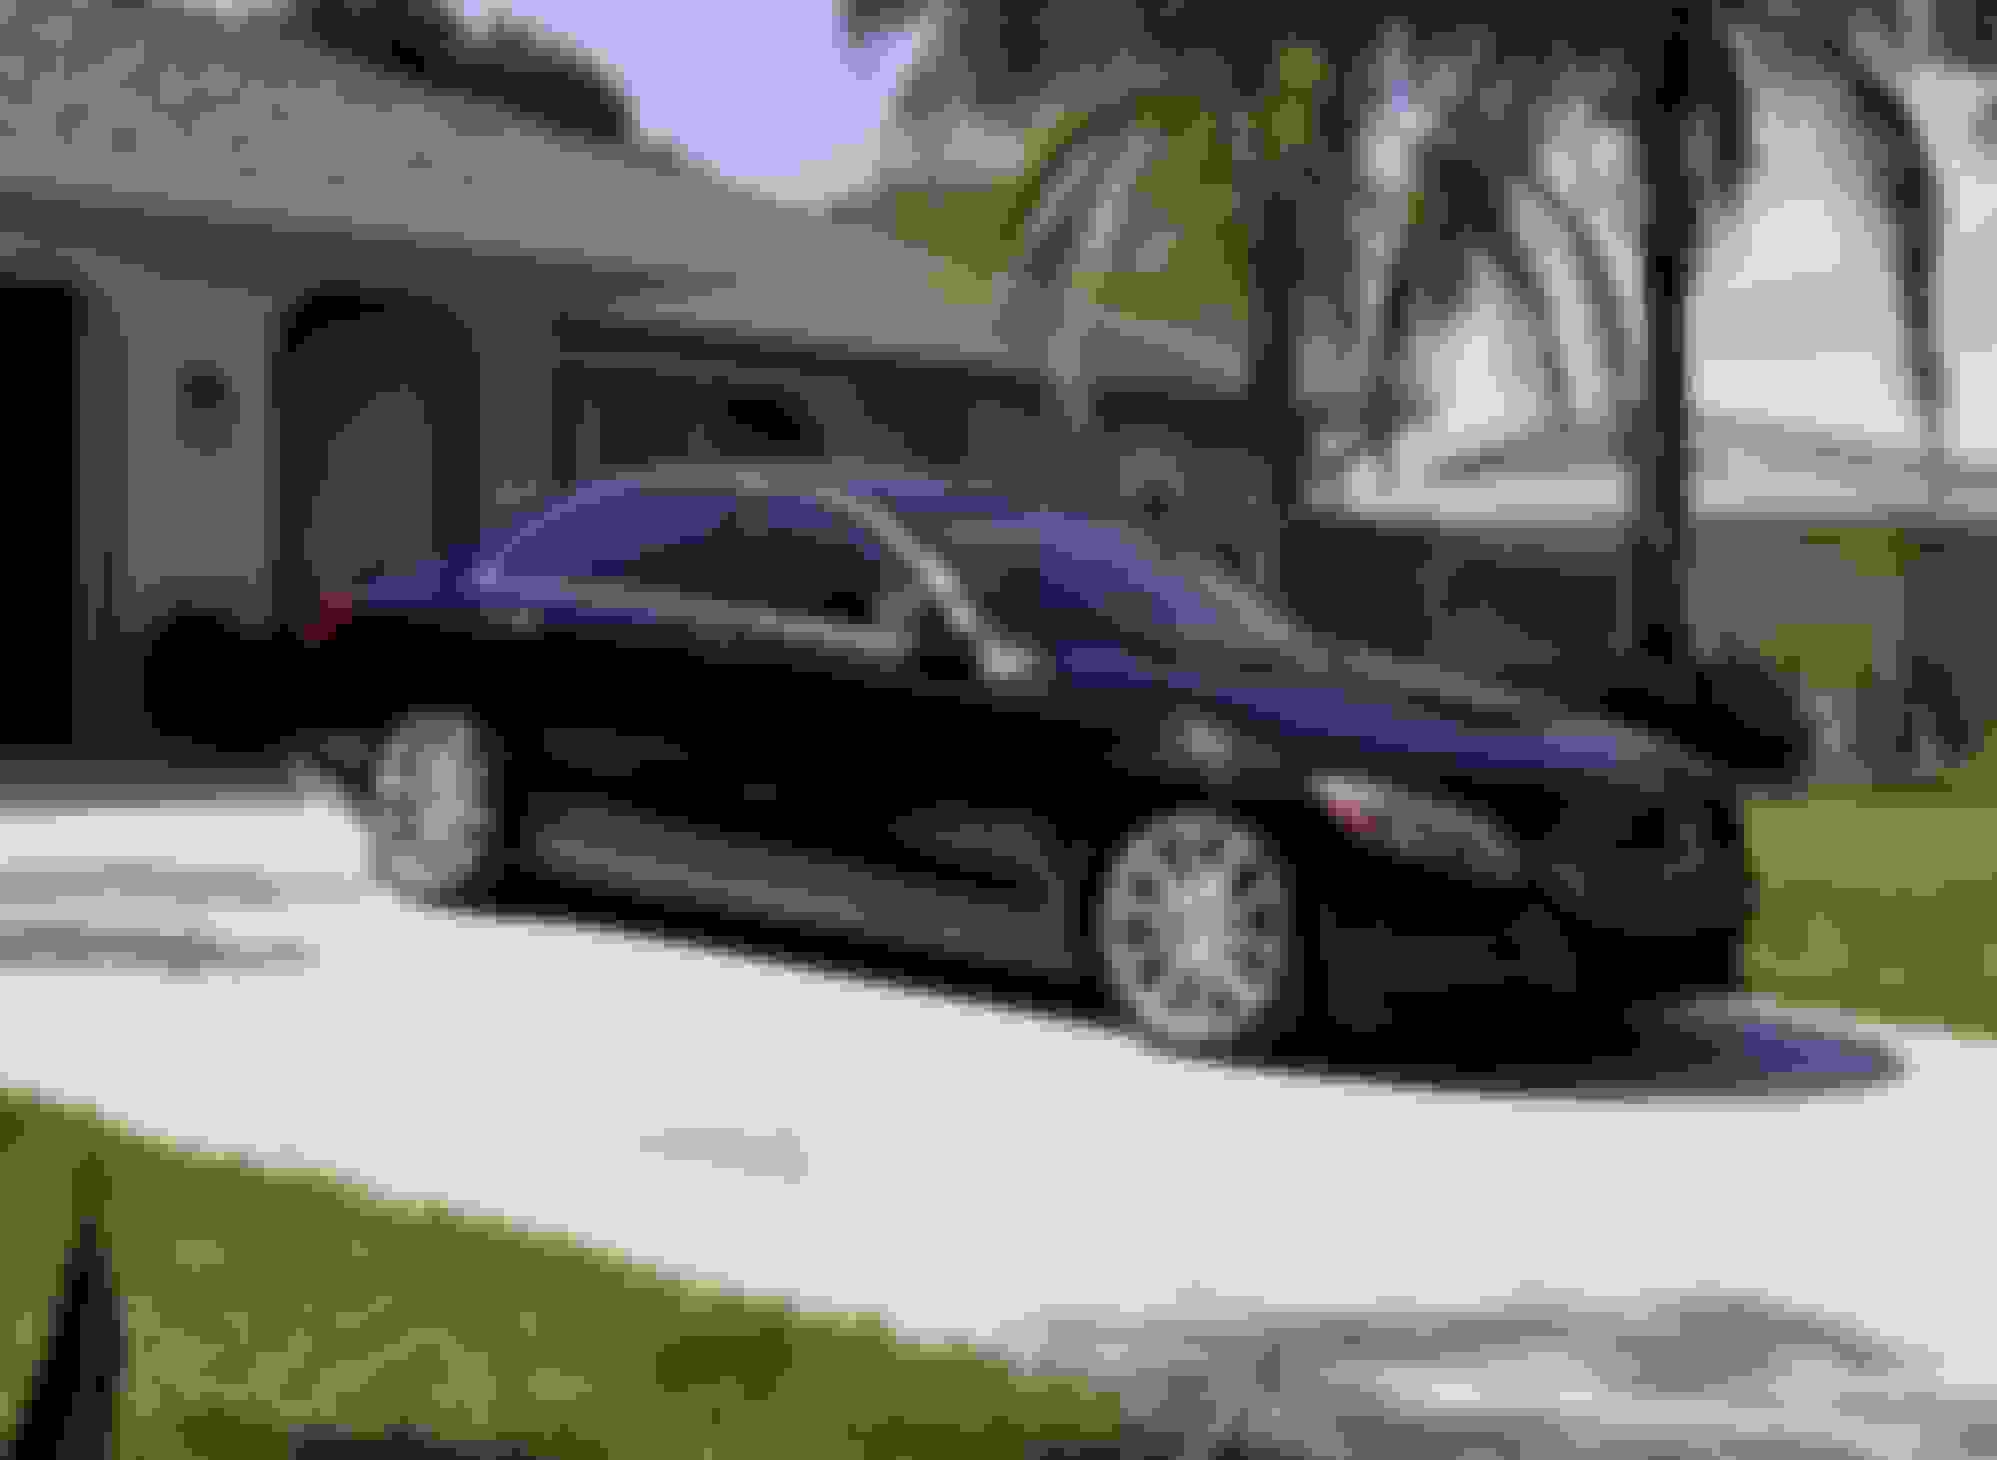
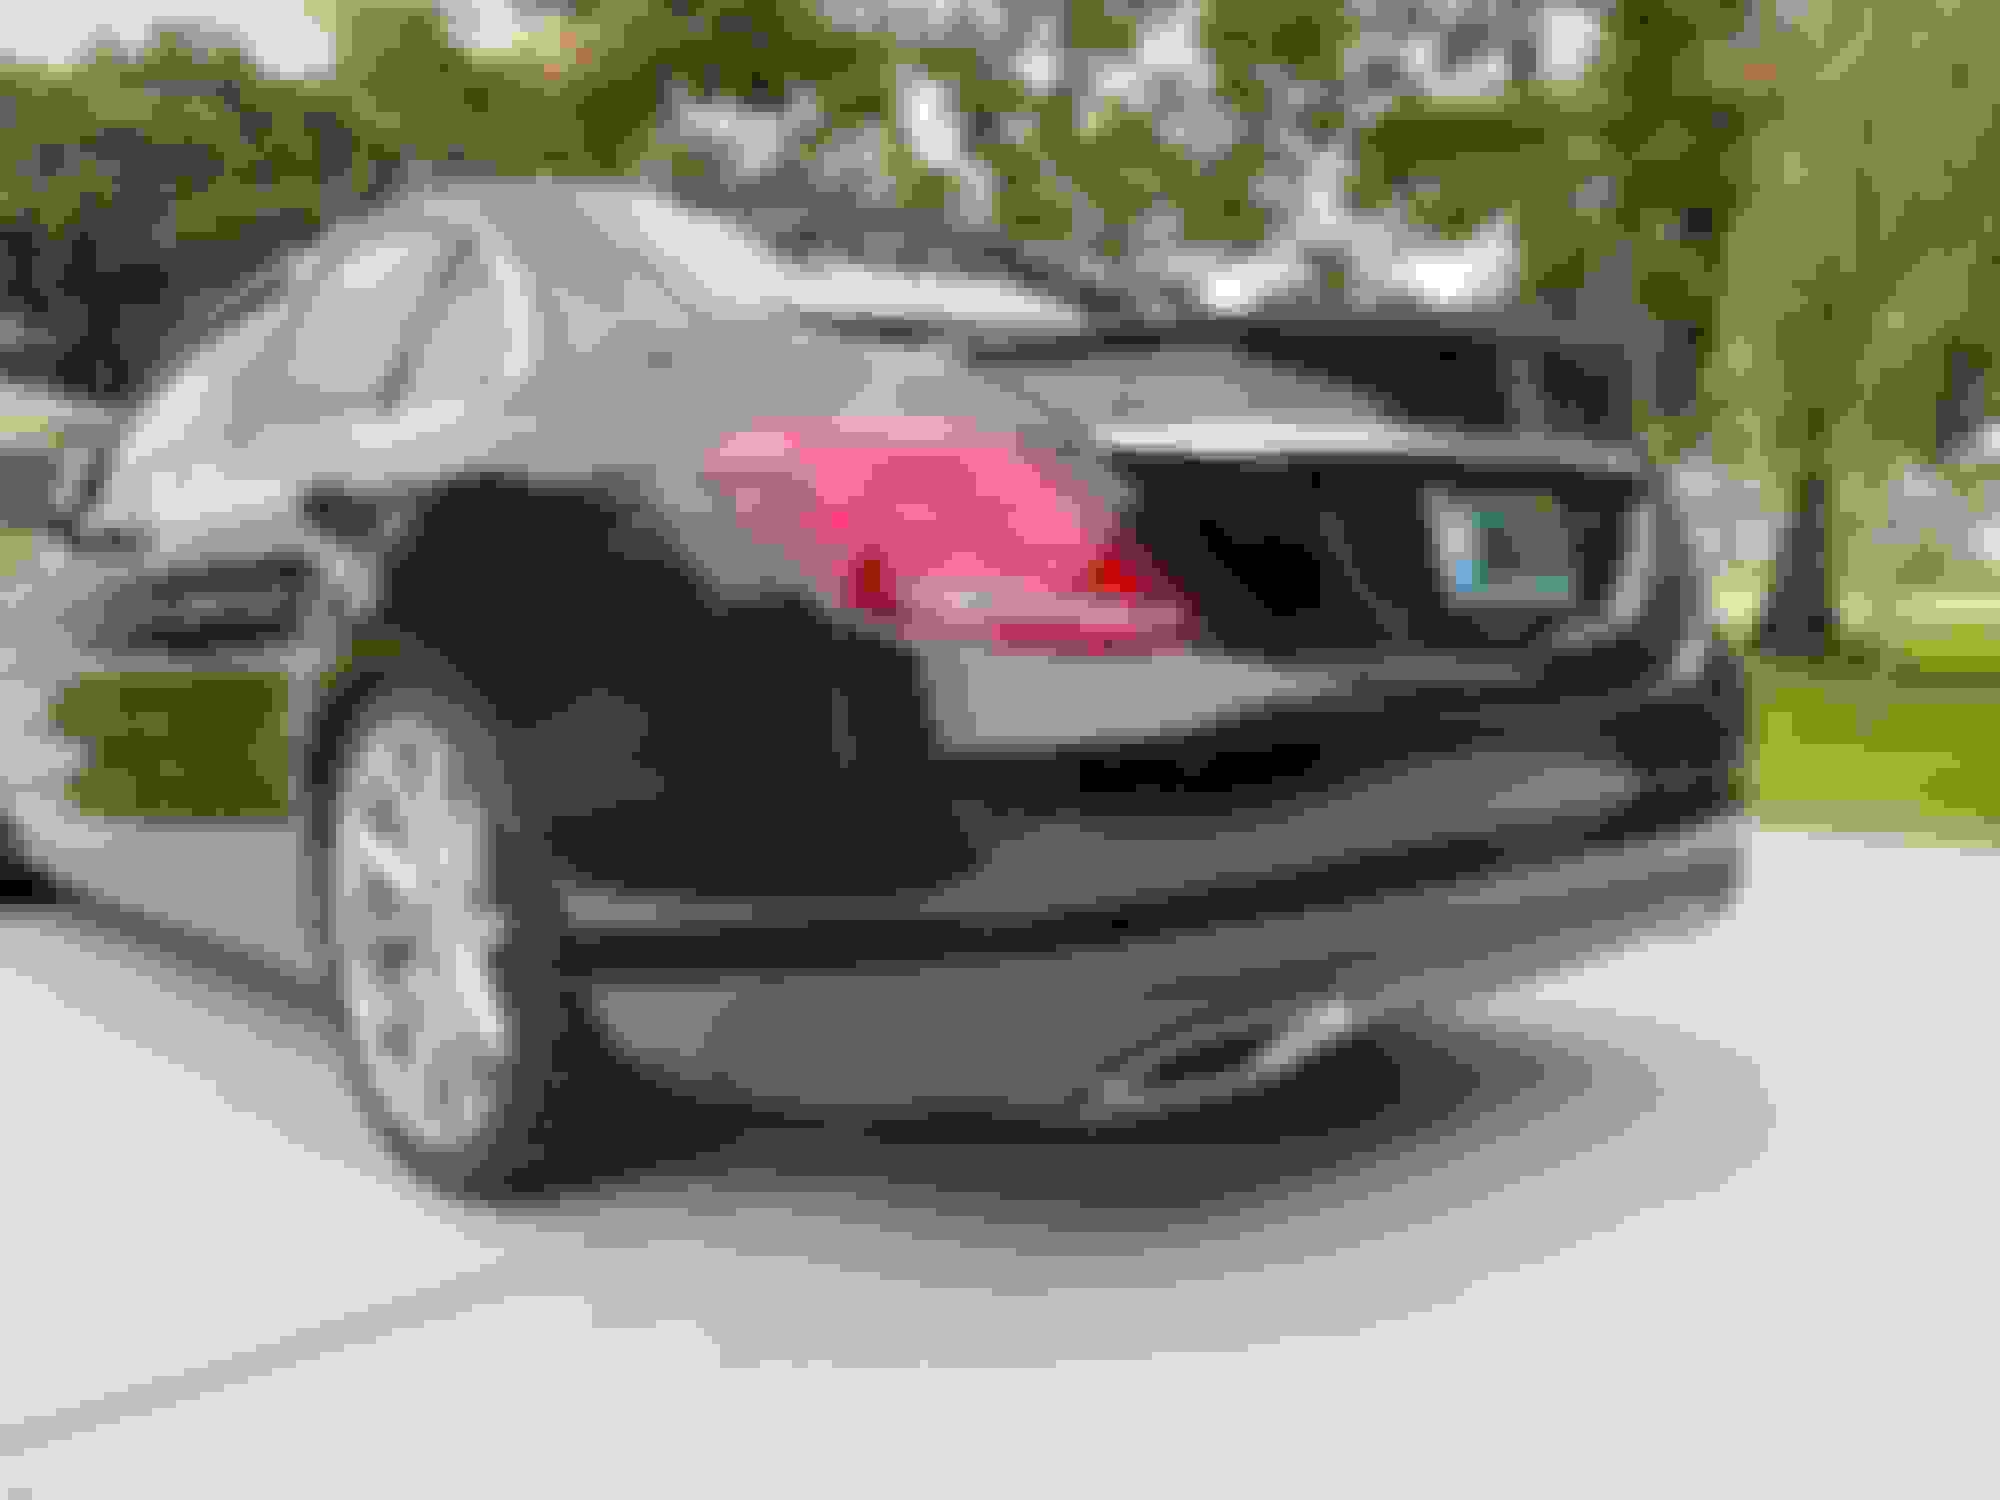
New bumper is on!:
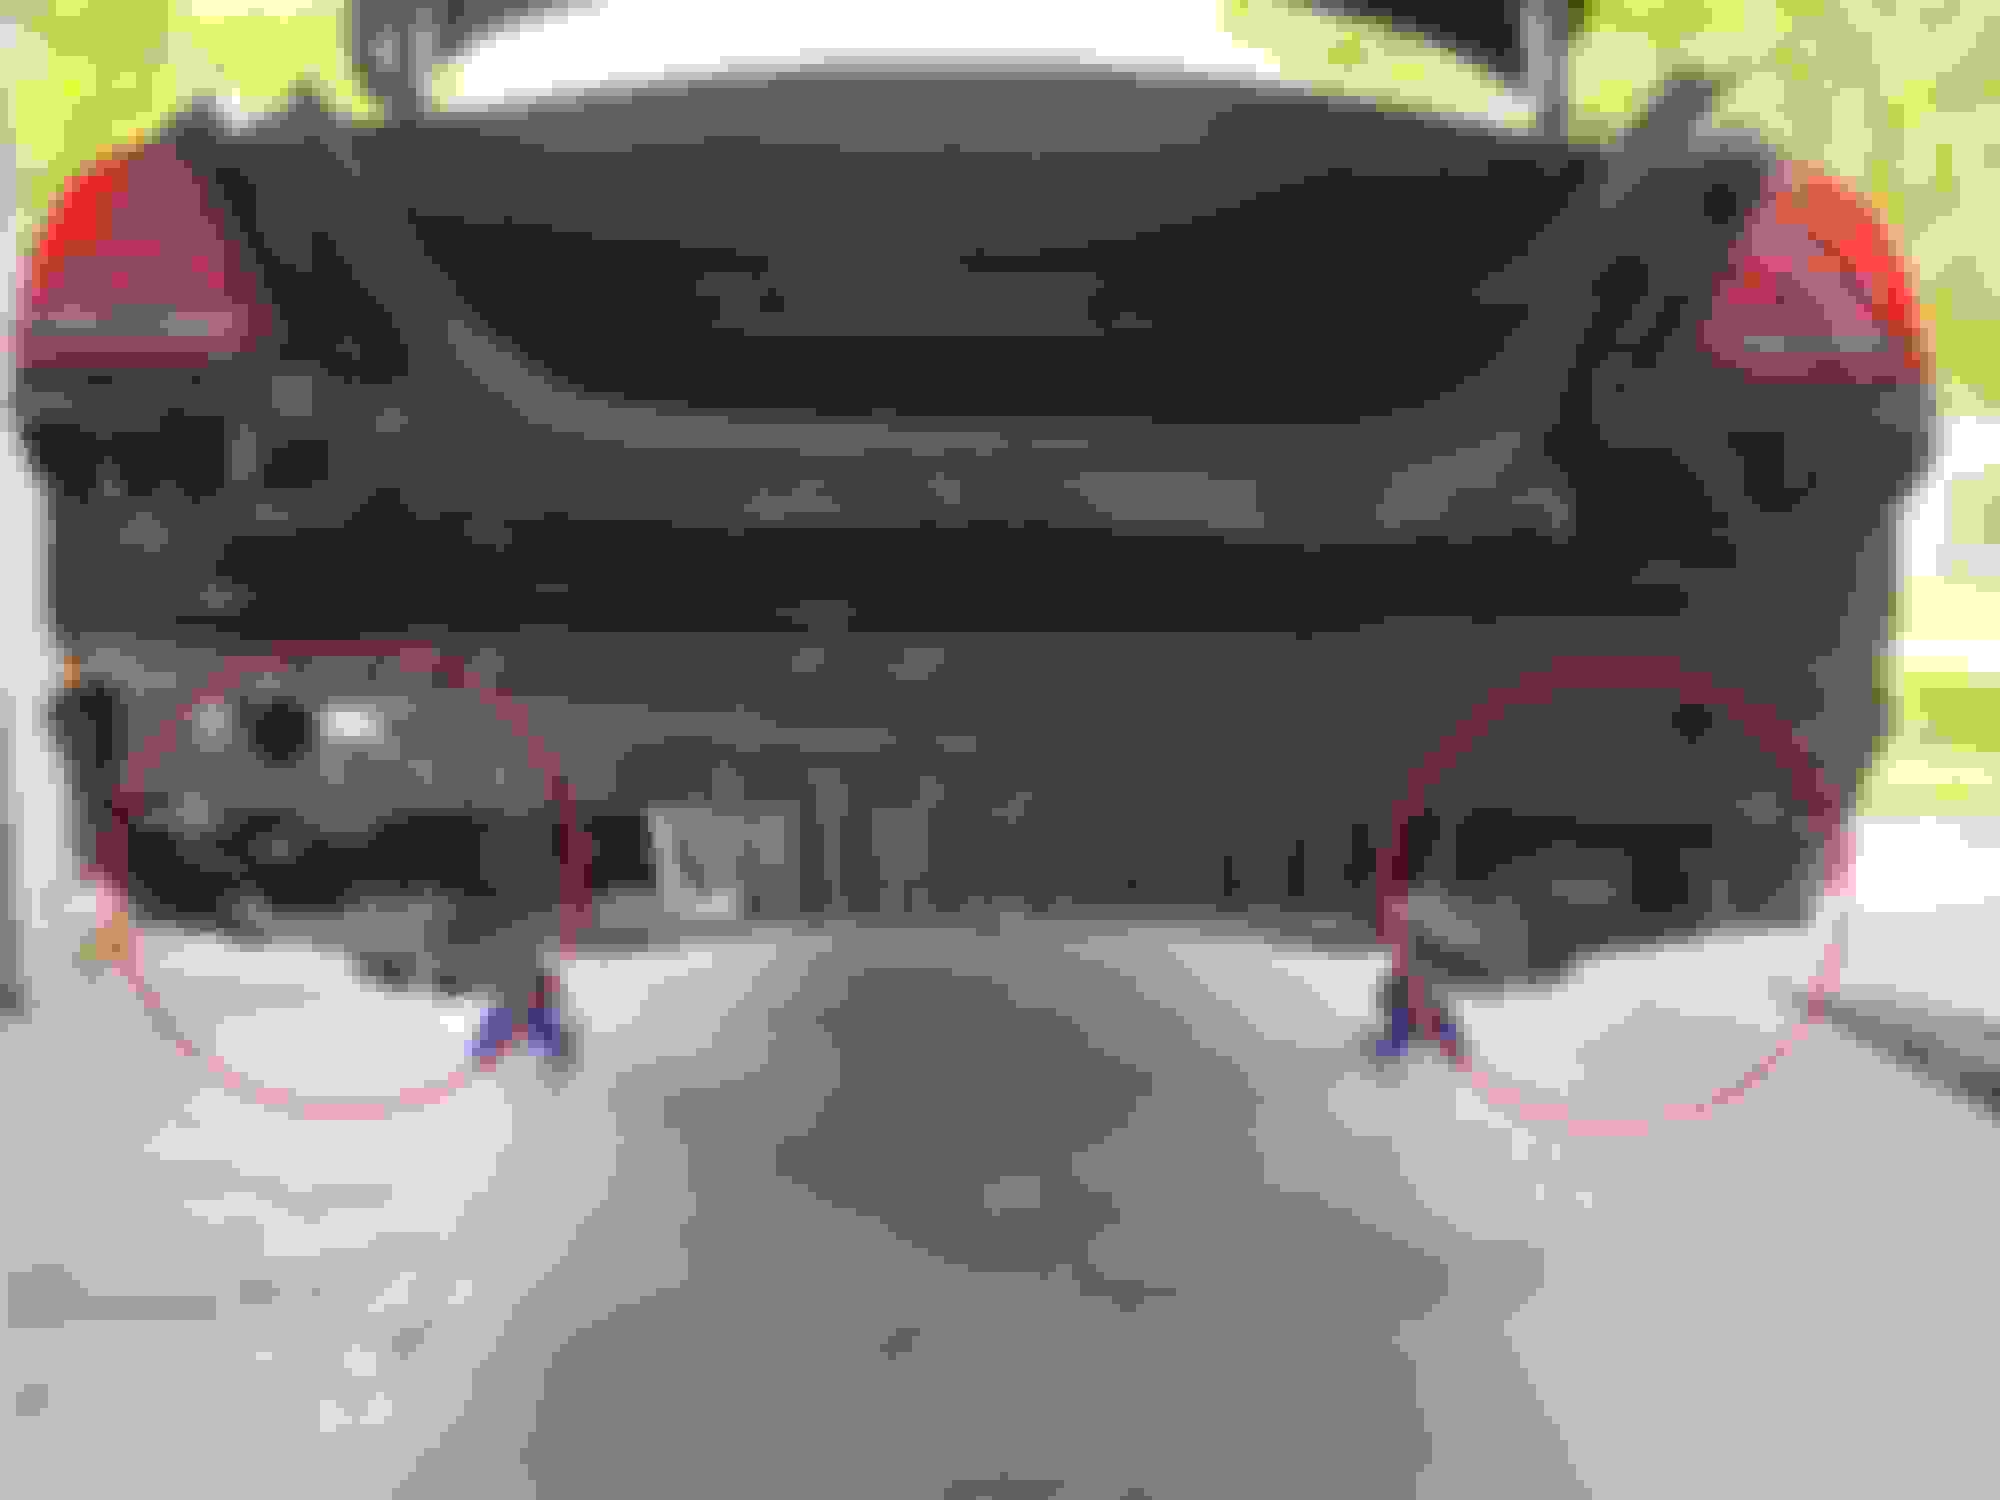
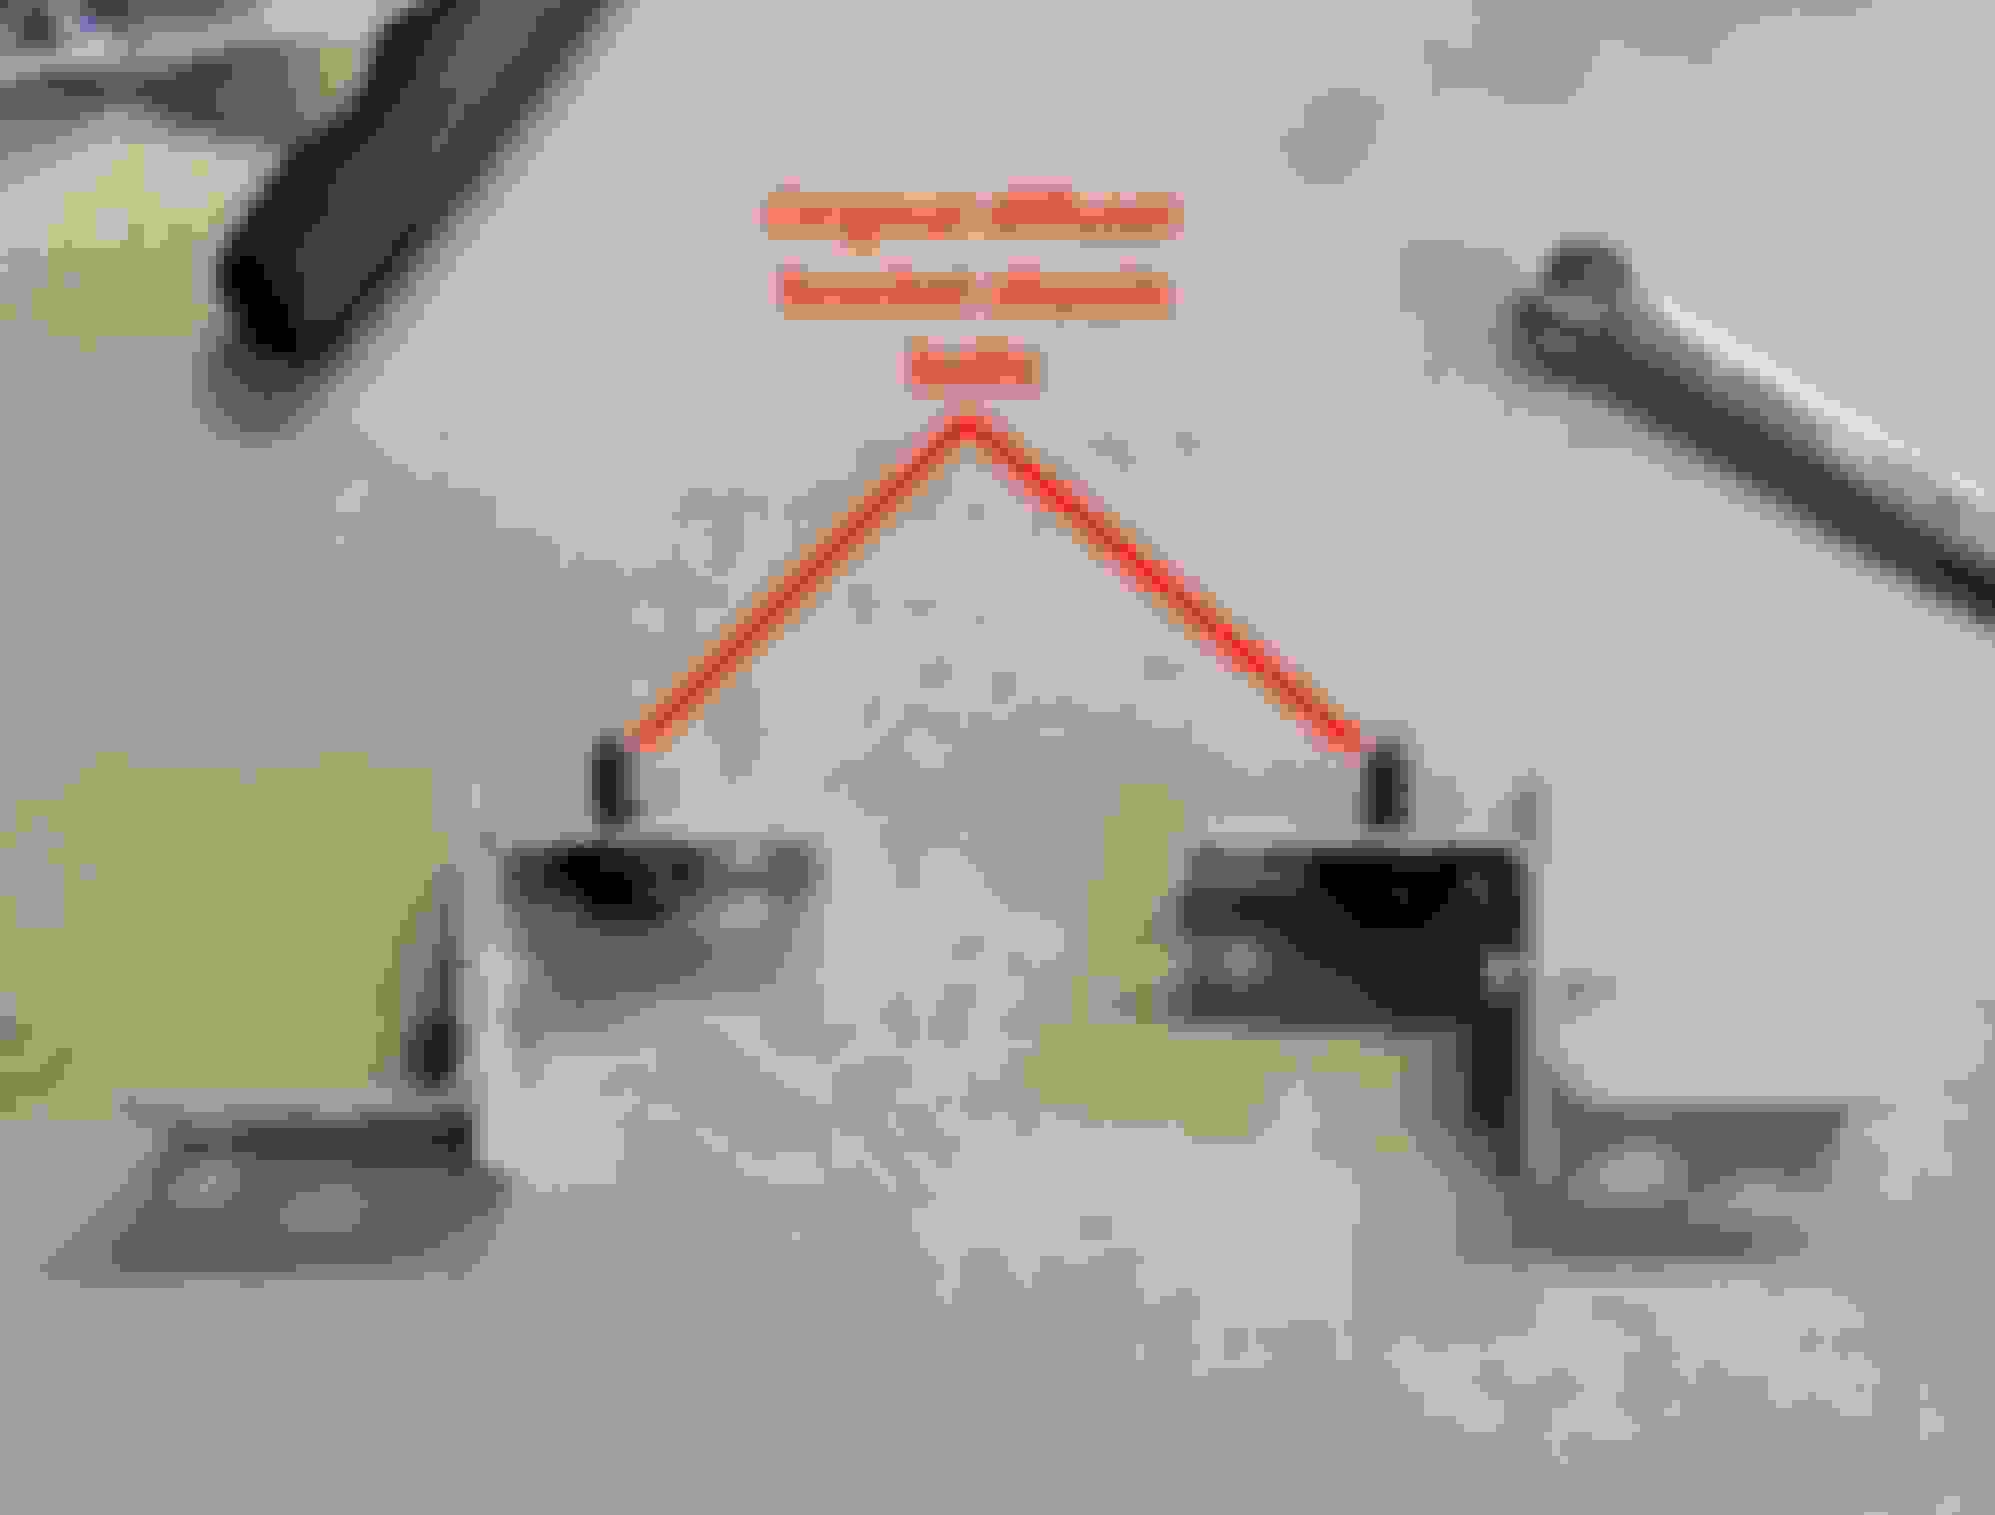
The new-diffuser to original-diffuser chassis mounting points did not line up, neither "left-right" or "up-down". Here's the issue (a minor issue):
There are many ways this can be corrected properly. I'll share my "special engineering" solution (not saying I'm right, just what I came up with): Using 4 small metal L-brackets (can be found at any hardware store) and 5mm machine screws, flat washers and nylon-insert locking nuts, I made 2 brackets to fill the gap and correct the offset of the mounting bolts:
Here's what it looks like installed on one side:
And here it is completed:
My description and the pictures may not make any sense without being familiar with the parts. When you go to do this work, it will definitely make sense then. I've found one of the advantages of having this type of bracketing is it allows you loosen the chassis mounting bolts and rotate the brackets to adjust the exhaust tips in and out to achieve flush-ness and make them even. Tightening the chassis bolt while holding the tip where you want it locks the adjustment and it's solid.
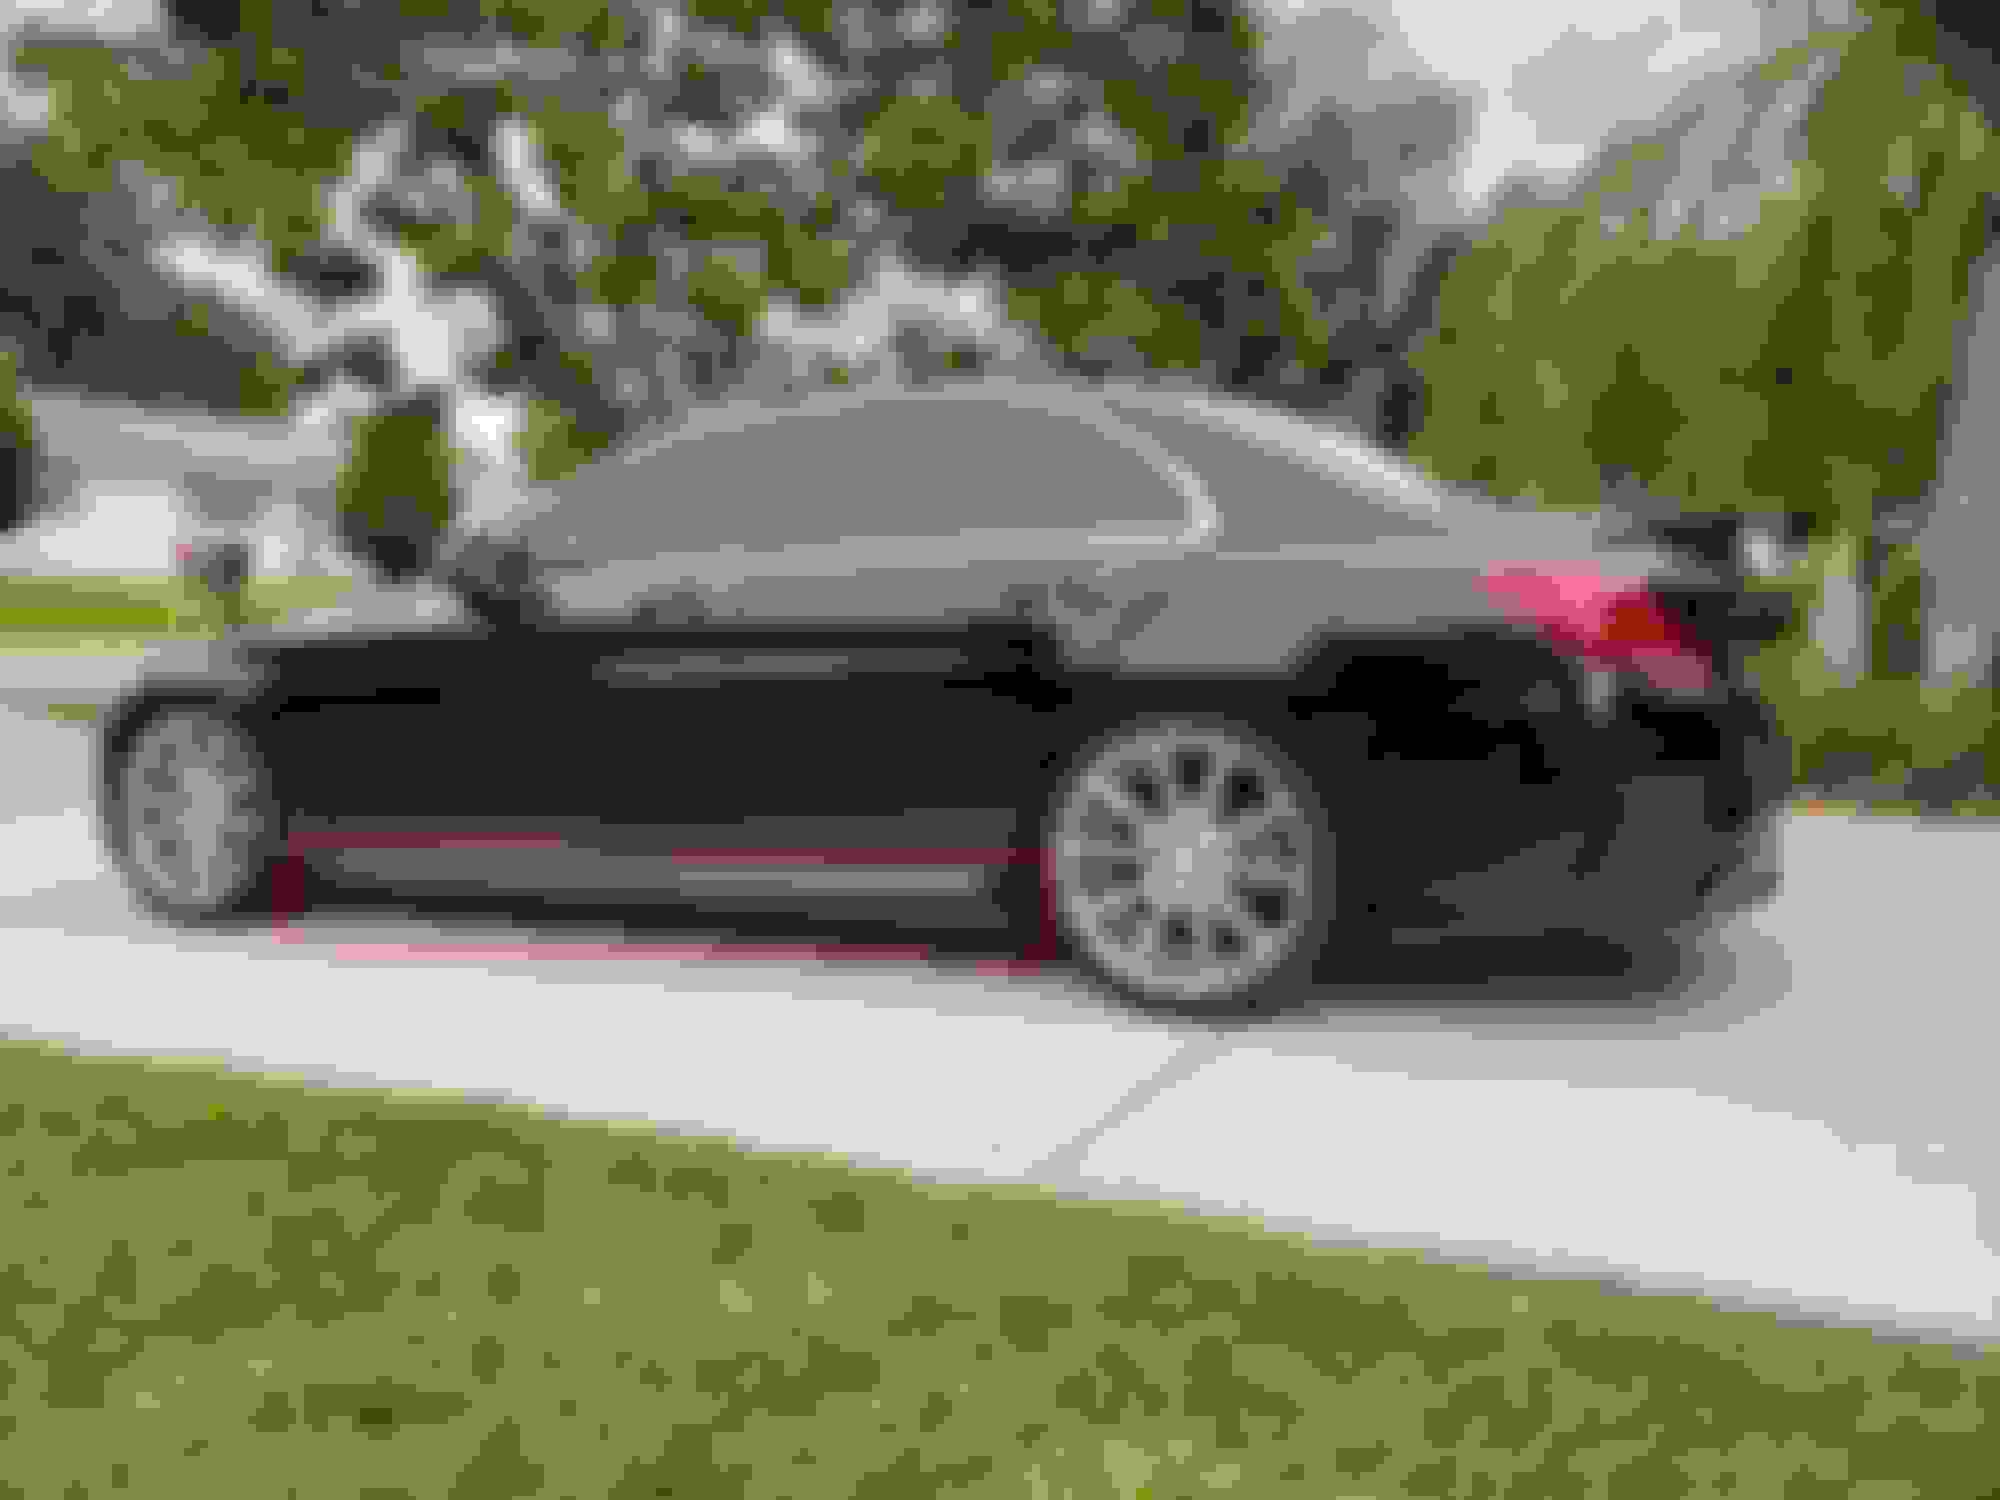
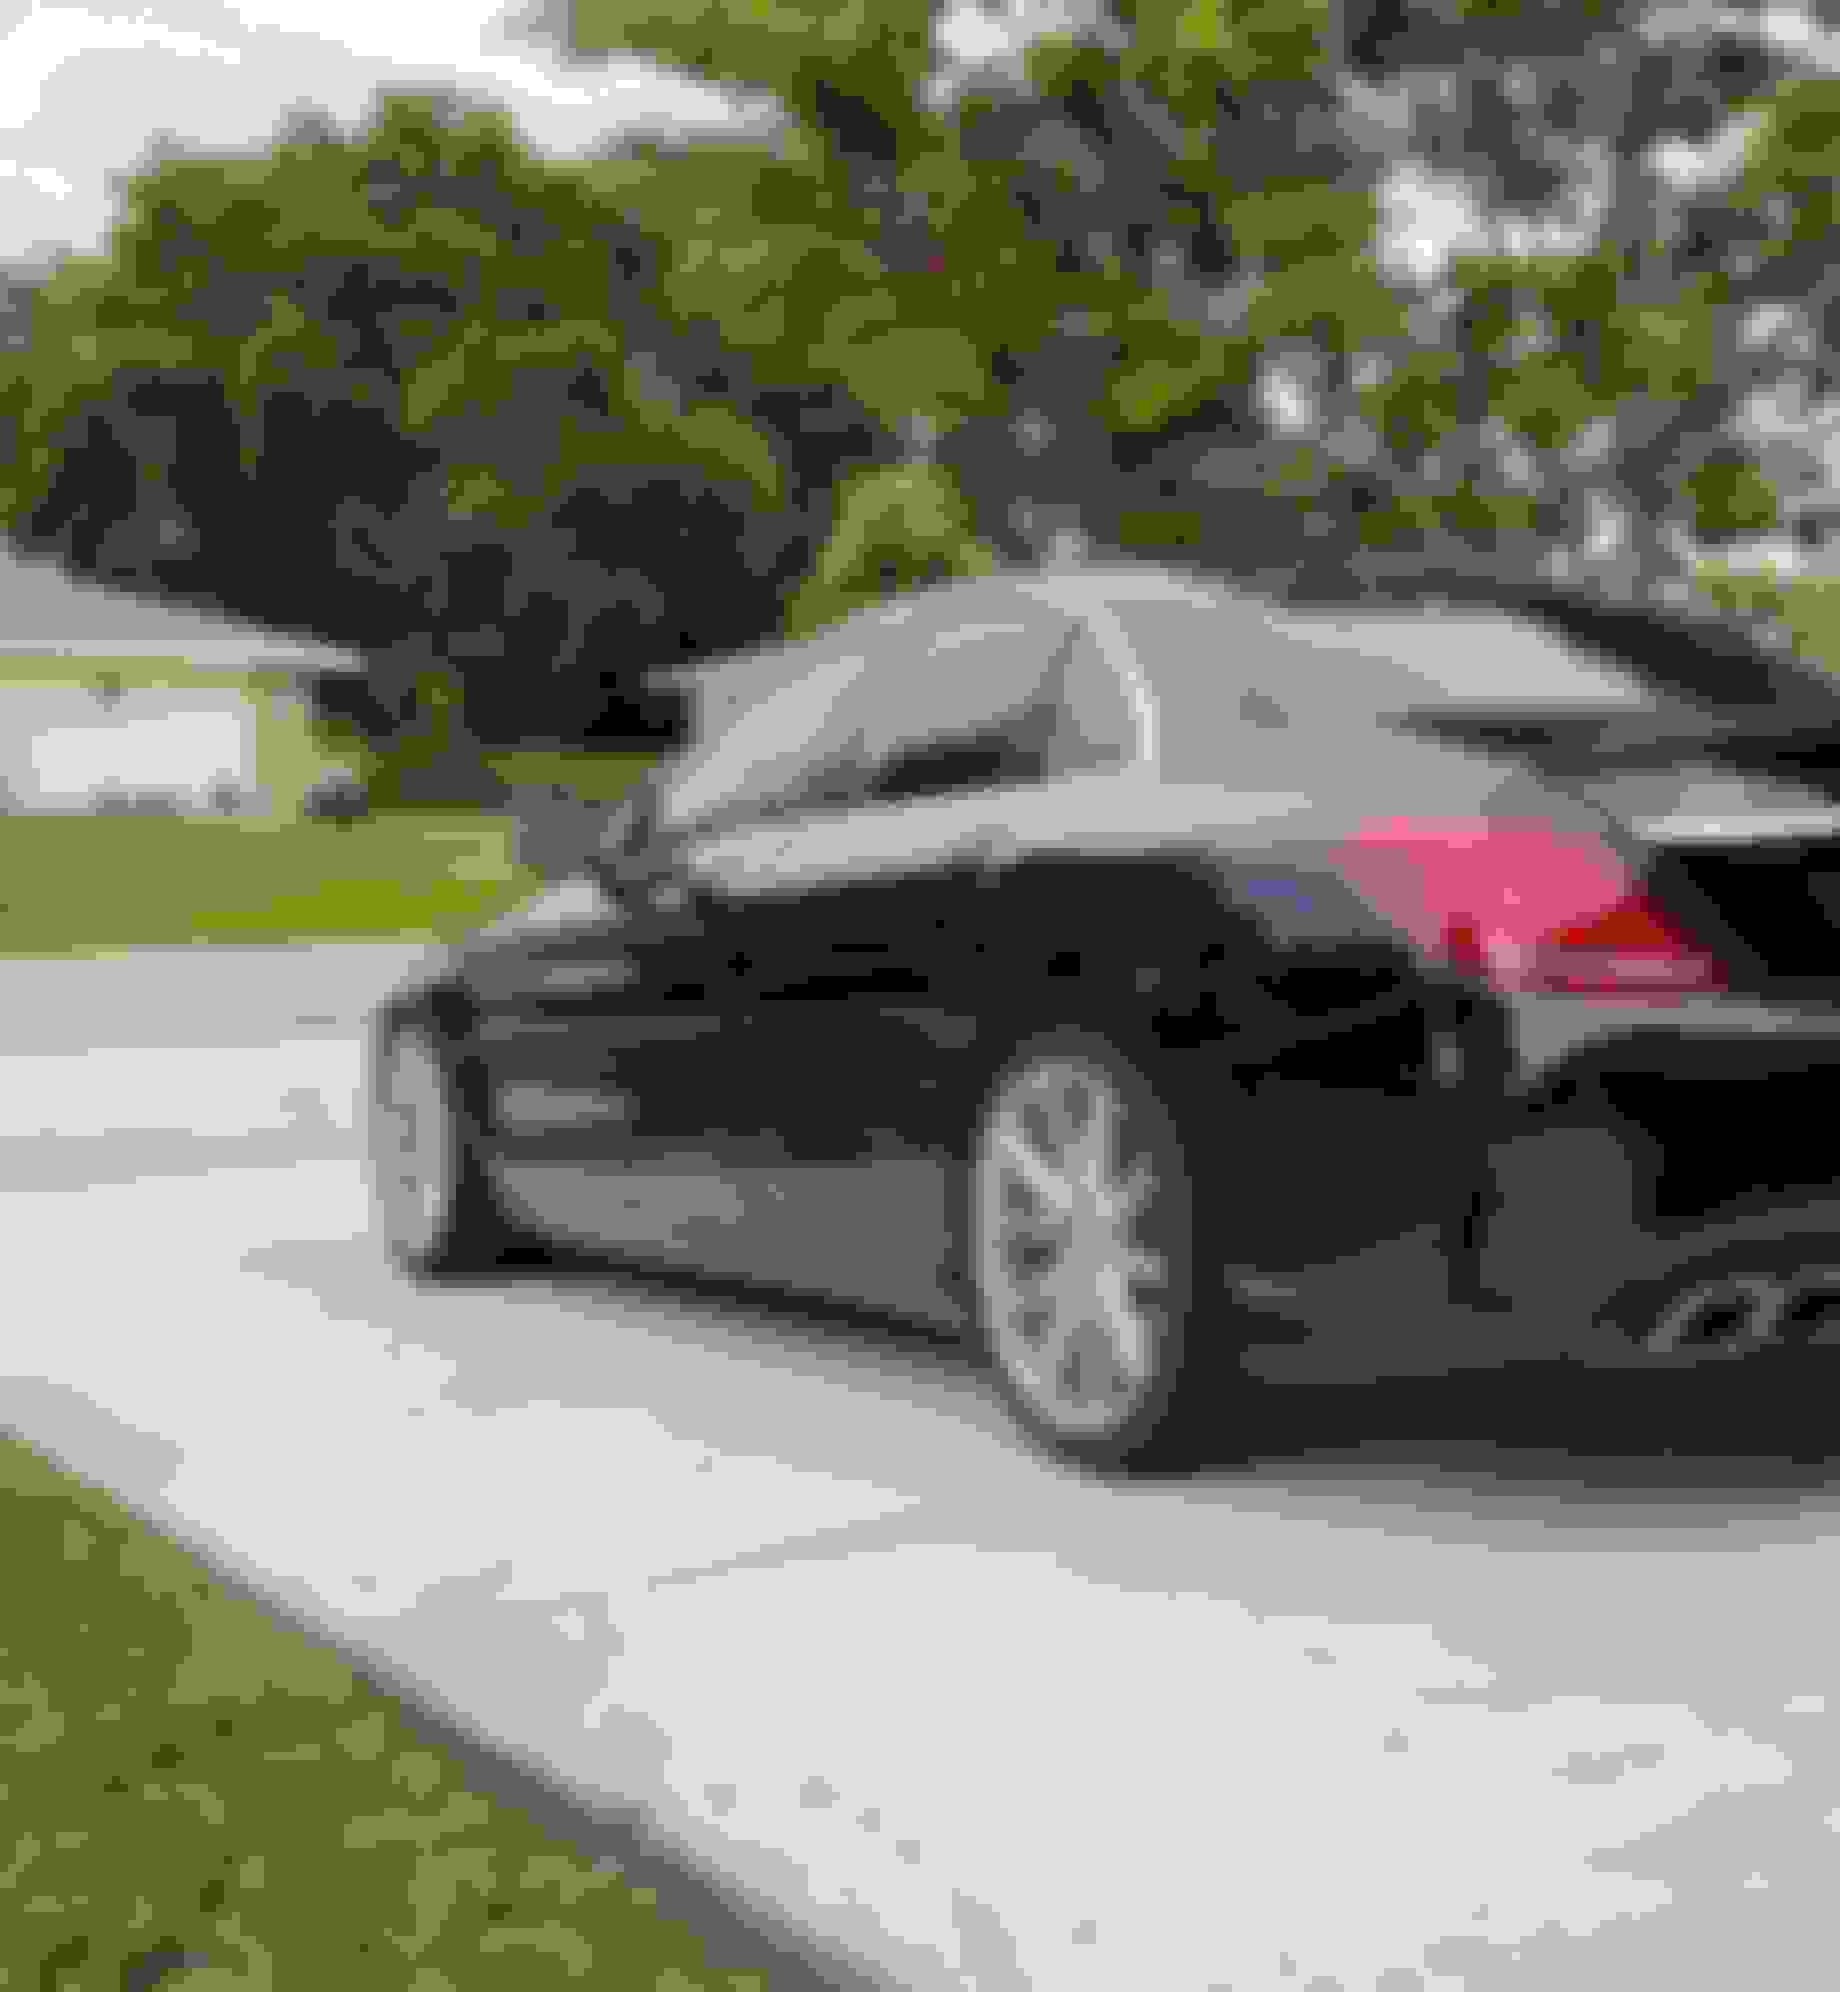
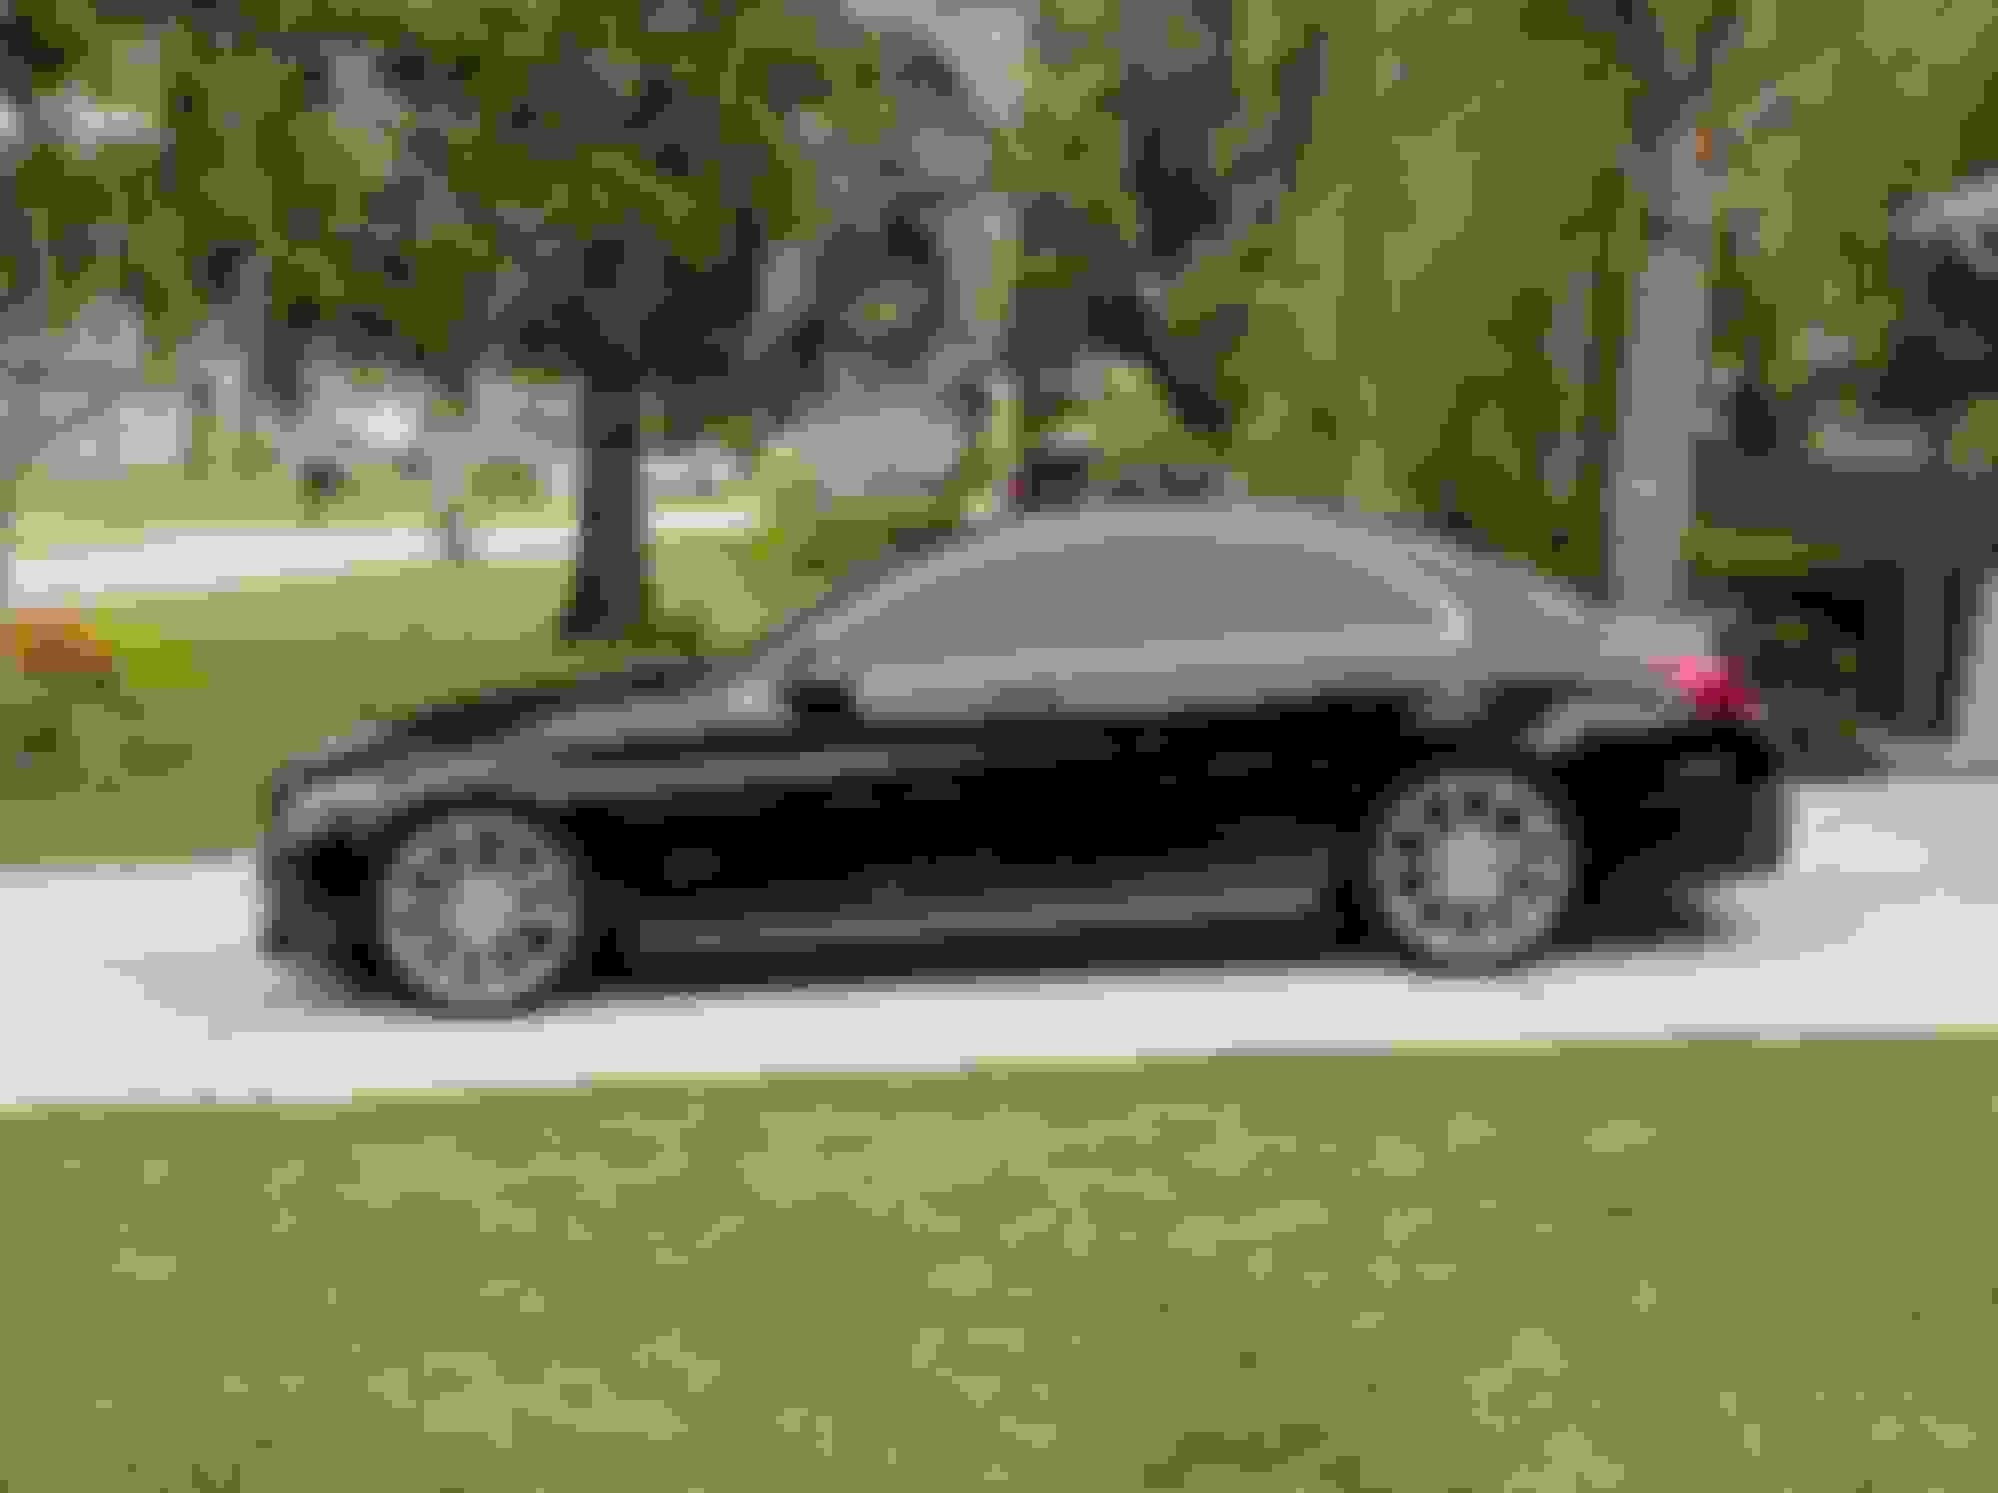
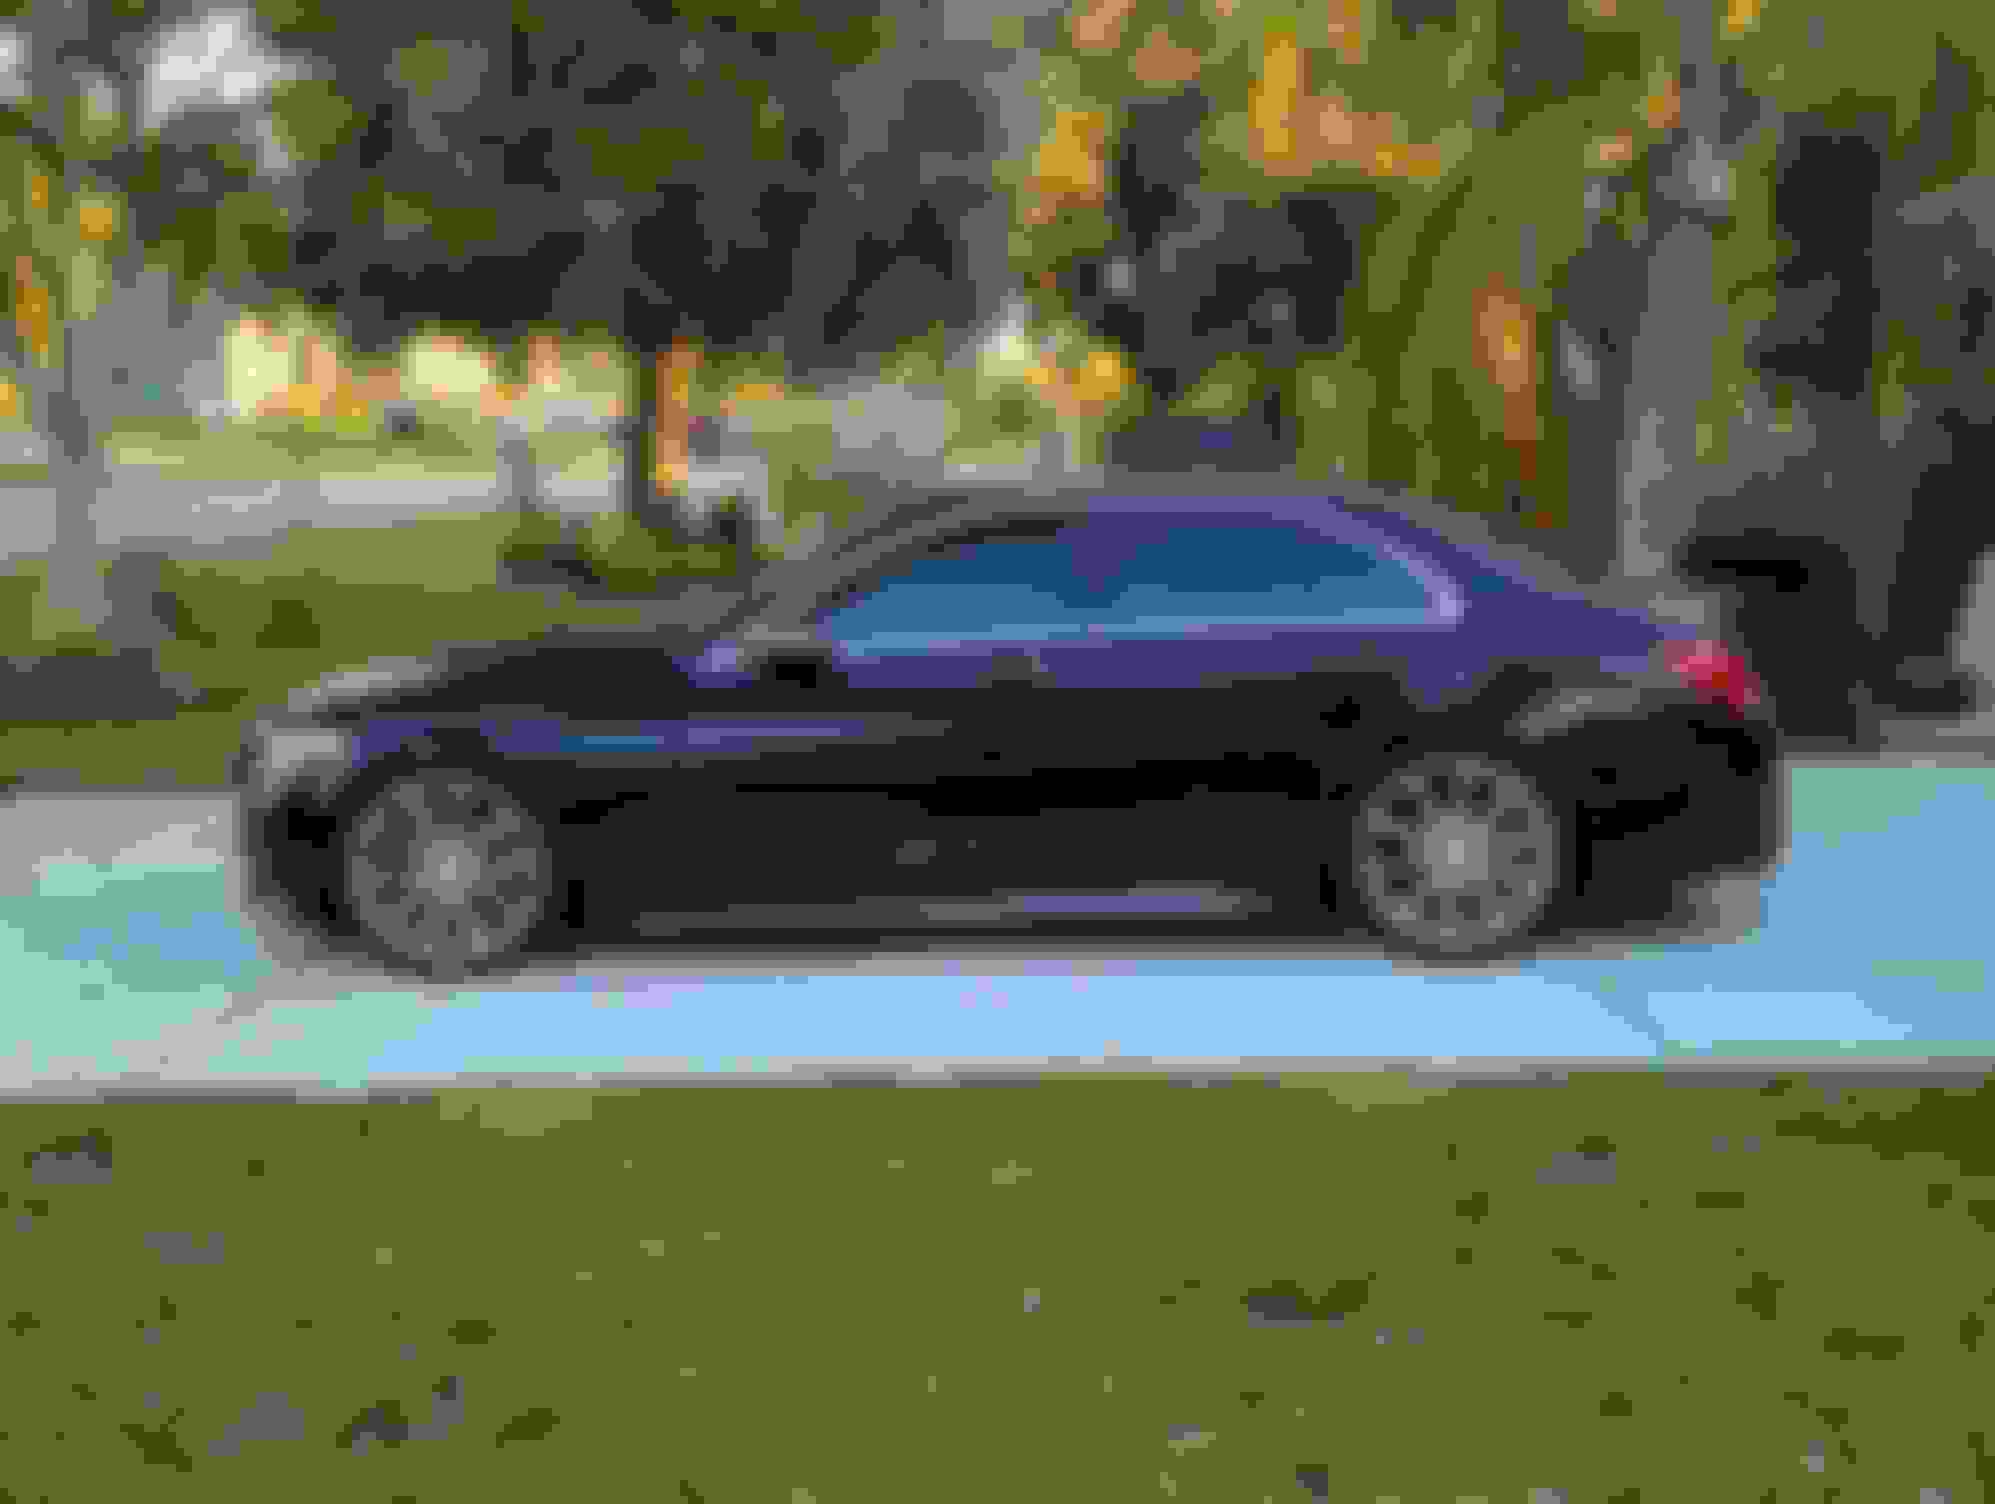
New diffuser is on!:
And the results!:
In the pics above, I have a temporary cheapo one-piece tow hook cover to fill the hole. The bumper cover did not come with a tow hook cover and the correct tow hook cover configuration should be 3 pieces; a backing plate, an upper cover and a lower cover. The lower cover portion will consist of the lower tow hook cover that came with the aftermarket diffuser to match the diffuser. I�ve painted the upper tow hook cover, but I still need to wet sand and polish it before installing. I will post updated pics when this is done and on the car.
The Parts:
New aftermarket (Good Go brand) W205 Sport/AMG Rear Bumper Cover (already painted code #040 Black, no sensor holes) from Ebay auction: $350
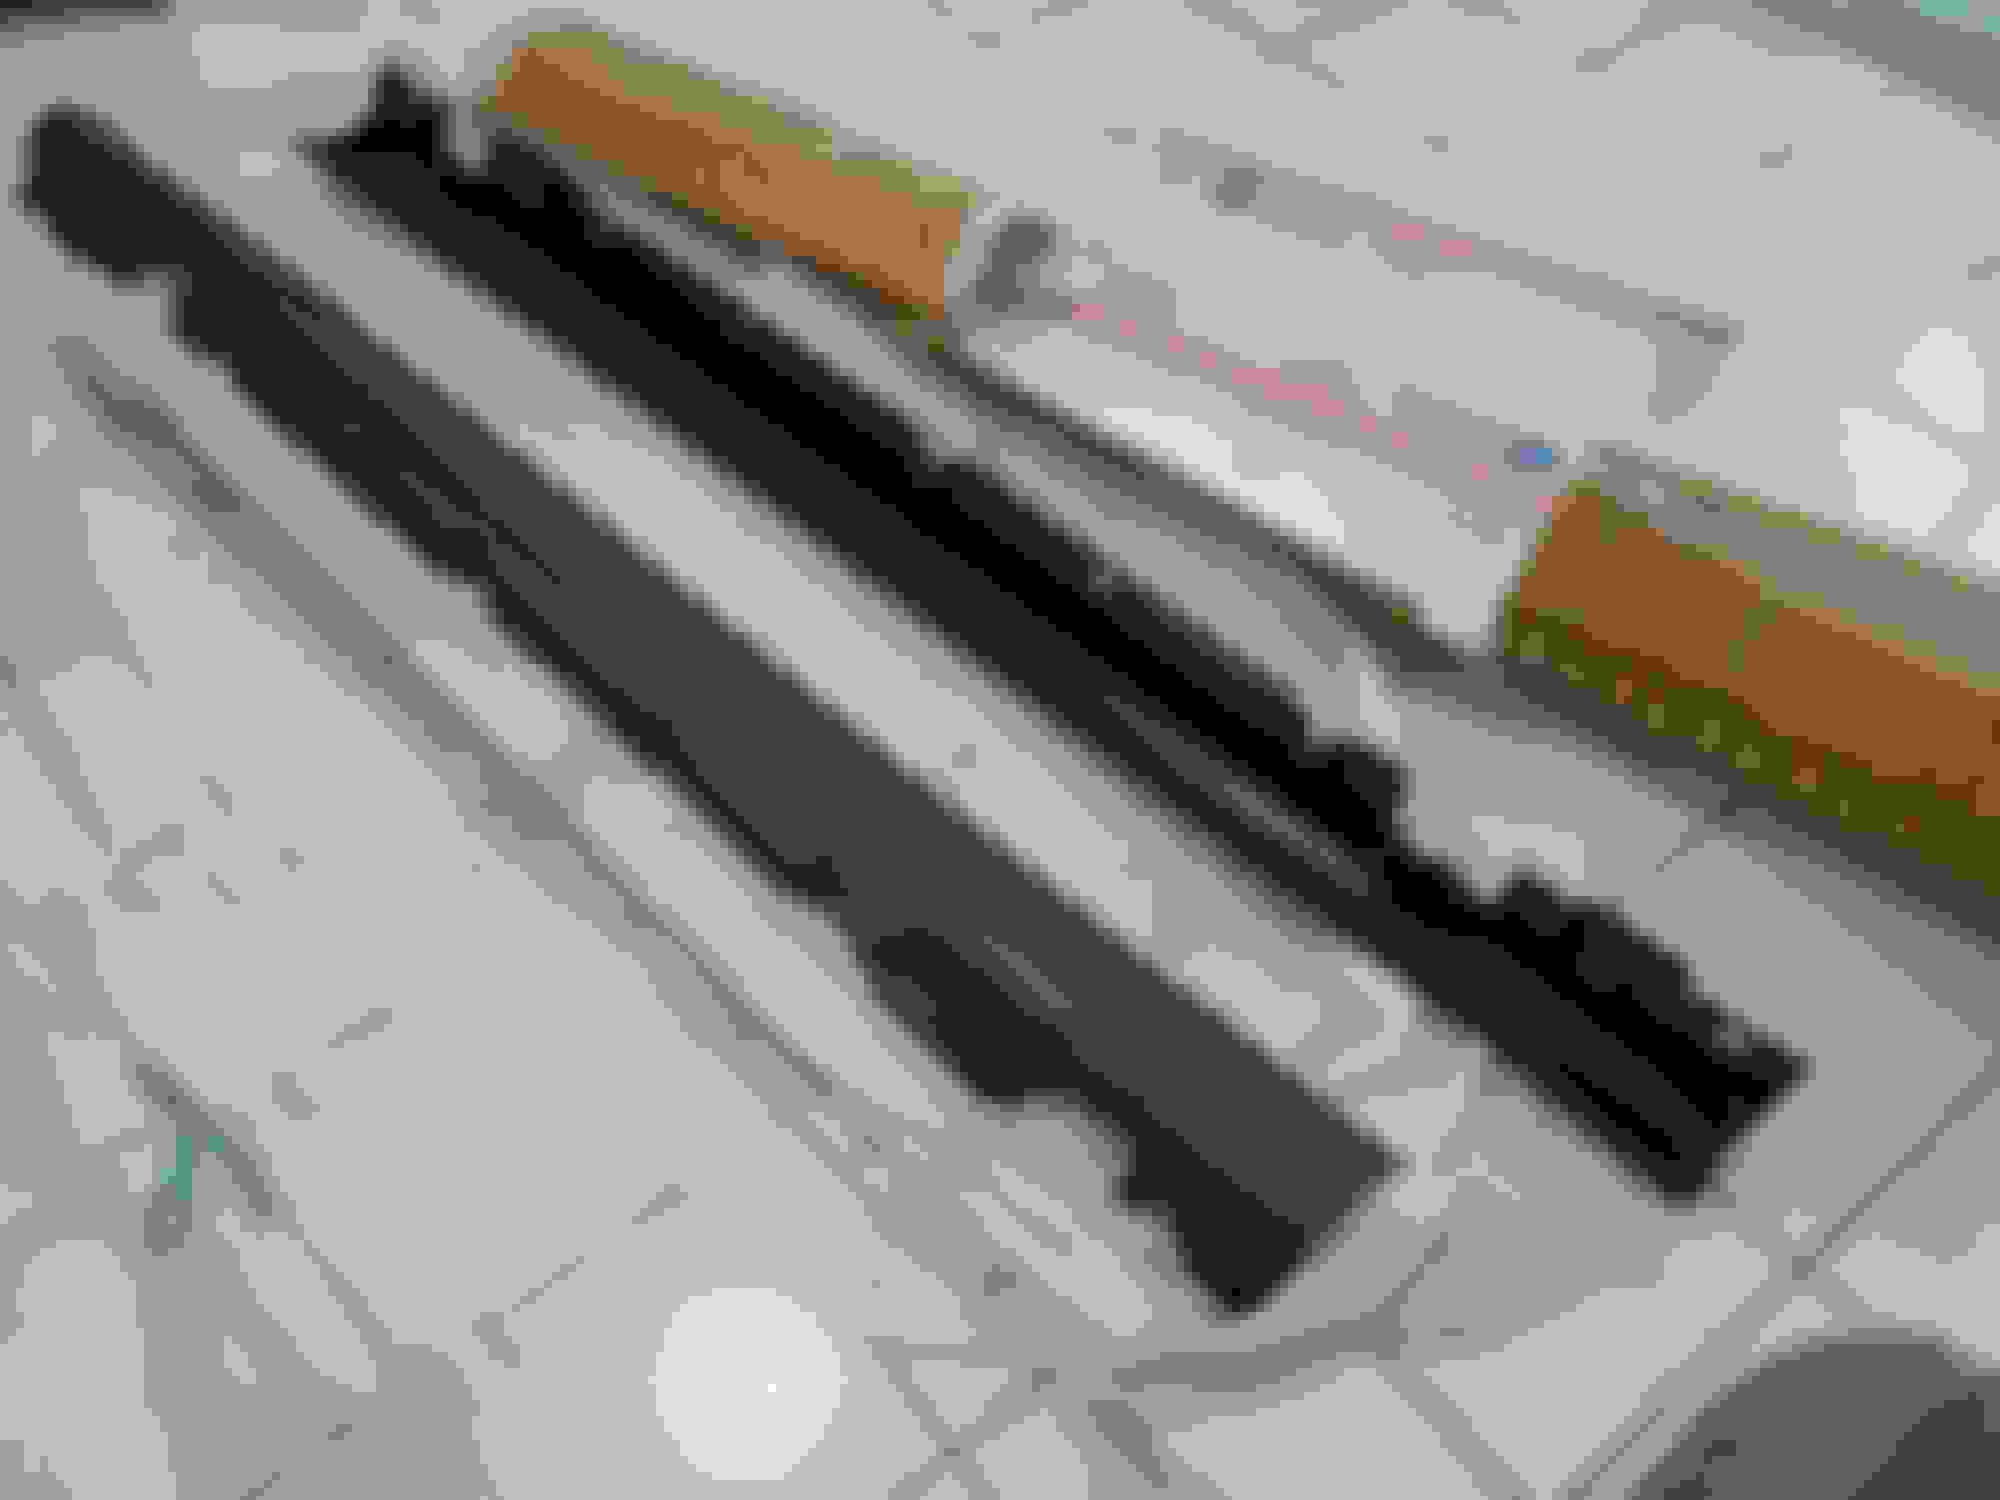
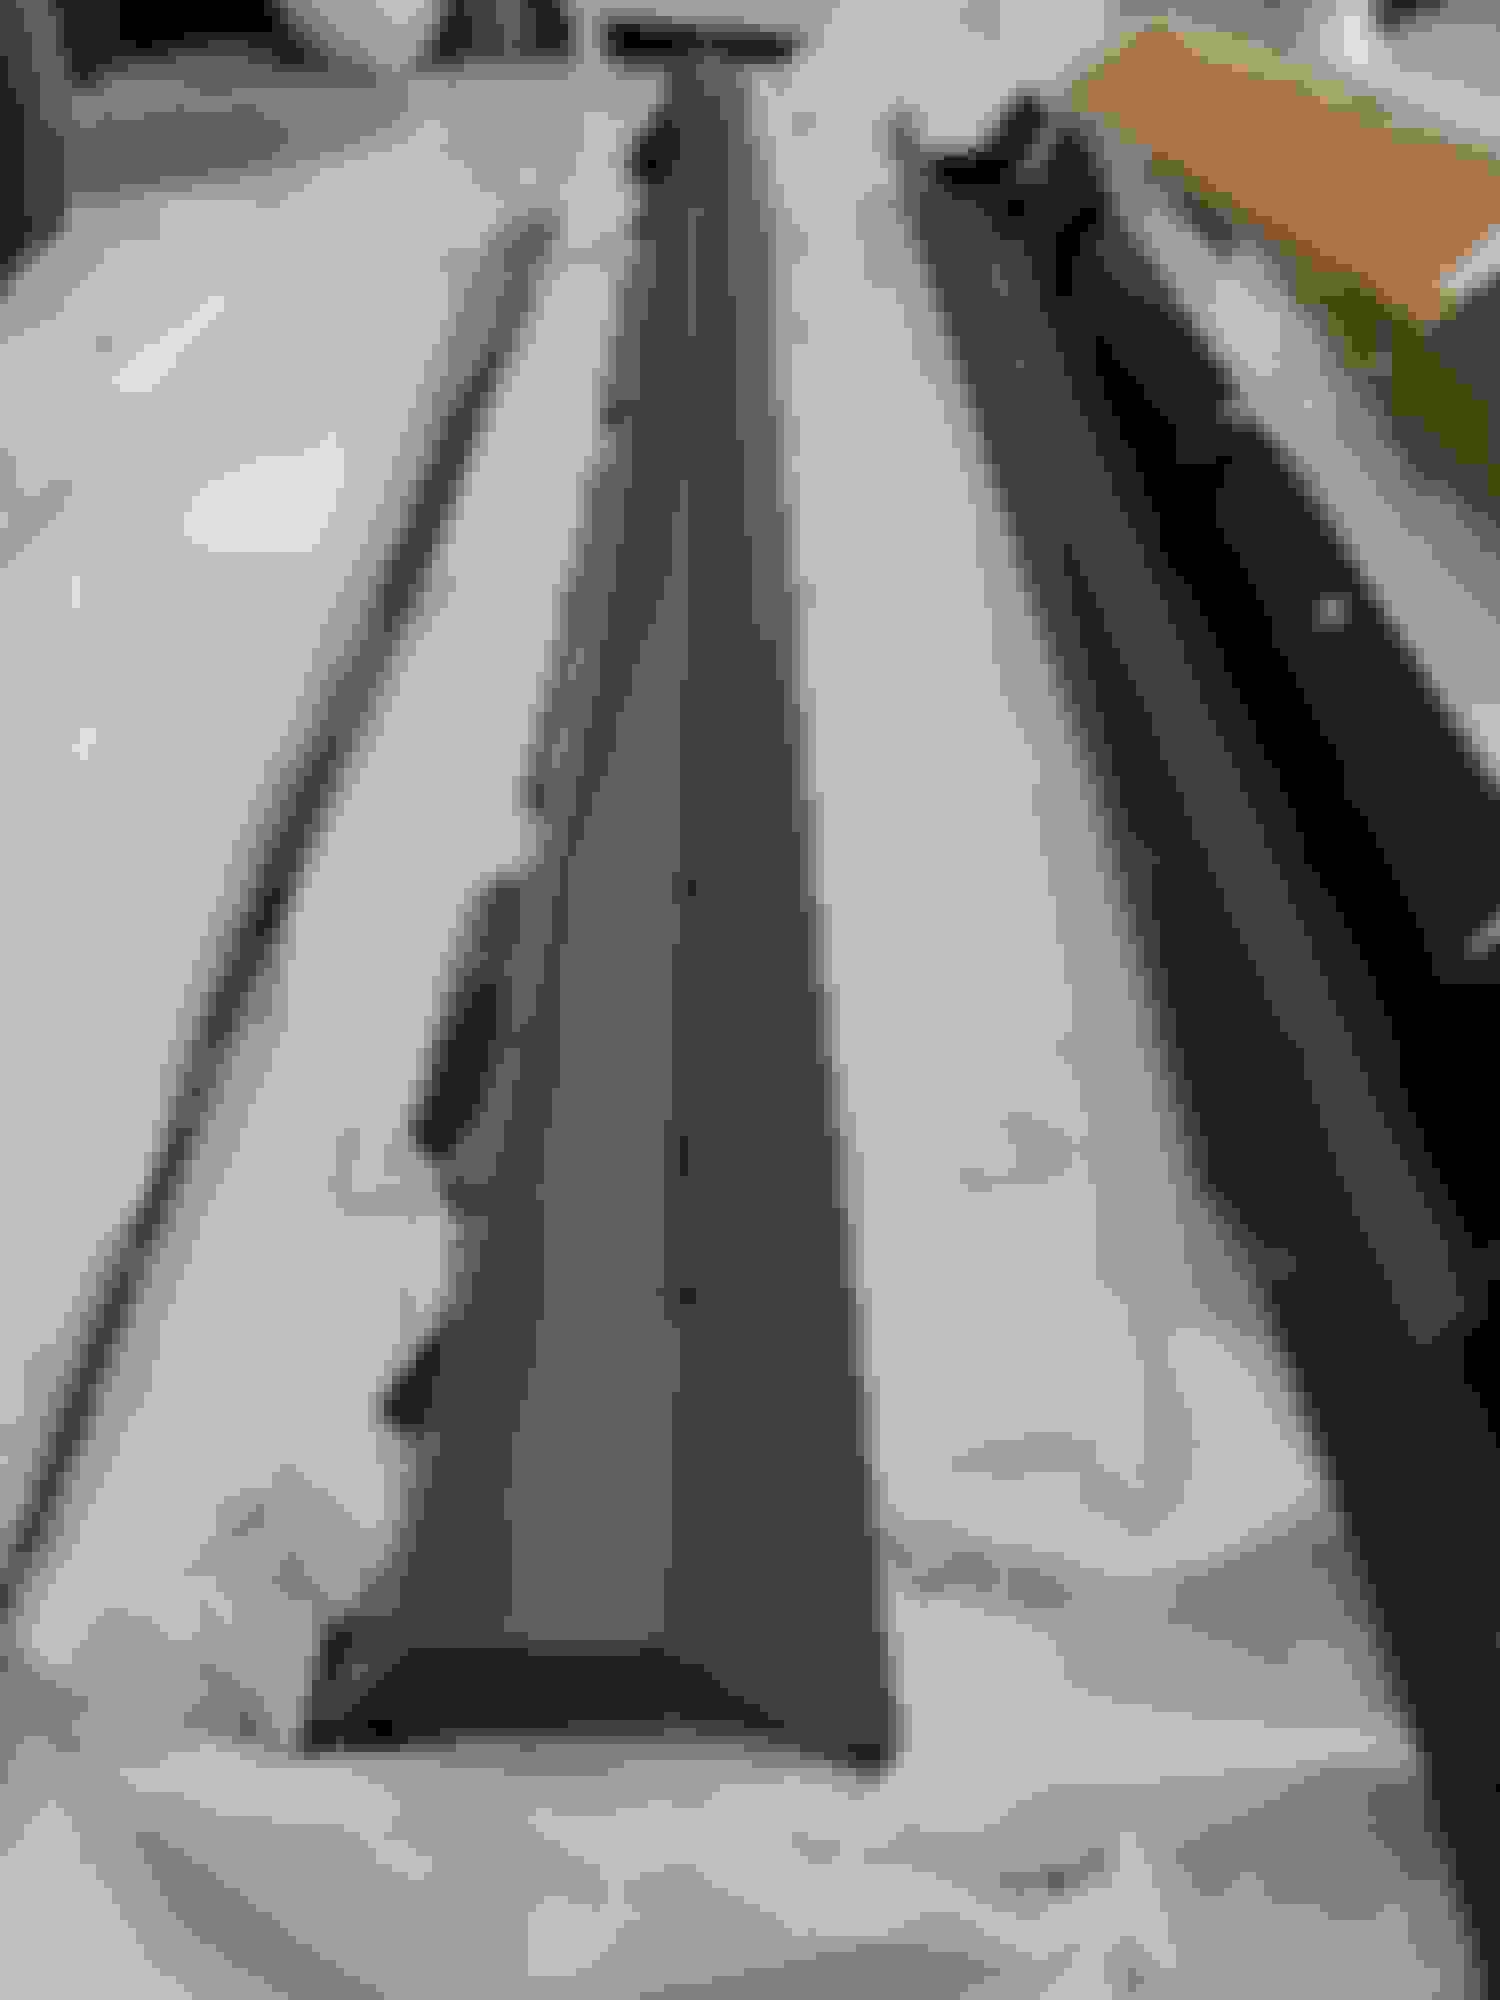
Four (4) Metal L-Brackets and Assorted 5mm Screws, Washers and Nylon-Insert Lock Nuts for the diffuser: $15.00
Total Cost: $975.23
Basic Summary of Work:
This turned out to be much easier than I had initially thought. It's approximately a dozen small bolts/screws/nuts and a handful of reusable plastic expansion rivets. The rest is all tracks of snap-in/snap-out tabs and ears. The bumper cover is just a big plastic cover and can be easily done by one person. The whole bumper cover hangs on two pins on the car located between the taillights and the trunk at the top of the twin thin upright portions of the bumper cover. After hanging the new bumper cover on the pins, it's just a matter of snapping it back in the tracks and putting the small bolts/screws/nuts and reusable plastic expansion rivets back in. All the original fasteners were reused and no additional parts, screws or brackets were needed for the bumper cover.
Even taking my time (which I always do) and plotting my own path for installing the diffuser, brackets and adjusting the tips, I spent about 5 hours getting this done.
Notes:
All W205 rear bumpers have the same mounting for the W205 chassis. It does not matter if the bumper cover is from a pre-facelift, post-facelift, C180 or C63.
The W205 rear diffusers are bumper-specific and the only specificity is that they are made for either the base/avantgarde bumper cover or the Sport/AMG bumper cover.
The diffuser outer ends attach to the bumper cover using a rivet on each end. I'm not a fan of rivets (unless you are an experienced riveter), so I used some short stainless-steel 5mm machine screws, 5mm flat washers and nylon-insert lock nuts instead, which to me is a much more reliable fastener than my lame riveting skills.
I'm starting at the back and working my way forward. I snagged a great deal on Ebay for a new aftermarket, (painted Black #040) AMG-line Sport Rear Bumper Cover for $350 shipped. Woot:
Ordered an aftermarket facelift (2019+) C63 Gloss Black Rear Diffuser w/chrome tips $485 shipped:
Ordered a pair of Gloss Black Rear Bumper Vent "Canards"/Winglets (snap-in) $45 shipped:
A reminder of what I�m starting with:
Bumper is off! That was quick: :p
The original bumper and diffuser comes off as one piece. The plastic inserts with the studs (circled in red) will need to be transferred to the new bumper (snaps/clips-in):
One of the small things that has bugged me about this car is how you can clearly see the mufflers behind the fake exhaust tips. To try to blend the mufflers more into the shadows, I painted the muffler ends with high-temperature black stove paint:
New bumper is on!:
The new-diffuser to original-diffuser chassis mounting points did not line up, neither "left-right" or "up-down". Here's the issue (a minor issue):
There are many ways this can be corrected properly. I'll share my "special engineering" solution (not saying I'm right, just what I came up with): Using 4 small metal L-brackets (can be found at any hardware store) and 5mm machine screws, flat washers and nylon-insert locking nuts, I made 2 brackets to fill the gap and correct the offset of the mounting bolts:
Here's what it looks like installed on one side:
And here it is completed:
My description and the pictures may not make any sense without being familiar with the parts. When you go to do this work, it will definitely make sense then. I've found one of the advantages of having this type of bracketing is it allows you loosen the chassis mounting bolts and rotate the brackets to adjust the exhaust tips in and out to achieve flush-ness and make them even. Tightening the chassis bolt while holding the tip where you want it locks the adjustment and it's solid.
New diffuser is on!:
And the results!:
In the pics above, I have a temporary cheapo one-piece tow hook cover to fill the hole. The bumper cover did not come with a tow hook cover and the correct tow hook cover configuration should be 3 pieces; a backing plate, an upper cover and a lower cover. The lower cover portion will consist of the lower tow hook cover that came with the aftermarket diffuser to match the diffuser. I�ve painted the upper tow hook cover, but I still need to wet sand and polish it before installing. I will post updated pics when this is done and on the car.
The Parts:
New aftermarket (Good Go brand) W205 Sport/AMG Rear Bumper Cover (already painted code #040 Black, no sensor holes) from Ebay auction: $350
Four (4) Metal L-Brackets and Assorted 5mm Screws, Washers and Nylon-Insert Lock Nuts for the diffuser: $15.00
Total Cost: $975.23
Basic Summary of Work:
This turned out to be much easier than I had initially thought. It's approximately a dozen small bolts/screws/nuts and a handful of reusable plastic expansion rivets. The rest is all tracks of snap-in/snap-out tabs and ears. The bumper cover is just a big plastic cover and can be easily done by one person. The whole bumper cover hangs on two pins on the car located between the taillights and the trunk at the top of the twin thin upright portions of the bumper cover. After hanging the new bumper cover on the pins, it's just a matter of snapping it back in the tracks and putting the small bolts/screws/nuts and reusable plastic expansion rivets back in. All the original fasteners were reused and no additional parts, screws or brackets were needed for the bumper cover.
Even taking my time (which I always do) and plotting my own path for installing the diffuser, brackets and adjusting the tips, I spent about 5 hours getting this done.
Notes:
All W205 rear bumpers have the same mounting for the W205 chassis. It does not matter if the bumper cover is from a pre-facelift, post-facelift, C180 or C63.
The W205 rear diffusers are bumper-specific and the only specificity is that they are made for either the base/avantgarde bumper cover or the Sport/AMG bumper cover.
The diffuser outer ends attach to the bumper cover using a rivet on each end. I'm not a fan of rivets (unless you are an experienced riveter), so I used some short stainless-steel 5mm machine screws, 5mm flat washers and nylon-insert lock nuts instead, which to me is a much more reliable fastener than my lame riveting skills.
Last edited by Keith66; 10-12-2021 at 01:13 PM.
Reason: Added Diffuser Bracket Info
As long as I drive a 205 I would have kept it just in case.
anyway to stay on topic, I would in your case maybe look for the sideskirts and a splitter for the front bumper and stop. I wouldnt change the front bumper.
the back looks really good now!
As long as I drive a 205 I would have kept it just in case.
anyway to stay on topic, I would in your case maybe look for the sideskirts and a splitter for the front bumper and stop. I wouldnt change the front bumper.
the back looks really good now!
As long as I drive a 205 I would have kept it just in case.
anyway to stay on topic, I would in your case maybe look for the sideskirts and a splitter for the front bumper and stop. I wouldnt change the front bumper.
the back looks really good now!
I kind of see a split in his front bumper. Keith correct me if I am wrong.
As long as I drive a 205 I would have kept it just in case.
I hear ya and I gave it a good 10 seconds of thought. As you can see in my garage, I already have too much crap to get rid of and it really wasn't worth saving. It had been repainted before I bought the car, by what appears to be by a blind man in a wind storm. Had drips in the paint, dull finish and some deformations in the plastic.
Originally Posted by Doa
... anyway to stay on topic, I would in your case maybe look for the sideskirts and a splitter for the front bumper and stop. I wouldnt change the front bumper.
the back looks really good now!
Thanks for the feedback, I appreciate it! I'm beyond decision making on the parts though. I already bought all the parts and they are piled up here waiting on me. My only deficit here is my time.
I kind of see a split in his front bumper. Keith correct me if I am wrong.
Probably the lighting or reflections, the front bumper is good and straight. The only issue is some clear coat is starting to separate around the tow hook cover.
I may try to sell the original front bumper cover.
Both the avantgarde and the sports bumper have a splitter, the sports bumper has a splitter over the full length where the avatgarde is only in the center but you can change this with some aftermarket splitter.
unless you will go for a replica c63 front bumper but its always a bit of a gamble in regards to fitting it and the gaps between the parts
Where are you finding all these great deals on eBay!? I cant find anything around the price point you got the rear bumper at. Details on both rear and front bumper please!!!
Where are you finding all these great deals on eBay!? I cant find anything around the price point you got the rear bumper at. Details on both rear and front bumper please!!!
Dude, I got extremely lucky on the rear bumper cover. I had been casually looking around for a rear bumper cover for a couple of months and checking Ebay about once a week or so. I came across the one I have, listed as an auction with a starting bid of $350. There were no bidders and the auction was scheduled to end in ~20 hours. I placed my opening bid at $350 and to auto-bid up to $575. The auction ended with myself being the only bidder. YAY.
Before that, I was seeing used with some damages around $300-500 and "good" used up to ~$1000 (craziness!). Another option for those wanting new aftermarket and pre-painted in your color, would be buying from suppliers that do so. There are a few out there but I have never done this myself, so YMMV. One example:
Professional prep, primer, color coat and clear coat: $600
Total Cost: $876.89
Basic Summary of Work:
This was a bit more difficult than I thought, as the retaining clips hold very well and force needs to be applied in the proper direction for the cover to separate from the clips. The first one I removed took me about an hour to remove. After I understood more clearly how it is fastened and where the clips are, the second one came off in just a few minutes.
The most crucial tool for this job is a solid, thin J-hook that can be wedged into the top between the body and the cover, then pull the cover up to release it from the retaining clips one at a time. After the cover is removed, the white retaining clips need to be removed from the body of the car using pliers and pulling them straight out. The white retaining clips then need to be attached to the new cover, then everything snaps back into the empty clip slots in the body.
No additional parts were needed, I reused all the original fasteners and clips. Luckily, I only broke one clip in a non-crucial location, so I left it that way.
Notes:
I know the pictures aren’t great, but they’re all I have right now.
This can be done cheaper. I chose to get them painted at an independent shop known for top-notch work, so I paid for that. I’m sure you could get these painted for less to save some money on paint work.
Keith's black beast dragon is becoming uncontrollable. I really can't believe that this C300 was base not even an AMG line. This conversion project is a success story.
Keith's black beast dragon is becoming uncontrollable. I really can't believe that this C300 was base not even an AMG line. This conversion project is a success story.
Thanks brother! I'm getting there
You've done a great job on your car also, inside and out. Your interior is beautiful and is my inspiration to do similar mods, whenever I get to the inside, lol.
Looks great so far, good job! Need some bigger brake calipers in the front now
Do you care about speed at all to back up the looks? If so, you should have started with a C400 instead of the C300, would have saved you money in the long run
Thanks! I agree, the stock brakes look very wimpy with larger wheel diameters. It's on my long list, to swap brakes from a C43.
Yeah, I care about power, but this car is more of a cruiser and corner carver for me (when I can find some curves in Florida, lol). Right now, it has sufficient power for my use. I have an AMR Stage 1 tune, a few other small tweaks, and looking towards a larger hairdryer, downpipe, custom free-flow (but quiet) exhaust, etc. later... but not a priority. What puts it into perspective for me is my C300 can currently lay down mid-high 14's in the 1/4 mile, which is quicker than my old '72 SS Chevelle with a built-up small block and my old '00 Pontiac GTP (supercharged), so I'm okay for now. It's funny how modern "average" sedans are quicker than the old USA muscle car legends. :p
Looks great so far, good job! Need some bigger brake calipers in the front now
Do you care about speed at all to back up the looks? If so, you should have started with a C400 instead of the C300, would have saved you money in the long run
Nope, personaly, I would grap this C300 black beast over a boring C400. Its not like am going to race on the Nurburing track.
 10-08-2021, 02:46 PM