When you click on links to various merchants on this site and make a purchase, this can result in this site earning a commission. Affiliate programs and affiliations include, but are not limited to, the eBay Partner Network.
As of Thursday I own a brand new c200 ( was a stock car as delivery times are a hell)
it comes with all the options except the enhanced ambient lightning.
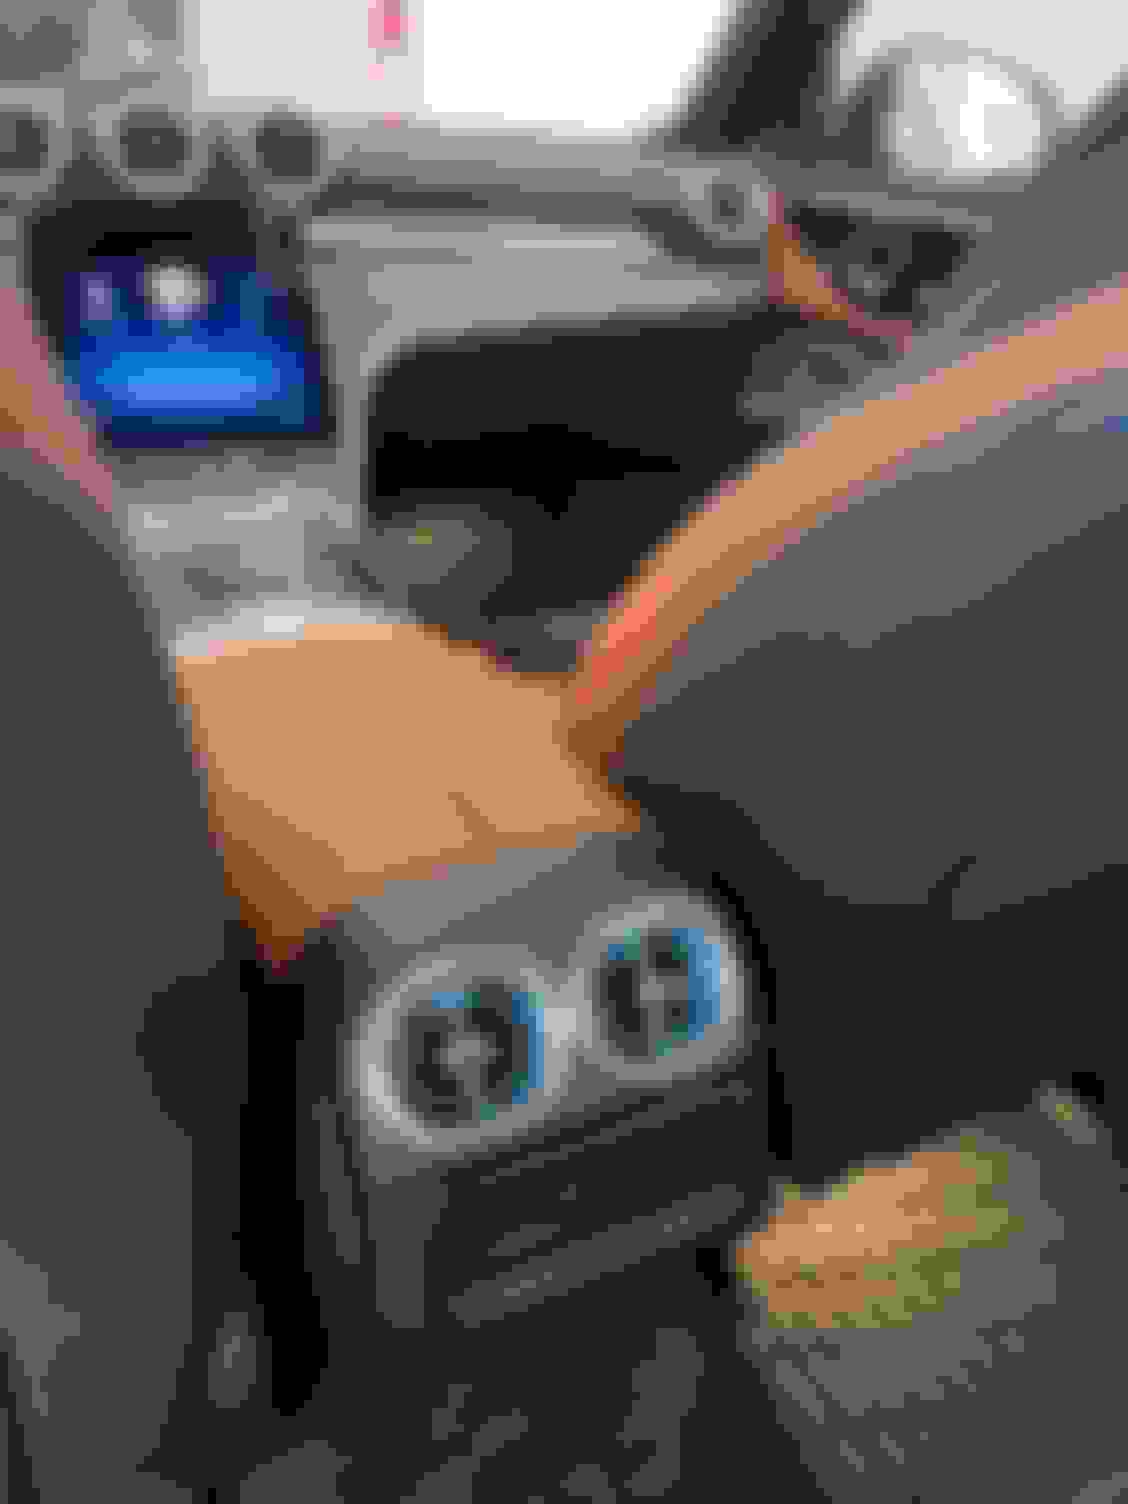
i’m looking at the vents in particular.
i got my hands on: https://benz-yourself.com/collections/c-class-w206-2021/products/air-vents-ambient-light-for-mercedes-benz-c-class-w206
while it does say : plug and play, I do wonder how much plug and play they actually are? I have little to no knowledge about cars.
while it does say : plug and play, I do wonder how much plug and play they actually are? I have little to no knowledge about cars.
I purchased a similar part from AliExpress for my w206. The plug-n-play support is halfway: it matches the colors you set but doesn’t support separate color zones for the vents like the OEM extended/enhanced ambient lighting. Even if you had all the OEM parts installed, MBUX would need to be coded to add extended lighting controls.
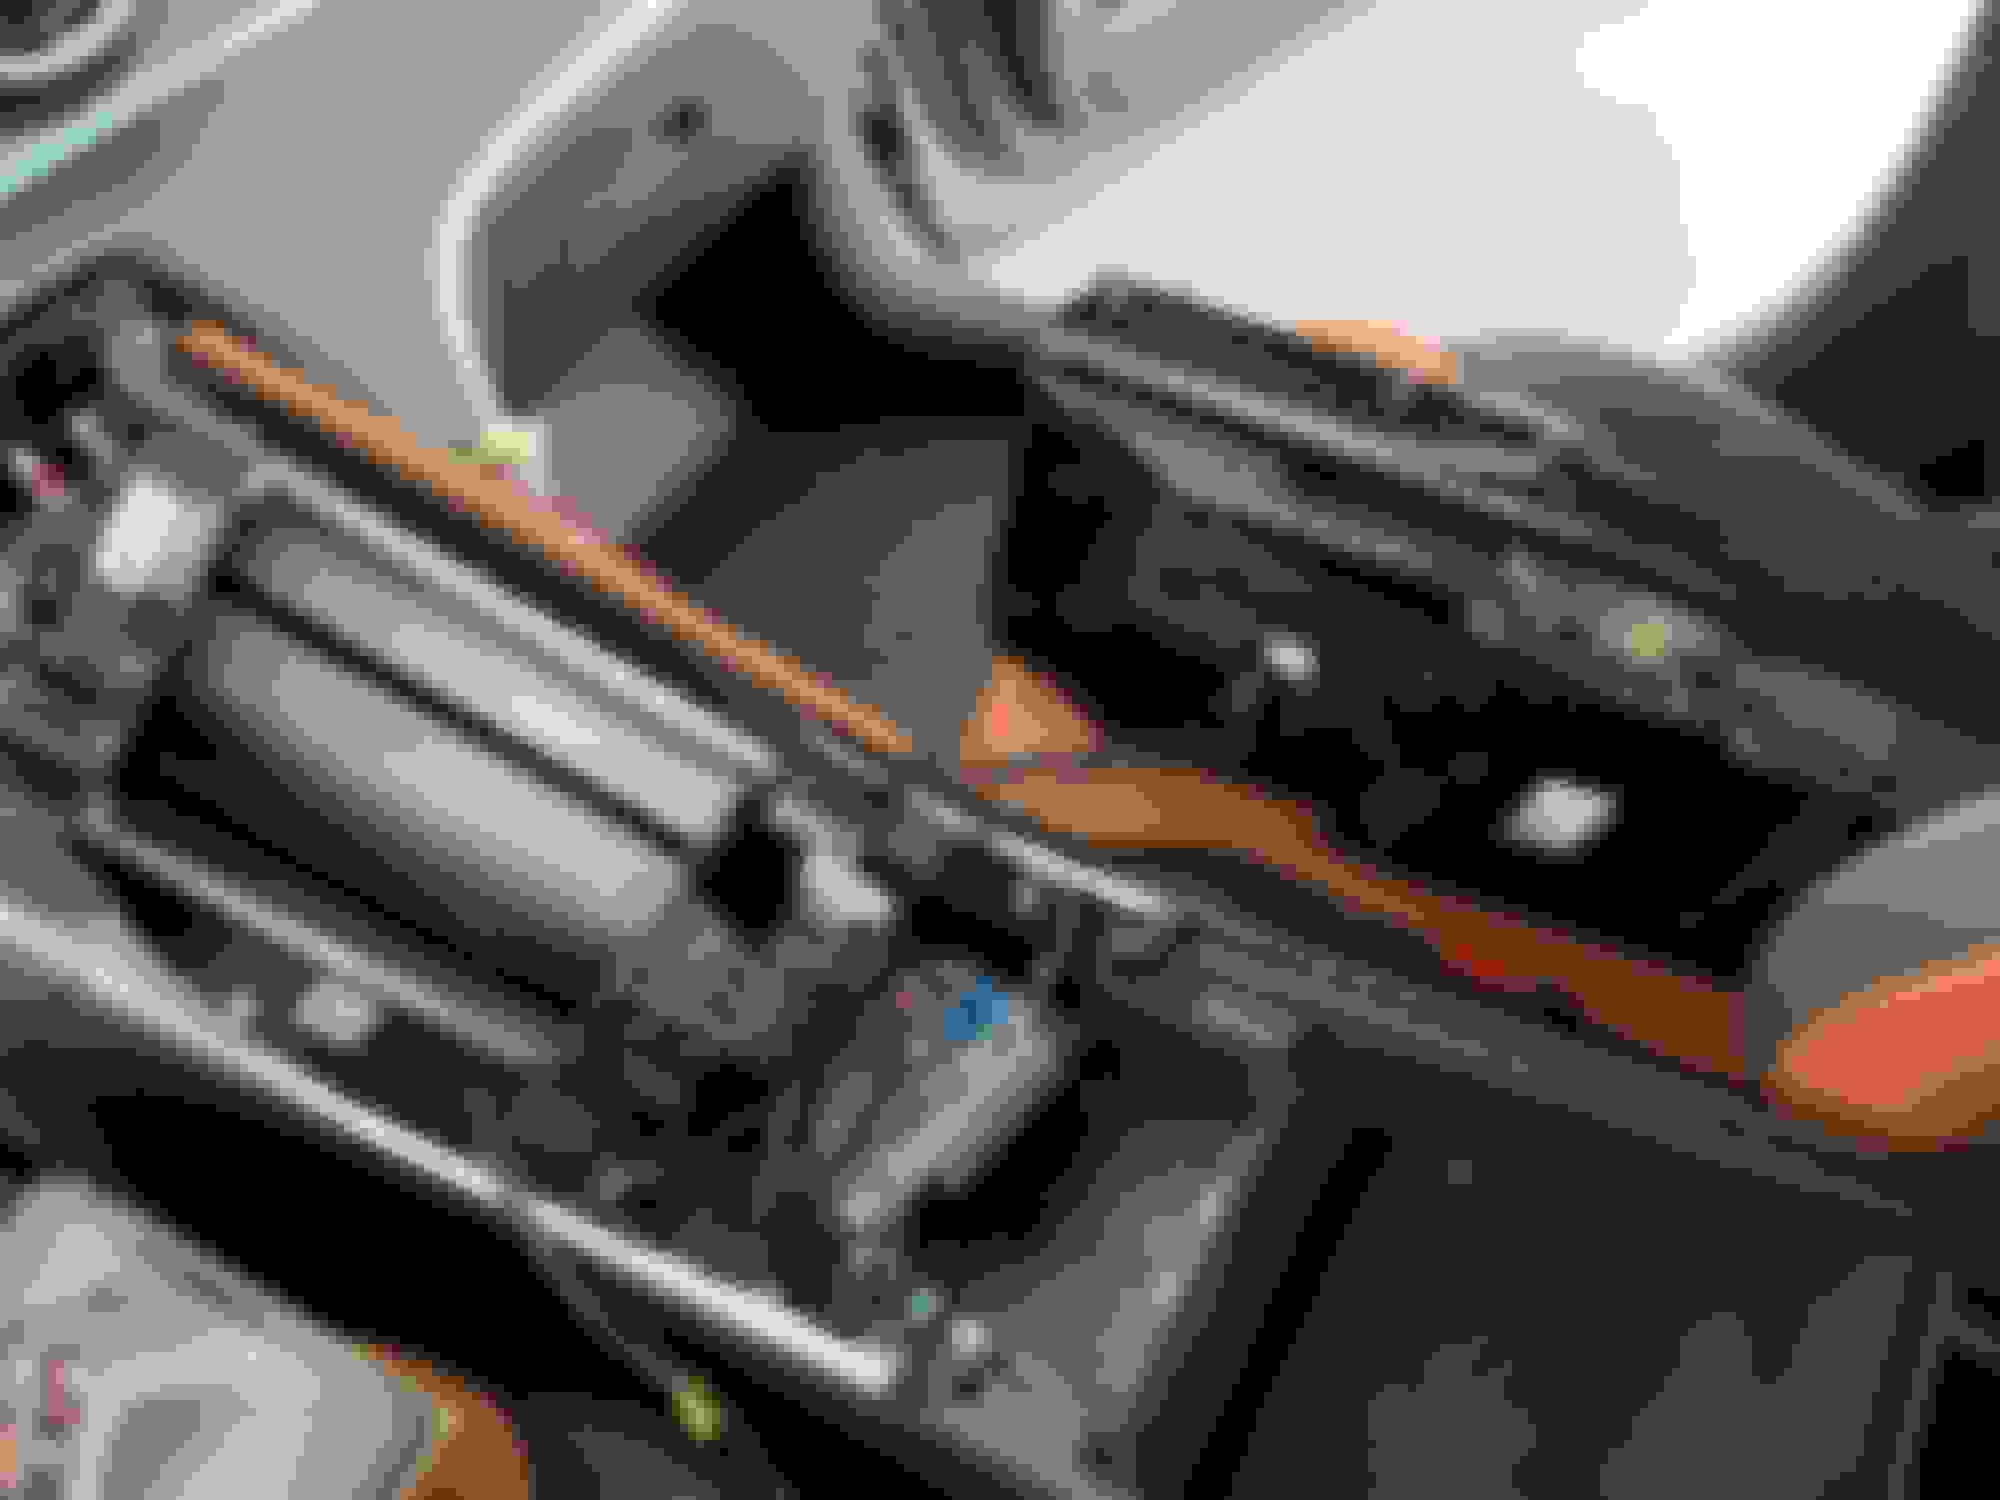
The LED vents are connected together and then the vent closest to the glovebox is connected to the ambient light LED located in the passenger footwell. They workaround the need to code MBUX by extending the connection from the basic ambient lighting. The kit I got came with all adapters and wires needed - however I found it impossible to pull out the factory vents (even after using plastic tools and the air vent hook tool).
I ultimately took it to a shop to have the vents installed and connected, but it’s pretty straightforward as long as you’re comfortable removing vents and the glovebox housing (plastic clips and a bolt). Super happy with them and don’t mind not having separate zones as they work flawlessly with MBUX.
@818benz did you install the illuminated rear vents as well? Is it difficult to do?
those are the only vents not illuminated on any trim (while they are lit for the Chinese long models)
I had the shop install and connect the rear as well. I'm not sure if it was difficult but the seller videos/instruction were vague (edited out difficult parts). They were even vaguer for the rear and I'm still not sure where the connector is. I would not have attempted to install the rear myself (video even warned to be careful as plastic clips holding the front panel around the vents can break easily) and would recommend you get only the front if you want to DIY.
I purchased a similar part from AliExpress for my w206. The plug-n-play support is halfway: it matches the colors you set but doesn’t support separate color zones for the vents like the OEM extended/enhanced ambient lighting. Even if you had all the OEM parts installed, MBUX would need to be coded to add extended lighting controls.
The LED vents are connected together and then the vent closest to the glovebox is connected to the ambient light LED located in the passenger footwell. They workaround the need to code MBUX by extending the connection from the basic ambient lighting. The kit I got came with all adapters and wires needed - however I found it impossible to pull out the factory vents (even after using plastic tools and the air vent hook tool).
I ultimately took it to a shop to have the vents installed and connected, but it’s pretty straightforward as long as you’re comfortable removing vents and the glovebox housing (plastic clips and a bolt). Super happy with them and don’t mind not having separate zones as they work flawlessly with MBUX.
I just bought the rear led vents, let's see how long it takes to get them from China.
I will attempt to follow Chesttechner DIY video and do the installation myself.
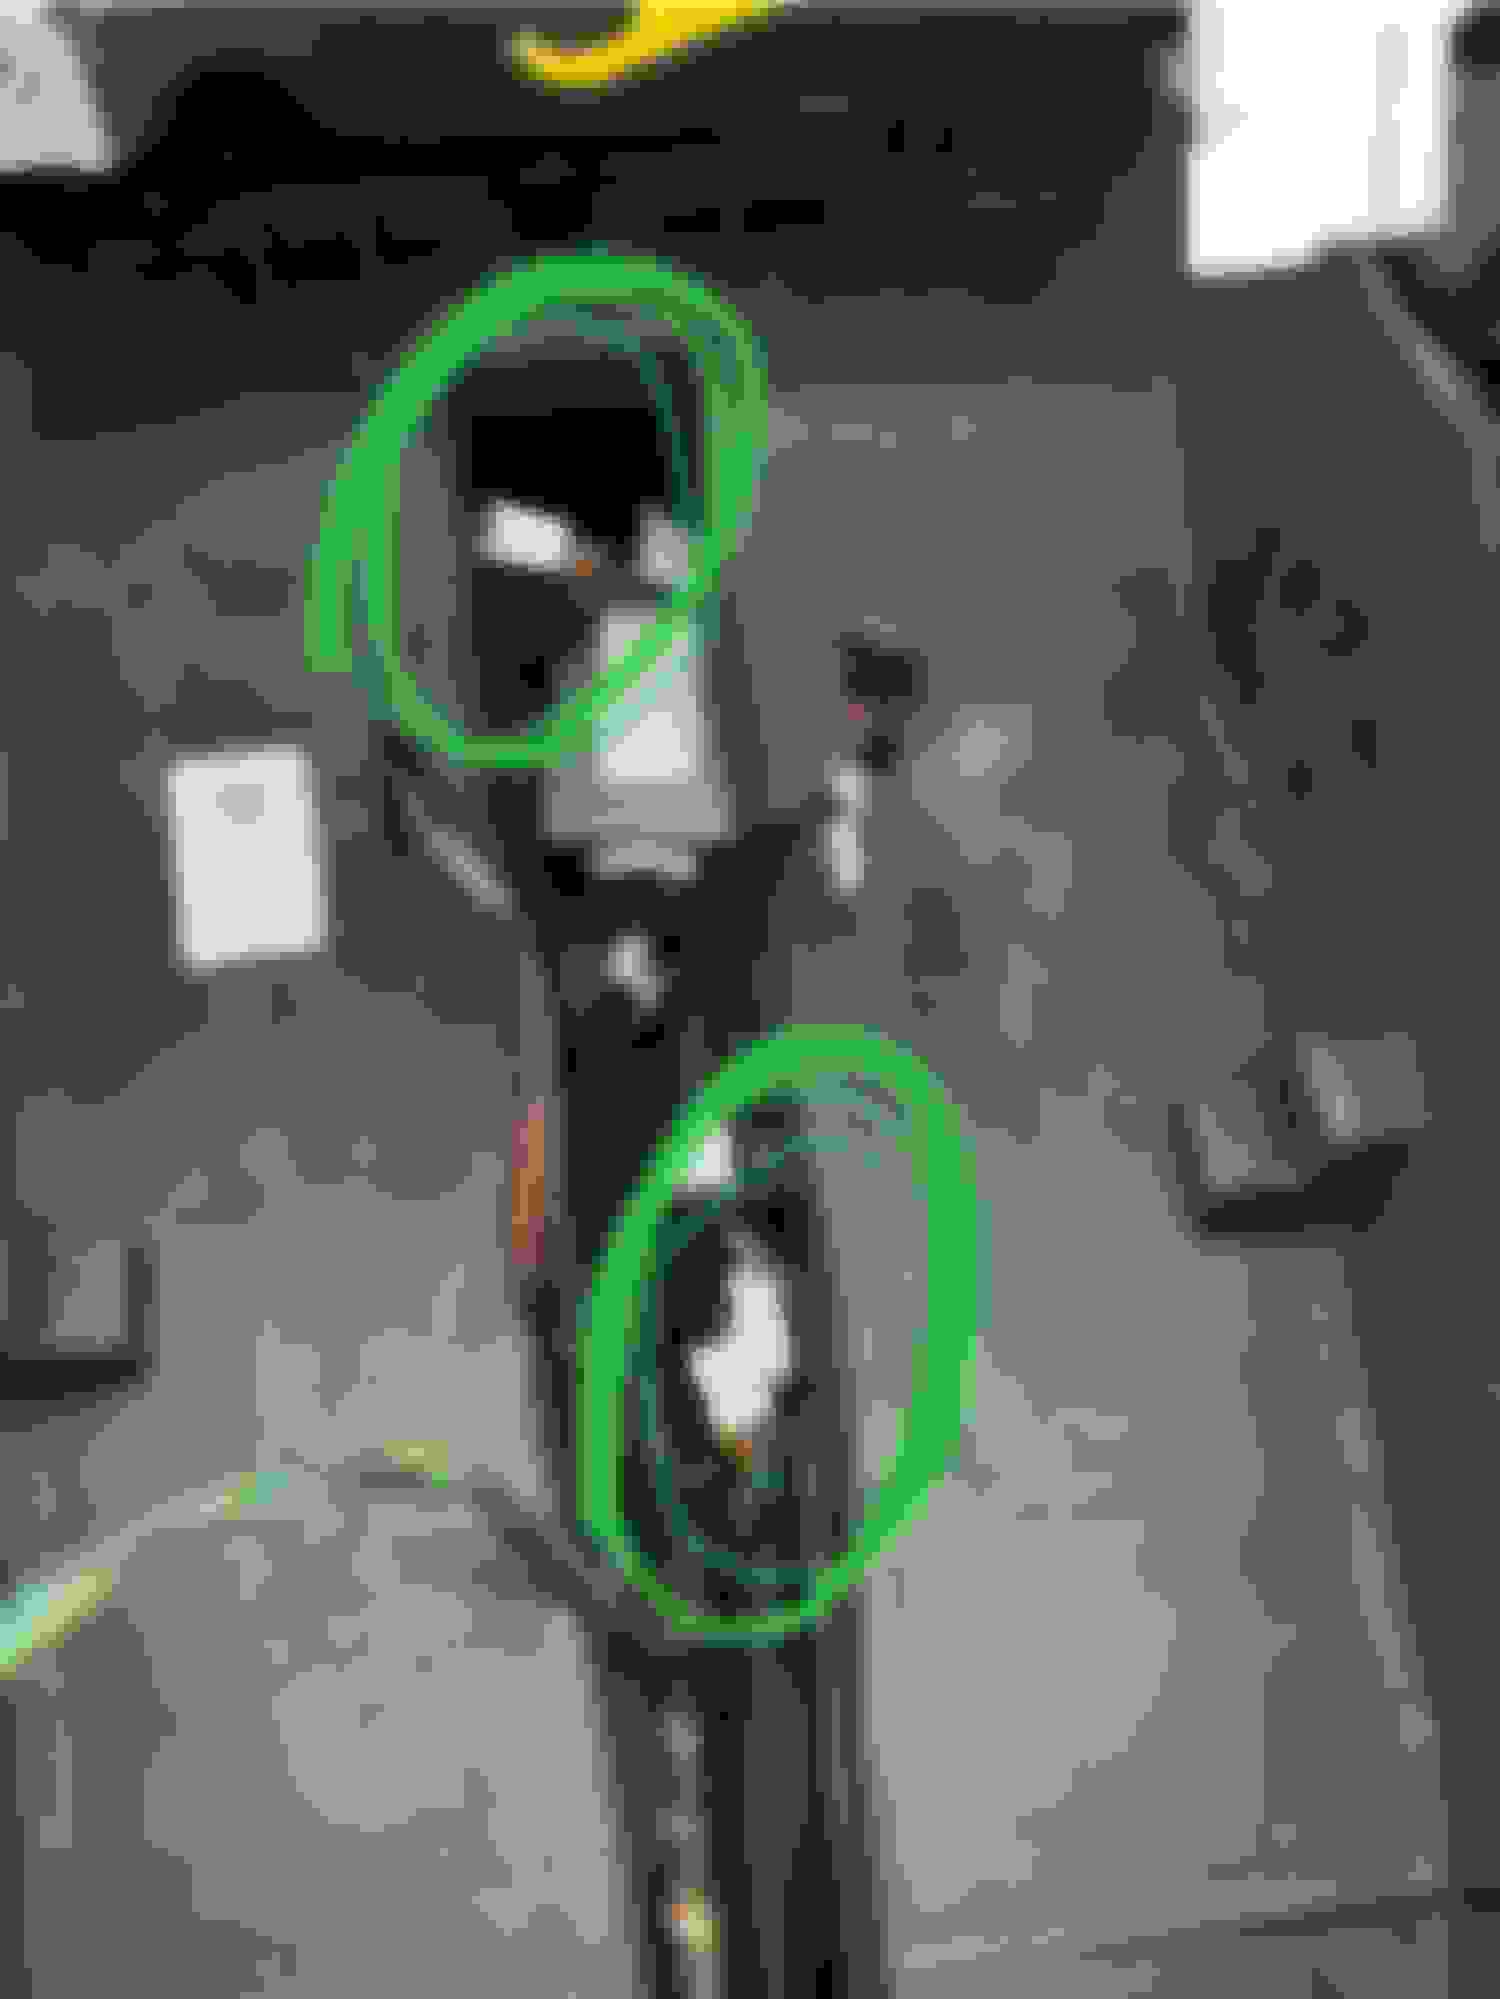
there are different vendors from China that sell the same thing, and some of them are even cheaper, however I decided to pick this vendor because he took the time to show in pictures all the parts he's shipping.
Chesttechner on his videos mentions that it's important to have the little box module and he had to buy it separately since the vendor he picked didn't ship that. As you can see from the picture this vendor included the module needed.
These are the links to Chesttechner videos, even though some parts I had to do it diffrently (I'll explain):
Remove rear vents panel - youtu.be/NhW4x2HbMV8?si=Vb09LKVv4bfztn7s
Remove center console - youtu.be/FpTScuY2UeA?si=NeSfEi_hg4GfGAxW
Install new vents and run the wires - youtu.be/oL1QQFnMhYM?si=t2xY-K6FIhQxNiXR
You can put the subtitles with auto translator, since the videos are in German.
What I did diffrently from Chesttechner:
I wasn't able to remove the USB ports the way he did (I have a US model without the 12v cigar port). It's much easier to remove the cubby first then from there it's super easy to remove the usb ports. Just pull it.
The rear panel is super hard to remove. It took 20 minutes to find a way to pull it, since I was too scared of breaking something. Eventually it came out.
Compared to the videos the tabs in my car are much harder to pull, I wonder if earlier models had different, more loosen tabs.
Another issue I had hard time figuring out. This freaking plug from the back of the screen. Took forever to understand how to pull it out. I don't even remember how I did it but proceed with extreme caution.
Another thing I wasn't able to do was to unplug the usb ports from the metal module that feeds the cupholder and center storage (too hard to pull, I didn't want to damage something), hence I had to hang them around still connected.
No problem, there's enough room to move around.
To run the wire inside the console I found it easier to pass the cable that goes to the rear vents from inside out, no like Chesttechner (he did outside in).
The two bolts (10mm socket) to loosen the center console (2nd video at minute 8:04) are deep inside those holes. Make sure you have a long 10mm socket like the one chesttechner uses. I had to stick an allen wrench on a short 10mm socket and it wasn't easy to unscrew those.
The confusing part is when you have to connect the plugs. There are two of them that don't connect to anything. I guess one is for the led backseat available in the Chinese market (not interested on that) and the other one I had no idea. Maybe they use the same harness for those who need to illuminate the front vents, who knows.
I tucked everything between the two A/C conduits and reversed the install to put everything back together.
I didn't change the rings on the rear vents (the ones shipped with from China are slightly different), I kept the originals on since I found them more cohesive with the ones in the front, and it's one less thing to do.
It took about 3 hours because I was very, very careful.
nice! Yeah my questions were about the front retrofit. But I decided against it, too much work for something not oem
I installed a full Ambient light kits into my car and it hacks the SAM system so it's all controlled by the head unit and produced all the colours even though my car only has 3 colours, I now have 64 colours. I have to say, that I use the blue more than any other colour.
I installed a full Ambient light kits into my car and it hacks the SAM system so it's all controlled by the head unit and produced all the colours even though my car only has 3 colours, I now have 64 colours. I have to say, that I use the blue more than any other colour.
What light kit did you use? Is it still working well?
 03-21-2023, 05:22 PM