
started tear down for paint

 08-23-2011, 07:03 PM
#401
MBWorld Fanatic!
Thread Starter
Glad you guys like the thread and the photos. Even though it's a lot of hard work, I just love doing this sh*t and mucking around with my cars. 
Should have the fuel injectors and rail back onto the motor tonight, along with a new water temp sender. I somehow buggered up the one on the 55 when I was removing the wiring harness, and also buggered up the one on the 43 trying to remove it. Cue another $20odd down the drain. Ah well.
If I get enough time, I will also likely start swapping the lower oil pans on the motors - doing this so I don't have to transfer the oil pan heater that I've affixed with super strong adhesive to the 43's pan.
I now also have the rest of the AC o-rings I need too, so just waiting on those two pieces from Germany....too bad they can't come "overnight, from Japan" (see if anyone catches the FnF references....)
 08-24-2011, 11:09 AM
#402
MBWorld Fanatic!
Thread Starter
I now know how the fire started that consumed the E55 from which my motor came!
Last night, I was nearly finished installing the fuel rail when I noticed the fuel feed was at an angle. Strange I thought. What a pain, as I was almost done and had to take it all apart again. At that point I noticed that the fuel feed was bent out of shape, and probably caused a leak and subsequent fire. The wiring harness from that side had all been melted.
Anyway, all buttoned up now. No pix, but maybe I'll shoot some later.
Tonight - need to get at the lower oil pan swap. Tomorrow and possibly Friday evening - get the engine off the stand and onto the hoist so I can install the rebuilt starter and replace the rear main seal. Just a few more days in the week - hopefully those two pieces arrive from Germany by Friday. I'm getting antsy, I want the motor back into the car on Saturday!!
08-25-2011, 11:08 AM
#403
MBWorld Fanatic!
Thread Starter
Good news - one of the pieces from Germany has arrived, the hose from the right cylinder head to the trans fluid cooler. Bad news - the pipe/water fitting which is friction fit into the right head and connects to the pipe leading to the trans cooler won't be here until mid to late next week. Argh.
Meantime, I borrowed my cousin's oxy-acetylene torch to try to get one of the fittings out of the 43's heads. Mucked around with it last night, but no luck at all. And now they are looking the worse for wear because of my mucking around with them. Boo. I was all keen to get the motor into the car this weekend, but we'll see. Might not be worth it, as there's no huge rush, maybe I will just wait for the part to arrive from Germany. Ah well.
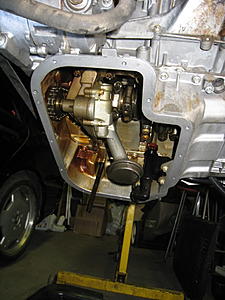
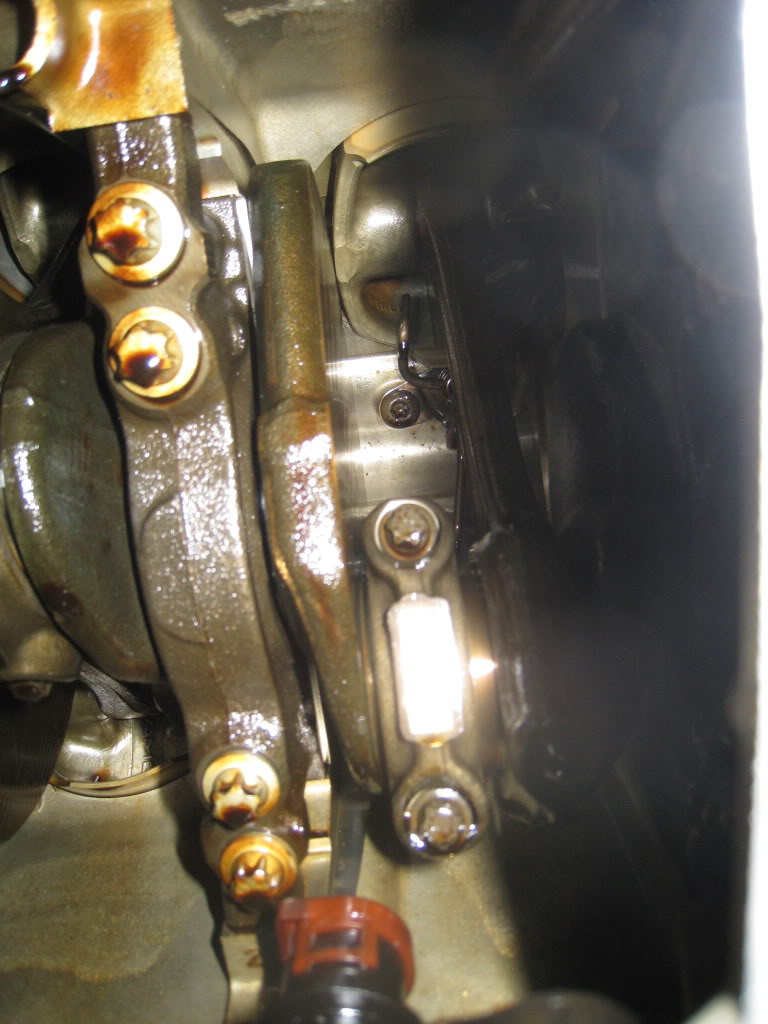
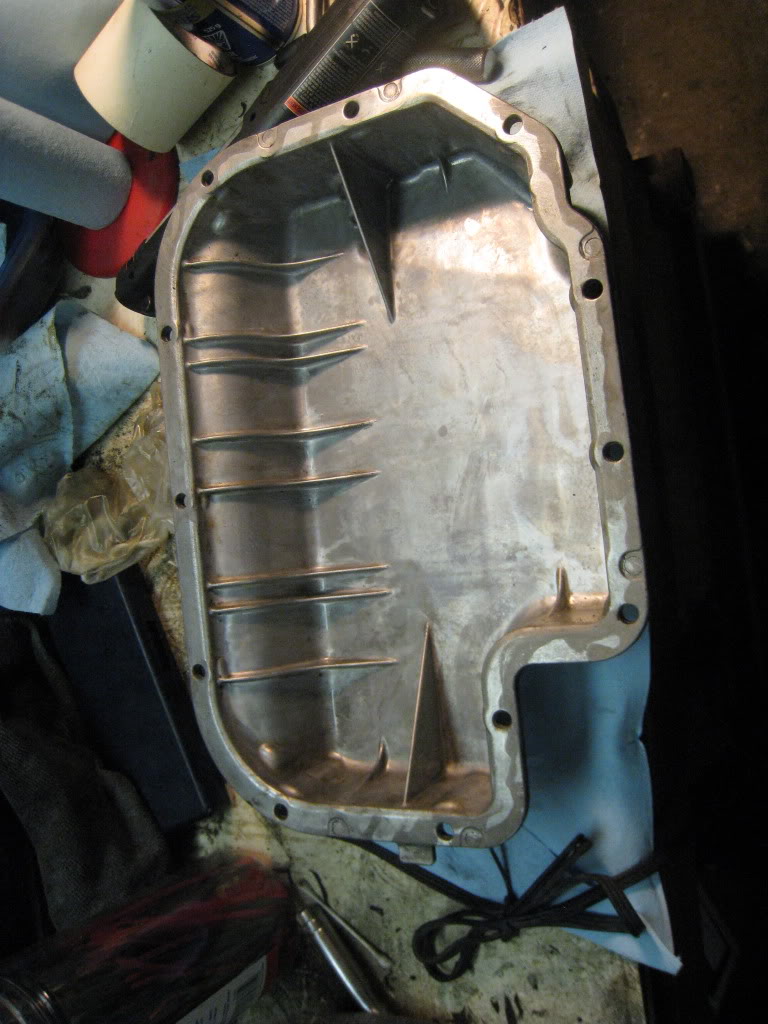
Last night I did swap over the lower oil pans though. As I was cleaning the mating surface with the upper oil pan, I had a look up into the cylinders. The bottoms of the pistons have 'AMG' cast into them! Cool. And there are also oil squirters too.
The pix:
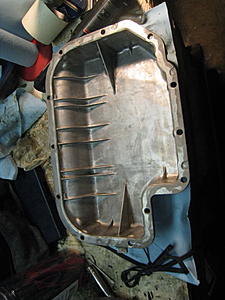
lower pan off and mating surface cleaned:
detail of the AMG casting on the piston:

oil squirter:

lower pan cleaned up and ready to re-install:
lower pan back on, showing my aftermarket oil pan heater:

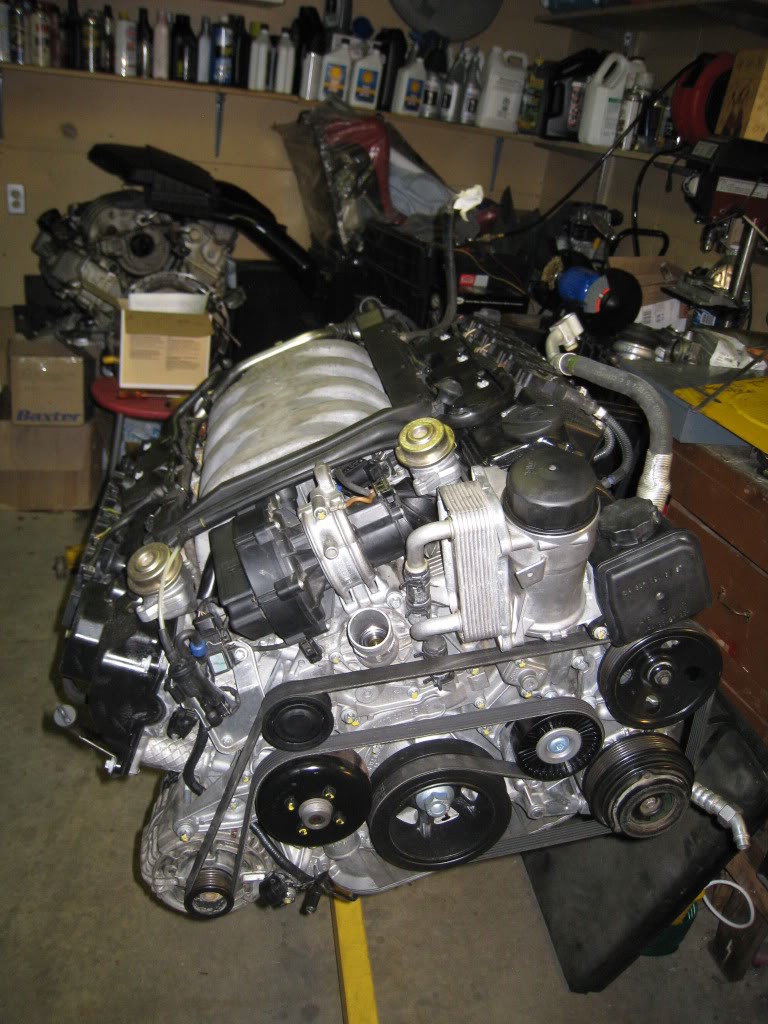
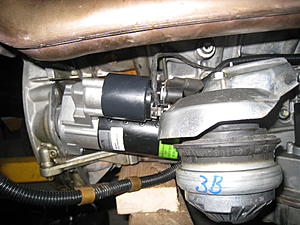
now the motor is just waiting for that pipe from Germany, starter and rear main seal:

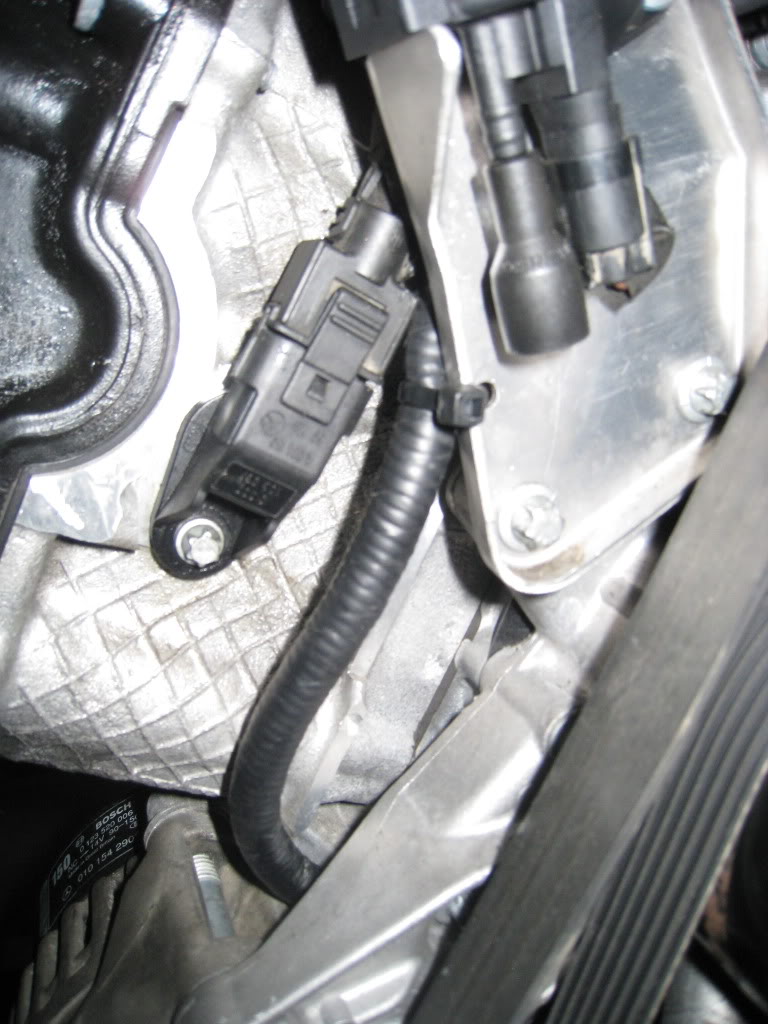
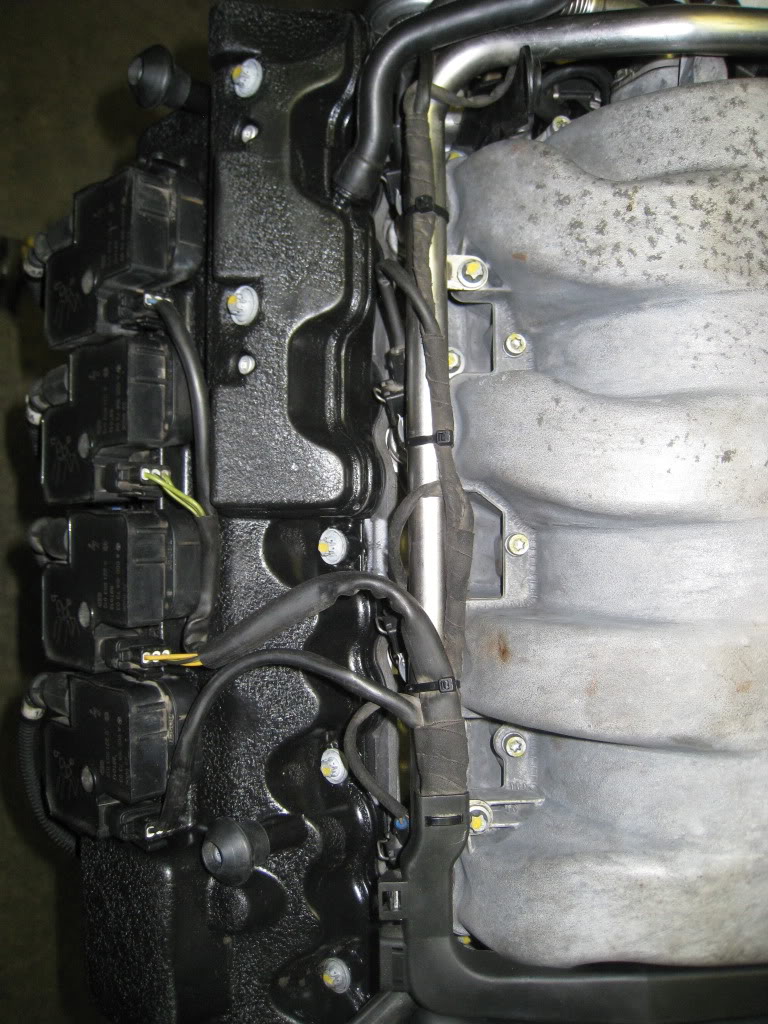
my attempt at 'OEM', the starter/alternator sub harness leading down by the end of the left head, zip tied just like stock, and trimmed too!:

more OEM-like ziptying of the main harness on the fuel rail:
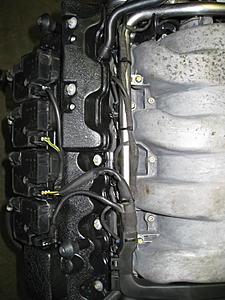
One can leave the zip ties untrimmed, but then it doesn't look tidy. Don't trim them enough, and the sharp edges of plastic will cut your hands to ribbons when you work on the car in that area. I cut them right on the edge of the locking mechanism with a box cutter.
Meantime, I borrowed my cousin's oxy-acetylene torch to try to get one of the fittings out of the 43's heads. Mucked around with it last night, but no luck at all. And now they are looking the worse for wear because of my mucking around with them. Boo. I was all keen to get the motor into the car this weekend, but we'll see. Might not be worth it, as there's no huge rush, maybe I will just wait for the part to arrive from Germany. Ah well.
Last night I did swap over the lower oil pans though. As I was cleaning the mating surface with the upper oil pan, I had a look up into the cylinders. The bottoms of the pistons have 'AMG' cast into them! Cool. And there are also oil squirters too.
The pix:
lower pan off and mating surface cleaned:

detail of the AMG casting on the piston:
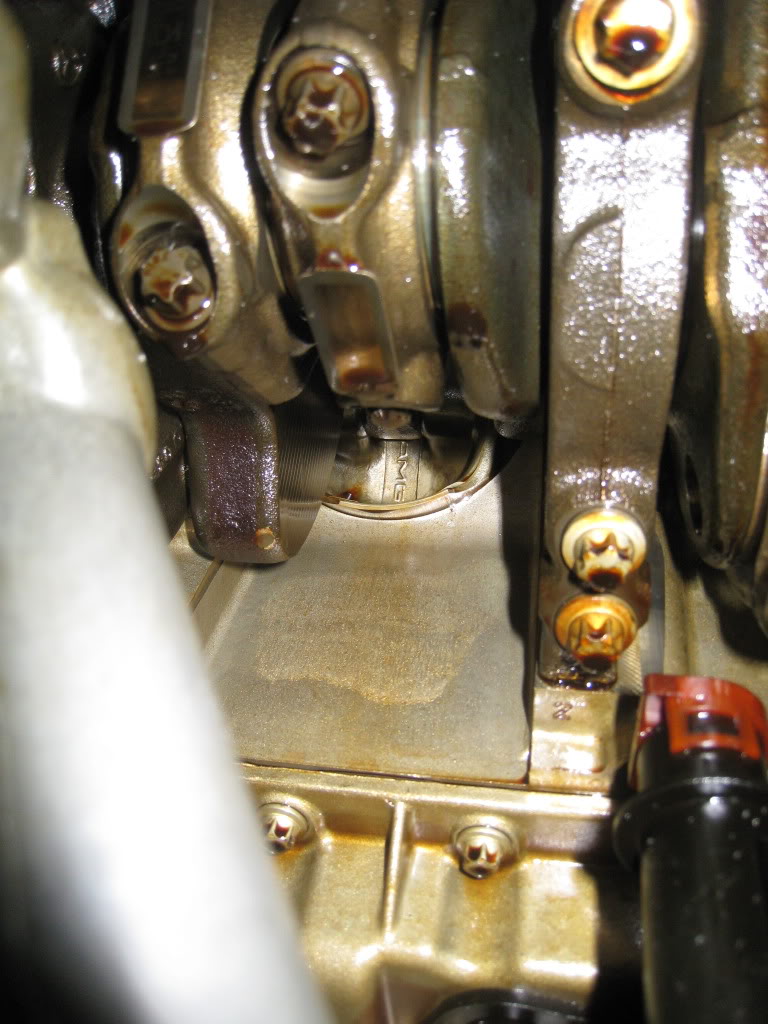
oil squirter:
lower pan cleaned up and ready to re-install:
lower pan back on, showing my aftermarket oil pan heater:

now the motor is just waiting for that pipe from Germany, starter and rear main seal:
my attempt at 'OEM', the starter/alternator sub harness leading down by the end of the left head, zip tied just like stock, and trimmed too!:
more OEM-like ziptying of the main harness on the fuel rail:
One can leave the zip ties untrimmed, but then it doesn't look tidy. Don't trim them enough, and the sharp edges of plastic will cut your hands to ribbons when you work on the car in that area. I cut them right on the edge of the locking mechanism with a box cutter.
Last edited by Saaboteur; 08-25-2011 at 11:10 AM.

 08-25-2011, 01:10 PM
#407
MBWorld Fanatic!
Join Date: Mar 2010
Location: Land of mountains, cheese, chocolate and watches
Posts: 5,686
Received 260 Likes
on
220 Posts
12' W204 C63 AMG coupe "T-Rex", 12' W451 Smart Fortwo Pulse (99' W202 C43 AMG sold)
Vince,
Nice, tidy, cool, clean, beautiful work
What is with the yellow paint on the screws Checked and torqued down perhaps?
Nice, tidy, cool, clean, beautiful work
What is with the yellow paint on the screws
Checked and torqued down perhaps?
08-25-2011, 04:42 PM
#408
MBWorld Fanatic!
Thread Starter
As my engine builder pointed out, the block heater will warm the coolant/water mixture, and is thus preferred by people. But the pan heater will heat the oil, and is preferred by engines. Thinking back, I actually don't think I even used the pan heater at all last year. Nice to have though, especially as I don't think there's facility to fit a standard type (coolant heating) block heater.
Paint on the bolts is exactly for that - because I've been working on the motor over a span of quite some time, I wanted to note which bolts I've removed and then refitted with proper torque specs. There are only a few exceptions - that bracket which I showed where I ziptied the starter/alternator sub harness to is one I just tightened up enough, another are the bolts inside the rubber mounting bulbs for the airbox assembly.
It is very nice having a clean engine bay - if anything leaks, you can tell where and hopefully what it is. Having another look at my original 43 motor, I believe that not only were the oil cooler seals leaking, and something on the power steering pump too, but also the oil filter housing itself. I thought it was cast into the timing cover, but the upper half, at least, can be removed. I never replaced that one, just the oil cooler seals. The timing cover on the 43 is very dirty.
Thinking back, I actually don't think I even used the pan heater at all last year. Nice to have though, especially as I don't think there's facility to fit a standard type (coolant heating) block heater. Paint on the bolts is exactly for that - because I've been working on the motor over a span of quite some time, I wanted to note which bolts I've removed and then refitted with proper torque specs. There are only a few exceptions - that bracket which I showed where I ziptied the starter/alternator sub harness to is one I just tightened up enough, another are the bolts inside the rubber mounting bulbs for the airbox assembly.
It is very nice having a clean engine bay - if anything leaks, you can tell where and hopefully what it is. Having another look at my original 43 motor, I believe that not only were the oil cooler seals leaking, and something on the power steering pump too, but also the oil filter housing itself. I thought it was cast into the timing cover, but the upper half, at least, can be removed. I never replaced that one, just the oil cooler seals. The timing cover on the 43 is very dirty.
08-27-2011, 12:28 AM
#409
MBWorld Fanatic!
Thread Starter
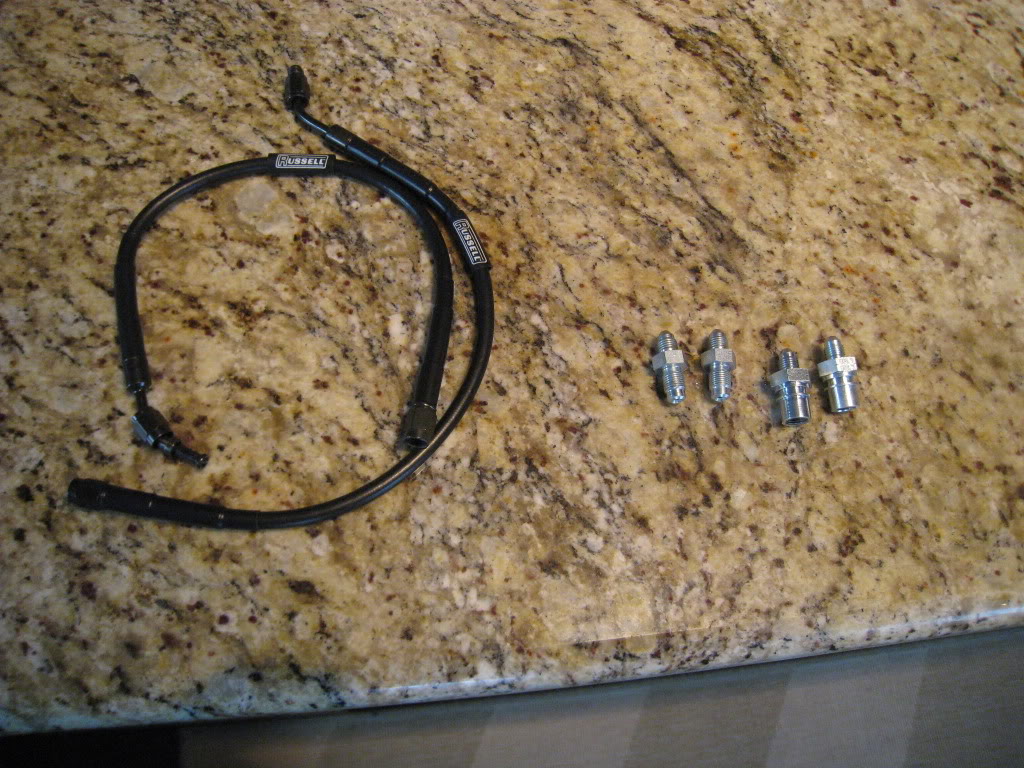
The new Russell lines came in today, so that's good news. They were about the only option available with a 45* -3 fitting on one end. Fingers crossed it should work nicely for what I'm doing. Bonus - they are also DOT approved.
Here's a shot of all the new brake fittings and the lines - all from different manufacturers: Russell, Aeroquip, and Earl's.

Here's a shot of all the new brake fittings and the lines - all from different manufacturers: Russell, Aeroquip, and Earl's.
 08-28-2011, 03:27 AM
#411
MBWorld Fanatic!
Thread Starter
I can do this! The various numbers show the equivalents from the different manufacturers. I just bought whatever the shop had, with the exception of the lines, which only Russell have. These had to be specially ordered.
I haven't fitted everything yet, but it *should* work. The Stoptech lines I have right now are 16" long. With the metric to -3 fittings the required line length should be reduced slightly, but I got the Russell lines in 16" to be sure.
*-3 male to 10mm x 1 male
Aeroquip FCM2941
Earl's 592032ERL
Russell 640431
*-3 male to 10mm x 1 female
*FCM2945
Earl's 989534ERL
Russell 640411
45* to -3 straight hose
16" 654243
08-29-2011, 11:09 AM
#412
MBWorld Fanatic!
Thread Starter
Didn't get a huge amount of work done on the car or motor this weekend - still waiting for that bloody water fitting to come in from Germany.
So, instead I just tackled a few small thing tasks which surprisingly, took quite a bit of time to do!
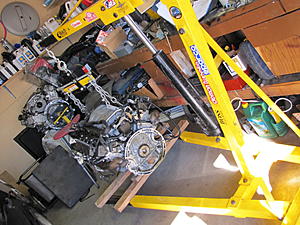
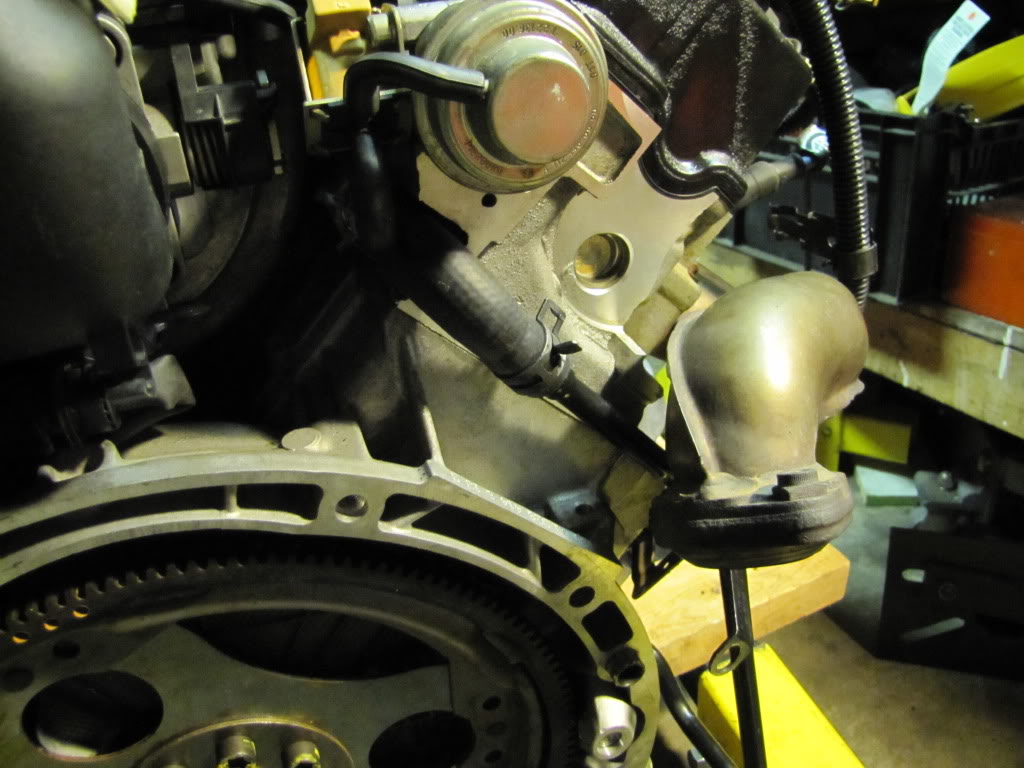
I first took the engine off the stand and onto the hoist, so I could get at the rear cover, rear main seal and also allow me to get the starter into place. Now the engine is sitting on some planks of wood I've laid on the hoist's legs. And I can get the crank pulley holder on there and torque everything down without the fear of the whole bloody thing tipping over on the engine stand!
I took the opportunity to torque the crank pulley on - the WIS calls for two stages of torque - 200Nm plus 90*. I could not for the life of me get the whole 90*, more like only 60* or so. The flywheel side is also two stage - but only 45Nm and then another 90*. Those were a whole lot easier!
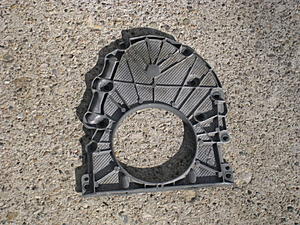
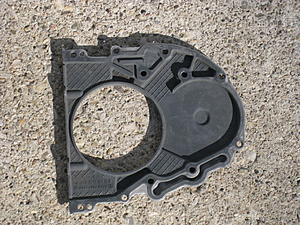
Then I removed the rear cover and cleaned up all the sealant crap left over. The WIS instructions say you can't really remove the rear main seal with the cover in place - it's tight in there. So once the cover was off, the main seal off, and everything cleaned up, the cover went back on, and then the new seal. Flywheel back on and done.
dirty:
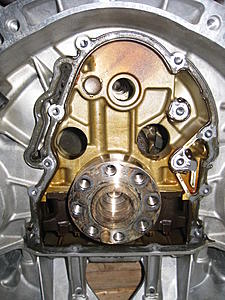
cleaned!:

new main seal on:
flywheel back on too:
I got the starter into place, but as it is actually held in place with the engine to transmission bolts, it's not bolted in of course. In the picture you can see what I did the starter now as a preventative measure - you need to remove the engine mount to get at the starter. Not fun with the engine in the car.
As I was mucking around with the engine mount, I remembered that I had purchased a special tool for getting at the engine mount top bolts - an offset wrench from Koch Tools:
http://www.kochtools.com/index.php?p=product&id=75
But I bought the 17mm version, not the 16mm (because on their site it lists the 17mm for W202s, not the 16mm), and actually I think when I bought it they only listed the 17mm version, not the 16mm. Anyway, turns out the engine mount bolts are 16mm, on both the 43 and 55 motors I have. This offset wrench is almost certainly required as there is nearly no room in the engine bay to get at the top of this bolt - unless you remove the exhaust manifold first. With this wrench, you get the end onto the bolt head, then you can get an extension onto the other end and away you go.
So of course instead of ordering the other wrench, I just bought new bolts with 17mm heads on them instead...
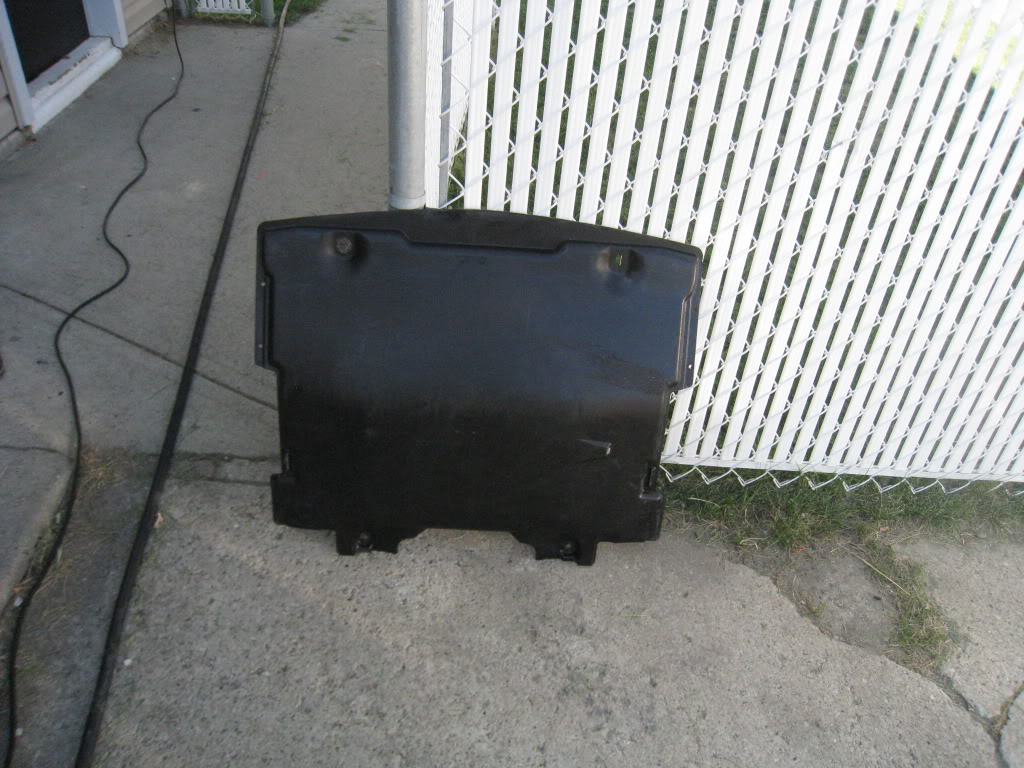
God, soooo boring now. If anyone is actually reading this, you can tell how bored and antsy *I* am waiting for that water fitting! I'm cleaning everything and taking pictures of so much boring crap! I took the pressure washer to the plastic undertray because the gunk was just caked on there, and even with degreaser it didn't come out with just the garden hose. Looking as new as possible now!

I just want the motor back in; it'll be fun. Unfortunately, because of the long weekend and the parts delays, my mechanic buddy won't be able to lend me a hand with the install this coming weekend (provided of course the fitting arrives). I've recruited my wife instead! I figure she can operate the hoist while I guide the engine in. Now I just need to figure out or remember exactly which engine to trans bolts go where now.... There are some brackets in there too.
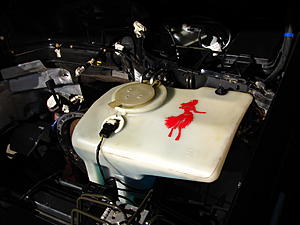
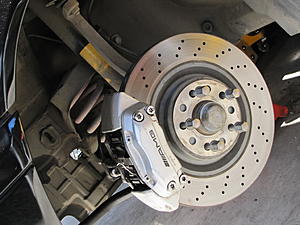
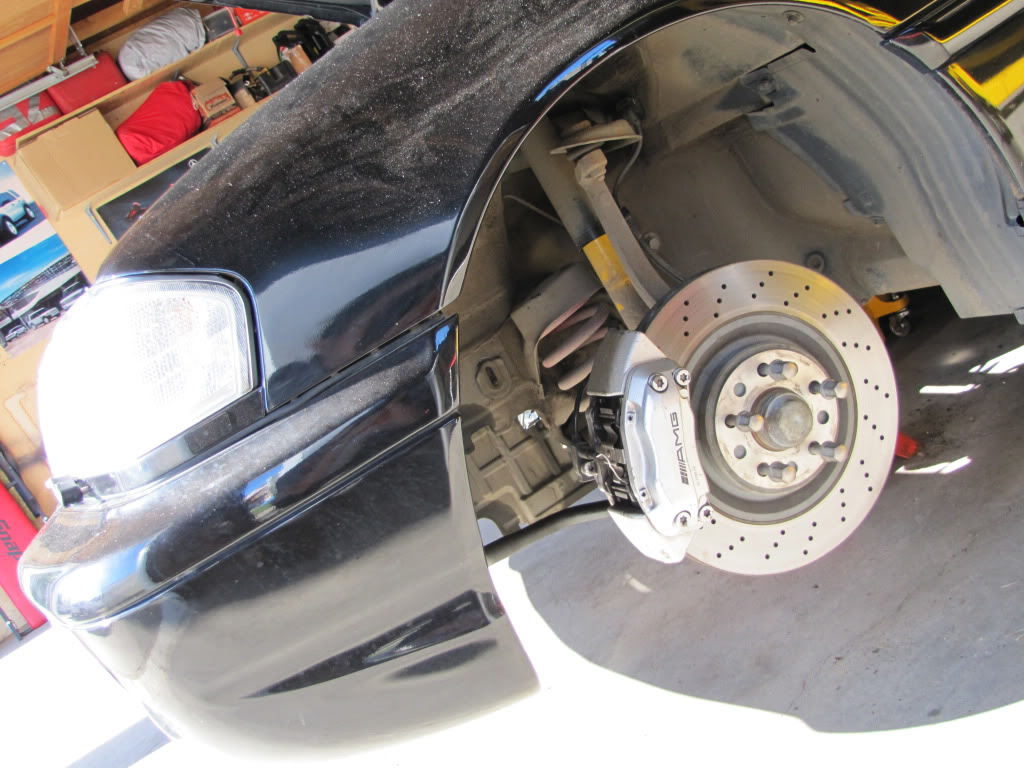
Finally, I also put a hula girl sticker on the car (I have the same one but in white on the S2000) and a gratuitous shot of the C32/55 calipers in the morning sun.

So, instead I just tackled a few small thing tasks which surprisingly, took quite a bit of time to do!
I first took the engine off the stand and onto the hoist, so I could get at the rear cover, rear main seal and also allow me to get the starter into place. Now the engine is sitting on some planks of wood I've laid on the hoist's legs. And I can get the crank pulley holder on there and torque everything down without the fear of the whole bloody thing tipping over on the engine stand!

I took the opportunity to torque the crank pulley on - the WIS calls for two stages of torque - 200Nm plus 90*. I could not for the life of me get the whole 90*, more like only 60* or so. The flywheel side is also two stage - but only 45Nm and then another 90*. Those were a whole lot easier!
Then I removed the rear cover and cleaned up all the sealant crap left over. The WIS instructions say you can't really remove the rear main seal with the cover in place - it's tight in there. So once the cover was off, the main seal off, and everything cleaned up, the cover went back on, and then the new seal. Flywheel back on and done.
dirty:

cleaned!:
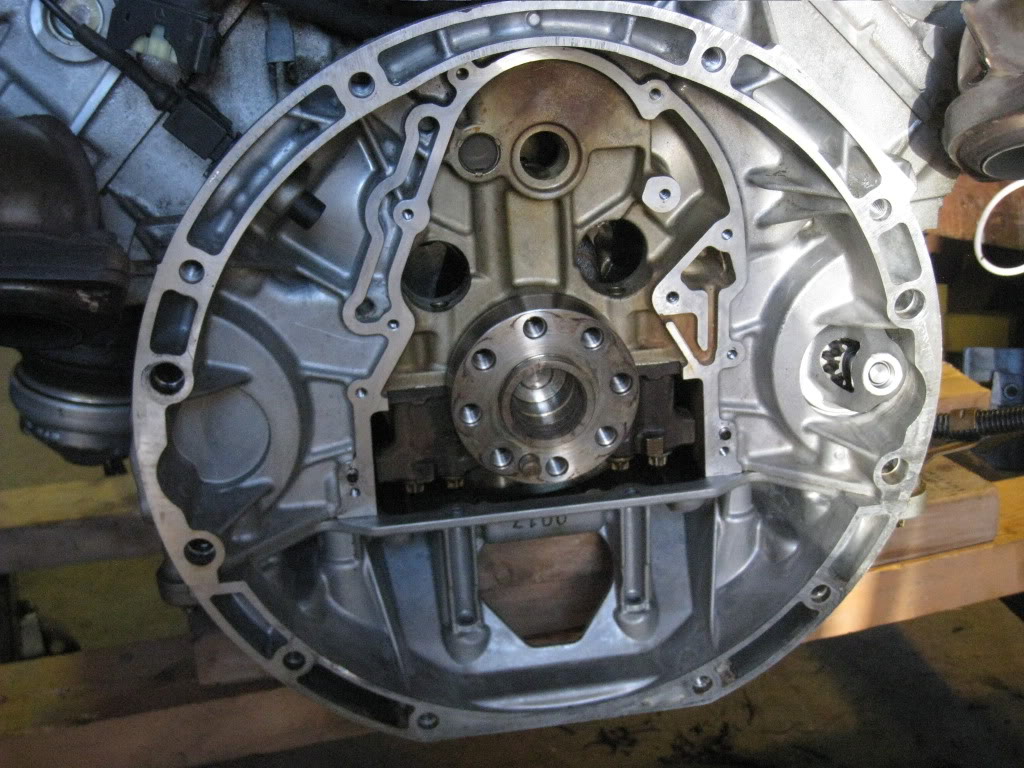

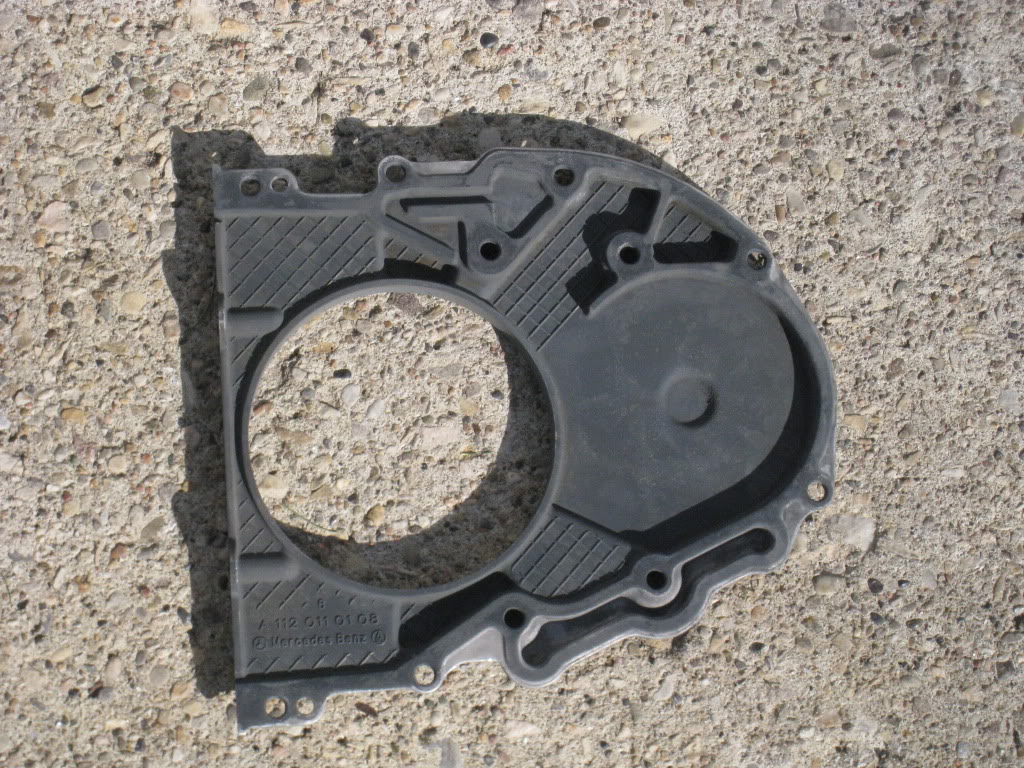
new main seal on:

flywheel back on too:

I got the starter into place, but as it is actually held in place with the engine to transmission bolts, it's not bolted in of course. In the picture you can see what I did the starter now as a preventative measure - you need to remove the engine mount to get at the starter. Not fun with the engine in the car.

As I was mucking around with the engine mount, I remembered that I had purchased a special tool for getting at the engine mount top bolts - an offset wrench from Koch Tools:
http://www.kochtools.com/index.php?p=product&id=75
But I bought the 17mm version, not the 16mm (because on their site it lists the 17mm for W202s, not the 16mm), and actually I think when I bought it they only listed the 17mm version, not the 16mm. Anyway, turns out the engine mount bolts are 16mm, on both the 43 and 55 motors I have. This offset wrench is almost certainly required as there is nearly no room in the engine bay to get at the top of this bolt - unless you remove the exhaust manifold first. With this wrench, you get the end onto the bolt head, then you can get an extension onto the other end and away you go.
So of course instead of ordering the other wrench, I just bought new bolts with 17mm heads on them instead...
God, soooo boring now. If anyone is actually reading this, you can tell how bored and antsy *I* am waiting for that water fitting! I'm cleaning everything and taking pictures of so much boring crap! I took the pressure washer to the plastic undertray because the gunk was just caked on there, and even with degreaser it didn't come out with just the garden hose. Looking as new as possible now!
I just want the motor back in; it'll be fun. Unfortunately, because of the long weekend and the parts delays, my mechanic buddy won't be able to lend me a hand with the install this coming weekend (provided of course the fitting arrives). I've recruited my wife instead! I figure she can operate the hoist while I guide the engine in. Now I just need to figure out or remember exactly which engine to trans bolts go where now....
There are some brackets in there too.Finally, I also put a hula girl sticker on the car (I have the same one but in white on the S2000) and a gratuitous shot of the C32/55 calipers in the morning sun.


 08-29-2011, 01:30 PM
#413
Hey SAABOTAGE  eh I meant SAABOT�R
gREat pictures
why didn't you repaint your used calipers making them look like new and apply a new AMG logo.
paint looks a bit worn if you check closely.
you'll never sell that car! you'd be sorry.
soon you'll be able to drive it
foggot to ask you, did you use C32 brake pad wear sensors or did you re-use the C43 BPW-sensors
eh I meant SAABOT�R gREat pictures
why didn't you repaint your used calipers making them look like new and apply a new AMG logo.
paint looks a bit worn if you check closely.
you'll never sell that car!
you'd be sorry. soon you'll be able to drive it
foggot to ask you, did you use C32 brake pad wear sensors or did you re-use the C43 BPW-sensors
08-29-2011, 03:05 PM
#414
MBWorld Fanatic!
Thread Starter
I guess I just can't be bothered at the moment to paint the calipers. When I put them on, I needed them done ASAP, and didn't have the time or patience to paint them - and that was in the winter. I suppose I could do it now, but I want to get the engine sorted out first.
I used the C32 pad wear sensors.
I used the C32 pad wear sensors.
08-30-2011, 04:42 AM
#415
MBWorld Fanatic!
Join Date: Mar 2010
Location: Land of mountains, cheese, chocolate and watches
Posts: 5,686
Received 260 Likes
on
220 Posts
12' W204 C63 AMG coupe "T-Rex", 12' W451 Smart Fortwo Pulse (99' W202 C43 AMG sold)
Great thread, great reading, great pictures, great job and I admire your patience Your calipers don't need paint. Looks relatively OK to me and look like having been on the car since a long time....
Your calipers don't need paint. Looks relatively OK to me and look like having been on the car since a long time....
Last edited by DRBC43AMG; 08-30-2011 at 04:59 AM. Reason: Completed
08-31-2011, 03:21 PM
#416
MBWorld Fanatic!
Thread Starter
Well, here's the latest - still nothing from Germany! That little water fitting is driving me nuts now. I'm pessimistic of it arriving here by the weekend. They said it was back ordered, but now I'm beginning to think they are actually fabricating one for me!
The delay is going to hurt, because this coming weekend is a long weekend, and my last in town for a couple of weeks (off to Hawaii for holiday!!) so I really want to get the motor in this weekend and as much done as possible. It's nuts, because all of my weekends are now basically fully booked until (Canadian) Thanksgiving into the second week of October - this weekend is Labour Day long weekend; then Hawaii holiday that will cover two weekends; then a wedding on the weekend after we get back; after that a deal to install a supercharger system, gauges and some other work on a local guy's S2000; relatives over for Thanksgiving - it's crazy! I suppose I like being busy though.
Anyway, instead of waiting for the fitting, I'm going to do a couple things. First I'm going to try again at getting those fittings off the 43 head. My engine builder told me to heat it up, cool it down, and to do that cycle five times. Doing so should shrink the fitting slightly each time. See if that works.
The other plan, which I like a bit better, is to fabricate something up - essentially an aluminum plug that will be fitted into the head, and then either a brass or aluminum fitting screwed into the aluminum plug. This piece would take the place of the one coming from Germany.
Also have decided to have the injectors cleaned. What happened is that when I was installing the new lower o-rings onto the 55's injectors, the little plastic washer on a few of them came apart! Alarming. This little washer holds the o-ring in place. While I salvaged a few of them off the 43 injectors, I wasn't entirely happy with them, they didn't all seem secure and some were cracking again.
Cue a mad drive yesterday afternoon, through rush hour traffic, all across the city and into one of the neighbouring suburbs to meet with the only outfit I know that cleans injectors. Essentially a one man operation, but the guy knows his stuff. Unfortunately, he didn't have the washers in stock, but has since ordered them from one of his suppliers. Those won't be here until next week. So I will have the guy clean the injectors for me too, which is good news. But I likely won't get those back until we return from Hawaii - still, the fuel rail is relatively easy to put back onto the motor even when the motor is in the car.
So....if I can get my engine builder/machinist to sort out the plug for me by the weekend (or, if the part arrives from Germany) then I can get the engine back into the car on Saturday.
Fingers crossed!
Last edited by Saaboteur; 08-31-2011 at 05:35 PM.
09-01-2011, 03:50 PM
#417
MBWorld Fanatic!
Thread Starter
It pays to have a machinist as a good friend!
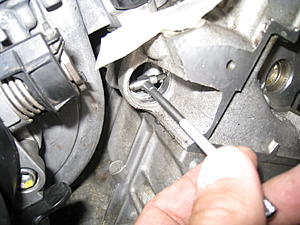
Borrowed a 'snap gauge' last night, and measured the orifice in the head. It's nearly impossible to get a set of calipers in there, so these snap gauges are used instead. They 'snap' to size, and then another measurement tool is used to measure the size.
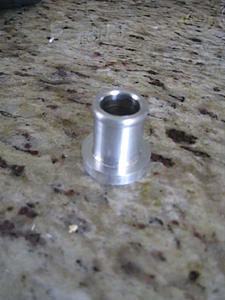
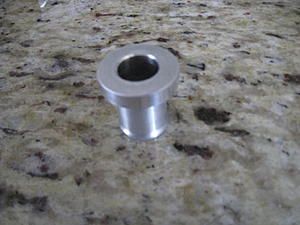
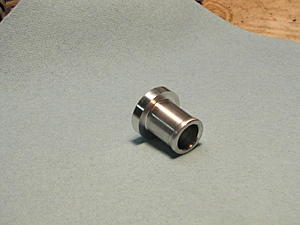
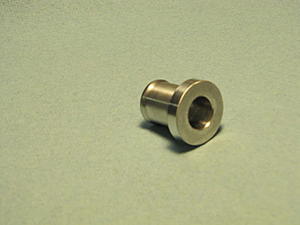
Brought the tool back this morning, and by lunch my friend had fabricated up the fitting. Wow. Haven't gotten the bill yet, but it's worth it in time for me. Pity, though, that it will be hidden away and not visible at all. So I took pictures instead!
I thought that he would just do up a small cylinder, into which an off the shelf hose end could be fitted. Instead, he machined the entire fitting out of a solid piece of aluminum. One piece construction should mean no possibilities for leakage. Even machined the lip for the hose clamp too.
Pictures - measuring the orifice:
and two views of the completed piece:
Should have it into the motor tonight, and the motor in the car sometime Saturday!!!
Borrowed a 'snap gauge' last night, and measured the orifice in the head. It's nearly impossible to get a set of calipers in there, so these snap gauges are used instead. They 'snap' to size, and then another measurement tool is used to measure the size.
Brought the tool back this morning, and by lunch my friend had fabricated up the fitting. Wow. Haven't gotten the bill yet, but it's worth it in time for me. Pity, though, that it will be hidden away and not visible at all. So I took pictures instead!
I thought that he would just do up a small cylinder, into which an off the shelf hose end could be fitted. Instead, he machined the entire fitting out of a solid piece of aluminum. One piece construction should mean no possibilities for leakage. Even machined the lip for the hose clamp too.
Pictures - measuring the orifice:

and two views of the completed piece:

Should have it into the motor tonight, and the motor in the car sometime Saturday!!!
09-01-2011, 04:20 PM
#418
MBWorld Fanatic!
Join Date: Mar 2010
Location: Land of mountains, cheese, chocolate and watches
Posts: 5,686
Received 260 Likes
on
220 Posts
12' W204 C63 AMG coupe "T-Rex", 12' W451 Smart Fortwo Pulse (99' W202 C43 AMG sold)
Vince, How are you going to seal the fitting inside so that it holds and doesn't leak or blow out?
09-01-2011, 05:07 PM
#419
MBWorld Fanatic!
Thread Starter
The fitting - like the OE one - is a friction fit. It's meant to just be tapped into place. I will, however, apply some Permetex/Loctite green to it, on advice from my engine builder.
http://www.permatex.com/products/Aut...e_Retainer.htm
http://www.permatex.com/products/Aut...e_Retainer.htm
09-02-2011, 12:11 AM
#420
MBWorld Fanatic!
Thread Starter
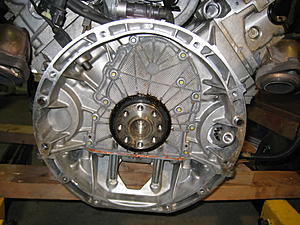
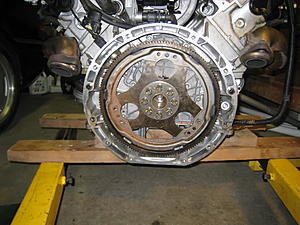
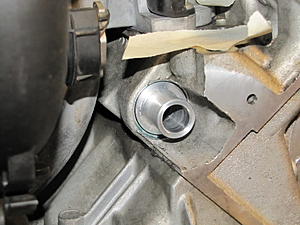
NICE! Motor is ready to go in now! I just finished installing the new piece. Went in just perfectly. And I just installed it onto the motor, then put the hose and coolant hard line (leading to the trans cooler) on too. All ready now...
...Murphy's is going to stirke soon though, I'm sure, as my engine builder pointed out. The fitting from Germany will probably arrive soon!
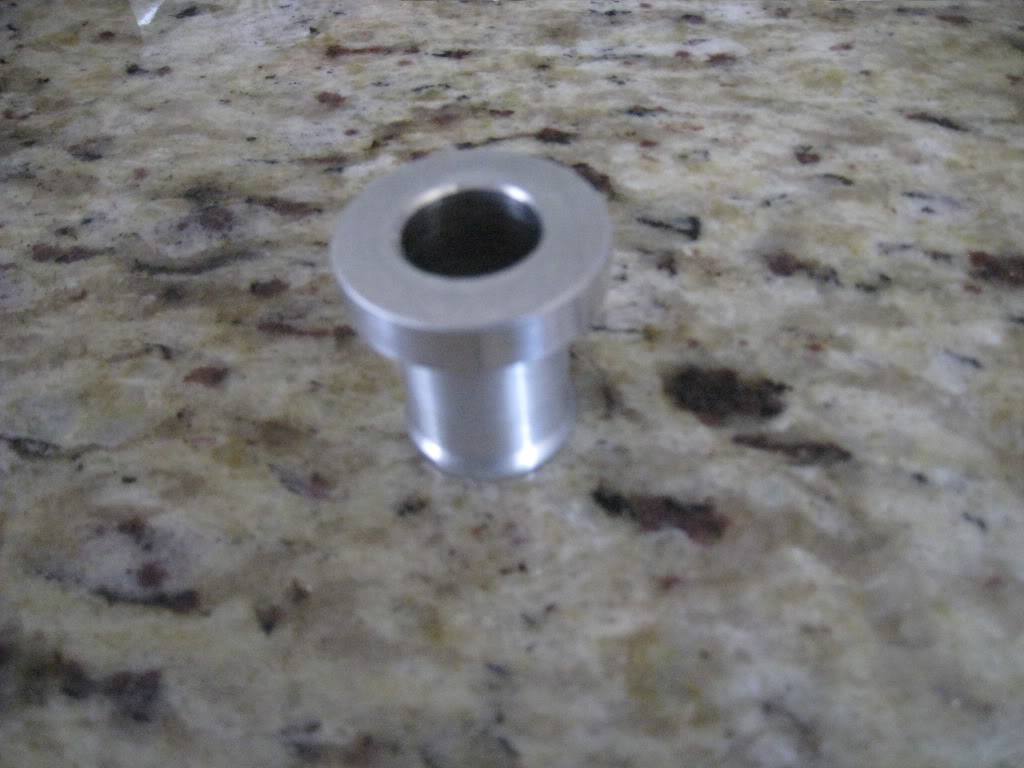
Here are a few more pictures, including some better ones of the fitting, shot with my nicer camera.
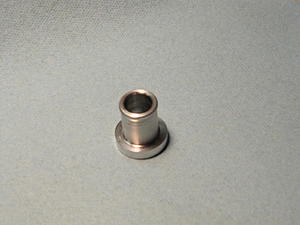
and installed, plus comparison to a stock piece:
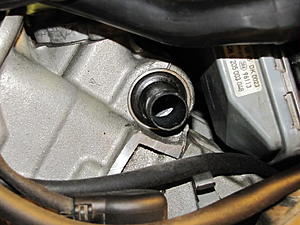
and the hardline and hose installed too:

...Murphy's is going to stirke soon though, I'm sure, as my engine builder pointed out. The fitting from Germany will probably arrive soon!
Here are a few more pictures, including some better ones of the fitting, shot with my nicer camera.


and installed, plus comparison to a stock piece:

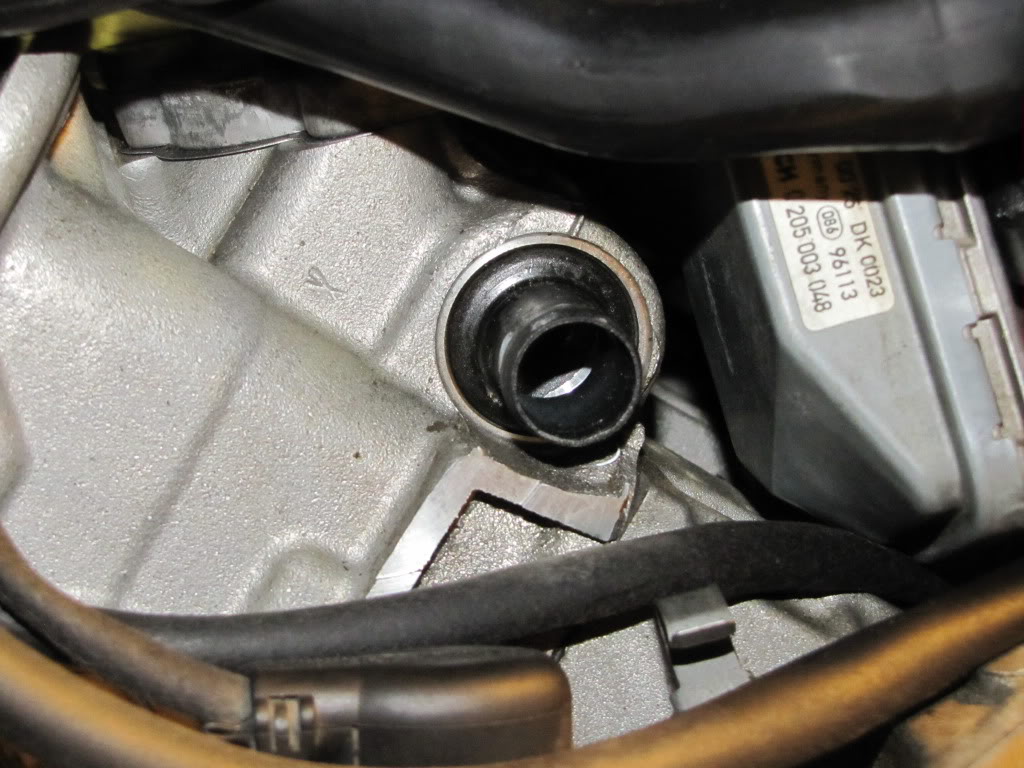
and the hardline and hose installed too:
 09-02-2011, 05:25 AM
#422
MBWorld Fanatic!
Join Date: Mar 2010
Location: Land of mountains, cheese, chocolate and watches
Posts: 5,686
Received 260 Likes
on
220 Posts
12' W204 C63 AMG coupe "T-Rex", 12' W451 Smart Fortwo Pulse (99' W202 C43 AMG sold)

Vince, how about some glue around the edge of the fitting as life insurance and extra precaution?
09-02-2011, 09:02 AM
#423
MBWorld Fanatic!
Thread Starter
Well, the Permetex product I used is good for 400*C and supposedly adds up to 3000psi of holding capability. The fit is already tight; it was meant to be that way, with basically zero tolerance. I guess some extra sealant around the edge can't hurt, and I do have it available, both OE and aftermarket.
09-02-2011, 09:20 AM
#424
Senior Member

Join Date: Feb 2009
Location: Germany
Posts: 317
Likes: 0
Received 1 Like
on
1 Post
C43 AMG 5.5 - 396.4HP
Ah... I thought you did not use any glue at all...
The permatex you used is good for up to 400�F/204�C. But I think it should be enough. The head is cooled with water, so I think the temperature is limited at around 100�C. But I was a little nervous because if the engine is installed and you find some leakage you need to dismount again.
The permatex you used is good for up to 400�F/204�C. But I think it should be enough. The head is cooled with water, so I think the temperature is limited at around 100�C. But I was a little nervous because if the engine is installed and you find some leakage you need to dismount again.
09-02-2011, 10:42 AM
#425
MBWorld Fanatic!
Thread Starter
Whoops, that's right, 400*F, not *C. At any rate, it's much more than required. Still, on advice of my engine builder, I will add some silicone-like sealant around the edge, for insurance purposes! I'll use either the Victor Reinz (OE) stuff I bought and used for the valve covers, rated for 300*C, or the Permetex copper stuff I have used on the oil pan and rear cover, rated for 400*C.
I'll use either the Victor Reinz (OE) stuff I bought and used for the valve covers, rated for 300*C, or the Permetex copper stuff I have used on the oil pan and rear cover, rated for 400*C.


