

Painted Calipers


Thread Starter
Newbie
Joined: Mar 2009
Posts: 4
Likes: 0
None
Painted Calipers
Is there any company out there that paints brake calipers on AMG's. I was thinking about painting them red or something. I would rather not do it myself and have it professionally done.
MBWorld Fanatic!

Joined: May 2008
Posts: 1,005
Likes: 1
a durr
Heres a tutorial.
PRELIMINARY
Now now, I believe everyone has a ricer side. Alot of people deny that, heck even I used to be a "RID" (Ricer In Denial)
Recently, I've let it go.
Race Inspired Cosmetic Enhancement FTW
Anyways, this is my first DYI for you ricers. Every ricer knows that their brakes have to stand out from others and look flashy to recieve magical HORSEPOWERS from the rice gods.
My stock brakes were abit dull and gray... They never really get noticed.
When I first got my car, I was going to paint them red (classic ricer brembo wanna be color), however never bothered (refer to my "RID" stage), plus my winter rims are silver so WHITE/RED/SILVER wouldn't be that great of a combo. So I put it off, and actually drove my car (yes that actually happened)
Before:
BACKGROUND
Ok, some of you may be wondering what is needed to paint parts on your cars. Now, we're assuming that you do not have a decent air compressor, or your paint mixer at your house with a painting room with full filtration system. If you do, that's great, you can save lots of money with the right experience and patience. I do not recommend painting your entire car by yourself without out those basics. However, for small parts that you can easily manipulate, I do recommend changing their looks w/o paying the big bux at your convenience.
All you need is patience and abit of "GIV'R" attitude.
I have some painting experience dating way back to my secondary highschool days. I painted everything, cheap bike frames, bike rims, suspension forks, springs, helmets etc.
It all started with a rattle can of XXXX paint at China Tire and lots of trial and error. I screwed up alot, then found out that multiple thin coats are way better than one thick blob coat. Also, preparation makes or breaks the paint job because if nothing sticks, or peels two weeks down the road, you have to paint again. Also curing stage is important for the paint because it is really vulnerable until it is cured and hardened, ready for abuse.
some of my past "experiments":
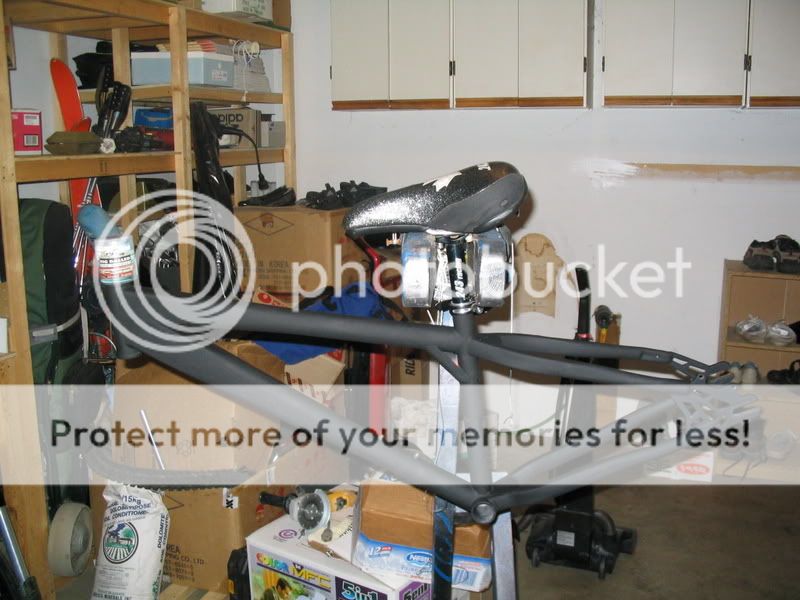
My bike frame in grade 10 I think... simple flat black.
Grade 11 summer, right before I quit biking for abit only to realize that was a stupid decision.
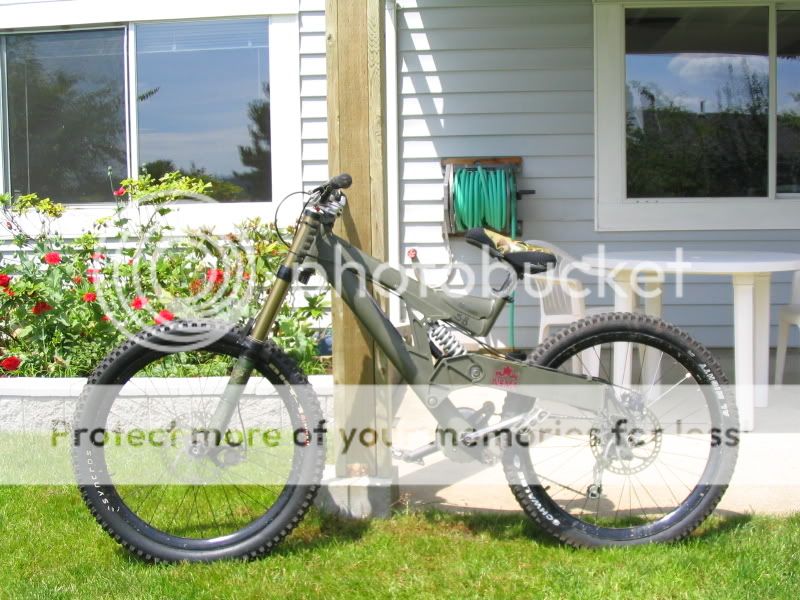
Flat army green. The frame used to be gloss orange, took two coats of primer, and 4 coats of green to cover.
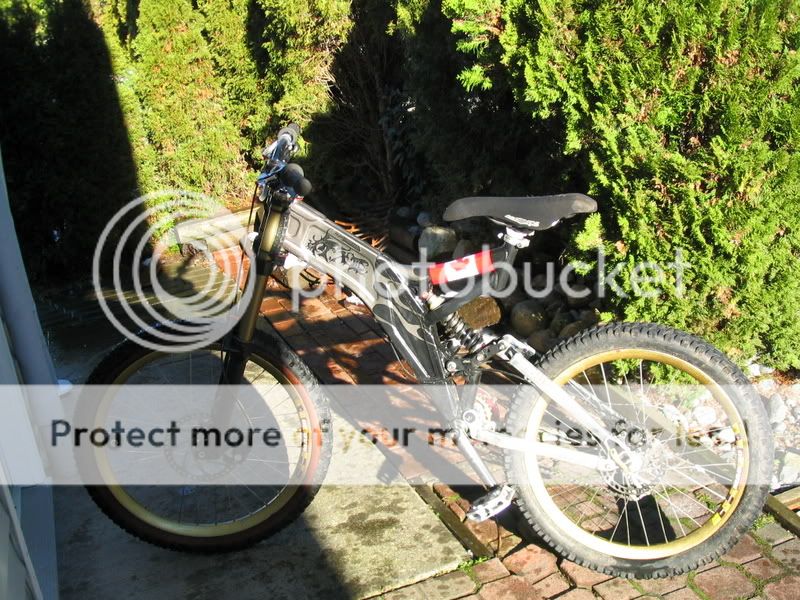
The mother of it all, grade 9 hahahah. I even masked flame on it, then did two tone paint job. It actually turned out well and some stupid kid ended up buying it for more money. WIN.
Anyways, so yeah you need patience and lots of stuff to just test things on.
-----------------------------------------------------------------------------------------------------
INTRODUCTION
I never plan on getting bigger brakes for my car because I don't track my car more than two days a year, and therefore they will never even pass their limits. Also ENDLESS brake set quoted was about $3200.00 excluding S.S braided lines. F-that!
I also asked a powdercoater how much it would be to coat my 4 calipers. Came to about 80 dollars for cleaning them, dissassembly, then 150 dollars for powder coat of any color of my choice (flourescent pink even eah )
eah )
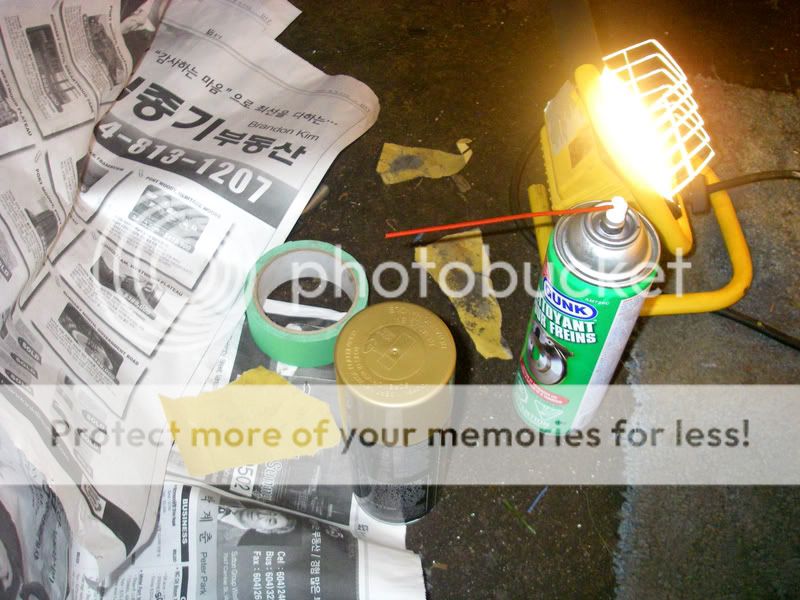
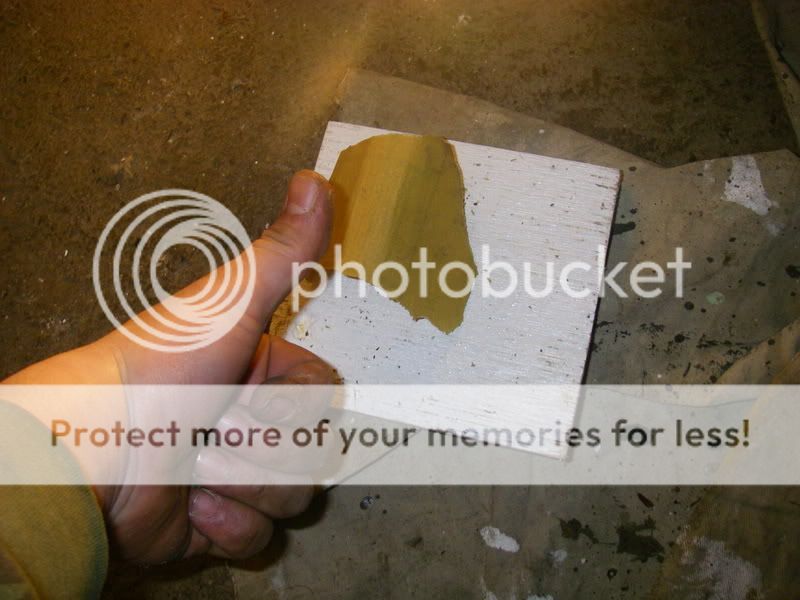
Well, after not much thoughts after the quotes, I stopped at Lordco and bought two cans of spraypaint and "brakekleen" for 20 bux after our SFASC discount. I already had a roll of painter's tape, 150 grit and 250 grit sand paper available.
MATERIALS
-Paint
-Painter's tape (green stuff works because they don't leave sticky residue)
-light grit sand paper (120-600 grit)
-Brake cleaner (BRAKEKLEEN) or Methyl Hydrate or Rubbing alcohol
-a brush, sponge or what have you.
-Newspaper (free)
PROCEDURES
So let's begin:
I'm going to assume you know all the safety rules and procedures involving lifting a car, removing the wheels, reinstalling the wheels using correct torque specs and bolt tightening patterns.
*DISCLAIMER: SFASC and I are not responsible for any damage, injuries or death(s) caused by following this mod, please make sure to completely understand how to lift your car using correct jack points, wheel chucks, jackstands and proper torque wrenches to install your wheels
eh hem, ok that's covered.
First of all, we need high temperature paint because your brake will see at least 800 Farrenheit on a regular drive. 1200 if you are tracking, or going down a long hill and braking 24/7 like a soccer mom. Make sure you brake all the way through the corner for extra understeer :p
I've tried out all kinds of rattle can paint out there. For high heat, just use lacquer based paint that say they can handle heat.
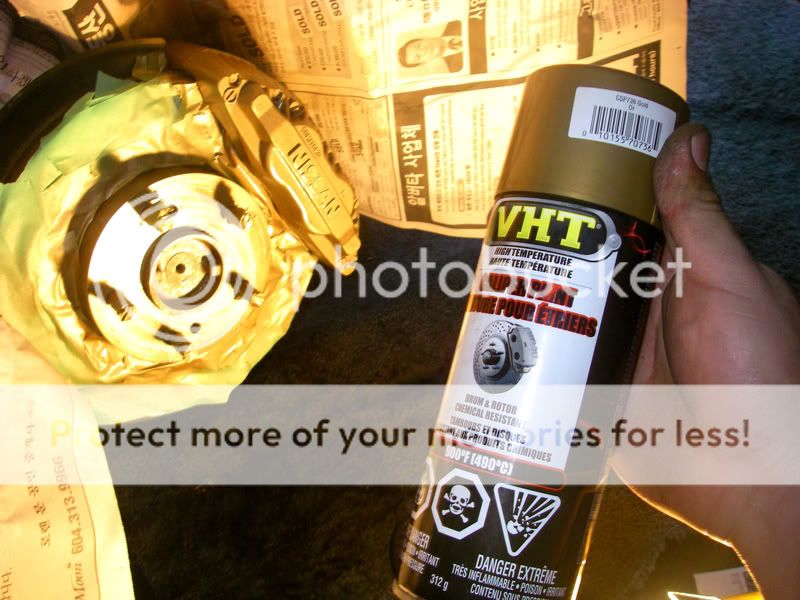
Make sure you read the back for instructions for your paint because depending on the chemicals your application technique will be different. However, it is generally thin coats, wait 10 - 40 min per coat (depending on the solvent) then dry time, then cure time.
I chose lacquer because I used ceramic high heat paint before and had problems with them cracking at high heat. Also they chipped very easily even with good preparation and cure time. One thing I noticed with the lacquer paint today is that they flow very nicely and thin coats looked great after about 3rd application. Also being an alcohol solvent the dry time between thin coats were 10 minutes.
Make sure your car has been off for at least 20 minutes to let the brakes cool down. Last thing you want is burning yourself by touching hot brake caliper/rotors. Lift you car one wheel at a time using correct jack points, place jackstands are correct indicated locations as instructed by your manufacturer. Once car is securely lifted, remove the wheel to access your brake caliper.
Your brake caliper will need to be clean and offer "grip" for the new coat of paint. If you skip this, chances are your paint will just peel off like skin or chip off very easily later. Then you'll graduate from rice and move to mexican style.
I am painting my calipers and the hub today so I just doused them with brakekleen. The stuff washes away most gunk and brake pad dust and as a bonus dries really fast. Then I took out my 120 grit sand paper, cut them into little strips then sanded any dirty grooves or rusted areas on the hub. I then stepped down to a 200 grit sand paper then repeated, followed by an abrasive pad you use for washing dishes. I find really fine steel wool to work well here too (XXXX grade)
Then I sprayed some more brake cleaner here. I have used methyl hydrate or rubbing alcohol for this application to clean it. They will give you the same effect, but brake cleaner is pressurized and really helps with the jet stream of cleaner blasting away the crud rather than just pouring liquid over it.
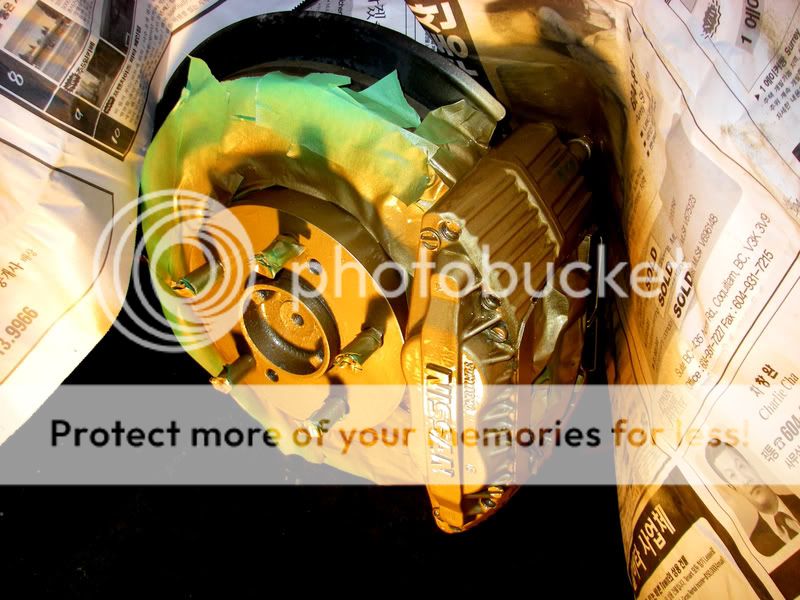
Then I started masking the areas I didn't want this paint to adhere to. Rotors, brake pads, fender, suspension parts are fine the way they are right now and any paint on the braking surface is not going to help my brake stop, so I masked everything but my calipers and the hub.
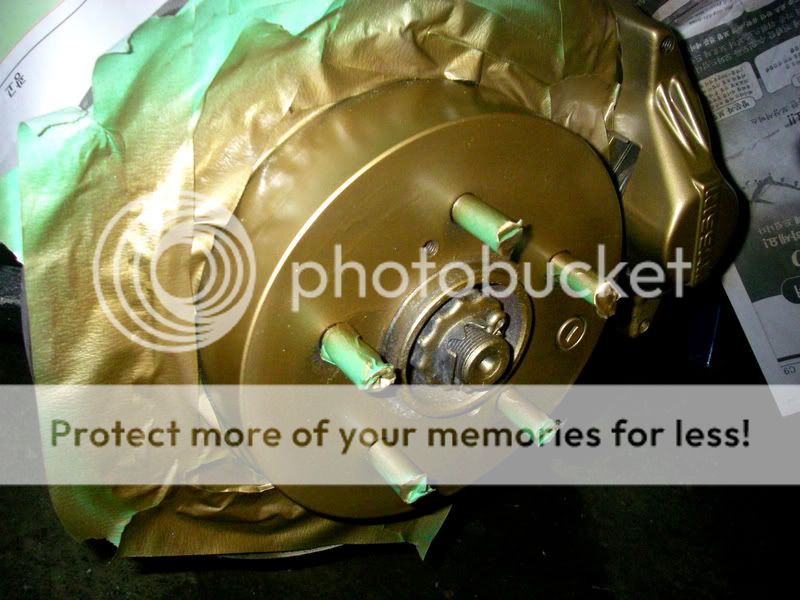
Once everything is masked, give it a very light first coat of paint in a uniform and smooth motion. You won't be able to cover anything with first coat, so have patience.
Wait 10-20 minutes.
Second coat, same procedure. Smooth, light coat of paint in a smooth motion. It still won't cover 50% of the original color so don't worry.
Wait 10-20 minutes.
Third coat, same smooth action. This time it will be looking closer to what you want it to.
Wait 10-20 minutes.
Fourth coat is really needed for any paint that is light in tone, or if your old color is darker or more vibrant than your new paint. IE: black to red (that would suck to paint), purple to orange, green to white, etc.
Same procedure for any extra coats. Light, simple, uniform motion.
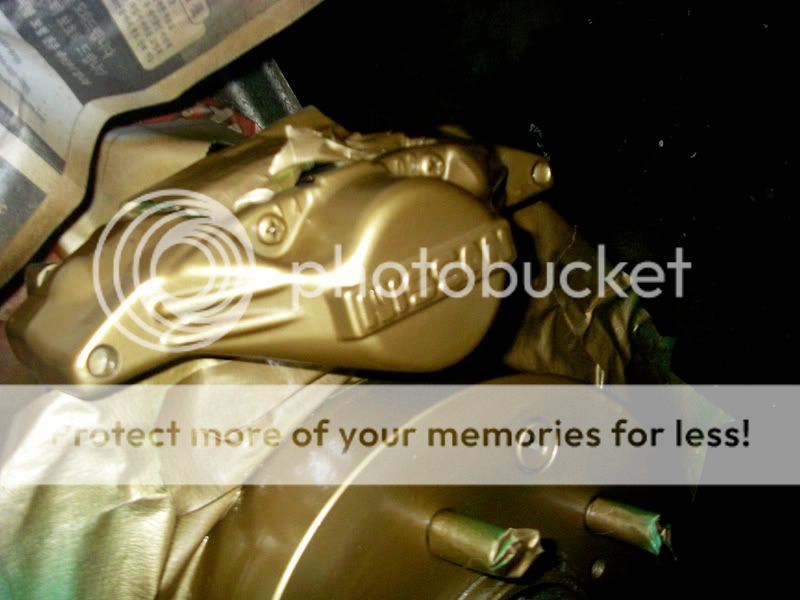
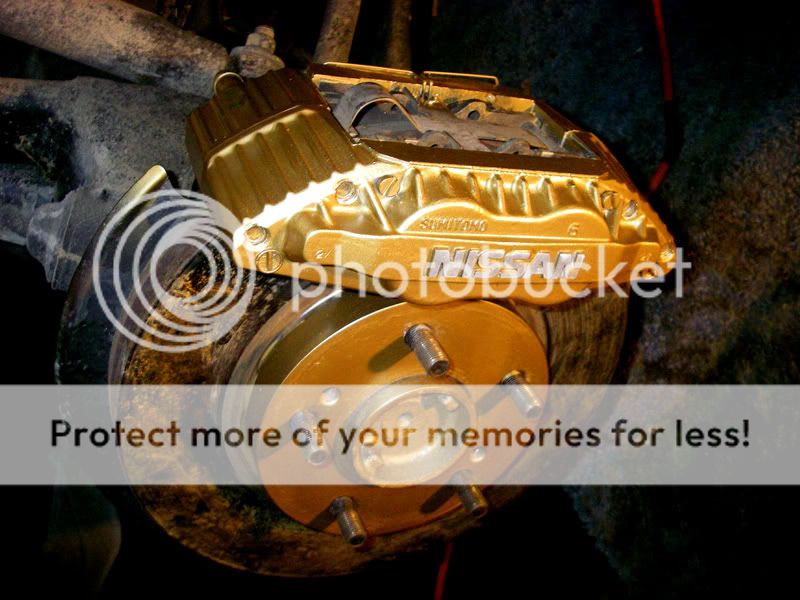
After fourth coat:
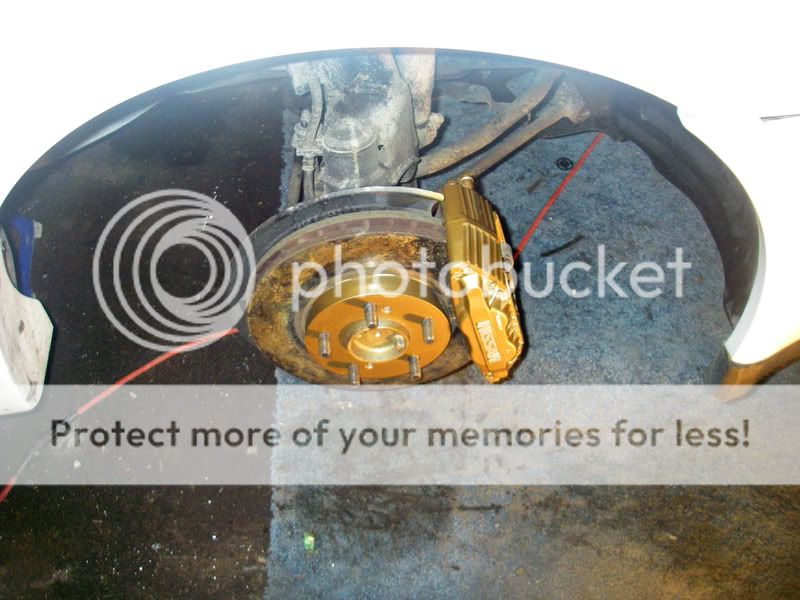
I started with my rear brakes.
Repeat* the same with your front:
*Do not rush preparation.
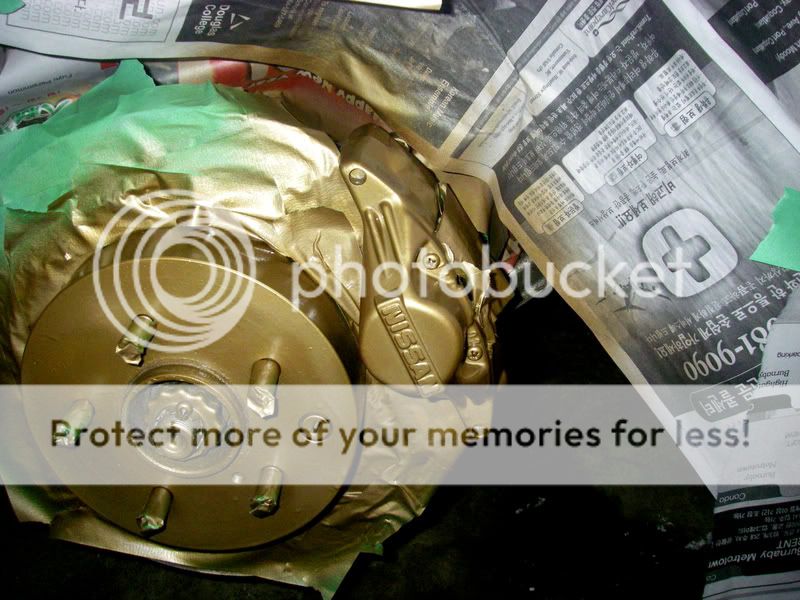
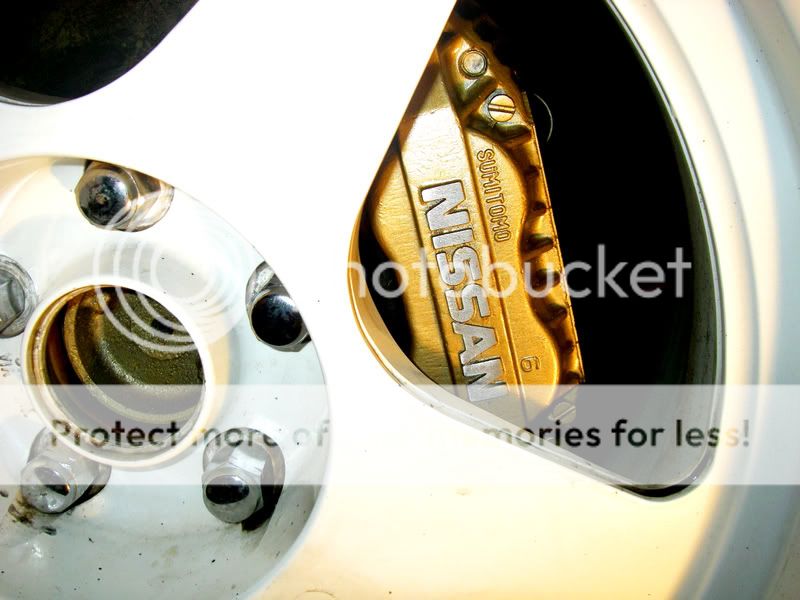
For my brakes, they have a raised logo for NISSAN and I didn't want them to be painted because that looks abit rushed and cheaper looking. Before painting, I could have just applied a thin layer of petroleum on it to prevent the paint from sticking to it, so that I can just rub the letters off after the paint is dried, but it's abit tedious so I decided to just sand it off after.
Get a block of wood for a flat surface, and a 120 grit sand paper.
then you sand the raised surface flat, making sure you do not chip your freshly painted caliper.
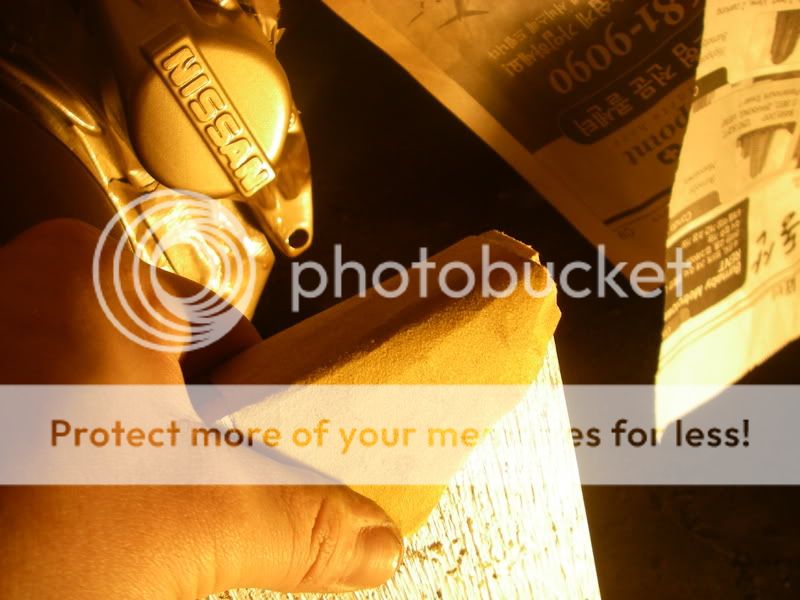
I did it to all my calipers and they look better than having the logos painted.
Alright, almost done!
Give the entire brake area a nice coat of "looking over"
Once everything is good, no touch ups are needed, slowly remove your masking tapes. The paint could be soft so becareful not to touch the painted surfaces yet.
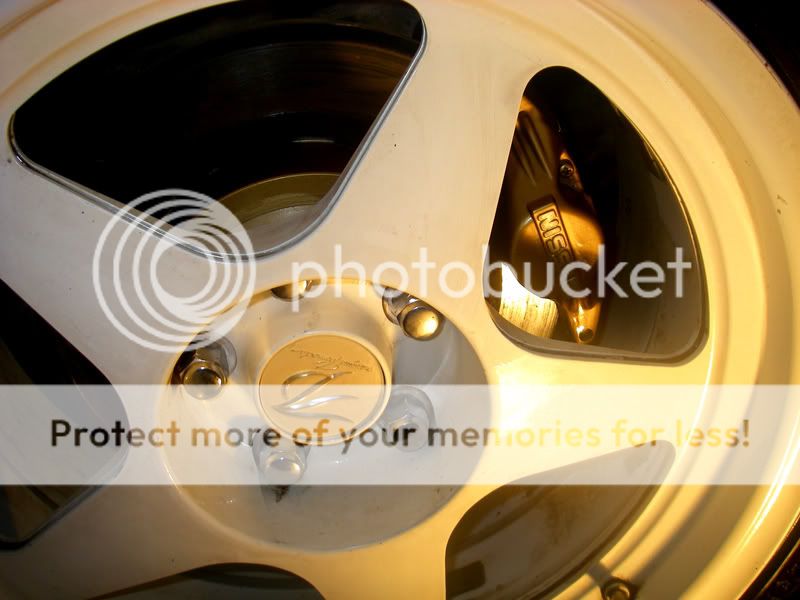
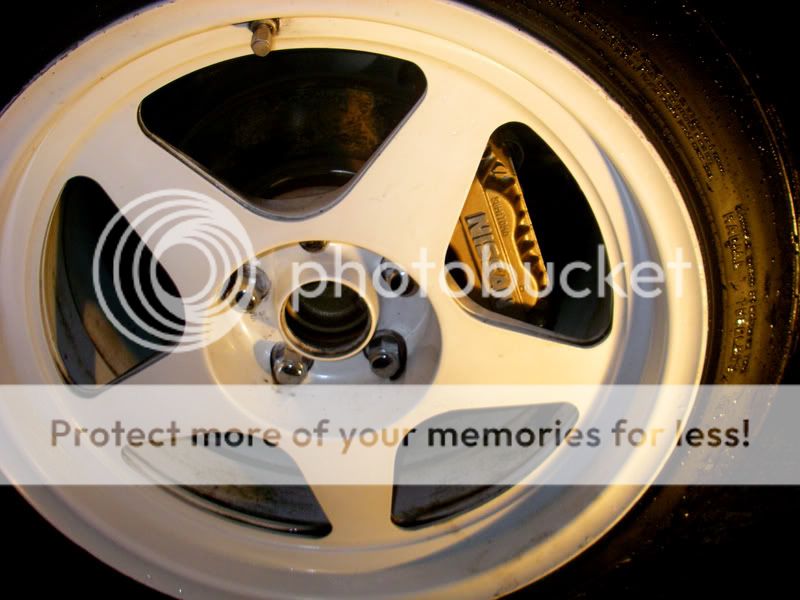
Looking good, now re-install your wheels. Follow the star pattern for tightening your wheel nuts.
Lower the car using your jack and obviously safety precautions.
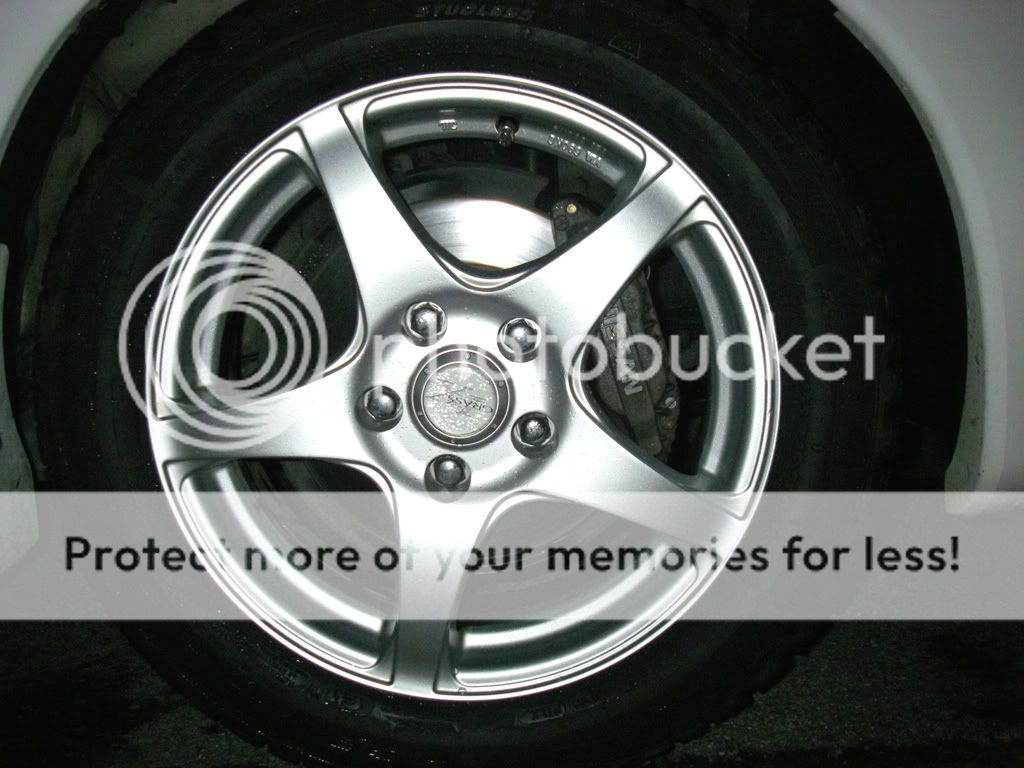
Should look a lot better than before painting.
REAR
FRONT
ALL done, now your paint has to cure. It will take about 5-7 days so try not to clean your wheels any time soon. Using your brakes will cure the paint quicker because of heat.
Good luck.
Now now, I believe everyone has a ricer side. Alot of people deny that, heck even I used to be a "RID" (Ricer In Denial)
Recently, I've let it go.
Race Inspired Cosmetic Enhancement FTW
Anyways, this is my first DYI for you ricers. Every ricer knows that their brakes have to stand out from others and look flashy to recieve magical HORSEPOWERS from the rice gods.
My stock brakes were abit dull and gray... They never really get noticed.
When I first got my car, I was going to paint them red (classic ricer brembo wanna be color), however never bothered (refer to my "RID" stage), plus my winter rims are silver so WHITE/RED/SILVER wouldn't be that great of a combo. So I put it off, and actually drove my car (yes that actually happened)
Before:
BACKGROUND
Ok, some of you may be wondering what is needed to paint parts on your cars. Now, we're assuming that you do not have a decent air compressor, or your paint mixer at your house with a painting room with full filtration system. If you do, that's great, you can save lots of money with the right experience and patience. I do not recommend painting your entire car by yourself without out those basics. However, for small parts that you can easily manipulate, I do recommend changing their looks w/o paying the big bux at your convenience.
All you need is patience and abit of "GIV'R" attitude.
I have some painting experience dating way back to my secondary highschool days. I painted everything, cheap bike frames, bike rims, suspension forks, springs, helmets etc.
It all started with a rattle can of XXXX paint at China Tire and lots of trial and error. I screwed up alot, then found out that multiple thin coats are way better than one thick blob coat. Also, preparation makes or breaks the paint job because if nothing sticks, or peels two weeks down the road, you have to paint again. Also curing stage is important for the paint because it is really vulnerable until it is cured and hardened, ready for abuse.
some of my past "experiments":
My bike frame in grade 10 I think... simple flat black.
Grade 11 summer, right before I quit biking for abit only to realize that was a stupid decision.
Flat army green. The frame used to be gloss orange, took two coats of primer, and 4 coats of green to cover.
The mother of it all, grade 9 hahahah. I even masked flame on it, then did two tone paint job. It actually turned out well and some stupid kid ended up buying it for more money. WIN.
Anyways, so yeah you need patience and lots of stuff to just test things on.
-----------------------------------------------------------------------------------------------------
INTRODUCTION
I never plan on getting bigger brakes for my car because I don't track my car more than two days a year, and therefore they will never even pass their limits. Also ENDLESS brake set quoted was about $3200.00 excluding S.S braided lines. F-that!
I also asked a powdercoater how much it would be to coat my 4 calipers. Came to about 80 dollars for cleaning them, dissassembly, then 150 dollars for powder coat of any color of my choice (flourescent pink even
eah )Well, after not much thoughts after the quotes, I stopped at Lordco and bought two cans of spraypaint and "brakekleen" for 20 bux after our SFASC discount. I already had a roll of painter's tape, 150 grit and 250 grit sand paper available.
MATERIALS
-Paint
-Painter's tape (green stuff works because they don't leave sticky residue)
-light grit sand paper (120-600 grit)
-Brake cleaner (BRAKEKLEEN) or Methyl Hydrate or Rubbing alcohol
-a brush, sponge or what have you.
-Newspaper (free)
PROCEDURES
So let's begin:
I'm going to assume you know all the safety rules and procedures involving lifting a car, removing the wheels, reinstalling the wheels using correct torque specs and bolt tightening patterns.
*DISCLAIMER: SFASC and I are not responsible for any damage, injuries or death(s) caused by following this mod, please make sure to completely understand how to lift your car using correct jack points, wheel chucks, jackstands and proper torque wrenches to install your wheels
eh hem, ok that's covered.
First of all, we need high temperature paint because your brake will see at least 800 Farrenheit on a regular drive. 1200 if you are tracking, or going down a long hill and braking 24/7 like a soccer mom. Make sure you brake all the way through the corner for extra understeer :p
I've tried out all kinds of rattle can paint out there. For high heat, just use lacquer based paint that say they can handle heat.
Make sure you read the back for instructions for your paint because depending on the chemicals your application technique will be different. However, it is generally thin coats, wait 10 - 40 min per coat (depending on the solvent) then dry time, then cure time.
I chose lacquer because I used ceramic high heat paint before and had problems with them cracking at high heat. Also they chipped very easily even with good preparation and cure time. One thing I noticed with the lacquer paint today is that they flow very nicely and thin coats looked great after about 3rd application. Also being an alcohol solvent the dry time between thin coats were 10 minutes.
Make sure your car has been off for at least 20 minutes to let the brakes cool down. Last thing you want is burning yourself by touching hot brake caliper/rotors. Lift you car one wheel at a time using correct jack points, place jackstands are correct indicated locations as instructed by your manufacturer. Once car is securely lifted, remove the wheel to access your brake caliper.
Your brake caliper will need to be clean and offer "grip" for the new coat of paint. If you skip this, chances are your paint will just peel off like skin or chip off very easily later. Then you'll graduate from rice and move to mexican style.
I am painting my calipers and the hub today so I just doused them with brakekleen. The stuff washes away most gunk and brake pad dust and as a bonus dries really fast. Then I took out my 120 grit sand paper, cut them into little strips then sanded any dirty grooves or rusted areas on the hub. I then stepped down to a 200 grit sand paper then repeated, followed by an abrasive pad you use for washing dishes. I find really fine steel wool to work well here too (XXXX grade)
Then I sprayed some more brake cleaner here. I have used methyl hydrate or rubbing alcohol for this application to clean it. They will give you the same effect, but brake cleaner is pressurized and really helps with the jet stream of cleaner blasting away the crud rather than just pouring liquid over it.
Then I started masking the areas I didn't want this paint to adhere to. Rotors, brake pads, fender, suspension parts are fine the way they are right now and any paint on the braking surface is not going to help my brake stop, so I masked everything but my calipers and the hub.
Once everything is masked, give it a very light first coat of paint in a uniform and smooth motion. You won't be able to cover anything with first coat, so have patience.
Wait 10-20 minutes.
Second coat, same procedure. Smooth, light coat of paint in a smooth motion. It still won't cover 50% of the original color so don't worry.
Wait 10-20 minutes.
Third coat, same smooth action. This time it will be looking closer to what you want it to.
Wait 10-20 minutes.
Fourth coat is really needed for any paint that is light in tone, or if your old color is darker or more vibrant than your new paint. IE: black to red (that would suck to paint), purple to orange, green to white, etc.
Same procedure for any extra coats. Light, simple, uniform motion.
After fourth coat:
I started with my rear brakes.
Repeat* the same with your front:
*Do not rush preparation.
For my brakes, they have a raised logo for NISSAN and I didn't want them to be painted because that looks abit rushed and cheaper looking. Before painting, I could have just applied a thin layer of petroleum on it to prevent the paint from sticking to it, so that I can just rub the letters off after the paint is dried, but it's abit tedious so I decided to just sand it off after.
Get a block of wood for a flat surface, and a 120 grit sand paper.
then you sand the raised surface flat, making sure you do not chip your freshly painted caliper.
I did it to all my calipers and they look better than having the logos painted.
Alright, almost done!
Give the entire brake area a nice coat of "looking over"
Once everything is good, no touch ups are needed, slowly remove your masking tapes. The paint could be soft so becareful not to touch the painted surfaces yet.
Looking good, now re-install your wheels. Follow the star pattern for tightening your wheel nuts.
Lower the car using your jack and obviously safety precautions.
Should look a lot better than before painting.
REAR
FRONT
ALL done, now your paint has to cure. It will take about 5-7 days so try not to clean your wheels any time soon. Using your brakes will cure the paint quicker because of heat.
Good luck.
Thread Starter
Newbie
Joined: Mar 2009
Posts: 4
Likes: 0
None
Thanks for the great write up. I do know how to paint the calipers as I have done it before, but I was just wondering if there is a company out there that does this. Maybe I will just have to paint them myself.
MBWorld Fanatic!
Joined: Nov 2007
Posts: 1,423
Likes: 0
From: Phoenix, AZ
2014 Ghibli S Q4 & 2008 C350
I was considering painting my calipers as well but decided against it. Your calipers IMHO looks perfect how they are, especially compared to my non-amg parts. 
That said, if you want to keep that high-end look, maybe consider having them power-coated. Would look better and last longer but it would require more labor to remove and prep them... just my 2 c
And welcome to mbworld!
That said, if you want to keep that high-end look, maybe consider having them power-coated. Would look better and last longer but it would require more labor to remove and prep them... just my 2 c
And welcome to mbworld!
Thread Starter
Newbie
Joined: Mar 2009
Posts: 4
Likes: 0
None
I was considering painting my calipers as well but decided against it. Your calipers IMHO looks perfect how they are, especially compared to my non-amg parts.
That said, if you want to keep that high-end look, maybe consider having them power-coated. Would look better and last longer but it would require more labor to remove and prep them... just my 2 c
And welcome to mbworld!
That said, if you want to keep that high-end look, maybe consider having them power-coated. Would look better and last longer but it would require more labor to remove and prep them... just my 2 c
And welcome to mbworld!
MBWorld Fanatic!
Joined: Nov 2007
Posts: 1,423
Likes: 0
From: Phoenix, AZ
2014 Ghibli S Q4 & 2008 C350


