

DIY - Replacing Fog Light Bulbs (with pics)

Thread Starter
Senior Member
Joined: Jan 2014
Posts: 267
Likes: 0
2010 C63 P30
DIY - Replacing Fog Light Bulbs (with pics)
Hey MB World.
I know there is already a great DIY from Dogtag114 for replacing seen here: https://mbworld.org/forums/c63-amg-w...g-housing.html
Do at your own risk. I am not responsible for any damages or injury.
I decided to replace my fog light bulbs and figured I would take a few pics along the way. I am by no means an expert at making DIY threads but I wanted to share how easy it is to do this job. Not only will it save you time and money but it will improve your skills and get you familiar with the car. My method might not be the most simple or easy but it works.
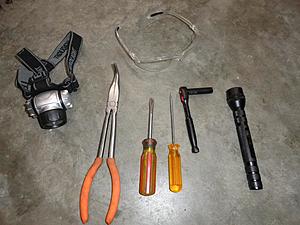
What you need:
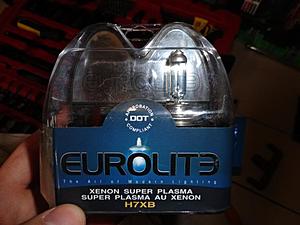
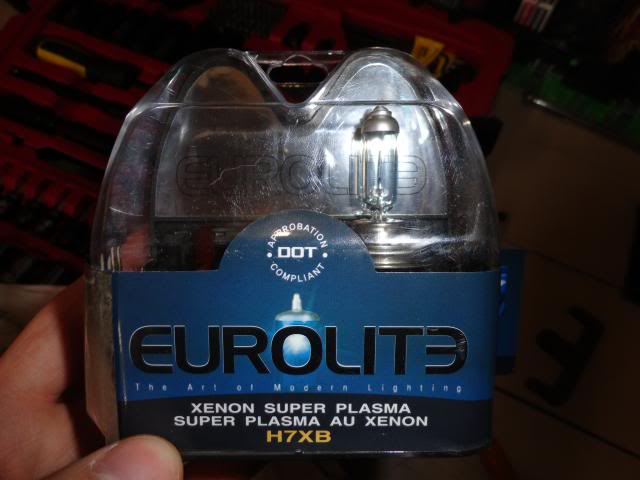
-H7 bulbs. (I used Eurolite)
-Jack
-Jack stands (2)
-8mm ratchet
-flat head screwdriver
-pliers or some tool to remove plastic rivets.
-flashlight
-safety glasses
-Nitrile Gloves would be good when handling the bulbs.
Some tools:
First step. Make sure your car is off, e-brake on, in park. Put some wheel chocks on the back wheels.
Then you can jack up the car. You might need to drive up on some 2/4s to be able to fit the jack underneath.
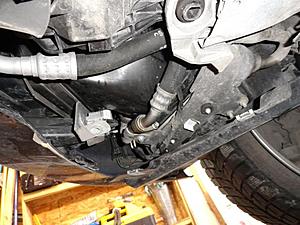
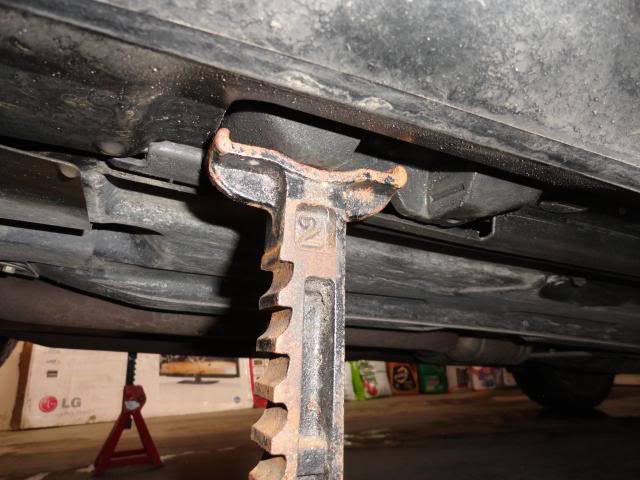
Here is the jacking point: Located in the center of the car under engine.
Jack it up. then line up your 2 jack stands on either side and slowly lower. Double check to make sure they are secure.
Jack stand:

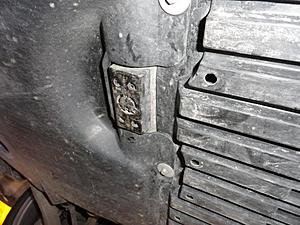
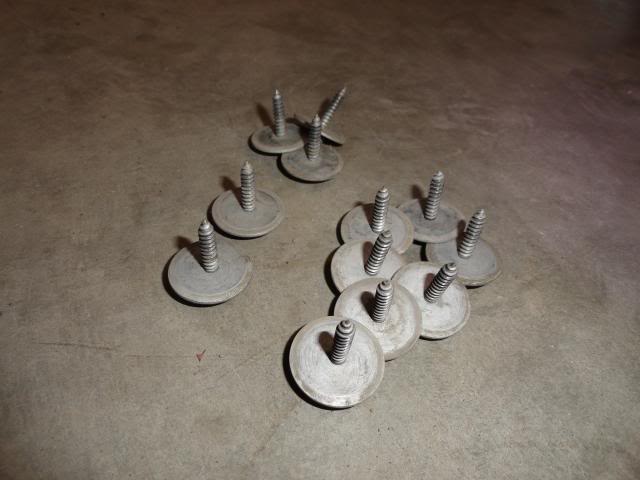
Now you can get under the car and start removing the plastic engine tray. Start unscrewing the 8mm bolts holding the tray and remove.
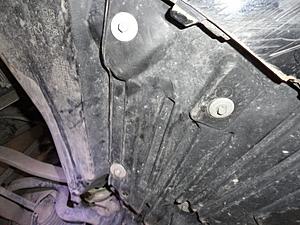
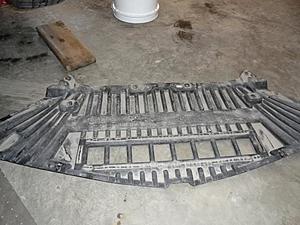
8mm bolts removed:

Splash shield removed: Green wire in the distance is the passenger fog light.
Now you can get over to where the fog light assembly is.
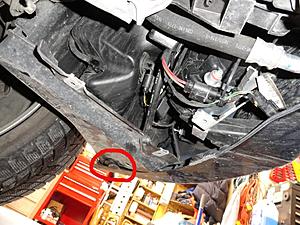
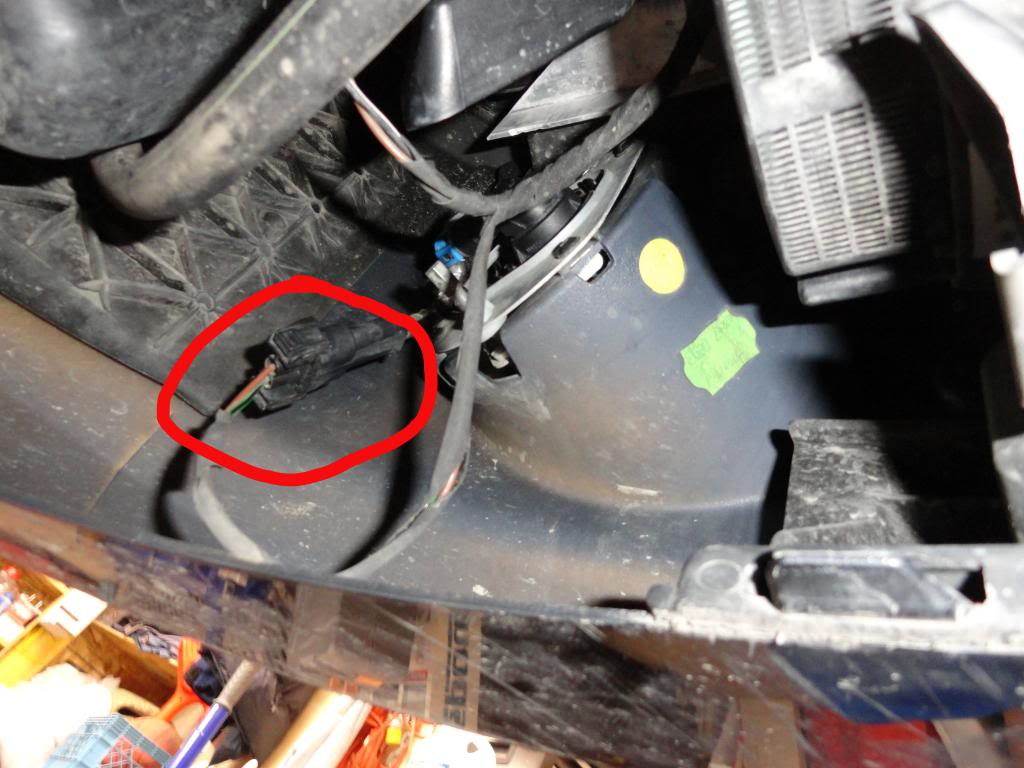
This is the driver side. You will need to use your screw driver and work out the little plastic rivet from the red circled area. you need to remove the center part of the rivet first, and pull that out, then the outer one will come out. After that pull that panel back to give yourself some room.
Ok so now we can get over to the fog light and remove it.
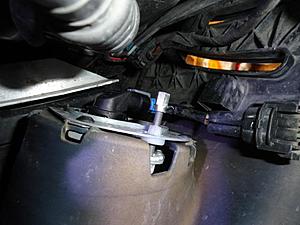
First thing. Unclip this. You can seen the fog light decently in this picture. I took off that blue clip, and then uncliped from the fog light. You might need to use your flat head to undo the clips but be careful not to break anything. Take your time with these clips.

After that you grab the fog light and rotate it to remove. Clockwise for the driver side and counter clockwise for the passenger side.
Here is the passenger side now. You can clearly see all the clips associated. on this side all you need to do is unhook the main black one and you can rotate your bulb out with the wire.
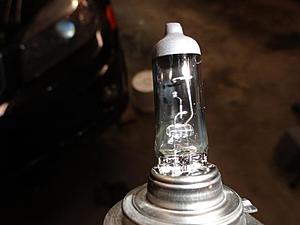
Pic of the burnt bulb. Be careful not to get any finger prints on your new bulbs the oil from your hands will cause the bulb to rupture when its on.
Installing the bulb back into the housing can be tricky. You need to line it up and push in, then rotate it. Practice doing this a couple of times without your new bulb in. Once you think you got it plop in your new H7 bulb into your socket and install. Be careful again to not touch the bulb or get it dirty in any way. If you have nitrile gloves use those.
After you install your bulbs and clip back up the connections. You need to check if everything works. Grab your key and turn your car onto the on position (dont fire it up tho)
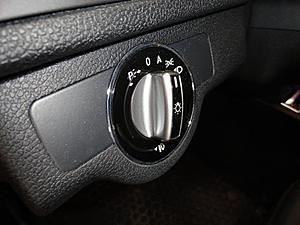
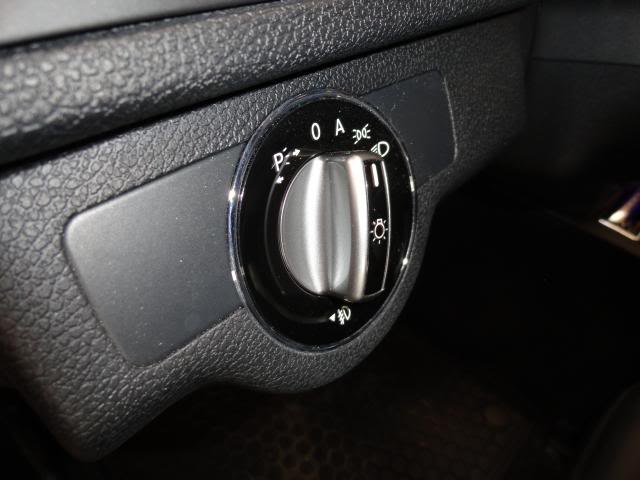
Then you need to put your light switch all the way to the right, and then pull it out. This will engage the fog lights.
Before:
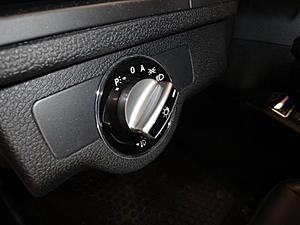
After:
Make sure both fogs work. And then your done! Put back on your plastic covers and lower down the car.
Again if you want to replace the entire fog light assembly check out Dogtag114 DIY https://mbworld.org/forums/c63-amg-w...g-housing.html
Here is the after pic: Not sure how I feel. It actually looks pretty much identical to stock lol.

Thanks again.
I know there is already a great DIY from Dogtag114 for replacing seen here: https://mbworld.org/forums/c63-amg-w...g-housing.html
Do at your own risk. I am not responsible for any damages or injury.
I decided to replace my fog light bulbs and figured I would take a few pics along the way. I am by no means an expert at making DIY threads but I wanted to share how easy it is to do this job. Not only will it save you time and money but it will improve your skills and get you familiar with the car. My method might not be the most simple or easy but it works.
What you need:
-H7 bulbs. (I used Eurolite)
-Jack
-Jack stands (2)
-8mm ratchet
-flat head screwdriver
-pliers or some tool to remove plastic rivets.
-flashlight
-safety glasses
-Nitrile Gloves would be good when handling the bulbs.
Some tools:

First step. Make sure your car is off, e-brake on, in park. Put some wheel chocks on the back wheels.
Then you can jack up the car. You might need to drive up on some 2/4s to be able to fit the jack underneath.
Here is the jacking point: Located in the center of the car under engine.

Jack it up. then line up your 2 jack stands on either side and slowly lower. Double check to make sure they are secure.
Jack stand:
Now you can get under the car and start removing the plastic engine tray. Start unscrewing the 8mm bolts holding the tray and remove.

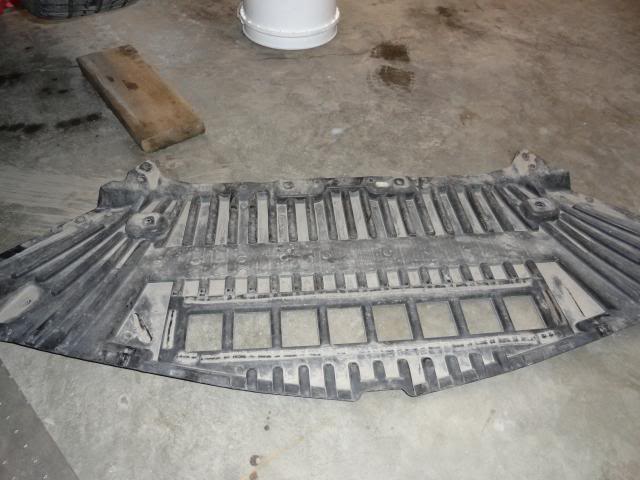
8mm bolts removed:
Splash shield removed: Green wire in the distance is the passenger fog light.

Now you can get over to where the fog light assembly is.
This is the driver side. You will need to use your screw driver and work out the little plastic rivet from the red circled area. you need to remove the center part of the rivet first, and pull that out, then the outer one will come out. After that pull that panel back to give yourself some room.

Ok so now we can get over to the fog light and remove it.
First thing. Unclip this. You can seen the fog light decently in this picture. I took off that blue clip, and then uncliped from the fog light. You might need to use your flat head to undo the clips but be careful not to break anything. Take your time with these clips.
After that you grab the fog light and rotate it to remove. Clockwise for the driver side and counter clockwise for the passenger side.
Here is the passenger side now. You can clearly see all the clips associated. on this side all you need to do is unhook the main black one and you can rotate your bulb out with the wire.

Pic of the burnt bulb. Be careful not to get any finger prints on your new bulbs the oil from your hands will cause the bulb to rupture when its on.

Installing the bulb back into the housing can be tricky. You need to line it up and push in, then rotate it. Practice doing this a couple of times without your new bulb in. Once you think you got it plop in your new H7 bulb into your socket and install. Be careful again to not touch the bulb or get it dirty in any way. If you have nitrile gloves use those.
After you install your bulbs and clip back up the connections. You need to check if everything works. Grab your key and turn your car onto the on position (dont fire it up tho)
Then you need to put your light switch all the way to the right, and then pull it out. This will engage the fog lights.
Before:
After:

Make sure both fogs work. And then your done! Put back on your plastic covers and lower down the car.
Again if you want to replace the entire fog light assembly check out Dogtag114 DIY https://mbworld.org/forums/c63-amg-w...g-housing.html
Here is the after pic: Not sure how I feel. It actually looks pretty much identical to stock lol.

Thanks again.
Last edited by AMG Boost; Apr 2, 2014 at 12:52 AM.
MBWorld Fanatic!
Joined: Aug 2009
Posts: 2,899
Likes: 93
C63 AMG
Good job on the DIY. For those of you contemplating a fog light bulb change, remove the under tray as these instructions indicate. To go through the wheel wells like I did will take twice as long and tear up your hands in the process.

MBWorld Fanatic!
Joined: Sep 2005
Posts: 3,165
Likes: 59
C63 AMG P30 *EuroCharged*| Porsche Cayenne | Buell XB9SX
nice, thanks for taking the time. I was gonna go through the wheel well, but maybe not, as this undertray method seems easier. I have one burned out bulb, but I may just replace both so I don't have to do this again in a few months after the other one burns out.
Thread Starter
Senior Member
Joined: Jan 2014
Posts: 267
Likes: 0
2010 C63 P30
No problem guys! The only real part I dont show well is undoing the clips from the fog light. But just take your time on it and try not to force anything. It is fairly easy and straightforward to do.
Senior Member


Joined: Feb 2013
Posts: 390
Likes: 37
From: Melbourne, Australia
2010 C63 and 2018 GLC63s
Thank you - mine has just started giving a warning re the right front foglight being out. Being in Australia I will never use the fog lights but the message is annoying.
Member
Joined: Feb 2013
Posts: 230
Likes: 2
From: southern NJ
C63
sorry to bump this old thread but like this DIY, i also removed the blue clips but after, realized i probably didn't have to. i was searching around and saw this thread and that the OP removed the blue pieces too, lol.
is that really necessary? thanks guize.
is that really necessary? thanks guize.


