


AMG3.2's DIY Headbolt Adventure
Thread Starter
MBWorld Fanatic!


Joined: Jun 2011
Posts: 3,318
Likes: 171
From: Silicon Valley, CA
C63 AMG, P30
AMG3.2's DIY Headbolt Adventure
Alrighty folks - now that I've had my C63 for a mere two weeks, I figure I'd knock out the headbolt issue because why not.
I've been working on cars for quite some time and feel semi comfortable embarking on this project myself. As I work on this, I plan to take pictures of the process and ask for help as I'm sure I'll need some guidance here and there.
I do have some questions below that I'm hoping others who have done this before, can answer.
1) I read somewhere that you have to silicone all of the headbolts bolts that go into the head. If someone could walk me through exactly where to silicone, that would be great. On the actual bolt? Just the head? I'm sure it's simple, but just need clarification.
2) Are new cam bolts p/n 000000003236 (qty 32) needed? Not sure if these are one time use.
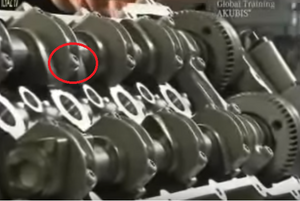
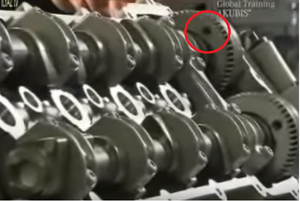
3) Setting the timing at 40 degrees - I've read this is done by turning over the engine until the pulley matches to the arrow on the block. Can you not just tell when it's at 40 degrees by looking at the cams since both the holes will be pointed upwards? Or is this just an approximation?
Also, if someone could review my parts list and let me know if I need anything else, that would be great.
M156 Updated Headbolt x20 156-016-07-69
Actuator Bolts x4 910105-012018
Timing Case Bolts x8 000000001150
27MM Short Socket for Crank
Mercedes Cam Timing Tool M156
Diamond Washers Cam Phaser x4 (need part number)
Engine Marker - Sharpie
Engine Lubricant - Lubriplate 105
Engine Camera to look at timing on pulling
Update thanks to Roadtalontsi on additional parts needed:
Front cylinder head/timing cover gaskets 2x 1560162221
Valve cover gaskets 1560162421 (i think the left and right are different part numbers i dont remember)
Spark plug gaskets for valve cover 8x 1560162121
Diamond Washers 4x 1560510275
Any other specialty Mercedes tools that I'll be needing?
Before going ahead and doing tappets, I want to open it up and take a look at how they look before dropping a grand on the M159 tappets. Worse comes to worse, I'll open up the head a couple of weekend down the road and install them as I'm sure it won't take me nearly as long to do the second time around.
Thank you!
New: 9/8/17 I've started a site (www.DIYTechnica.com) where you can purchase a step by step DIY for $10 should you want more info than what's found below.
I've been working on cars for quite some time and feel semi comfortable embarking on this project myself. As I work on this, I plan to take pictures of the process and ask for help as I'm sure I'll need some guidance here and there.
I do have some questions below that I'm hoping others who have done this before, can answer.
1) I read somewhere that you have to silicone all of the headbolts bolts that go into the head. If someone could walk me through exactly where to silicone, that would be great. On the actual bolt? Just the head? I'm sure it's simple, but just need clarification.
2) Are new cam bolts p/n 000000003236 (qty 32) needed? Not sure if these are one time use.

3) Setting the timing at 40 degrees - I've read this is done by turning over the engine until the pulley matches to the arrow on the block. Can you not just tell when it's at 40 degrees by looking at the cams since both the holes will be pointed upwards? Or is this just an approximation?

Also, if someone could review my parts list and let me know if I need anything else, that would be great.
M156 Updated Headbolt x20 156-016-07-69
Actuator Bolts x4 910105-012018
Timing Case Bolts x8 000000001150
27MM Short Socket for Crank
Mercedes Cam Timing Tool M156
Diamond Washers Cam Phaser x4 (need part number)
Engine Marker - Sharpie
Engine Lubricant - Lubriplate 105
Engine Camera to look at timing on pulling
Update thanks to Roadtalontsi on additional parts needed:
Front cylinder head/timing cover gaskets 2x 1560162221
Valve cover gaskets 1560162421 (i think the left and right are different part numbers i dont remember)
Spark plug gaskets for valve cover 8x 1560162121
Diamond Washers 4x 1560510275
Any other specialty Mercedes tools that I'll be needing?
Before going ahead and doing tappets, I want to open it up and take a look at how they look before dropping a grand on the M159 tappets. Worse comes to worse, I'll open up the head a couple of weekend down the road and install them as I'm sure it won't take me nearly as long to do the second time around.
Thank you!
New: 9/8/17 I've started a site (www.DIYTechnica.com) where you can purchase a step by step DIY for $10 should you want more info than what's found below.
Last edited by AMG3.2; Sep 8, 2017 at 12:57 PM.
MBWorld Fanatic!

Joined: Jun 2008
Posts: 8,075
Likes: 2,867
From: Los Angeles
2012 P31 C63 Coupe Trackrat, 2019 GLE63S Coupe Beast
Good luck! IMO you should do the M159 lifters at the same time. It's good preventative maintenance, and you're going to have it torn down already anyway. On an '09 I think the benefits of just doing it and knowing you have the most upgraded hardware in there far outweighs the cost, or having to do it down the road.

MBWorld Fanatic!
Joined: Jan 2009
Posts: 4,563
Likes: 42
C63 AMG
Cam bolts get reused.
The bolts pass through the water jacket so for peace of mind, I put a small circle of high temp silicone on the washer/head of the bolt and clean the surface of the head off with brake clean on a rag with a screw driver. It looks like the bolts come with some white stuff/sealant on the washer/head, the factory doesn't add anything extra for silicone, I figure it can't hurt.
No don't use those holes. Use the mark on the engine and remove the one dust cap or pulley to see it better. You need to be right on the money.
Make sure u drain the coolant.
Thread Starter
MBWorld Fanatic!
Joined: Jun 2011
Posts: 3,318
Likes: 171
From: Silicon Valley, CA
C63 AMG, P30
Great. Thanks.
I'm assuming the head bolts are the bolt listed about 5 stages of torque specs? If so, since I'm only doing one at a time, should I go straight to 50nm and then rotate 270 degrees?
Also, since these bolts go into water jackets, I'm assuming you wouldn't oil them prior to going in right? Install and torque dry?
Last edited by AMG3.2; Jul 20, 2017 at 11:28 AM.
Member
Joined: Jan 2014
Posts: 157
Likes: 3
From: Atlanta, GA
2008 C63, 2008 ML550, 2014 KTM 500 XC W, John Deere 990
Are you also changing the head gasket. I presume that the last three 90 degree turns are for proper gasket crush. If doing one at a time with existing gasket, that procedure may or may not work. I have had the same issue with motorcycle heads. I could not get the full 270 degrees without fear of causing damage. I may be all wrong on this, so if anyone else has better info please chime in. The nice thing about the Arp studs is that they are torqued to force not angle.
Trending Topics
MBWorld Fanatic!
Joined: Jan 2009
Posts: 4,563
Likes: 42
C63 AMG
Put the bolt in, no oil or grease and follow all 5 torque steps till its torqued 100% then move onto the next one, following the mb head bolt torque sequence.
The 90 degree turns are when the bolt will stretch, the torque actually remains the same as you do those stages. It's a good pull on the torque wrench.
The 90 degree turns are when the bolt will stretch, the torque actually remains the same as you do those stages. It's a good pull on the torque wrench.
MB World Stories
The Best of Mercedes & AMG

6 Mercedes Models That Did NOT Age Well (But Are Somehow Still Cool)
Verdad Gallardo
Manual Mercedes? 6 Times Sindelfingen Let Drivers Have All The Fun
Verdad Gallardo
Mercedes SLR McLaren 722 S Is Extremely Rare Example Modified by McLaren
Verdad Gallardo
8 Classic Boxy Mercedes Designs That Have Aged Like Fine Wine
Verdad Gallardo
Flawlessly Restored Mercedes 190E Evo II Heads to Auction
Verdad Gallardo
Electric Mercedes C-Class Unveiled: 11 Things You Need to Know
Verdad Gallardo
Mercedes EQS Gets A Major Update: Everything You Need to Know
Verdad Gallardo
5 Underrated Mercedes-Benz Models That Don't Get the Love They Deserve
Verdad Gallardo
Mercedes 300D Has Pushed Well Past 1 Million Miles and It Ain't Stopping
Verdad Gallardo
Thread Starter
MBWorld Fanatic!
Joined: Jun 2011
Posts: 3,318
Likes: 171
From: Silicon Valley, CA
C63 AMG, P30
Put the bolt in, no oil or grease and follow all 5 torque steps till its torqued 100% then move onto the next one, following the mb head bolt torque sequence.
The 90 degree turns are when the bolt will stretch, the torque actually remains the same as you do those stages. It's a good pull on the torque wrench.
The 90 degree turns are when the bolt will stretch, the torque actually remains the same as you do those stages. It's a good pull on the torque wrench.

Last edited by AMG3.2; Nov 30, 2015 at 02:02 AM.
MBWorld Fanatic!
Joined: Jan 2009
Posts: 4,563
Likes: 42
C63 AMG
You're worrying me. 50nm is only the 2nd stage. There is 3 more 90 turns after that. Those are your final torque. I think it's around 80lbs or so that starts stretching the bolts.
They use 90 turns because it's more accurate than saying 80ftlbs with TTY bolts.
They use 90 turns because it's more accurate than saying 80ftlbs with TTY bolts.
Thread Starter
MBWorld Fanatic!
Joined: Jun 2011
Posts: 3,318
Likes: 171
From: Silicon Valley, CA
C63 AMG, P30
Lol No -- I totally understand that! Obviously 50nm plus another 270 (90+90+90) degrees of turning would exceed 50nm. My last post was not thought through to be honest. Apologies - been studying all day and my brain has just about had it for the day.
Last edited by AMG3.2; Nov 30, 2015 at 02:05 AM.
MBWorld Fanatic!
Joined: Oct 2007
Posts: 2,305
Likes: 381
From: Texas
10 C six trizzle
as mentioned dont use those holes as an indicator of 40*. those holes can be anywhere. The adjusters come off of the camshafts and can be installed at infinite angles/positions. You wont need a camera. Just pull the belt off if necessary and the idler pulley that sits above the crankshaft and you can see the arrow and marks on the pulley easily.

Super Member
Joined: Apr 2010
Posts: 609
Likes: 38
From: Arizona
2011 C63
If the three 90 degree increments are there to help crush the head gasket, then I'm concerned. Since you are doing one bolt at a time, the head gasket is already crushed. Then if you do three 90 degree increments, won't you be overloading the bolt since the head gasket is not giving?
MBWorld Fanatic!

Joined: Aug 2011
Posts: 5,351
Likes: 1,677
From: Kitchener, ON
2010 C63 AMG
They're TTY bolts. It's to stretch them, not compress the HG.
https://en.wikipedia.org/wiki/Torque-to-yield_fastener
EDIT:
I know it's not a direct comparison but given the "problem" it's almost ironic since a TTY bolt is designed to increase the fatigue life lol.
https://en.wikipedia.org/wiki/Torque-to-yield_fastener
EDIT:
I know it's not a direct comparison but given the "problem" it's almost ironic since a TTY bolt is designed to increase the fatigue life lol.
Last edited by Jasonoff; Dec 4, 2015 at 09:11 PM.
Super Member
Joined: Apr 2010
Posts: 609
Likes: 38
From: Arizona
2011 C63
They're TTY bolts. It's to stretch them, not compress the HG.
https://en.wikipedia.org/wiki/Torque-to-yield_fastener
EDIT:
I know it's not a direct comparison but given the "problem" it's almost ironic since a TTY bolt is designed to increase the fatigue life lol.
https://en.wikipedia.org/wiki/Torque-to-yield_fastener
EDIT:
I know it's not a direct comparison but given the "problem" it's almost ironic since a TTY bolt is designed to increase the fatigue life lol.
Thanks for this info. However, the gasket will compress and when it compresses the load of the bolt relaxes. Consider the bolt a spring and when stretched it applies a load. So when the gasket compresses, the spring (bolt) is not stretched as far and the load goes down. Then you turn it 90 degrees again, then one more time just so you know that the gasket is all the way compressed. But if you start out with a compressed gasket (1 bolt at a time), then the second and third 90 degree turns could be yielding the bolt too far. Hopefully not. But once the bolt starts to yield, the bolt starts necking down and the load carrying capability goes down quickly. I used to do bolt load calculations in my work life when I was a mechanical engineer (I'm retired now).
MBWorld Fanatic!
Joined: Jan 2009
Posts: 4,563
Likes: 42
C63 AMG
I've done this before it works. I don't know the math, not an engineer.
How much compression are you going to get out of a metal gasket? I'd say the 50nm compresses the gasket and the 90s stretch the bolt.
How much compression are you going to get out of a metal gasket? I'd say the 50nm compresses the gasket and the 90s stretch the bolt.
Super Member
Joined: Apr 2010
Posts: 609
Likes: 38
From: Arizona
2011 C63
That's good news. I didn't know if it was a composite or a metal gasket. You are right, you will get very little compression out of a metal gasket. They use the three increments just to make sure you have a nice even torque among all the bolts. I remember doing the heads on american V8's and I always torqued down the head bolts in increments (larger and larger torque values since they were not torque to yield bolts).
If I were doing one bolt at a time, I'd just do the 270 degrees at one time.
MBWorld Fanatic!
Joined: Aug 2011
Posts: 5,351
Likes: 1,677
From: Kitchener, ON
2010 C63 AMG
We've had this convo before.
https://mbworld.org/forums/c63-amg-w...ml#post6401974
Maybe start at 40nm before the 270�?. Care to try and figure out the math, or is it too rusty?
I'm on the fence about spending the cheese on the ARP studs over the OE updated bolts since I will never toss a blower on this thing before getting rid of it.
Super Member
Joined: Apr 2010
Posts: 609
Likes: 38
From: Arizona
2011 C63
We've had this convo before.
https://mbworld.org/forums/c63-amg-w...ml#post6401974
Maybe start at 40nm before the 270�?. Care to try and figure out the math, or is it too rusty?
I'm on the fence about spending the cheese on the ARP studs over the OE updated bolts since I will never toss a blower on this thing before getting rid of it.
https://mbworld.org/forums/c63-amg-w...ml#post6401974
Maybe start at 40nm before the 270�?. Care to try and figure out the math, or is it too rusty?
I'm on the fence about spending the cheese on the ARP studs over the OE updated bolts since I will never toss a blower on this thing before getting rid of it.
Second, I'd need the thread pitch to see how far the bolt stretches when you turn it 270 degrees. I also need to know the length of the bolt, but only the length that is not threaded into the block. That is the length that can stretch when you torque the bolt. Then it's pretty simple, you go back to the formula for the modulus of elasticity. E = Stress over Strain. You know the strain, it's the stretch of the bolt divided by the un-engaged length of the bolt. E is 30,000,000 psi for most steels. Then the stress is E times the strain. Add that to stress you already have at 40 NM and viola, you should be pretty close to the total stress. And since this is a torque to yield bolt, the value should be above the yield stress and hopefully below the ultimate.
Thanks for making me exercise my brain. It's been a while. Some engineers will argue that there might be some combined stress with some residual torque from the friction of the threads, but what I wrote above is good enough for government work.
Super Member
Joined: Apr 2010
Posts: 609
Likes: 38
From: Arizona
2011 C63
We've had this convo before.
https://mbworld.org/forums/c63-amg-w...ml#post6401974
Maybe start at 40nm before the 270�?. Care to try and figure out the math, or is it too rusty?
I'm on the fence about spending the cheese on the ARP studs over the OE updated bolts since I will never toss a blower on this thing before getting rid of it.
https://mbworld.org/forums/c63-amg-w...ml#post6401974
Maybe start at 40nm before the 270�?. Care to try and figure out the math, or is it too rusty?
I'm on the fence about spending the cheese on the ARP studs over the OE updated bolts since I will never toss a blower on this thing before getting rid of it.
Super Member
Joined: Apr 2010
Posts: 609
Likes: 38
From: Arizona
2011 C63
OK, from what I can gather, the head bolts are M11 x 1.5. M11 is a very oddball size, can someone verify this? I estimated the un-engaged length to be around 100mm. Converting to SAE. 11 = .43", bolt area = .147 in2, unengaged length = 3.937", 40NM = 29.5 pound feet = 354 pound inch.
The stress from the 40NM of torque:
F= 354 pound inch/(.2)(.43 inch) = 4116 pound force
Stress = 4116/.147 = 28,002 psi
The stress from the 270 degrees:
Additional stretch from 270 degrees = 270/360 * 1.5 mm = .75 x 1.5 = 1.125mm = .044"
Strain = .044/3.937 = .011 in/in
Stress = E x Strain = .011 x 30,000,000 = 335,281 psi
Add this to the original stress and you get 363,282 psi
That seems high, I was expecting they would torque to around 300,000 psi to be slightly above yield. Of course, a very important number, the un-engaged length was just an estimate on my part. If that length is longer, then the stresses go down.
EDIT: Some interesting sidenotes. If the total stress is 363,282 psi, then the clamping load per bolt is 363,282 x .147 = 53,402 pounds. The real number will be lower because as the bolt yields, the cross sectional area of the bolt gets smaller. And this is also probably why my stress numbers are high. I've never worked with torque to yield bolts, we were old fashion where I worked.
And the equivalent bolt torque to get the total load would be 383 pound feet.
Oh and one more caveat, these formulaes ignore the compression of the head and gasket. Again, that would slightly lower the bolt clamping force and stress on the bolts.
I apologize to everyone for such a boring analysis. However, it was fun to re-engage my brain, it's been 2 years since I retired and all I've been working on is my golf game.
Last edited by glennhl; Dec 5, 2015 at 11:37 AM.
MBWorld Fanatic!
Joined: Aug 2011
Posts: 5,351
Likes: 1,677
From: Kitchener, ON
2010 C63 AMG
https://mbworld.org/forums/c63-amg-w...ml#post6599150
With the above info I'd estimate more like 160-170mm for the un-engaged length on the OE bolt.
EDIT: You could calculate the ARP strain as well.
They're rated to 260,000 psi Tensile Strength and 255,000 psi Yield Strength
Torque sequence =
a. 55Nm
b. 110 Nm
c. 150 Nm
http://weistec.com/all/c/c-63/2008-2...tuds-m156.html
Last edited by Jasonoff; Dec 5, 2015 at 01:22 PM.
Super Member
Joined: Apr 2010
Posts: 609
Likes: 38
From: Arizona
2011 C63
jclaus98 posted info on the ARP stud below.
https://mbworld.org/forums/c63-amg-w...ml#post6599150
With the above info I'd estimate more like 160-170mm for the un-engaged length on the OE bolt.
EDIT: You could calculate the ARP strain as well.
They're rated to 260,000 psi Tensile Strength and 255,000 psi Yield Strength
Torque sequence =
a. 55Nm
b. 110 Nm
c. 150 Nm
http://weistec.com/all/c/c-63/2008-2...tuds-m156.html
And I agree, 160mm of un-engaged length would give good numbers.
MBWorld Fanatic!
Joined: Aug 2011
Posts: 5,351
Likes: 1,677
From: Kitchener, ON
2010 C63 AMG
I know there's quite a few unknowns in that calculation but that still seems way too tight no?


