


Replaced Front Control Arms

Thread Starter
MBworld Guru
Joined: Dec 2009
Posts: 10,782
Likes: 1,011
NO LONGER ACTIVE
Replaced Front Control Arms
I've been fighting some noise from the front anti-sway bar bushings. The last time I was under there lubricating the bushings, I noticed that my front right torque strut (a.k.a. upper control arm) had a torn bushing. I checked the tie rods and sway bar end links and they all seems good, so I figured I'd just replace the control arms (all four). I debated on brand, and decided on Lemfoerder, the OEM supplier for MBZ. I did a bit of shopping around and the best price was at partsgeek. With a $15 off coupon and free shipping, it was $396. I give partsgeek 5 out of 5 stars - good prices, and my order arrived the next day.
My schedule is pretty busy over the next few weeks, but i know I need to get this done. After running some errands today, we got home this afternoon around 6PM so I decided I'd start the job and figured I'd at least get one side done. By 8PM, I had the right side completed, so I figured the left would be faster. It was and I had it all done by 9:30. So, 3.5 hours, from start to clean up.
Sorry, I didn't take any photos, but I will mention a few things I learned. First, there are so many things in WIS that are "misleading" it's not even funny. The cross strut simply cannot be torqued with a traditional ratchet wrench. There is no way to get a socket on the bolt. If you remove the hub from the car, then maybe, but otherwise, no way. It is not necessary to completely remove the anti sway bar and end links. All you need to do is remove its bushing brackets, then you can slide it back and forth out of the way.
Unless you have camber bolts, none of this affects the caster, camber or toe adjustments, so it's not necessary to have an alignment, but that is still a good idea. Oh, and be prepared with some large sized wrenches - everything seems to be 21mm. Unless you have a pit or ramps, it will be impossible to torque the bolts on the frame side of the control arms with the vehicle weight resting on the wheels. What I did was to use my jack under the wheel hub to support it and then I could torque the bolts.
I drove a few miles down the highway and back and it seems to have really improved the ride. I'll know better after my daily commute on Monday. I'll probably drop it off that afternoon for an alignment, too.

Senior Member
Joined: Dec 2009
Posts: 269
Likes: 1
From: Greece
clk v6
that sounds like a good improvement. nice for you rodney
i just got left arm control lower and upper and lower right.
i got them like 80 euro all. slightly used but mint condition.
i noticed that they write on them w204 (i owe w209) but then did a search on german parts seller and the hole pack they were selling was like 250 euros including all arms and bushing for front axle and in the compatibility area they described compatible with w203 w209 w204 and many other models.
i got excited that benz models share same axle parts between them. can you confirm this or it is different in the usa?
Super Member
Joined: Mar 2010
Posts: 684
Likes: 14
From: Lebanon
2007 BMW 550i
I actually "injected" my ball joints for the control arms with a grease that's supposed to remove the corrosion and lubricate it. Worked like a charm!.. Just noticed what I wrote: "injected my ball joints".. I crack myself up..
Trending Topics
Thread Starter
MBworld Guru
Joined: Dec 2009
Posts: 10,782
Likes: 1,011
NO LONGER ACTIVE
Left Lower
2033303311
W0133-1795512
Left Upper
2033303911
W0133-1808358
Right Lower
2033303411
W0133-1795513
Right Upper
2033304011
W0133-1808359
MB World Stories
The Best of Mercedes & AMG

8 Oddball Mercedes Ideas That Actually Made it to Production
Verdad Gallardo
Dubai Tuner Gives the Mercedes G-Class An Entirely New Look
Verdad Gallardo
Six Gift Ideas Your AMG Loving Dad or Grad Will Cherish

7 Craziest Things AMG Gas Ever Built
Verdad Gallardo
New Electric Mercedes-AMG GT 4-Door Coupe Unveiled: 10 Things You Need to Know
Verdad Gallardo
6 Mercedes Models That Did NOT Age Well (But Are Somehow Still Cool)
Verdad Gallardo
Manual Mercedes? 6 Times Sindelfingen Let Drivers Have All The Fun
Verdad Gallardo
Mercedes SLR McLaren 722 S Is Extremely Rare Example Modified by McLaren
Verdad Gallardo
8 Classic Boxy Mercedes Designs That Have Aged Like Fine Wine
Verdad GallardoSuper Member
Joined: Mar 2010
Posts: 684
Likes: 14
From: Lebanon
2007 BMW 550i


Junior Member
Joined: Mar 2015
Posts: 38
Likes: 0
CLK 500
Do the front control arms need to be filled with grease or they come pre lubbed? Also, can this job be done on ramps, to make it easier for torquing or does the work have to be done on the ground first, then put up on ramps?
Thread Starter
MBworld Guru
Joined: Dec 2009
Posts: 10,782
Likes: 1,011
NO LONGER ACTIVE
The bushings and ball joints are pre-lubricated and do not have any capability for adding any additional lubricant.
You will have to lift the tires off the ground and remove them. When torquing the bolts on the bushings, you need the vehicle weight on the wheels, so ramps could be used, or, with the chassis supported, gently lift the hub with a jack (that's what I did). The center jack pint (the big rubber puck under the engine) is a wonderful way to lift. Use a low-profile hydraulic jack under there to lift the entire front end, the place jack stands one each side at the jack points.
You will have to lift the tires off the ground and remove them. When torquing the bolts on the bushings, you need the vehicle weight on the wheels, so ramps could be used, or, with the chassis supported, gently lift the hub with a jack (that's what I did). The center jack pint (the big rubber puck under the engine) is a wonderful way to lift. Use a low-profile hydraulic jack under there to lift the entire front end, the place jack stands one each side at the jack points.

Super Member

Joined: Feb 2008
Posts: 699
Likes: 44
From: PA
09 CLK550
I have "203050426" printed on my front lower right which seems to be used in C and CLK
Startek is quite confusing, seems these parts have been re-issued a few times
Code:
Left
Original p/n A2033303911
replaced by A2033303911
replaced by A2043303311
replaced by A2043304311
Super Member
Joined: Feb 2008
Posts: 699
Likes: 44
From: PA
09 CLK550
Thanks, just ordered all 4 control arms and another sway bar link for the one I stripped.
I already did the sway bar bushings and strut bearings so that's basically everything up front.
I'll post pics next week.
I already did the sway bar bushings and strut bearings so that's basically everything up front.
I'll post pics next week.
Thread Starter
MBworld Guru
Joined: Dec 2009
Posts: 10,782
Likes: 1,011
NO LONGER ACTIVE
Thread Starter
MBworld Guru
Joined: Dec 2009
Posts: 10,782
Likes: 1,011
NO LONGER ACTIVE
The ball joint itself is pressed onto the end of the control arm. It's the stud on it that bolts tot he wheel hub. That stud is tapered and that's what you need the separator tool. When re-installing, tightening of the bolt on that stud properly seats it, so no "pressing" needed.

Junior Member
Joined: Apr 2015
Posts: 21
Likes: 0
2006 CLK 350
Looked at my front upper control arm, it looks like you need to remove those bolts that attacked to the knuckle to get the control arm out. If those bolts that attacked to shock are remove? Do I need to clam down the spring/or something to hold the brake assembly?
Thread Starter
MBworld Guru
Joined: Dec 2009
Posts: 10,782
Likes: 1,011
NO LONGER ACTIVE
Yes, you will need to remove the shock/strut cartridge assembly from the steering knuckle. The spring is captured inside the strut cartridge, so no need to compress it. Just an FYI, getting everything lined up to get the shock bolts back in place can be a challenge!
Super Member
Joined: Feb 2008
Posts: 699
Likes: 44
From: PA
09 CLK550
Pic heavy writeup coming:
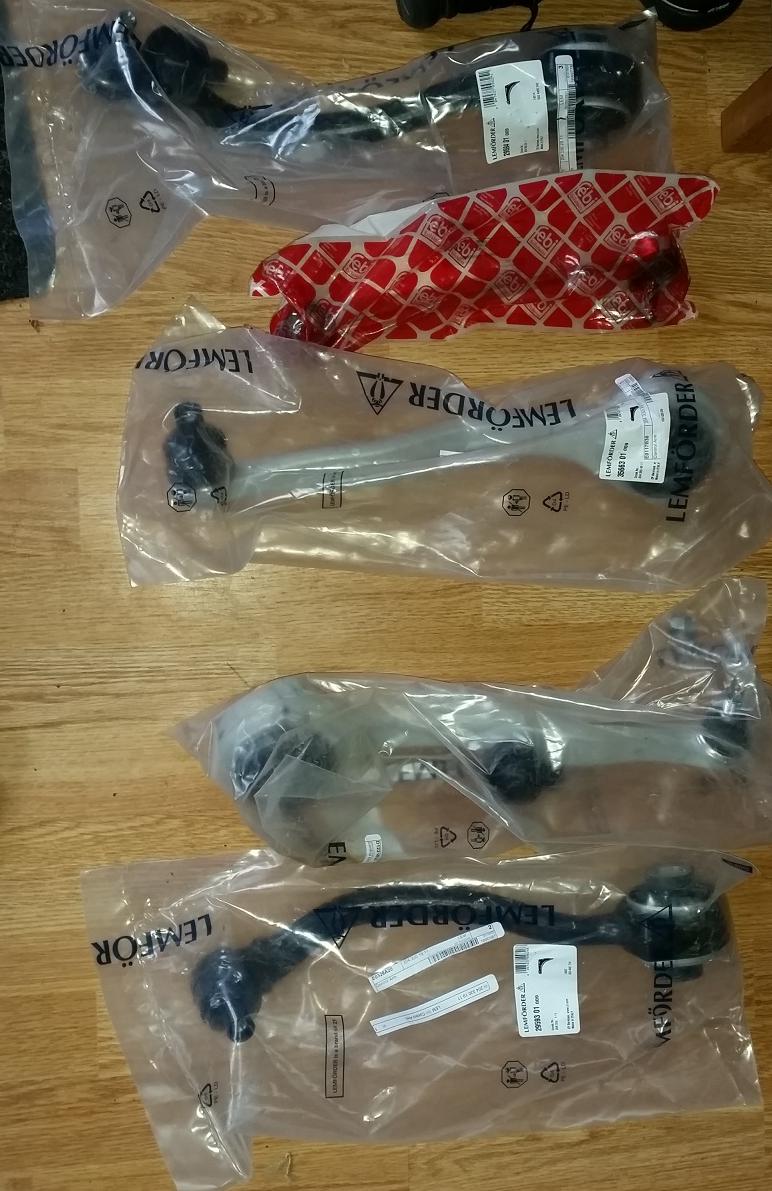
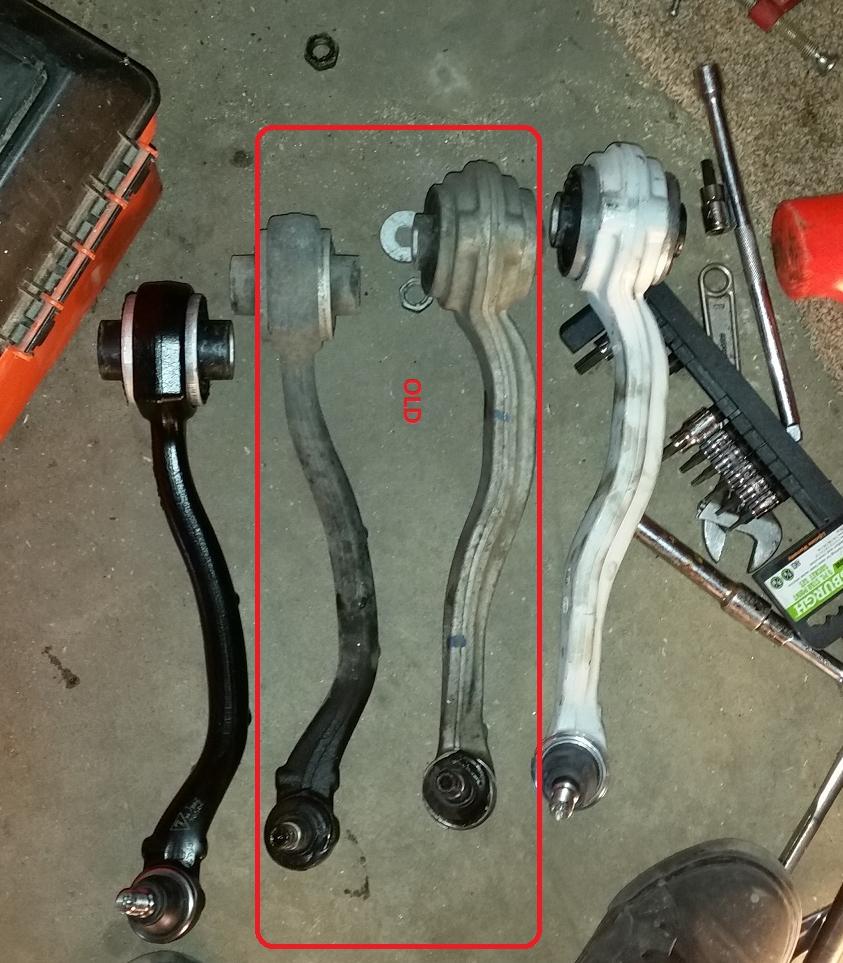
New parts
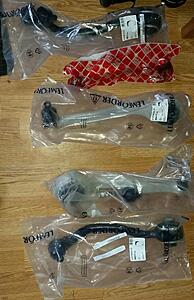
At first I was concerned at www.partsgeek.com lack of packing then I realized there really isn't anything to 'hurt' here.
Safety first!
Parking brake set and wheel chocks
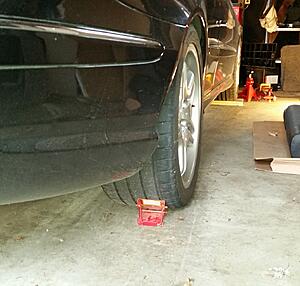
Break lugs before jacking off
If I was smart I would have removed the belly pan (6 x 8mm bolts) before jacking off. I had to reposition the jack and jackstands to get the control arms out.
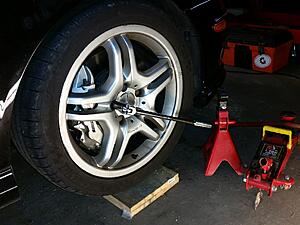
Remove sway bar bushings
I forgot to get a pic of the strut itself. I just took these out last month to replace the strut bearing so this was all pretty easy.
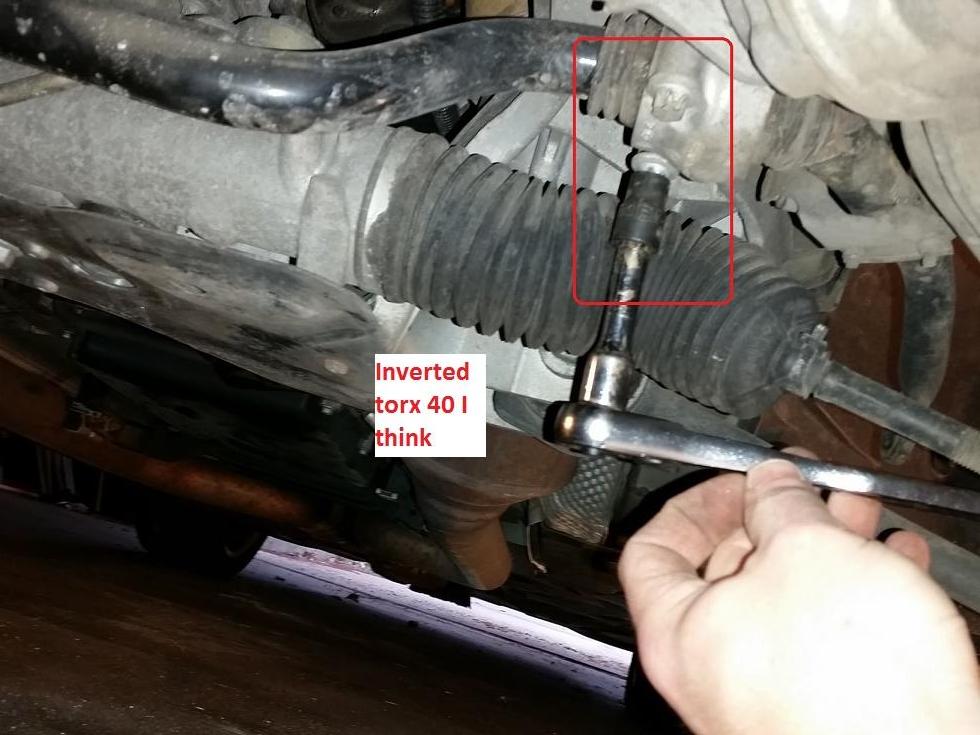
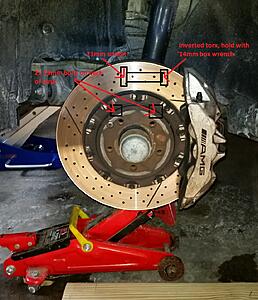
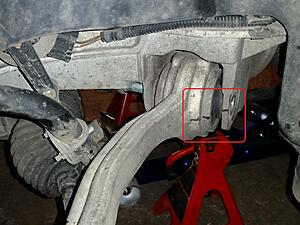
Remove 2 x19mm bolts + Lock washers on back of strut.
Loosen 21mm nut hiding behind the rotor and hold the other torx end of it with a 14mm boxwrench.
Once you pop this bolt out the whole brake assembly will drop a few inches. Its heavy.
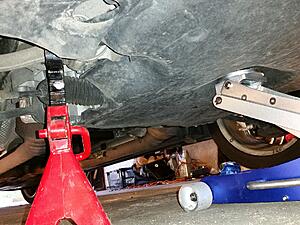
Now its time to start the real work.
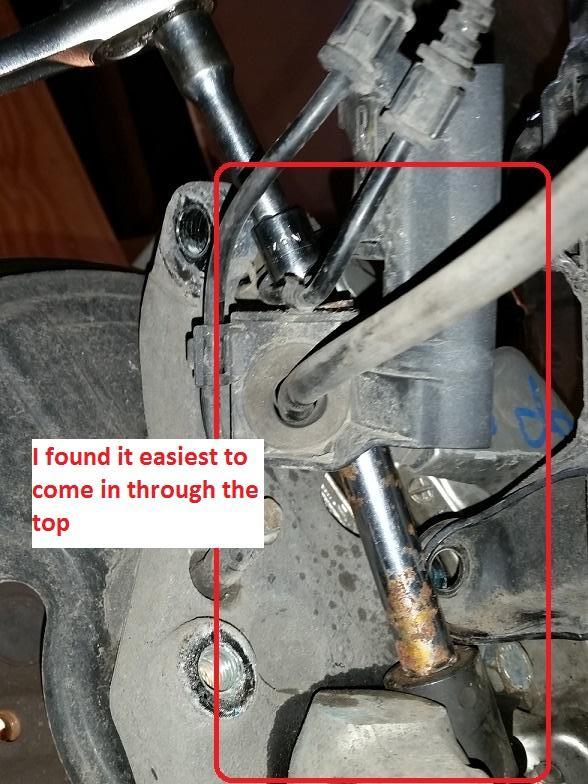
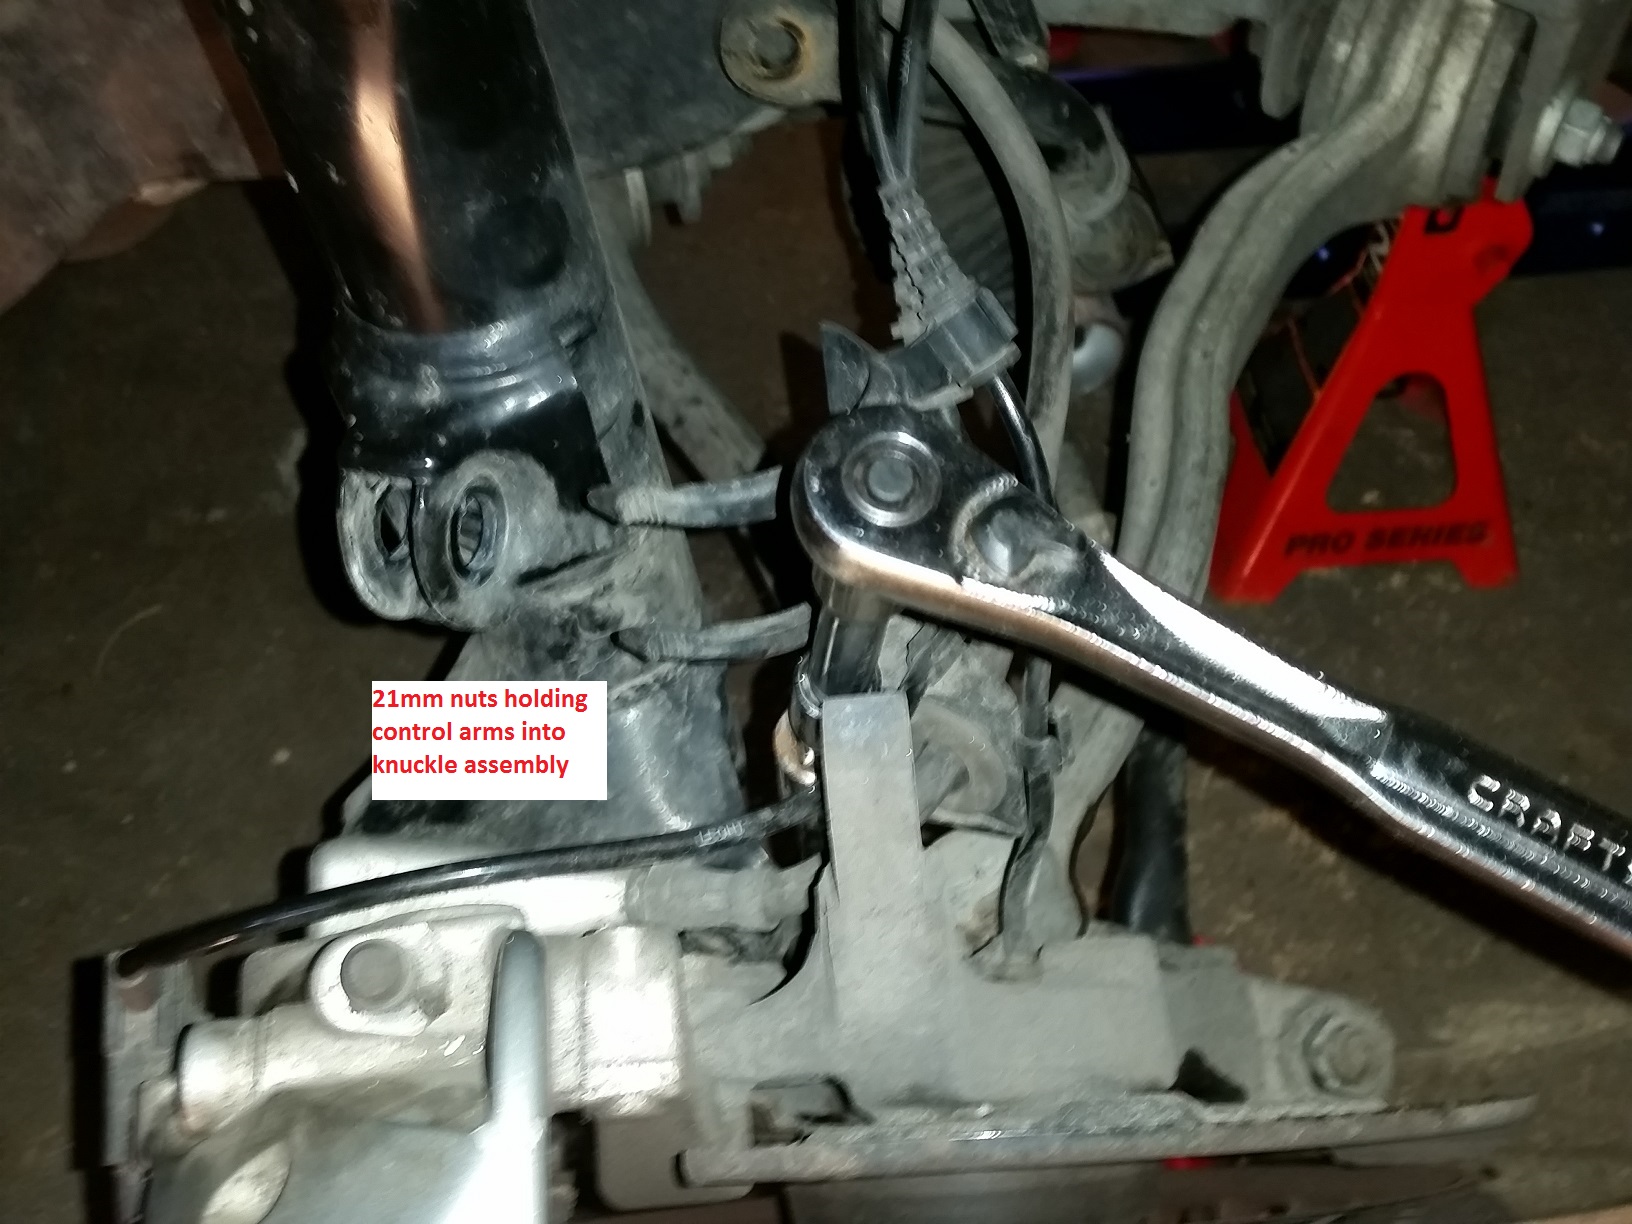
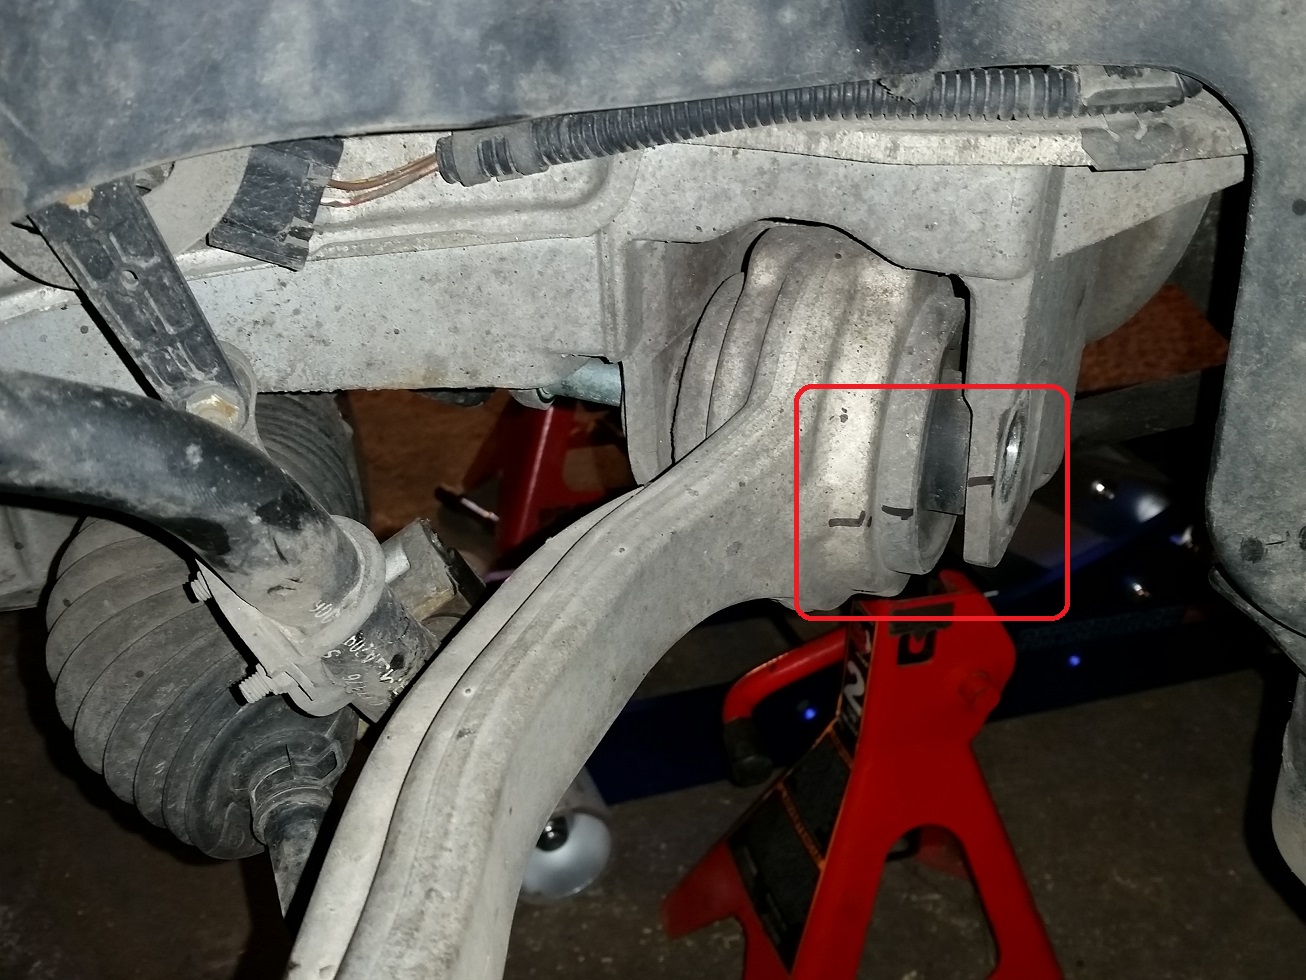
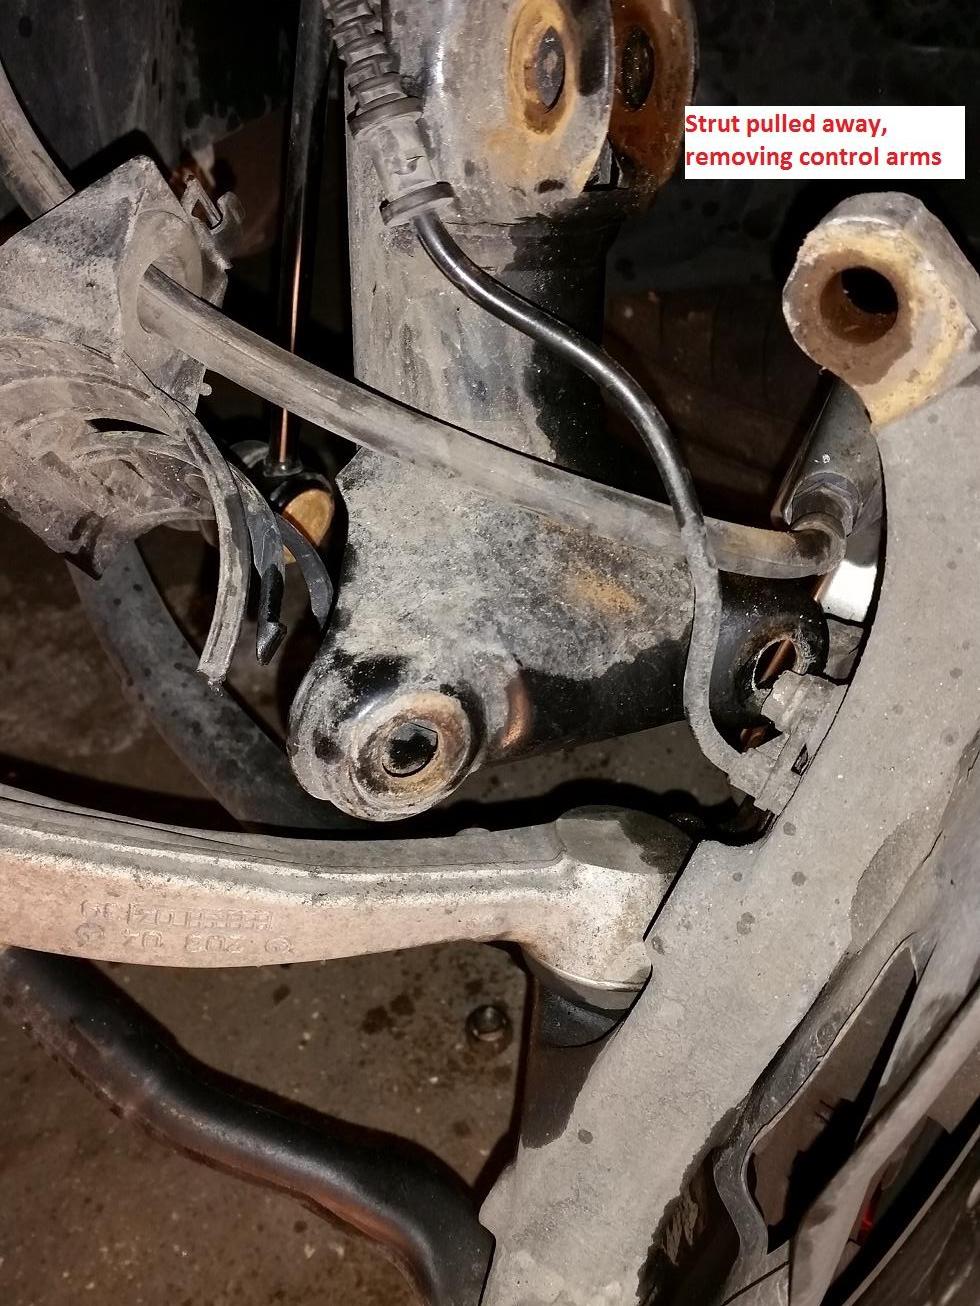
Wiggle the strut out of the way so you can get to the 21mm crown nuts holding the control arms to the steering knuckle assembly. One is easy to get to from the bottom. The other is hiding under the base of the strut. There isn't much room to work. I used some 1/2" drive extensions to get at it from above
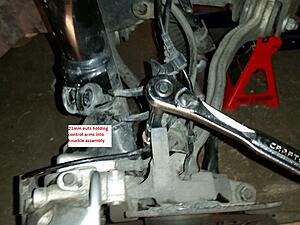
With the 2x 21mm crown nuts holding the control arms in removed, its time for some FUN!
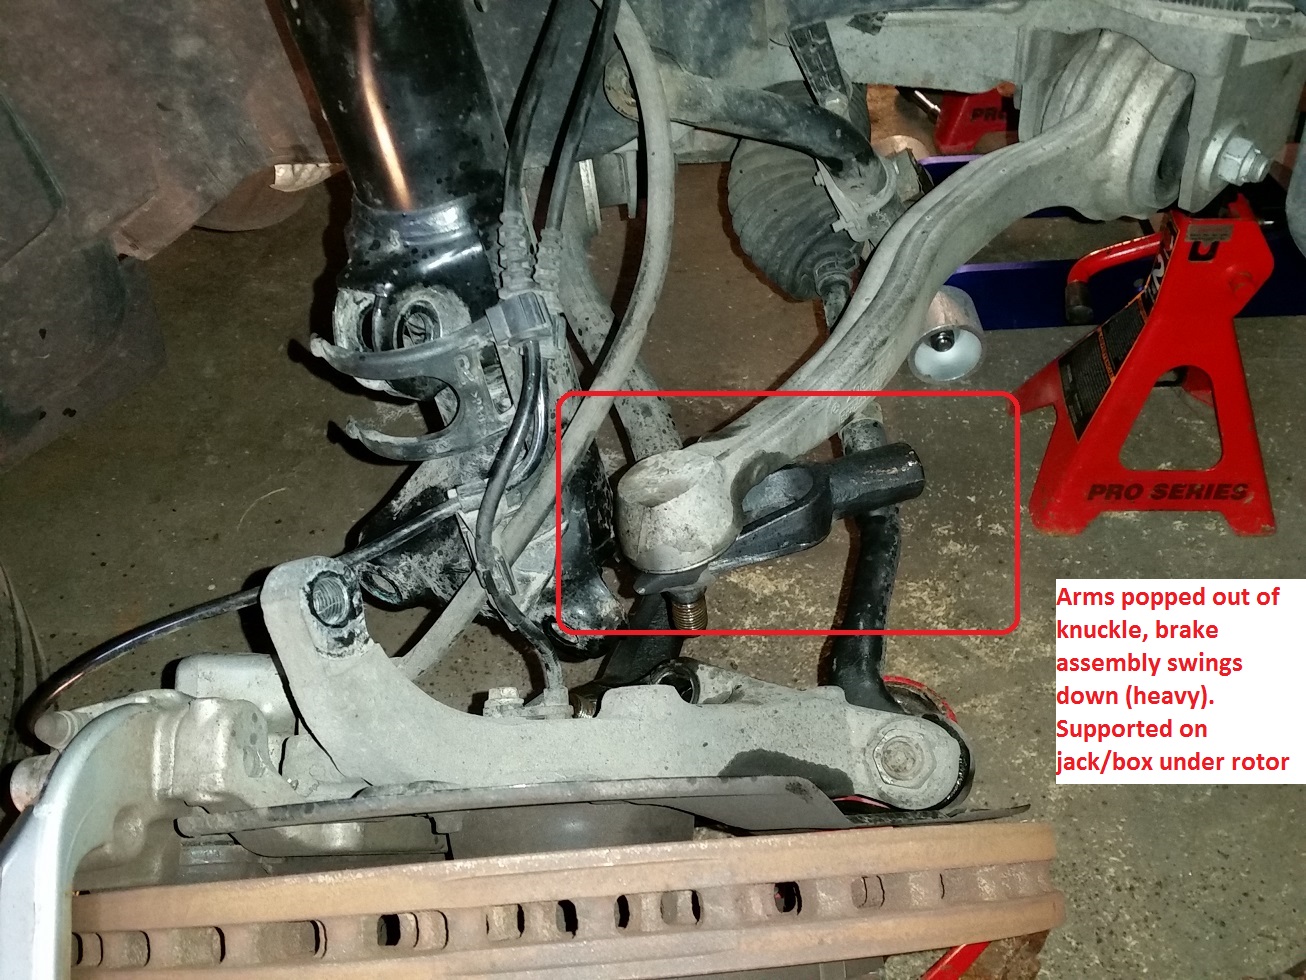
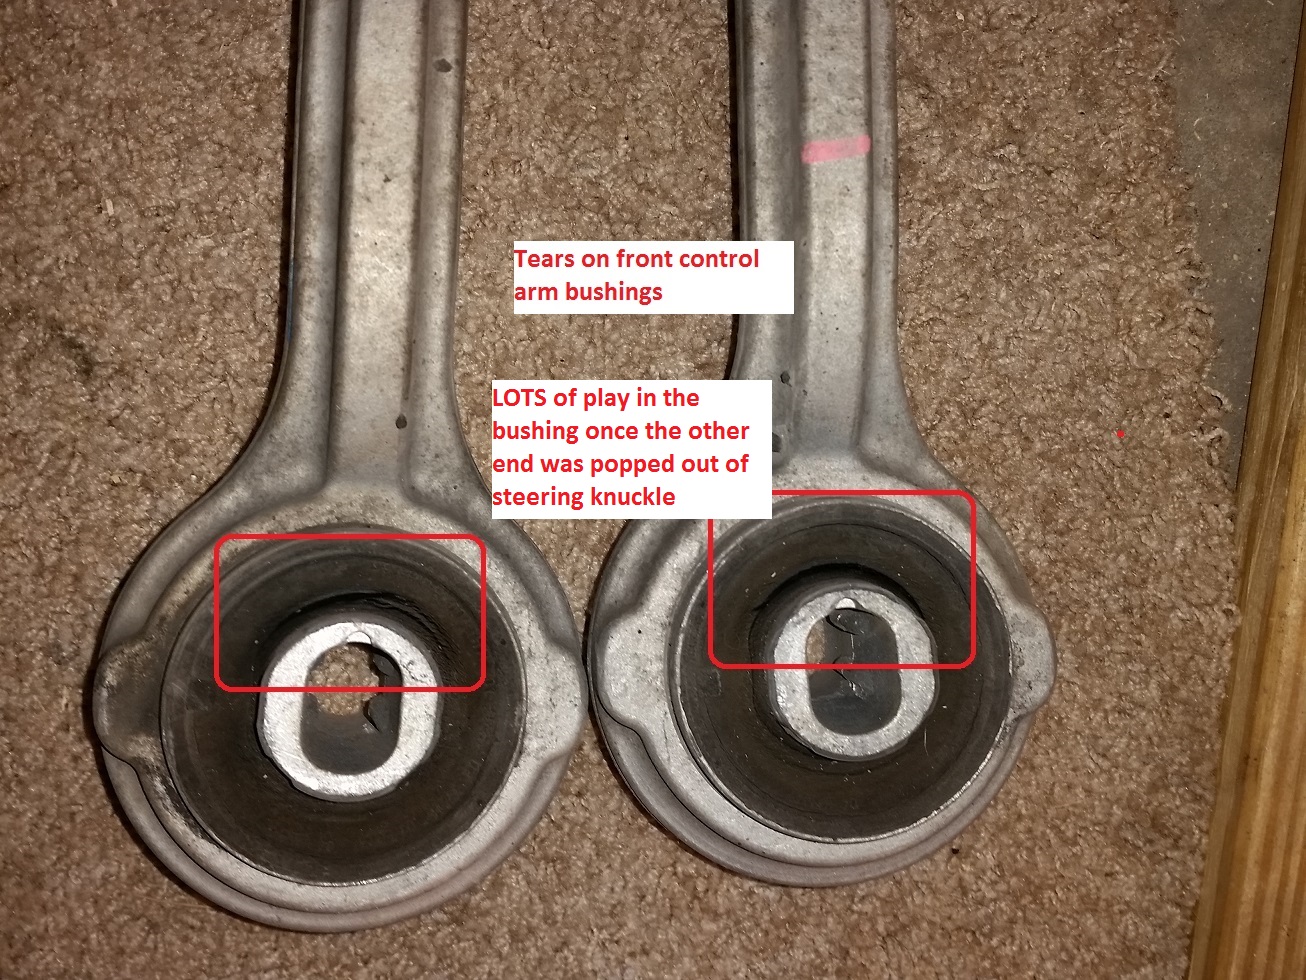
I used a 'pickle fork' to separate the control arms from the knuckle. I basically just hammered the **** out of them till they popped free. There are much more elegant 'pullers' that will do the same thing.
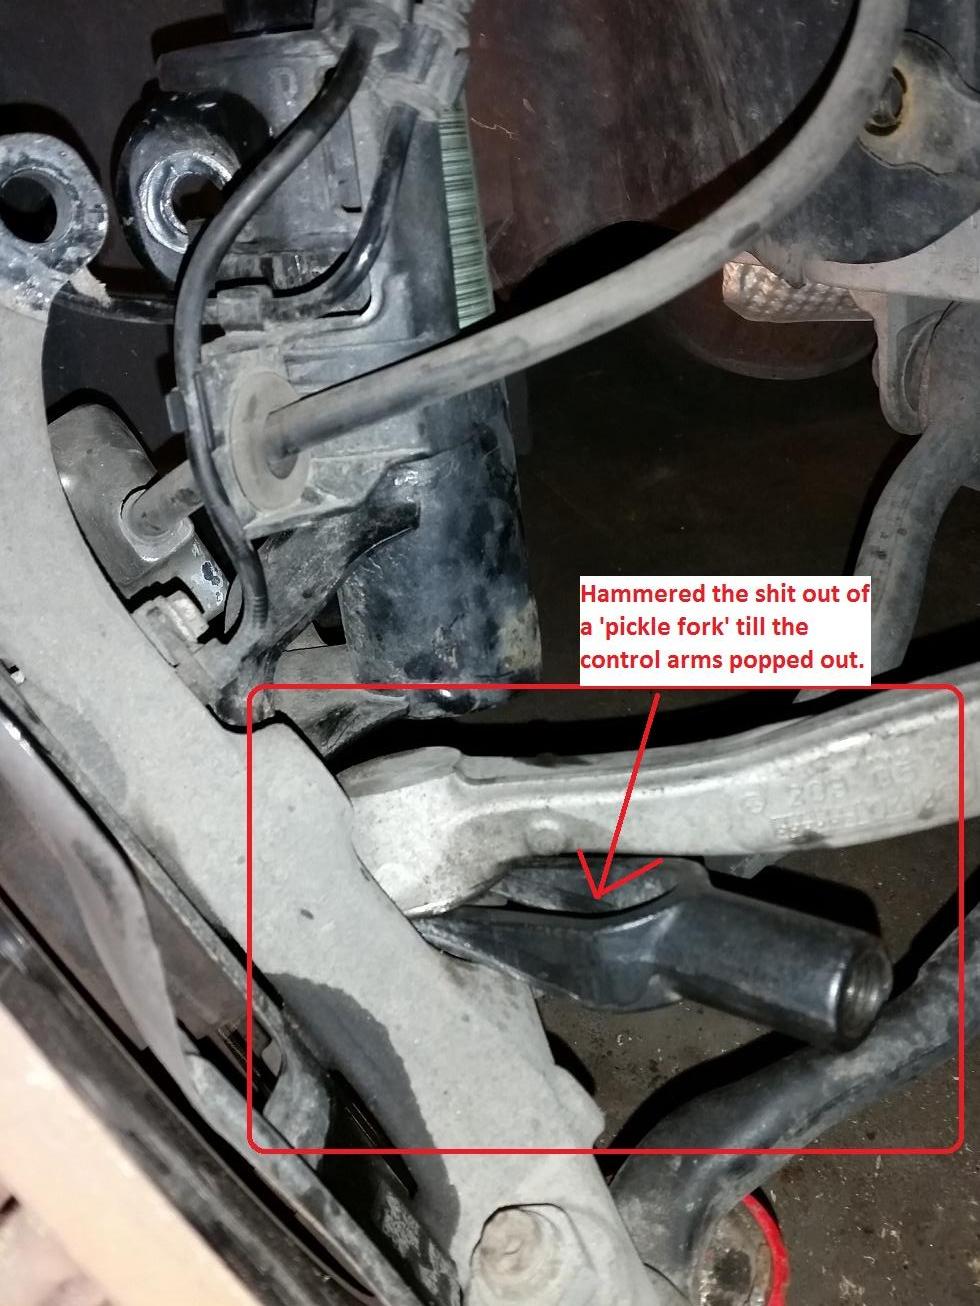
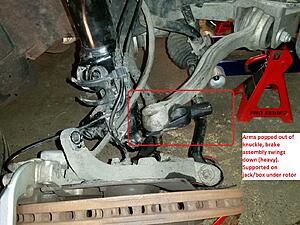
With both of the control arms popped free all that supports the steering knuckle is the steering tie-rod end and the brake lines. Be sure to support it from under.
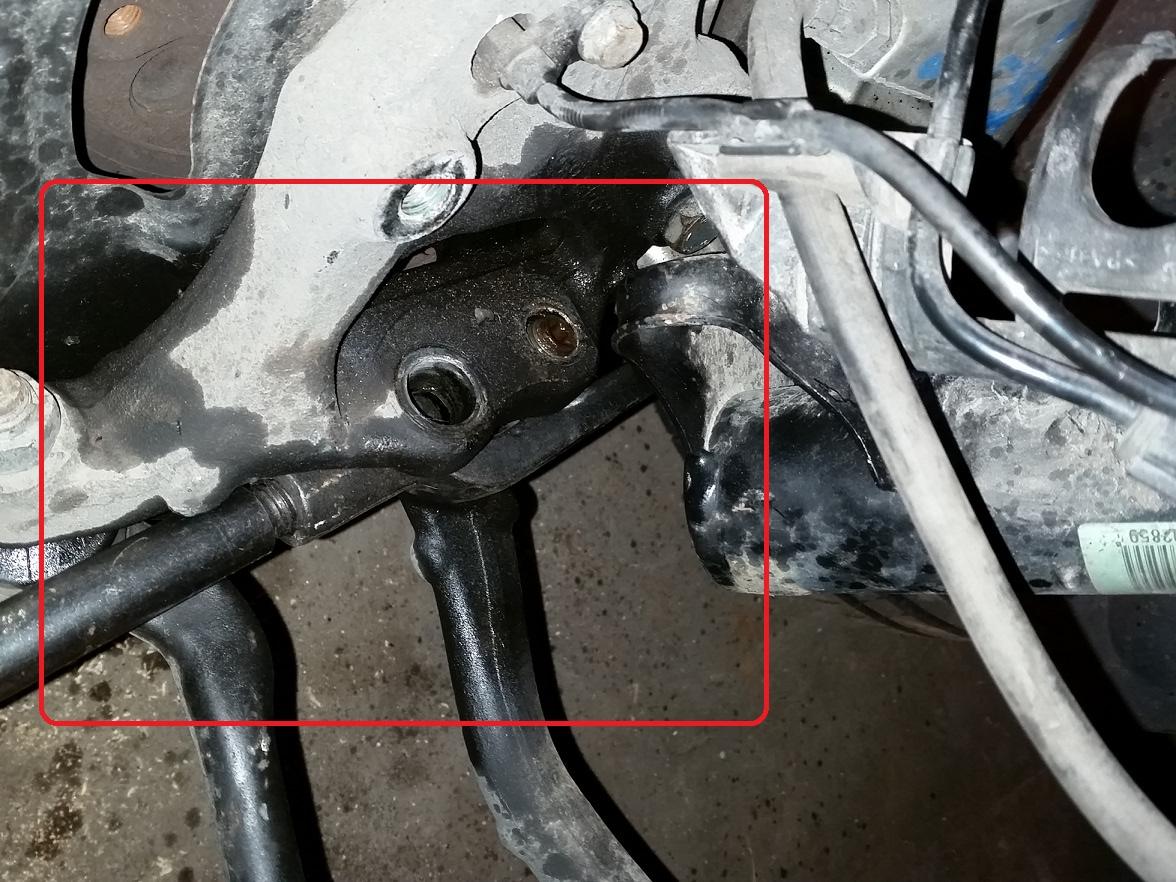
Pickle fork wedging the control arms out.

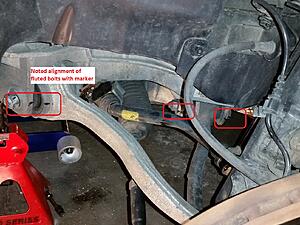
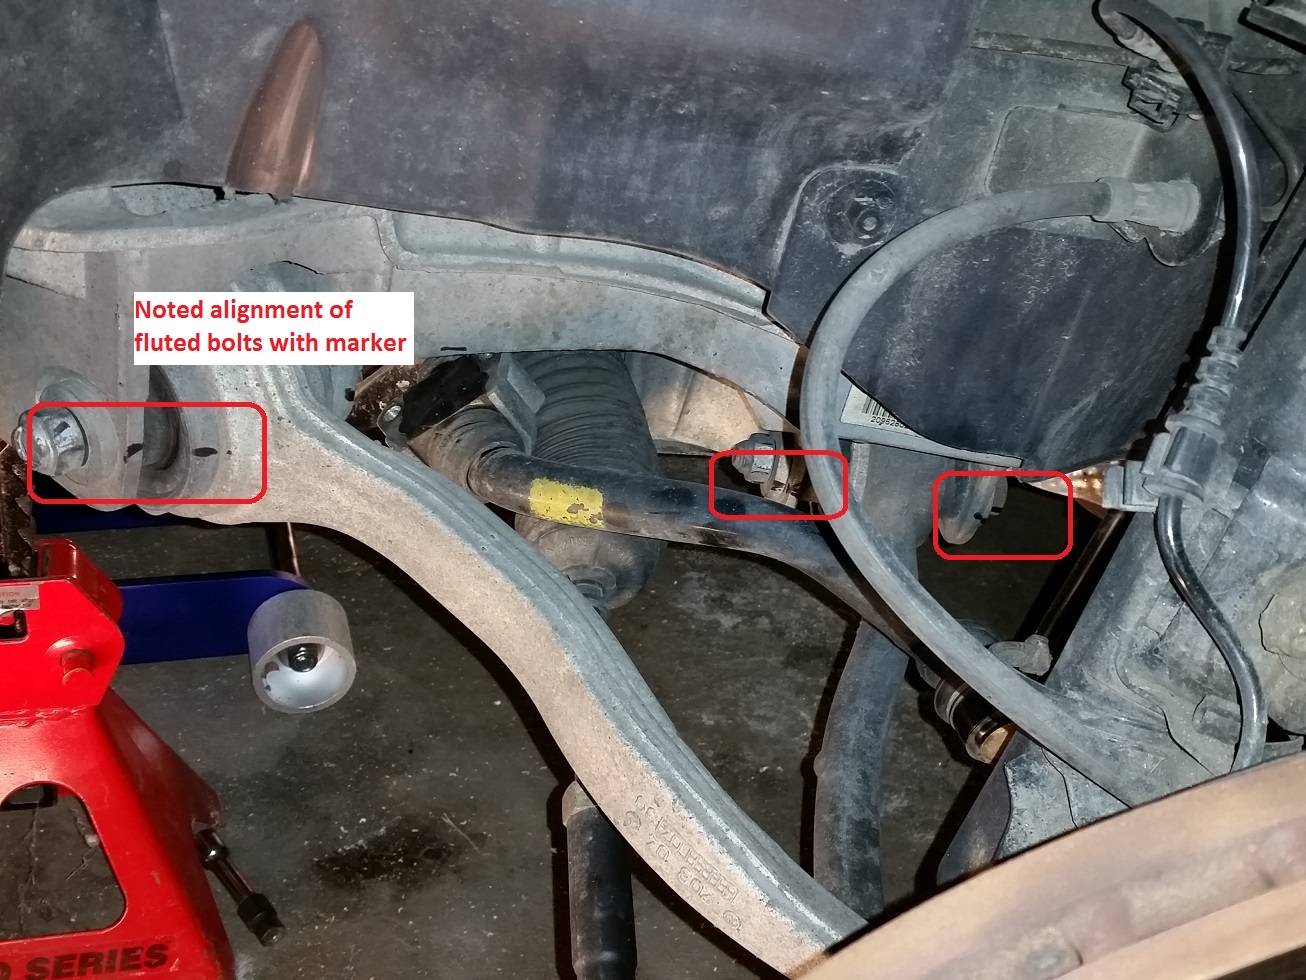
Make sure to mark the bolt and spacer orientation. Only the rear control arm had a 'fluted' bolt. but I tried to line them back up exactly anyway.
One side out
New parts
At first I was concerned at www.partsgeek.com lack of packing then I realized there really isn't anything to 'hurt' here.
Safety first!
Parking brake set and wheel chocks

Break lugs before jacking off

If I was smart I would have removed the belly pan (6 x 8mm bolts) before jacking off. I had to reposition the jack and jackstands to get the control arms out.

Remove sway bar bushings
I forgot to get a pic of the strut itself. I just took these out last month to replace the strut bearing so this was all pretty easy.
Remove 2 x19mm bolts + Lock washers on back of strut.
Loosen 21mm nut hiding behind the rotor and hold the other torx end of it with a 14mm boxwrench.
Once you pop this bolt out the whole brake assembly will drop a few inches. Its heavy.

Now its time to start the real work.
Wiggle the strut out of the way so you can get to the 21mm crown nuts holding the control arms to the steering knuckle assembly. One is easy to get to from the bottom. The other is hiding under the base of the strut. There isn't much room to work. I used some 1/2" drive extensions to get at it from above
With the 2x 21mm crown nuts holding the control arms in removed, its time for some FUN!
I used a 'pickle fork' to separate the control arms from the knuckle. I basically just hammered the **** out of them till they popped free. There are much more elegant 'pullers' that will do the same thing.
With both of the control arms popped free all that supports the steering knuckle is the steering tie-rod end and the brake lines. Be sure to support it from under.
Pickle fork wedging the control arms out.
Make sure to mark the bolt and spacer orientation. Only the rear control arm had a 'fluted' bolt. but I tried to line them back up exactly anyway.
One side out
Super Member
Joined: Feb 2008
Posts: 699
Likes: 44
From: PA
09 CLK550
part2
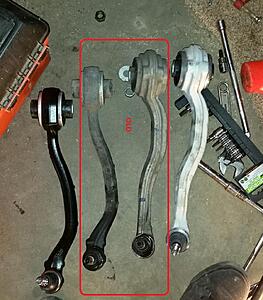
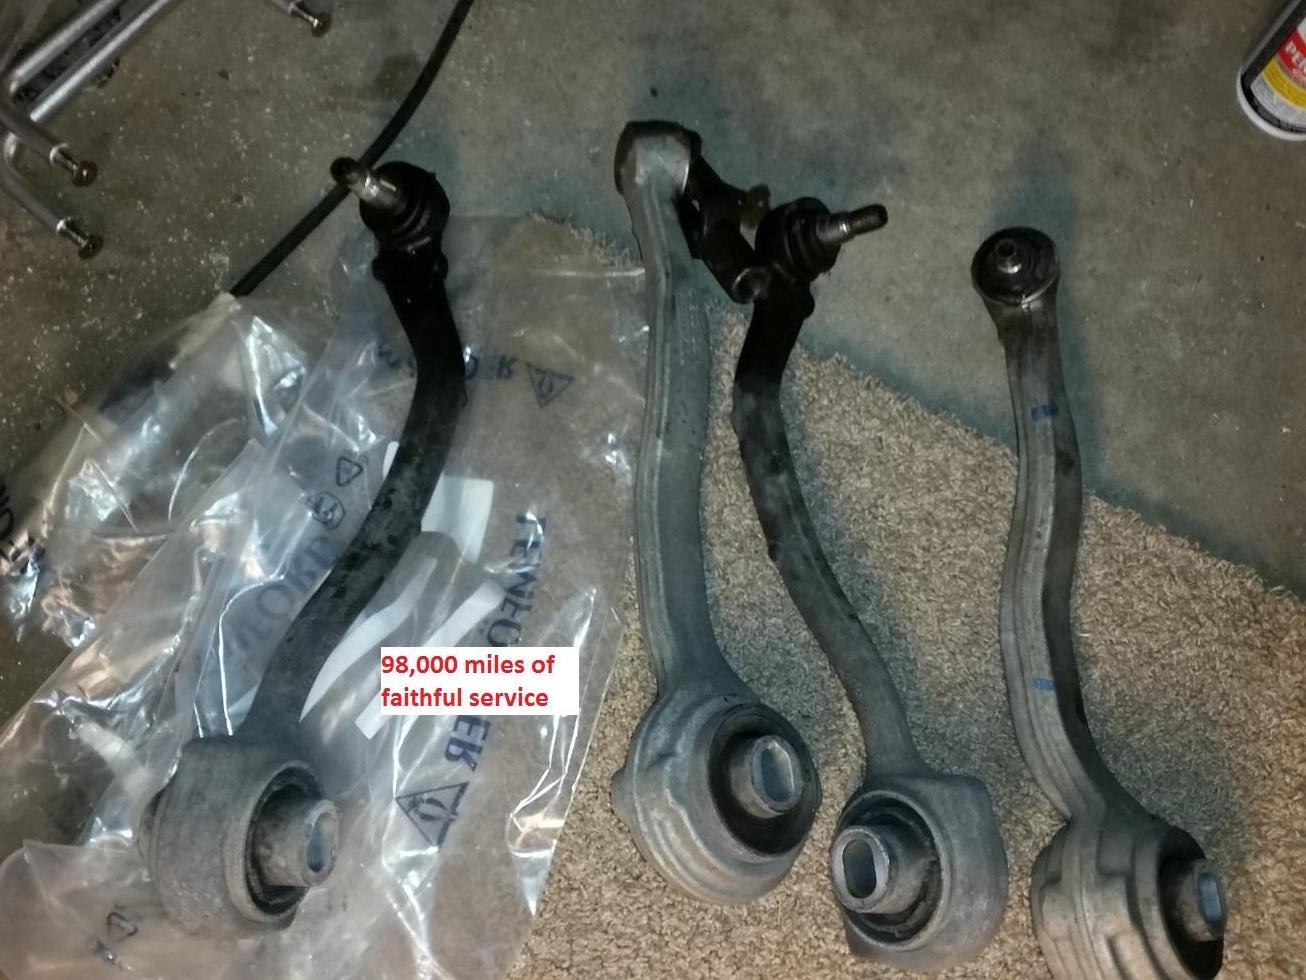
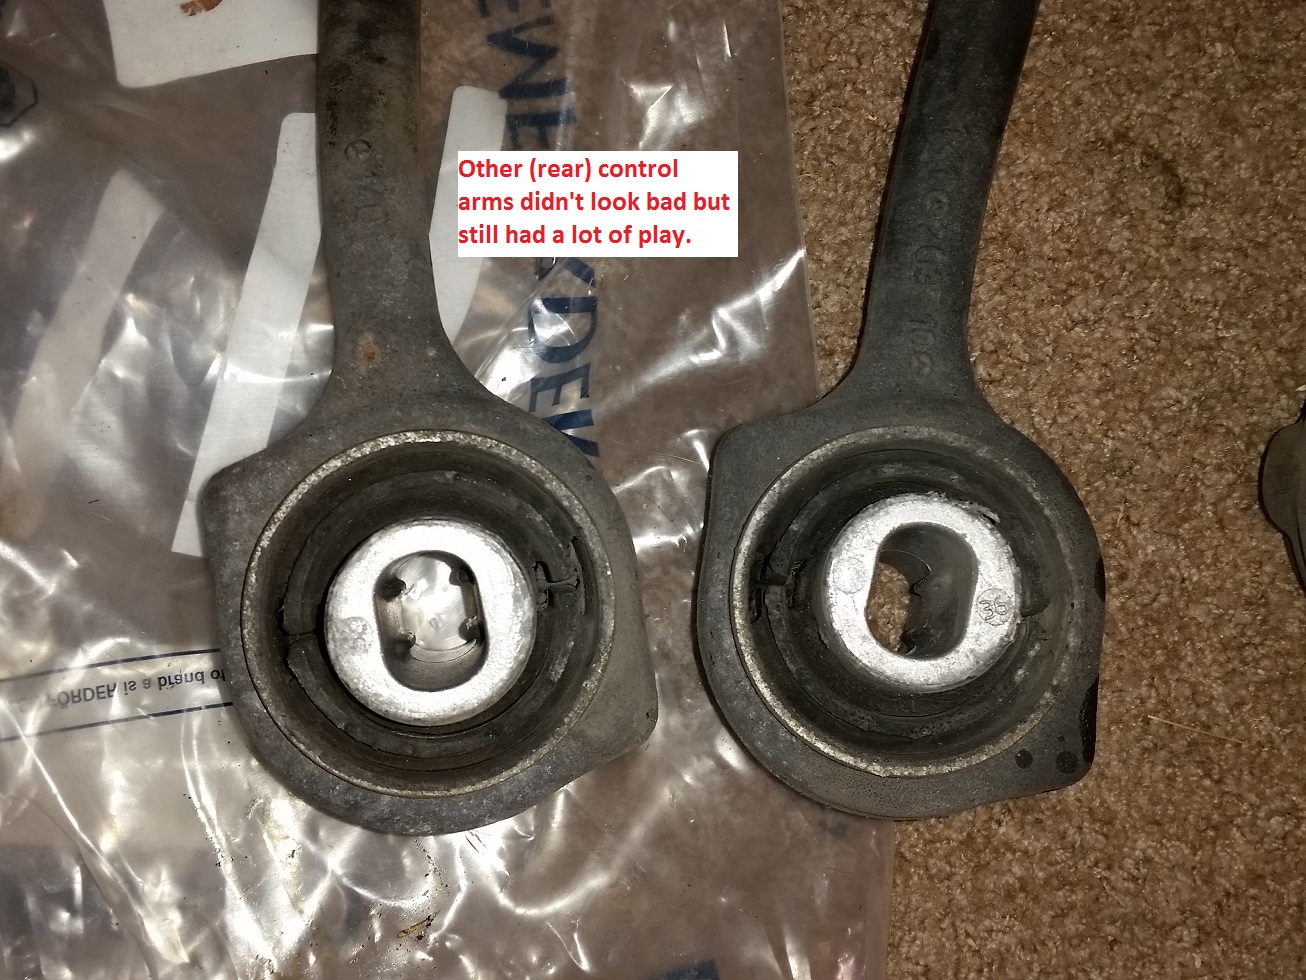
Both arms removed!

New arm going in
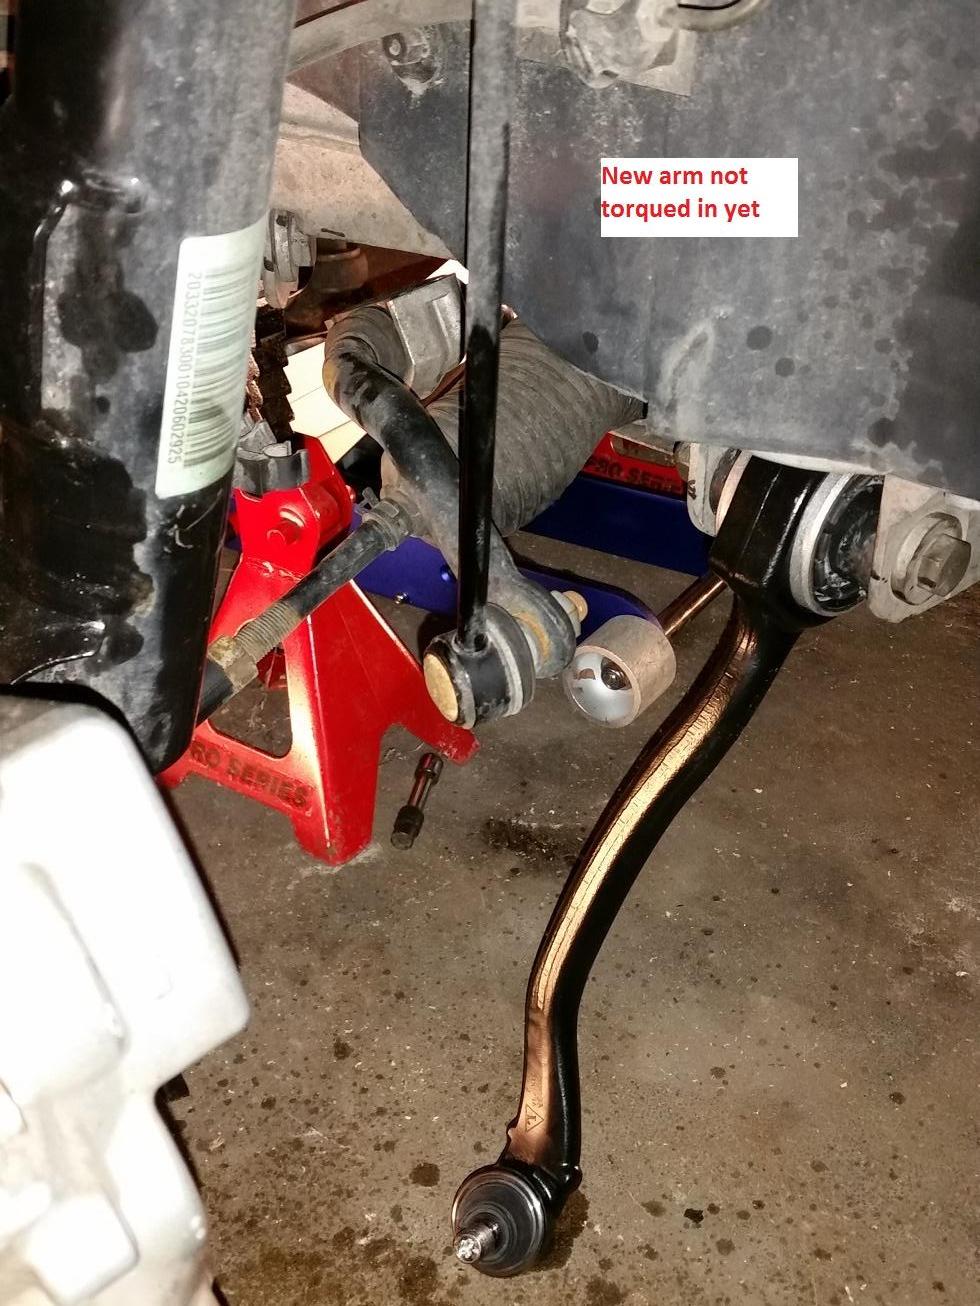
At this point I have tightened the 2x 21mm crown nuts holding the control arms to the steering knuckle.
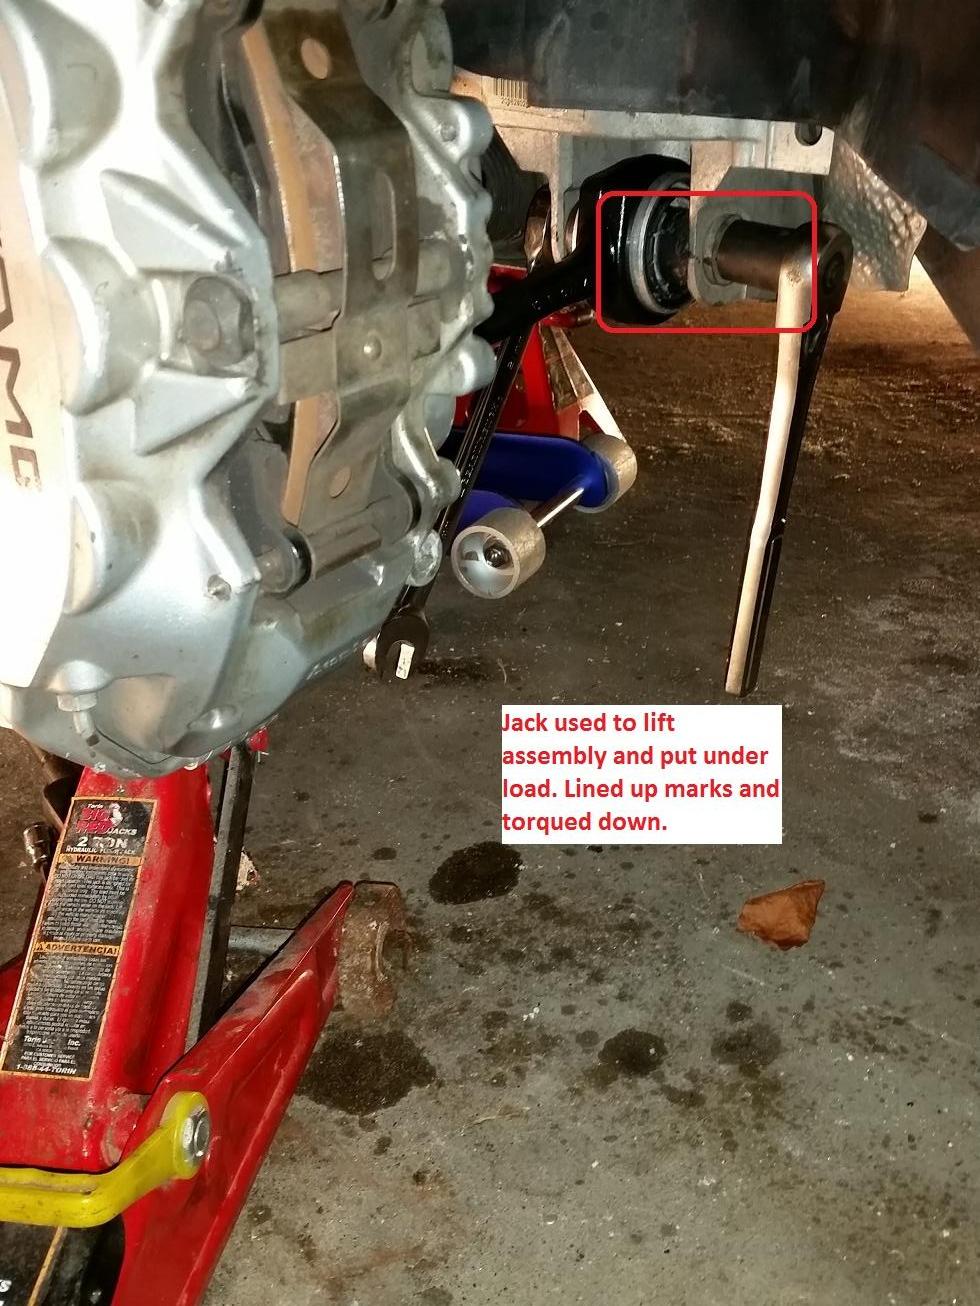
Putting the steering knuckle under load to align the control arms for tightening.
All the old arms removed

So at this point I had tightened everything up. re-attached the sway bar and replaced a pass-side swaybar link that was clunking.
Took about 6 hours total, 3/4 of that was on the first side fighting with everything and learning. The other side went 2x as fast because I knew what I was doing. or so I thought.
Took the car out for a drive and the steering wheel isn't straight. Car pulls to the driver-side a bit.
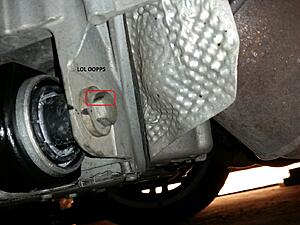
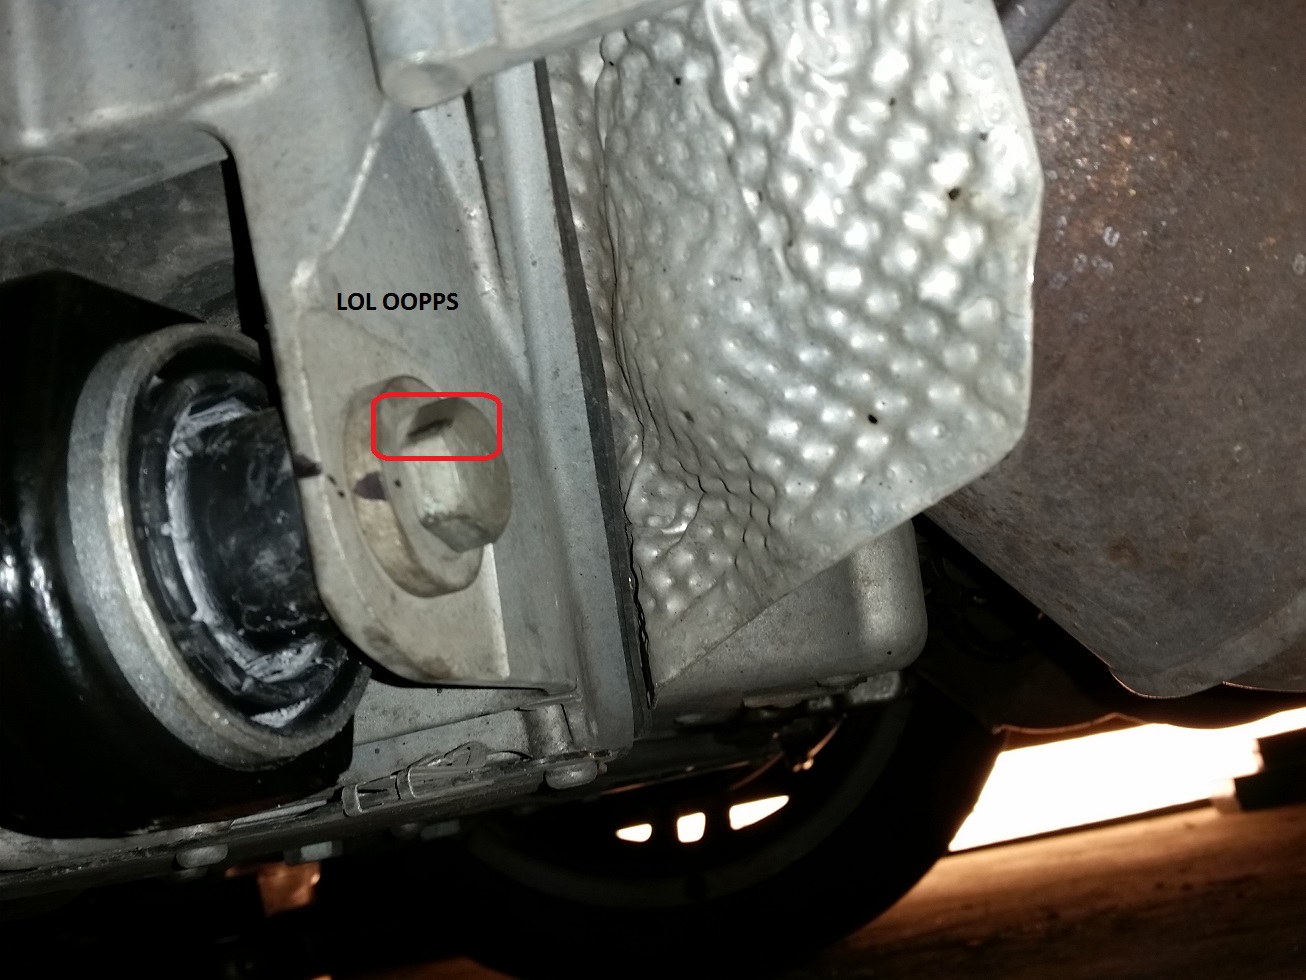
Got home and realized I screwed up the driver side fluted bolt. Sigh.
Both arms removed!
New arm going in
At this point I have tightened the 2x 21mm crown nuts holding the control arms to the steering knuckle.
Putting the steering knuckle under load to align the control arms for tightening.
All the old arms removed
So at this point I had tightened everything up. re-attached the sway bar and replaced a pass-side swaybar link that was clunking.
Took about 6 hours total, 3/4 of that was on the first side fighting with everything and learning. The other side went 2x as fast because I knew what I was doing. or so I thought.
Took the car out for a drive and the steering wheel isn't straight. Car pulls to the driver-side a bit.
Got home and realized I screwed up the driver side fluted bolt. Sigh.
Super Member
Joined: Feb 2008
Posts: 699
Likes: 44
From: PA
09 CLK550
myclk350: As Rudeney said you need to get the strut out of the way. There is a crown bolt directly under it that cant be removed with the strut in place. Removing the 3 bolts that attach it to the steering knuckle gave me enough to wiggle around it.
What I learned:
It sucked. This wasn't fun at all. I'm pretty fit and have no problems doing car work but this was a workout. Squatting and bending over/under the car to heavily torque everything down was tiresome. I probably wouldn't do it again, ever.
PB Blaster is awesome. I should have started squirting it everywhere I planned on working on a week ago.
The 21mm ratcheting crescent wrench I have is way too long, like 14" It was very awkward to work with in the tight spaces behind the strut.
If you're doing this much work, you might as well do the strut bearing and sway bar bushings while you're in there. Like 90% of the work that is required you've already completed.
I think I might take my car for an alignment anyway, even after I fix the flutes bolt I messed up. My drive-side tire has a tiny bit of toe-out now.


