DIY: Kleemann SC H/E Replacement
 03-03-2013, 04:31 PM
#1
MBWorld Fanatic!
Thread Starter
DIY: Kleemann SC H/E Replacement
I sprung a leak on my Kleemann Heat Exchanger and decided to replace it myself with a bigger H/E. There was no guide on the replacement process, so I have decided to create this DIY for my Kleemann Brothers. The DIY below shows the steps I did in order to replace my H/E. First the Legal Stuff.
IMPORTANT DISCLAIMER: This DYI is to be viewed as a literary work, which is to be used for entertainment purposes only. These are not assorted sets of instructions to assist anyone in modifying, repairing or maintaining a car, motorcycle, truck or any related parts. Working on modern cars and/or car parts is acutely technical, and I highly recommend that you hire a professional to service your car. This DIY contains information about what a professional MIGHT do when working on a car, and equally as important, why they may do it. The author of this DIY assumes no responsibility for inconveniences or damages resulting from use of the information supplied. The consumer or reader is individually responsible for his or her use of the information supplied and uses this information at their own risk. The author of this DIY has no liability for errors, omissions, or any defects whatsoever in the information or instructions, or for any damage or injury resulting from the utilization of said information or instructions.
Parts Used:
Comparison of the old Kleemann H/E (Top) and the new FTP H/E (Bottom).


Instructions:
My overall impressions of the new H/E will be written below.
IMPORTANT DISCLAIMER: This DYI is to be viewed as a literary work, which is to be used for entertainment purposes only. These are not assorted sets of instructions to assist anyone in modifying, repairing or maintaining a car, motorcycle, truck or any related parts. Working on modern cars and/or car parts is acutely technical, and I highly recommend that you hire a professional to service your car. This DIY contains information about what a professional MIGHT do when working on a car, and equally as important, why they may do it. The author of this DIY assumes no responsibility for inconveniences or damages resulting from use of the information supplied. The consumer or reader is individually responsible for his or her use of the information supplied and uses this information at their own risk. The author of this DIY has no liability for errors, omissions, or any defects whatsoever in the information or instructions, or for any damage or injury resulting from the utilization of said information or instructions.
Parts Used:
- FTP H/E � 2� width and Black Ceramic Coated (no Logo)
- 2 Brass Hose Barbs � 1/2� NPT (threaded side) to 1� Male Barb
- Teflon Thread Tape � 1/2�
- 2 3" C-Clamps
- 2 �L� shape brackets � About 1.75� in length
- 4 metal screws � for mounting the H/E to the brackets and bumper.
- 1 gallon of Antifreeze
Comparison of the old Kleemann H/E (Top) and the new FTP H/E (Bottom).
Instructions:
- Download (google the file names given in the parenthesis) and read/go over the pdf instructions for both the SC (Manual V8 ver.2.pdf) and removing the bumpers (HL_INSTALL_MBZ_W209.pdf) to ensure you have all the right tools and materials.
- Remove front Bumper
- Raise the rear of the car
- Disconnect the Battery
- Drain the coolant out of the Kleemann H/E via the bleeder valve (or just remove the 1� hoses; much faster)
- Remove the Kleemann H/E � Warning: the 1� hoses may be stuck on there; so this might take some manipulation and time.
- Install the new inlet/outlet hose barbs (if necessary) and attach the brackets to the new H/E.

- Install the new H/E and use some clamps to hold it in place � Warning: In order to install my bigger FTP H/E I had to permanently remove the plastic shroud that directs the air to the radiators.

- Bolt the brackets to the bumper and install the two 1� hoses.


- Find the 1� hose that is attached on the back of the SC (close to the firewall), remove it, and start filling it with a 50/50 solution of MB approved coolant until the coolant starts to come out from the SC (from where you removed the 1� hose).
- Find the hose that connects to the outlet water manifold stub on the back of the SC (the line with the one way valve coming out of the 'T' connection from the expansion tank)
- Remove the hose from the outlet water manifold stub
- Get a hose and funnel that will fit in to the outlet water manifold stub (like on Pg 20 of the Kleemann guide)
- Fill the funnel with a 50/50 mix of water and antifreeze till you can't put in anymore (this may take a while).
- Squeeze one of the 1� hoses a few times to push the bubbles out
- Turn on the electric water pump too to circulate the system.
- Repeat steps 14 - 16 until there is no more bubbles.
- Reattach the expansion tank hose with the one way valve back onto the outlet water manifold stub. Any bubbles trapped at this point will be removed when the SC system self bleeds.
- Reconnect the battery
- Lower the car
- Reinstall the bumper
My overall impressions of the new H/E will be written below.
 03-03-2013, 04:42 PM
#2
MBWorld Fanatic!
Thread Starter
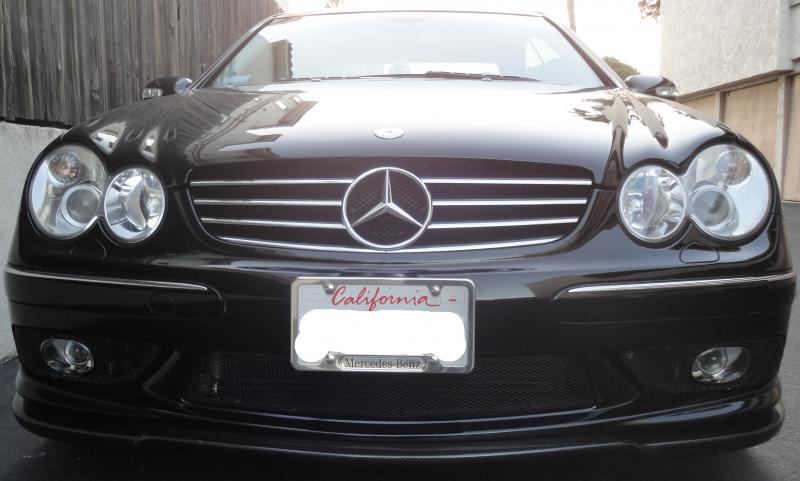
Looks wise, I really like how the new H/E takes up the lower portion of the grill. I'm going for a sleeper look, that's why I had it painted black (I don't want people to know I'm packing a bazooka); it really looks OEM from the front! Performance wise I don't think it make that much of a difference; but I will re-dyno the car in the future to make sure and post results.
The bucket containing the old coolant; it looks really dirty!

The H/E installed. It's hard to tell it's there, but that's what I want!

The bucket containing the old coolant; it looks really dirty!
The H/E installed. It's hard to tell it's there, but that's what I want!
03-03-2013, 06:08 PM
#3
MBWorld Fanatic!
Join Date: Nov 2009
Location: Texas
Posts: 3,589
Received 68 Likes
on
44 Posts
C63 507 AMG DA Car #19
Great Write-up!
My kleemann H/E has some rust going on in the base of it. So I may need this down the road.
Very curious to hear about any diff in performance over the stocker.
My kleemann H/E has some rust going on in the base of it. So I may need this down the road.
Very curious to hear about any diff in performance over the stocker.
03-03-2013, 09:51 PM
#4
MBWorld Fanatic!

Join Date: Mar 2009
Location: GA
Posts: 2,135
Likes: 0
Received 6 Likes
on
6 Posts
2016 Chevrolet SS, 2006 Cadillac STS-V
I just recently replaced my H/E because it was leaking. Kleemann sent me a new "original" unit under warranty. I originally tried to find a bigger one and never came across anything at the time. I wonder if that would fit on my C55. My car has a plastic shroud around the front of the radiator that I don't see in your pictures.
03-04-2013, 09:56 PM
#5
MBWorld Fanatic!
Thread Starter

I just recently replaced my H/E because it was leaking. Kleemann sent me a new "original" unit under warranty. I originally tried to find a bigger one and never came across anything at the time. I wonder if that would fit on my C55. My car has a plastic shroud around the front of the radiator that I don't see in your pictures.


