When you click on links to various merchants on this site and make a purchase, this can result in this site earning a commission. Affiliate programs and affiliations include, but are not limited to, the eBay Partner Network.
I received my android head unit from a company in China called Seicane, and I have generally been disappointed with seller communication. There were no instruction or user manual in the box. As such, a big caveat to this DIY is that you will pretty much be on your own. Without instructions, this is a very, very difficult install. But now you have my DIY to help!
Step 2. Get the Power!
The first step is to connect power. You need to connect 3 wires: Black (ground), Yellow (BATT, continuous) and Red (ACC, ignition). If you do not connect all 3 wires, the unit will not turn on.
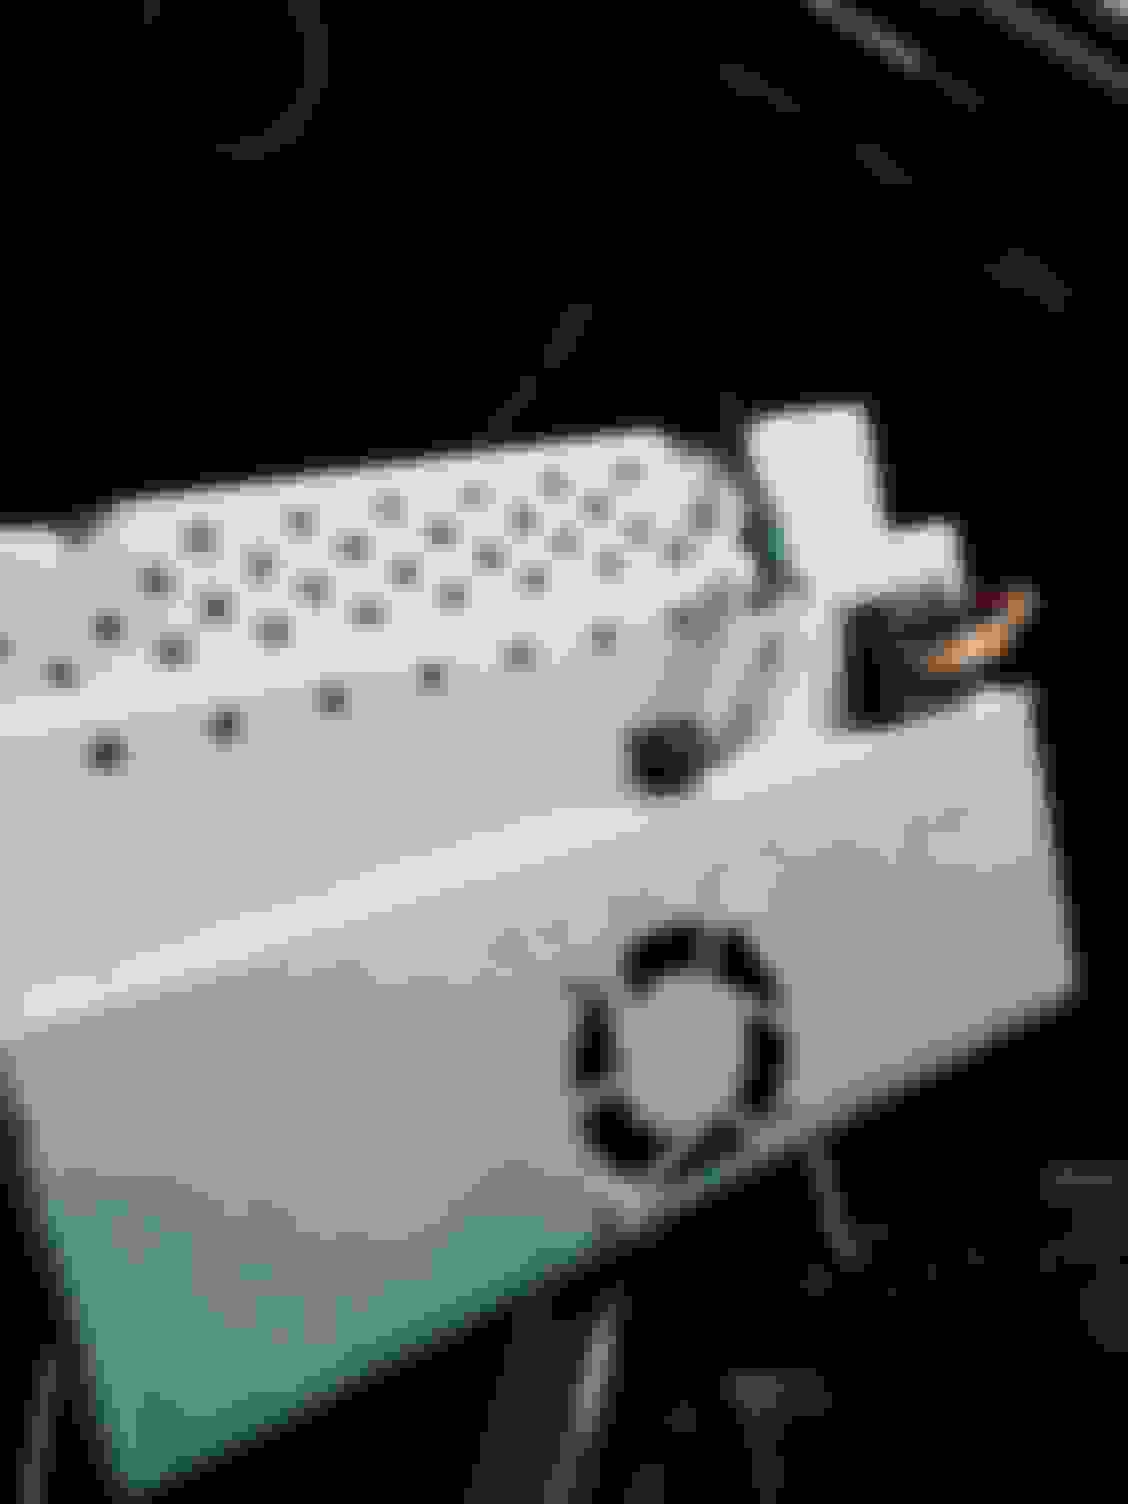
Now, locate these wires and what to connect. Here is the back of my OEM head unit.
Notice the plug on the right. The orange wires are fiber optic. Carefully remove this plug. You'll notice there are actually 2 plugs in 1. The first is the plug with the orange plug that is fiber optic. Leave that one alone for now, it will be used later for the MOST converter. Now, see the little plug with three wires. The red/yellow wire is power and the red is ground. Those will be used to power your new head unit!!
You can work on this plug to power your android head unit. Brown is Ground and Red/Yellow Stripe is power.
RED YELLOW STRIP =POWER, BROWN= Ground
The GROUND wire is BROWN, and the POWER wire is RED/YELOW strip. The pink is not used, and the orange are Fiber optic (leave alone for later)
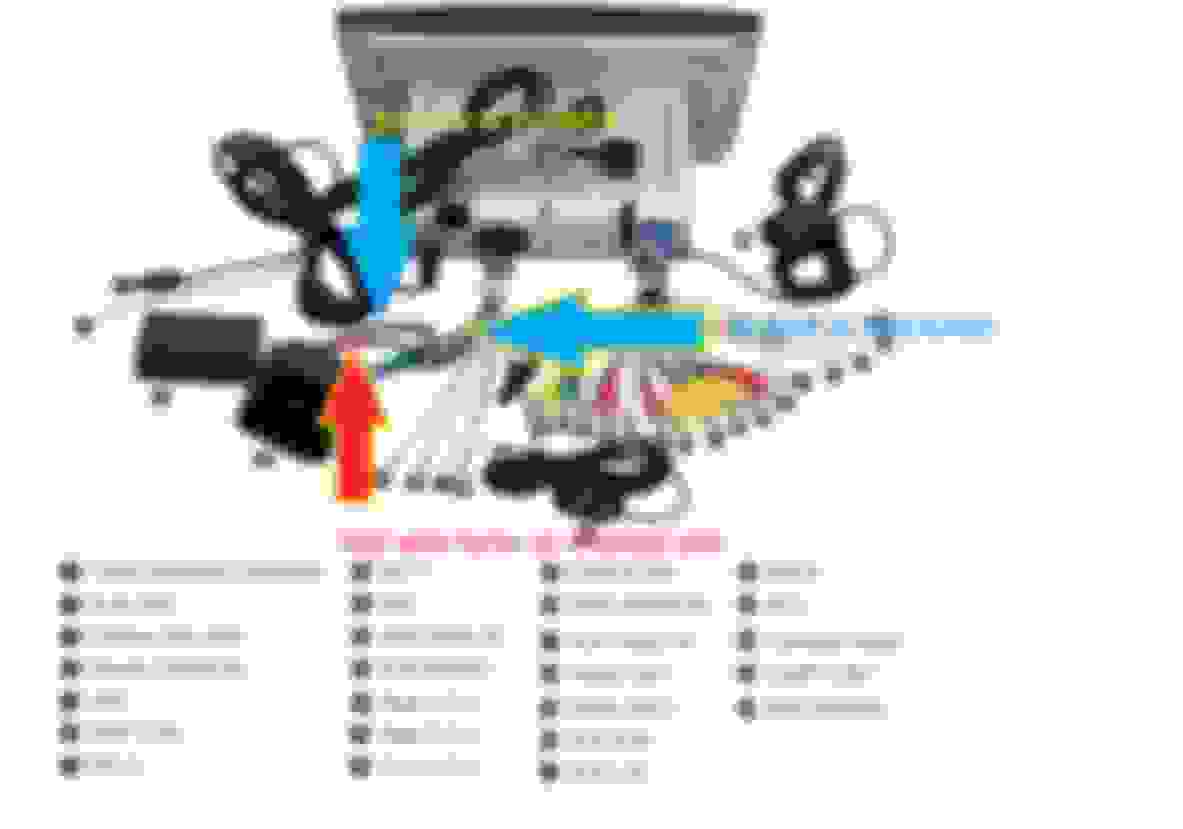
Now, connect the yellow and black wires from the power harness that is supplied with the head unit. Yellow goes to the red/yellow wire in your car and black goes with brown. Here are pics of the power harness and the final set up. You'll need to splice into the new head unit's large power plug since our car does not have this plug. Yellow is power, and is connected to the red/yellow stripe on your car's plug, and black is ground which connects to brown. Red is ACC (ignition) that can also be connected to cigarette lighter.
Here is the pic sent to me from Seicane. You can see the red/yellow strip connected to a power source and brown connected to ground. You may have to expand the pic to see.
After you connect these 2 wires, now connect the Red (ACC) wire to the cigarette lighter wire (red/yellow). If you connect these 3 wires, you new Android head unit will power on!
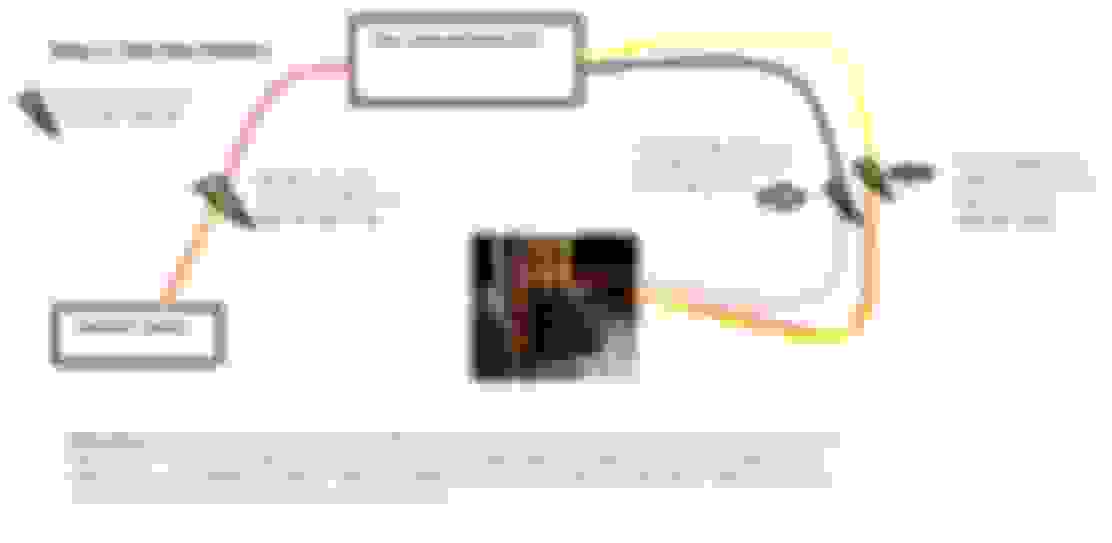
Wiring Diagram:
Here is a summary of Step 2. If you connect ACC, BATT+, and Ground, your new beautiful Android will power on. Progress!
*** TO BE CONTINUE***
TEASER: Here are some pics of my new android unit installed in my car. More pics to come.
Nice. I have just purchased a Masten Roadmaster that should slot straight in. Got an additional wiring harness for the Harman Kardon Logic 7 speakers. Hopefully it will arrive in the next 2 weeks.
Nice. I have just purchased a Masten Roadmaster that should slot straight in. Got an additional wiring harness for the Harman Kardon Logic 7 speakers. Hopefully it will arrive in the next 2 weeks.
Sounds cool! I Seriousely doubt it is completely plug and play, so expect to do some wire splicing. Plus there is the issue of the CANBUS decoder and Fiber Optic decoder (which I think you said you purchased).
Are you installing yourself? If so I am happy to help. I don't want anyone else to go through the misery that I went through. Hopefully the seller will at least provide a wiring diagram.
Do you have a link to the android head unit that you bought? I'd love to see it. Have a great day!
Hi!, I was trying to tackle at this and the unit boots up without a problem thanks to you. I also managed to connect the MOST fiber optic decoder and the steering wheel buttons work as it should. But I�m having trouble getting the sound to work. Does the blue wire (amp-con) connect to somewhere?
Hi!, I was trying to tackle at this and the unit boots up without a problem thanks to you. I also managed to connect the MOST fiber optic decoder and the steering wheel buttons work as it should. But I�m having trouble getting the sound to work. Does the blue wire (amp-con) connect to somewhere?
Sorry, don't know - I paid a professional installer
Sounds cool! I Seriousely doubt it is completely plug and play, so expect to do some wire splicing. Plus there is the issue of the CANBUS decoder and Fiber Optic decoder (which I think you said you purchased).
Are you installing yourself? If so I am happy to help. I don't want anyone else to go through the misery that I went through. Hopefully the seller will at least provide a wiring diagram.
Do you have a link to the android head unit that you bought? I'd love to see it. Have a great day!
Hey I have a CLS55, I�m going to be swapping out my head unit, if you could give me some help that would be great, and I�ll be adding an amp and sub
Hey I have a CLS55, I�m going to be swapping out my head unit, if you could give me some help that would be great, and I�ll be adding an amp and sub
most aftermarket radios come with a remote wire hook up along with the in and out for your rca cables. i actually havent seen a unit without them in a long time. route everything back. make sure power wire doesnt cross with the rcas obviously
its an easy swap once you have it all opened up. nothing to it

 04-29-2019 | 03:55 PM